Cherry K.O. (talk | contribs) |
Cherry K.O. (talk | contribs) |
||
| Line 1: | Line 1: | ||
==Introduction== | ==Introduction== | ||
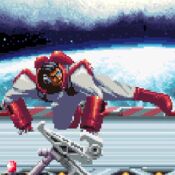
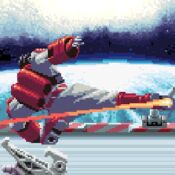
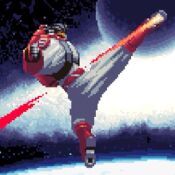
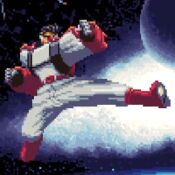
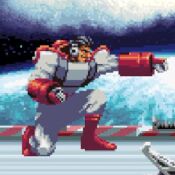
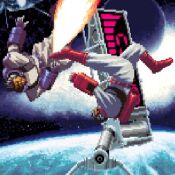
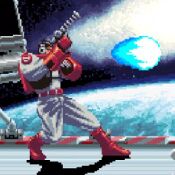
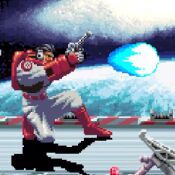
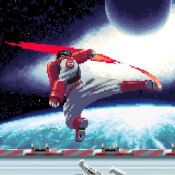
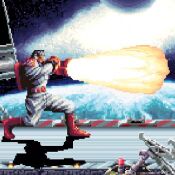
Rolf is a powerful, well-rounded character. His move set allows him to easily switch between offensive and defensive play. This flexibility in play style offers Rolf a wide variety of responses for most situations in the game. | Rolf is a powerful, well-rounded character. His move set allows him to easily switch between offensive and defensive play. This flexibility in play style offers Rolf a wide variety of responses for most situations in the game. For his offense, Rolf has amazing damage, stun, and combo potential. He also has access to most offensive tools in the game. He can start block strings, combo out of a cross up, poke opponents at safe distances, anti air with ease, and zone opponents with his projectiles. For his defense, his most notable tool is the double jump. It easily helps him escape juggle sequences and allows him to retreat from a bad approach. The best part is that he gains an additional jump each time he is hit in the air. | ||
Despite his great versatility, Rolf does have notable weaknesses. | Despite his great versatility, Rolf does have notable weaknesses. Certain moves and combos do not function properly on crouching, non-heavy characters. He lacks priority on his jumping normal attacks, and he requires difficult execution to maximize his combo potential. In addition, Rolf's offense largely depends on his ability to safely pressure opponents at a certain distance. If he wants to zone or initiate a combo, he needs the opponent to be at the right distance. His defense works in a similar manner because he struggles to escape if the opponent is too close, or if he is knocked down. | ||
[[file:gfRolf.gif|center]] | [[file:gfRolf.gif|center]] | ||
{{ProConTable | |||
| pros = | |||
* Easy to understand and use. | |||
* Flexible move set that allows for both offensive and defensive play. | |||
* His damage, stun, and combo potential are amazing. | |||
* Offense has a lot of variety, which gives him multiple ways to play neutral. | |||
* Has a double jump to avoid being juggled, and gains an additional jump each time he is hit in the air. | |||
* Rolf's Dashing Rapid Crush is one of the best cross up and block string tools in the game. | |||
| cons = | |||
* Although he is easy to pick up and play, Rolf has a very high skill ceiling. | |||
* Best combos are difficult to execute. | |||
* Certain moves do not work against crouching, non-heavy characters. | |||
* Struggles to deal with block strings or oki. | |||
* Lack a consistent guard cancel. | |||
* Performs poorly when the opponent is outside his preferred distance. | |||
}} | |||
==Move List== | ==Move List== | ||
Revision as of 16:22, 27 June 2022
Introduction
Rolf is a powerful, well-rounded character. His move set allows him to easily switch between offensive and defensive play. This flexibility in play style offers Rolf a wide variety of responses for most situations in the game. For his offense, Rolf has amazing damage, stun, and combo potential. He also has access to most offensive tools in the game. He can start block strings, combo out of a cross up, poke opponents at safe distances, anti air with ease, and zone opponents with his projectiles. For his defense, his most notable tool is the double jump. It easily helps him escape juggle sequences and allows him to retreat from a bad approach. The best part is that he gains an additional jump each time he is hit in the air.
Despite his great versatility, Rolf does have notable weaknesses. Certain moves and combos do not function properly on crouching, non-heavy characters. He lacks priority on his jumping normal attacks, and he requires difficult execution to maximize his combo potential. In addition, Rolf's offense largely depends on his ability to safely pressure opponents at a certain distance. If he wants to zone or initiate a combo, he needs the opponent to be at the right distance. His defense works in a similar manner because he struggles to escape if the opponent is too close, or if he is knocked down.
| Strengths | Weaknesses |
|---|---|
|
|
Move List
Standing Normals
| Damage | Startup, Active, and Recovery | On Hit | On Block | ||||||||
|---|---|---|---|---|---|---|---|---|---|---|---|
| 7 | - | - | - | ||||||||
| Dash Damage | Dash Startup, Active, and Recovery | On Dash Hit | On Dash Block | ||||||||
| 10 | - | - | - | ||||||||
| |||||||||||
| Damage | Startup, Active, and Recovery | On Hit | On Block | ||||||||
|---|---|---|---|---|---|---|---|---|---|---|---|
| 23 | - | - | - | ||||||||
| Dash Damage | Dash Startup, Active, and Recovery | On Dash Hit | On Dash Block | ||||||||
| 34 | - | - | - | ||||||||
| |||||||||||
| Damage | Startup, Active, and Recovery | On Hit | On Block | ||||||||
|---|---|---|---|---|---|---|---|---|---|---|---|
| 32 | - | - | - | ||||||||
| Dash Damage | Dash Startup, Active, and Recovery | On Dash Hit | On Dash Block | ||||||||
| 48 | - | - | - | ||||||||
| |||||||||||
| Damage | Startup, Active, and Recovery | On Hit | On Block | ||||||||
|---|---|---|---|---|---|---|---|---|---|---|---|
| 6 | - | - | - | ||||||||
| Dash Damage | Dash Startup, Active, and Recovery | On Dash Hit | On Dash Block | ||||||||
| 9 | - | - | - | ||||||||
| |||||||||||
| Damage | Startup, Active, and Recovery | On Hit | On Block | ||||||||
|---|---|---|---|---|---|---|---|---|---|---|---|
| 22 | - | - | - | ||||||||
| Dash Damage | Dash Startup, Active, and Recovery | On Dash Hit | On Dash Block | ||||||||
| 33 | - | - | - | ||||||||
| |||||||||||
| Damage | Startup, Active, and Recovery | On Hit | On Block | ||||||||
|---|---|---|---|---|---|---|---|---|---|---|---|
| 55 | - | - | - | ||||||||
| Dash Damage | Dash Startup, Active, and Recovery | On Dash Hit | On Dash Block | ||||||||
| 82 | - | - | - | ||||||||
| |||||||||||
Crouching Normals
| Damage | Startup, Active, and Recovery | On Hit | On Block | ||||||||
|---|---|---|---|---|---|---|---|---|---|---|---|
| 7 | - | - | - | ||||||||
| |||||||||||
| Damage | Startup, Active, and Recovery | On Hit | On Block | ||||||||
|---|---|---|---|---|---|---|---|---|---|---|---|
| 23 | - | - | - | ||||||||
| |||||||||||
| Damage | Startup, Active, and Recovery | On Hit | On Block | ||||||||
|---|---|---|---|---|---|---|---|---|---|---|---|
| 32 | - | - | - | ||||||||
| |||||||||||
Jumping Normals
| Damage | Startup, Active, and Recovery | On Hit | On Block | ||||||||
|---|---|---|---|---|---|---|---|---|---|---|---|
| 8 | - | - | - | ||||||||
| Dash Damage | Dash Startup, Active, and Recovery | On Dash Hit | On Dash Block | ||||||||
| 9 | - | - | - | ||||||||
| |||||||||||
| Damage | Startup, Active, and Recovery | On Hit | On Block | ||||||||
|---|---|---|---|---|---|---|---|---|---|---|---|
| 22 | - | - | - | ||||||||
| Dash Damage | Dash Startup, Active, and Recovery | On Dash Hit | On Dash Block | ||||||||
| 33 | - | - | - | ||||||||
| |||||||||||
| Damage | Startup, Active, and Recovery | On Hit | On Block | ||||||||
|---|---|---|---|---|---|---|---|---|---|---|---|
| 32 | - | - | - | ||||||||
| Dash Damage | Dash Startup, Active, and Recovery | On Dash Hit | On Dash Block | ||||||||
| 48 | - | - | - | ||||||||
| |||||||||||
| Damage | Startup, Active, and Recovery | On Hit | On Block | ||||||||
|---|---|---|---|---|---|---|---|---|---|---|---|
| 6 | - | - | - | ||||||||
| Dash Damage | Dash Startup, Active, and Recovery | On Dash Hit | On Dash Block | ||||||||
| 9 | - | - | - | ||||||||
| |||||||||||
| Damage | Startup, Active, and Recovery | On Hit | On Block | ||||||||
|---|---|---|---|---|---|---|---|---|---|---|---|
| 22 | - | - | - | ||||||||
| Dash Damage | Dash Startup, Active, and Recovery | On Dash Hit | On Dash Block | ||||||||
| 33 | - | - | - | ||||||||
| |||||||||||
| Damage | Startup, Active, and Recovery | On Hit | On Block | ||||||||
|---|---|---|---|---|---|---|---|---|---|---|---|
| 32 | - | - | - | ||||||||
| Dash Damage | Dash Startup, Active, and Recovery | On Dash Hit | On Dash Block | ||||||||
| 48 | - | - | - | ||||||||
| |||||||||||
Command Normals
| Damage | Startup, Active, and Recovery | On Hit | On Block | ||||||||
|---|---|---|---|---|---|---|---|---|---|---|---|
| 6 | - | - | - | ||||||||
| |||||||||||
| Damage | Startup, Active, and Recovery | On Hit | On Block | ||||||||
|---|---|---|---|---|---|---|---|---|---|---|---|
| 22 | - | - | - | ||||||||
| |||||||||||
| Damage | Startup, Active, and Recovery | On Hit | On Block | ||||||||
|---|---|---|---|---|---|---|---|---|---|---|---|
| 32 | - | - | - | ||||||||
| |||||||||||
Throws
| Damage | Startup | Active | Recovery | ||
|---|---|---|---|---|---|
| 32 | 1 | 1 | - | ||
| |||||
| Damage | Startup | Active | Recovery | ||
|---|---|---|---|---|---|
| 32 | 1 | 1 | - | ||
| |||||
Special Moves
| A | Damage | Startup, Active, and Recovery | On Hit | On Block | ||||||||
|---|---|---|---|---|---|---|---|---|---|---|---|---|
| 17 | - | - | - | |||||||||
| Dash Damage | Dash Startup, Active, and Recovery | On Dash Hit | On Dash Block | |||||||||
| 23 | - | - | - | |||||||||
| ||||||||||||
| B | Damage | Startup, Active, and Recovery | On Hit | On Block | ||||||||
| 17 | - | - | - | |||||||||
| Dash Damage | Dash Startup, Active, and Recovery | On Dash Hit | On Dash Block | |||||||||
| 23 | - | - | - | |||||||||
| ||||||||||||
| C | Damage | Startup, Active, and Recovery | On Hit | On Block | ||||||||
| 17 | - | - | - | |||||||||
| Dash Damage | Dash Startup, Active, and Recovery | On Dash Hit | On Dash Block | |||||||||
| 23 | - | - | - | |||||||||
Other Notes:
| ||||||||||||
| A | Damage | Startup, Active, and Recovery | On Hit | On Block | ||||||||
|---|---|---|---|---|---|---|---|---|---|---|---|---|
| 36 | - | - | - | |||||||||
| Dash Damage | Dash Startup, Active, and Recovery | On Dash Hit | On Dash Block | |||||||||
| 48 | - | - | - | |||||||||
| ||||||||||||
| B | Damage | Startup, Active, and Recovery | On Hit | On Block | ||||||||
| 48 | - | - | - | |||||||||
| Dash Damage | Dash Startup, Active, and Recovery | On Dash Hit | On Dash Block | |||||||||
| 60 | - | - | - | |||||||||
| ||||||||||||
| C | Damage | Startup, Active, and Recovery | On Hit | On Block | ||||||||
| 60 | - | - | - | |||||||||
| Dash Damage | Dash Startup, Active, and Recovery | On Dash Hit | On Dash Block | |||||||||
| 72 | - | - | - | |||||||||
Other Notes:
Common Counter Play:
| ||||||||||||
| A | Damage | Startup, Active, and Recovery | On Hit | On Block | ||||||||
|---|---|---|---|---|---|---|---|---|---|---|---|---|
| 34 | - | - | - | |||||||||
| Dash Damage | Dash Startup, Active, and Recovery | On Dash Hit | On Dash Block | |||||||||
| 43 | - | - | - | |||||||||
| ||||||||||||
| B | Damage | Startup, Active, and Recovery | On Hit | On Block | ||||||||
| 34 | - | - | - | |||||||||
| Dash Damage | Dash Startup, Active, and Recovery | On Dash Hit | On Dash Block | |||||||||
| 43 | - | - | - | |||||||||
| ||||||||||||
| C | Damage | Startup, Active, and Recovery | On Hit | On Block | ||||||||
| 34 | - | - | - | |||||||||
| Dash Damage | Dash Startup, Active, and Recovery | On Dash Hit | On Dash Block | |||||||||
| 43 | - | - | - | |||||||||
Other Notes:
Common Counter Play:
| ||||||||||||
| A | Damage | Startup, Active, and Recovery | On Hit | On Block | ||||||||
|---|---|---|---|---|---|---|---|---|---|---|---|---|
| 69 | - | - | - | |||||||||
| B | Damage | Startup, Active, and Recovery | On Hit | On Block | ||||||||
| 69 | - | - | - | |||||||||
| C | Damage | Startup, Active, and Recovery | On Hit | On Block | ||||||||
| 69 | - | - | - | |||||||||
|
Other Notes:
Common Counter Play:
| ||||||||||||
Combos and Juggles
- 66, 214+A, 2B xx 214+A
This combo instantly bubble stuns an opponent when fully connected. Another way of landing the combo is by crossing-up the opponent with the first 214+A.


