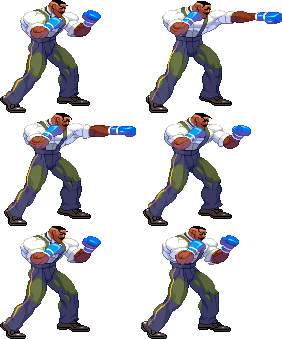
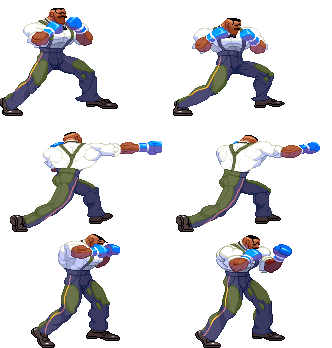
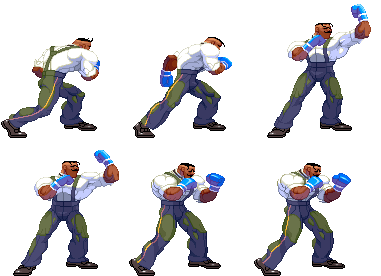
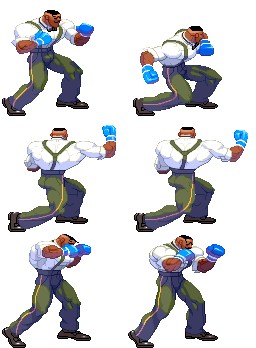
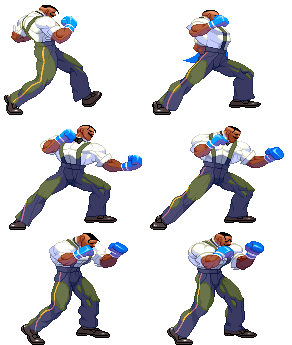
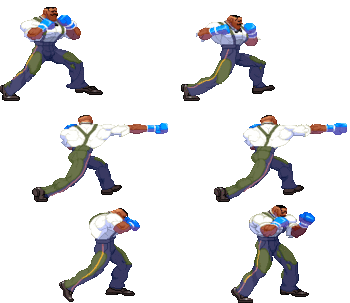
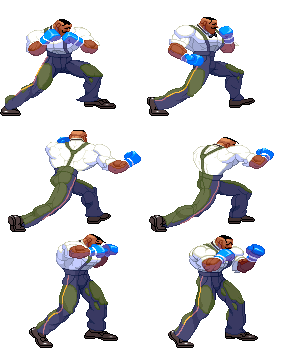
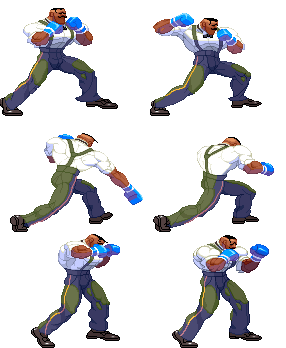
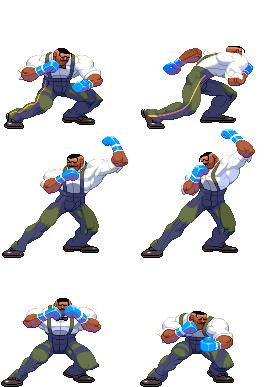
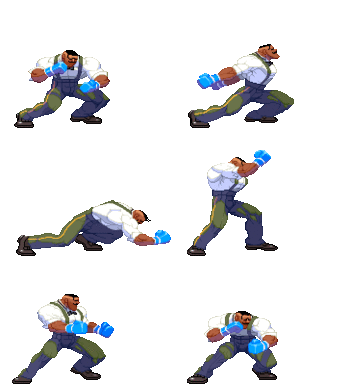
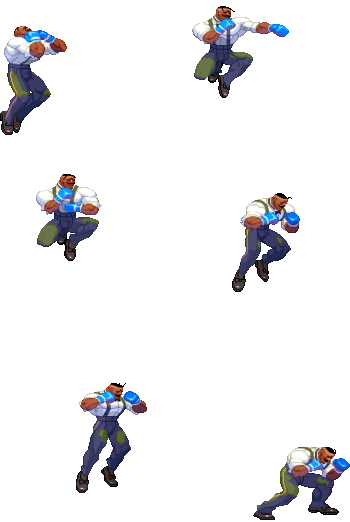
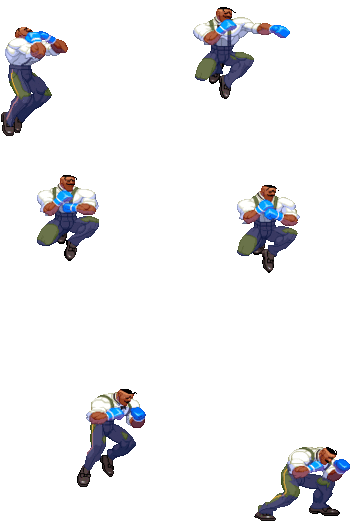
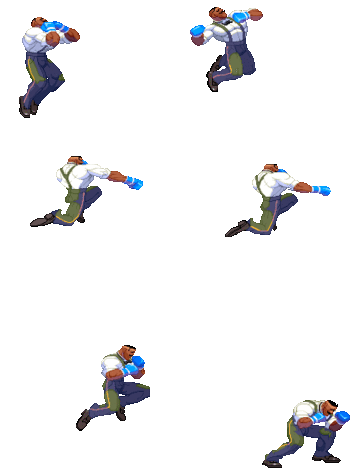
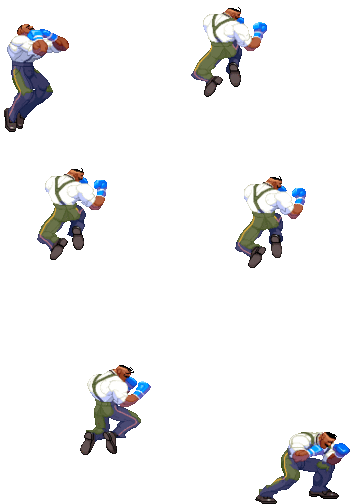
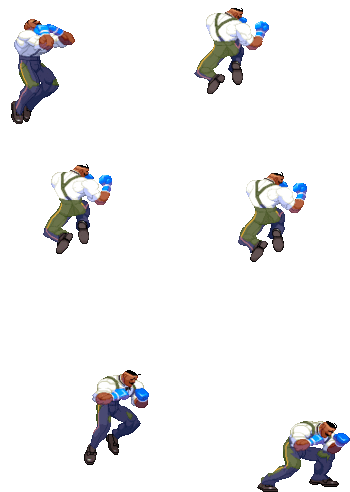
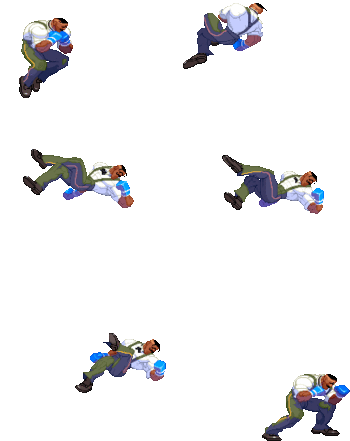
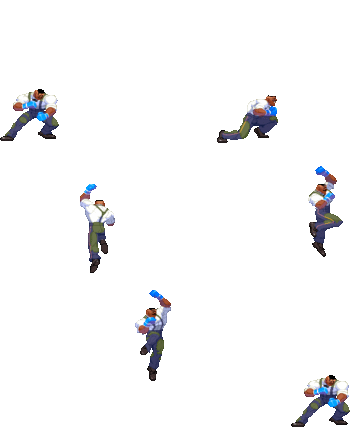
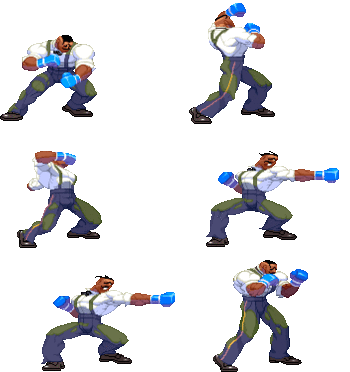
(Ported SF3 3rd strike's wiki) |
(removed fat pages that third strike wiki uses for dudley) |
||
| Line 44: | Line 44: | ||
|description= | |description= | ||
* Cancel options: self ch sp su | * Cancel options: self ch sp su | ||
}} | }} | ||
}} | }} | ||
| Line 68: | Line 67: | ||
* Self meter gain: Whiff: 2, Hit: 11, Block: 6. | * Self meter gain: Whiff: 2, Hit: 11, Block: 6. | ||
* Opponent meter gain: Whiff: 0, Hit: 2, Block: 0. | * Opponent meter gain: Whiff: 0, Hit: 2, Block: 0. | ||
}} | }} | ||
}} | }} | ||
| Line 92: | Line 90: | ||
* Self meter gain: Whiff: 3, Hit: 19, Block: 10. | * Self meter gain: Whiff: 3, Hit: 19, Block: 10. | ||
* Opponent meter gain: Whiff: 0, Hit: 4, Block: 0. | * Opponent meter gain: Whiff: 0, Hit: 4, Block: 0. | ||
}} | }} | ||
}} | }} | ||
| Line 114: | Line 111: | ||
|description= | |description= | ||
* Cancel options: sp su | * Cancel options: sp su | ||
}} | }} | ||
}} | }} | ||
| Line 137: | Line 133: | ||
* Self meter gain: Whiff: 2, Hit: 11, Block: 6. | * Self meter gain: Whiff: 2, Hit: 11, Block: 6. | ||
* Opponent meter gain: Whiff: 0, Hit: 2, Block: 0. | * Opponent meter gain: Whiff: 0, Hit: 2, Block: 0. | ||
}} | }} | ||
}} | }} | ||
| Line 161: | Line 156: | ||
* Self meter gain: Whiff: 3, Hit: 19, Block: 10. | * Self meter gain: Whiff: 3, Hit: 19, Block: 10. | ||
* Opponent meter gain: Whiff: 0, Hit: 4, Block: 0. | * Opponent meter gain: Whiff: 0, Hit: 4, Block: 0. | ||
}} | }} | ||
}} | }} | ||
| Line 189: | Line 183: | ||
* Cancel options: self sp su | * Cancel options: self sp su | ||
* 12 kara range | * 12 kara range | ||
}} | }} | ||
}} | }} | ||
| Line 213: | Line 206: | ||
* Self meter gain: Whiff: 2, Hit: 11, Block: 6. | * Self meter gain: Whiff: 2, Hit: 11, Block: 6. | ||
* Opponent meter gain: Whiff: 0, Hit: 2, Block: 0. | * Opponent meter gain: Whiff: 0, Hit: 2, Block: 0. | ||
}} | }} | ||
}} | }} | ||
| Line 238: | Line 230: | ||
* Self meter gain: Whiff: 3, Hit: 19, Block: 10. | * Self meter gain: Whiff: 3, Hit: 19, Block: 10. | ||
* Opponent meter gain: Whiff: 0, Hit: 4, Block: 0. | * Opponent meter gain: Whiff: 0, Hit: 4, Block: 0. | ||
}} | }} | ||
}} | }} | ||
| Line 264: | Line 255: | ||
* Self meter gain: Whiff: 2, Hit: 11, Block: 6. | * Self meter gain: Whiff: 2, Hit: 11, Block: 6. | ||
* Opponent meter gain: Whiff: 0, Hit: 2, Block: 0. | * Opponent meter gain: Whiff: 0, Hit: 2, Block: 0. | ||
}} | }} | ||
}} | }} | ||
| Line 288: | Line 278: | ||
* Self meter gain: Whiff: 3, Hit: 19, Block: 10. | * Self meter gain: Whiff: 3, Hit: 19, Block: 10. | ||
* Opponent meter gain: Whiff: 0, Hit: 4, Block: 0. | * Opponent meter gain: Whiff: 0, Hit: 4, Block: 0. | ||
}} | }} | ||
}} | }} | ||
| Line 314: | Line 303: | ||
|description= | |description= | ||
* Cancel options: self ch sp su | * Cancel options: self ch sp su | ||
}} | }} | ||
}} | }} | ||
| Line 338: | Line 326: | ||
* Self meter gain: Whiff: 2, Hit: 11, Block: 6. | * Self meter gain: Whiff: 2, Hit: 11, Block: 6. | ||
* Opponent meter gain: Whiff: 0, Hit: 2, Block: 0. | * Opponent meter gain: Whiff: 0, Hit: 2, Block: 0. | ||
}} | }} | ||
}} | }} | ||
| Line 360: | Line 347: | ||
* Self meter gain: Whiff: 3, Hit: 19, Block: 10. | * Self meter gain: Whiff: 3, Hit: 19, Block: 10. | ||
* Opponent meter gain: Whiff: 0, Hit: 4, Block: 0. | * Opponent meter gain: Whiff: 0, Hit: 4, Block: 0. | ||
}} | }} | ||
}} | }} | ||
| Line 379: | Line 365: | ||
|description= | |description= | ||
* Cancel options: self ch sp su | * Cancel options: self ch sp su | ||
}} | }} | ||
}} | }} | ||
| Line 402: | Line 387: | ||
* Self meter gain: Whiff: 2, Hit: 11, Block: 6. | * Self meter gain: Whiff: 2, Hit: 11, Block: 6. | ||
* Opponent meter gain: Whiff: 0, Hit: 2, Block: 0. | * Opponent meter gain: Whiff: 0, Hit: 2, Block: 0. | ||
}} | }} | ||
}} | }} | ||
| Line 425: | Line 409: | ||
* Self meter gain: Whiff: 3, Hit: 19, Block: 10. | * Self meter gain: Whiff: 3, Hit: 19, Block: 10. | ||
* Opponent meter gain: Whiff: 0, Hit: 4, Block: 0. | * Opponent meter gain: Whiff: 0, Hit: 4, Block: 0. | ||
}} | }} | ||
}} | }} | ||
| Line 447: | Line 430: | ||
|stun=9 | |stun=9 | ||
|description= | |description= | ||
}} | }} | ||
}} | }} | ||
| Line 466: | Line 448: | ||
* Self meter gain: Whiff: 2, Hit: 11, Block: 6. | * Self meter gain: Whiff: 2, Hit: 11, Block: 6. | ||
* Opponent meter gain: Whiff: 0, Hit: 2, Block: 0. | * Opponent meter gain: Whiff: 0, Hit: 2, Block: 0. | ||
}} | }} | ||
}} | }} | ||
| Line 485: | Line 466: | ||
* Self meter gain: Whiff: 3, Hit: 19, Block: 10. | * Self meter gain: Whiff: 3, Hit: 19, Block: 10. | ||
* Opponent meter gain: Whiff: 0, Hit: 4, Block: 0. | * Opponent meter gain: Whiff: 0, Hit: 4, Block: 0. | ||
}} | }} | ||
}} | }} | ||
| Line 502: | Line 482: | ||
|stun=5 | |stun=5 | ||
|description= | |description= | ||
}} | }} | ||
}} | }} | ||
| Line 521: | Line 500: | ||
* Self meter gain: Whiff: 2, Hit: 11, Block: 6. | * Self meter gain: Whiff: 2, Hit: 11, Block: 6. | ||
* Opponent meter gain: Whiff: 0, Hit: 2, Block: 0. | * Opponent meter gain: Whiff: 0, Hit: 2, Block: 0. | ||
}} | }} | ||
}} | }} | ||
| Line 540: | Line 518: | ||
* Self meter gain: Whiff: 3, Hit: 19, Block: 10. | * Self meter gain: Whiff: 3, Hit: 19, Block: 10. | ||
* Opponent meter gain: Whiff: 0, Hit: 4, Block: 0. | * Opponent meter gain: Whiff: 0, Hit: 4, Block: 0. | ||
}} | }} | ||
}} | }} | ||
| Line 555: | Line 532: | ||
{{AttackData-3S | {{AttackData-3S | ||
|description= | |description= | ||
}} | }} | ||
}} | }} | ||
| Line 566: | Line 542: | ||
{{AttackData-3S | {{AttackData-3S | ||
|description= | |description= | ||
}} | }} | ||
}} | }} | ||
| Line 577: | Line 552: | ||
{{AttackData-3S | {{AttackData-3S | ||
|description= | |description= | ||
}} | }} | ||
}} | }} | ||
| Line 600: | Line 574: | ||
|description= | |description= | ||
* 20 throw range | * 20 throw range | ||
}} | }} | ||
}} | }} | ||
| Line 619: | Line 592: | ||
|description= | |description= | ||
* 20 throw range | * 20 throw range | ||
}} | }} | ||
}} | }} | ||
| Line 645: | Line 617: | ||
|stun=3 | |stun=3 | ||
|description= | |description= | ||
}} | }} | ||
}} | }} | ||
| Line 667: | Line 638: | ||
* Self meter gain: Whiff: 4, Hit: 14, Block: 7. | * Self meter gain: Whiff: 4, Hit: 14, Block: 7. | ||
* Opponent meter gain: Whiff: 0, Hit: 3, Block: 0. | * Opponent meter gain: Whiff: 0, Hit: 3, Block: 0. | ||
}} | }} | ||
}} | }} | ||
| Line 699: | Line 669: | ||
* Self meter gain: Whiff: 3, Hit: 21, Block: 15. | * Self meter gain: Whiff: 3, Hit: 21, Block: 15. | ||
* Opponent meter gain: Whiff: 0, Hit: 6, Block: 0. | * Opponent meter gain: Whiff: 0, Hit: 6, Block: 0. | ||
}} | }} | ||
| Line 715: | Line 684: | ||
* Self meter gain: Whiff: 3, Hit: 21, Block: 15. | * Self meter gain: Whiff: 3, Hit: 21, Block: 15. | ||
* Opponent meter gain: Whiff: 0, Hit: 6, Block: 0. | * Opponent meter gain: Whiff: 0, Hit: 6, Block: 0. | ||
}} | }} | ||
| Line 731: | Line 699: | ||
* Self meter gain: Whiff: 3, Hit: 22, Block: 16. | * Self meter gain: Whiff: 3, Hit: 22, Block: 16. | ||
* Opponent meter gain: Whiff: 0, Hit: 6, Block: 0. | * Opponent meter gain: Whiff: 0, Hit: 6, Block: 0. | ||
}} | }} | ||
| Line 746: | Line 713: | ||
* Self meter gain: Whiff: -40, Hit: -40, Block: -40. | * Self meter gain: Whiff: -40, Hit: -40, Block: -40. | ||
* Opponent meter gain: Whiff: 0, Hit: 0, Block: 0. | * Opponent meter gain: Whiff: 0, Hit: 0, Block: 0. | ||
}} | }} | ||
}} | }} | ||
| Line 772: | Line 738: | ||
* Self meter gain: Whiff: 3, Hit: 20, Block: 14. | * Self meter gain: Whiff: 3, Hit: 20, Block: 14. | ||
* Opponent meter gain: Whiff: 0, Hit: 4, Block: 0. | * Opponent meter gain: Whiff: 0, Hit: 4, Block: 0. | ||
}} | }} | ||
| Line 787: | Line 752: | ||
* Self meter gain: Whiff: 3, Hit: 21, Block: 15. | * Self meter gain: Whiff: 3, Hit: 21, Block: 15. | ||
* Opponent meter gain: Whiff: 0, Hit: 4, Block: 0. | * Opponent meter gain: Whiff: 0, Hit: 4, Block: 0. | ||
}} | }} | ||
| Line 802: | Line 766: | ||
* Self meter gain: Whiff: 3, Hit: 23, Block: 17. | * Self meter gain: Whiff: 3, Hit: 23, Block: 17. | ||
* Opponent meter gain: Whiff: 0, Hit: 4, Block: 0. | * Opponent meter gain: Whiff: 0, Hit: 4, Block: 0. | ||
}} | }} | ||
| Line 817: | Line 780: | ||
* Self meter gain: Whiff: -40, Hit: -40, Block: -40. | * Self meter gain: Whiff: -40, Hit: -40, Block: -40. | ||
* Opponent meter gain: Whiff: 0, Hit: 0, Block: 0. | * Opponent meter gain: Whiff: 0, Hit: 0, Block: 0. | ||
}} | }} | ||
}} | }} | ||
| Line 830: | Line 792: | ||
{{AttackData-3S | {{AttackData-3S | ||
|description= | |description= | ||
}} | }} | ||
}} | }} | ||
| Line 853: | Line 814: | ||
* Self meter gain: Whiff: 3, Hit: 19, Block: 10. | * Self meter gain: Whiff: 3, Hit: 19, Block: 10. | ||
* Opponent meter gain: Whiff: 0, Hit: 4, Block: 0. | * Opponent meter gain: Whiff: 0, Hit: 4, Block: 0. | ||
}} | }} | ||
}} | }} | ||
| Line 876: | Line 836: | ||
* Self meter gain: Whiff: 3, Hit: 20, Block: 11. | * Self meter gain: Whiff: 3, Hit: 20, Block: 11. | ||
* Opponent meter gain: Whiff: 0, Hit: 4, Block: 0. | * Opponent meter gain: Whiff: 0, Hit: 4, Block: 0. | ||
}} | }} | ||
}} | }} | ||
| Line 897: | Line 856: | ||
|description= | |description= | ||
* If inputted with HCB,F+P, it can be kara-canceled into another punch due to an input bug | * If inputted with HCB,F+P, it can be kara-canceled into another punch due to an input bug | ||
}} | }} | ||
| Line 906: | Line 864: | ||
|description= | |description= | ||
* If inputted with HCB,F+P, it can be kara-canceled into another punch due to an input bug | * If inputted with HCB,F+P, it can be kara-canceled into another punch due to an input bug | ||
}} | }} | ||
| Line 915: | Line 872: | ||
|description= | |description= | ||
* If inputted with HCB,F+P, it can be kara-canceled into another punch due to an input bug | * If inputted with HCB,F+P, it can be kara-canceled into another punch due to an input bug | ||
}} | }} | ||
| Line 923: | Line 879: | ||
|parry=A | |parry=A | ||
|description= | |description= | ||
}} | }} | ||
}} | }} | ||
| Line 953: | Line 908: | ||
* Self meter gain: Whiff: 3, Hit: 17, Block: 12. | * Self meter gain: Whiff: 3, Hit: 17, Block: 12. | ||
* Opponent meter gain: Whiff: 0, Hit: 4, Block: 0. | * Opponent meter gain: Whiff: 0, Hit: 4, Block: 0. | ||
}} | }} | ||
| Line 971: | Line 925: | ||
* Self meter gain: Whiff: 3, Hit: 17, Block: 12. | * Self meter gain: Whiff: 3, Hit: 17, Block: 12. | ||
* Opponent meter gain: Whiff: 0, Hit: 4, Block: 0. | * Opponent meter gain: Whiff: 0, Hit: 4, Block: 0. | ||
}} | }} | ||
| Line 989: | Line 942: | ||
* Self meter gain: Whiff: 3, Hit: 17, Block: 12. | * Self meter gain: Whiff: 3, Hit: 17, Block: 12. | ||
* Opponent meter gain: Whiff: 0, Hit: 4, Block: 0. | * Opponent meter gain: Whiff: 0, Hit: 4, Block: 0. | ||
}} | }} | ||
| Line 1,006: | Line 958: | ||
* Self meter gain: Whiff: -40, Hit: -40, Block: -40. | * Self meter gain: Whiff: -40, Hit: -40, Block: -40. | ||
* Opponent meter gain: Whiff: 0, Hit: 0, Block: 0. | * Opponent meter gain: Whiff: 0, Hit: 0, Block: 0. | ||
}} | }} | ||
}} | }} | ||
| Line 1,029: | Line 980: | ||
|stun=10 | |stun=10 | ||
|description= | |description= | ||
}} | }} | ||
}} | }} | ||
| Line 1,048: | Line 998: | ||
|stun=13 | |stun=13 | ||
|description= | |description= | ||
}} | }} | ||
}} | }} | ||
| Line 1,068: | Line 1,017: | ||
|description= | |description= | ||
* Dudley will continue Ducking toward the opponent, extending the range of SA2 at the cost of startup time | * Dudley will continue Ducking toward the opponent, extending the range of SA2 at the cost of startup time | ||
}} | }} | ||
}} | }} | ||
| Line 1,087: | Line 1,035: | ||
|description= | |description= | ||
* Higher strength versions travel farther (1st active frames all have the same range)<br>- The LP version can be useful for anti-airing since it's less likely to go under the opponent | * Higher strength versions travel farther (1st active frames all have the same range)<br>- The LP version can be useful for anti-airing since it's less likely to go under the opponent | ||
}} | }} | ||
}} | }} | ||
Revision as of 07:22, 28 April 2022
Introduction
Dudley is an English gentleman boxer who despises dirty fighting and seeks opponents who offer a good, clean match. He is never seen without his beloved blue boxing gloves even while driving, drinking tea, and reading the newpaper.
Dudley is a quick, strong, high-precision character with various juggles, strong mixups and lockdown capability, as well as multiple different anti-airs. As a king of rushdown, his main problem is his difficulty dealing with strong offense himself.
Super Arts
SA1: Rocket Uppercut
Occasionally used and favored by specific players, or for specific matchups (notably Akuma for his very low stamina and generally offensive playstyle which can be dissuaded due to the high damage and incredible startup speed (same startup as SA3). Also has 2 stocks (large bar size) so reasonable access to meter. Opponents can drop out of combos which can lead to unfortunate losses, however. For example play, Fujiwara is a strong player that favors SA1 often
SA2: Rolling Thunder
Least popular option as it has issues with dropping, slower startup than the others, and the 1 medium stock size. It does cover ground rather effectively, at least. If the opponent does happen to take the full brunt of the damage, it is just behind the damage of SA1 so it certainly does hurt.
SA3: Corkscrew Blow
Most popular SA with it's 3 stocks and smaller bar so supers are gained quickly. Damage is worse than the other SA options, however it is lightning fast and very easy to use in conversions. If you're in doubt, just pick this SA as the only notable downside is the lower damage
| Strengths | Weaknesses |
|---|---|
|
|
| Dudley #3S_DU | |
|---|---|
| Vitals | |
| Life Points | 1200 |
| Stun Points | 72 |
| Super Art Stock/Size | |
| SA1 | 2/96 |
| SA2 | 1/112 |
| SA3 | 3/80 |
| Ground Movement | |
| Forward Dash duration/distance | 18 (111px) |
| Back Dash duration/distance | 19 (95px) |
| Jumping | |
| Back Jump duration | 36(4+30+2) |
| Neutral Jump duration | 39(4+33+2) |
| Forward Jump duration | 36(4+30+2) |
| Back Super Jump duration | 46(5+39+2) |
| Neutral Super Jump duration | 40(5+33+2) |
| Forward Super Jump duration | 40(5+33+2) |
| Wake up | |
| Wake up duration | 55 |
| Quick rise duration | 45 |
| 3S Frame Data Glossary | |
|---|---|
| Active |
How many frames a move remains active (can hurt opponents) for. Consecutive sets of active frames on a multi-hit move are separated by an asterisk (ex: 3*5). If there is a gap between sets of active frames, the gap is denoted by a number in parentheses (ex: 2(4)2) |
| Attack |
Attack level is L for low attacks (must be blocked crouching), H is for High attacks (which can be blocked high or low) and M for overhead (must be blocked standing). T is for throw attacks (which cannot be blocked). |
| Cancel options |
Available cancel options.
|
| Damage |
Attack damage on hit in life points. Notation may denote multi-hit or "sweet spot" damage values on certain frames. |
| Hit/Block |
These are frame advantage values when the attack hits or is blocked. If the number is positive, then the move will end before the defender can act again. If the number is negative, the defender will be able to act before the attacker and maybe even punish. D refers to knockdown on hit. "Cr. Hit" is an additional frame advantage value denoting if the advantage on hit changes when the defender is being hit while crouching. |
| Kara Range |
Almost all normal attacks can be canceled into a special or a multi-button command within three frames of startup. During that time, some attacks will shift position forward or backward and affect the reach of the special or command accordingly. This is denoted in pixels of range. There are a handful of moves in the game that can be kara-canceled after this initial window and will be denoted as a late kara-cancel. |
| Link |
A combo that is performed by inputting the second move after the first move has completely recovered (as opposed to cancelling the first move's animation). In 3S, the final frame of a move's hitstun allows a character to block a normal or special move, as well as some projectile supers. Therefore, an attack's frame advantage must be 2 frames greater than the followup move's startup in order to link. Ex: a +6 normal can link into a 4f normal/special, or a 5f super. |
| Parry |
This field will show a value of A if the attack can be parried standing or crouching, H if it must be parried standing or L if it must be parried crouching. |
| Recovery |
How many frames it takes for a move to finish after it's been active. |
| Startup |
How many frames it takes before the move becomes 'active' or has a hitbox. 3S uses classic startup notation, which does not include the first active frame. A move with 3 startup becomes active on frame 4. |
| Stun |
Amount of stun added to the opponent's stun bar on hit. |
| Throw range |
Range in pixels from the center of the character to the center of the opponent which allows a grab to connect. |
Frame Data
Standing Normals
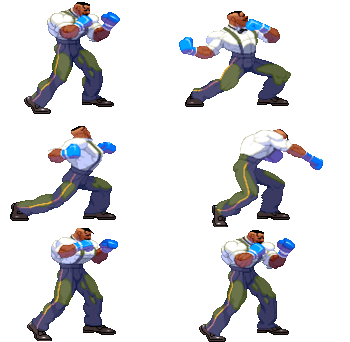
5LP
| Startup | Active | Recovery | Block | Hit | Cr. Hit | Damage | Stun | Kara | Guard Level | Parry Level |
|---|---|---|---|---|---|---|---|---|---|---|
| 3 | 2 | 6 | 3 | 3 | 3 | 3 | 3 | - | - | A |
| Cancel Options | Self Meter Gain | Whiff | Hit | Block / Tech | Opponent Meter Gain | Hit | Block / Tech | |||
| - | - | - | - | - | - | |||||
| ||||||||||
5MP
| Startup | Active | Recovery | Block | Hit | Cr. Hit | Damage | Stun | Kara | Guard Level | Parry Level |
|---|---|---|---|---|---|---|---|---|---|---|
| 3 | 2 | 10 | 1 | 2 | 4 | 10 | 9 | - | - | H |
| Cancel Options | Self Meter Gain | Whiff | Hit | Block / Tech | Opponent Meter Gain | Hit | Block / Tech | |||
| - | - | - | - | - | - | |||||
| ||||||||||
5HP
| Startup | Active | Recovery | Block | Hit | Cr. Hit | Damage | Stun | Kara | Guard Level | Parry Level |
|---|---|---|---|---|---|---|---|---|---|---|
| 7 | 3 | 17 | -1 | 1 | 3 | 24 | 13 | - | - | H |
| Cancel Options | Self Meter Gain | Whiff | Hit | Block / Tech | Opponent Meter Gain | Hit | Block / Tech | |||
| - | - | - | - | - | - | |||||
| ||||||||||
5LK
| Startup | Active | Recovery | Block | Hit | Cr. Hit | Damage | Stun | Kara | Guard Level | Parry Level |
|---|---|---|---|---|---|---|---|---|---|---|
| 5 | 2 | 8 | 2 | 2 | 2 | 5 | 3 | - | - | A |
| Cancel Options | Self Meter Gain | Whiff | Hit | Block / Tech | Opponent Meter Gain | Hit | Block / Tech | |||
| - | - | - | - | - | - | |||||
| ||||||||||
5MK
| Startup | Active | Recovery | Block | Hit | Cr. Hit | Damage | Stun | Kara | Guard Level | Parry Level |
|---|---|---|---|---|---|---|---|---|---|---|
| 5 | 3 | 13 | - | 2 | 2 | 14 | 11 | - | - | H |
| Cancel Options | Self Meter Gain | Whiff | Hit | Block / Tech | Opponent Meter Gain | Hit | Block / Tech | |||
| - | - | - | - | - | - | |||||
| ||||||||||
5HK
| Startup | Active | Recovery | Block | Hit | Cr. Hit | Damage | Stun | Kara | Guard Level | Parry Level |
|---|---|---|---|---|---|---|---|---|---|---|
| 5 | 3 | 12 | 4 | 6 | 8 | 21 | 13 | - | - | H |
| Cancel Options | Self Meter Gain | Whiff | Hit | Block / Tech | Opponent Meter Gain | Hit | Block / Tech | |||
| - | - | - | - | - | - | |||||
| ||||||||||
Command Normals
6LP
| Startup | Active | Recovery | Block | Hit | Cr. Hit | Damage | Stun | Kara | Guard Level | Parry Level |
|---|---|---|---|---|---|---|---|---|---|---|
| 4 | 2 | 8 | 1 | 1 | 1 | 4 | 3 | - | - | A |
| Cancel Options | Self Meter Gain | Whiff | Hit | Block / Tech | Opponent Meter Gain | Hit | Block / Tech | |||
| - | - | - | - | - | - | |||||
| ||||||||||
6MP
| Startup | Active | Recovery | Block | Hit | Cr. Hit | Damage | Stun | Kara | Guard Level | Parry Level |
|---|---|---|---|---|---|---|---|---|---|---|
| 8 | 5 | 10 | -1 | - | 1 | 14 | 5 | - | - | H |
| Cancel Options | Self Meter Gain | Whiff | Hit | Block / Tech | Opponent Meter Gain | Hit | Block / Tech | |||
| - | - | - | - | - | - | |||||
| ||||||||||
6HP
| Startup | Active | Recovery | Block | Hit | Cr. Hit | Damage | Stun | Kara | Guard Level | Parry Level |
|---|---|---|---|---|---|---|---|---|---|---|
| 15 | 5 | 16 | -3 | -1 | 1 | 24 | 13 | - | - | H |
| Cancel Options | Self Meter Gain | Whiff | Hit | Block / Tech | Opponent Meter Gain | Hit | Block / Tech | |||
| - | - | - | - | - | - | |||||
| ||||||||||
6MK
| Startup | Active | Recovery | Block | Hit | Cr. Hit | Damage | Stun | Kara | Guard Level | Parry Level |
|---|---|---|---|---|---|---|---|---|---|---|
| 5 | 2 | 9 | 2 | 3 | 3 | 17 | 9 | - | - | H |
| Cancel Options | Self Meter Gain | Whiff | Hit | Block / Tech | Opponent Meter Gain | Hit | Block / Tech | |||
| - | - | - | - | - | - | |||||
| ||||||||||
6HK
| Startup | Active | Recovery | Block | Hit | Cr. Hit | Damage | Stun | Kara | Guard Level | Parry Level |
|---|---|---|---|---|---|---|---|---|---|---|
| 12 | 4 | 16 | -2 | - | 2 | 19 | 7 | - | - | H |
| Cancel Options | Self Meter Gain | Whiff | Hit | Block / Tech | Opponent Meter Gain | Hit | Block / Tech | |||
| - | - | - | - | - | - | |||||
| ||||||||||
Crouching Normals
2LP
| Startup | Active | Recovery | Block | Hit | Cr. Hit | Damage | Stun | Kara | Guard Level | Parry Level |
|---|---|---|---|---|---|---|---|---|---|---|
| 3 | 1 | 9 | 1 | 1 | 1 | 3 | 3 | - | - | A |
| Cancel Options | Self Meter Gain | Whiff | Hit | Block / Tech | Opponent Meter Gain | Hit | Block / Tech | |||
| - | - | - | - | - | - | |||||
| ||||||||||
2MP
| Startup | Active | Recovery | Block | Hit | Cr. Hit | Damage | Stun | Kara | Guard Level | Parry Level |
|---|---|---|---|---|---|---|---|---|---|---|
| 4 | 2 | 9 | 2 | 3 | 4 | 12 | 7 | - | - | A |
| Cancel Options | Self Meter Gain | Whiff | Hit | Block / Tech | Opponent Meter Gain | Hit | Block / Tech | |||
| - | - | - | - | - | - | |||||
| ||||||||||
2HP
| Startup | Active | Recovery | Block | Hit | Cr. Hit | Damage | Stun | Kara | Guard Level | Parry Level |
|---|---|---|---|---|---|---|---|---|---|---|
| 7 | 4 | 13 | - | 2 | 2 | 23 | 13 | - | - | A |
| Cancel Options | Self Meter Gain | Whiff | Hit | Block / Tech | Opponent Meter Gain | Hit | Block / Tech | |||
| - | - | - | - | - | - | |||||
| ||||||||||
2LK
| Startup | Active | Recovery | Block | Hit | Cr. Hit | Damage | Stun | Kara | Guard Level | Parry Level |
|---|---|---|---|---|---|---|---|---|---|---|
| 4 | 1 | 10 | - | - | - | 5 | 3 | - | - | L |
| Cancel Options | Self Meter Gain | Whiff | Hit | Block / Tech | Opponent Meter Gain | Hit | Block / Tech | |||
| - | - | - | - | - | - | |||||
| ||||||||||
2MK
| Startup | Active | Recovery | Block | Hit | Cr. Hit | Damage | Stun | Kara | Guard Level | Parry Level |
|---|---|---|---|---|---|---|---|---|---|---|
| 9 | 3 | 22 | -12 | D | D | 10 | 3 | - | - | L |
| Cancel Options | Self Meter Gain | Whiff | Hit | Block / Tech | Opponent Meter Gain | Hit | Block / Tech | |||
| - | - | - | - | - | - | |||||
| ||||||||||
2HK
| Startup | Active | Recovery | Block | Hit | Cr. Hit | Damage | Stun | Kara | Guard Level | Parry Level |
|---|---|---|---|---|---|---|---|---|---|---|
| 15 | 3 | 21 | 1 | D | D | 17 | 3 | - | - | L |
| Cancel Options | Self Meter Gain | Whiff | Hit | Block / Tech | Opponent Meter Gain | Hit | Block / Tech | |||
| - | - | - | - | - | - | |||||
| ||||||||||
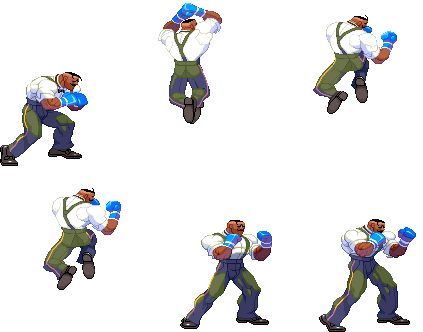
Jumping Normals
- Dudley's jump normals do not change during angled jumps
j.LP
| Startup | Active | Recovery | Block | Hit | Cr. Hit | Damage | Stun | Kara | Guard Level | Parry Level |
|---|---|---|---|---|---|---|---|---|---|---|
| 4 | 4 | - | - | - | - | 7 | 9 | - | - | H |
| Cancel Options | Self Meter Gain | Whiff | Hit | Block / Tech | Opponent Meter Gain | Hit | Block / Tech | |||
| - | - | - | - | - | - | |||||
j.MP
| Startup | Active | Recovery | Block | Hit | Cr. Hit | Damage | Stun | Kara | Guard Level | Parry Level |
|---|---|---|---|---|---|---|---|---|---|---|
| 5 | 4 | - | - | - | - | 12 | 13 | - | - | H |
| Cancel Options | Self Meter Gain | Whiff | Hit | Block / Tech | Opponent Meter Gain | Hit | Block / Tech | |||
| - | - | - | - | - | - | |||||
| ||||||||||
j.HP
| Startup | Active | Recovery | Block | Hit | Cr. Hit | Damage | Stun | Kara | Guard Level | Parry Level |
|---|---|---|---|---|---|---|---|---|---|---|
| 8 | 3 | - | - | - | - | 21 | 15 | - | - | H |
| Cancel Options | Self Meter Gain | Whiff | Hit | Block / Tech | Opponent Meter Gain | Hit | Block / Tech | |||
| - | - | - | - | - | - | |||||
| ||||||||||
j.LK
| Startup | Active | Recovery | Block | Hit | Cr. Hit | Damage | Stun | Kara | Guard Level | Parry Level |
|---|---|---|---|---|---|---|---|---|---|---|
| 4 | 17 | - | - | - | - | 7 | 5 | - | - | H |
| Cancel Options | Self Meter Gain | Whiff | Hit | Block / Tech | Opponent Meter Gain | Hit | Block / Tech | |||
| - | - | - | - | - | - | |||||
j.MK
| Startup | Active | Recovery | Block | Hit | Cr. Hit | Damage | Stun | Kara | Guard Level | Parry Level |
|---|---|---|---|---|---|---|---|---|---|---|
| 5 | 13 | - | - | - | - | 10 | 7 | - | - | H |
| Cancel Options | Self Meter Gain | Whiff | Hit | Block / Tech | Opponent Meter Gain | Hit | Block / Tech | |||
| - | - | - | - | - | - | |||||
| ||||||||||
j.HK
| Startup | Active | Recovery | Block | Hit | Cr. Hit | Damage | Stun | Kara | Guard Level | Parry Level |
|---|---|---|---|---|---|---|---|---|---|---|
| 12 | 4 | - | - | - | - | 16 | 9 | - | - | H |
| Cancel Options | Self Meter Gain | Whiff | Hit | Block / Tech | Opponent Meter Gain | Hit | Block / Tech | |||
| - | - | - | - | - | - | |||||
| ||||||||||
Target Combos
None
| Startup | Active | Recovery | Block | Hit | Cr. Hit | Damage | Stun | Kara | Guard Level | Parry Level |
|---|---|---|---|---|---|---|---|---|---|---|
| - | - | - | - | - | - | - | - | - | - | - |
| Cancel Options | Self Meter Gain | Whiff | Hit | Block / Tech | Opponent Meter Gain | Hit | Block / Tech | |||
| - | - | - | - | - | - | |||||
Throws
LPLK (mash)
| Startup | Active | Recovery | Block | Hit | Cr. Hit | Damage | Stun | Kara | Guard Level | Parry Level |
|---|---|---|---|---|---|---|---|---|---|---|
| 2 | 1 | 21 | - | - | - | 19 | 22 | - | - | - |
| Cancel Options | Self Meter Gain | Whiff | Hit | Block / Tech | Opponent Meter Gain | Hit | Block / Tech | |||
| - | - | - | - | - | - | |||||
| ||||||||||
4LPLK
| Startup | Active | Recovery | Block | Hit | Cr. Hit | Damage | Stun | Kara | Guard Level | Parry Level |
|---|---|---|---|---|---|---|---|---|---|---|
| 2 | 1 | 21 | - | - | - | 21 | 12 | - | - | - |
| Cancel Options | Self Meter Gain | Whiff | Hit | Block / Tech | Opponent Meter Gain | Hit | Block / Tech | |||
| - | - | - | - | - | - | |||||
| ||||||||||
Universal Overhead
MPMK
| Startup | Active | Recovery | Block | Hit | Cr. Hit | Damage | Stun | Kara | Guard Level | Parry Level |
|---|---|---|---|---|---|---|---|---|---|---|
| 15 | 10 | 5 | -5 ~ +7 | 0 ~ +8 | 1 ~ +9 | 7 | 3 | - | - | H |
| Cancel Options | Self Meter Gain | Whiff | Hit | Block / Tech | Opponent Meter Gain | Hit | Block / Tech | |||
| - | - | - | - | - | - | |||||
Taunt
HPHK
| Startup | Active | Recovery | Block | Hit | Cr. Hit | Damage | Stun | Kara | Guard Level | Parry Level |
|---|---|---|---|---|---|---|---|---|---|---|
| 38 | - | - | - | - | - | 1 | - | - | - | A |
| Cancel Options | Self Meter Gain | Whiff | Hit | Block / Tech | Opponent Meter Gain | Hit | Block / Tech | |||
| - | - | - | - | - | - | |||||
| ||||||||||
Special Moves
623P
| LP | Startup | Active | Recovery | Block | Hit | Cr. Hit | Damage | Stun | Kara | Guard Level | Parry Level |
|---|---|---|---|---|---|---|---|---|---|---|---|
| 4 | 8 | 29 | -23 | - | - | 24 | 17 | - | - | A | |
| Cancel Options | Self Meter Gain | Whiff | Hit | Block / Tech | Opponent Meter Gain | Hit | Block / Tech | ||||
| - | - | - | - | - | - | ||||||
| |||||||||||
| MP | Startup | Active | Recovery | Block | Hit | Cr. Hit | Damage | Stun | Kara | Guard Level | Parry Level |
| 4 | 16 | 28 | -30 | - | - | 28 | 19 | - | - | A | |
| Cancel Options | Self Meter Gain | Whiff | Hit | Block / Tech | Opponent Meter Gain | Hit | Block / Tech | ||||
| - | - | - | - | - | - | ||||||
| |||||||||||
| HP | Startup | Active | Recovery | Block | Hit | Cr. Hit | Damage | Stun | Kara | Guard Level | Parry Level |
| 3 | 21 | 32 | -38 | - | - | 31 | 20 | - | - | A | |
| Cancel Options | Self Meter Gain | Whiff | Hit | Block / Tech | Opponent Meter Gain | Hit | Block / Tech | ||||
| - | - | - | - | - | - | ||||||
| |||||||||||
| EX | Startup | Active | Recovery | Block | Hit | Cr. Hit | Damage | Stun | Kara | Guard Level | Parry Level |
| 3 | 21 | 34 | -37 | - | - | 37 | 20 | - | - | A | |
| Cancel Options | Self Meter Gain | Whiff | Hit | Block / Tech | Opponent Meter Gain | Hit | Block / Tech | ||||
| - | - | - | - | - | - | ||||||
| |||||||||||
41236P
| LP | Startup | Active | Recovery | Block | Hit | Cr. Hit | Damage | Stun | Kara | Guard Level | Parry Level |
|---|---|---|---|---|---|---|---|---|---|---|---|
| 8 | 8 | 18 | -3 | - | - | 19 | 7 | - | - | H | |
| Cancel Options | Self Meter Gain | Whiff | Hit | Block / Tech | Opponent Meter Gain | Hit | Block / Tech | ||||
| - | - | - | - | - | - | ||||||
| |||||||||||
| MP | Startup | Active | Recovery | Block | Hit | Cr. Hit | Damage | Stun | Kara | Guard Level | Parry Level |
| 15 | 10 | 24 | -9 | - | - | 22 | 7 | - | - | H | |
| Cancel Options | Self Meter Gain | Whiff | Hit | Block / Tech | Opponent Meter Gain | Hit | Block / Tech | ||||
| - | - | - | - | - | - | ||||||
| |||||||||||
| HP | Startup | Active | Recovery | Block | Hit | Cr. Hit | Damage | Stun | Kara | Guard Level | Parry Level |
| 17 | 13 | 30 | -15 | - | - | 27 | 9 | - | - | H | |
| Cancel Options | Self Meter Gain | Whiff | Hit | Block / Tech | Opponent Meter Gain | Hit | Block / Tech | ||||
| - | - | - | - | - | - | ||||||
| |||||||||||
| EX | Startup | Active | Recovery | Block | Hit | Cr. Hit | Damage | Stun | Kara | Guard Level | Parry Level |
| 16 | 17 | 28 | -15 | - | - | 32 | 10 | - | - | H | |
| Cancel Options | Self Meter Gain | Whiff | Hit | Block / Tech | Opponent Meter Gain | Hit | Block / Tech | ||||
| - | - | - | - | - | - | ||||||
| |||||||||||
41236K
| Startup | Active | Recovery | Block | Hit | Cr. Hit | Damage | Stun | Kara | Guard Level | Parry Level |
|---|---|---|---|---|---|---|---|---|---|---|
| - | - | - | - | - | - | - | - | - | - | - |
| Cancel Options | Self Meter Gain | Whiff | Hit | Block / Tech | Opponent Meter Gain | Hit | Block / Tech | |||
| - | - | - | - | - | - | |||||
41236K > P
| Startup | Active | Recovery | Block | Hit | Cr. Hit | Damage | Stun | Kara | Guard Level | Parry Level |
|---|---|---|---|---|---|---|---|---|---|---|
| 21/20/22 | 4 | 19 | -7 | - | - | 28 | 17 | - | - | H |
| Cancel Options | Self Meter Gain | Whiff | Hit | Block / Tech | Opponent Meter Gain | Hit | Block / Tech | |||
| - | - | - | - | - | - | |||||
| ||||||||||
41236K > K
| Startup | Active | Recovery | Block | Hit | Cr. Hit | Damage | Stun | Kara | Guard Level | Parry Level |
|---|---|---|---|---|---|---|---|---|---|---|
| 20/19/21 | 4 | 25 | -12 | - | - | 30 | 11 | - | - | H |
| Cancel Options | Self Meter Gain | Whiff | Hit | Block / Tech | Opponent Meter Gain | Hit | Block / Tech | |||
| - | - | - | - | - | - | |||||
| ||||||||||
63214P
| LP | Startup | Active | Recovery | Block | Hit | Cr. Hit | Damage | Stun | Kara | Guard Level | Parry Level |
|---|---|---|---|---|---|---|---|---|---|---|---|
| 2 | - | - | - | - | - | - | - | - | - | A | |
| Cancel Options | Self Meter Gain | Whiff | Hit | Block / Tech | Opponent Meter Gain | Hit | Block / Tech | ||||
| - | - | - | - | - | - | ||||||
| |||||||||||
| MP | Startup | Active | Recovery | Block | Hit | Cr. Hit | Damage | Stun | Kara | Guard Level | Parry Level |
| 2 | - | - | - | - | - | - | - | - | - | A | |
| Cancel Options | Self Meter Gain | Whiff | Hit | Block / Tech | Opponent Meter Gain | Hit | Block / Tech | ||||
| - | - | - | - | - | - | ||||||
| |||||||||||
| HP | Startup | Active | Recovery | Block | Hit | Cr. Hit | Damage | Stun | Kara | Guard Level | Parry Level |
| 2 | - | - | - | - | - | - | - | - | - | A | |
| Cancel Options | Self Meter Gain | Whiff | Hit | Block / Tech | Opponent Meter Gain | Hit | Block / Tech | ||||
| - | - | - | - | - | - | ||||||
| |||||||||||
| EX | Startup | Active | Recovery | Block | Hit | Cr. Hit | Damage | Stun | Kara | Guard Level | Parry Level |
| 4 | - | - | - | - | - | - | - | - | - | A | |
| Cancel Options | Self Meter Gain | Whiff | Hit | Block / Tech | Opponent Meter Gain | Hit | Block / Tech | ||||
| - | - | - | - | - | - | ||||||
63214K
| LK | Startup | Active | Recovery | Block | Hit | Cr. Hit | Damage | Stun | Kara | Guard Level | Parry Level |
|---|---|---|---|---|---|---|---|---|---|---|---|
| 17 | 3 | 13 | 0 | 2 | 4 | 33 | 19 | - | - | H | |
| Cancel Options | Self Meter Gain | Whiff | Hit | Block / Tech | Opponent Meter Gain | Hit | Block / Tech | ||||
| - | - | - | - | - | - | ||||||
| |||||||||||
| MK | Startup | Active | Recovery | Block | Hit | Cr. Hit | Damage | Stun | Kara | Guard Level | Parry Level |
| 20 | 3 | 13 | 0 | 2 | 4 | 33 | 19 | - | - | H | |
| Cancel Options | Self Meter Gain | Whiff | Hit | Block / Tech | Opponent Meter Gain | Hit | Block / Tech | ||||
| - | - | - | - | - | - | ||||||
| |||||||||||
| HK | Startup | Active | Recovery | Block | Hit | Cr. Hit | Damage | Stun | Kara | Guard Level | Parry Level |
| 23 | 3 | 13 | 0 | 2 | 4 | 33 | 19 | - | - | H | |
| Cancel Options | Self Meter Gain | Whiff | Hit | Block / Tech | Opponent Meter Gain | Hit | Block / Tech | ||||
| - | - | - | - | - | - | ||||||
| |||||||||||
| EX | Startup | Active | Recovery | Block | Hit | Cr. Hit | Damage | Stun | Kara | Guard Level | Parry Level |
| 17 | 10 | - | -3 | KD | KD | 33 | 22 | - | - | H | |
| Cancel Options | Self Meter Gain | Whiff | Hit | Block / Tech | Opponent Meter Gain | Hit | Block / Tech | ||||
| - | - | - | - | - | - | ||||||
| |||||||||||
Super Arts
236236P (SA1)
| Startup | Active | Recovery | Block | Hit | Cr. Hit | Damage | Stun | Kara | Guard Level | Parry Level |
|---|---|---|---|---|---|---|---|---|---|---|
| 1 | 40 | 31 | - | - | - | 63 | 10 | - | - | A |
| Cancel Options | Self Meter Gain | Whiff | Hit | Block / Tech | Opponent Meter Gain | Hit | Block / Tech | |||
| - | - | - | - | - | - | |||||
236236P (mash P) (SA2)
| Startup | Active | Recovery | Block | Hit | Cr. Hit | Damage | Stun | Kara | Guard Level | Parry Level |
|---|---|---|---|---|---|---|---|---|---|---|
| 2 | 17 | 20 | - | - | - | 60 | 13 | - | - | H |
| Cancel Options | Self Meter Gain | Whiff | Hit | Block / Tech | Opponent Meter Gain | Hit | Block / Tech | |||
| - | - | - | - | - | - | |||||
236236P (hold PPP) (SA2)
| Startup | Active | Recovery | Block | Hit | Cr. Hit | Damage | Stun | Kara | Guard Level | Parry Level |
|---|---|---|---|---|---|---|---|---|---|---|
| 2 | 17 | 20 | - | - | - | 60 | 13 | - | - | H |
| Cancel Options | Self Meter Gain | Whiff | Hit | Block / Tech | Opponent Meter Gain | Hit | Block / Tech | |||
| - | - | - | - | - | - | |||||
| ||||||||||
236236P (SA3)
| Startup | Active | Recovery | Block | Hit | Cr. Hit | Damage | Stun | Kara | Guard Level | Parry Level |
|---|---|---|---|---|---|---|---|---|---|---|
| 1 | 10 | 24 | - | - | - | 46 | - | - | - | H |
| Cancel Options | Self Meter Gain | Whiff | Hit | Block / Tech | Opponent Meter Gain | Hit | Block / Tech | |||
| - | - | - | - | - | - | |||||
| ||||||||||

