mNo edit summary |
(Added more frame data for his aerial lights, 2P, and j.2P) |
||
| Line 45: | Line 45: | ||
{{MoveData | {{MoveData | ||
|image= NASB leo light mid.png | |image= NASB leo light mid.png | ||
|caption= The neutral winner | |caption= '''The neutral winner''' | ||
|name= Horizontal Slash | |name= Horizontal Slash | ||
|linkname= 5L | |linkname= 5L | ||
| Line 70: | Line 70: | ||
{{MoveData | {{MoveData | ||
|image= NASB leo light up.png | |image= NASB leo light up.png | ||
|caption= Trademark combo starter | |caption= '''Trademark combo starter''' | ||
|name= Vertical Slash | |name= Vertical Slash | ||
|linkname= 8L | |linkname= 8L | ||
| Line 95: | Line 95: | ||
{{MoveData | {{MoveData | ||
|image= NASB leo light down.png | |image= NASB leo light down.png | ||
|caption= Nice recovery, nerd | |caption= '''Nice recovery, nerd''' | ||
|name= Leg Sweep | |name= Leg Sweep | ||
|linkname= 2L | |linkname= 2L | ||
| Line 131: | Line 131: | ||
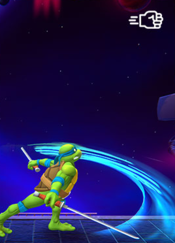
{{MoveData | {{MoveData | ||
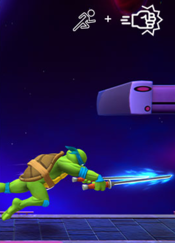
|image= NASB leo aerial light mid.png | |image= NASB leo aerial light mid.png | ||
|caption= | |caption= '''"Oh? You're approaching me?"''' | ||
|name= Aerial Horizontal Slash | |name= Aerial Horizontal Slash | ||
|linkname= j5L | |linkname= j5L | ||
|input= j5L / Jump Light | |input= j5L / Jump Light | ||
|data= | |data= | ||
{{AttackData-NASB | |||
|Damage= 5% (9%) | |||
|Startup= 8 | |||
|Active= 2 | |||
|Recovery= 17 | |||
|Frame Advantage= N/A | |||
|Knockback= | |||
|Knockback on Block= | |||
|Angle= | |||
|DI Angle= | |||
|Special Properties=Tip of hitbox has additional damage and knockback | |||
|description= | |||
*Values in () are for tipper hitbox | |||
Your go-to neutral tool. Amazing horizontal disjoint allowing you to easily zone your opponent out. When approaching, it's good to mix up between retreating neutral lights and approaching to force your opponent to guess which of the two you will do and make them overextend. As an edge guarding tool, it's outstanding for safely covering high recovery options from your opponent, and if you manage to hit them with the tipper hitbox they can die at absurdly low percents off stage. | |||
}} | |||
}} | |||
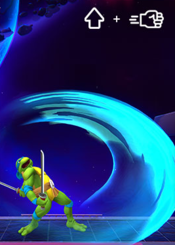
{{MoveData | {{MoveData | ||
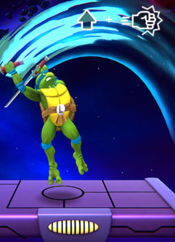
|image= NASB leo aerial light up.png | |image= NASB leo aerial light up.png | ||
|caption= | |caption= '''If you got hit by this, prepare to not touch the ground for a while''' | ||
|name= Aerial Vertical Slash | |name= Aerial Vertical Slash | ||
|linkname= j8L | |linkname= j8L | ||
|input= j8L / Jump Up Light | |input= j8L / Jump Up Light | ||
|data= | |data= | ||
{{AttackData-NASB | |||
|Damage= 5% (9%) | |||
|Startup= 8 | |||
|Active= 2 | |||
|Recovery= 19 | |||
|Frame Advantage= N/A | |||
|Knockback= | |||
|Knockback on Block= | |||
|Angle= | |||
|DI Angle= | |||
|Special Properties=Tip of hitbox has additional damage and knockback | |||
|description= | |||
*Values in () are for tipper hitbox | |||
Another one of Leo's outstanding disjoints. This one excels at sharking, and at low percents just one of these can combo into j.L -> dj.2L -> j.2L spike ender on bad DI. | |||
}} | |||
}} | |||
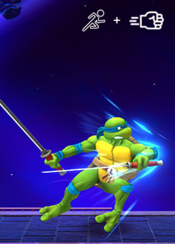
{{MoveData | {{MoveData | ||
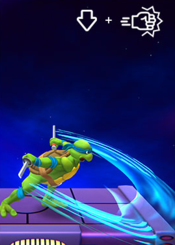
|image= NASB leo aerial light down.png | |image= NASB leo aerial light down.png | ||
|caption= | |caption= '''"GGs, shake my hand"''' | ||
|name= Down Slash | |name= Down Slash | ||
|linkname= j2lL | |linkname= j2lL | ||
|input= j2L / Jump Down Light | |input= j2L / Jump Down Light | ||
|data= | |data= | ||
{{AttackData-NASB | |||
|Damage= 6% (10%) | |||
|Startup= 8 | |||
|Active= 3 | |||
|Recovery= 19 | |||
|Frame Advantage= N/A | |||
|Knockback= | |||
|Knockback on Block= | |||
|Angle= | |||
|DI Angle= | |||
|Special Properties=Tip of hitbox has additional damage and knockback | |||
|description= | |||
*Values in () are for tipper hitbox | |||
Go-to spike ender for covering low recoveries, or you managed to grab the opponent at 0% at the ledge. This move also combos into itself off stage while still being able to recover from the bottom blast zone thanks to his amazing j.8P. As a neutral tool, any stray hit from this move will put your opponent in a tech chase position that's heavily in your favor. | |||
}} | |||
}} | }} | ||
| Line 166: | Line 208: | ||
{{MoveData | {{MoveData | ||
|image= NASB leo strong mid.png | |image= NASB leo strong mid.png | ||
|caption= Spin to win | |caption= '''Spin to win''' | ||
|name= Dual Horizontal Slash | |name= Dual Horizontal Slash | ||
|linkname= 5S | |linkname= 5S | ||
| Line 191: | Line 233: | ||
{{MoveData | {{MoveData | ||
|image= NASB leo strong up.png | |image= NASB leo strong up.png | ||
|caption= WHY YOU MASHING BRO?? | |caption= '''WHY YOU MASHING BRO??''' | ||
|name= Dual Vertical Slash | |name= Dual Vertical Slash | ||
|linkname= 8S | |linkname= 8S | ||
| Line 216: | Line 258: | ||
{{MoveData | {{MoveData | ||
|image= NASB leo strong down.png | |image= NASB leo strong down.png | ||
|caption= You thought you were safe now? | |caption= '''You thought you were safe now?''' | ||
|name= Scissor Slash | |name= Scissor Slash | ||
|linkname= 2S | |linkname= 2S | ||
| Line 253: | Line 295: | ||
{{MoveData | {{MoveData | ||
|image= NASB leo aerial strong mid.png | |image= NASB leo aerial strong mid.png | ||
|caption= | |caption= '''These attack names are becoming a mouthful...''' | ||
|name= Aerial Dual Horizontal Slash | |name= Aerial Dual Horizontal Slash | ||
|linkname= j5S | |linkname= j5S | ||
| Line 287: | Line 329: | ||
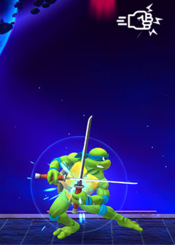
{{MoveData | {{MoveData | ||
|image= NASB leo special mid.png | |image= NASB leo special mid.png | ||
|caption= For when you have the power of Splinter and anime on your side | |caption= '''For when you have the power of Splinter and anime on your side''' | ||
|name= Niten-Ichi Ryu | |name= Niten-Ichi Ryu | ||
|linkname= 5P | |linkname= 5P | ||
| Line 298: | Line 340: | ||
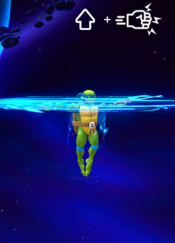
{{MoveData | {{MoveData | ||
|image= NASB leo special up.png | |image= NASB leo special up.png | ||
|caption= We hope you enjoy your flight on Leonardo Airlines | |caption= '''We hope you enjoy your flight on Leonardo Airlines''' | ||
|name= Endless Screw | |name= Endless Screw | ||
|linkname= 8P | |linkname= 8P | ||
| Line 309: | Line 351: | ||
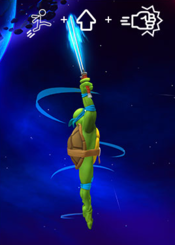
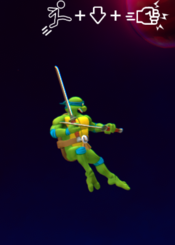
{{MoveData | {{MoveData | ||
|image= NASB leo special down.png | |image= NASB leo special down.png | ||
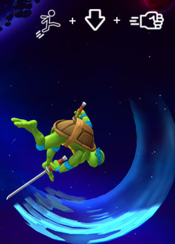
|caption= | |caption= '''"What's with characters named Leo and DPs?"''' | ||
|name= Backflip | |name= Backflip | ||
|linkname= 2P | |linkname= 2P | ||
|input= 2P / Down Special | |input= 2P / Down Special | ||
|data= | |data= | ||
{{AttackData-NASB | |||
|Damage= N/A | |||
|Startup= 1 | |||
|Active= 6 | |||
|Recovery= 20 [1] | |||
|Frame Advantage= N/A | |||
|Knockback= | |||
|Knockback on Block= | |||
|Angle= | |||
|DI Angle= | |||
|Special Properties=Full-body invuln. frames 1-6 | |||
|description= | |||
*Values in []: for the recovery, there is a minimum 1 frame of recovery before you can cancel the flip into j.2P | |||
Frame-1 invincible flip that will often high-profile your opponents moves on the ground, and punish if cancelled into j.2P. Basically works like a normal fighting game DP as an out of shield option, and as an extra layer to your options on tech thanks to being frame 1 invincible. | |||
}} | |||
}} | |||
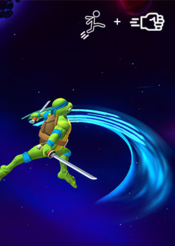
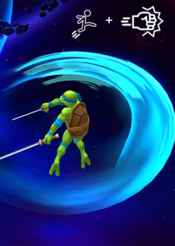
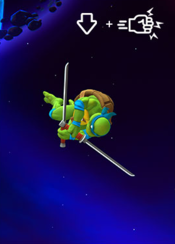
{{MoveData | |||
|image= NASB leo aerial special down.png | |||
|caption= '''Airdash 2: Now with a hitbox''' | |||
|name= Backflip | |||
|linkname= j2P | |||
|input= j2P / Jump Down Special | |||
|data= | |||
{{AttackData-NASB | |||
|Damage= 8% | |||
|Startup= 10 | |||
|Active= 8 | |||
|Recovery= 20 | |||
|Frame Advantage= N/A | |||
|Knockback= | |||
|Knockback on Block= | |||
|Angle= | |||
|DI Angle= | |||
|Special Properties= | |||
|description= | |||
As a standalone move, this works pretty much as a second airdash, allowing you to survive ridiculous situations and still keep your normal airdash. Your momentum in the air is also completely changed as soon as you input this move, allowing you to further mixup how you'll land on stage. | |||
}} | |||
}} | |||
=== Universal Mechanics === | === Universal Mechanics === | ||
Revision as of 14:01, 22 October 2021
Story
It's my call, I decide who gets a beat down.
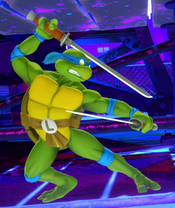
The serious, mature, and skilled leader of the Teenage Mutant Ninja Turtles, Leonardo is a master with his Twin Ninjatos. He couldn't let Mikey have all the fun so he decided to join the brawl and show the others what it means to be Master Splinter student!
Gameplay
Leonardo is a rushdown character with a very wide range but weaker overall attack strength; he's made for gradually chipping away at his opponent with his assault while also keeping anyone from getting too close to him due to his smorgasbord of disjoints. The key to being effective with the blue boy is to know your combos and know your spacing. His recovery differs from others as having hitboxes on both sides rather than up and below, making it very useful for anyone trying to stuff out your return to stage. Alongside this are his Unique Special moves, with Niten Ichi-Ryu being a rekka attack that can lead into 1 of 2 follows ups depending and the situation and Back Flip which is a quick evasive reversal option that can be cancelled into a drop kick attack to confound opponents.
Interestingly Leo also has a unique attribute being that his sword moves have higher knockback and damage if you hit them on the tip of his swords while hitting them at the hilt will do less damage and knockback.
If you're willing to sacrifice attack power for speed and like keeping your foes at arms length, then this turtle will certianly lead you to victory!
| Franchise |
Teenage Mutant Ninja Turtles |
|---|---|
| Weight Class |
Middle |
| Character Discord | |
| Home Stage |
Sewers Slam |
| Strengths | Weaknesses |
|---|---|
|
|
Moves List
Light Attacks
| Damage | Startup Frames | Active Frames | Total Frames | Safety | |
|---|---|---|---|---|---|
| 6% (9%) | 8 | 2 | - | - | |
Somewhat slow as a jab, but the huge horizontal disjoint still makes this worth using. Great for closing out stocks for it's awkward horizontal launch angle at high %. | |||||
| Damage | Startup Frames | Active Frames | Total Frames | Safety | |
|---|---|---|---|---|---|
| 6% (9%) | 7 | 3 | - | - | |
Big range, upwards launching, fast combo starter. 1 frame faster than Leo's 5L in startup, but smaller horizontal hitbox making this better for starting out stocks for its combo ability. | |||||
| Damage | Startup Frames | Active Frames | Total Frames | Safety | |
|---|---|---|---|---|---|
| 8% | 4 | 5 | - | - | |
|
Leo's fastest ground normal. This is your go-to option out of shield for punishing your opponent. Because of it's long active frames and spike effect when used on opponents below you, this is an amazing move for 2-frameing your opponents. On hit, 2L -> 8L is a true combo starter at 0%. | |||||
Jumping/Air Light Attacks
| Damage | Startup Frames | Active Frames | Total Frames | Safety | |
|---|---|---|---|---|---|
| 5% (9%) | 8 | 2 | - | - | |
Your go-to neutral tool. Amazing horizontal disjoint allowing you to easily zone your opponent out. When approaching, it's good to mix up between retreating neutral lights and approaching to force your opponent to guess which of the two you will do and make them overextend. As an edge guarding tool, it's outstanding for safely covering high recovery options from your opponent, and if you manage to hit them with the tipper hitbox they can die at absurdly low percents off stage. | |||||
| Damage | Startup Frames | Active Frames | Total Frames | Safety | |
|---|---|---|---|---|---|
| 5% (9%) | 8 | 2 | - | - | |
Another one of Leo's outstanding disjoints. This one excels at sharking, and at low percents just one of these can combo into j.L -> dj.2L -> j.2L spike ender on bad DI. | |||||
| Damage | Startup Frames | Active Frames | Total Frames | Safety | |
|---|---|---|---|---|---|
| 6% (10%) | 8 | 3 | - | - | |
Go-to spike ender for covering low recoveries, or you managed to grab the opponent at 0% at the ledge. This move also combos into itself off stage while still being able to recover from the bottom blast zone thanks to his amazing j.8P. As a neutral tool, any stray hit from this move will put your opponent in a tech chase position that's heavily in your favor. | |||||
Strong Attacks
| Damage | Startup Frames | Active Frames | Total Frames | Safety | |
|---|---|---|---|---|---|
| 10% (16%) | 21 | 3 | - | - | |
Leo's slowest strong attack. Good for baiting and punishing your opponents approach options, its framedata on block and disjoint makes it very spammable, just don't overuse it or risk being whiff-punished or hit out of the startup. | |||||
| Damage | Startup Frames | Active Frames | Total Frames | Safety | |
|---|---|---|---|---|---|
| 10% (16%) | 20 | 5 | - | - | |
Very high-reaching disjoint, great for mixing up your approach after doing something like 8L -> j.8L if your opponent is prone to mashing out of your air combos. | |||||
| Damage | Startup Frames | Active Frames | Total Frames | Safety | |
|---|---|---|---|---|---|
| 10% (16%) | 19 | 5 | - | - | |
Situational usage in safely 2-frameing thanks to the disjoint, but the startup makes it pale in comparison to his 2L. When hitting opponents below you it also spikes them at a slower speed than 2L. Better than 2L in matchups where the characters recovery has a hitbox that can hit you out of your 2-frame attempt like Spongebob. | |||||
Jumping/Air Strong Attacks
Special Attacks
| Damage | Startup Frames | Active Frames | Total Frames | Safety | |
|---|---|---|---|---|---|
| N/A | 1 | 6 | - | - | |
Frame-1 invincible flip that will often high-profile your opponents moves on the ground, and punish if cancelled into j.2P. Basically works like a normal fighting game DP as an out of shield option, and as an extra layer to your options on tech thanks to being frame 1 invincible. | |||||
| Damage | Startup Frames | Active Frames | Total Frames | Safety | |
|---|---|---|---|---|---|
| 8% | 10 | 8 | - | - | |
|
As a standalone move, this works pretty much as a second airdash, allowing you to survive ridiculous situations and still keep your normal airdash. Your momentum in the air is also completely changed as soon as you input this move, allowing you to further mixup how you'll land on stage. | |||||
Universal Mechanics

