SONICPHOENIX (talk | contribs) (Undo revision 277324 by SONICPHOENIX (talk)) Tag: Undo |
SONICPHOENIX (talk | contribs) (Undo revision 274807 by SONICPHOENIX (talk)) Tag: Undo |
||
| Line 45: | Line 45: | ||
* Cancel options: self | * Cancel options: self | ||
{{3S Button FAT|link=https://fullmeter.com/fatonline/#/framedata/movedetail/3S/Hugo/normal/Stand%20LP}} | {{3S Button FAT|link=https://fullmeter.com/fatonline/#/framedata/movedetail/3S/Hugo/normal/Stand%20LP}} | ||
}} | }} | ||
}} | }} | ||
| Line 68: | Line 67: | ||
* Opponent meter gain: Whiff: 0, Hit: 3, Block: 0. | * Opponent meter gain: Whiff: 0, Hit: 3, Block: 0. | ||
{{3S Button FAT|link=https://fullmeter.com/fatonline/#/framedata/movedetail/3S/Hugo/normal/Stand%20MP}} | {{3S Button FAT|link=https://fullmeter.com/fatonline/#/framedata/movedetail/3S/Hugo/normal/Stand%20MP}} | ||
}} | }} | ||
}} | }} | ||
| Line 92: | Line 90: | ||
* Opponent meter gain: Whiff: 0, Hit: 6, Block: 0. | * Opponent meter gain: Whiff: 0, Hit: 6, Block: 0. | ||
{{3S Button FAT|link=https://fullmeter.com/fatonline/#/framedata/movedetail/3S/Hugo/normal/Stand%20HP}} | {{3S Button FAT|link=https://fullmeter.com/fatonline/#/framedata/movedetail/3S/Hugo/normal/Stand%20HP}} | ||
}} | }} | ||
}} | }} | ||
| Line 115: | Line 112: | ||
* Cancel options: sp su | * Cancel options: sp su | ||
{{3S Button FAT|link=https://fullmeter.com/fatonline/#/framedata/movedetail/3S/Hugo/normal/Stand%20LK}} | {{3S Button FAT|link=https://fullmeter.com/fatonline/#/framedata/movedetail/3S/Hugo/normal/Stand%20LK}} | ||
}} | }} | ||
}} | }} | ||
| Line 141: | Line 136: | ||
* Opponent meter gain: Whiff: 0, Hit: 3, Block: 0. | * Opponent meter gain: Whiff: 0, Hit: 3, Block: 0. | ||
{{3S Button FAT|link=https://fullmeter.com/fatonline/#/framedata/movedetail/3S/Hugo/normal/Stand%20MK}} | {{3S Button FAT|link=https://fullmeter.com/fatonline/#/framedata/movedetail/3S/Hugo/normal/Stand%20MK}} | ||
}} | }} | ||
}} | }} | ||
| Line 165: | Line 159: | ||
* Opponent meter gain: Whiff: 0, Hit: 6, Block: 0. | * Opponent meter gain: Whiff: 0, Hit: 6, Block: 0. | ||
{{3S Button FAT|link=https://fullmeter.com/fatonline/#/framedata/movedetail/3S/Hugo/normal/Stand%20HK}} | {{3S Button FAT|link=https://fullmeter.com/fatonline/#/framedata/movedetail/3S/Hugo/normal/Stand%20HK}} | ||
}} | }} | ||
}} | }} | ||
| Line 193: | Line 186: | ||
* Opponent meter gain: Whiff: 0, Hit: 6, Block: 0. | * Opponent meter gain: Whiff: 0, Hit: 6, Block: 0. | ||
{{3S Button FAT|link=https://fullmeter.com/fatonline/#/framedata/movedetail/3S/Hugo/normal/Hammer%20Hook}} | {{3S Button FAT|link=https://fullmeter.com/fatonline/#/framedata/movedetail/3S/Hugo/normal/Hammer%20Hook}} | ||
}} | }} | ||
}} | }} | ||
| Line 199: | Line 191: | ||
<br> | <br> | ||
<br> | <br> | ||
==== Crouching Normals ==== | ==== Crouching Normals ==== | ||
| Line 221: | Line 212: | ||
* Cancel options: self sp su | * Cancel options: self sp su | ||
{{3S Button FAT|link=https://fullmeter.com/fatonline/#/framedata/movedetail/3S/Hugo/normal/Crouch%20LP}} | {{3S Button FAT|link=https://fullmeter.com/fatonline/#/framedata/movedetail/3S/Hugo/normal/Crouch%20LP}} | ||
}} | }} | ||
}} | }} | ||
| Line 244: | Line 234: | ||
* Opponent meter gain: Whiff: 0, Hit: 3, Block: 0. | * Opponent meter gain: Whiff: 0, Hit: 3, Block: 0. | ||
{{3S Button FAT|link=https://fullmeter.com/fatonline/#/framedata/movedetail/3S/Hugo/normal/Crouch%20MP}} | {{3S Button FAT|link=https://fullmeter.com/fatonline/#/framedata/movedetail/3S/Hugo/normal/Crouch%20MP}} | ||
}} | }} | ||
}} | }} | ||
| Line 269: | Line 258: | ||
* Opponent meter gain: Whiff: 0, Hit: 6, Block: 0. | * Opponent meter gain: Whiff: 0, Hit: 6, Block: 0. | ||
{{3S Button FAT|link=https://fullmeter.com/fatonline/#/framedata/movedetail/3S/Hugo/normal/Crouch%20HP}} | {{3S Button FAT|link=https://fullmeter.com/fatonline/#/framedata/movedetail/3S/Hugo/normal/Crouch%20HP}} | ||
}} | }} | ||
}} | }} | ||
| Line 292: | Line 280: | ||
* Cancel options: sp su | * Cancel options: sp su | ||
{{3S Button FAT|link=https://fullmeter.com/fatonline/#/framedata/movedetail/3S/Hugo/normal/Crouch%20LK}} | {{3S Button FAT|link=https://fullmeter.com/fatonline/#/framedata/movedetail/3S/Hugo/normal/Crouch%20LK}} | ||
}} | }} | ||
}} | }} | ||
| Line 316: | Line 303: | ||
* Opponent meter gain: Whiff: 0, Hit: 3, Block: 0. | * Opponent meter gain: Whiff: 0, Hit: 3, Block: 0. | ||
{{3S Button FAT|link=https://fullmeter.com/fatonline/#/framedata/movedetail/3S/Hugo/normal/Crouch%20MK}} | {{3S Button FAT|link=https://fullmeter.com/fatonline/#/framedata/movedetail/3S/Hugo/normal/Crouch%20MK}} | ||
}} | }} | ||
}} | }} | ||
| Line 342: | Line 328: | ||
}} | }} | ||
}} | }} | ||
<br> | <br> | ||
<br> | <br> | ||
| Line 362: | Line 347: | ||
|description= | |description= | ||
{{3S Button FAT|link=https://fullmeter.com/fatonline/#/framedata/movedetail/3S/Hugo/normal/Jump%20LP}} | {{3S Button FAT|link=https://fullmeter.com/fatonline/#/framedata/movedetail/3S/Hugo/normal/Jump%20LP}} | ||
}} | }} | ||
}} | }} | ||
| Line 382: | Line 366: | ||
* Opponent meter gain: Whiff: 0, Hit: 3, Block: 0. | * Opponent meter gain: Whiff: 0, Hit: 3, Block: 0. | ||
{{3S Button FAT|link=https://fullmeter.com/fatonline/#/framedata/movedetail/3S/Hugo/normal/Jump%20MP}} | {{3S Button FAT|link=https://fullmeter.com/fatonline/#/framedata/movedetail/3S/Hugo/normal/Jump%20MP}} | ||
}} | }} | ||
}} | }} | ||
| Line 402: | Line 385: | ||
* Opponent meter gain: Whiff: 0, Hit: 6, Block: 0. | * Opponent meter gain: Whiff: 0, Hit: 6, Block: 0. | ||
{{3S Button FAT|link=https://fullmeter.com/fatonline/#/framedata/movedetail/3S/Hugo/normal/Jump%20HP}} | {{3S Button FAT|link=https://fullmeter.com/fatonline/#/framedata/movedetail/3S/Hugo/normal/Jump%20HP}} | ||
}} | }} | ||
}} | }} | ||
| Line 420: | Line 402: | ||
|description= | |description= | ||
{{3S Button FAT|link=https://fullmeter.com/fatonline/#/framedata/movedetail/3S/Hugo/normal/Jump%20LK}} | {{3S Button FAT|link=https://fullmeter.com/fatonline/#/framedata/movedetail/3S/Hugo/normal/Jump%20LK}} | ||
}} | }} | ||
}} | }} | ||
| Line 440: | Line 421: | ||
* Opponent meter gain: Whiff: 0, Hit: 3, Block: 0. | * Opponent meter gain: Whiff: 0, Hit: 3, Block: 0. | ||
{{3S Button FAT|link=https://fullmeter.com/fatonline/#/framedata/movedetail/3S/Hugo/normal/Jump%20MK}} | {{3S Button FAT|link=https://fullmeter.com/fatonline/#/framedata/movedetail/3S/Hugo/normal/Jump%20MK}} | ||
}} | }} | ||
}} | }} | ||
| Line 460: | Line 440: | ||
* Opponent meter gain: Whiff: 0, Hit: 6, Block: 0. | * Opponent meter gain: Whiff: 0, Hit: 6, Block: 0. | ||
{{3S Button FAT|link=https://fullmeter.com/fatonline/#/framedata/movedetail/3S/Hugo/normal/Jump%20HK}} | {{3S Button FAT|link=https://fullmeter.com/fatonline/#/framedata/movedetail/3S/Hugo/normal/Jump%20HK}} | ||
}} | }} | ||
}} | }} | ||
| Line 479: | Line 458: | ||
* Opponent meter gain: Whiff: 0, Hit: 6, Block: 0. | * Opponent meter gain: Whiff: 0, Hit: 6, Block: 0. | ||
{{3S Button FAT|link=https://fullmeter.com/fatonline/#/framedata/movedetail/3S/Hugo/normal/Body%20Press}} | {{3S Button FAT|link=https://fullmeter.com/fatonline/#/framedata/movedetail/3S/Hugo/normal/Body%20Press}} | ||
}} | }} | ||
}} | }} | ||
| Line 503: | Line 481: | ||
|description= | |description= | ||
* 32 throw range | * 32 throw range | ||
* If the opponent is in the corner, Hugo can combo s.LP or cr.MP, depending on the character. | |||
{{3S Button FAT|link=https://fullmeter.com/fatonline/#/framedata/movedetail/3S/Hugo/normal/Neck%20Hanging%20Three}} | {{3S Button FAT|link=https://fullmeter.com/fatonline/#/framedata/movedetail/3S/Hugo/normal/Neck%20Hanging%20Three}} | ||
}} | }} | ||
}} | }} | ||
| Line 525: | Line 503: | ||
* 32 throw range | * 32 throw range | ||
{{3S Button FAT|link=https://fullmeter.com/fatonline/#/framedata/movedetail/3S/Hugo/normal/Body%20Slam}} | {{3S Button FAT|link=https://fullmeter.com/fatonline/#/framedata/movedetail/3S/Hugo/normal/Body%20Slam}} | ||
}} | }} | ||
}} | }} | ||
| Line 551: | Line 528: | ||
|description= | |description= | ||
{{3S Button FAT|link=https://fullmeter.com/fatonline/#/framedata/movedetail/3S/Hugo/normal/Knee%20Attack}} | {{3S Button FAT|link=https://fullmeter.com/fatonline/#/framedata/movedetail/3S/Hugo/normal/Knee%20Attack}} | ||
}} | }} | ||
}} | }} | ||
| Line 570: | Line 546: | ||
* Held taunt - Increases damage for the next hit/combo/throw by 25%. One taunt is the maximum. | * Held taunt - Increases damage for the next hit/combo/throw by 25%. One taunt is the maximum. | ||
{{3S Button FAT|link=https://fullmeter.com/fatonline/#/framedata/movedetail/3S/Hugo/normal/Intimidation}} | {{3S Button FAT|link=https://fullmeter.com/fatonline/#/framedata/movedetail/3S/Hugo/normal/Intimidation}} | ||
}} | }} | ||
}} | }} | ||
| Line 584: | Line 559: | ||
*If this taunt is used, no bonus effect is applied | *If this taunt is used, no bonus effect is applied | ||
{{3S Button FAT|link=https://fullmeter.com/fatonline/#/framedata/movedetail/3S/Hugo/normal/Intimidation%20+%20Poison%20Taunt}} | {{3S Button FAT|link=https://fullmeter.com/fatonline/#/framedata/movedetail/3S/Hugo/normal/Intimidation%20+%20Poison%20Taunt}} | ||
}} | }} | ||
}} | }} | ||
| Line 637: | Line 611: | ||
* Opponent meter gain: Whiff: 0, Hit: 8, Block: ---. | * Opponent meter gain: Whiff: 0, Hit: 8, Block: ---. | ||
{{3S Button FAT|link=https://fullmeter.com/fatonline/#/framedata/movedetail/3S/Hugo/normal/HK%20Shootdown%20Backbreaker}} | {{3S Button FAT|link=https://fullmeter.com/fatonline/#/framedata/movedetail/3S/Hugo/normal/HK%20Shootdown%20Backbreaker}} | ||
}} | }} | ||
}} | }} | ||
| Line 686: | Line 659: | ||
* Opponent meter gain: Whiff: 0, Hit: 8, Block: ---. | * Opponent meter gain: Whiff: 0, Hit: 8, Block: ---. | ||
{{3S Button FAT|link=https://fullmeter.com/fatonline/#/framedata/movedetail/3S/Hugo/normal/HP%20Moonsault%20Press}} | {{3S Button FAT|link=https://fullmeter.com/fatonline/#/framedata/movedetail/3S/Hugo/normal/HP%20Moonsault%20Press}} | ||
}} | }} | ||
}} | }} | ||
| Line 705: | Line 677: | ||
|stun=13 | |stun=13 | ||
|description= | |description= | ||
* Very hard to connect, but if doing well, Hugo takes the opponent and puts them cornered in a side of the screen, and here's when Hugo can take advantage of the match. It doesn't do a lot of damage, but setups the opponent for you. Use the LK version inmediately after a Body Press or when enemy likes to crouch in the middle of the screen, after a succesful parry from an air attack, or during a parry on a ground attack. In those cases you can also do a Moonsault Press for the punish, but depend of your mixup game, the desicion is yours to decide which attack you want to do, corner the enemy or punish him with a Moonsault. During the frames Hugo is running towards in this move, he cannot be throwed by regular throws, but he can be throw during the startup before running. | |||
* 32 throw range | * 32 throw range | ||
* Self meter gain: Whiff: 2, Hit: 31, Block: ---. | * Self meter gain: Whiff: 2, Hit: 31, Block: ---. | ||
| Line 735: | Line 708: | ||
* Opponent meter gain: Whiff: 0, Hit: 8, Block: ---. | * Opponent meter gain: Whiff: 0, Hit: 8, Block: ---. | ||
{{3S Button FAT|link=https://fullmeter.com/fatonline/#/framedata/movedetail/3S/Hugo/normal/HK%20Meat%20Squasher}} | {{3S Button FAT|link=https://fullmeter.com/fatonline/#/framedata/movedetail/3S/Hugo/normal/HK%20Meat%20Squasher}} | ||
}} | }} | ||
}} | }} | ||
| Line 800: | Line 772: | ||
* Opponent meter gain: Whiff: 0, Hit: 6, Block: 0. | * Opponent meter gain: Whiff: 0, Hit: 6, Block: 0. | ||
{{3S Button FAT|link=https://fullmeter.com/fatonline/#/framedata/movedetail/3S/Hugo/normal/HP%20Giant%20Palm%20Bomber}} | {{3S Button FAT|link=https://fullmeter.com/fatonline/#/framedata/movedetail/3S/Hugo/normal/HP%20Giant%20Palm%20Bomber}} | ||
}} | }} | ||
{{AttackData-3S | {{AttackData-3S | ||
| Line 816: | Line 787: | ||
* Opponent meter gain: Whiff: 0, Hit: 0, Block: 0. | * Opponent meter gain: Whiff: 0, Hit: 0, Block: 0. | ||
{{3S Button FAT|link=https://fullmeter.com/fatonline/#/framedata/movedetail/3S/Hugo/normal/EX%20Giant%20Palm%20Bomber}} | {{3S Button FAT|link=https://fullmeter.com/fatonline/#/framedata/movedetail/3S/Hugo/normal/EX%20Giant%20Palm%20Bomber}} | ||
}} | }} | ||
}} | }} | ||
| Line 871: | Line 841: | ||
{{3S Button FAT|link=https://fullmeter.com/fatonline/#/framedata/movedetail/3S/Hugo/normal/HK%20Monster%20Lariat}} | {{3S Button FAT|link=https://fullmeter.com/fatonline/#/framedata/movedetail/3S/Hugo/normal/HK%20Monster%20Lariat}} | ||
}} | }} | ||
{{AttackData-3S | {{AttackData-3S | ||
|version=EX | |version=EX | ||
| Line 885: | Line 854: | ||
* Opponent meter gain: Whiff: 0, Hit: 0, Block: 0. | * Opponent meter gain: Whiff: 0, Hit: 0, Block: 0. | ||
{{3S Button FAT|link=https://fullmeter.com/fatonline/#/framedata/movedetail/3S/Hugo/normal/EX%20Monster%20Lariat}} | {{3S Button FAT|link=https://fullmeter.com/fatonline/#/framedata/movedetail/3S/Hugo/normal/EX%20Monster%20Lariat}} | ||
}} | }} | ||
}} | }} | ||
| Line 935: | Line 902: | ||
* Opponent meter gain: Whiff: 0, Hit: 4, Block: ---. | * Opponent meter gain: Whiff: 0, Hit: 4, Block: ---. | ||
{{3S Button FAT|link=https://fullmeter.com/fatonline/#/framedata/movedetail/3S/Hugo/normal/HK%20Ultra%20Throw}} | {{3S Button FAT|link=https://fullmeter.com/fatonline/#/framedata/movedetail/3S/Hugo/normal/HK%20Ultra%20Throw}} | ||
}} | }} | ||
}} | }} | ||
| Line 957: | Line 923: | ||
|description= | |description= | ||
* 55 throw range | * 55 throw range | ||
* 1f of startup happens before the super flash, making it impossible to escape by jumping on reaction | |||
* If final hit will inflict fatal damage and timer hits 00 near the peak of the final leap, game time-out will be disabled | * If final hit will inflict fatal damage and timer hits 00 near the peak of the final leap, game time-out will be disabled | ||
{{3S Button FAT|link=https://fullmeter.com/fatonline/#/framedata/movedetail/3S/Hugo/normal/Gigas%20Breaker}} | {{3S Button FAT|link=https://fullmeter.com/fatonline/#/framedata/movedetail/3S/Hugo/normal/Gigas%20Breaker}} | ||
}} | }} | ||
}} | }} | ||
| Line 1,004: | Line 968: | ||
* 51 throw range | * 51 throw range | ||
{{3S Button FAT|link=https://fullmeter.com/fatonline/#/framedata/movedetail/3S/Hugo/normal/HK%20Megaton%20Press}} | {{3S Button FAT|link=https://fullmeter.com/fatonline/#/framedata/movedetail/3S/Hugo/normal/HK%20Megaton%20Press}} | ||
}} | }} | ||
}} | }} | ||
| Line 1,016: | Line 978: | ||
|data= | |data= | ||
{{AttackData-3S | {{AttackData-3S | ||
|startup= | |startup=5 | ||
|active=18 | |active=18 | ||
|recovery=47 | |recovery=47 | ||
| Line 1,025: | Line 987: | ||
|description= | |description= | ||
{{3S Button FAT|link=https://fullmeter.com/fatonline/#/framedata/movedetail/3S/Hugo/normal/Hammer%20Frenzy}} | {{3S Button FAT|link=https://fullmeter.com/fatonline/#/framedata/movedetail/3S/Hugo/normal/Hammer%20Frenzy}} | ||
}} | }} | ||
}} | }} | ||
Revision as of 13:39, 30 April 2024
Introduction
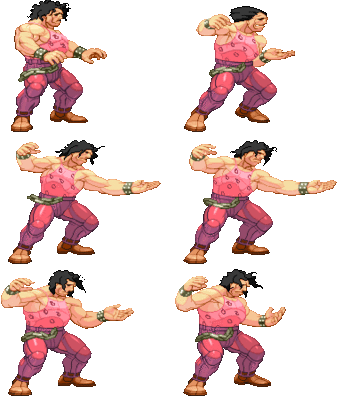
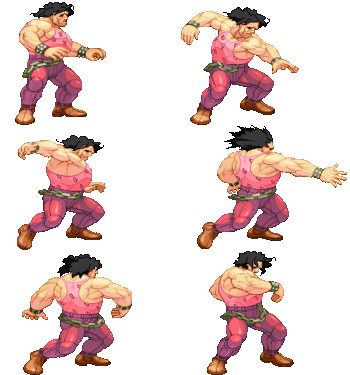
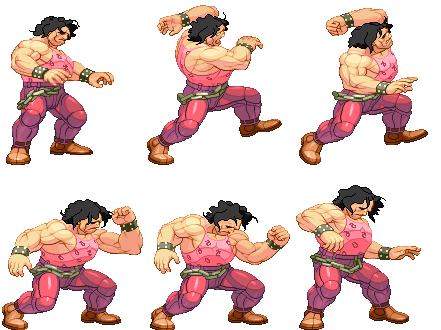
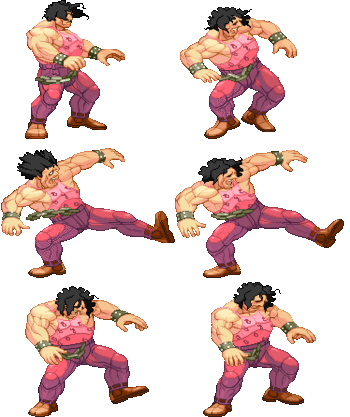
Hugo (or Andore as he was called in his initial debut as an enemy in the beat-em-up series Final Fight) is an ex-member of the Mad Gear Gang. His old gang now fallen, Hugo is determined to become the number one wrestler in the world, with his former gang member and long-time friend Poison as his manager. Hugo was first introduced to the Street Fighter series in Street Fighter III: 2nd Impact
Hugo is 3rd Strike's most straightforward grappler, moreso than Alex, and as such, requires exceptional patience to play. His impressive damage output puts a lot of mental overhead on the opponent and enables him to take games in only a few interactions if he can lock them down, but his slow move speed, committal buttons and unconventional-to-bad anti airs mean he often gets overwhelmed. Hugo is also the largest character in 3rd Strike, meaning he has a big set of hurtboxes, and combined with his unsafe pokes makes him exploitable in neutral and severely vulnerable against moves that aren't very strong versus other characters.
Super Arts
SA1: Gigas Breaker
Recommended
Gigas Breaker is great because it forces the opponent to play Hugo's game, lest they instantly lose half their health. Can be setup in a variety of ways including an SJ cancel/Tachi gigas. It can also be buffered in a dash, but is mostly used in a situation where a parry or block can lead to fat ass damage. Drawbacks include a lack of combo-ability and loss of some EX potential. Hayao is arguably the best known SAI player, also notable is Eriho.
- Does incredible damage.
- Instant startup, beats many moves.
- Puts a lot of mental overhead on the opponent.
- Usually takes close to or an entire round to fill the meter
- If missed, Hugo is screwed.
- Always be buffering 360 motions into your normals, jumps and other moves. This allows you to execute a second 360 on reaction, and thus Gigas on demand, without jumping.
SA2: Megaton Press
Not Recommended
Hugo's version of Aerial Russian Slam, being similarly useless. It has very low priority and is hard to land versus an aware opponent. It can be used to counter characters who want to be in the air a lot and force them to play a ground game. Can be comboed into in place of backbreaker. Most people pass it up to have either the power of Gigas or the flexibility of Hammer Mountain.
- Excellent damage if hit raw
- Gives Hugo a decent amount of EX to play with
- Zero invulnerability; gets stuffed by most jump-ins if used on reaction
- Particularly affected by damage scaling
SA3: Hammer Mountain
Recommended
Hammer Mountain is Hugo's most flexible SA. It deals decent damage and stun, can be used on wakeup or to charge through poke strings and as a whiff punisher. Easily confirmable from claps and jumping normals and allows for EX usage. The best known SAIII player is YSB. Hammer mountain is the best choice if you want to play a more hit-confirm based play-style, as opposed to the reactive style of Gigas.
- Good damage output.
- Has running/cancel gimmick, which is useful for longer range confirms.
- Ample invincibility on startup
- Great corner with a potent knockdown Hugo can capitalize on
- Lots of moves that confirm into it
- Occasional consistency issues
- Easily baitable and death on block or whiff.
- Cheeky overhead
| Strengths | Weaknesses |
|---|---|
|
|
Character Colors
| Hugo #3S_HU | |
|---|---|
| Vitals | |
| Life Points | 1385 |
| Stun Points | 72 |
| Super Art Stock/Size | |
| SA1 | 1/128 |
| SA2 | 2/112 |
| SA3 | 2/88 |
| Ground Movement | |
| Forward Dash duration/distance | 22 (80px) |
| Back Dash duration/distance | 22 (69px) |
| Jumping | |
| Back Jump duration | 42(6+33+3) |
| Neutral Jump duration | 44(6+35+3) |
| Forward Jump duration | 43(6+34+3) |
| Back Super Jump duration | 50(8+39+3) |
| Neutral Super Jump duration | 49(8+38+3) |
| Forward Super Jump duration | 50(8+39+3) |
| Wake up | |
| Wake up duration | 69 |
| Quick rise duration | 54 |
| 3S Frame Data Glossary | |
|---|---|
| Active |
How many frames a move remains active (can hurt opponents) for. Consecutive sets of active frames on a multi-hit move are separated by an asterisk (ex: 3*5). If there is a gap between sets of active frames, the gap is denoted by a number in parentheses (ex: 2(4)2) |
| Attack |
Attack level is L for low attacks (must be blocked crouching), H is for High attacks (which can be blocked high or low) and M for overhead (must be blocked standing). T is for throw attacks (which cannot be blocked). |
| Cancel options |
Available cancel options.
|
| Damage |
Attack damage on hit in life points. Notation may denote multi-hit or "sweet spot" damage values on certain frames. |
| Hit/Block |
These are frame advantage values when the attack hits or is blocked. If the number is positive, then the move will end before the defender can act again. If the number is negative, the defender will be able to act before the attacker and maybe even punish. D refers to knockdown on hit. "Cr. Hit" is an additional frame advantage value denoting if the advantage on hit changes when the defender is being hit while crouching. |
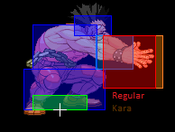
| Kara Range |
Almost all normal attacks can be canceled into a special or a multi-button command within three frames of startup. During that time, some attacks will shift position forward or backward and affect the reach of the special or command accordingly. This is denoted in pixels of range. There are a handful of moves in the game that can be kara-canceled after this initial window and will be denoted as a late kara-cancel. |
| Link |
A combo that is performed by inputting the second move after the first move has completely recovered (as opposed to cancelling the first move's animation). In 3S, the final frame of a move's hitstun allows a character to block a normal or special move, as well as some projectile supers. Therefore, an attack's frame advantage must be 2 frames greater than the followup move's startup in order to link. Ex: a +6 normal can link into a 4f normal/special, or a 5f super. |
| Parry |
This field will show a value of A if the attack can be parried standing or crouching, H if it must be parried standing or L if it must be parried crouching. |
| Recovery |
How many frames it takes for a move to finish after it's been active. |
| Startup |
How many frames it takes before the move becomes 'active' or has a hitbox. 3S uses classic startup notation, which does not include the first active frame. A move with 3 startup becomes active on frame 4. |
| Stun |
Amount of stun added to the opponent's stun bar on hit. |
| Throw range |
Range in pixels from the center of the character to the center of the opponent which allows a grab to connect. |
Frame Data
Standing Normals
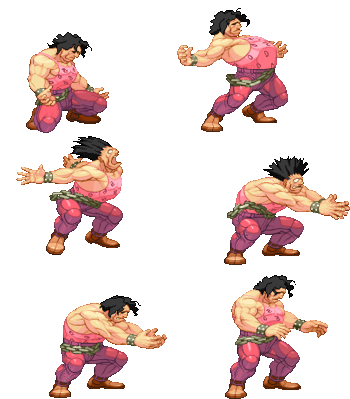
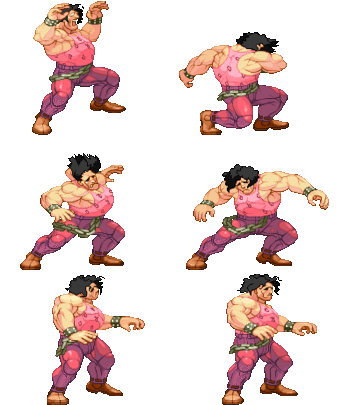
5LP
5MP
5HP
5LK
5MK
5HK
Command Normals
6HP
Crouching Normals
2LP
2MP
2HP
2LK
2MK
2HK
Jumping Normals
j.LP
j.MP
j.HP
j.LK
j.MK
j.HK
2HP (air)
Throws
LPLK (mash)
4/6LPK
Universal Overhead
MPMK
Taunts
HPHK
STHPHK
Special Moves
623K
4268P
4268K
63214+P
236K
63214K


