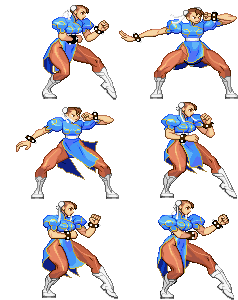
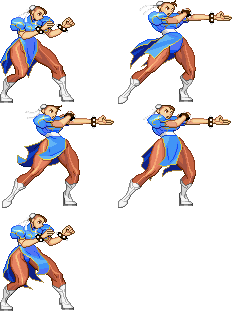
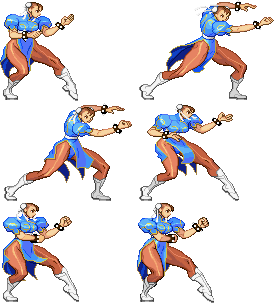
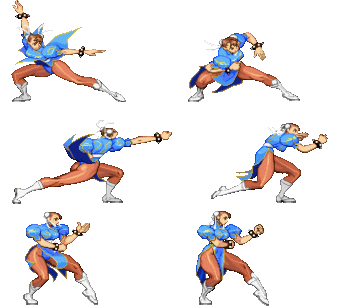
Callie Rose (talk | contribs) No edit summary |
Callie Rose (talk | contribs) No edit summary |
||
| Line 44: | Line 44: | ||
|description= | |description= | ||
* Cancel options: sp su | * Cancel options: sp su | ||
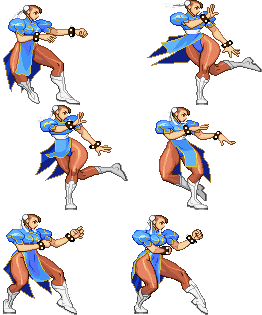
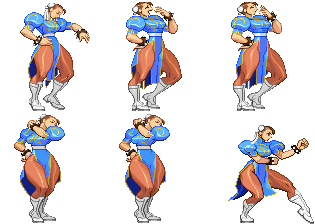
A fast elbow. Tied for Chun's fastest normal at an incredible 2 frames, but can be crouched by a majority of the cast. Instead, it acts as a great way to anti-air and deal with air parries thanks to the speed and safety. | |||
{{3S Button FAT|link=https://fullmeter.com/fatonline/#/framedata/movedetail/3S/Chun-Li/normal/Close%20LP}} | {{3S Button FAT|link=https://fullmeter.com/fatonline/#/framedata/movedetail/3S/Chun-Li/normal/Close%20LP}} | ||
}} | }} | ||
}} | }} | ||
| Line 67: | Line 67: | ||
|description= | |description= | ||
* Cancel options: ch sp su | * Cancel options: ch sp su | ||
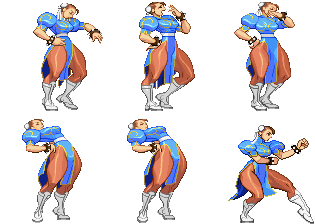
A similarly fast jab but with longer range in trade for 1 more frame of startup. Mostly used for intercepting jumps on the way down, similar to cl.LP, but is generally overshined by the crouching version. | |||
{{3S Button FAT|link=https://fullmeter.com/fatonline/#/framedata/movedetail/3S/Chun-Li/normal/Far%20LP}} | {{3S Button FAT|link=https://fullmeter.com/fatonline/#/framedata/movedetail/3S/Chun-Li/normal/Far%20LP}} | ||
}} | }} | ||
}} | }} | ||
| Line 91: | Line 91: | ||
* Self meter gain: Whiff: 2, Hit: 10, Block: 5. | * Self meter gain: Whiff: 2, Hit: 10, Block: 5. | ||
* Opponent meter gain: Whiff: 0, Hit: 2, Block: 0. | * Opponent meter gain: Whiff: 0, Hit: 2, Block: 0. | ||
An odd button you likely won't use often, as it is rarely the best option for any scenario. It can be used to punish things into super, but you'll usually have a higher damage option that still works. | |||
{{3S Button FAT|link=https://fullmeter.com/fatonline/#/framedata/movedetail/3S/Chun-Li/normal/Stand%20MP}} | {{3S Button FAT|link=https://fullmeter.com/fatonline/#/framedata/movedetail/3S/Chun-Li/normal/Stand%20MP}} | ||
}} | }} | ||
}} | }} | ||
| Line 114: | Line 114: | ||
* Self meter gain: Whiff: 3, Hit: 18, Block: 9. | * Self meter gain: Whiff: 3, Hit: 18, Block: 9. | ||
* Opponent meter gain: Whiff: 0, Hit: 4, Block: 0. | * Opponent meter gain: Whiff: 0, Hit: 4, Block: 0. | ||
One of Chun's longest reaching normals, and a great option for preemptively stuffing buttons and poor movement. If the opponent is whiffing buttons outside of 2MK range you can usually snipe them with this. Be ware about using it a lot however, as it's an easy parry and has a decent amount of whifflag by Chun normal standards. | |||
{{3S Button FAT|link=https://fullmeter.com/fatonline/#/framedata/movedetail/3S/Chun-Li/normal/Stand%20HP}} | {{3S Button FAT|link=https://fullmeter.com/fatonline/#/framedata/movedetail/3S/Chun-Li/normal/Stand%20HP}} | ||
}} | }} | ||
}} | }} | ||
| Line 136: | Line 136: | ||
|stun=3 | |stun=3 | ||
|description= | |description= | ||
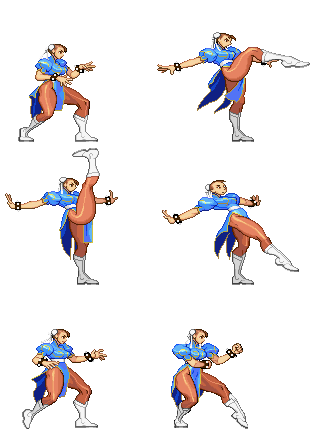
One of the only truly bad Chun normals. Stubby kick that hits mid despite looks. Doesn't lead to much reward, and is worse than her jabs for checking forward movement, though she doesn't have to crouch before using it like with 2LP. | |||
{{3S Button FAT|link=https://fullmeter.com/fatonline/#/framedata/movedetail/3S/Chun-Li/normal/Stand%20LK}} | {{3S Button FAT|link=https://fullmeter.com/fatonline/#/framedata/movedetail/3S/Chun-Li/normal/Stand%20LK}} | ||
}} | }} | ||
}} | }} | ||
| Line 159: | Line 159: | ||
* Self meter gain: Whiff: 2, Hit: 10, Block: 5. | * Self meter gain: Whiff: 2, Hit: 10, Block: 5. | ||
* Opponent meter gain: Whiff: 0, Hit: 2, Block: 0. | * Opponent meter gain: Whiff: 0, Hit: 2, Block: 0. | ||
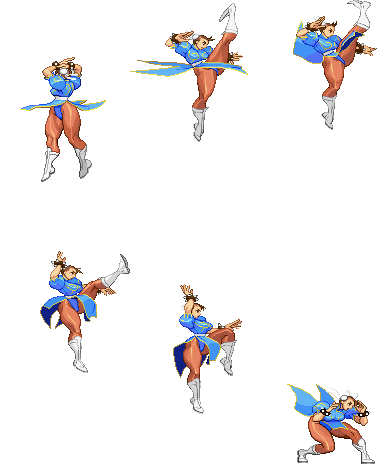
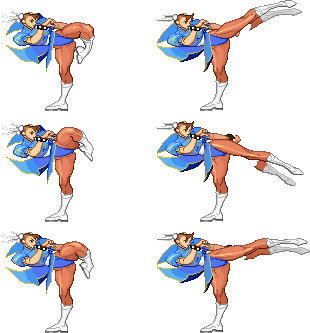
A high upward kick that can be held to transition into a followup axe kick. One of Chun's anti-air options, best for opponents directly above her, though it can usually be stuffed if not done a little early. | |||
A high upward kick that can be held to transition into a followup axe kick. One of Chun's anti-air options, best for opponents directly above her, though it can usually be stuffed if not done a little early. | {{3S Button FAT|link=https://fullmeter.com/fatonline/#/framedata/movedetail/3S/Chun-Li/normal/Close%20MK}} | ||
}} | }} | ||
}} | }} | ||
| Line 184: | Line 184: | ||
* Self meter gain: Whiff: 2, Hit: 10, Block: 5. | * Self meter gain: Whiff: 2, Hit: 10, Block: 5. | ||
* Opponent meter gain: Whiff: 0, Hit: 2, Block: 0. | * Opponent meter gain: Whiff: 0, Hit: 2, Block: 0. | ||
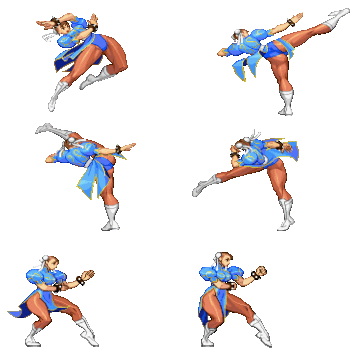
Another anti-air kick, better for people falling in front of her at an angle. Likely Chun's best standard anti-air in terms of reliability, but a lack of any cancels makes it very weak to air parry. | |||
One notable thing about this move is the insane range it has as a kara throw. You can input throw (LP+LK) during the first few frames of startup to add a massive amount of range to Chun's throw, making it a much scarier option. | |||
{{3S Button FAT|link=https://fullmeter.com/fatonline/#/framedata/movedetail/3S/Chun-Li/normal/Far%20MK}} | {{3S Button FAT|link=https://fullmeter.com/fatonline/#/framedata/movedetail/3S/Chun-Li/normal/Far%20MK}} | ||
}} | }} | ||
}} | }} | ||
| Line 210: | Line 212: | ||
* Self meter gain: Whiff: 3, Hit: 18, Block: 9. | * Self meter gain: Whiff: 3, Hit: 18, Block: 9. | ||
* Opponent meter gain: Whiff: 0, Hit: 4, Block: 0. | * Opponent meter gain: Whiff: 0, Hit: 4, Block: 0. | ||
A fast knee with tons of active frames. Cancels into superjumps, allowing it some extra safety and the ability to superjump cancel into SAII. Can be a useful anti-air as well, especially vs air parry where you can superjump after the parry to escape a punish. | A fast knee with tons of active frames. Cancels into superjumps, allowing it some extra safety and the ability to superjump cancel into SAII. Can be a useful anti-air as well, especially vs air parry where you can superjump after the parry to escape a punish. | ||
You can use the superjump cancel to make this cancellable into supers, notably SAII. To do this, input the super as a normal cancel during cl.HK, but end the input with a 9 (2362369). Done properly, you can press any kick button and cl.HK will "cancel" to super. | You can use the superjump cancel to make this cancellable into supers, notably SAII. To do this, input the super as a normal cancel during cl.HK, but end the input with a 9 (2362369). Done properly, you can press any kick button and cl.HK will "cancel" to super. | ||
{{3S Button FAT|link=https://fullmeter.com/fatonline/#/framedata/movedetail/3S/Chun-Li/normal/Close%20HK}} | |||
}} | }} | ||
}} | }} | ||
| Line 236: | Line 238: | ||
* Opponent meter gain: Whiff: 0, Hit: 4, Block: 0. | * Opponent meter gain: Whiff: 0, Hit: 4, Block: 0. | ||
* Airborne from frames 1-19 | * Airborne from frames 1-19 | ||
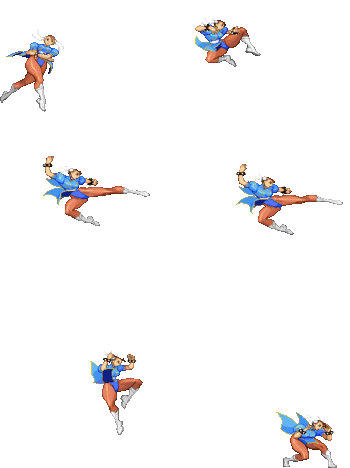
A leaping kick normal. Great for crushing throws and lows, and on crouching it you can link it to SAII, making it a stellar option vs people mashing low kicks in neutral or on defense. | |||
{{3S Button FAT|link=https://fullmeter.com/fatonline/#/framedata/movedetail/3S/Chun-Li/normal/Far%20HK}} | {{3S Button FAT|link=https://fullmeter.com/fatonline/#/framedata/movedetail/3S/Chun-Li/normal/Far%20HK}} | ||
}} | }} | ||
}} | }} | ||
| Line 264: | Line 266: | ||
* Self meter gain: Whiff: 2, Hit: 11, Block: 6. | * Self meter gain: Whiff: 2, Hit: 11, Block: 6. | ||
* Opponent meter gain: Whiff: 0, Hit: 2, Block: 0. | * Opponent meter gain: Whiff: 0, Hit: 2, Block: 0. | ||
A quick double slap that makes for a useful anti-air against air parries and weaker jump normals. It can be cancelled into specials and supers on either hit, which allows you to mix up how you respond to the opponents air parry and hitconfirm close range punishes you might not be sure of. | |||
{{3S Button FAT|link=https://fullmeter.com/fatonline/#/framedata/movedetail/3S/Chun-Li/normal/Sourenshou}} | {{3S Button FAT|link=https://fullmeter.com/fatonline/#/framedata/movedetail/3S/Chun-Li/normal/Sourenshou}} | ||
}} | }} | ||
| Line 289: | Line 292: | ||
* Self meter gain: Whiff: 3, Hit: 18, Block: 9. | * Self meter gain: Whiff: 3, Hit: 18, Block: 9. | ||
* Opponent meter gain: Whiff: 0, Hit: 4, Block: 0. | * Opponent meter gain: Whiff: 0, Hit: 4, Block: 0. | ||
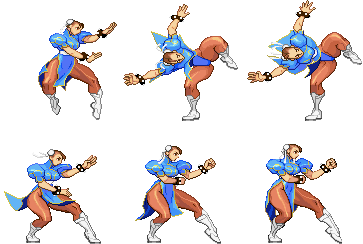
Likely Chun's most infamous button. Tons of priority on a massive hitbox with absurd active frames, and a relatively short and safe whiff in neutral for meter. On top of that, cancels into both specials and supers for safety and damage. You can also use this as a meaty vs opponents who aren't parrying often, as you can easily time it late to get lots of plus frames. | |||
{{3S Button FAT|link=https://fullmeter.com/fatonline/#/framedata/movedetail/3S/Chun-Li/normal/Hakkei}} | {{3S Button FAT|link=https://fullmeter.com/fatonline/#/framedata/movedetail/3S/Chun-Li/normal/Hakkei}} | ||
}} | }} | ||
| Line 312: | Line 316: | ||
* Self meter gain: Whiff: 2, Hit: 10, Block: 5. | * Self meter gain: Whiff: 2, Hit: 10, Block: 5. | ||
* Opponent meter gain: Whiff: 0, Hit: 2, Block: 0. | * Opponent meter gain: Whiff: 0, Hit: 2, Block: 0. | ||
An advancing button that leaves Chun 0 on block. Great poke to take space in front of you, and great as a pressure reset since Chun's 2LP is unusually fast. Generally you'll either try to catch a mash with a jab, poke again with 2MK, or do a slight walk into kara throw after this. It is a similarly easy parry to 5HP however, while also putting Chun in perfect range for a high damage punish, making it risky if used too often. | |||
{{3S Button FAT|link=https://fullmeter.com/fatonline/#/framedata/movedetail/3S/Chun-Li/normal/Senjoushuu}} | {{3S Button FAT|link=https://fullmeter.com/fatonline/#/framedata/movedetail/3S/Chun-Li/normal/Senjoushuu}} | ||
}} | }} | ||
| Line 333: | Line 338: | ||
|description= | |description= | ||
* 1st hit forces standing | * 1st hit forces standing | ||
An odd multihit drop kick. Whiffs on crouchers, making it niche in any pressure scenario despite having fairly nice frame data on hit and block. | |||
{{3S Button FAT|link=https://fullmeter.com/fatonline/#/framedata/movedetail/3S/Chun-Li/normal/Kakushuu%20Rakukyaku}} | {{3S Button FAT|link=https://fullmeter.com/fatonline/#/framedata/movedetail/3S/Chun-Li/normal/Kakushuu%20Rakukyaku}} | ||
}} | }} | ||
| Line 357: | Line 363: | ||
* Opponent meter gain: Whiff: 0, Hit: 4, Block: 0. | * Opponent meter gain: Whiff: 0, Hit: 4, Block: 0. | ||
* Airborne from frames 1-19 | * Airborne from frames 1-19 | ||
Like 5HK but it moves forward. Shares identical frame data to 5HK, making it generally a better version thanks to the forward movement. You can use it around kara throw range to beat people trying to tech throws, and hop over longer range lows. The only downside is that if this gets parried, you'll usually be in a worse position than if 5HK had gotten parried. | |||
{{3S Button FAT|link=https://fullmeter.com/fatonline/#/framedata/movedetail/3S/Chun-Li/normal/Yokusenkyaku}} | {{3S Button FAT|link=https://fullmeter.com/fatonline/#/framedata/movedetail/3S/Chun-Li/normal/Yokusenkyaku}} | ||
}} | }} | ||
| Line 379: | Line 386: | ||
* Self meter gain: Whiff: 3, Hit: 18, Block: 9. | * Self meter gain: Whiff: 3, Hit: 18, Block: 9. | ||
* Opponent meter gain: Whiff: 0, Hit: 4, Block: 0. | * Opponent meter gain: Whiff: 0, Hit: 4, Block: 0. | ||
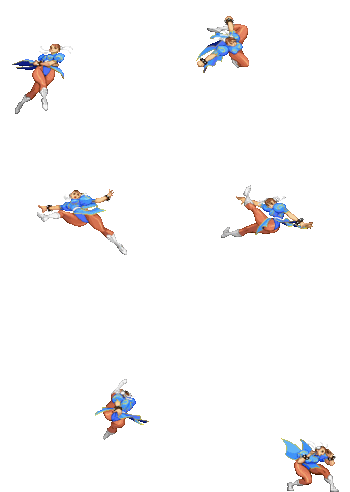
An incredibly situational button, though powerful if used correctly. Chun does a large, slow leap over the opponent, landing with a crossup kick. This is always incredibly plus, generally allowing you to combo a 2MK > SAII for high damage, making it an attractive mixup. If the opponent is looking for it or reacts however, you'll eat an anti-air at best and a parry into a massive combo at worst. Use very sparingly. | |||
{{3S Button FAT|link=https://fullmeter.com/fatonline/#/framedata/movedetail/3S/Chun-Li/normal/Tenshin%20Shuukyaku}} | {{3S Button FAT|link=https://fullmeter.com/fatonline/#/framedata/movedetail/3S/Chun-Li/normal/Tenshin%20Shuukyaku}} | ||
}} | }} | ||
| Line 405: | Line 413: | ||
|description= | |description= | ||
* Cancel options: ch sp su | * Cancel options: ch sp su | ||
A terrifyingly good jab. Starts up in 2 frames, making it one of the fastest normals in the game, and is plus on block for amazing frametrap/throw pressure that can repeat into itself. It's also an incredibly safe whiff in neutral to discourage dashing or extending hurtboxes, and on defense it's your go-to for beating tick throws and mashing out of pressure. | |||
{{3S Button FAT|link=https://fullmeter.com/fatonline/#/framedata/movedetail/3S/Chun-Li/normal/Crouch%20LP}} | {{3S Button FAT|link=https://fullmeter.com/fatonline/#/framedata/movedetail/3S/Chun-Li/normal/Crouch%20LP}} | ||
}} | }} | ||
| Line 429: | Line 438: | ||
* Self meter gain: Whiff: 2, Hit: 10, Block: 5. | * Self meter gain: Whiff: 2, Hit: 10, Block: 5. | ||
* Opponent meter gain: Whiff: 0, Hit: 2, Block: 0. | * Opponent meter gain: Whiff: 0, Hit: 2, Block: 0. | ||
A niche button that mostly gets used as a way to snipe with an extremely long low. You would generally prefer 2MK over this for a variety of reasons, but this extends farther, which is notable to push people even farther back when they try and space around 2MK. | |||
{{3S Button FAT|link=https://fullmeter.com/fatonline/#/framedata/movedetail/3S/Chun-Li/normal/Crouch%20MP}} | {{3S Button FAT|link=https://fullmeter.com/fatonline/#/framedata/movedetail/3S/Chun-Li/normal/Crouch%20MP}} | ||
}} | }} | ||
| Line 454: | Line 464: | ||
* Self meter gain: Whiff: 3, Hit: 18, Block: 9. | * Self meter gain: Whiff: 3, Hit: 18, Block: 9. | ||
* Opponent meter gain: Whiff: 0, Hit: 4, Block: 0. | * Opponent meter gain: Whiff: 0, Hit: 4, Block: 0. | ||
Another niche button. It has a decent amount of forward movement, but it doesn't happen early enough to kara anything. This does allow you to hit with a heavy button into SAII from farther out than the opponent might expect, but 4HP is always a better option and is also faster. | |||
{{3S Button FAT|link=https://fullmeter.com/fatonline/#/framedata/movedetail/3S/Chun-Li/normal/Crouch%20HP}} | {{3S Button FAT|link=https://fullmeter.com/fatonline/#/framedata/movedetail/3S/Chun-Li/normal/Crouch%20HP}} | ||
}} | }} | ||
| Line 476: | Line 487: | ||
|description= | |description= | ||
* Cancel options: ch | * Cancel options: ch | ||
Chun's first low kick. Similar to 2LP but hits low, which would be quite nice if Chun had a more immediate high/low mixup to think about. You can use it to discourage wakeup high parry, but the lack of a self cancel and the existence of 2MK make it generally less useful as a low option. | |||
{{3S Button FAT|link=https://fullmeter.com/fatonline/#/framedata/movedetail/3S/Chun-Li/normal/Crouch%20LK}} | {{3S Button FAT|link=https://fullmeter.com/fatonline/#/framedata/movedetail/3S/Chun-Li/normal/Crouch%20LK}} | ||
}} | }} | ||
| Line 499: | Line 511: | ||
* Self meter gain: Whiff: 2, Hit: 10, Block: 5. | * Self meter gain: Whiff: 2, Hit: 10, Block: 5. | ||
* Opponent meter gain: Whiff: 0, Hit: 2, Block: 0. | * Opponent meter gain: Whiff: 0, Hit: 2, Block: 0. | ||
Another infamously strong button. A super fast, long reaching low poke that harasses people and shuts down some characters in neutral entirely. Starts up quite fast, is very safe, cancels to specials and to supers, you couldn't ask for more. Against a lot of characters you can structure your gameplan solely around this move and still find success. | |||
A notable feature of 2MK is the delay cancel window. Uniquely, it has a period later in the frame data where it can still cancel to supers after the hit. With practice, this delay cancel can be used to hitconfirm the otherwise unsafe SAII, allowing you to safely threaten 2MK > SAII without worrying about it being blocked. Mastering this delay cancel is a large part of what makes SAII so scary. | |||
{{3S Button FAT|link=https://fullmeter.com/fatonline/#/framedata/movedetail/3S/Chun-Li/normal/Crouch%20MK}} | {{3S Button FAT|link=https://fullmeter.com/fatonline/#/framedata/movedetail/3S/Chun-Li/normal/Crouch%20MK}} | ||
}} | }} | ||
| Line 522: | Line 537: | ||
* Self meter gain: Whiff: 3, Hit: 18, Block: 9. | * Self meter gain: Whiff: 3, Hit: 18, Block: 9. | ||
* Opponent meter gain: Whiff: 0, Hit: 4, Block: 0. | * Opponent meter gain: Whiff: 0, Hit: 4, Block: 0. | ||
A long range sweep with an odd but useful hitbox. Without super, you will generally either settle for this or throw if you want to punish with a knockdown. This is also a fairly scary and fast neutral poke that the opponent may not be ready for, though its notably less safe than Chun's other normals. The higher hitbox allows it to act as a shockingly good anti-air from farther away, where Chun's other anti-airs may fail. | |||
{{3S Button FAT|link=https://fullmeter.com/fatonline/#/framedata/movedetail/3S/Chun-Li/normal/Crouch%20HK}} | {{3S Button FAT|link=https://fullmeter.com/fatonline/#/framedata/movedetail/3S/Chun-Li/normal/Crouch%20HK}} | ||
}} | }} | ||
| Line 542: | Line 558: | ||
|stun=7 | |stun=7 | ||
|description= | |description= | ||
A fast punch meant to be used for air-to-air. In reality, there's almost never a spot to use this where another normal wouldn't do the same thing better. | |||
{{3S Button FAT|link=https://fullmeter.com/fatonline/#/framedata/movedetail/3S/Chun-Li/normal/Jump%20LP%20(Neutral)}} | {{3S Button FAT|link=https://fullmeter.com/fatonline/#/framedata/movedetail/3S/Chun-Li/normal/Jump%20LP%20(Neutral)}} | ||
}} | }} | ||
| Line 558: | Line 575: | ||
|stun=7 | |stun=7 | ||
|description= | |description= | ||
A similarly fast and active jab to nj.LP, though the diagonal movement makes it much more potent as a jump-in to tick throw with and as a way to intercept jumps. | |||
{{3S Button FAT|link=https://fullmeter.com/fatonline/#/framedata/movedetail/3S/Chun-Li/normal/Jump%20LP}} | {{3S Button FAT|link=https://fullmeter.com/fatonline/#/framedata/movedetail/3S/Chun-Li/normal/Jump%20LP}} | ||
}} | }} | ||
| Line 576: | Line 594: | ||
* Self meter gain: Whiff: 2, Hit: 10, Block: 5. | * Self meter gain: Whiff: 2, Hit: 10, Block: 5. | ||
* Opponent meter gain: Whiff: 0, Hit: 2, Block: 0. | * Opponent meter gain: Whiff: 0, Hit: 2, Block: 0. | ||
Like nj.LP, but heavier and slower. Similar to nj.LP, you rarely use this in real matches, though it is technically the better option for air-to-air. | |||
{{3S Button FAT|link=https://fullmeter.com/fatonline/#/framedata/movedetail/3S/Chun-Li/normal/Jump%20MP%20(Neutral)}} | {{3S Button FAT|link=https://fullmeter.com/fatonline/#/framedata/movedetail/3S/Chun-Li/normal/Jump%20MP%20(Neutral)}} | ||
}} | }} | ||
| Line 594: | Line 613: | ||
* Self meter gain: Whiff: 2, Hit: 10, Block: 5. | * Self meter gain: Whiff: 2, Hit: 10, Block: 5. | ||
* Opponent meter gain: Whiff: 0, Hit: 2, Block: 0. | * Opponent meter gain: Whiff: 0, Hit: 2, Block: 0. | ||
Like j.LP, but again, heavier and slower. You can use it for the same purposes as j.LP, as the two are fairly interchangeable without much difference besides the frame data. | |||
{{3S Button FAT|link=https://fullmeter.com/fatonline/#/framedata/movedetail/3S/Chun-Li/normal/Jump%20MP}} | {{3S Button FAT|link=https://fullmeter.com/fatonline/#/framedata/movedetail/3S/Chun-Li/normal/Jump%20MP}} | ||
}} | }} | ||
| Line 613: | Line 633: | ||
* Self meter gain: Whiff: 3, Hit: 18, Block: 9. | * Self meter gain: Whiff: 3, Hit: 18, Block: 9. | ||
* Opponent meter gain: Whiff: 0, Hit: 4, Block: 0. | * Opponent meter gain: Whiff: 0, Hit: 4, Block: 0. | ||
A punch straight down. Plummets the opponent to the floor on hit, making it a rewarding air-to-air, but you still don't use it often since it lacks much range. | |||
{{3S Button FAT|link=https://fullmeter.com/fatonline/#/framedata/movedetail/3S/Chun-Li/normal/Jump%20HP%20(Neutral)}} | {{3S Button FAT|link=https://fullmeter.com/fatonline/#/framedata/movedetail/3S/Chun-Li/normal/Jump%20HP%20(Neutral)}} | ||
}} | }} | ||
| Line 632: | Line 653: | ||
* Self meter gain: Whiff: 3, Hit: 18, Block: 9. | * Self meter gain: Whiff: 3, Hit: 18, Block: 9. | ||
* Opponent meter gain: Whiff: 0, Hit: 4, Block: 0. | * Opponent meter gain: Whiff: 0, Hit: 4, Block: 0. | ||
A fast punch that mainly sees use to start her target combo. Good to use as a jump-in mixup, since you can either do two overheads with her TC or land and do a 2MK low. | |||
{{3S Button FAT|link=https://fullmeter.com/fatonline/#/framedata/movedetail/3S/Chun-Li/normal/Jump%20HP}} | {{3S Button FAT|link=https://fullmeter.com/fatonline/#/framedata/movedetail/3S/Chun-Li/normal/Jump%20HP}} | ||
}} | }} | ||
| Line 649: | Line 671: | ||
|stun=5 | |stun=5 | ||
|description= | |description= | ||
A second punch after j.HP. Great to use as a double overhead mixup, and is often seen at the end of combos involving SAII to get a standing mixup on the opponent, where Chun is offscreen and can set up a high/low with universal overhead vs 2MK or go for safe chip with Lightning Legs. | |||
{{3S Button FAT|link=https://fullmeter.com/fatonline/#/framedata/movedetail/3S/Chun-Li/normal/Jump%20HP-HP%20(TC)}} | {{3S Button FAT|link=https://fullmeter.com/fatonline/#/framedata/movedetail/3S/Chun-Li/normal/Jump%20HP-HP%20(TC)}} | ||
}} | }} | ||
| Line 667: | Line 689: | ||
|stun=7 | |stun=7 | ||
|description= | |description= | ||
An odd upwards kick. Can be used to intercept opponents very high above Chun, but this rarely happens. | |||
{{3S Button FAT|link=https://fullmeter.com/fatonline/#/framedata/movedetail/3S/Chun-Li/normal/Jump%20LK%20(Neutral)}} | {{3S Button FAT|link=https://fullmeter.com/fatonline/#/framedata/movedetail/3S/Chun-Li/normal/Jump%20LK%20(Neutral)}} | ||
}} | }} | ||
| Line 683: | Line 706: | ||
|stun=5 | |stun=5 | ||
|description= | |description= | ||
A nice and long ranged way to air-to-air, and usually your go-to way to do it. Can also hit crossup rarely, though it usually requires good spacing and won't always net you a combo. | |||
{{3S Button FAT|link=https://fullmeter.com/fatonline/#/framedata/movedetail/3S/Chun-Li/normal/Jump%20LK}} | {{3S Button FAT|link=https://fullmeter.com/fatonline/#/framedata/movedetail/3S/Chun-Li/normal/Jump%20LK}} | ||
}} | }} | ||
| Line 702: | Line 726: | ||
* Self meter gain: Whiff: 2, Hit: 10, Block: 5. | * Self meter gain: Whiff: 2, Hit: 10, Block: 5. | ||
* Opponent meter gain: Whiff: 0, Hit: 2, Block: 0. | * Opponent meter gain: Whiff: 0, Hit: 2, Block: 0. | ||
A heavier and slower nj.LK. Still useful in the rare situation an opponent is too high above Chun for any other options to work. | |||
{{3S Button FAT|link=https://fullmeter.com/fatonline/#/framedata/movedetail/3S/Chun-Li/normal/Jump%20MK%20(Neutral)}} | {{3S Button FAT|link=https://fullmeter.com/fatonline/#/framedata/movedetail/3S/Chun-Li/normal/Jump%20MK%20(Neutral)}} | ||
}} | }} | ||
| Line 721: | Line 746: | ||
* Self meter gain: Whiff: 2, Hit: 10, Block: 5. | * Self meter gain: Whiff: 2, Hit: 10, Block: 5. | ||
* Opponent meter gain: Whiff: 0, Hit: 2, Block: 0. | * Opponent meter gain: Whiff: 0, Hit: 2, Block: 0. | ||
A heavier and slower j.LK. Mostly fills the same role, but the slower frame data can actually make a difference depending on how fast you reacted to their jump, making j.LK a bit more reliable at the cost of damage. | |||
{{3S Button FAT|link=https://fullmeter.com/fatonline/#/framedata/movedetail/3S/Chun-Li/normal/Jump%20MK}} | {{3S Button FAT|link=https://fullmeter.com/fatonline/#/framedata/movedetail/3S/Chun-Li/normal/Jump%20MK}} | ||
}} | }} | ||
| Line 740: | Line 766: | ||
* Self meter gain: Whiff: 3, Hit: 18, Block: 9. | * Self meter gain: Whiff: 3, Hit: 18, Block: 9. | ||
* Opponent meter gain: Whiff: 0, Hit: 4, Block: 0. | * Opponent meter gain: Whiff: 0, Hit: 4, Block: 0. | ||
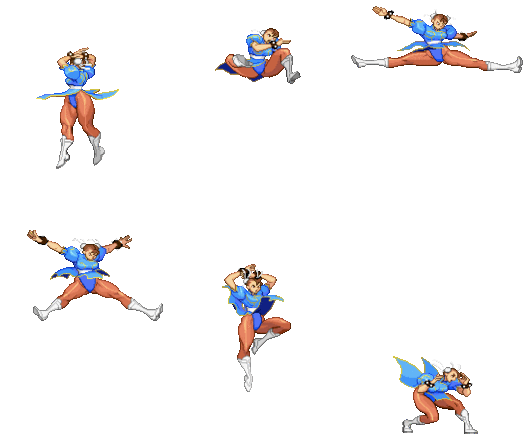
A beefy splits kick that does great damage. Useful to set up jump mixups over a downed opponent, and can even be used rarely as a safejump if they don't quickrise. It also makes for a damaging long range air-to-air. | |||
{{3S Button FAT|link=https://fullmeter.com/fatonline/#/framedata/movedetail/3S/Chun-Li/normal/Jump%20HK%20(Neutral)}} | {{3S Button FAT|link=https://fullmeter.com/fatonline/#/framedata/movedetail/3S/Chun-Li/normal/Jump%20HK%20(Neutral)}} | ||
}} | }} | ||
| Line 759: | Line 786: | ||
* Self meter gain: Whiff: 3, Hit: 18, Block: 9. | * Self meter gain: Whiff: 3, Hit: 18, Block: 9. | ||
* Opponent meter gain: Whiff: 0, Hit: 4, Block: 0. | * Opponent meter gain: Whiff: 0, Hit: 4, Block: 0. | ||
What you'll press a majority of the time when jumping. Great hitbox for air-to-ground with shockingly long range, and knocks down vs airborne opponents to set up some okizeme. Like many Chun buttons, it has abnormally high priority, allowing you to stuff tons of things for great reward. | |||
{{3S Button FAT|link=https://fullmeter.com/fatonline/#/framedata/movedetail/3S/Chun-Li/normal/Jump%20HK}} | {{3S Button FAT|link=https://fullmeter.com/fatonline/#/framedata/movedetail/3S/Chun-Li/normal/Jump%20HK}} | ||
}} | }} | ||
| Line 779: | Line 807: | ||
* Self meter gain: Whiff: 2, Hit: 10, Block: 5. | * Self meter gain: Whiff: 2, Hit: 10, Block: 5. | ||
* Opponent meter gain: Whiff: 0, Hit: 0, Block: 0. | * Opponent meter gain: Whiff: 0, Hit: 0, Block: 0. | ||
Identical to nj.HP, but can be done from a forward jump. Can't be done when jumping backwards. It shares much of the same use as nj.HP, being a strong way to knock down airborne opponents, but usually it gets outshined by j.HK for that purpose. | |||
{{3S Button FAT|link=https://fullmeter.com/fatonline/#/framedata/movedetail/3S/Chun-Li/normal/Suitotsuda}} | {{3S Button FAT|link=https://fullmeter.com/fatonline/#/framedata/movedetail/3S/Chun-Li/normal/Suitotsuda}} | ||
}} | }} | ||
| Line 796: | Line 825: | ||
|stun=5 | |stun=5 | ||
|description= | |description= | ||
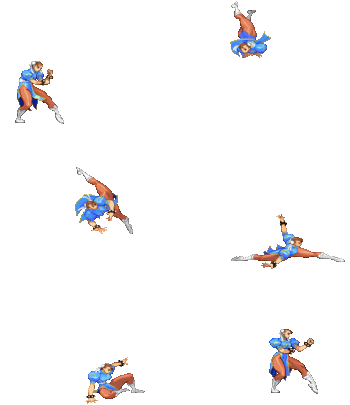
Chun-Li's stomp. Bounces off of the opponents head, setting you up to fall with a normal or parry, or walljump away in the corner. Most opponents will try to mash after blocking this, which you can sometimes beat with a j.HK, though the situation afterwards isn't always favorable for Chun. You can also use this in some combos for a bit of extra damage, namely after SAII if you do j.2MK and quickly j.HK afterwards for a knockdown. | |||
{{3S Button FAT|link=https://fullmeter.com/fatonline/#/framedata/movedetail/3S/Chun-Li/normal/Yousoukyaku}} | {{3S Button FAT|link=https://fullmeter.com/fatonline/#/framedata/movedetail/3S/Chun-Li/normal/Yousoukyaku}} | ||
}} | }} | ||
| Line 819: | Line 849: | ||
|description= | |description= | ||
* 26 throw range | * 26 throw range | ||
The core of Chun's mixups. Fairly decent range for a throw, but this is further offset by her amazing kara throw, making it a much scarier option as you can throw from farther than opponents normally expect. Without meter, this is generally your only punish option for a knockdown as well. | |||
{{3S Button FAT|link=https://fullmeter.com/fatonline/#/framedata/movedetail/3S/Chun-Li/normal/Koshuutou}} | {{3S Button FAT|link=https://fullmeter.com/fatonline/#/framedata/movedetail/3S/Chun-Li/normal/Koshuutou}} | ||
}} | }} | ||
| Line 838: | Line 869: | ||
|description= | |description= | ||
* 25 throw range | * 25 throw range | ||
A unique and fairly useful air throw. Good for calling out repeated air parries and catching people trying to jump away from normal throw in the corner. | |||
{{3S Button FAT|link=https://fullmeter.com/fatonline/#/framedata/movedetail/3S/Chun-Li/normal/Ryuuseiraku}} | {{3S Button FAT|link=https://fullmeter.com/fatonline/#/framedata/movedetail/3S/Chun-Li/normal/Ryuuseiraku}} | ||
}} | }} | ||
| Line 857: | Line 889: | ||
|onBlock=- | |onBlock=- | ||
|description= | |description= | ||
Chun's unique movement option. Useful for escaping the corner, as Chun flies away quite fast and intercepting her can be hard without a read. It can also be useful to leap away to safety after a stomp in the corner if you don't want to commit to falling on their head. If Chun is at the edge of the screen (i.e. the camera won't zoom out any more) she can use this without needing the corner, which allows her to quickly jump forward when the opponent may not expect it. | |||
{{3S Button FAT|link=https://fullmeter.com/fatonline/#/framedata/movedetail/3S/Chun-Li/normal/Triangle%20Jump}} | {{3S Button FAT|link=https://fullmeter.com/fatonline/#/framedata/movedetail/3S/Chun-Li/normal/Triangle%20Jump}} | ||
}} | }} | ||
| Line 883: | Line 916: | ||
|stun=3 | |stun=3 | ||
|description= | |description= | ||
Chun's go-to option for an overhead mixup. Generally unsafe on block if not done meaty, but you can set it up to be meaty on most knockdowns or after SAII > TC in the corner. Done meaty enough, it can link into SAII, leading into her offense or looping it to seal rounds quickly. | |||
{{3S Button FAT|link=https://fullmeter.com/fatonline/#/framedata/movedetail/3S/Chun-Li/normal/Kakushiken}} | {{3S Button FAT|link=https://fullmeter.com/fatonline/#/framedata/movedetail/3S/Chun-Li/normal/Kakushiken}} | ||
}} | }} | ||
| Line 912: | Line 946: | ||
* Back stretch (happens 15% of the time) - Increases defense by 31.3% (more than the shoulder tap) for the whole round. Also increases damage for the next hit/combo by 31.3%. Maximum one back stretch. | * Back stretch (happens 15% of the time) - Increases defense by 31.3% (more than the shoulder tap) for the whole round. Also increases damage for the next hit/combo by 31.3%. Maximum one back stretch. | ||
A very odd taunt with RNG on what you get. Yawn is the guaranteed taunt, though stun recovery isn't usually worth the incredibly long recovery animations of the other three outcomes. Back stretch is the ideal one to get, as the defense boost is very notable, though it is the rarest to get. Neck stretch can make a cancel to SAII much more damaging, and is the most common, but you usually can't set it up without spending SAII and you give up the mixup after SAII to do it. | |||
{{3S Button FAT|link=https://fullmeter.com/fatonline/#/framedata/movedetail/3S/Chun-Li/normal/Yawn}} | {{3S Button FAT|link=https://fullmeter.com/fatonline/#/framedata/movedetail/3S/Chun-Li/normal/Yawn}} | ||
}} | }} | ||
| Line 981: | Line 1,017: | ||
* Self meter gain: Whiff: -40, Hit: -40, Block: -40. | * Self meter gain: Whiff: -40, Hit: -40, Block: -40. | ||
* Opponent meter gain: Whiff: 0, Hit: 0, Block: 0. | * Opponent meter gain: Whiff: 0, Hit: 0, Block: 0. | ||
Chun's fireball series. Like most fireballs, it won't see much use outside of pressure and confirms into supers, especially considering they're very slow and only a single parry. Higher strengths travel less and less distance. | |||
EX Kikoken is an incredibly slow fireball that travels fullscreen. This would be a great move in any game without parry, but the slow movement and being a single parry nullifies much of the use it has, making it Chun's best way to waste meter. | |||
{{3S Button FAT|link=https://fullmeter.com/fatonline/#/framedata/movedetail/3S/Chun-Li/normal/EX%20Kikkoken}} | {{3S Button FAT|link=https://fullmeter.com/fatonline/#/framedata/movedetail/3S/Chun-Li/normal/EX%20Kikkoken}} | ||
}} | }} | ||
| Line 1,082: | Line 1,121: | ||
* Self meter gain: Whiff: -40, Hit: -40, Block: -40. | * Self meter gain: Whiff: -40, Hit: -40, Block: -40. | ||
* Opponent meter gain: Whiff: 0, Hit: 0, Block: 0. | * Opponent meter gain: Whiff: 0, Hit: 0, Block: 0. | ||
Chun's Lightning Legs. Useful specials for trapping people in the corner, and are notably incredibly difficult to properly parry since Chun can stop them at any time. The frame data varies a lot (see chart above) but is generally safe on block due to pushback. | |||
{{3S Button FAT|link=https://fullmeter.com/fatonline/#/framedata/movedetail/3S/Chun-Li/normal/EX%20Hyakuretsukyaku}} | {{3S Button FAT|link=https://fullmeter.com/fatonline/#/framedata/movedetail/3S/Chun-Li/normal/EX%20Hyakuretsukyaku}} | ||
}} | }} | ||
| Line 1,141: | Line 1,181: | ||
* Self meter gain: Whiff: -40, Hit: -40, Block: -40. | * Self meter gain: Whiff: -40, Hit: -40, Block: -40. | ||
* Opponent meter gain: Whiff: 0, Hit: 0, Block: 0. | * Opponent meter gain: Whiff: 0, Hit: 0, Block: 0. | ||
* Invincibility frames on | * Invincibility frames on 0~8 | ||
An odd special that can be occassionally used to end combos, though they don't knock down and are usually unsafe due to whiffing crouchers. If you need max damage and don't have SAII, a 2HP > Spinning Bird Kick may be enough to kill. | |||
EX Spinning Bird Kick is likely Chun's most notable EX move, as it is a reversal. It isn't invincible to the first active frame, and it's quite slow making it easy to safejump/safejab, but it's good to remind your opponent that Chun does have a reversal when on defense. | |||
{{3S Button FAT|link=https://fullmeter.com/fatonline/#/framedata/movedetail/3S/Chun-Li/normal/EX%20Spinning%20Bird%20Kick}} | {{3S Button FAT|link=https://fullmeter.com/fatonline/#/framedata/movedetail/3S/Chun-Li/normal/EX%20Spinning%20Bird%20Kick}} | ||
}} | }} | ||
| Line 1,210: | Line 1,253: | ||
* Self meter gain: Whiff: -40, Hit: -40, Block: -40. | * Self meter gain: Whiff: -40, Hit: -40, Block: -40. | ||
* Opponent meter gain: Whiff: 0, Hit: 0, Block: 0. | * Opponent meter gain: Whiff: 0, Hit: 0, Block: 0. | ||
Slow but safe overheads. Can be used occassionaly as a cancel to keep the opponent on their toes, but they're reactable with parry, making it a very high risk for very low reward. | |||
EX Hazanshu is incredibly slow and flashes yellow, making it good for giving your opponent a free parry punish if you feel very generous. | |||
{{3S Button FAT|link=https://fullmeter.com/fatonline/#/framedata/movedetail/3S/Chun-Li/normal/EX%20Hazan%20Shu}} | {{3S Button FAT|link=https://fullmeter.com/fatonline/#/framedata/movedetail/3S/Chun-Li/normal/EX%20Hazan%20Shu}} | ||
}} | }} | ||
| Line 1,230: | Line 1,276: | ||
|damage=57 | |damage=57 | ||
|description= | |description= | ||
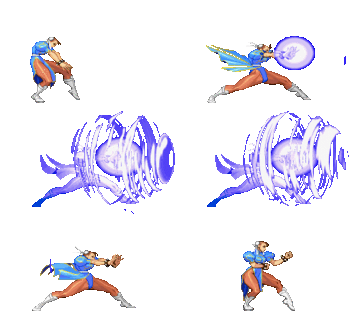
Chun blasts a huge Kikoken from her hands. Hits a ton of times, and does great damage, making it a decent super in it's own right. However, it isn't as useful as SAII due to only stocking 1 bar and lacking much damage from ranged 2MK hitconfirms. It does outshine SAII as an anti-air and as a reversal however, giving it some unique merit and use in specific matchups. | |||
{{3S Button FAT|link=https://fullmeter.com/fatonline/#/framedata/movedetail/3S/Chun-Li/normal/Kikoshou}} | {{3S Button FAT|link=https://fullmeter.com/fatonline/#/framedata/movedetail/3S/Chun-Li/normal/Kikoshou}} | ||
}} | }} | ||
| Line 1,251: | Line 1,298: | ||
|description= | |description= | ||
* 2f window to parry after the super freeze | * 2f window to parry after the super freeze | ||
Chun's main super, and one of the scariest supers in the game. Incredibly fast, hits a ton of times, does great damage, and the last hit can be cancelled into superjump for a followup juggle, usually into her air TC or a j.HK. This makes any poke or punish from Chun lead into massive damage and corner carry, especially her 2MK which can be delay cancelled into it for one button hitconfirms. It doubles as a punish tool thanks to the fast startup, and pulls triple duty as a great chip kill tool thanks to hitting 17 times total. Generally it's hard to punish on block due to massive pushback, but the final hit makes for an easy parry that puts you in perfect range for a damaging combo, so don't expect to go unpunished vs decent players. | |||
{{3S Button FAT|link=https://fullmeter.com/fatonline/#/framedata/movedetail/3S/Chun-Li/normal/Houyoku%20Sen}} | {{3S Button FAT|link=https://fullmeter.com/fatonline/#/framedata/movedetail/3S/Chun-Li/normal/Houyoku%20Sen}} | ||
}} | }} | ||
| Line 1,271: | Line 1,319: | ||
|stun=19 | |stun=19 | ||
|description= | |description= | ||
Chun's least useful super. The biggest upside is that it has 3 stocks, letting you get much more liberal with EX moves, though Chun doesn't have many EX moves worth spamming. The super itself tends to whiff a lot, especially vs crouchers and at range, and only really hits tall characters well up close. This makes punishes from midrange essentially nonexistent, and Chun lives by midrange punishes. The final hit is an overhead, but it gives your opponent tons of time to react and is incredibly unsafe while also being fairly lenient to parry. | |||
{{3S Button FAT|link=https://fullmeter.com/fatonline/#/framedata/movedetail/3S/Chun-Li/normal/Tensei%20Ranka}} | {{3S Button FAT|link=https://fullmeter.com/fatonline/#/framedata/movedetail/3S/Chun-Li/normal/Tensei%20Ranka}} | ||
}} | }} | ||
Revision as of 04:12, 24 February 2023
Introduction
Chun-Li returns to the third World Warrior tournament, albeit a little different stylistically, both in her appearance and her fighting style. She's still just as quick and agile, but her actions are more fluid. No longer fighting for the sake of revenge, but for the protection of others, she seems more confident in her fighting ability as well.
In her most notorious incarnation, Chun-Li is a defensive beast. She's known for her overwhelming neutral presence, sporting absurdly strong buttons for controlling space in a myriad of ways. Long reaching lows like 2MK, far ranged heavy buttons like 5HP, and absurdly high priority buttons like 4HP let Chun keep the pace regardless of the gamestate. Her jabs are absurdly fast as well, namely her 2 frame 2LP, giving her a fast defensive option to rely on. On offense, she's known for her amazing strike/throw, complimented by pressure resets like 6MK and her amazing 5MK kara throw, which adds an incredible amount of range to her already strong throw.
Likely Chun-Li's most powerful tool is her SAII, Houyoku-Sen. It's a blindingly fast rush super that hits 17 times total for massive damage, combos from all of her pokes at all ranges, and can be superjump cancelled for followup juggles that lead to shockingly strong mixups. It has some invulnerability, allowing it to beat fireballs and pokes with low active frames, and comes with a healthy amount of chip damage for sealing out rounds with a difficult parry. Notably, it stocks 2 bars, letting Chun use her EX moves more. The most notable fact about stocking 2 bars is the fear that one stock puts into the opponent usually lets you more safely build the second bar, and most characters will die after two SAII uses.
Chun-Li is a solidly top 1 character, with no losing matchups and few real weaknesses. You will have to learn to properly play neutral, as her low health and lack of strong anti-airs means a few bad decisions ends the round, but realistically she's quite simple, fun, and incredibly rewarding to play.
Super Arts
SAI (Kikou-Shou)
Kikou-Shou is a relatively high-damage super and comes with a rather short bar, which means you can have this super stocked more often than the Houyoku-Sen. It does more chip damage and is more difficult to parry than the Houyoku-Sen, but the primary drawbacks are the fact that it only comes with one stock, and that its range is fairly limited; you cannot cancel a max-ranged 2MK into a Kikou-Shou and expect it to hit. For this reason, and its singular bar, SA2 is considered a much more powerful super. However, the SA1 does have its merits as an anti-air or chipout tool.
SAII: (Houyoku-Sen)
Chun-Li's most powerful Super Art is Houyoku-Sen. It's a reversal and anti-projectile tool, has a healthy stock of two supers, is very damaging, is almost a guaranteed free ride for your opponent into the corner, and can be super-cancelled or linked into using many of her attacks, most notably off of 2MK. The Houyoku-Sen's final kick can be super-jump cancelled, and the opponent may be juggled following the Houyoku-Sen, or reset into a mixup. SA2 is also a 17-hit Super Art, making it a notorious ender of rounds via chip damage. You may also cancel a Kikouken or EX Kikouken into the Houyoku-Sen for the purpose of disrupting the timing for the opponent should they decide to try and parry it. Its two stocks also consitute to an incredibly oppressive gameplan once Chun has a super stocked, where she's allowed to poke and kara throw her way to towards another bar against a now defensive opponent, while confirming SA2 off of any opening she is given. Even once a super is used, there's a good chance she'll have another one very soon.
SAIII: (Tensei-Ranka)
Tensei-Ranka comes with much more meter than Chun's other options at 3 bars, but it's much more difficult to use successfully. Unless the opponent is very tall or standing, you will not be able to hit them on the way up using the super, which turns the Tensei-Ranka most of the time into an extremely delayed, reactable overhead. It is best used as an anti-air or confirmable damage off of an anti-air, however its short range and poor invulnerability can still lose to jumping opponents. Worst of all, it loses Chun-Li's infamous 2MK confirm, which leaves this super with the large amount of bar it stores as its only read advantage, and not one Chun cares too much for.
| Strengths | Weaknesses |
|---|---|
|
|
| Chun-Li #3S_CH | |
|---|---|
| Vitals | |
| Life Points | 1120 |
| Stun Points | 64 |
| Super Art Stock/Size | |
| SA1 | 1/88 |
| SA2 | 2/104 |
| SA3 | 3/72 |
| Ground Movement | |
| Forward Dash duration/distance | 16 (106px) |
| Back Dash duration/distance | 25 (124px) |
| Jumping | |
| Back Jump duration | 43(4+36+3) |
| Neutral Jump duration | 43(4+36+3) |
| Forward Jump duration | 43(4+36+3) |
| Back Super Jump duration | 51(5+43+3) |
| Neutral Super Jump duration | 47(5+39+3) |
| Forward Super Jump duration | 49(5+41+3) |
| Wake up | |
| Wake up duration | 88 |
| Quick rise duration | 61 |
| 3S Frame Data Glossary | |
|---|---|
| Active |
How many frames a move remains active (can hurt opponents) for. Consecutive sets of active frames on a multi-hit move are separated by an asterisk (ex: 3*5). If there is a gap between sets of active frames, the gap is denoted by a number in parentheses (ex: 2(4)2) |
| Attack |
Attack level is L for low attacks (must be blocked crouching), H is for High attacks (which can be blocked high or low) and M for overhead (must be blocked standing). T is for throw attacks (which cannot be blocked). |
| Cancel options |
Available cancel options.
|
| Damage |
Attack damage on hit in life points. Notation may denote multi-hit or "sweet spot" damage values on certain frames. |
| Hit/Block |
These are frame advantage values when the attack hits or is blocked. If the number is positive, then the move will end before the defender can act again. If the number is negative, the defender will be able to act before the attacker and maybe even punish. D refers to knockdown on hit. "Cr. Hit" is an additional frame advantage value denoting if the advantage on hit changes when the defender is being hit while crouching. |
| Kara Range |
Almost all normal attacks can be canceled into a special or a multi-button command within three frames of startup. During that time, some attacks will shift position forward or backward and affect the reach of the special or command accordingly. This is denoted in pixels of range. There are a handful of moves in the game that can be kara-canceled after this initial window and will be denoted as a late kara-cancel. |
| Link |
A combo that is performed by inputting the second move after the first move has completely recovered (as opposed to cancelling the first move's animation). In 3S, the final frame of a move's hitstun allows a character to block a normal or special move, as well as some projectile supers. Therefore, an attack's frame advantage must be 2 frames greater than the followup move's startup in order to link. Ex: a +6 normal can link into a 4f normal/special, or a 5f super. |
| Parry |
This field will show a value of A if the attack can be parried standing or crouching, H if it must be parried standing or L if it must be parried crouching. |
| Recovery |
How many frames it takes for a move to finish after it's been active. |
| Startup |
How many frames it takes before the move becomes 'active' or has a hitbox. 3S uses classic startup notation, which does not include the first active frame. A move with 3 startup becomes active on frame 4. |
| Stun |
Amount of stun added to the opponent's stun bar on hit. |
| Throw range |
Range in pixels from the center of the character to the center of the opponent which allows a grab to connect. |
Frame Data
Standing Normals
5LP (cl)
5LP (far)
5MP
5HP
5LK
5MK (cl)
5MK (far)
5HK (cl)
5HK (far)
Command Normals
4MP
4HP
6MK
5MK (hold)
6HK
3HK
Crouching Normals
2LP
2MP
2HP
2LK
2MK
2HK
Jumping Normals
8LP
9LP
8MP
9MP
8HP
9HP
j.HP-HP
8LK
j.LK
8MK
j.MK
8HK
j.HK
2HP (air)
2MK (air)
Throws
LPLK
LPLK (air)
Walljump
9 (wall)
Universal Overheads
MPMK
Taunts
HPHK

