No edit summary |
(→6HK) |
||
| (16 intermediate revisions by 4 users not shown) | |||
| Line 37: | Line 37: | ||
|active=2 | |active=2 | ||
|recovery=6 | |recovery=6 | ||
|onHit=2 | |onHit=+2 | ||
|onHitCrouch=2 | |onHitCrouch=+2 | ||
|onBlock=2 | |onBlock=+2 | ||
|parry=A | |parry=A | ||
|damage=5 | |damage=5 | ||
| Line 55: | Line 55: | ||
|input={{lp}} (far) | |input={{lp}} (far) | ||
|image=(chunlilp).gif | |image=(chunlilp).gif | ||
|hitbox=Chun_f5L_hb.PNG | |||
|data= | |data= | ||
{{AttackData-3S | {{AttackData-3S | ||
| Line 60: | Line 61: | ||
|active=5 | |active=5 | ||
|recovery=4 | |recovery=4 | ||
|onHit=2 | |onHit=+2 | ||
|onHitCrouch=2 | |onHitCrouch=+2 | ||
|onBlock=2 | |onBlock=+2 | ||
|parry=A | |parry=A | ||
|damage=3 | |damage=3 | ||
| Line 78: | Line 79: | ||
|input={{mp}} | |input={{mp}} | ||
|image=(chunlimp).gif | |image=(chunlimp).gif | ||
|hitbox=Chun_5MP_hb.PNG | |||
|data= | |data= | ||
{{AttackData-3S | {{AttackData-3S | ||
| Line 103: | Line 105: | ||
|input={{hp}} | |input={{hp}} | ||
|image=(chunlihp).gif | |image=(chunlihp).gif | ||
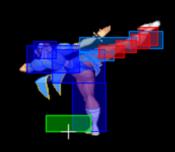
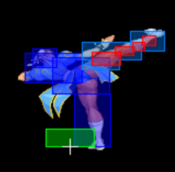
|caption=Chun steps her lower hurtbox out before punching | |||
|hitbox=Chun_5HP_9f_hb.PNG | |||
|hitboxCaption=frame 9 - 10 | |||
|hitbox2=Chun_5HP_11f_hb.PNG | |||
|hitboxCaption2=frame 11 onward | |||
|data= | |data= | ||
{{AttackData-3S | {{AttackData-3S | ||
| Line 109: | Line 116: | ||
|recovery=17 | |recovery=17 | ||
|onHit=0 | |onHit=0 | ||
|onHitCrouch=2 | |onHitCrouch=+2 | ||
|onBlock=-2 | |onBlock=-2 | ||
|parry=H | |parry=H | ||
| Line 127: | Line 134: | ||
|input={{lk}} | |input={{lk}} | ||
|image=(chunlilk).gif | |image=(chunlilk).gif | ||
|hitbox=Chun_5LK_hb.PNG | |||
|data= | |data= | ||
{{AttackData-3S | {{AttackData-3S | ||
| Line 132: | Line 140: | ||
|active=5 | |active=5 | ||
|recovery=9 | |recovery=9 | ||
|onHit=1 | |onHit=+1 | ||
|onHitCrouch=1 | |onHitCrouch=+1 | ||
|onBlock=1 | |onBlock=+1 | ||
|parry=A | |parry=A | ||
|damage=7 | |damage=7 | ||
| Line 149: | Line 157: | ||
|input={{mk}} (cl) | |input={{mk}} (cl) | ||
|image=(chunliclosemk).gif | |image=(chunliclosemk).gif | ||
|hitbox=Chun_clMK_7f_hb.PNG | |||
|hitboxCaption= frame 7 | |||
|hitbox2=Chun_clMK_8f_hb.PNG | |||
|hitboxCaption2= frame 8 | |||
|data= | |data= | ||
{{AttackData-3S | {{AttackData-3S | ||
| Line 176: | Line 188: | ||
|input={{mk}} (far) | |input={{mk}} (far) | ||
|image=(chunlimk).gif | |image=(chunlimk).gif | ||
|hitbox=Chun_fMK_8f_hb.PNG | |||
|hitboxCaption=frame 8 - 9 | |||
|hitbox2=Chun_fMK_10f_hb.PNG | |||
|hitboxCaption2=frame 10 - 11 | |||
|hitbox3=Chun_fMK_12f_hb.PNG | |||
|hitboxCaption3=frame 12 onwards | |||
|data= | |data= | ||
{{AttackData-3S | {{AttackData-3S | ||
| Line 203: | Line 221: | ||
|input={{hk}} (cl) | |input={{hk}} (cl) | ||
|image=(chunliclosehk).gif | |image=(chunliclosehk).gif | ||
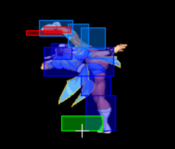
|hitbox=Chun_clHK_5f_hb.PNG | |||
|hitboxCaption= frame 5 - 6 | |||
|hitbox2=Chun_clHK_7f_hb.PNG | |||
|hitboxCaption2= frame 7 onwards | |||
|data= | |data= | ||
{{AttackData-3S | {{AttackData-3S | ||
| Line 209: | Line 231: | ||
|recovery=12 | |recovery=12 | ||
|onHit=-1 | |onHit=-1 | ||
|onHitCrouch=1 | |onHitCrouch=+1 | ||
|onBlock=-3 | |onBlock=-3 | ||
|parry=H | |parry=H | ||
| Line 233: | Line 255: | ||
|input={{hk}} (far) | |input={{hk}} (far) | ||
|image=(chunlihk).gif | |image=(chunlihk).gif | ||
|hitbox=Chun_fHK_13f_hb.PNG | |||
|data= | |data= | ||
{{AttackData-3S | {{AttackData-3S | ||
| Line 238: | Line 261: | ||
|active=1 | |active=1 | ||
|recovery=15 | |recovery=15 | ||
|onHit=2 | |onHit=+2 | ||
|onHitCrouch=4 | |onHitCrouch=+4 | ||
|onBlock=0 | |onBlock=0 | ||
|parry=H | |parry=H | ||
| Line 265: | Line 288: | ||
|subtitle=Backhand Slaps | |subtitle=Backhand Slaps | ||
|image=(chunlibmp).gif | |image=(chunlibmp).gif | ||
|hitbox=Chun_4MP_6f7f_hb.PNG | |||
|hitboxCaption=frame 6 - 7 | |||
|hitbox2=Chun_4MP_16f_hb.PNG | |||
|hitboxCaption2=frame 16 | |||
|data= | |data= | ||
{{AttackData-3S | {{AttackData-3S | ||
| Line 290: | Line 317: | ||
|subtitle=Double Palm Strike | |subtitle=Double Palm Strike | ||
|image=(chunlibhp).gif | |image=(chunlibhp).gif | ||
|hitbox=Chun_4HP_8f_hb.PNG | |||
|data= | |data= | ||
{{AttackData-3S | {{AttackData-3S | ||
| Line 295: | Line 323: | ||
|active=9 | |active=9 | ||
|recovery=10 | |recovery=10 | ||
|onHit=1 | |onHit=+1 | ||
|onHitCrouch=3 | |onHitCrouch=+3 | ||
|onBlock=-1 | |onBlock=-1 | ||
|parry=H | |parry=H | ||
| Line 318: | Line 346: | ||
|subtitle=Stepping Kick | |subtitle=Stepping Kick | ||
|image=(chunlifmk).gif | |image=(chunlifmk).gif | ||
|hitbox=Chun_6MK_hb.PNG | |||
|data= | |data= | ||
{{AttackData-3S | {{AttackData-3S | ||
| Line 323: | Line 352: | ||
|active=7 | |active=7 | ||
|recovery=11 | |recovery=11 | ||
|onHit=1 | |onBlock=0 | ||
|onHitCrouch=2 | |onHit=+1 | ||
|onHitCrouch=+2 | |||
|parry=H | |parry=H | ||
|damage=14 | |damage=14 | ||
| Line 347: | Line 377: | ||
|active=6*1*1 | |active=6*1*1 | ||
|recovery=15 | |recovery=15 | ||
|onHit=3 | |onHit=+3 | ||
|onHitCrouch=3 | |onHitCrouch=+3 | ||
|onBlock=-1 | |onBlock=-1 | ||
|parry=H*H*H | |parry=H*H*H | ||
| Line 364: | Line 394: | ||
|subtitle=Forward Heavy Kick | |subtitle=Forward Heavy Kick | ||
|image=(chunlifhk).gif | |image=(chunlifhk).gif | ||
|hitbox=Chun_fHK_13f_hb.PNG | |||
|data= | |data= | ||
{{AttackData-3S | {{AttackData-3S | ||
| Line 369: | Line 400: | ||
|active=1 | |active=1 | ||
|recovery=15 | |recovery=15 | ||
|onHit=2 | |onBlock=0 | ||
|onHitCrouch=4 | |onHit=+2 | ||
|onHitCrouch=+4 | |||
|parry=H | |parry=H | ||
|damage=21 | |damage=21 | ||
| Line 389: | Line 421: | ||
|subtitle=Sideswitch Leap Kick | |subtitle=Sideswitch Leap Kick | ||
|image=(chunlidfhk).gif | |image=(chunlidfhk).gif | ||
|hitbox=Chun_3HK_hb.PNG | |||
|data= | |data= | ||
{{AttackData-3S | {{AttackData-3S | ||
| Line 394: | Line 427: | ||
|active=5 | |active=5 | ||
|recovery=2 | |recovery=2 | ||
|onHit=11 | |onHit=+11 | ||
|onHitCrouch=15 | |onHitCrouch=+15 | ||
|onBlock=9 | |onBlock=+9 | ||
|parry=H | |parry=H | ||
|damage=19 | |damage=19 | ||
| Line 420: | Line 453: | ||
|input={{d}}+{{lp}} | |input={{d}}+{{lp}} | ||
|image=(chunliclp).gif | |image=(chunliclp).gif | ||
|hitbox=Chun_2LP_hb.PNG | |||
|data= | |data= | ||
{{AttackData-3S | {{AttackData-3S | ||
| Line 425: | Line 459: | ||
|active=4 | |active=4 | ||
|recovery=5 | |recovery=5 | ||
|onHit=3 | |onHit=+3 | ||
|onHitCrouch=3 | |onHitCrouch=+3 | ||
|onBlock=3 | |onBlock=+3 | ||
|parry=A | |parry=A | ||
|damage=3 | |damage=3 | ||
| Line 434: | Line 468: | ||
* Cancel options: ch sp su | * Cancel options: ch sp su | ||
A terrifyingly good jab. Starts up in 2 frames, making it one of the fastest normals in the game, and is plus on block for amazing frametrap/throw pressure that can repeat into itself. Be careful with abusing it on defense, as it is high+low parryable, and predictable mashing of this button will get you smoked. | A terrifyingly good jab. Starts up in 2 frames, making it one of the fastest normals in the game, and is plus on block for amazing frametrap/throw pressure that can repeat into itself. Be careful with abusing it on defense, as it is high+low parryable, and predictable mashing of this button will get you smoked. | ||
NOTE: crLP can be buffered during the self cancel window, but the next crLP won't startup until the cancel window ends. This makes crLP > crLP have a notably bigger gap relative to stLP > crLP | |||
{{3S Button FAT|link=https://fullmeter.com/fatonline/#/framedata/movedetail/3S/Chun-Li/normal/Crouch%20LP}} | {{3S Button FAT|link=https://fullmeter.com/fatonline/#/framedata/movedetail/3S/Chun-Li/normal/Crouch%20LP}} | ||
}} | }} | ||
| Line 443: | Line 479: | ||
|input={{d}}+{{mp}} | |input={{d}}+{{mp}} | ||
|image=(chunlicmp).gif | |image=(chunlicmp).gif | ||
|caption=notably good low profile | |||
|hitbox=Chun_2MP_hb.PNG | |||
|data= | |data= | ||
{{AttackData-3S | {{AttackData-3S | ||
| Line 459: | Line 497: | ||
* Opponent meter gain: Whiff: 0, Hit: 2, Block: 0. | * Opponent meter gain: Whiff: 0, Hit: 2, Block: 0. | ||
A niche button that mostly gets used as a way to snipe with an extremely long low. You would generally prefer 2MK over this for a variety of reasons, but this extends farther, which is notable to push people even farther back when they try and space around 2MK. | A niche button that mostly gets used as a way to snipe with an extremely long low. You would generally prefer 2MK over this for a variety of reasons, but this extends farther, which is notable to push people even farther back when they try and space around 2MK. | ||
Commonly referred to as "nekopan" as well. | |||
{{3S Button FAT|link=https://fullmeter.com/fatonline/#/framedata/movedetail/3S/Chun-Li/normal/Crouch%20MP}} | {{3S Button FAT|link=https://fullmeter.com/fatonline/#/framedata/movedetail/3S/Chun-Li/normal/Crouch%20MP}} | ||
}} | }} | ||
| Line 468: | Line 508: | ||
|input={{d}}+{{hp}} | |input={{d}}+{{hp}} | ||
|image=(chunlichp).gif | |image=(chunlichp).gif | ||
|hitbox=Chun_2HP_hb.PNG | |||
|data= | |data= | ||
{{AttackData-3S | {{AttackData-3S | ||
| Line 473: | Line 514: | ||
|active=2 | |active=2 | ||
|recovery=22 | |recovery=22 | ||
|onHit=1 | |onHit=+1 | ||
|onHitCrouch=3 | |onHitCrouch=+3 | ||
|onBlock=-1 | |onBlock=-1 | ||
|parry=A | |parry=A | ||
| Line 494: | Line 535: | ||
|input={{d}}+{{lk}} | |input={{d}}+{{lk}} | ||
|image=(chunliclk).gif | |image=(chunliclk).gif | ||
|hitbox=Chun_2LK_hb.PNG | |||
|data= | |data= | ||
{{AttackData-3S | {{AttackData-3S | ||
| Line 499: | Line 541: | ||
|active=2 | |active=2 | ||
|recovery=6 | |recovery=6 | ||
|onHit=3 | |onHit=+3 | ||
|onHitCrouch=3 | |onHitCrouch=+3 | ||
|onBlock=3 | |onBlock=+3 | ||
|parry=L | |parry=L | ||
|damage=3 | |damage=3 | ||
| Line 517: | Line 559: | ||
|input={{d}}+{{mk}} | |input={{d}}+{{mk}} | ||
|image=(chunlicmk).gif | |image=(chunlicmk).gif | ||
|hitbox=Chun_2MK_hb.PNG | |||
|data= | |data= | ||
{{AttackData-3S | {{AttackData-3S | ||
| Line 534: | Line 577: | ||
Another infamously strong button. You should be pressing this button in neutral more than any other move. A super fast, long reaching low poke that harasses people and can shut some characters in neutral entirely. Starts up quite fast, is very safe, cancels to specials and to supers. Against a lot of characters you can structure your gameplan solely around this move and still find success. It is your safest whiff meter gain. | Another infamously strong button. You should be pressing this button in neutral more than any other move. A super fast, long reaching low poke that harasses people and can shut some characters in neutral entirely. Starts up quite fast, is very safe, cancels to specials and to supers. Against a lot of characters you can structure your gameplan solely around this move and still find success. It is your safest whiff meter gain. | ||
A notable feature of 2MK is the late cancel window. The move is unique in that it has two separate cancel windows: one immediately after hit, and then a small 2 frame window after its active frames end, with a gap of non-cancellable frames in between both. This late cancel window makes the move functionally similar to a link (without the risk of being late on the link and leaking super) and generously hitconfirmable at 17-18F. You are only hitconfirming the move during the late cancel window, as the early cancel window occurs too soon to allow you to react to if it is hit or blocked. You cannot play Chun Li if you do not master this hitconfirm in particular. | A notable feature of 2MK is the late cancel window. The move is unique in that it has two separate cancel windows: one immediately after hit, and then a small 2 frame window after its active frames end, with a gap of non-cancellable frames in between both. This late cancel window makes the move functionally similar to a link (without the risk of being late on the link and leaking super) and generously hitconfirmable at 17-18F. You are only hitconfirming the move during the late cancel window, as the early cancel window occurs too soon to allow you to react to if it is hit or blocked. Visually speaking, these are the frames where Chun-Li looks like she is kicking ''backwards''. You cannot play Chun Li if you do not master this hitconfirm in particular. | ||
{{3S Button FAT|link=https://fullmeter.com/fatonline/#/framedata/movedetail/3S/Chun-Li/normal/Crouch%20MK}} | {{3S Button FAT|link=https://fullmeter.com/fatonline/#/framedata/movedetail/3S/Chun-Li/normal/Crouch%20MK}} | ||
}} | }} | ||
| Line 544: | Line 587: | ||
|input={{d}}+{{hk}} | |input={{d}}+{{hk}} | ||
|image=(chunlichk).gif | |image=(chunlichk).gif | ||
|hitbox=Chun_2HK_8f_hb.PNG | |||
|hitboxCaption=frame 8 | |||
|hitbox2=Chun_2HK_9f_hb.PNG | |||
|hitboxCaption2=frame 9 onwards | |||
|data= | |data= | ||
{{AttackData-3S | {{AttackData-3S | ||
| Line 574: | Line 621: | ||
|input={{u}}+{{lp}} | |input={{u}}+{{lp}} | ||
|image=(chunlinjlp).gif | |image=(chunlinjlp).gif | ||
|hitbox=Chun_njLP_hb.PNG | |||
|data= | |data= | ||
{{AttackData-3S | {{AttackData-3S | ||
| Line 591: | Line 639: | ||
|input={{uf}}+{{lp}} | |input={{uf}}+{{lp}} | ||
|image=(chunlijlp).gif | |image=(chunlijlp).gif | ||
|hitbox=Chun_jLP_hb.PNG | |||
|data= | |data= | ||
{{AttackData-3S | {{AttackData-3S | ||
| Line 608: | Line 657: | ||
|input={{u}}+{{mp}} | |input={{u}}+{{mp}} | ||
|image=(chunlinjmp).gif | |image=(chunlinjmp).gif | ||
|hitbox=Chun_njMP_hb.PNG | |||
|data= | |data= | ||
{{AttackData-3S | {{AttackData-3S | ||
| Line 627: | Line 677: | ||
|input={{uf}}+{{mp}} | |input={{uf}}+{{mp}} | ||
|image=(chunlijmp).gif | |image=(chunlijmp).gif | ||
|hitbox=Chun_jMP_hb.PNG | |||
|data= | |data= | ||
{{AttackData-3S | {{AttackData-3S | ||
| Line 646: | Line 697: | ||
|input={{u}}+{{hp}} | |input={{u}}+{{hp}} | ||
|image=(chunlinjhp).gif | |image=(chunlinjhp).gif | ||
|hitbox=Chun_njHP_hb.PNG | |||
|data= | |data= | ||
{{AttackData-3S | {{AttackData-3S | ||
| Line 666: | Line 718: | ||
|input={{uf}}+{{hp}} | |input={{uf}}+{{hp}} | ||
|image=(chunlijhp).gif | |image=(chunlijhp).gif | ||
|hitbox=Chun_jHP_hb.PNG | |||
|data= | |data= | ||
{{AttackData-3S | {{AttackData-3S | ||
| Line 706: | Line 759: | ||
|input={{u}}+{{lk}} | |input={{u}}+{{lk}} | ||
|image=(chunlinjlk).gif | |image=(chunlinjlk).gif | ||
|hitbox=Chun_njLK_6f_hb.PNG | |||
|hitboxCaption=frame 6 | |||
|hitbox2=Chun_njLK_7f_hb.PNG | |||
|hitboxCaption2=frame 7 onwards | |||
|data= | |data= | ||
{{AttackData-3S | {{AttackData-3S | ||
| Line 724: | Line 781: | ||
|input={{uf}}+{{lk}} | |input={{uf}}+{{lk}} | ||
|image=(chunlijlk).gif | |image=(chunlijlk).gif | ||
|hitbox=Chun_jLK_hb.PNG | |||
|data= | |data= | ||
{{AttackData-3S | {{AttackData-3S | ||
| Line 741: | Line 799: | ||
|input={{u}}+{{mk}} | |input={{u}}+{{mk}} | ||
|image=(chunlinjmk).gif | |image=(chunlinjmk).gif | ||
|hitbox=Chun_njMK_7f_hb.PNG | |||
|data= | |data= | ||
{{AttackData-3S | {{AttackData-3S | ||
| Line 761: | Line 820: | ||
|input={{uf}}+{{mk}} | |input={{uf}}+{{mk}} | ||
|image=(chunlijmk).gif | |image=(chunlijmk).gif | ||
|hitbox=Chun_jMK_hb.PNG | |||
|data= | |data= | ||
{{AttackData-3S | {{AttackData-3S | ||
| Line 781: | Line 841: | ||
|input={{u}}+{{hk}} | |input={{u}}+{{hk}} | ||
|image=(chunlinjhk).gif | |image=(chunlinjhk).gif | ||
|hitbox=Chun_njHK_hb.PNG | |||
|data= | |data= | ||
{{AttackData-3S | {{AttackData-3S | ||
| Line 801: | Line 862: | ||
|input={{uf}}+{{hk}} | |input={{uf}}+{{hk}} | ||
|image=(chunlijhk).gif | |image=(chunlijhk).gif | ||
|hitbox=Chun_jHK_hb.PNG | |||
|data= | |data= | ||
{{AttackData-3S | {{AttackData-3S | ||
| Line 822: | Line 884: | ||
|subtitle=Air Smash Punch | |subtitle=Air Smash Punch | ||
|image=(chunlijdhp).gif | |image=(chunlijdhp).gif | ||
|hitbox=Chun_njHP_hb.PNG | |||
|data= | |data= | ||
{{AttackData-3S | {{AttackData-3S | ||
| Line 843: | Line 906: | ||
|subtitle=Air Stomp | |subtitle=Air Stomp | ||
|image=(chunlijdmk).gif | |image=(chunlijdmk).gif | ||
|hitbox=Chun_j2MK_hb.PNG | |||
|data= | |data= | ||
{{AttackData-3S | {{AttackData-3S | ||
| Line 931: | Line 995: | ||
|subtitle=Universal Overhead | |subtitle=Universal Overhead | ||
|image=(chunlioh).gif | |image=(chunlioh).gif | ||
|hitbox=Chun_UOH_hb.PNG | |||
|data= | |data= | ||
{{AttackData-3S | {{AttackData-3S | ||
| Line 936: | Line 1,001: | ||
|active=10 | |active=10 | ||
|recovery=5 | |recovery=5 | ||
|onHit=0 ~8 | |onHit=0 ~+8 | ||
|onHitCrouch=1~9 | |onHitCrouch=+1~+9 | ||
|onBlock=-5~7 | |onBlock=-5~7 | ||
|parry=H | |parry=H | ||
| Line 992: | Line 1,057: | ||
|image=(chunlikikoken).gif | |image=(chunlikikoken).gif | ||
|caption={{lp}}/{{mp}}/{{hp}} | |caption={{lp}}/{{mp}}/{{hp}} | ||
|hitbox=Chun_236PP_hb.PNG | |||
|image2=(chunlikikokenex).gif | |image2=(chunlikikokenex).gif | ||
|caption2={{ex}} | |caption2={{ex}} | ||
| Line 1,061: | Line 1,127: | ||
|image=(chunlihkk).gif | |image=(chunlihkk).gif | ||
|caption={{hk}} | |caption={{hk}} | ||
|hitbox=Chun_LL_1_hb.PNG | |||
|hitbox2=Chun_LL_2_hb.PNG | |||
|hitbox3=Chun_LL_3_hb.PNG | |||
|hitbox4=Chun_LL_4_hb.PNG | |||
|hitboxCaption4=1, 2, 3, 4, repeat! | |||
|image2=(chunlihkk).gif | |image2=(chunlihkk).gif | ||
|caption2={{ex}} | |caption2={{ex}} | ||
| Line 1,161: | Line 1,232: | ||
|image=(chunlisbk).gif | |image=(chunlisbk).gif | ||
|caption={{lk}}/{{mk}}/{{hk}} | |caption={{lk}}/{{mk}}/{{hk}} | ||
|hitbox=Chun_SBK_1_hb.PNG | |||
|hitbox2=Chun_SBK_2_hb.PNG | |||
|hitboxCaption2=cycles between 1 and 2. ex version shown, normal versions are slightly different | |||
|image2=(chunlisbkex).gif | |image2=(chunlisbkex).gif | ||
|caption2={{ex}} | |caption2={{ex}} | ||
| Line 1,225: | Line 1,299: | ||
|image=(chunlihzs).gif | |image=(chunlihzs).gif | ||
|caption={{lk}}/{{mk}}/{{hk}} | |caption={{lk}}/{{mk}}/{{hk}} | ||
|hitbox=Chun_624K_hb.PNG | |||
|image2=(chunlihzsex).gif | |image2=(chunlihzsex).gif | ||
|caption2={{ex}} | |caption2={{ex}} | ||
| Line 1,296: | Line 1,371: | ||
|subtitle=SA1 | |subtitle=SA1 | ||
|image=(chunlisa1).gif | |image=(chunlisa1).gif | ||
|hitbox=Chun_SA1_hb.gif | |||
|hitboxCaption=played at 20fps | |||
|data= | |data= | ||
{{AttackData-3S | {{AttackData-3S | ||
| Line 1,316: | Line 1,393: | ||
|subtitle=SA2 | |subtitle=SA2 | ||
|image=(chunlisa2).gif | |image=(chunlisa2).gif | ||
|hitbox=Chun_SA2_hb.gif | |||
|hitboxCaption=played at 20fps | |||
|data= | |data= | ||
{{AttackData-3S | {{AttackData-3S | ||
| Line 1,340: | Line 1,419: | ||
|subtitle=SA3 | |subtitle=SA3 | ||
|image=(chunlisa3).gif | |image=(chunlisa3).gif | ||
|hitbox=Chun_SA3_hb.gif | |||
|hitboxCaption=played at 20fps | |||
|data= | |data= | ||
{{AttackData-3S | {{AttackData-3S | ||
Latest revision as of 04:01, 29 March 2025
Introduction
Chun-Li returns to the third World Warrior tournament, albeit a little different stylistically, both in her appearance and her fighting style. She's still just as quick and agile, but her actions are more fluid. No longer fighting for the sake of revenge, but for the protection of others, she seems more confident in her fighting ability as well.
In her most notorious incarnation, Chun-Li is a defensive beast. She's known for her overwhelming neutral presence, sporting absurdly strong buttons for controlling space in a myriad of ways. Long reaching lows like 2MK, far ranged heavy buttons like 5HP, and absurdly high priority buttons like 4HP let Chun keep the pace regardless of the gamestate. Her jabs are absurdly fast as well, namely her 2 frame 2LP, giving her a fast defensive option to rely on. On offense, she's known for her amazing strike/throw, complimented by pressure resets like 6MK and her amazing 5MK kara throw, which adds an incredible amount of range to her already strong throw.
Likely Chun-Li's most powerful tool is her SAII, Houyoku-Sen. It's a blindingly fast rush super that hits 17 times total for massive damage, combos from all of her pokes at all ranges, and can be superjump cancelled for followup juggles that lead to shockingly strong mixups. It has some invulnerability, allowing it to beat fireballs and pokes with low active frames, and comes with a healthy amount of chip damage for sealing out rounds with a difficult parry. Notably, it stocks 2 bars, letting Chun use her EX moves more. The most notable fact about stocking 2 bars is the fear that one stock puts into the opponent usually lets you more safely build the second bar, and most characters will die after two SAII uses.
Chun-Li is a solidly top 1 character, with no losing matchups and few real weaknesses. You will have to learn to properly play neutral, as her low health and lack of strong anti-airs means a few bad decisions ends the round, but realistically she's quite simple, fun, and incredibly rewarding to play.
Super Arts
SAI (Kikou-Shou)
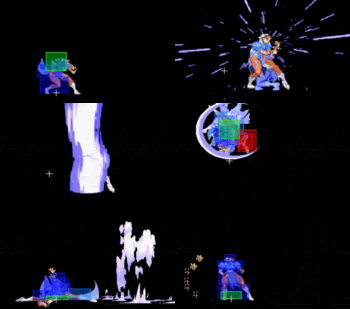
Kikou-Shou is a relatively high-damage super and comes with a rather short bar, which means you can have this super stocked more often than the Houyoku-Sen. It does more chip damage and is more difficult to parry than the Houyoku-Sen, but the primary drawbacks are the fact that it only comes with one stock, and that its range is fairly limited; you cannot cancel a max-ranged 2MK into a Kikou-Shou and expect it to hit. For this reason, and its singular bar, SA2 is considered a much more powerful super. However, the SA1 does have its merits as an anti-air or chipout tool.
SAII: (Houyoku-Sen)
Chun-Li's most powerful Super Art is Houyoku-Sen. It's a reversal and anti-projectile tool, has a healthy stock of two supers, is very damaging, is almost a guaranteed free ride for your opponent into the corner, and can be super-cancelled or linked into using many of her attacks, most notably off of 2MK. The Houyoku-Sen's final kick can be super-jump cancelled, and the opponent may be juggled following the Houyoku-Sen, or reset into a mixup. SA2 is also a 17-hit Super Art, making it a notorious ender of rounds via chip damage. You may also cancel a Kikouken or EX Kikouken into the Houyoku-Sen for the purpose of disrupting the timing for the opponent should they decide to try and parry it. Its two stocks also consitute to an incredibly oppressive gameplan once Chun has a super stocked, where she's allowed to poke and kara throw her way to towards another bar against a now defensive opponent, while confirming SA2 off of any opening she is given. Even once a super is used, there's a good chance she'll have another one very soon.
SAIII: (Tensei-Ranka)
Tensei-Ranka comes with much more meter than Chun's other options at 3 bars, but it's much more difficult to use successfully. Unless the opponent is very tall or standing, you will not be able to hit them on the way up using the super, which turns the Tensei-Ranka most of the time into an extremely delayed, reactable overhead. It is best used as an anti-air or confirmable damage off of an anti-air, however its short range and poor invulnerability can still lose to jumping opponents. Worst of all, it loses Chun-Li's infamous 2MK confirm, which leaves this super with the large amount of bar it stores as its only read advantage, and not one Chun cares too much for.
| Strengths | Weaknesses |
|---|---|
|
|
| Chun-Li #3S_CH | |
|---|---|
| Vitals | |
| Life Points | 1120 |
| Stun Points | 64 |
| Super Art Stock/Size | |
| SA1 | 1/88 |
| SA2 | 2/104 |
| SA3 | 3/72 |
| Ground Movement | |
| Forward Dash duration/distance | 16 (106px) |
| Back Dash duration/distance | 25 (124px) |
| Jumping | |
| Back Jump duration | 43(4+36+3) |
| Neutral Jump duration | 43(4+36+3) |
| Forward Jump duration | 43(4+36+3) |
| Back Super Jump duration | 51(5+43+3) |
| Neutral Super Jump duration | 47(5+39+3) |
| Forward Super Jump duration | 49(5+41+3) |
| Wake up | |
| Wake up duration | 88 |
| Quick rise duration | 61 |
| 3S Frame Data Glossary | |
|---|---|
| Active |
How many frames a move remains active (can hurt opponents) for. Consecutive sets of active frames on a multi-hit move are separated by an asterisk (ex: 3*5). If there is a gap between sets of active frames, the gap is denoted by a number in parentheses (ex: 2(4)2) |
| Attack |
Attack level is L for low attacks (must be blocked crouching), H is for High attacks (which can be blocked high or low) and M for overhead (must be blocked standing). T is for throw attacks (which cannot be blocked). |
| Cancel options |
Available cancel options.
|
| Damage |
Attack damage on hit in life points. Notation may denote multi-hit or "sweet spot" damage values on certain frames. |
| Hit/Block |
These are frame advantage values when the attack hits or is blocked. If the number is positive, then the move will end before the defender can act again. If the number is negative, the defender will be able to act before the attacker and maybe even punish. D refers to knockdown on hit. "Cr. Hit" is an additional frame advantage value denoting if the advantage on hit changes when the defender is being hit while crouching. |
| Kara Range |
Almost all normal attacks can be canceled into a special or a multi-button command within three frames of startup. During that time, some attacks will shift position forward or backward and affect the reach of the special or command accordingly. This is denoted in pixels of range. There are a handful of moves in the game that can be kara-canceled after this initial window and will be denoted as a late kara-cancel. |
| Link |
A combo that is performed by inputting the second move after the first move has completely recovered (as opposed to cancelling the first move's animation). In 3S, the final frame of a move's hitstun allows a character to block a normal or special move, as well as some projectile supers. Therefore, an attack's frame advantage must be 2 frames greater than the followup move's startup in order to link. Ex: a +6 normal can link into a 4f normal/special, or a 5f super. |
| Parry |
This field will show a value of A if the attack can be parried standing or crouching, H if it must be parried standing or L if it must be parried crouching. |
| Recovery |
How many frames it takes for a move to finish after it's been active. |
| Startup |
How many frames it takes before the move becomes 'active' or has a hitbox. 3S uses classic startup notation, which does not include the first active frame. A move with 3 startup becomes active on frame 4. |
| Stun |
Amount of stun added to the opponent's stun bar on hit. |
| Throw range |
Range in pixels from the center of the character to the center of the opponent which allows a grab to connect. |
Frame Data
Standing Normals
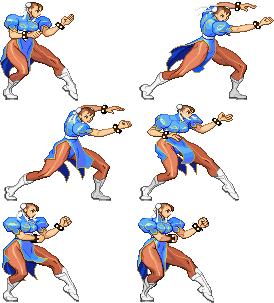
5LP (cl)
5LP (far)
5MP
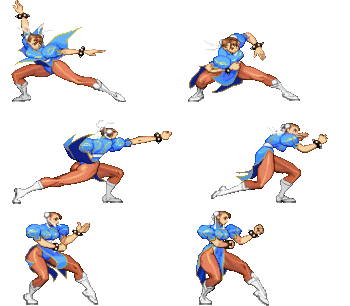
5HP
5LK
5MK (cl)
5MK (far)
5HK (cl)
| Startup | Active | Recovery | Block | Hit | Cr. Hit | Damage | Stun | Kara | Guard Level | Parry Level |
|---|---|---|---|---|---|---|---|---|---|---|
| 4 | 9 | 12 | -3 | -1 | +1 | 21 | 15 | - | - | H |
| Cancel Options | Self Meter Gain | Whiff | Hit | Block / Tech | Opponent Meter Gain | Hit | Block / Tech | |||
| - | - | - | - | - | - | |||||
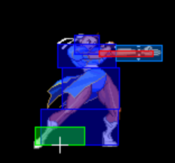
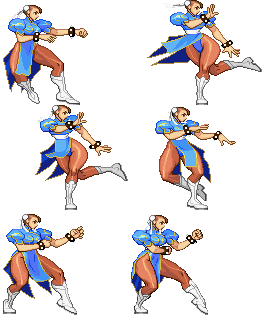
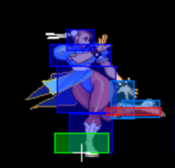
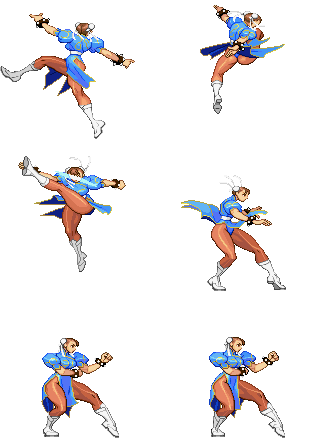
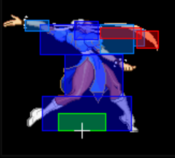
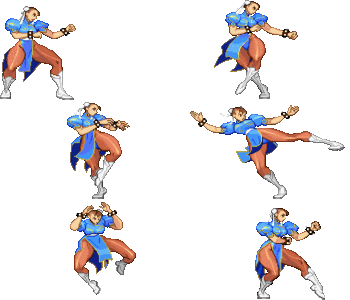
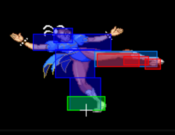
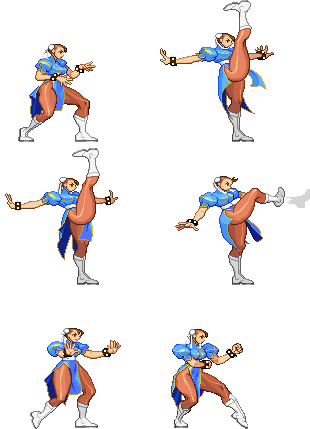
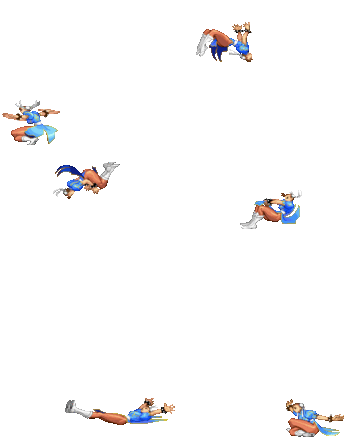
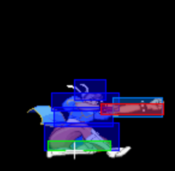
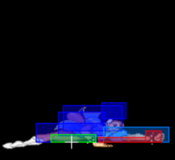
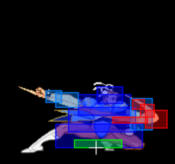
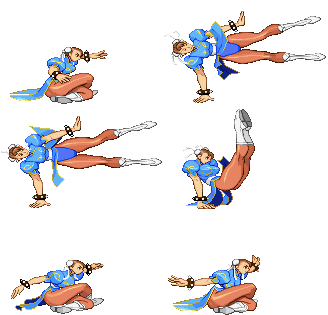
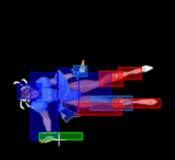
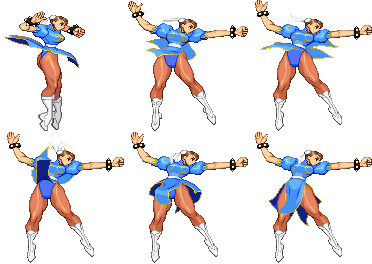
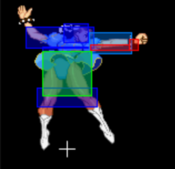
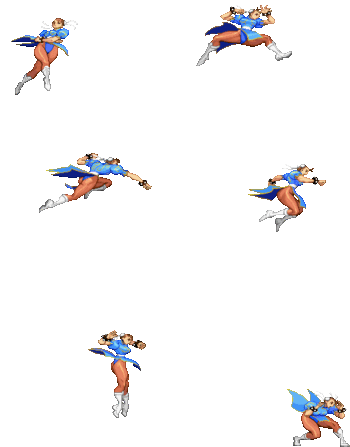
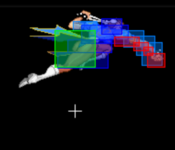
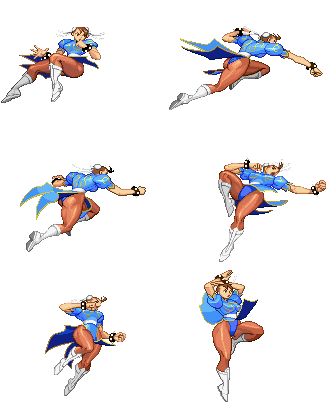
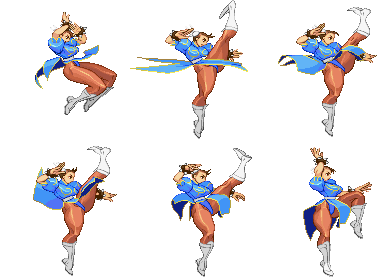
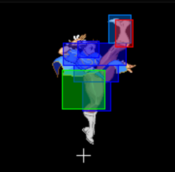
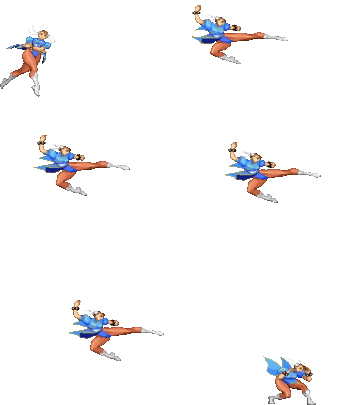
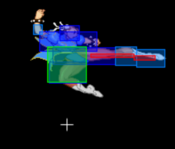
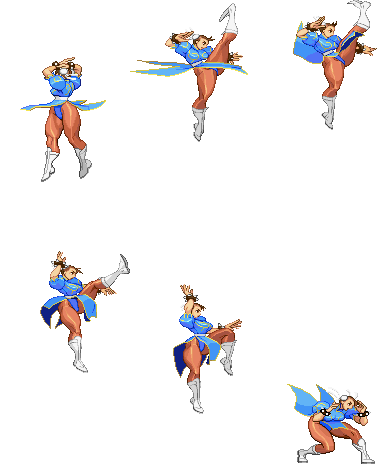
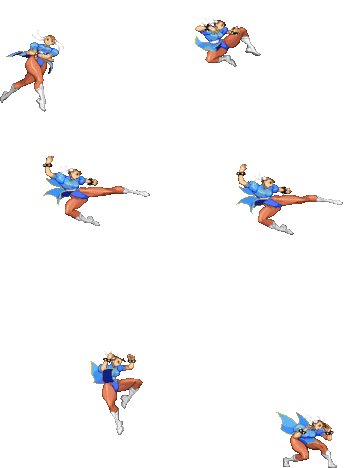
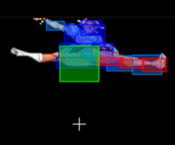
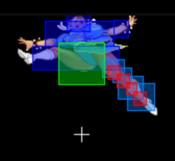
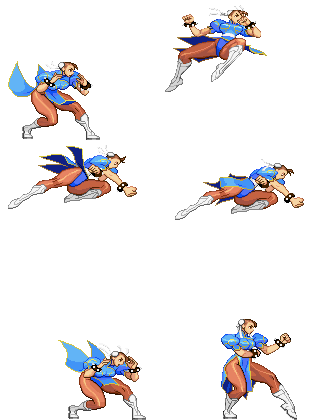
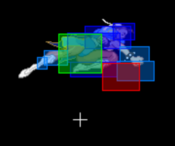
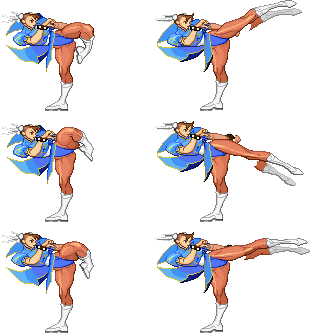
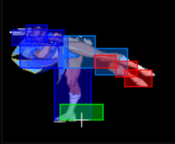
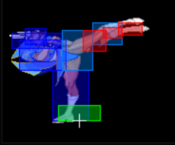
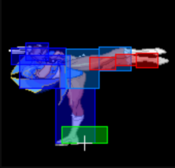
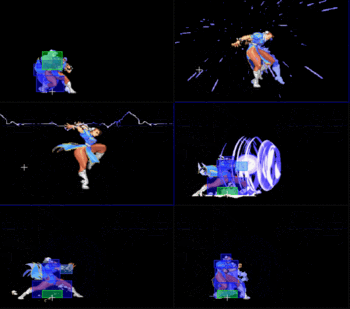
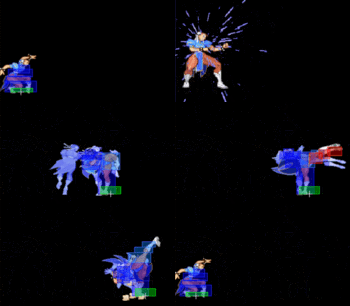
Her second kara cancel normal, however it has many other uses besides its usefulness as a kara. A fast knee with tons of active frames, as well has an extremely generous vertically disjointed hitbox that shifts her upper hurtbox down during the move, making it an extremely potent anti-air choice. Its proximity range is bigger than most proximity normals in the game. The move itself does not have special or super cancel frames, but it can be canceled into superjump during hitstop. To do this, input the super as a normal cancel during cl.HK, but end the input with a 9 (2362369). Done properly, you can press any kick button and cl.HK will "cancel" to super. The move is extremely generously hitconfirmable, up to 20F. Short tutorial from Snooze | ||||||||||
5HK (far)
Command Normals
4MP
4HP
6MK
5MK (hold)
6HK
3HK
Crouching Normals
2LP
2MP
2HP
2LK
2MK
2HK
Jumping Normals
8LP
9LP
8MP
9MP
8HP
9HP
j.HP-HP
8LK
j.LK
8MK
j.MK
8HK
j.HK
2HP (air)
2MK (air)
Throws
LPLK
LPLK (air)
Walljump
9 (wall)
Universal Overheads
MPMK
Taunts
HPHK
