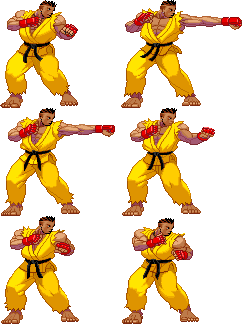
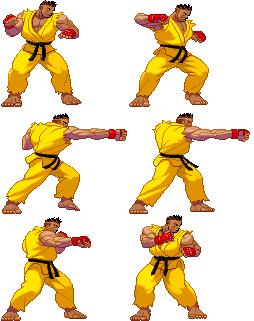
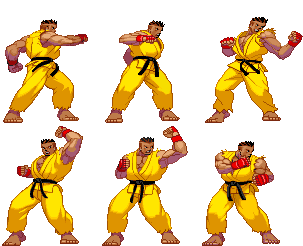
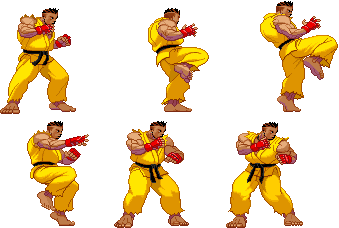
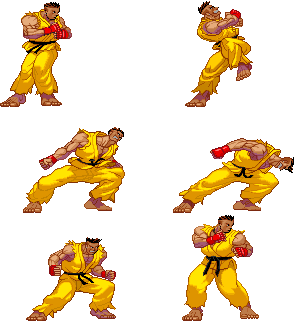
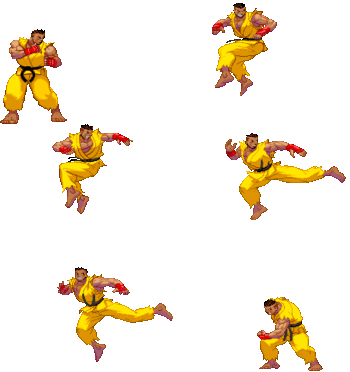
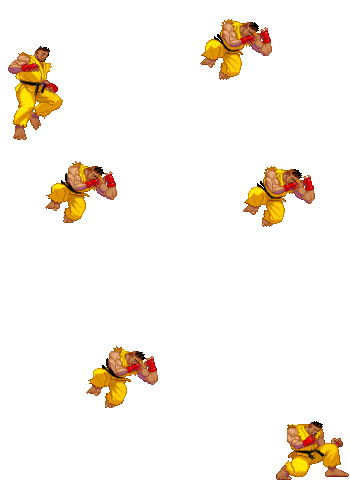
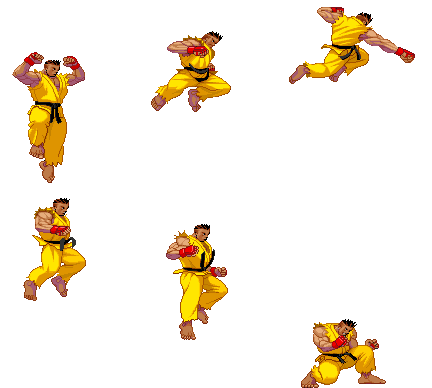
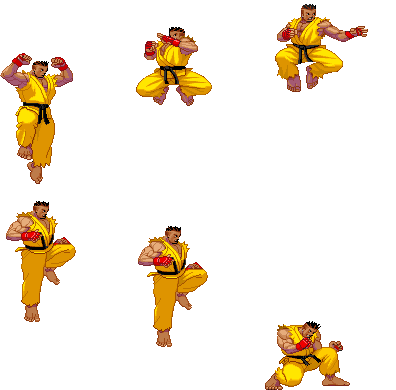
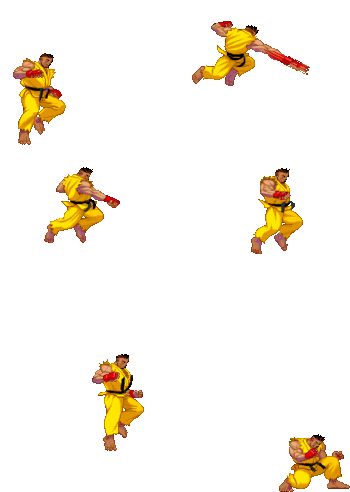
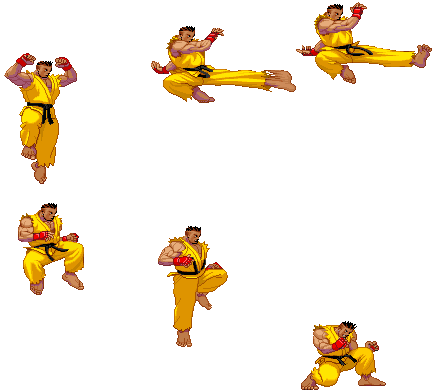
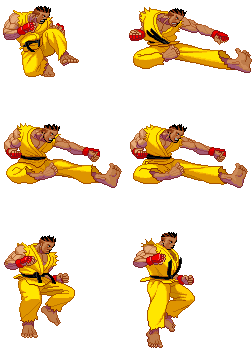
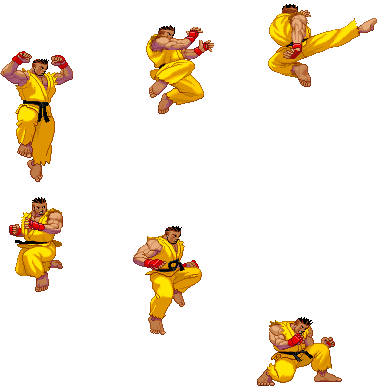
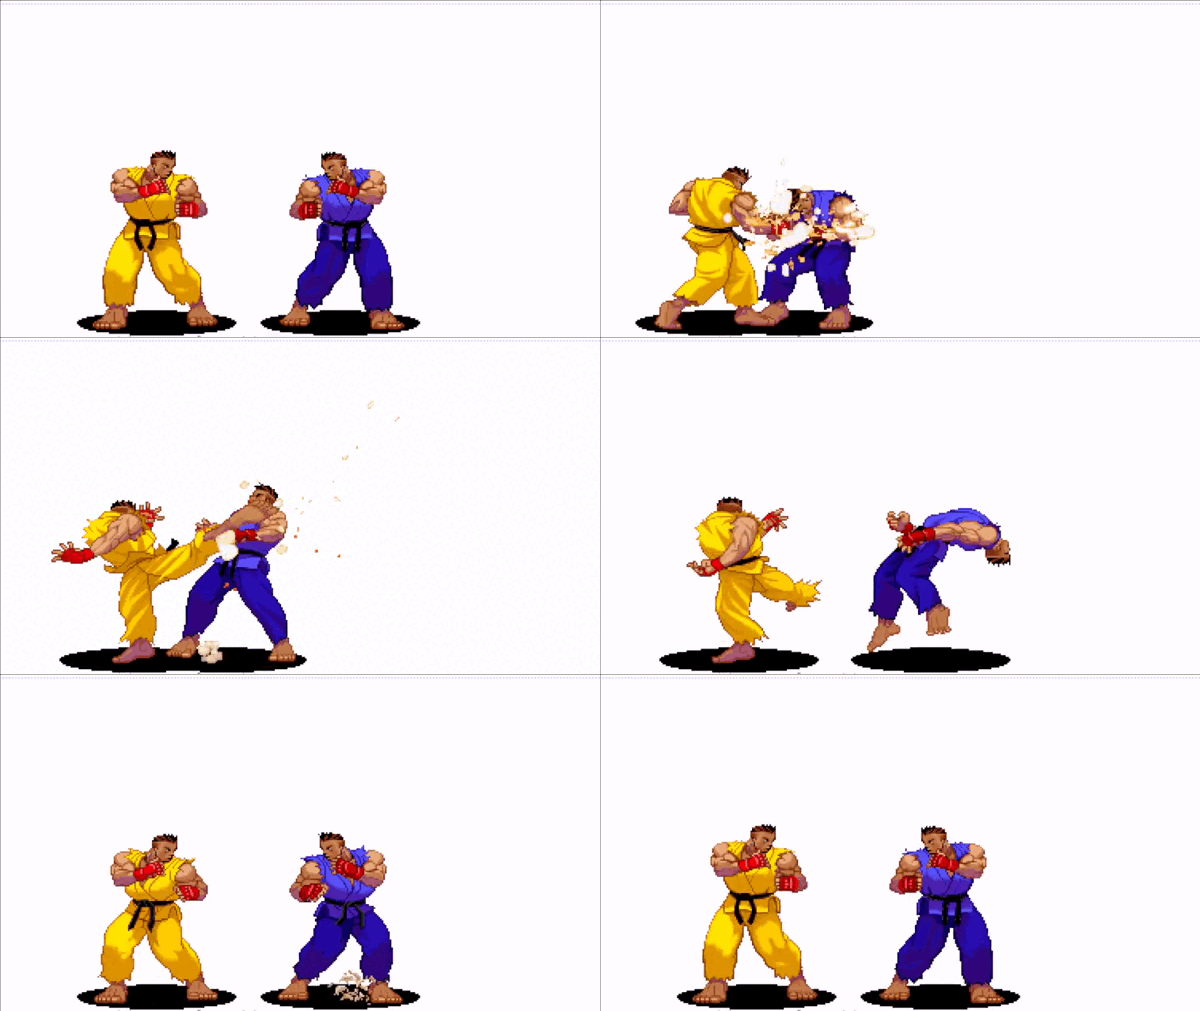
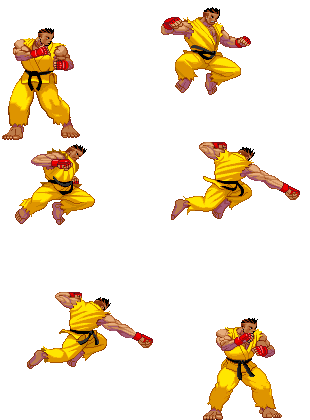
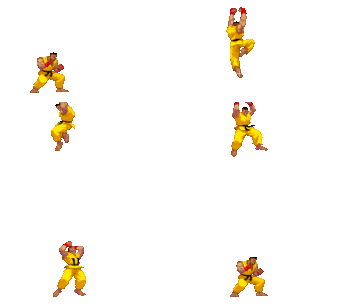
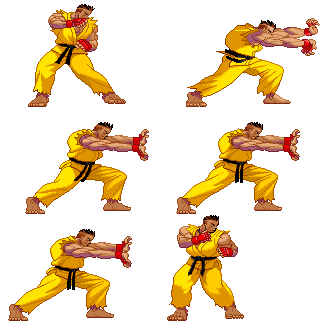
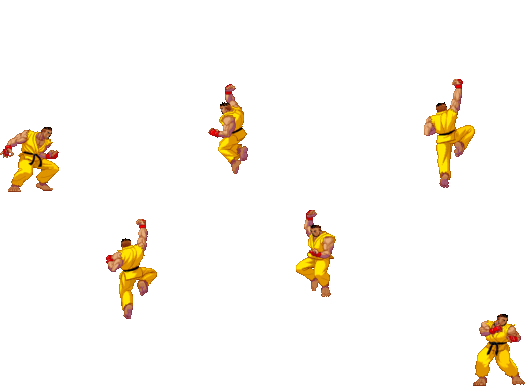
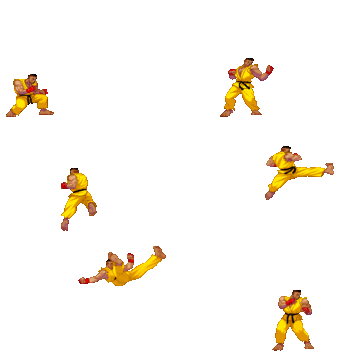
(→6HK) |
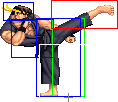
(→j.MP) |
||
| (49 intermediate revisions by 2 users not shown) | |||
| Line 37: | Line 37: | ||
|active=2 | |active=2 | ||
|recovery=5 | |recovery=5 | ||
|onHit=<font color=green> | |onHit=<font color=green>+5</font> | ||
|onHitCrouch=<font color=green> | |onHitCrouch=<font color=green>+5</font> | ||
|onBlock=<font color=green> | |onBlock=<font color=green>+5</font> | ||
|parry=A | |parry=A | ||
|damage=3 | |damage=3 | ||
| Line 76: | Line 76: | ||
* Self meter gain: Whiff: 2, Hit: 11, Block: 6. | * Self meter gain: Whiff: 2, Hit: 11, Block: 6. | ||
* Opponent meter gain: Whiff: 0, Hit: 2, Block: 0. | * Opponent meter gain: Whiff: 0, Hit: 2, Block: 0. | ||
** One of the most important normals in his arsenal | ** One of the most important normals in his arsenal, might even be the best | ||
** Relatively fast Swiss army knife normal that might arguably be in the same realm as Ken's | ** Relatively fast Swiss army knife normal that might arguably be in the same realm as Ken's | ||
** Juggle counter of "3" meaning any air reset off this is TDK | ** Juggle counter of "3" meaning any air reset off this is TDK | ||
** As a tick, leaves you in range for Cr. MK and Cl. HK | ** As a tick, leaves you in range for Cr. MK and Cl. HK | ||
** | ** Cancel this into tackle or wheel kick up close to add a few extra dimensions to your pressure | ||
** Even though its 0 on block, most still respect it like its positive anyways | ** Even though its 0 on block, most still respect it like its positive anyways | ||
** Starter for his target combo (MP-HK) | ** Starter for his target combo (MP-HK) | ||
| Line 172: | Line 172: | ||
** Has high priority throughout its active frames also making it one of his strongest AA's | ** Has high priority throughout its active frames also making it one of his strongest AA's | ||
** Less push-back on block than the other shotos | ** Less push-back on block than the other shotos | ||
<br> | |||
'''''Hit and block advantage per active frame:''''' | |||
<br> | |||
<table border="2" cellpadding="5"> | |||
<tr> | |||
== | <td>'''Active frame'''</td> | ||
<td>'''On Block'''</td> | |||
<td>'''On Hit'''</td> | |||
<td>'''Crouch Hit'''</td> | |||
</tr> | |||
<tr> | |||
<td>1st</td> | |||
<td><font color=red>-4</font></td> | |||
<td><font color=red>-2</font></td> | |||
<td>0</td> | |||
</tr> | |||
<tr> | |||
<td>2nd</td> | |||
<td><font color=red>-3</font></td> | |||
<td><font color=red>-1</font></td> | |||
<td><font color=green>+1</font></td> | |||
</tr> | |||
<tr> | |||
<td>3rd</td> | |||
<td><font color=red>-2</font></td> | |||
<td>0</td> | |||
<td><font color=green>+2</font></td> | |||
</tr> | |||
<tr> | |||
<td>4th</td> | |||
<td><font color=red>-1</font></td> | |||
<td><font color=green>+1</font></td> | |||
{{3S Button FAT|link=https://fullmeter.com/fatonline/#/framedata/movedetail/3S/Sean/normal/ | <td><font color=green>+3</font></td> | ||
</tr> | |||
<tr> | |||
<td>5th</td> | |||
<td>0</td> | |||
<td><font color=green>+2</font></td> | |||
<td><font color=green>+4</font></td> | |||
</tr> | |||
<tr> | |||
</table> | |||
[[File:Sean lp.png|500px|frame|right|Max range Cl. HP]] | |||
{{3S Button FAT|link=https://fullmeter.com/fatonline/#/framedata/movedetail/3S/Sean/normal/Close%20HP}} | |||
}} | }} | ||
}} | }} | ||
=====<font style="visibility:hidden; float:right"> | =====<font style="visibility:hidden; float:right">5HP (far)</font>===== | ||
{{MoveData | {{MoveData | ||
|name= | |name=Far HP | ||
|input={{ | |input={{hp}} (far) | ||
|image=( | |image=(seanhp).gif | ||
|data= | |data= | ||
{{AttackData-3S | {{AttackData-3S | ||
|startup= | |startup=9 | ||
|active=4 | |active=4 | ||
|recovery= | |recovery=19 | ||
|onHit=<font color= | |onHit= <font color=red>-5</font> | ||
|onHitCrouch=<font color= | |onHitCrouch= <font color=red>-3</font> | ||
|onBlock=<font color= | |onBlock= <font color=red>-7</font> | ||
|parry= | |parry=H | ||
|damage= | |damage=21 | ||
|stun= | |stun=10 | ||
|description= | |description= | ||
* Self meter gain: Whiff: 0, Block: 1, Hit: 2 | * 12 kara range | ||
* Opponent meter gain: Block/Hit: 0 | * Self meter gain: Whiff: 2, Hit: 11, Block: 6. | ||
** The plus and fast version of St. MK | * Opponent meter gain: Whiff: 0, Hit: 2, Block: 0. | ||
** Can chain into this normal but not after it | ** Called "Rookie Hook" | ||
** Cr. LP is generally better all-around '''''although''''' St. LK has a better down-ward hitbox which is helpful in certain situations | ** Amongst the longest reaching in his tool kit | ||
** Can link SA2 after in close proximity | ** Solid at max range but be careful against short crouchers as they can low profile it through various means | ||
** Suffers from the quirk of building meter like a medium attack rather than a heavy | |||
{{3S Button FAT|link=https://fullmeter.com/fatonline/#/framedata/movedetail/3S/Sean/normal/Stand%20LK}} | ** Can be used to SGGK in tick throw situations | ||
}} | ** Easy to Kara back-throw using this | ||
** Has a slight juggle counter of "3" | |||
<br> | |||
'''''Hit and block advantage per active frame:''''' | |||
<br> | |||
<table border="2" cellpadding="5"> | |||
<tr> | |||
<td>'''Active frame'''</td> | |||
<td>'''On Block'''</td> | |||
<td>'''On Hit'''</td> | |||
<td>'''Crouch Hit'''</td> | |||
</tr> | |||
<tr> | |||
<td>1st</td> | |||
<td><font color=red>-7</font></td> | |||
<td><font color=red>-5</font></td> | |||
<td><font color=red>-3</font></td> | |||
</tr> | |||
<tr> | |||
<td>2nd</td> | |||
<td><font color=red>-6</font></td> | |||
<td><font color=red>-4</font></td> | |||
<td><font color=red>-2</font></td> | |||
</tr> | |||
<tr> | |||
<td>3rd</td> | |||
<td><font color=red>-5</font></td> | |||
<td><font color=red>-3</font></td> | |||
<td><font color=red>-1</font></td> | |||
</tr> | |||
<tr> | |||
<td>4th</td> | |||
<td><font color=red>-4</font></td> | |||
<td><font color=red>-2</font></td> | |||
<td>0</td> | |||
</tr> | |||
<tr> | |||
</table> | |||
{{3S Button FAT|link=https://fullmeter.com/fatonline/#/framedata/movedetail/3S/Sean/normal/Far%20HP}} | |||
}} | |||
}} | |||
=====<font style="visibility:hidden; float:right">5LK</font>===== | |||
{{MoveData | |||
|name=Stand LK | |||
|input={{lk}} | |||
|image=(seanlk).gif | |||
|data= | |||
{{AttackData-3S | |||
|startup=4 | |||
|active=4 | |||
|recovery=7 | |||
|onHit=<font color=green>+2</font> | |||
|onHitCrouch=<font color=green>+2</font> | |||
|onBlock=<font color=green>+2</font> | |||
|parry=A | |||
|damage=5 | |||
|stun=3 | |||
|description= | |||
* Self meter gain: Whiff: 0, Block: 1, Hit: 2 | |||
* Opponent meter gain: Block/Hit: 0 | |||
** The plus and fast version of St. MK | |||
** Can chain into this normal but not after it | |||
** Cr. LP is generally better all-around '''''although''''' St. LK has a better down-ward hitbox which is helpful in certain situations | |||
** Can link SA2 after in close proximity | |||
{{3S Button FAT|link=https://fullmeter.com/fatonline/#/framedata/movedetail/3S/Sean/normal/Stand%20LK}} | |||
}} | |||
}} | }} | ||
| Line 248: | Line 329: | ||
|active=4 | |active=4 | ||
|recovery=15 | |recovery=15 | ||
|onHit=<font color=red> | |onHit=<font color=red>-1</font> | ||
|onBlock=<font color=red> | |onBlock=<font color=red>-2</font> | ||
|onHitCrouch=0 | |onHitCrouch=0 | ||
|parry=A | |parry=A | ||
| Line 263: | Line 344: | ||
** Since its active for decent bit of time, sometimes this normal will hit later making it less negative or even plus situationally | ** Since its active for decent bit of time, sometimes this normal will hit later making it less negative or even plus situationally | ||
** High and low parry-able which means no spam | ** High and low parry-able which means no spam | ||
<br> | |||
'''''Hit and block advantage per active frame:''''' | |||
<br> | |||
<table border="2" cellpadding="5"> | |||
<tr> | |||
<td>'''Active frame'''</td> | |||
<td>'''On Block'''</td> | |||
<td>'''On Hit'''</td> | |||
<td>'''Crouch Hit'''</td> | |||
</tr> | |||
<tr> | |||
<td>1st to 2nd</td> | |||
<td><font color=red>-2</font></td> | |||
<td><font color=red>-1</font></td> | |||
<td>0</td> | |||
</tr> | |||
<tr> | |||
<td>3rd</td> | |||
<td><font color=red>-1</font></td> | |||
<td>0</td> | |||
<td><font color=green>+1</font></td> | |||
</tr> | |||
<tr> | |||
<td>4th</td> | |||
<td>0</td> | |||
<td><font color=green>+1</font></td> | |||
<td><font color=green>+2</font></td> | |||
</tr> | |||
<tr> | |||
</table> | |||
{{3S Button FAT|link=https://fullmeter.com/fatonline/#/framedata/movedetail/3S/Sean/normal/Stand%20MK}} | {{3S Button FAT|link=https://fullmeter.com/fatonline/#/framedata/movedetail/3S/Sean/normal/Stand%20MK}} | ||
}} | }} | ||
| Line 277: | Line 390: | ||
|active=5 | |active=5 | ||
|recovery=10 | |recovery=10 | ||
|onHit=<font color=green> | |onHit=<font color=green>+4</font> | ||
|onHitCrouch=<font color=green> | |onHitCrouch=<font color=green>+6</font> | ||
|onBlock=<font color=green> | |onBlock=<font color=green>+2</font> | ||
|parry=H | |parry=H | ||
|damage=25 | |damage=25 | ||
| Line 292: | Line 405: | ||
** Has a massive range recognition, even more than Cl. HP | ** Has a massive range recognition, even more than Cl. HP | ||
** 15f cancel window into specials/super | ** 15f cancel window into specials/super | ||
** Cl. HK in conjunction with Cr. MK and walk up Kara throw allows him to somewhat mimic Chun's wakeup pressure once he has his super | ** Cl. HK in conjunction with Cr. MK and walk up Kara throw allows him to somewhat mimic Chun's wakeup pressure once he has his super | ||
** Can SGGK off this normal up close | ** Can SGGK off this normal up close | ||
** One of the main wake-up abare normals once you get the timing down but be careful cause your opponent can shimmy out of range in which you'll get far HK instead and die | ** One of the main wake-up abare normals once you get the timing down but be careful cause your opponent can shimmy out of range in which you'll get far HK instead and die | ||
[[File:Sean hkrecog.png|frame|right|Max range Cl. HK]] | <br> | ||
{{3S Button FAT|link=https://fullmeter.com/fatonline/#/framedata/movedetail/3S/Sean/normal/Close%20HK}} | '''''Hit and block advantage per active frame:''''' | ||
}} | <br> | ||
}} | <table border="2" cellpadding="5"> | ||
<tr> | |||
=====<font style="visibility:hidden; float:right">5HK (far)</font>===== | <td>'''Active frame'''</td> | ||
{{MoveData | <td>'''On Block'''</td> | ||
|name=Far HK | <td>'''On Hit'''</td> | ||
|input={{hk}} (far) | <td>'''Crouch Hit'''</td> | ||
|image=(seanfhk).gif | </tr> | ||
|data= | <tr> | ||
{{AttackData-3S | <td>1st to 2nd</td> | ||
|startup=7 | <td><font color=green>+2</font></td> | ||
<td><font color=green>+4</font></td> | |||
<td><font color=green>+6</font></td> | |||
</tr> | |||
<tr> | |||
<td>3rd</td> | |||
<td><font color=green>+3</font></td> | |||
<td><font color=green>+5</font></td> | |||
<td><font color=green>+7</font></td> | |||
</tr> | |||
<tr> | |||
<td>4th</td> | |||
<td><font color=green>+4</font></td> | |||
<td><font color=green>+6</font></td> | |||
<td><font color=green>+8</font></td> | |||
</tr> | |||
<tr> | |||
<td>5th</td> | |||
<td><font color=green>+5</font></td> | |||
<td><font color=green>+7</font></td> | |||
<td><font color=green>+9</font></td> | |||
</tr> | |||
<tr> | |||
</table> | |||
<br> | |||
[[File:Sean hkrecog.png|frame|right|Max range Cl. HK]] | |||
{{3S Button FAT|link=https://fullmeter.com/fatonline/#/framedata/movedetail/3S/Sean/normal/Close%20HK}} | |||
}} | |||
}} | |||
=====<font style="visibility:hidden; float:right">5HK (far)</font>===== | |||
{{MoveData | |||
|name=Far HK | |||
|input={{hk}} (far) | |||
|image=(seanfhk).gif | |||
|data= | |||
{{AttackData-3S | |||
|startup=7 | |||
|active=4 | |active=4 | ||
|recovery=26 | |recovery=26 | ||
|onHit=<font color=red> | |onHit=<font color=red>-7</font> | ||
|onHitCrouch=<font color=red> | |onHitCrouch=<font color=red>-5</font> | ||
|onBlock=<font color=red> | |onBlock=<font color=red>-9</font> | ||
|parry=H | |parry=H | ||
|damage=21 | |damage=21 | ||
| Line 348: | Line 497: | ||
|active=7 | |active=7 | ||
|recovery=25 | |recovery=25 | ||
|onHit=<font color=red> | |onHit=<font color=red>-4</font> | ||
|onHitCrouch=<font color=red> | |onHitCrouch=<font color=red>-2</font> | ||
|onBlock=<font color=red> | |onBlock=<font color=red>-6</font> | ||
|parry=H | |parry=H | ||
|damage=22 | |damage=22 | ||
| Line 393: | Line 542: | ||
** Same meter build quirk as Far HK/HP | ** Same meter build quirk as Far HK/HP | ||
** The best quality of this normal is that it leads to TDK if it hits | ** The best quality of this normal is that it leads to TDK if it hits | ||
<br> | <br> | ||
'''''Hit and block advantage per active frame:''''' | |||
<br> | <br> | ||
<br> | <table border="2" cellpadding="5"> | ||
<tr> | |||
==== Crouching Normals ==== | <td>'''Active frame'''</td> | ||
=====<font style="visibility:hidden; float:right">2LP</font>===== | <td>'''On Block'''</td> | ||
{{MoveData | <td>'''On Hit'''</td> | ||
|name=Crouch LP | <td>'''Crouch Hit'''</td> | ||
|input={{d}}+{{lp}} | </tr> | ||
|image=(seanclp).gif | <tr> | ||
<td>1st and 3rd</td> | |||
<td><font color=red>-5</font></td> | |||
<td><font color=green>+12</font></td> | |||
<td><font color=green>+12</font></td> | |||
</tr> | |||
<tr> | |||
<td>2nd</td> | |||
<td><font color=red>-4</font></td> | |||
<td><font color=green>+13</font></td> | |||
<td><font color=green>+13</font></td> | |||
</tr> | |||
<tr> | |||
<td>4th</td> | |||
<td><font color=red>-4</font></td> | |||
<td><font color=green>+11</font></td> | |||
<td><font color=green>+11</font></td> | |||
</tr> | |||
<tr> | |||
<td>5th</td> | |||
<td><font color=red>-3</font></td> | |||
<td><font color=green>+12</font></td> | |||
<td><font color=green>+12</font></td> | |||
</tr> | |||
<tr> | |||
</table> | |||
{{3S Button FAT|link=https://fullmeter.com/fatonline/#/framedata/movedetail/3S/Sean/normal/Rolling%20Sobat}} | |||
}} | |||
}} | |||
<br> | |||
<br> | |||
<br> | |||
==== Crouching Normals ==== | |||
=====<font style="visibility:hidden; float:right">2LP</font>===== | |||
{{MoveData | |||
|name=Crouch LP | |||
|input={{d}}+{{lp}} | |||
|image=(seanclp).gif | |||
|data= | |data= | ||
{{AttackData-3S | {{AttackData-3S | ||
| Line 426: | Line 614: | ||
** Less push-back than Cr. LK but more than St. LP | ** Less push-back than Cr. LK but more than St. LP | ||
** High and low parryable | ** High and low parryable | ||
{{3S Button FAT|link=https://fullmeter.com/fatonline/#/framedata/movedetail/3S/Sean/normal/Crouch%20LP}} | <br> | ||
}} | '''''Hit and block advantage per active frame:''''' | ||
<br> | |||
<table border="2" cellpadding="5"> | |||
<tr> | |||
<td>'''Active frame'''</td> | |||
<td>'''On Block'''</td> | |||
<td>'''On Hit'''</td> | |||
<td>'''Crouch Hit'''</td> | |||
</tr> | |||
<tr> | |||
<td>1st and 2nd</td> | |||
<td><font color=green>+3</font></td> | |||
<td><font color=green>+3</font></td> | |||
<td><font color=green>+3</font></td> | |||
</tr> | |||
<tr> | |||
<td>3rd</td> | |||
<td><font color=green>+4</font></td> | |||
<td><font color=green>+4</font></td> | |||
<td><font color=green>+4</font></td> | |||
</tr> | |||
<tr> | |||
</table> | |||
<br> | |||
{{3S Button FAT|link=https://fullmeter.com/fatonline/#/framedata/movedetail/3S/Sean/normal/Crouch%20LP}} | |||
}} | |||
}} | }} | ||
| Line 457: | Line 670: | ||
** Has DED potential (just be careful cause its easy to get a DP instead of super if inputs aren't clean) | ** Has DED potential (just be careful cause its easy to get a DP instead of super if inputs aren't clean) | ||
** Like Cr. LP, its high/low parry-able | ** Like Cr. LP, its high/low parry-able | ||
{{3S Button FAT|link=https://fullmeter.com/fatonline/#/framedata/movedetail/3S/Sean/normal/Crouch%20MP}} | <br> | ||
}} | '''''Hit and block advantage per active frame:''''' | ||
<br> | |||
<table border="2" cellpadding="5"> | |||
<tr> | |||
<td>'''Active frame'''</td> | |||
<td>'''On Block'''</td> | |||
<td>'''On Hit'''</td> | |||
<td>'''Crouch Hit'''</td> | |||
</tr> | |||
<tr> | |||
<td>1st and 2nd</td> | |||
<td><font color=green>+3</font></td> | |||
<td><font color=green>+4</font></td> | |||
<td><font color=green>+5</font></td> | |||
</tr> | |||
<tr> | |||
<td>3rd</td> | |||
<td><font color=green>+4</font></td> | |||
<td><font color=green>+5</font></td> | |||
<td><font color=green>+6</font></td> | |||
</tr> | |||
<tr> | |||
<td>4th</td> | |||
<td><font color=green>+5</font></td> | |||
<td><font color=green>+6</font></td> | |||
<td><font color=green>+7</font></td> | |||
</table> | |||
<br> | |||
{{3S Button FAT|link=https://fullmeter.com/fatonline/#/framedata/movedetail/3S/Sean/normal/Crouch%20MP}} | |||
}} | |||
}} | }} | ||
| Line 485: | Line 727: | ||
** Like Far HK, max range Cr. HP is difficult for a portion of the cast to punish due to enormous pushback on block | ** Like Far HK, max range Cr. HP is difficult for a portion of the cast to punish due to enormous pushback on block | ||
** Has DED potential | ** Has DED potential | ||
{{3S Button FAT|link=https://fullmeter.com/fatonline/#/framedata/movedetail/3S/Sean/normal/Crouch%20HP}} | <br> | ||
}} | '''''Hit and block advantage per active frame:''''' | ||
}} | <br> | ||
<table border="2" cellpadding="5"> | |||
<tr> | |||
<td>'''Active frame'''</td> | |||
<td>'''On Block'''</td> | |||
<td>'''On Hit'''</td> | |||
<td>'''Crouch Hit'''</td> | |||
</tr> | |||
<tr> | |||
<td>1st</td> | |||
<td><font color=red>-9</font></td> | |||
<td><font color=red>-7</font></td> | |||
<td><font color=red>-5</font></td> | |||
</tr> | |||
<tr> | |||
<td>2nd</td> | |||
<td><font color=red>-8</font></td> | |||
<td><font color=red>-6</font></td> | |||
<td><font color=red>-4</font></td> | |||
</tr> | |||
<tr> | |||
<td>3rd</td> | |||
<td><font color=red>-7</font></td> | |||
<td><font color=red>-5</font></td> | |||
<td><font color=red>-3</font></td> | |||
</tr> | |||
<tr> | |||
<td>4th</td> | |||
<td><font color=red>-6</font></td> | |||
<td><font color=red>-4</font></td> | |||
<td><font color=red>-2</font></td> | |||
</tr> | |||
<tr> | |||
<td>5th</td> | |||
<td><font color=red>-5</font></td> | |||
<td><font color=red>-3</font></td> | |||
<td><font color=red>-1</font></td> | |||
</tr> | |||
<tr> | |||
</table> | |||
<br> | |||
{{3S Button FAT|link=https://fullmeter.com/fatonline/#/framedata/movedetail/3S/Sean/normal/Crouch%20HP}} | |||
}} | |||
}} | |||
=====<font style="visibility:hidden; float:right">2LK</font>===== | =====<font style="visibility:hidden; float:right">2LK</font>===== | ||
| Line 513: | Line 798: | ||
** Same startup as Cl. HK means that there is no "block the slower high or low" for your opponent to exploit | ** Same startup as Cl. HK means that there is no "block the slower high or low" for your opponent to exploit | ||
** Cr. LK into Cl. HK frame-trap is very strong when combined with Cr. LK delayed/step forward Cr. LK x 2 and Cr. LK tick kara throw | ** Cr. LK into Cl. HK frame-trap is very strong when combined with Cr. LK delayed/step forward Cr. LK x 2 and Cr. LK tick kara throw | ||
{{3S Button FAT|link=https://fullmeter.com/fatonline/#/framedata/movedetail/3S/Sean/normal/Crouch%20LK}} | <br> | ||
'''''Hit and block advantage per active frame:''''' | |||
<br> | |||
<table border="2" cellpadding="5"> | |||
<tr> | |||
<td>'''Active frame'''</td> | |||
<td>'''On Block'''</td> | |||
<td>'''On Hit'''</td> | |||
<td>'''Crouch Hit'''</td> | |||
</tr> | |||
<tr> | |||
<td>1st and 2nd</td> | |||
<td><font color=green>+1</font></td> | |||
<td><font color=green>+1</font></td> | |||
<td><font color=green>+1</font></td> | |||
</tr> | |||
<tr> | |||
<td>3rd</td> | |||
<td><font color=green>+2</font></td> | |||
<td><font color=green>+2</font></td> | |||
<td><font color=green>+2</font></td> | |||
</tr> | |||
<tr> | |||
</table> | |||
<br> | |||
{{3S Button FAT|link=https://fullmeter.com/fatonline/#/framedata/movedetail/3S/Sean/normal/Crouch%20LK}} | |||
}} | }} | ||
}} | }} | ||
| Line 579: | Line 889: | ||
** '''Has''' to be done at max range all the time or a great deal of the cast will kill you for using it | ** '''Has''' to be done at max range all the time or a great deal of the cast will kill you for using it | ||
** Another one of his meter-builders on block | ** Another one of his meter-builders on block | ||
** Interchangeable with Cr. MK in regards to Kara's | ** Interchangeable with Cr. MK in regards to Kara's | ||
<br> | |||
'''''Hit and block advantage per active frame:''''' | |||
<br> | |||
<table border="2" cellpadding="5"> | |||
<tr> | |||
<td>'''Active frame'''</td> | |||
<td>'''On Block'''</td> | |||
<td>'''On Hit'''</td> | |||
<td>'''Crouch Hit'''</td> | |||
</tr> | |||
<tr> | |||
<td>1st through 3rd</td> | |||
<td><font color=red>-16</font></td> | |||
<td>KND</td> | |||
<td>KND</td> | |||
</tr> | |||
<tr> | |||
<td>3rd through 5th</td> | |||
<td><font color=red>-13</font></td> | |||
<td>KND</td> | |||
<td>KND</td> | |||
</tr> | |||
<tr> | |||
</table> | |||
<br> | |||
{{3S Button FAT|link=https://fullmeter.com/fatonline/#/framedata/movedetail/3S/Sean/normal/Crouch%20HK}} | {{3S Button FAT|link=https://fullmeter.com/fatonline/#/framedata/movedetail/3S/Sean/normal/Crouch%20HK}} | ||
| Line 651: | Line 986: | ||
|active=5 | |active=5 | ||
|parry=H | |parry=H | ||
|onHit=<font color=red>-2</font> to <font color=green>+10</font> | |||
|onBlock=<font color=red>-2</font> to <font color=green>+10</font> | |||
|damage=16 | |damage=16 | ||
|stun=9 | |stun=9 | ||
| Line 656: | Line 993: | ||
* Self meter gain: Whiff: 2, Hit: 11, Block: 6. | * Self meter gain: Whiff: 2, Hit: 11, Block: 6. | ||
* Opponent meter gain: Whiff: 0, Hit: 2, Block: 0. | * Opponent meter gain: Whiff: 0, Hit: 2, Block: 0. | ||
** Same hitbox size as J. HP but is located mainly above his arm instead of below | |||
** One of his main A2A's considering how active it is and how fast it is | |||
** Has a weird quirk with how it hits the opponent; It hits them like an actual overhead as opposed to a normal high placed attack on their sprite | |||
{{3S Button FAT|link=https://fullmeter.com/fatonline/#/framedata/movedetail/3S/Sean/normal/Jump%20MP}} | {{3S Button FAT|link=https://fullmeter.com/fatonline/#/framedata/movedetail/3S/Sean/normal/Jump%20MP}} | ||
}} | }} | ||
| Line 669: | Line 1,009: | ||
|startup=7 | |startup=7 | ||
|active=3 | |active=3 | ||
|onHit=<font color=red>-4</font> to <font color=green>+10</font> | |||
|onBlock=<font color=red>-4</font> to <font color=green>+10</font> | |||
|parry=H | |parry=H | ||
|damage=23 | |damage=23 | ||
| Line 675: | Line 1,017: | ||
* Self meter gain: Whiff: 3, Hit: 19, Block: 10. | * Self meter gain: Whiff: 3, Hit: 19, Block: 10. | ||
* Opponent meter gain: Whiff: 0, Hit: 4, Block: 0. | * Opponent meter gain: Whiff: 0, Hit: 4, Block: 0. | ||
** Has the distinction of dealing the most stun of any of Sean's normals | |||
** Strong as an air-to-air with great horizontal hitboxes | |||
** Can lead to TDK when done later in the jump | |||
** Timing it to hit vs shorter characters is difficult | |||
** Won't hit any character not named Hugo crouching | |||
{{3S Button FAT|link=https://fullmeter.com/fatonline/#/framedata/movedetail/3S/Sean/normal/Jump%20HP%20(Neutral)}} | {{3S Button FAT|link=https://fullmeter.com/fatonline/#/framedata/movedetail/3S/Sean/normal/Jump%20HP%20(Neutral)}} | ||
}} | }} | ||
| Line 688: | Line 1,036: | ||
|startup=6 | |startup=6 | ||
|active=4 | |active=4 | ||
|onHit=<font color=red>-4</font> to <font color=green>+10</font> | |||
|onBlock=<font color=red>-4</font> to <font color=green>+10</font> | |||
|parry=H | |parry=H | ||
|damage=23 | |damage=23 | ||
| Line 694: | Line 1,044: | ||
* Self meter gain: Whiff: 3, Hit: 19, Block: 10. | * Self meter gain: Whiff: 3, Hit: 19, Block: 10. | ||
* Opponent meter gain: Whiff: 0, Hit: 4, Block: 0. | * Opponent meter gain: Whiff: 0, Hit: 4, Block: 0. | ||
** One of the main jump in normals you'll be using when doing a jump in combo | |||
** Strong down-ward hitboxes that is beneath his arm | |||
** Can be used as an A2A but Sean has better normals suited for that purpose | |||
** Has to hit really late in the jump in order to link Cr. MK or Sweep | |||
{{3S Button FAT|link=https://fullmeter.com/fatonline/#/framedata/movedetail/3S/Sean/normal/Jump%20HP}} | {{3S Button FAT|link=https://fullmeter.com/fatonline/#/framedata/movedetail/3S/Sean/normal/Jump%20HP}} | ||
}} | }} | ||
| Line 917: | Line 1,271: | ||
|active=8 | |active=8 | ||
|recovery=7 | |recovery=7 | ||
|onHit=<font color=red>-1</font> to <font color=green>+7</font> | |||
|onHitCrouch=0 to <font color=green>+8</font> | |||
|onBlock=<font color=red>-6</font> to 0 | |||
|parry=H | |parry=H | ||
|damage=7 | |damage=7 | ||
|stun=3 | |stun=3 | ||
|description= | |description= | ||
* Self meter gain: Whiff: 0, Hit: 2, Block: 1. | |||
* Opponent meter gain: Whiff: 0, Hit: 0, Block: 0. | |||
** Standard UOH | |||
** Can be used to hop over troubling lows in neutral and in some cases confirm SA3 (against a character like Chun) | |||
** Kara makes UOH go around the range of a max range sweep | |||
** Yes it is possible to link SA1 from a UOH but you need at least a +4 or 5 one just to be safe | |||
** Meaty UOH into Cl. HK is ridiculous damage | |||
** Don't land crouching as it adds a frame of recovery (instead of -5 on block you'll be -6) so down parry instead and just walk forward | |||
** Juggle counter of "1" for some reason so if it hits them out of the air, its a free TDK | |||
{{3S Button FAT|link=https://fullmeter.com/fatonline/#/framedata/movedetail/3S/Sean/normal/Straight%20Hit}} | {{3S Button FAT|link=https://fullmeter.com/fatonline/#/framedata/movedetail/3S/Sean/normal/Straight%20Hit}} | ||
}} | }} | ||
| Line 927: | Line 1,293: | ||
<br> | <br> | ||
<br> | <br> | ||
==== Taunt ==== | ==== Taunt ==== | ||
=====<font style="visibility:hidden; float:right">HPHK</font>===== | =====<font style="visibility:hidden; float:right">HPHK</font>===== | ||
| Line 950: | Line 1,317: | ||
** Ball is active for around 22-24(?) frames after it leaves his hand | ** Ball is active for around 22-24(?) frames after it leaves his hand | ||
** Has an insane juggle counter of "1" which allows Sean to combo DP if they mess up trying to escape or let it reset them into TDK | ** Has an insane juggle counter of "1" which allows Sean to combo DP if they mess up trying to escape or let it reset them into TDK | ||
** Enables higher meter-gain than normal | ** Enables higher meter-gain than normal and meter-less confirms into Dragon Smash | ||
** Can be thrown in various ways and timings (example: Ball hits meaty/Sean hits after or Ball thrown/Sean hits meaty, etc.) | ** Can be thrown in various ways and timings (example: Ball hits meaty/Sean hits after or Ball thrown/Sean hits meaty, etc.) | ||
** The only way he can combo into EX Wheel or EX Tackle | ** The only way he can combo into EX Wheel or EX Tackle | ||
** Taunt -> St. LP -> ball hit is '''extremely positive''' on hit/block/parry | ** Taunt -> St. LP -> ball hit is '''extremely positive''' on hit/block/parry | ||
** Lastly, it does chip damage | |||
The ball itself has a few special quirks to it: | The ball itself has a few special quirks to it: | ||
| Line 1,131: | Line 1,499: | ||
|active=4 | |active=4 | ||
|recovery=21 | |recovery=21 | ||
|onHit=<font color=red> | |onHit=<font color=red>-5</font> | ||
|onHitCrouch=<font color=red>-5</font> ''(forces stand)'' | |onHitCrouch=<font color=red>-5</font> ''(forces stand)'' | ||
<font color=red>-3</font> ''If first hit whiffs'' | <font color=red>-3</font> ''If first hit whiffs'' | ||
| Line 1,156: | Line 1,524: | ||
|active=8 | |active=8 | ||
|recovery=21 | |recovery=21 | ||
|onHit=<font color=red> | |onHit=<font color=red>-4</font> | ||
|onHitCrouch=<font color=red>-4</font> ''(forces stand)'' | |onHitCrouch=<font color=red>-4</font> ''(forces stand)'' | ||
<font color=red>-2</font> ''If first hit whiffs'' | <font color=red>-2</font> ''If first hit whiffs'' | ||
| Line 1,177: | Line 1,545: | ||
|active=13 | |active=13 | ||
|recovery=21 | |recovery=21 | ||
|onHit=<font color=red> | |onHit=<font color=red>-4</font> | ||
|onHitCrouch=<font color=red>-4</font> ''(forces stand)'' | |onHitCrouch=<font color=red>-4</font> ''(forces stand)'' | ||
<font color=red>-2</font> ''If first hit whiffs'' | <font color=red>-2</font> ''If first hit whiffs'' | ||
| Line 1,199: | Line 1,567: | ||
|active=11 | |active=11 | ||
|recovery=17 | |recovery=17 | ||
|onHit=<font color=red> | |onHit=<font color=red>-1</font> | ||
|onHitCrouch=<font color=red>-1</font> ''(forces stand)'' | |onHitCrouch=<font color=red>-1</font> ''(forces stand)'' | ||
<font color=green>+1</font> ''If first hit whiffs'' | <font color=green>+1</font> ''If first hit whiffs'' | ||
| Line 1,342: | Line 1,710: | ||
|active=6 | |active=6 | ||
|recovery=36 | |recovery=36 | ||
|onBlock=<font color=red> | |onBlock=<font color=red>-24</font> | ||
|parry=A | |parry=A | ||
|damage=23 | |damage=23 | ||
| Line 1,366: | Line 1,734: | ||
|active=6 | |active=6 | ||
|recovery=36 | |recovery=36 | ||
|onBlock=<font color=red> | |onBlock=<font color=red>-30</font> | ||
|parry=A | |parry=A | ||
|damage=23 | |damage=23 | ||
| Line 1,386: | Line 1,754: | ||
|active=9 | |active=9 | ||
|recovery=42 | |recovery=42 | ||
|onBlock=<font color=red> | |onBlock=<font color=red>-34</font> | ||
|parry=A | |parry=A | ||
|damage=23 | |damage=23 | ||
| Line 1,406: | Line 1,774: | ||
|active=12 | |active=12 | ||
|recovery=42 | |recovery=42 | ||
|onBlock=<font color=red> | |onBlock=<font color=red>-37</font> | ||
|parry=A | |parry=A | ||
|damage=31 | |damage=31 | ||
| Line 1,442: | Line 1,810: | ||
|startup=2 | |startup=2 | ||
|recovery=61 | |recovery=61 | ||
|onBlock=-29 | |onBlock=<font color=red>-29</font> | ||
|parry=H | |parry=H | ||
|damage=39 | |damage=39 | ||
| Line 1,448: | Line 1,816: | ||
|onHit=KND | |onHit=KND | ||
|description= | |description= | ||
* Sean's very own hadouken | |||
* 2nd shortest meter length in the game | |||
* 1 frame of complete invincibility on start-up | |||
* AA Cl. MP x SA1 is a true combo and an important one | |||
* Gets an extra 5% damage when it hits crouching so Cl. HK x SA1 on a down parry guesser is taking off around 45% | |||
* Beats 1-hit projectiles, cancels out 2-hit projectiles and takes off 3 hits from multi-hitting projectiles (like Yagyou) | |||
* Max range Cr. HP x SA1 on block is annoying to punish for some characters like Gouki and Remy | |||
* Can confirm into from the important normals | |||
* Useable in juggle/trade combos for respectable damage | |||
* SA1 makes trading with him threatening as double sa1 is the same damage as a raw SA3 | |||
* Run up the EX's, he gets 5 of them at max meter | |||
* Takes time to travel which means it can't punish things you'd think it'd be able to | |||
* Stop trying to throw this out raw like Gouki sa1 it is not that kind of super | |||
* Triple Hadou burst is possible vs Urien and Oro | |||
<br> | |||
For more in-depth information, see: ''<big> '''[https://www.youtube.com/watch?v=iUxu70_6K1Q&t=13s SA1 breakdown]'''</big> | |||
{{3S Button FAT|link=https://fullmeter.com/fatonline/#/framedata/movedetail/3S/Sean/normal/Hadou%20Burst}} | {{3S Button FAT|link=https://fullmeter.com/fatonline/#/framedata/movedetail/3S/Sean/normal/Hadou%20Burst}} | ||
}} | }} | ||
| Line 1,462: | Line 1,848: | ||
|active=36 | |active=36 | ||
|recovery=36 | |recovery=36 | ||
|onBlock=-43 | |onBlock=<font color=red>-43</font> | ||
|parry=A | |parry=A | ||
|damage=38 | |damage=38 | ||
|onHit=KND | |onHit=KND | ||
|description= | |description= | ||
* Dragon punch super | |||
* 10 frames of complete invincibility | |||
* 2 moderate length bars which means 2 good touches can kill your opponent | |||
* 4 EX's in total | |||
* Double SA2 in the corner and various other resets to apply pressure or knockdowns to get damage | |||
* Using this means being content with having to constantly get in to get big damage | |||
* Let's your opponent know be mindful of their jumps as any cancellable button into SA2 will hit as an AA if it hits properly | |||
* Fewer confirms than the other 2 supers | |||
* There are bunches of set-ups possible after landing SA2 (left/rights, taunt, roll, etc) | |||
* No close range denjin setups allowed | |||
* Only super for chipping out | |||
<br> | |||
For more in-depth information, see:''<big> '''[https://www.youtube.com/watch?v=N_wrLHkpdSA SA2 breakdown Part 1]'''</big> and ''<big> '''[https://www.youtube.com/watch?v=AQiC1yMQafo Part 2]'''</big> | |||
{{3S Button FAT|link=https://fullmeter.com/fatonline/#/framedata/movedetail/3S/Sean/normal/Shoryuu%20Cannon}} | {{3S Button FAT|link=https://fullmeter.com/fatonline/#/framedata/movedetail/3S/Sean/normal/Shoryuu%20Cannon}} | ||
}} | }} | ||
| Line 1,481: | Line 1,880: | ||
|active=14 | |active=14 | ||
|recovery=53 | |recovery=53 | ||
|onBlock=-31 | |onBlock=<font color=red>-31</font> | ||
|parry=A | |parry=A | ||
|damage=76 | |damage=76 | ||
|stun= | |stun=10 | ||
|onHit=KND | |onHit=KND | ||
|description= | |description= | ||
* Rush-Ranbu super | |||
* 12 frames of complete invincibility + 4 frames of throw invincibility | |||
** The invincibility goes away once he starts hitting | |||
* No projectiles in the mid-range, no big whiffs, and no truly unsafe moves allowed | |||
* Can lead to taunt setups against certain characters | |||
* Confirms off of the important buttons like SA1 | |||
* Only 3 EX's which means weigh your options carefully | |||
* When it trades with a projectile, you're plus enough usually to link a sweep after | |||
* Forced crouching recovery | |||
<br> | |||
For more in-depth information, see:''<big> '''[https://www.youtube.com/watch?v=XF95arCOOpY&t=40s SA3 breakdown]'''</big> | |||
{{3S Button FAT|link=https://fullmeter.com/fatonline/#/framedata/movedetail/3S/Sean/normal/Hyper%20Tornado}} | {{3S Button FAT|link=https://fullmeter.com/fatonline/#/framedata/movedetail/3S/Sean/normal/Hyper%20Tornado}} | ||
}} | }} | ||
Latest revision as of 18:10, 2 February 2025
Introduction
Sean is a young, prideful amateur martial artist from Brazil. He idolizes Ken, eventually becoming Ken's student and seeking to prove his worth as a fighter. Sean first appears in Street Fighter III: New Generation.
Sean is perhaps the most efficient definition of an underrated character in the history of fighting games. In the 2nd version of Street Fighter III, 2nd Impact, he was pretty much totally broken, doing tons of damage off of his lengthy combo strings. In response to this, Capcom did the responsible thing and made him an original character, as opposed to a black Ken in a yellow gi.
Well, they did it a little too well.
Other than being extremely hard to use and situational because of his hit-box placement and frame advantage (Dragon Smash's hit-box is located over his head), 3s makes Sean much more of a defensive counter character. When you play as him you have to understand that he does have a lot of good points, such as his MP-HK target combo, Cl.HK/Shoto normals, EX Tornado, and his supers. He trades pretty well if used properly with the right SA's against the right match-ups. He also has an assortment of AAs to choose from.
| Strengths | Weaknesses |
|---|---|
|
|
| Sean #3S_SE | |
|---|---|
| Vitals | |
| Life Points | 1120 |
| Stun Points | 64 |
| Super Art Stock/Size | |
| SA1 | 3/72 |
| SA2 | 2/96 |
| SA3 | 1/120 |
| Ground Movement | |
| Forward Dash duration/distance | 13 (17) (112px) |
| Back Dash duration/distance | 15 (54px) |
| Jumping | |
| Back Jump duration | 41(4+36+1) |
| Neutral Jump duration | 37(4+32+1) |
| Forward Jump duration | 38(4+33+1) |
| Back Super Jump duration | 52(7+44+1) |
| Neutral Super Jump duration | 52(7+44+1) |
| Forward Super Jump duration | 52(7+44+1) |
| Wake up | |
| Wake up duration | 77 |
| Quick rise duration | 50 |
}}
| 3S Frame Data Glossary | |
|---|---|
| Active |
How many frames a move remains active (can hurt opponents) for. Consecutive sets of active frames on a multi-hit move are separated by an asterisk (ex: 3*5). If there is a gap between sets of active frames, the gap is denoted by a number in parentheses (ex: 2(4)2) |
| Attack |
Attack level is L for low attacks (must be blocked crouching), H is for High attacks (which can be blocked high or low) and M for overhead (must be blocked standing). T is for throw attacks (which cannot be blocked). |
| Cancel options |
Available cancel options.
|
| Damage |
Attack damage on hit in life points. Notation may denote multi-hit or "sweet spot" damage values on certain frames. |
| Hit/Block |
These are frame advantage values when the attack hits or is blocked. If the number is positive, then the move will end before the defender can act again. If the number is negative, the defender will be able to act before the attacker and maybe even punish. D refers to knockdown on hit. "Cr. Hit" is an additional frame advantage value denoting if the advantage on hit changes when the defender is being hit while crouching. |
| Kara Range |
Almost all normal attacks can be canceled into a special or a multi-button command within three frames of startup. During that time, some attacks will shift position forward or backward and affect the reach of the special or command accordingly. This is denoted in pixels of range. There are a handful of moves in the game that can be kara-canceled after this initial window and will be denoted as a late kara-cancel. |
| Link |
A combo that is performed by inputting the second move after the first move has completely recovered (as opposed to cancelling the first move's animation). In 3S, the final frame of a move's hitstun allows a character to block a normal or special move, as well as some projectile supers. Therefore, an attack's frame advantage must be 2 frames greater than the followup move's startup in order to link. Ex: a +6 normal can link into a 4f normal/special, or a 5f super. |
| Parry |
This field will show a value of A if the attack can be parried standing or crouching, H if it must be parried standing or L if it must be parried crouching. |
| Recovery |
How many frames it takes for a move to finish after it's been active. |
| Startup |
How many frames it takes before the move becomes 'active' or has a hitbox. 3S uses classic startup notation, which does not include the first active frame. A move with 3 startup becomes active on frame 4. |
| Stun |
Amount of stun added to the opponent's stun bar on hit. |
| Throw range |
Range in pixels from the center of the character to the center of the opponent which allows a grab to connect. |
Frame Data
Standing Normals
5LP
5MP (cl)
5MP (far)
| Startup | Active | Recovery | Block | Hit | Cr. Hit | Damage | Stun | Kara | Guard Level | Parry Level |
|---|---|---|---|---|---|---|---|---|---|---|
| 5 | 4 | 13 | 0 | +1 | +2 | 14 | 11 | - | - | H |
| Cancel Options | Self Meter Gain | Whiff | Hit | Block / Tech | Opponent Meter Gain | Hit | Block / Tech | |||
| - | - | - | - | - | - | |||||
| ||||||||||
5HP (cl)
| Startup | Active | Recovery | Block | Hit | Cr. Hit | Damage | Stun | Kara | Guard Level | Parry Level | ||||||||||||||||||||||||
|---|---|---|---|---|---|---|---|---|---|---|---|---|---|---|---|---|---|---|---|---|---|---|---|---|---|---|---|---|---|---|---|---|---|---|
| 5 | 5 | 15 | -4 | -2 | 0 | 21 | 13 | - | - | H | ||||||||||||||||||||||||
| Cancel Options | Self Meter Gain | Whiff | Hit | Block / Tech | Opponent Meter Gain | Hit | Block / Tech | |||||||||||||||||||||||||||
| - | - | - | - | - | - | |||||||||||||||||||||||||||||
| ||||||||||||||||||||||||||||||||||
5HP (far)
| Startup | Active | Recovery | Block | Hit | Cr. Hit | Damage | Stun | Kara | Guard Level | Parry Level | ||||||||||||||||||||
|---|---|---|---|---|---|---|---|---|---|---|---|---|---|---|---|---|---|---|---|---|---|---|---|---|---|---|---|---|---|---|
| 9 | 4 | 19 | -7 | -5 | -3 | 21 | 10 | - | - | H | ||||||||||||||||||||
| Cancel Options | Self Meter Gain | Whiff | Hit | Block / Tech | Opponent Meter Gain | Hit | Block / Tech | |||||||||||||||||||||||
| - | - | - | - | - | - | |||||||||||||||||||||||||
| ||||||||||||||||||||||||||||||
5LK
| Startup | Active | Recovery | Block | Hit | Cr. Hit | Damage | Stun | Kara | Guard Level | Parry Level |
|---|---|---|---|---|---|---|---|---|---|---|
| 4 | 4 | 7 | +2 | +2 | +2 | 5 | 3 | - | - | A |
| Cancel Options | Self Meter Gain | Whiff | Hit | Block / Tech | Opponent Meter Gain | Hit | Block / Tech | |||
| - | - | - | - | - | - | |||||
| ||||||||||
5MK
| Startup | Active | Recovery | Block | Hit | Cr. Hit | Damage | Stun | Kara | Guard Level | Parry Level | ||||||||||||||||
|---|---|---|---|---|---|---|---|---|---|---|---|---|---|---|---|---|---|---|---|---|---|---|---|---|---|---|
| 6 | 4 | 15 | -2 | -1 | 0 | 16 | 5 | - | - | A | ||||||||||||||||
| Cancel Options | Self Meter Gain | Whiff | Hit | Block / Tech | Opponent Meter Gain | Hit | Block / Tech | |||||||||||||||||||
| - | - | - | - | - | - | |||||||||||||||||||||
| ||||||||||||||||||||||||||
5HK (cl)
| Startup | Active | Recovery | Block | Hit | Cr. Hit | Damage | Stun | Kara | Guard Level | Parry Level | ||||||||||||||||||||
|---|---|---|---|---|---|---|---|---|---|---|---|---|---|---|---|---|---|---|---|---|---|---|---|---|---|---|---|---|---|---|
| 5 | 5 | 10 | +2 | +4 | +6 | 25 | 11 | - | - | H | ||||||||||||||||||||
| Cancel Options | Self Meter Gain | Whiff | Hit | Block / Tech | Opponent Meter Gain | Hit | Block / Tech | |||||||||||||||||||||||
| - | - | - | - | - | - | |||||||||||||||||||||||||
| ||||||||||||||||||||||||||||||
5HK (far)
| Startup | Active | Recovery | Block | Hit | Cr. Hit | Damage | Stun | Kara | Guard Level | Parry Level |
|---|---|---|---|---|---|---|---|---|---|---|
| 7 | 4 | 26 | -9 | -7 | -5 | 21 | 11 | - | - | H |
| Cancel Options | Self Meter Gain | Whiff | Hit | Block / Tech | Opponent Meter Gain | Hit | Block / Tech | |||
| - | - | - | - | - | - | |||||
| ||||||||||
Command Normals
6HP
| Startup | Active | Recovery | Block | Hit | Cr. Hit | Damage | Stun | Kara | Guard Level | Parry Level |
|---|---|---|---|---|---|---|---|---|---|---|
| 21 | 7 | 25 | -6 | -4 | -2 | 22 | 13 | - | - | H |
| Cancel Options | Self Meter Gain | Whiff | Hit | Block / Tech | Opponent Meter Gain | Hit | Block / Tech | |||
| - | - | - | - | - | - | |||||
| ||||||||||
6HK
| Startup | Active | Recovery | Block | Hit | Cr. Hit | Damage | Stun | Kara | Guard Level | Parry Level | ||||||||||||||||||||
|---|---|---|---|---|---|---|---|---|---|---|---|---|---|---|---|---|---|---|---|---|---|---|---|---|---|---|---|---|---|---|
| 15 | 5 | 18 | -5 | D | D | 16 | 9 | - | - | H | ||||||||||||||||||||
| Cancel Options | Self Meter Gain | Whiff | Hit | Block / Tech | Opponent Meter Gain | Hit | Block / Tech | |||||||||||||||||||||||
| - | - | - | - | - | - | |||||||||||||||||||||||||
| ||||||||||||||||||||||||||||||
Crouching Normals
2LP
| Startup | Active | Recovery | Block | Hit | Cr. Hit | Damage | Stun | Kara | Guard Level | Parry Level | ||||||||||||
|---|---|---|---|---|---|---|---|---|---|---|---|---|---|---|---|---|---|---|---|---|---|---|
| 4 | 3 | 5 | +3 | +3 | +3 | 3 | 3 | - | - | A | ||||||||||||
| Cancel Options | Self Meter Gain | Whiff | Hit | Block / Tech | Opponent Meter Gain | Hit | Block / Tech | |||||||||||||||
| - | - | - | - | - | - | |||||||||||||||||
| ||||||||||||||||||||||
2MP
| Startup | Active | Recovery | Block | Hit | Cr. Hit | Damage | Stun | Kara | Guard Level | Parry Level | ||||||||||||||||
|---|---|---|---|---|---|---|---|---|---|---|---|---|---|---|---|---|---|---|---|---|---|---|---|---|---|---|
| 5 | 4 | 7 | +3 | +4 | +5 | 14 | 7 | - | - | A | ||||||||||||||||
| Cancel Options | Self Meter Gain | Whiff | Hit | Block / Tech | Opponent Meter Gain | Hit | Block / Tech | |||||||||||||||||||
| - | - | - | - | - | - | |||||||||||||||||||||
| ||||||||||||||||||||||||||
2HP
| Startup | Active | Recovery | Block | Hit | Cr. Hit | Damage | Stun | Kara | Guard Level | Parry Level | ||||||||||||||||||||||||
|---|---|---|---|---|---|---|---|---|---|---|---|---|---|---|---|---|---|---|---|---|---|---|---|---|---|---|---|---|---|---|---|---|---|---|
| 7 | 5 | 17 | -9 | -7 | -5 | 21 | 13 | - | - | A | ||||||||||||||||||||||||
| Cancel Options | Self Meter Gain | Whiff | Hit | Block / Tech | Opponent Meter Gain | Hit | Block / Tech | |||||||||||||||||||||||||||
| - | - | - | - | - | - | |||||||||||||||||||||||||||||
| ||||||||||||||||||||||||||||||||||
2LK
| Startup | Active | Recovery | Block | Hit | Cr. Hit | Damage | Stun | Kara | Guard Level | Parry Level | ||||||||||||
|---|---|---|---|---|---|---|---|---|---|---|---|---|---|---|---|---|---|---|---|---|---|---|
| 5 | 3 | 7 | +1 | +1 | +1 | 3 | 3 | - | - | L | ||||||||||||
| Cancel Options | Self Meter Gain | Whiff | Hit | Block / Tech | Opponent Meter Gain | Hit | Block / Tech | |||||||||||||||
| - | - | - | - | - | - | |||||||||||||||||
| ||||||||||||||||||||||
2MK
| Startup | Active | Recovery | Block | Hit | Cr. Hit | Damage | Stun | Kara | Guard Level | Parry Level |
|---|---|---|---|---|---|---|---|---|---|---|
| 7 | 5 | 17 | -4 | -3 | -2 | 15 | 3 | - | - | L |
| Cancel Options | Self Meter Gain | Whiff | Hit | Block / Tech | Opponent Meter Gain | Hit | Block / Tech | |||
| - | - | - | - | - | - | |||||
| ||||||||||
2HK
| Startup | Active | Recovery | Block | Hit | Cr. Hit | Damage | Stun | Kara | Guard Level | Parry Level | ||||||||||||
|---|---|---|---|---|---|---|---|---|---|---|---|---|---|---|---|---|---|---|---|---|---|---|
| 8 | 5 | 26 | -16 | KND | KND | 21 | 3 | - | - | L | ||||||||||||
| Cancel Options | Self Meter Gain | Whiff | Hit | Block / Tech | Opponent Meter Gain | Hit | Block / Tech | |||||||||||||||
| - | - | - | - | - | - | |||||||||||||||||
| ||||||||||||||||||||||
Jumping Normals
8LP
j.LP
8MP
| Startup | Active | Recovery | Block | Hit | Cr. Hit | Damage | Stun | Kara | Guard Level | Parry Level |
|---|---|---|---|---|---|---|---|---|---|---|
| 6 | 5 | - | - | - | - | 16 | 11 | - | - | H |
| Cancel Options | Self Meter Gain | Whiff | Hit | Block / Tech | Opponent Meter Gain | Hit | Block / Tech | |||
| - | - | - | - | - | - | |||||
| ||||||||||
j.MP
| Startup | Active | Recovery | Block | Hit | Cr. Hit | Damage | Stun | Kara | Guard Level | Parry Level |
|---|---|---|---|---|---|---|---|---|---|---|
| 5 | 5 | - | -2 to +10 | -2 to +10 | - | 16 | 9 | - | - | H |
| Cancel Options | Self Meter Gain | Whiff | Hit | Block / Tech | Opponent Meter Gain | Hit | Block / Tech | |||
| - | - | - | - | - | - | |||||
| ||||||||||
8HP
| Startup | Active | Recovery | Block | Hit | Cr. Hit | Damage | Stun | Kara | Guard Level | Parry Level |
|---|---|---|---|---|---|---|---|---|---|---|
| 7 | 3 | - | -4 to +10 | -4 to +10 | - | 23 | 15 | - | - | H |
| Cancel Options | Self Meter Gain | Whiff | Hit | Block / Tech | Opponent Meter Gain | Hit | Block / Tech | |||
| - | - | - | - | - | - | |||||
| ||||||||||
j.HP
| Startup | Active | Recovery | Block | Hit | Cr. Hit | Damage | Stun | Kara | Guard Level | Parry Level |
|---|---|---|---|---|---|---|---|---|---|---|
| 6 | 4 | - | -4 to +10 | -4 to +10 | - | 23 | 13 | - | - | H |
| Cancel Options | Self Meter Gain | Whiff | Hit | Block / Tech | Opponent Meter Gain | Hit | Block / Tech | |||
| - | - | - | - | - | - | |||||
| ||||||||||
8LK
j.LK
8MK
| Startup | Active | Recovery | Block | Hit | Cr. Hit | Damage | Stun | Kara | Guard Level | Parry Level |
|---|---|---|---|---|---|---|---|---|---|---|
| 5 | 6 | - | - | - | - | 16 | 9 | - | - | H |
| Cancel Options | Self Meter Gain | Whiff | Hit | Block / Tech | Opponent Meter Gain | Hit | Block / Tech | |||
| - | - | - | - | - | - | |||||
| ||||||||||
j.MK
| Startup | Active | Recovery | Block | Hit | Cr. Hit | Damage | Stun | Kara | Guard Level | Parry Level |
|---|---|---|---|---|---|---|---|---|---|---|
| 5 | 6 | - | - | - | - | 16 | 9 | - | - | H |
| Cancel Options | Self Meter Gain | Whiff | Hit | Block / Tech | Opponent Meter Gain | Hit | Block / Tech | |||
| - | - | - | - | - | - | |||||
| ||||||||||
8HK
| Startup | Active | Recovery | Block | Hit | Cr. Hit | Damage | Stun | Kara | Guard Level | Parry Level |
|---|---|---|---|---|---|---|---|---|---|---|
| 7 | 5 | - | - | - | - | 23 | 13 | - | - | H |
| Cancel Options | Self Meter Gain | Whiff | Hit | Block / Tech | Opponent Meter Gain | Hit | Block / Tech | |||
| - | - | - | - | - | - | |||||
| ||||||||||
j.HK
| Startup | Active | Recovery | Block | Hit | Cr. Hit | Damage | Stun | Kara | Guard Level | Parry Level |
|---|---|---|---|---|---|---|---|---|---|---|
| 6 | 4 | - | - | - | - | 19 | 13 | - | - | H |
| Cancel Options | Self Meter Gain | Whiff | Hit | Block / Tech | Opponent Meter Gain | Hit | Block / Tech | |||
| - | - | - | - | - | - | |||||
| ||||||||||
Target Combos
5MP (cl) - 5HK
| Startup | Active | Recovery | Block | Hit | Cr. Hit | Damage | Stun | Kara | Guard Level | Parry Level |
|---|---|---|---|---|---|---|---|---|---|---|
| 4 | 5 | 10 | -2 | -1 | 0 | 24 | 10 | - | - | H |
| Cancel Options | Self Meter Gain | Whiff | Hit | Block / Tech | Opponent Meter Gain | Hit | Block / Tech | |||
| - | - | - | - | - | - | |||||
| ||||||||||
Throws
LPLK
| Startup | Active | Recovery | Block | Hit | Cr. Hit | Damage | Stun | Kara | Guard Level | Parry Level |
|---|---|---|---|---|---|---|---|---|---|---|
| 2 | 1 | 21 | - | KND | KND | 21 | 10 | - | - | - |
| Cancel Options | Self Meter Gain | Whiff | Hit | Block / Tech | Opponent Meter Gain | Hit | Block / Tech | |||
| - | - | - | - | - | - | |||||
| ||||||||||
4LPLK
| Startup | Active | Recovery | Block | Hit | Cr. Hit | Damage | Stun | Kara | Guard Level | Parry Level |
|---|---|---|---|---|---|---|---|---|---|---|
| 2 | 1 | 21 | - | KND | KND | 24 | 4 | - | - | - |
| Cancel Options | Self Meter Gain | Whiff | Hit | Block / Tech | Opponent Meter Gain | Hit | Block / Tech | |||
| - | - | - | - | - | - | |||||
| ||||||||||
Universal Overhead
MPMK
| Startup | Active | Recovery | Block | Hit | Cr. Hit | Damage | Stun | Kara | Guard Level | Parry Level |
|---|---|---|---|---|---|---|---|---|---|---|
| 15 | 8 | 7 | -6 to 0 | -1 to +7 | 0 to +8 | 7 | 3 | - | - | H |
| Cancel Options | Self Meter Gain | Whiff | Hit | Block / Tech | Opponent Meter Gain | Hit | Block / Tech | |||
| - | - | - | - | - | - | |||||
| ||||||||||
Taunt
HPHK
| Startup | Active | Recovery | Block | Hit | Cr. Hit | Damage | Stun | Kara | Guard Level | Parry Level |
|---|---|---|---|---|---|---|---|---|---|---|
| 31 | - | 19 | +5 | +5 | +5 | 1 | - | - | - | H |
| Cancel Options | Self Meter Gain | Whiff | Hit | Block / Tech | Opponent Meter Gain | Hit | Block / Tech | |||
| - | - | - | - | - | - | |||||
The ball itself has a few special quirks to it:
| ||||||||||
Special Moves
214P
| LP | Startup | Active | Recovery | Block | Hit | Cr. Hit | Damage | Stun | Kara | Guard Level | Parry Level |
|---|---|---|---|---|---|---|---|---|---|---|---|
| 2 | 19 | 7 | - | - | - | - | - | - | - | - | |
| Cancel Options | Self Meter Gain | Whiff | Hit | Block / Tech | Opponent Meter Gain | Hit | Block / Tech | ||||
| - | - | - | - | - | - | ||||||
| |||||||||||
| MP | Startup | Active | Recovery | Block | Hit | Cr. Hit | Damage | Stun | Kara | Guard Level | Parry Level |
| 2 | 29 | 7 | - | - | - | - | - | - | - | - | |
| Cancel Options | Self Meter Gain | Whiff | Hit | Block / Tech | Opponent Meter Gain | Hit | Block / Tech | ||||
| - | - | - | - | - | - | ||||||
| |||||||||||
| HP | Startup | Active | Recovery | Block | Hit | Cr. Hit | Damage | Stun | Kara | Guard Level | Parry Level |
| 2 | 43 | 7 | - | - | - | - | - | - | - | - | |
| Cancel Options | Self Meter Gain | Whiff | Hit | Block / Tech | Opponent Meter Gain | Hit | Block / Tech | ||||
| - | - | - | - | - | - | ||||||
| |||||||||||
236K
| LK | Startup | Active | Recovery | Block | Hit | Cr. Hit | Damage | Stun | Kara | Guard Level | Parry Level |
|---|---|---|---|---|---|---|---|---|---|---|---|
| 25 | 8 | 15 | -5 to 0 | -5 to 0 | -5 to 0 | 21 | 19 | - | - | H | |
| Cancel Options | Self Meter Gain | Whiff | Hit | Block / Tech | Opponent Meter Gain | Hit | Block / Tech | ||||
| - | - | - | - | - | - | ||||||
| |||||||||||
| MK | Startup | Active | Recovery | Block | Hit | Cr. Hit | Damage | Stun | Kara | Guard Level | Parry Level |
| 25 | 8 | 15 | -5 to 0 | -5 to 0 | -5 to 0 | 21 | 19 | - | - | H | |
| Cancel Options | Self Meter Gain | Whiff | Hit | Block / Tech | Opponent Meter Gain | Hit | Block / Tech | ||||
| - | - | - | - | - | - | ||||||
| |||||||||||
| HK | Startup | Active | Recovery | Block | Hit | Cr. Hit | Damage | Stun | Kara | Guard Level | Parry Level |
| 25 | 8 | 15 | -5 to 0 | -5 to 0 | -5 to 0 | 21 | 19 | - | - | H | |
| Cancel Options | Self Meter Gain | Whiff | Hit | Block / Tech | Opponent Meter Gain | Hit | Block / Tech | ||||
| - | - | - | - | - | - | ||||||
| |||||||||||
| EX | Startup | Active | Recovery | Block | Hit | Cr. Hit | Damage | Stun | Kara | Guard Level | Parry Level |
| 25 | 8 | 15 | -1 to 0 | -1 to 0 | -1 to 0 | 32 | 19 | - | - | H | |
| Cancel Options | Self Meter Gain | Whiff | Hit | Block / Tech | Opponent Meter Gain | Hit | Block / Tech | ||||
| - | - | - | - | - | - | ||||||
| |||||||||||
214K
| LK | Startup | Active | Recovery | Block | Hit | Cr. Hit | Damage | Stun | Kara | Guard Level | Parry Level |
|---|---|---|---|---|---|---|---|---|---|---|---|
| 11 | 4 | 21 | -7 | -5 | -5 (forces stand)
-3 If first hit whiffs |
16 | 9 | - | - | H | |
| Cancel Options | Self Meter Gain | Whiff | Hit | Block / Tech | Opponent Meter Gain | Hit | Block / Tech | ||||
| - | - | - | - | - | - | ||||||
| |||||||||||
| MK | Startup | Active | Recovery | Block | Hit | Cr. Hit | Damage | Stun | Kara | Guard Level | Parry Level |
| 14 | 8 | 21 | -6 | -4 | -4 (forces stand)
-2 If first hit whiffs |
24 | 12 | - | - | H | |
| Cancel Options | Self Meter Gain | Whiff | Hit | Block / Tech | Opponent Meter Gain | Hit | Block / Tech | ||||
| - | - | - | - | - | - | ||||||
| |||||||||||
| HK | Startup | Active | Recovery | Block | Hit | Cr. Hit | Damage | Stun | Kara | Guard Level | Parry Level |
| 16 | 13 | 21 | -6 | -4 | -4 (forces stand)
-2 If first hit whiffs |
26 | 15 | - | - | H | |
| Cancel Options | Self Meter Gain | Whiff | Hit | Block / Tech | Opponent Meter Gain | Hit | Block / Tech | ||||
| - | - | - | - | - | - | ||||||
| |||||||||||
| EX | Startup | Active | Recovery | Block | Hit | Cr. Hit | Damage | Stun | Kara | Guard Level | Parry Level |
| 9 | 11 | 17 | -3 | -1 | -1 (forces stand)
+1 If first hit whiffs |
28 | 19 | - | - | H | |
| Cancel Options | Self Meter Gain | Whiff | Hit | Block / Tech | Opponent Meter Gain | Hit | Block / Tech | ||||
| - | - | - | - | - | - | ||||||
| |||||||||||
41236P
| LP | Startup | Active | Recovery | Block | Hit | Cr. Hit | Damage | Stun | Kara | Guard Level | Parry Level |
|---|---|---|---|---|---|---|---|---|---|---|---|
| 18 | 2 | 28 | -14 | KND | - | 30 | 16 | - | - | L | |
| Cancel Options | Self Meter Gain | Whiff | Hit | Block / Tech | Opponent Meter Gain | Hit | Block / Tech | ||||
| - | - | - | - | - | - | ||||||
| |||||||||||
| MP | Startup | Active | Recovery | Block | Hit | Cr. Hit | Damage | Stun | Kara | Guard Level | Parry Level |
| 22 | 2 | 28 | -14 | KND | - | 30 | 16 | - | - | L | |
| Cancel Options | Self Meter Gain | Whiff | Hit | Block / Tech | Opponent Meter Gain | Hit | Block / Tech | ||||
| - | - | - | - | - | - | ||||||
| |||||||||||
| HP | Startup | Active | Recovery | Block | Hit | Cr. Hit | Damage | Stun | Kara | Guard Level | Parry Level |
| 26 | 2 | 28 | -14 | KND | - | 30 | 16 | - | - | L | |
| Cancel Options | Self Meter Gain | Whiff | Hit | Block / Tech | Opponent Meter Gain | Hit | Block / Tech | ||||
| - | - | - | - | - | - | ||||||
| |||||||||||
| EX | Startup | Active | Recovery | Block | Hit | Cr. Hit | Damage | Stun | Kara | Guard Level | Parry Level |
| 28 | 2 | 28 | -14 | KND | - | 40 | 25 | - | - | L | |
| Cancel Options | Self Meter Gain | Whiff | Hit | Block / Tech | Opponent Meter Gain | Hit | Block / Tech | ||||
| - | - | - | - | - | - | ||||||
| |||||||||||
623P
| LP | Startup | Active | Recovery | Block | Hit | Cr. Hit | Damage | Stun | Kara | Guard Level | Parry Level |
|---|---|---|---|---|---|---|---|---|---|---|---|
| 5 | 6 | 36 | -24 | KND | - | 23 | 11 | - | - | A | |
| Cancel Options | Self Meter Gain | Whiff | Hit | Block / Tech | Opponent Meter Gain | Hit | Block / Tech | ||||
| - | - | - | - | - | - | ||||||
| |||||||||||
| MP | Startup | Active | Recovery | Block | Hit | Cr. Hit | Damage | Stun | Kara | Guard Level | Parry Level |
| 7 | 6 | 36 | -30 | KND | - | 23 | 11 | - | - | A | |
| Cancel Options | Self Meter Gain | Whiff | Hit | Block / Tech | Opponent Meter Gain | Hit | Block / Tech | ||||
| - | - | - | - | - | - | ||||||
| |||||||||||
| HP | Startup | Active | Recovery | Block | Hit | Cr. Hit | Damage | Stun | Kara | Guard Level | Parry Level |
| 9 | 9 | 42 | -34 | KND | - | 23 | 11 | - | - | A | |
| Cancel Options | Self Meter Gain | Whiff | Hit | Block / Tech | Opponent Meter Gain | Hit | Block / Tech | ||||
| - | - | - | - | - | - | ||||||
| |||||||||||
| EX | Startup | Active | Recovery | Block | Hit | Cr. Hit | Damage | Stun | Kara | Guard Level | Parry Level |
| 8 | 12 | 42 | -37 | KND | - | 31 | 17 | - | - | A | |
| Cancel Options | Self Meter Gain | Whiff | Hit | Block / Tech | Opponent Meter Gain | Hit | Block / Tech | ||||
| - | - | - | - | - | - | ||||||
| |||||||||||
Super Arts
236236P (SA1)
| Startup | Active | Recovery | Block | Hit | Cr. Hit | Damage | Stun | Kara | Guard Level | Parry Level |
|---|---|---|---|---|---|---|---|---|---|---|
| 2 | - | 61 | -29 | KND | - | 39 | 9 | - | - | H |
| Cancel Options | Self Meter Gain | Whiff | Hit | Block / Tech | Opponent Meter Gain | Hit | Block / Tech | |||
| - | - | - | - | - | - | |||||
For more in-depth information, see: SA1 breakdown | ||||||||||
236236P (SA2)
| Startup | Active | Recovery | Block | Hit | Cr. Hit | Damage | Stun | Kara | Guard Level | Parry Level |
|---|---|---|---|---|---|---|---|---|---|---|
| 1 | 36 | 36 | -43 | KND | - | 38 | - | - | - | A |
| Cancel Options | Self Meter Gain | Whiff | Hit | Block / Tech | Opponent Meter Gain | Hit | Block / Tech | |||
| - | - | - | - | - | - | |||||
For more in-depth information, see: SA2 breakdown Part 1 and Part 2 | ||||||||||
236236P (SA3)
| Startup | Active | Recovery | Block | Hit | Cr. Hit | Damage | Stun | Kara | Guard Level | Parry Level |
|---|---|---|---|---|---|---|---|---|---|---|
| 2 | 14 | 53 | -31 | KND | - | 76 | 10 | - | - | A |
| Cancel Options | Self Meter Gain | Whiff | Hit | Block / Tech | Opponent Meter Gain | Hit | Block / Tech | |||
| - | - | - | - | - | - | |||||
For more in-depth information, see: SA3 breakdown | ||||||||||

