Luciancuatro (talk | contribs) No edit summary |
CartoonFan18 (talk | contribs) No edit summary |
||
| (7 intermediate revisions by 3 users not shown) | |||
| Line 36: | Line 36: | ||
{{MoveData | {{MoveData | ||
|image= NASB reptar light mid.png | |image= NASB reptar light mid.png | ||
|caption= | |caption= That's using your head. | ||
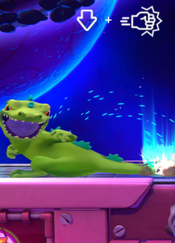
|name= Headbutt | |name= Headbutt | ||
|linkname= 5L | |linkname= 5L | ||
|input= 5L / Neutral Light | |input= 5L / Neutral Light | ||
|data= | |data= | ||
{{AttackData-NASB | |||
|Damage=10% | |||
|Startup=10 | |||
|Active=10-11 | |||
|Total Frames=24 | |||
|Safety=-5 | |||
|description= | |||
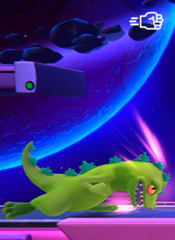
Reptar lashes out with a powerful headbutt. Generally considered his safest neutral poke and OOS option. | |||
* High damage and KO potential for a light attack. | |||
* Large, far-reaching hitbox which covers Reptar's entire body. | |||
* Confirms out of light dash-attack for jablock setups at low% and a quick kill confirm at high% | |||
}} | |||
}} | |||
| Line 52: | Line 63: | ||
|input= 8L / Up Light | |input= 8L / Up Light | ||
|data= | |data= | ||
{{AttackData-NASB | |||
|Damage=12% | |||
|Startup=9 | |||
|Active=9-10 | |||
|Total Frames=26 | |||
|Safety=-8 | |||
|description= | |||
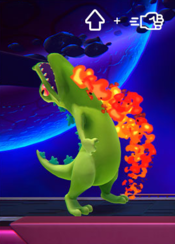
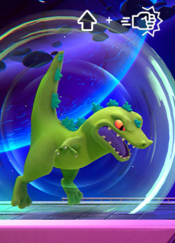
A (relatively) fast fiery chin uppercut that allows for followups: | |||
* Combos into light down air at low-mid%, converting into a tech chase scenario. | |||
* Combos into light up air at most %, allowing for a brief juggle or a kill at high%. | |||
* Leads into light neutral air at low-mid%. | |||
}} | |||
}} | |||
| Line 63: | Line 85: | ||
|input= 2L / Down Light | |input= 2L / Down Light | ||
|data= | |data= | ||
{{AttackData-NASB | |||
|Damage=10% | |||
|Startup=9 | |||
|Active=9-11 | |||
|Total Frames=24 | |||
|Safety=-6 | |||
|description= | |||
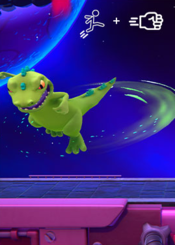
Reptar quickly slams his head into the ground in front of him. | |||
* A quick slightly disjointed poke. | |||
* Can lead to follow-ups on poor DI. | |||
* Generally outclassed by light mid in utility. | |||
}} | |||
}} | |||
| Line 74: | Line 107: | ||
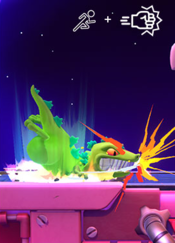
|input= 66L / Run Light | |input= 66L / Run Light | ||
|data= | |data= | ||
{{AttackData-NASB | |||
|Damage=11% | |||
|Startup=9 | |||
|Active=9-16 | |||
|Total Frames=40 | |||
|Safety=-30 | |||
|description= | |||
A committal but flexible burst option. | |||
* Can be cancelled into a grab or light mid, both of which can lead to devastating down special loops and tech chases (light mid with jab resets and grab with down throw in the corner). | |||
* A kill confirm at high% with light mid. | |||
* Not in range for a light dash attack? Don't worry! If you want a specific followup from light dash attack but are only in range for a strong dash attack, simply cancel the strong dash attack into a wavedash and it will combo into light dash attack, allowing you to transpose strong dash attacks into light dash attacks. | |||
* If the attack launches the opponent off-stage, the move combos into down strong which can kill middle-weight characters (SpongeBob) at 60% on most probably DI out and slightly earlier on DI in. This is more optimal than going for a gimp with down air which doesn't kill outright until 115% on the same characters. | |||
}} | |||
}} | |||
=== Jumping/Air Light Attacks === | === Jumping/Air Light Attacks === | ||
| Line 86: | Line 132: | ||
|input= j5L / Jump Light | |input= j5L / Jump Light | ||
|data= | |data= | ||
{{AttackData-NASB | |||
|Damage=12% | |||
|Startup=10 | |||
|Active=10-11 | |||
|Total Frames=24 | |||
|Safety=-6 | |||
|description= | |||
A long range tail attack with decent kill power and poking ability. | |||
* Combos from a 50/50 DI mixup off of aerial forward throw, which is an easy and consistent kill confirm at high% off of grab. | |||
* Can lead into itself at low%, giving it good corner carry ability. | |||
* Can intercept opponents trying to recover high. | |||
}} | |||
}} | |||
| Line 97: | Line 154: | ||
|input= j8L / Jump Up Light | |input= j8L / Jump Up Light | ||
|data= | |data= | ||
{{AttackData-NASB | |||
|Damage=11% | |||
|Startup=9 | |||
|Active=9-11 | |||
|Total Frames=26 | |||
|Safety=-6 | |||
|description= | |||
A simple and functional up air attack. | |||
* Combo's into itself at low%, leading into a brief juggle, which is especially effective against fast fallers. | |||
* Reptar's best kill move off the top, killing at high%. | |||
}} | |||
}} | |||
| Line 108: | Line 175: | ||
|input= j2L / Jump Down Light | |input= j2L / Jump Down Light | ||
|data= | |data= | ||
{{AttackData-NASB | |||
|Damage=14% | |||
|Startup=10 | |||
|Active=10-12 | |||
|Total Frames=33 | |||
|Safety=-6 | |||
|description= | |||
An big, fast, brutal spike with exceptional utility in Reptars kit. | |||
* Offstage this move is a gimping machine. If the first light down air doesn't kill outright from its high knockback, follow them down, jump and use light down air again to read a jump, airdash up or immediate up special for a free stock. If they don't use any of those options, instead of jumping you can keep falling after them and use down special for the kill. A lethal 50/50. | |||
** Can also intercept a lot of recoveries due to the huge amount of space it commands at the ledge, especially recoveries without a hitbox. Try it against April and Ren and Stimpy! | |||
* On stage, this move is a good neutral option due to its speed and size. | |||
** The hitbox is partially disjointed for some of the active frames, allowing Reptar to use this attack like a sword. Try wavedashing off of a platform to gain a burst of momentum and then using light down for a surprising burst attack that converts into tech chases. | |||
* As previously mentioned, this attack combos from light up. This combo can be looped if they bounce or miss their tech, but if they miss their tech it's normally better to go for a jab lock to continue the tech chases. | |||
}} | |||
}} | }} | ||
| Line 121: | Line 201: | ||
|input= 5S / Neutral Strong | |input= 5S / Neutral Strong | ||
|data= | |data= | ||
{{AttackData-NASB | |||
|Damage=20% | |||
|Startup=21 | |||
|Active=21-25 | |||
|Total Frames=55 | |||
|Safety=-14 | |||
|description= | |||
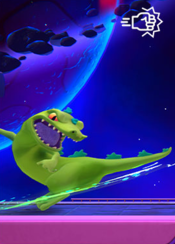
Reptar swings his tail forward with exceptional force. | |||
* This is your best option to punish your opponent after an RPS win, as it is Reptar's earliest most convenient kill move. If your opponent is not at kill % however, you should use down special to rack up more damage. | |||
** Like most moves that are very similar between their grounded and aerial versions, the aerial version outclasses the grounded version due to being more mobile and being able to autocancel the move on landing to reduce endlag. In this case, however, the grounded version is better due to the fact it deals an additional 2% and jumping in order to land an aerial strong in the short window that your opponent is stunned after an RPS can sometimes be awkward. | |||
}} | |||
}} | }} | ||
| Line 132: | Line 223: | ||
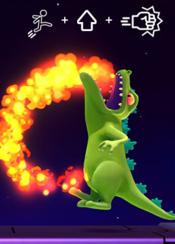
|input= 8S / Up Strong | |input= 8S / Up Strong | ||
|data= | |data= | ||
{{AttackData-NASB | |||
|Damage=19% | |||
|Startup=21 | |||
|Active=22-26 | |||
|Total Frames=55 | |||
|Safety=-11 | |||
|description= | |||
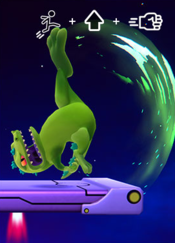
Reptar somersaults and swings his tail into the opponent from below, sending them high. | |||
* This move can be used to catch your opponent's landings but is quite risky due to the high amount of lag. | |||
* The visual effects associated with this move are deceptive. The streak coming from Reptar's tail might lead you to believe that this attack hits all around Reptar in a circle when the hitbox actually only appears briefly in front of and above Reptar. | |||
}} | |||
}} | }} | ||
| Line 143: | Line 244: | ||
|input= 2S / Down Strong | |input= 2S / Down Strong | ||
|data= | |data= | ||
{{AttackData-NASB | |||
|Damage=21% | |||
|Startup=20 | |||
|Active=20-24 | |||
|Total Frames=55 | |||
|Safety=-10 | |||
|description= | |||
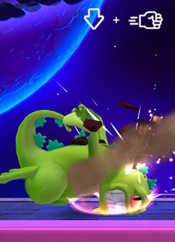
Reptar hammers his tail into the ground creating a shockwave and brutally spiking anyone hit. | |||
* As previously mentioned, if you can knock your opponent off stage with light dash attack, follow up with this move for an early kill. | |||
* Technically it is the fastest of Reptar's grounded strongs (by 1 frame). This is handy because Reptar's aerial down strong has... deficiencies that make it less than ideal for RPS. You will have to use this move in order to RPS your opponent's mid strongs practically. | |||
}} | |||
}} | }} | ||
| Line 154: | Line 265: | ||
|input= 66S / Run Strong | |input= 66S / Run Strong | ||
|data= | |data= | ||
{{AttackData-NASB | |||
|Damage=17% | |||
|Startup=22 | |||
|Active=22-26 | |||
|Total Frames=45 | |||
|Safety=-13 | |||
|description= | |||
Reptar launches himself far forward and delivers a biting attack. | |||
* Due to its exceptional long range, you WILL hit people unsuspectingly halfway across the stage with this move if you use it in neutral from time to time. This is good because strong dash attack has many punishing followups. | |||
** Cancel strong dash attack with a jump and it confirms into grab for some of Reptar's most stylish looking combos. | |||
** Cancel strong dash attack with a short hop and strong neutral air for Reptar's best kill confirm. If on stage there is the possibility they will be able to tech, but if they are knocked offstage there is no way to avoid the strong neutral air follow-up provided that you fast fall the move by airdashing down for more coverage. | |||
** As mentioned previously, this move can combo into light dash attack provided that you wavedash in between. | |||
** If you expect your opponent will land, then you can cancel strong dash attack into a wavedash and use down special to cover multiple tech options at once, practically guaranteeing a continuation to your tech chase string if the opponent is cornered. | |||
* Make note that this move is much less active than light dash, with the active frames coming out awkwardly late. As such, this move is not ideal for hitting close-range opponents. Consider light dash attack instead, even if there are fewer possible follow-ups. | |||
}} | |||
}} | }} | ||
| Line 166: | Line 291: | ||
|input= j5S / Jump Neutral Strong | |input= j5S / Jump Neutral Strong | ||
|data= | |data= | ||
{{AttackData-NASB | |||
|Damage=18% | |||
|Startup=21 | |||
|Active=21-25 | |||
|Total Frames=55 | |||
|Safety=-4 | |||
|description= | |||
Reptar swings his tail forward with exceptional force... But in the air. | |||
* This is one of Reptar's best kill options, with plenty of ways to confirm into it. | |||
* Notably, the move is only -4 on shield, this makes it quite safe if spaced on block, meaning that you can throw this move out in neutral in certain situations. | |||
** Use it to call out your opponent's ledge/tech option and approaches! Strong neutral air is powerful and surprisingly hard to punish, so make your opponent fear it. | |||
* Confirm into this move from strong dash attack or from a 50/50 DI mixup from jump forward throw (only works at very high %, at lower % light neutral is more consistent) | |||
}} | |||
}} | |||
| Line 177: | Line 314: | ||
|input= j8S / Jump Up Strong | |input= j8S / Jump Up Strong | ||
|data= | |data= | ||
{{AttackData-NASB | |||
|Damage=18% | |||
|Startup=24 | |||
|Active=24-29 | |||
|Total Frames=55 | |||
|Safety=-2 | |||
|description= | |||
Reptar unleashes a rising chin-move with a mouth full of fire. | |||
* Since the removal of T-dropping, this move is generally outclassed by strong neutral air except for its use in RPS. | |||
* If you need to hit someone above you in the air, light up air is faster and less likely to get you punished, while still retaining a bit of kill power. In general, attacking people above is one of Reptar's weaknesses. | |||
* Despite having technically better shield safety than strong neutral air, the hitbox makes it much worse for hitting shields. | |||
}} | |||
}} | }} | ||
| Line 188: | Line 336: | ||
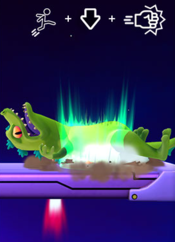
|input= j2S / Jump Down Strong | |input= j2S / Jump Down Strong | ||
|data= | |data= | ||
{{AttackData-NASB | |||
|Damage=20% | |||
|Startup=23 | |||
|Active=23-End | |||
|Total Frames=-- | |||
|Safety=+4 | |||
|description= | |||
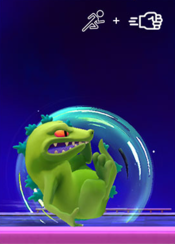
Using the spines along his back Reptar crashes into his opponent from above. A stall and fall aerial. If Reptar hits anything apart from the ground with this move, he will bounce back up in the direction held and be actionable much quicker. | |||
* This move has a particularly niche utility against characters with a straight verticle recovery, most notably Korra but also Helga. If used against them, the move will always atleast trade and result in them dying to the spike, while Reptar can recover easily due to the unique on-hit property of his strong down air that causes him to bounce up in the direction held on hit. | |||
* This move is notably bad for RPS due to it being a stall and fall. This means that Reptar has a hard time punishing strong neutral air spam from his opponents, which is noticeable in a few matchups (Catdog, Zim). | |||
* The move is very safe on block not just because of its frame data but because of the on-hit property. This doesn't mean that it's advisable to throw it out in neutral, however. You will be inviting your opponent's most devastating punish if you land on the ground due to the high amount of landing lag. | |||
}} | |||
}} | }} | ||
| Line 195: | Line 354: | ||
{{MoveData | {{MoveData | ||
|image= NASB reptar special mid.png | |image= NASB reptar special mid.png | ||
|caption= | |caption= | ||
|name= Fireball/Volcanic Beam | |name= Fireball/Volcanic Beam | ||
|linkname= 5P | |linkname= 5P | ||
| Line 217: | Line 376: | ||
{{MoveData | {{MoveData | ||
|image= NASB reptar special down.png | |image= NASB reptar special down.png | ||
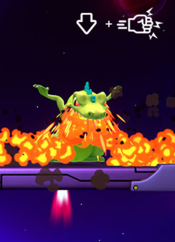
|caption= | |caption= Hope you can tech! | ||
|name= Flame Breath | |name= Flame Breath | ||
|linkname= 2P | |linkname= 2P | ||
| Line 225: | Line 384: | ||
}} | }} | ||
=== Taunt === | === Taunt === | ||
| Line 242: | Line 390: | ||
|image= NASB_reptar_taunt.jpg | |image= NASB_reptar_taunt.jpg | ||
|caption= Part of a complete balanced breakfast! | |caption= Part of a complete balanced breakfast! | ||
|name= | |name= Taunt | ||
|linkname= Weapon Activation | |linkname= Weapon Activation | ||
|input= | |input= Taunt Button | ||
|data= | |data= cereal | ||
}} | }} | ||
== | == Colors == | ||
[[File:NASB reptar character.png|200px]] | |||
[[File:NASB Reptar alt costume 1 .png|200px]] | |||
{{Navbox-NASB}} | {{Navbox-NASB}} | ||
[[Category:Nickelodeon All-Star Brawl]] | [[Category:Nickelodeon All-Star Brawl]] | ||
Latest revision as of 03:40, 20 February 2023
Story
I am REPTAR! HEAR ME ROAR!
He's loud, he's mean, and he turns milk green! Rampaging his way out of the Rugrats franchise, Reptar is the world famous kaiju known for his devastating destruction and his delicious cereal! Is he a hero? A villain? The answer depends on what kind of mood the big green guy is in at any given moment, but one thing for certain is that he'll certainly be terrorizing anyone unfortunate enough to face him in this brawl!
Gameplay
Reptar is a heavyweight mighty glacier that trades speed for raw power. Reptar's special moves Fireball and Flame Breath are unique in that they can be charged up into more powerful variants that cover a surprisingly wide range. With Flame Breath Reptar can cover all sorts of get-up options without having to get too close and can even cover ledge recoveries, and even if he can't go deep off stage to secure a stock, charging Fireball into Volcanic Beam will easily put a stop to anyone trying to recover horizontally.
If you don't mind trading maneuverability for sheer strength, Reptar will stomp over anyone in your way!
| Franchise |
Rugrats |
|---|---|
| Weight Class |
Heavy |
| Character Discord | |
| Home Stage |
Showdown at Teeter Totter Gulch |
| Strengths | Weaknesses |
|---|---|
|
|
Moves List
Light Attacks
| Damage | Startup Frames | Active Frames | Total Frames | Safety | |
|---|---|---|---|---|---|
| 10% | 10 | 10-11 | 24 | -5 | |
|
Reptar lashes out with a powerful headbutt. Generally considered his safest neutral poke and OOS option.
| |||||
| Damage | Startup Frames | Active Frames | Total Frames | Safety | |
|---|---|---|---|---|---|
| 12% | 9 | 9-10 | 26 | -8 | |
|
A (relatively) fast fiery chin uppercut that allows for followups:
| |||||
| Damage | Startup Frames | Active Frames | Total Frames | Safety | |
|---|---|---|---|---|---|
| 10% | 9 | 9-11 | 24 | -6 | |
|
Reptar quickly slams his head into the ground in front of him.
| |||||
| Damage | Startup Frames | Active Frames | Total Frames | Safety | |
|---|---|---|---|---|---|
| 11% | 9 | 9-16 | 40 | -30 | |
|
A committal but flexible burst option.
| |||||
Jumping/Air Light Attacks
| Damage | Startup Frames | Active Frames | Total Frames | Safety | |
|---|---|---|---|---|---|
| 12% | 10 | 10-11 | 24 | -6 | |
|
A long range tail attack with decent kill power and poking ability.
| |||||
| Damage | Startup Frames | Active Frames | Total Frames | Safety | |
|---|---|---|---|---|---|
| 11% | 9 | 9-11 | 26 | -6 | |
|
A simple and functional up air attack.
| |||||
| Damage | Startup Frames | Active Frames | Total Frames | Safety | |
|---|---|---|---|---|---|
| 14% | 10 | 10-12 | 33 | -6 | |
|
An big, fast, brutal spike with exceptional utility in Reptars kit.
| |||||
Strong Attacks
| Damage | Startup Frames | Active Frames | Total Frames | Safety | |
|---|---|---|---|---|---|
| 20% | 21 | 21-25 | 55 | -14 | |
|
Reptar swings his tail forward with exceptional force.
| |||||
| Damage | Startup Frames | Active Frames | Total Frames | Safety | |
|---|---|---|---|---|---|
| 19% | 21 | 22-26 | 55 | -11 | |
|
Reptar somersaults and swings his tail into the opponent from below, sending them high.
| |||||
| Damage | Startup Frames | Active Frames | Total Frames | Safety | |
|---|---|---|---|---|---|
| 21% | 20 | 20-24 | 55 | -10 | |
|
Reptar hammers his tail into the ground creating a shockwave and brutally spiking anyone hit.
| |||||
| Damage | Startup Frames | Active Frames | Total Frames | Safety | |
|---|---|---|---|---|---|
| 17% | 22 | 22-26 | 45 | -13 | |
|
Reptar launches himself far forward and delivers a biting attack.
| |||||
Jumping/Air Strong Attacks
| Damage | Startup Frames | Active Frames | Total Frames | Safety | |
|---|---|---|---|---|---|
| 18% | 21 | 21-25 | 55 | -4 | |
|
Reptar swings his tail forward with exceptional force... But in the air.
| |||||
| Damage | Startup Frames | Active Frames | Total Frames | Safety | |
|---|---|---|---|---|---|
| 18% | 24 | 24-29 | 55 | -2 | |
|
Reptar unleashes a rising chin-move with a mouth full of fire.
| |||||
| Damage | Startup Frames | Active Frames | Total Frames | Safety | |
|---|---|---|---|---|---|
| 20% | 23 | 23-End | -- | +4 | |
|
Using the spines along his back Reptar crashes into his opponent from above. A stall and fall aerial. If Reptar hits anything apart from the ground with this move, he will bounce back up in the direction held and be actionable much quicker.
| |||||
Special Attacks

