mNo edit summary |
Scatteraxis (talk | contribs) m (Scatteraxis moved page Street Fighter 3: 3rd Strike/Hugo to Street Fighter 3: 3rd Strike/Hugo/Archive without leaving a redirect) |
||
| (358 intermediate revisions by 22 users not shown) | |||
| Line 1: | Line 1: | ||
[[Image:Hugo3sport.gif|frame|right|Hugo's Character Select Portrait]] | |||
[[Image:Hugo3s-stance.gif|frame|right|Hugo's Neutral Stance]] | [[Image:Hugo3s-stance.gif|frame|right|Hugo's Neutral Stance]] | ||
==Updated version available!== | |||
You're reading the old version of this page. [https://srk.shib.live/w/Street_Fighter_3:_3rd_Strike/Hugo/2021 Click here] to read the (in-progress) updated version! | |||
==Introduction== | ==Introduction== | ||
Hugo is 3rd Strike's most straightforward grappler, moreso than Alex, and as such, requires exceptional patience to play. He can do a highly impressive amount of damage with only a few moves (theoretically capable of KOing Chun-Li with only 4 uses of his main command grab, the Moonsault Press), but getting within range is certainly not easy. Hugo is also the largest character in 3rd Strike, meaning he has a big set of hitboxes, which other characters can use to easily hit-confirm many combos and Super Arts. He is also the slowest among them, so most of the time, blocking a move from the opponent doesn't automatically mean you have the opportunity to counteract with a combo or command grab, like other characters can do, such as Chun-Li. So it's easy to say that Hugo’s punishing game off of blocks isn't all that strong. | |||
To master our good Andore, one must also master the 360 motion. It is vital to remember that when the opponent comes near and you parry their attack, a simple throw isn't any good compared to the damage a Moonsault can do. Punishing with a normal throw is just as impractical with Hugo as it is with any other character, although for different reasons, as most others would resort to a combo or Super Art for optimal damage. With Hugo, more than anyone else, you must exploit any and all whiffed moves or successful parries on point blank attacks to Moonsault them, because Hugo is no Shoto, and as stated before, getting in close is not an easy task. | |||
Four '''unheld''' taunts with Hugo gains him 25% more defense, and with this, he obtains the 2nd highest defense rating in the game (only Q after 3 taunts surpassing him). | |||
{{ ProConTable | |||
| pros= | |||
* Very high health, with taunts that can increase it further. | |||
* Longe range attacks and pokes with far reach. | |||
* Deal high damage normals and grabs. | |||
* Claps allow for tight and versitile pressure and mixups, especially if it manages to knockdown. | |||
* Very damaging super arts. | |||
* Has the best parry bait options in the game. | |||
| cons= | |||
* Many attacks are very slow. | |||
* Wide hurtbox allows for optimized combos and unique setups that don't work against everyone. | |||
* Tall height allows him to be bullied by much of the cast. | |||
* Low mobility, can struggle to get in close. | |||
* Has several matchups he heavily struggles in | |||
* No reliable anti-airs. | |||
* No fast overheads. | |||
}} | |||
== | ==Specific Character Information== | ||
*Stamina: 1385, 1400 with 1 taunt, 1535 with 2 taunts, 1670 with 3 taunts, 1870 with 4 taunts. | |||
{| border="1em | *Stun Bar Length (in pixels): 72 (Long) | ||
*Stun Bar Recovery (frames it takes to recover 1 pixel): 21 | |||
*Taunt: | |||
Unheld taunt - Increases damage for the next hit/combo (not throw) by 18.8% (maximum 1 taunt). Also increases defense for the rest of the round by 6.3% per taunt (maximum 4 taunts, 25% bonus) | |||
Held taunt - Increases damage for the next hit/combo/throw by 25%. One taunt is the maximum. | |||
*Best Kara-Throw: MK | |||
=== Character Colors === | |||
[[Image:(hcolor).gif|center]] | |||
= Moves List = | |||
==Throws== | |||
{| border="1em" cellspacing="0" width="45%" style="border: 1px solid #999; background: none;"|- | |||
| Neck Hanging Three || [[File:Lp.png]]+[[File:Lk.png]] | |||
|- | |- | ||
| | | Body Slam || [[File:F.png]]/[[File:B.png]]+[[File:Lp.png]]+[[File:Lk.png]] | ||
|} | |||
==Command Moves== | |||
{| border="1em" cellspacing="0" width="45%" style="border: 1px solid #999; background: none;"|- | |||
| Hammer Hook || [[File:F.png]]+[[File:Hp.png]] | |||
|- | |- | ||
| | | Drop Kick || [[File:F.png]]/[[File:B.png]]+[[File:Hk.png]] | ||
|- | |- | ||
| | | Poison Secret Taunt || Hold S then [[File:Hp.png]]+[[File:Hk.png]] | ||
|- | |- | ||
| | | Body Press || Air [[File:D.png]]+[[File:Hp.png]] | ||
|} | |||
==Special Moves== | |||
{| border="1em" cellspacing="0" width="45%" style="border: 1px solid #999; background: none;"|- | |||
| Giant Palm Bomber || [[File:Qcb.png]]+[[File:P.png]] || EX SC | |||
|- | |- | ||
| | | Monster Lariat || [[File:Qcf.png]]+[[File:K.png]] || EX | ||
|- | |- | ||
| | | Ultra Throw || Close [[File:Hcb.png]]+[[File:K.png]] | ||
|- | |- | ||
| | | Moonsault Press || Close [[File:360.png]]+[[File:P.png]] | ||
|- | |- | ||
| | | Meat Squasher || [[File:360.png]]+[[File:K.png]] | ||
|- | |- | ||
| Super | | Shootdown Backbreaker || [[File:Dp.png]]+[[File:K.png]] | ||
|} | |||
==Super Arts== | |||
{| border="1em" cellspacing="0" width="45%" style="border: 1px solid #999; background: none;"|- | |||
| I ||Gigas Breaker || Close [[File:360.png]][[File:360.png]]+[[File:P.png]] || 128 Gauge Dots || 1 Stock || 3.1 EX Uses | |||
|- | |- | ||
| | | II || Megaton Press || [[File:Qcf.png]][[File:Qcf.png]]+[[File:K.png]] || 112 Gauge Dots || 2 Stocks || 5.5 EX Uses | ||
|- | |- | ||
| | | III || Hammer Frenzy || [[File:Qcf.png]][[File:Qcf.png]]+Hold P || 88 Gauge Dots || 2 Stocks || 4.3 EX Uses | ||
|} | |||
= Move Analysis = | |||
*All those sprites are taken from the site http://www.zweifuss.ca/ | |||
*All Framedatas in "Move Analysis" section are taken from [http://gr.qee.jp/01_3rd/index.html Game Restaurant] , this means the Framedata isn't from the Dreamcast version like Karathrow site, it's from Arcade version. | |||
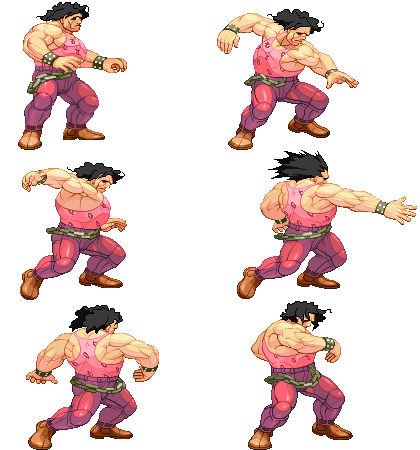
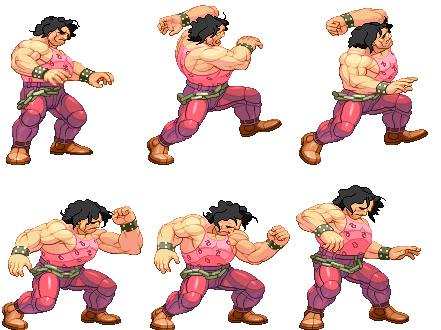
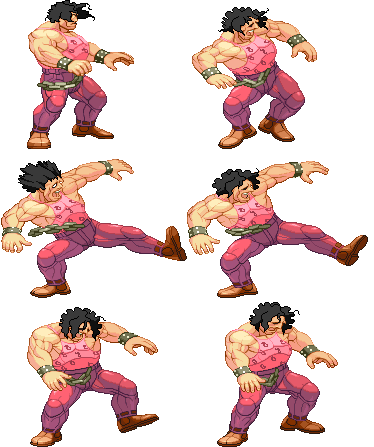
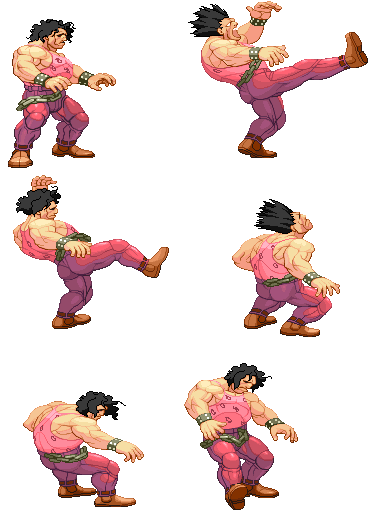
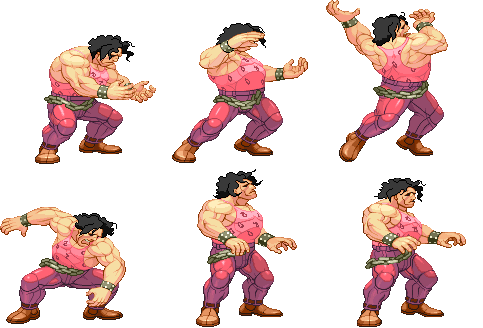
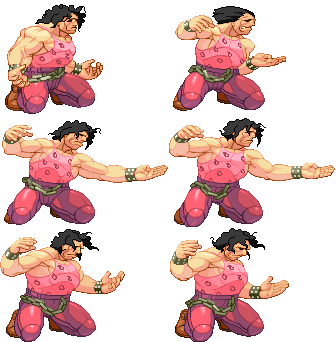
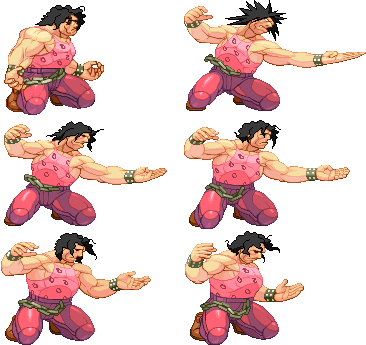
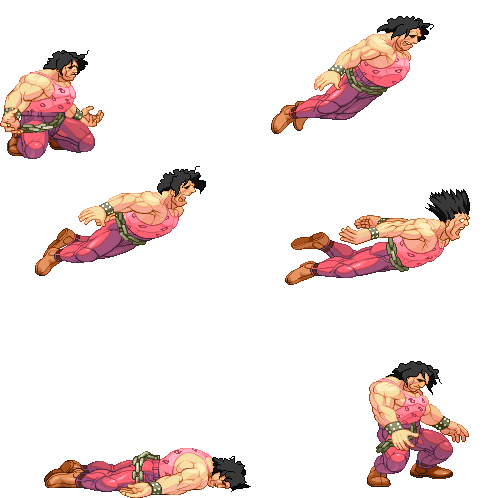
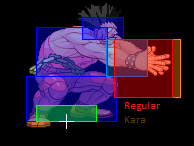
Please note that the images show in this section are for the 1st frame it hits, so this means the opponent is taking the hit in the image shown on the move. I use the 1st frame of every move (except taunt, jump, dash and 2nd throw image sprites) because you will see the maximum range of every attack (mostly of the attacks). Note also that those images are ACCURATE, they are exactly the 1rst frame it hits, so enemy takes damage but they still dont make the "pain" frame. | |||
General | |||
*'''Move''': Move name | |||
*'''Motion''': What you must do to execute the move | |||
*'''Damage''': Damage it does (in pixels) | |||
*'''Stun Damage''': Stun Damage it does (in pixels) | |||
*'''Chains into itself''': If you can combo into the same movement | |||
*'''Special Cancel''': If you can cancel the move into a Special Move | |||
*'''Super Cancel''': If you can cancel the move into a Super Art | |||
*'''Throw Range''': Range of the throw (in pixels) | |||
*'''Throw Range (Front)''': Range of the throw in front of your character (in pixels) | |||
*'''Throw Range (Up & Down)''': Range of the throw, up and down from your character (in pixels) | |||
*'''Gauge Needed''': Gauge you need to execute the EX move (in pixels) | |||
*'''Num.''': Super Art number | |||
*'''Super Art''': Super Art name | |||
*'''Super Art Stock''': Number of Gauge Bars the Super Art have, also the lenght of each bar (in pixels) | |||
Frame Data | |||
*'''Startup''': Number of frames it takes to start the move | |||
*'''Hit''': Number of frames that can hit the opponent | |||
*'''Recovery''': Number of frames it takes to recover from the move | |||
*'''Blocked Advantage''': Number of frames you are in advantage/disadvantage after opponent have been blocked the hit | |||
*'''Hit Advantage''': Number of frames you are in advantage/disadvantage after opponent have been take the hit | |||
*'''Crouching Hit Advantage''': Number of frames you are in advantage/disadvantage after opponent have been take the hit while he is crouching | |||
* + # : You have # frames of advantage | |||
* - # : You have # frames of disadvantage | |||
* # ~ # : Advantage/disadvantage can vary from # to # | |||
*Down: Enemy gets knocked down | |||
*'''Guard''': How opponent must guard the move, High (H), Low (L) or both (HL) | |||
*'''Parry''': How opponent must parry the move, High (H), Low (L) or both (HL) | |||
Gauge Increase | |||
*'''Miss''': Gauge you gain if you miss the move (in pixels) | |||
*'''Blocked''': Gauge you gain if the move gets blocked (in pixels) | |||
*'''Hit''': Gauge you gain if you hit the opponent with the move (in pixels) | |||
*'''Parry''': Gauge opponent gains when he parry the move (in pixels) | |||
=== Basic Moves === | |||
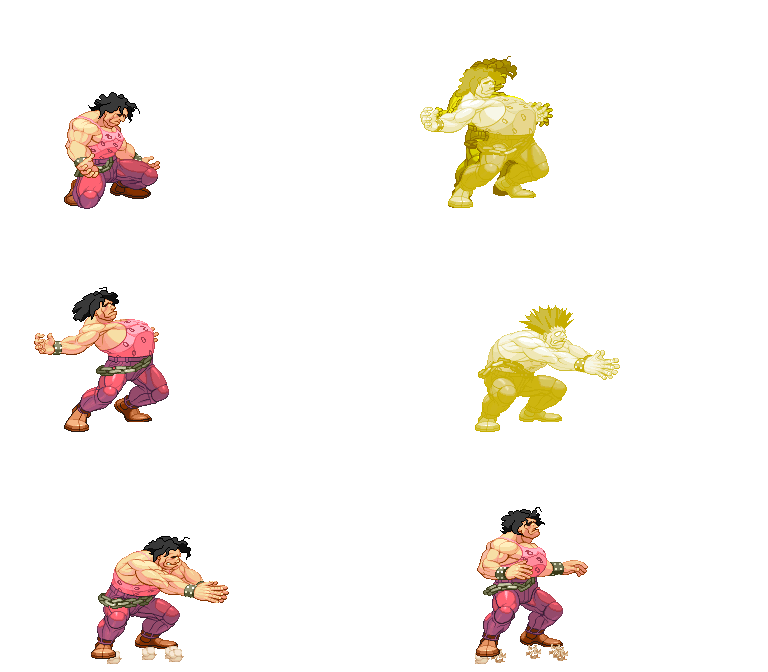
[[Image:(hugodf).gif|none]] | |||
{| border="1em" cellspacing="0" width="25%" style="border: 1px solid #999; background: none;" | |||
|- | |- | ||
| | ! align="center" | Move | ||
! align="center" | Total frames | |||
|- | |- | ||
| | | align="center" | Dash Forward | ||
| align="center" | 22 if cancelled | |||
|} | |||
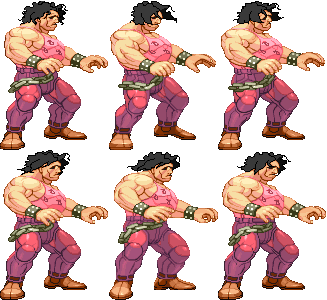
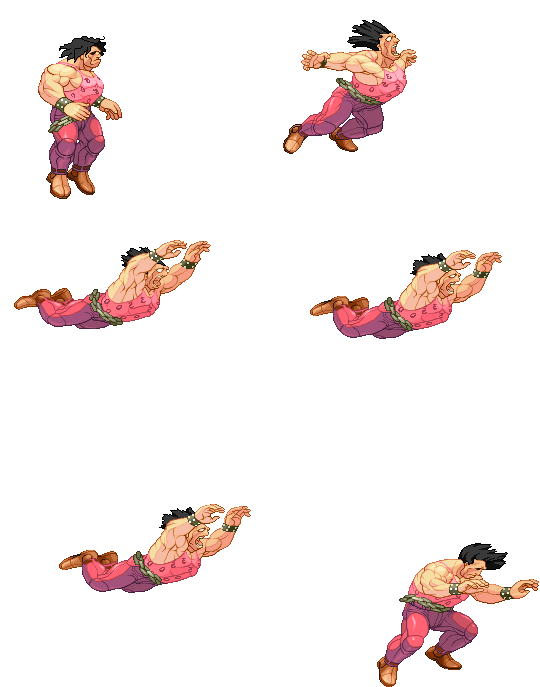
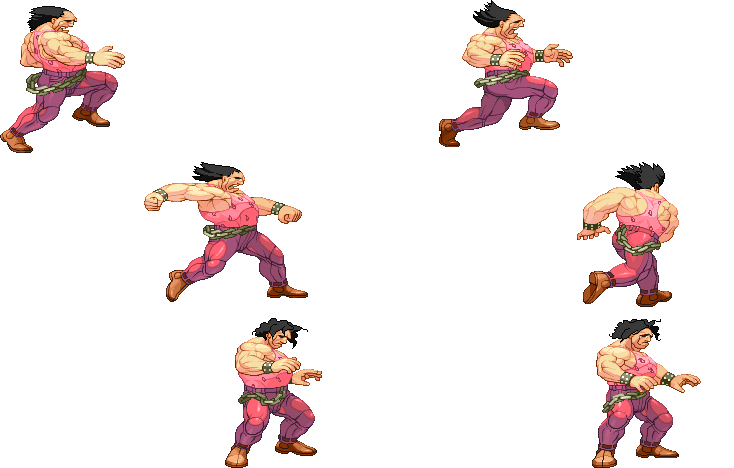
''Hugo's forward dash has the interesting property of making him airbourne for a handful of frames in the middle. This can allow you to dash over low moves, including the c.mk of many characters. By the same merit, Hugo can be anti-aired out of dash, though this typically isn't an issue.'' | |||
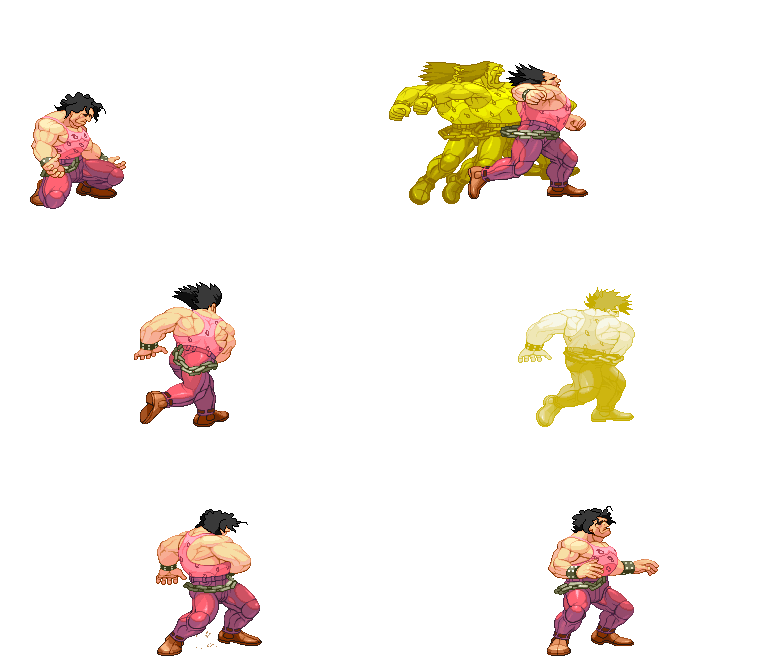
[[Image:(hugodb).gif|none]] | |||
{| border="1em" cellspacing="0" width="25%" style="border: 1px solid #999; background: none;" | |||
|- | |- | ||
| | ! align="center" | Move | ||
! align="center" | Total frames | |||
|- | |- | ||
| | | align="center" | Dash Backwards | ||
| align="center" | 20 | |||
|} | |||
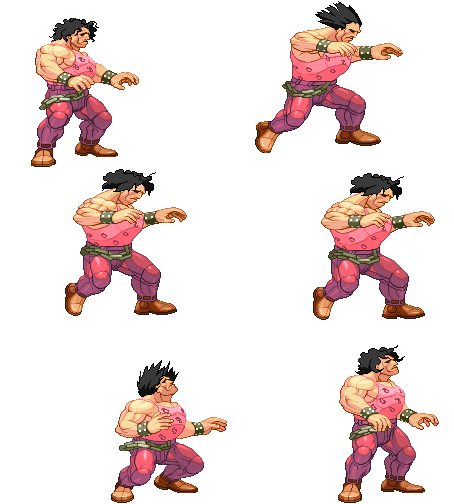
''Hugo is technically airbourne during backdash, though this property is rarely useful.'' | |||
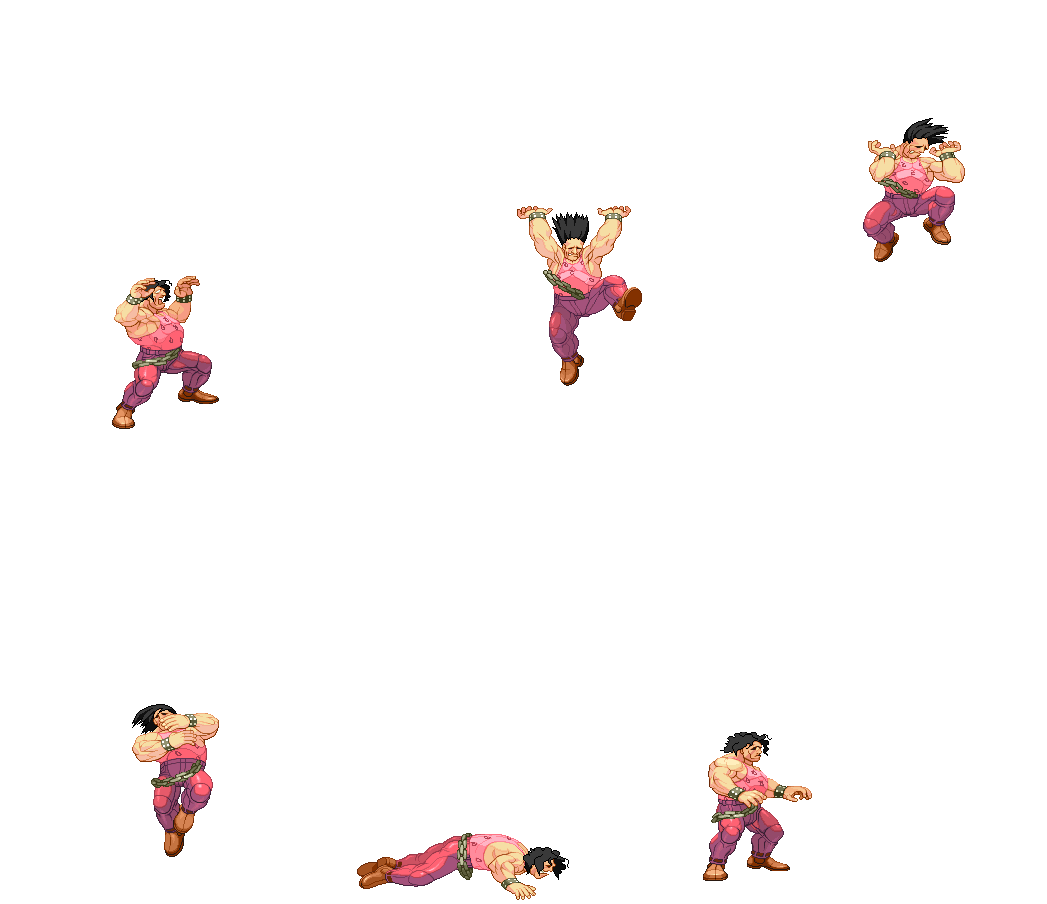
[[Image:(hugobjump).gif|none]] | |||
[[Image:(hugojump).gif|none]] | |||
[[Image:(hugofjump).gif|none]] | |||
{| border="1em" cellspacing="0" width="30%" style="border: 1px solid #999; background: none;" | |||
|- | |- | ||
| | | align="center" | '''Move''' || align="center" | '''Motion''' || align="center" | '''Startup Frames''' | ||
|- | |- | ||
| | | align="center" | Jump || align="center" | BU or U or FU || align="center" | 5 | ||
|} | |||
{| border="1em" cellspacing="0" width="30%" style="border: 1px solid #999; background: none;" | |||
|- | |- | ||
| | | align="center" | '''Move''' || align="center" | '''Motion''' || align="center" | '''Startup Frames''' | ||
|- | |- | ||
| | | align="center" | Super Jump || align="center" | DBU or DU or DFU || align="center" | 7 | ||
|} | |||
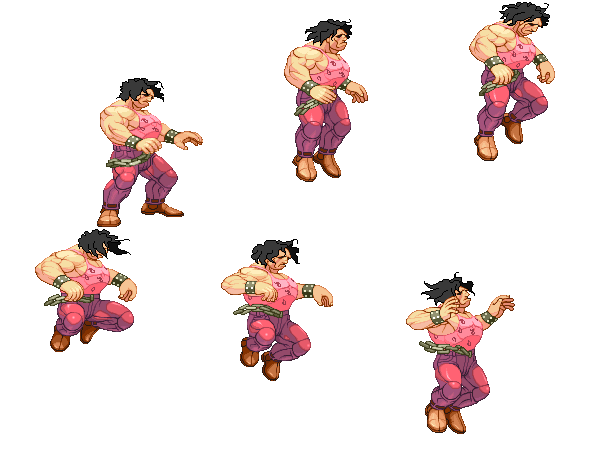
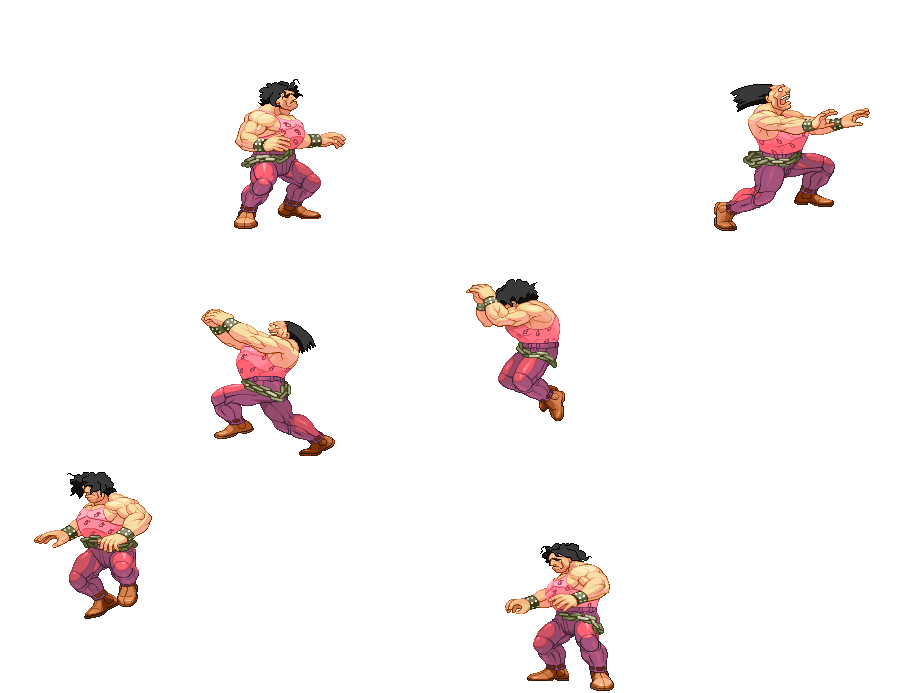
Hugo's jumps are just fine. Overall his jump startup is longer than other members of the cast, which is useful, providing more time to input SPD. You will be often cancelling the startup of a jump into an SPD with Hugo. This longer startup also allows for the Tachi Gigas technique. | |||
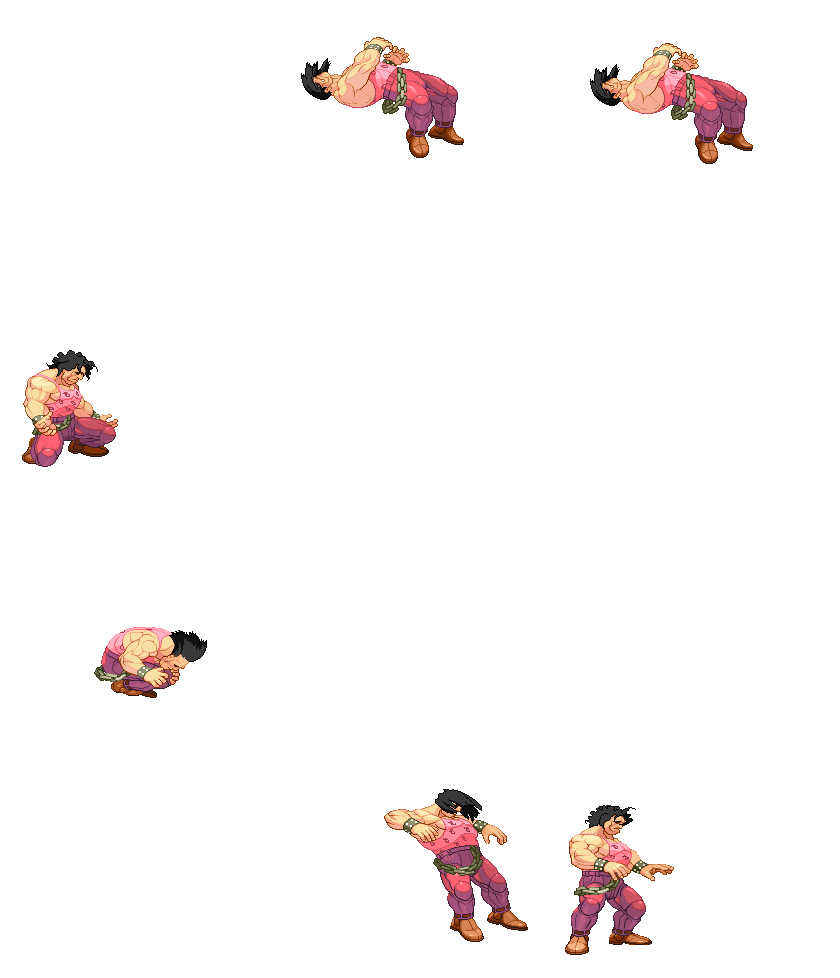
[[Image:(hugow).gif|none]] | |||
{| border="1em" cellspacing="0" width="30%" style="border: 1px solid #999; background: none;" | |||
|- | |- | ||
| | | align="center" | '''Move''' || align="center" | '''Motion''' || align="center" | '''Frames''' | ||
|- | |- | ||
| | | align="center" | Normal Wakeup || align="center" | - || align="center" | 69 | ||
|} | |||
''Comments here'' | |||
[[Image:(hugotw).gif|none]] | |||
{| border="1em" cellspacing="0" width="30%" style="border: 1px solid #999; background: none;" | |||
|- | |- | ||
| | | align="center" | '''Move''' || align="center" | '''Motion''' || align="center" | '''Frames''' | ||
|- | |- | ||
| | | align="center" | Quick Stand || align="center" | Tap D when hitting the ground || align="center" | 54 | ||
|} | |||
''Comments here'' | |||
[[Image:(hugotaunt).gif|none]] | |||
{| border="1em" cellspacing="0" width="40%" style="border: 1px solid #999; background: none;" | |||
|- | |- | ||
| | | align="center" | '''Move''' || align="center" | '''Motion''' || align="center" | '''Frames''' || align="center" | '''Gauge Increase''' | ||
|- | |- | ||
| | | align="center" | Unheld Taunt || align="center" | HP+HK || align="center" | 68? || align="center" | 6 | ||
|} | |||
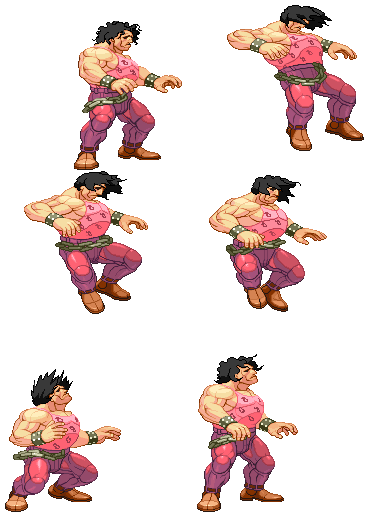
''An unheld taunt can be safely used after a neutral throw or c.mk vs many characters. Beware: often you're better to close the distance and apply pressure. Hugo requires 4 taunts to get the full buff, which is practically unachievable. '' | |||
[[Image:(hugotaunt).gif|none]] | |||
{| border="1em" cellspacing="0" width="40%" style="border: 1px solid #999; background: none;" | |||
|- | |- | ||
| | | align="center" | '''Move''' || align="center" | '''Motion''' || align="center" | '''Frames''' || align="center" | '''Gauge Increase''' | ||
|- | |- | ||
| | | align="center" | Held Taunt || align="center" | Hold HP+HK || align="center" | 95? || align="center" | 6 | ||
|} | |||
''Largely impossible to use, as it's duration is really long. The buff to throw damage is excellent, however is typically never worth using.'' | |||
[[Image:(hugohparry).gif|none]] | |||
[[Image:(hugolparry).gif|none]] | |||
{| border="1em" cellspacing="0" width="35%" style="border: 1px solid #999; background: none;" | |||
|- | |- | ||
| | | align="center" | '''Move''' || align="center" | '''Motion''' | ||
|- | |- | ||
| | | align="center" | Parry (High) || align="center" | Tap F when about taking a hit | ||
|- | |- | ||
| | | align="center" | Parry (Low) || align="center" | Tap D when about taking a hit | ||
|- | |- | ||
| | | align="center" | Parry (Air) || align="center" | Tap F in air when about taking a hit | ||
|} | |||
'''Frame Data''' | |||
{| border="1em" cellspacing="0" width="95%" style="border: 1px solid #999; background: none;" | |||
|- | |- | ||
| | | align="center" | '''Move''' || align="center" | '''Frames you're frozen''' || align="center" | '''Frames opponent is frozen''' || align="center" | '''Frame Advantage when parry is successful''' || align="center" | '''Frames before you can try another parry''' | ||
|- | |- | ||
| | | align="center" | Parry (High) || align="center" | 16 || align="center" | 16 || align="center" | +4(LP/LK) +3(MP/MK) +2(HP/HK) 0(Special/Super) -16(Fireball) || align="center" | 24(19 when attack comes from the air)*,** | ||
|- | |- | ||
| | | align="center" | Parry (Low) || align="center" | 16 || align="center" | 16 || align="center" | +4(LP/LK) +3(MP/MK) +2(HP/HK) 0(Special/Super) -16(Fireball) || align="center" | 24(19 when attack comes from the air)*,** | ||
|- | |- | ||
| | | align="center" | Parry (Air) || align="center" | 16 || align="center" | 16 || align="center" | +4(LP/LK) +3(MP/MK) +2(HP/HK) 0(Special/Super) -16(Fireball) || align="center" | 21(19 when attack comes from the air)*,** | ||
|} | |} | ||
{| border="1em" cellspacing="0" width="70%" style="border: 1px solid #999; background: none;" | |||
{| border="1em | |||
|- | |- | ||
| | |* (If a parry attempt is successful, the 19/21/24 frame restriction is taken away and you can attempt another parry immediately) | ||
|- | |- | ||
| | |** (If another attack connects within 2 frames of your parry, it will automatically be parried) | ||
|} | |||
'''Gauge Increase''' | |||
{| border="1em" cellspacing="0" width="30%" style="border: 1px solid #999; background: none;" | |||
|- | |- | ||
| | | align="center" | '''Move''' || align="center" | '''Gauge Increase''' | ||
|- | |- | ||
| | | align="center" | Parry (High) || align="center" | 4*** | ||
|- | |- | ||
| | | align="center" | Parry (Low) || align="center" | 4*** | ||
|- | |- | ||
| | | align="center" | Parry (Air) || align="center" | 4*** | ||
|} | |||
{| border="1em" cellspacing="0" width="57%" style="border: 1px solid #999; background: none;" | |||
|- | |- | ||
| | |*** (You gain 4 of gauge for whatever attack parried, and for whatever hit you parry during multihit attack) | ||
|} | |||
You can buffer any motion during High or Low parry, but NOT during Air parry, also parry resets the juggle count (and thus resets all scaling). | |||
*'''Parry information is taken from Shoryuken Forums, more exactly, from user JinraiPVC. Thanks for this information dude''' | |||
=== Normal Moves === | |||
==== Standing Normals ==== | |||
[[Image:(hugolp).gif|none]] | |||
''The jab appears to hit high enough to be useful as an anti-air, however this is not the case. The active hitbox of the jab runs UNDERNEATH Hugo's arm, meaning it hits far lower than you might expect. For this reason, the move is best against airbourne opponenets who are very close to the ground (think Necro twirling). | |||
Standing jab is also excellent for spacing claps. If it just whiffs, they're in a good range for any clap. If it hits, you push them back to a suitable range for a clap. Simple! | |||
'' | |||
{| border="1em" cellspacing="0" width="60%" style="border: 1px solid #999; background: none;" | |||
|- | |- | ||
| | | align="center" | '''Move''' || align="center" | '''Motion''' || align="center" | '''Damage''' || align="center" | '''Stun Damage''' || align="center" | '''Chains into itself''' || align="center" | '''Special Cancel''' || align="center" | '''Super Cancel''' || align="center" | '''Juggle Value''' | ||
|- | |- | ||
| | | align="center" | Jab || align="center" | LP || align="center" | 35(6 life points) || align="center" | 5 || align="center" | Yes || align="center" | No || align="center" | No | ||
|} | |||
'''Frame Data''' | |||
{| border="1em" cellspacing="0" width="60%" style="border: 1px solid #999; background: none;" | |||
|- | |- | ||
| | | align="center" | '''Startup''' || align="center" | '''Hit''' || align="center" | '''Recovery''' || align="center" | '''Blocked Advantage''' || align="center" | '''Hit Advantage''' || align="center" | '''Crouching Hit Advantage''' || align="center" | '''Guard''' || align="center" | '''Parry''' | ||
|- | |- | ||
| | | align="center" | 4 || align="center" | 4 || align="center" | 8 || align="center" | -1 || align="center" | -1 || align="center" | -1 || align="center" | HL || align="center" | HL | ||
|} | |||
'''Gauge Increase''' | |||
{| border="1em" cellspacing="0" width="30%" style="border: 1px solid #999; background: none;" | |||
|- | |- | ||
| | | align="center" | '''Miss''' || align="center" | '''Blocked''' || align="center" | '''Hit''' || align="center" | '''Parry (Gauge for opponent)''' | ||
|- | |- | ||
| | | align="center" | 0 || align="center" | 2 || align="center" | 3 || align="center" | 4 | ||
| | |||
| | |||
| | |||
| | |||
|} | |} | ||
{| border="1em | |||
[[Image:(hugomp).gif|none]] | |||
''Hugo's MP is a really fun button, and a great poke for beginners. It can easily destroy low skill level players, with excellent reach and decent damage. However, '''the move is unsafe on block''', meaning at higher levels it is rarely used. When Ken players start punishing MP on block with SA3, you'll know it's time to stop using this move. | |||
{| border="1em" cellspacing="0" width="60%" style="border: 1px solid #999; background: none;" | |||
|- | |||
| align="center" | '''Move''' || align="center" | '''Motion''' || align="center" | '''Damage''' || align="center" | '''Stun Damage''' || align="center" | '''Chains into itself''' || align="center" | '''Special Cancel''' || align="center" | '''Super Cancel''' || align="center" | '''Juggle Value''' | |||
|- | |- | ||
| | | align="center" | Strong || align="center" | MP || align="center" | 120(21 life points) || align="center" | 13 || align="center" | No || align="center" | No || align="center" | No | ||
|} | |||
'''Frame Data''' | |||
{| border="1em" cellspacing="0" width="60%" style="border: 1px solid #999; background: none;" | |||
|- | |- | ||
| | | align="center" | '''Startup''' || align="center" | '''Hit''' || align="center" | '''Recovery''' || align="center" | '''Blocked Advantage''' || align="center" | '''Hit Advantage''' || align="center" | '''Crouching Hit Advantage''' || align="center" | '''Guard''' || align="center" | '''Parry''' | ||
|- | |- | ||
| | | align="center" | 10 || align="center" | 7 || align="center" | 12 || align="center" | -5 || align="center" | 0 || align="center" | +1 || align="center" | HL || align="center" | H | ||
|} | |} | ||
'''Gauge Increase''' | |||
{| border="1em" cellspacing="0" width="30%" style="border: 1px solid #999; background: none;" | |||
|- | |||
| align="center" | '''Miss''' || align="center" | '''Blocked''' || align="center" | '''Hit''' || align="center" | '''Parry (Gauge for opponent)''' | |||
|- | |||
| align="center" | 2 || align="center" | 5 || align="center" | 9 || align="center" | 4 | |||
|} | |||
[[Image:(hugohp).gif|none]] | |||
This is an overhead move which does great stun and damamge. The move is slow enough to be visually reacted to, however very few players have enough experience fighting against Hugo to do this reliably. You won't regularly see high level Hugos using this move frequently. It's used very sparingly, perhaps once a match as an option to force a bad decision or end the round. | |||
{| border="1em" | {| border="1em" cellspacing="0" width="60%" style="border: 1px solid #999; background: none;" | ||
|- | |||
| align="center" | '''Move''' || align="center" | '''Motion''' || align="center" | '''Damage''' || align="center" | '''Stun Damage''' || align="center" | '''Chains into itself''' || align="center" | '''Special Cancel''' || align="center" | '''Super Cancel''' || align="center" | '''Juggle Value''' | |||
|- | |||
| align="center" | Fierce || align="center" | HP || align="center" | 170(30 life points) || align="center" | 21 || align="center" | No || align="center" | No || align="center" | No | |||
|} | |||
'''Frame Data''' | |||
{| border="1em" cellspacing="0" width="60%" style="border: 1px solid #999; background: none;" | |||
|- | |||
| align="center" | '''Startup''' || align="center" | '''Hit''' || align="center" | '''Recovery''' || align="center" | '''Blocked Advantage''' || align="center" | '''Hit Advantage''' || align="center" | '''Crouching Hit Advantage''' || align="center" | '''Guard''' || align="center" | '''Parry''' | |||
|- | |- | ||
| | | align="center" | 16 || align="center" | 7 || align="center" | 15 || align="center" | -3 || align="center" | -1 || align="center" | +1 || align="center" | HL || align="center" | HL | ||
|} | |||
'''Gauge Increase''' | |||
{| border="1em" cellspacing="0" width="30%" style="border: 1px solid #999; background: none;" | |||
|- | |- | ||
| | | align="center" | '''Miss''' || align="center" | '''Blocked''' || align="center" | '''Hit''' || align="center" | '''Parry (Gauge for opponent)''' | ||
|- | |- | ||
| | | align="center" | 3 || align="center" | 7 || align="center" | 15 || align="center" | 4 | ||
|} | |||
[[Image:(hugolk).gif|none]] | |||
An essential poke. Use it to set up '''frame traps''' with Giant Palm or an LK Meat Squasher. | |||
LK will often reach over low moves, such as sweep and low-forward. This means it can be used sparingly to apply pressure against character's attempting to bully with superior low normals. | |||
{| border="1em" cellspacing="0" width="60%" style="border: 1px solid #999; background: none;" | |||
|- | |- | ||
| | | align="center" | '''Move''' || align="center" | '''Motion''' || align="center" | '''Damage''' || align="center" | '''Stun Damage''' || align="center" | '''Chains into itself''' || align="center" | '''Special Cancel''' || align="center" | '''Super Cancel''' || align="center" | '''Juggle Value''' | ||
|- | |- | ||
| | | align="center" | Short || align="center" | LK || align="center" | 50(8 life points) || align="center" | 3 || align="center" | No || align="center" | Yes || align="center" | Yes | ||
|} | |||
'''Frame Data''' | |||
{| border="1em" cellspacing="0" width="60%" style="border: 1px solid #999; background: none;" | |||
|- | |- | ||
| Crouching | | align="center" | '''Startup''' || align="center" | '''Hit''' || align="center" | '''Recovery''' || align="center" | '''Blocked Advantage''' || align="center" | '''Hit Advantage''' || align="center" | '''Crouching Hit Advantage''' || align="center" | '''Guard''' || align="center" | '''Parry''' | ||
|- | |- | ||
| | | align="center" | 5 || align="center" | 4 || align="center" | 9 || align="center" | +1 || align="center" | +1 || align="center" | +1 || align="center" | HL || align="center" | HL | ||
|} | |||
'''Gauge Increase''' | |||
{| border="1em" cellspacing="0" width="30%" style="border: 1px solid #999; background: none;" | |||
|- | |- | ||
| | | align="center" | '''Miss''' || align="center" | '''Blocked''' || align="center" | '''Hit''' || align="center" | '''Parry (Gauge for opponent)''' | ||
|- | |- | ||
| | | align="center" | 0 || align="center" | 2 || align="center" | 3 || align="center" | 4 | ||
|} | |} | ||
[[Image:(hugomk).gif|none]] | |||
This move has no real uses. If you're already good at Hugo I'm sure you can find a situational application, however for 99% of players 99% of the time, '''this is garbage move that should never be used'''. | |||
{| border="1em | 2-hit attack, and the 2nd hit is an overhead. The first hit of MK hits higher, before the leg descends. | ||
{| border="1em" cellspacing="0" width="60%" style="border: 1px solid #999; background: none;" | |||
|- | |- | ||
| '''Move''' || '''Motion''' | | align="center" | '''Move''' || align="center" | '''Motion''' || align="center" | '''Damage''' || align="center" | '''Stun Damage''' || align="center" | '''Chains into itself''' || align="center" | '''Special Cancel''' || align="center" | '''Super Cancel''' || align="center" | '''Juggle Value''' | ||
|- | |- | ||
| | | align="center" | Forward || align="center" | MK || align="center" | 115(70+50)(19 life points) || align="center" | 13(9+5) || align="center" | No || align="center" | No || align="center" | No | ||
|} | |||
'''Frame Data''' | |||
{| border="1em" cellspacing="0" width="60%" style="border: 1px solid #999; background: none;" | |||
|- | |- | ||
| | | align="center" | '''Startup''' || align="center" | '''Hit''' || align="center" | '''Recovery''' || align="center" | '''Blocked Advantage''' || align="center" | '''Hit Advantage''' || align="center" | '''Crouching Hit Advantage''' || align="center" | '''Guard''' || align="center" | '''Parry''' | ||
|- | |- | ||
| | | align="center" | 9/14 || align="center" | 2/4 || align="center" | 23 || align="center" | -4 || align="center" | +1 || align="center" | +3 || align="center" | HL/H || align="center" | H/H | ||
|} | |||
'''Gauge Increase''' | |||
{| border="1em" cellspacing="0" width="30%" style="border: 1px solid #999; background: none;" | |||
|- | |- | ||
| | | align="center" | '''Miss''' || align="center" | '''Blocked''' || align="center" | '''Hit''' || align="center" | '''Parry (Gauge for opponent)''' | ||
|- | |- | ||
| | | align="center" | 7 || align="center" | 5 || align="center" | 11 || align="center" | 8(4+4) | ||
| | |||
| | |||
|} | |} | ||
{| border="1em" | [[Image:(hugojhk).gif|none]] | ||
This move is useless on paper, however has a few saving graces which make it suitable for use maybe once in every ten games: Firstly, it shares an animation with j.HK, which can make it hard to respond to when unexpected. Secondly, it does good stun and damage, which means there's OK reward for the risk you're taking. Finally, it trades well with a number of options, including wakeup shoto DP when timed correctly. | |||
Again, this move is uselesss on paper. The recovery is giant, and all characters have good punish options. For this reason it is highly situational, and shouldn't be used by 99% of players 99% of the time. | |||
{| border="1em" cellspacing="0" width="60%" style="border: 1px solid #999; background: none;" | |||
|- | |||
| align="center" | '''Move''' || align="center" | '''Motion''' || align="center" | '''Damage''' || align="center" | '''Stun Damage''' || align="center" | '''Chains into itself''' || align="center" | '''Special Cancel''' || align="center" | '''Super Cancel''' || align="center" | '''Juggle Value''' | |||
|- | |||
| align="center" | Roundhouse || align="center" | HK || align="center" | 150(26 life points) || align="center" | 19 || align="center" | No || align="center" | No || align="center" | No | |||
|} | |||
'''Frame Data''' | |||
{| border="1em" cellspacing="0" width="60%" style="border: 1px solid #999; background: none;" | |||
|- | |||
| align="center" | '''Startup''' || align="center" | '''Hit''' || align="center" | '''Recovery''' || align="center" | '''Blocked Advantage''' || align="center" | '''Hit Advantage''' || align="center" | '''Crouching Hit Advantage''' || align="center" | '''Guard''' || align="center" | '''Parry''' | |||
|- | |- | ||
| | | align="center" | 21 || align="center" | 8 || align="center" | 28 || align="center" | -13 || align="center" | +3 || align="center" | +3 || align="center" | H || align="center" | H | ||
|} | |||
'''Gauge Increase''' | |||
{| border="1em" cellspacing="0" width="30%" style="border: 1px solid #999; background: none;" | |||
|- | |- | ||
| | | align="center" | '''Miss''' || align="center" | '''Blocked''' || align="center" | '''Hit''' || align="center" | '''Parry (Gauge for opponent)''' | ||
|- | |- | ||
| | | align="center" | 3 || align="center" | 7 || align="center" | 15 || align="center" | 4 | ||
|} | |} | ||
=== | ==== Jumping Normals ==== | ||
Jumping jab is a fine move. That's it. | |||
{| border="1em" | [[Image:(hugojlp).gif|none]] | ||
{| border="1em" cellspacing="0" width="60%" style="border: 1px solid #999; background: none;" | |||
|- | |||
| align="center" | '''Move''' || align="center" | '''Motion''' || align="center" | '''Damage''' || align="center" | '''Stun Damage''' || align="center" | '''Chains into itself''' || align="center" | '''Special Cancel''' || align="center" | '''Super Cancel''' || align="center" | '''Juggle Value''' | |||
|- | |||
| align="center" | Jump Jab || align="center" | (Air) LP || align="center" | 40(7 life points) || align="center" | 9 || align="center" | No || align="center" | No || align="center" | No | |||
|} | |||
'''Frame Data''' | |||
{| border="1em" cellspacing="0" width="60%" style="border: 1px solid #999; background: none;" | |||
|- | |- | ||
| ''' | | align="center" | '''Startup''' || align="center" | '''Hit''' || align="center" | '''Recovery''' || align="center" | '''Blocked Advantage''' || align="center" | '''Hit Advantage''' || align="center" | '''Crouching Hit Advantage''' || align="center" | '''Guard''' || align="center" | '''Parry''' | ||
|- | |- | ||
| | | align="center" | 3 || align="center" | 11 || align="center" | - || align="center" | -3~+7/-2~+7 || align="center" | -3~+7/-2~+7 || align="center" | +5~+7/+6~+7 || align="center" | H || align="center" | H | ||
|} | |||
'''Gauge Increase''' | |||
{| border="1em" cellspacing="0" width="30%" style="border: 1px solid #999; background: none;" | |||
|- | |- | ||
| | | align="center" | '''Miss''' || align="center" | '''Blocked''' || align="center" | '''Hit''' || align="center" | '''Parry (Gauge for opponent)''' | ||
|- | |- | ||
| | | align="center" | 0 || align="center" | 2 || align="center" | 3 || align="center" | 4 | ||
|} | |} | ||
[[Image:( | [[Image:(hugojmp).gif|none]] | ||
{| border="1em | Jump MP is fantastic button (if not Hugo's best) for quick air-to-air situations, with good speed, range and damage. It can be used to hit grounded targets, however typically other air normals are better for this purpose. | ||
{| border="1em" cellspacing="0" width="60%" style="border: 1px solid #999; background: none;" | |||
|- | |- | ||
| align="center" | '''Move''' || align="center" | '''Motion''' || align="center" | '''Damage''' || align="center" | '''Stun Damage''' | | align="center" | '''Move''' || align="center" | '''Motion''' || align="center" | '''Damage''' || align="center" | '''Stun Damage''' || align="center" | '''Chains into itself''' || align="center" | '''Special Cancel''' || align="center" | '''Super Cancel''' || align="center" | '''Juggle Value''' | ||
|- | |- | ||
| align="center" | | | align="center" | Jump Strong || align="center" | (Air) MP || align="center" | 100(17 life points) || align="center" | 13 || align="center" | No || align="center" | No || align="center" | No | ||
|} | |} | ||
'' | '''Frame Data''' | ||
{| border="1em" cellspacing="0" width="60%" style="border: 1px solid #999; background: none;" | |||
{| border="1em | |||
|- | |- | ||
| align="center" | ''' | | align="center" | '''Startup''' || align="center" | '''Hit''' || align="center" | '''Recovery''' || align="center" | '''Blocked Advantage''' || align="center" | '''Hit Advantage''' || align="center" | '''Crouching Hit Advantage''' || align="center" | '''Guard''' || align="center" | '''Parry''' | ||
|- | |- | ||
| align="center" | | | align="center" | 6 || align="center" | 8 || align="center" | - || align="center" | 0~+10/+2~+10 || align="center" | 0~+10/+2~+10 || align="center" | +8~+10/+10 || align="center" | H || align="center" | H | ||
|} | |} | ||
'' | '''Gauge Increase''' | ||
{| border="1em" cellspacing="0" width="30%" style="border: 1px solid #999; background: none;" | |||
{| border="1em | |||
|- | |- | ||
| align="center" | ''' | | align="center" | '''Miss''' || align="center" | '''Blocked''' || align="center" | '''Hit''' || align="center" | '''Parry (Gauge for opponent)''' | ||
|- | |- | ||
| align="center" | | | align="center" | 2 || align="center" | 5 || align="center" | 9 || align="center" | 4 | ||
|} | |} | ||
[[Image:( | [[Image:(hugojhp).gif|none]] | ||
{| border="1em | Hugo's best poke in the air when enemy is not close, otherwise a Body Slam is prefered. Very nice range, and has good priority. Use it when you're going to reach the ground and enemy is far, so it will prevent oponents jumps while you're in the air or landing, or you can hit them even on the ground, but beware because for some characters, this move will whiff when they are standing. | ||
Jump back HP can be a great option versus character's who's dominant strategy is to control the air - think Oro, Ibuki, Akuma etc. | |||
This move is '''very strong''', and not taking advantage of that would be a mistake. | |||
{| border="1em" cellspacing="0" width="60%" style="border: 1px solid #999; background: none;" | |||
|- | |- | ||
| align="center" | '''Move''' || align="center" | '''Motion''' || align="center" | '''Damage''' || align="center" | '''Stun Damage''' | | align="center" | '''Move''' || align="center" | '''Motion''' || align="center" | '''Damage''' || align="center" | '''Stun Damage''' || align="center" | '''Chains into itself''' || align="center" | '''Special Cancel''' || align="center" | '''Super Cancel''' || align="center" | '''Juggle Value''' | ||
|- | |- | ||
| align="center" | | | align="center" | Jump Fierce || align="center" | (Air) HP || align="center" | 150(26 life points) || align="center" | 17 || align="center" | No || align="center" | No || align="center" | No | ||
|} | |} | ||
'' | '''Frame Data''' | ||
{| border="1em" cellspacing="0" width="60%" style="border: 1px solid #999; background: none;" | |||
|- | |||
| align="center" | '''Startup''' || align="center" | '''Hit''' || align="center" | '''Recovery''' || align="center" | '''Blocked Advantage''' || align="center" | '''Hit Advantage''' || align="center" | '''Crouching Hit Advantage''' || align="center" | '''Guard''' || align="center" | '''Parry''' | |||
{| border="1em | |||
|- | |- | ||
| align="center" | | | align="center" | 11 || align="center" | 5 || align="center" | - || align="center" | +4~+13/+6~+13 || align="center" | +4~+13/+6~+13 || align="center" | +12~+13 || align="center" | H || align="center" | H | ||
|} | |||
'''Gauge Increase''' | |||
{| border="1em" cellspacing="0" width="30%" style="border: 1px solid #999; background: none;" | |||
|- | |- | ||
| align="center" | | | align="center" | '''Miss''' || align="center" | '''Blocked''' || align="center" | '''Hit''' || align="center" | '''Parry (Gauge for opponent)''' | ||
|- | |- | ||
| align="center" | | | align="center" | 3 || align="center" | 7 || align="center" | 15 || align="center" | 4 | ||
|} | |} | ||
[[Image:( | [[Image:(hugojlk).gif|none]] | ||
{| border="1em | It's a j.lk! Nothing special. | ||
{| border="1em" cellspacing="0" width="60%" style="border: 1px solid #999; background: none;" | |||
|- | |- | ||
| align="center" | '''Move''' || align="center" | '''Motion''' || align="center" | '''Damage''' || align="center" | '''Stun Damage''' | | align="center" | '''Move''' || align="center" | '''Motion''' || align="center" | '''Damage''' || align="center" | '''Stun Damage''' || align="center" | '''Chains into itself''' || align="center" | '''Special Cancel''' || align="center" | '''Super Cancel''' || align="center" | '''Juggle Value''' | ||
|- | |- | ||
| align="center" | | | align="center" | Jump Short || align="center" | (Air) LK || align="center" | 60(10 life points) || align="center" | 7 || align="center" | No || align="center" | No || align="center" | No | ||
|} | |} | ||
'' | '''Frame Data''' | ||
{| border="1em" cellspacing="0" width="60%" style="border: 1px solid #999; background: none;" | |||
{| border="1em | |||
|- | |- | ||
| align="center" | ''' | | align="center" | '''Startup''' || align="center" | '''Hit''' || align="center" | '''Recovery''' || align="center" | '''Blocked Advantage''' || align="center" | '''Hit Advantage''' || align="center" | '''Crouching Hit Advantage''' || align="center" | '''Guard''' || align="center" | '''Parry''' | ||
|- | |- | ||
| align="center" | | | align="center" | 3 || align="center" | 16 || align="center" | - || align="center" | -9~+7/-8~+7 || align="center" | -9~+7/-8~+7 || align="center" | +1~+7/+2~+7 || align="center" | H || align="center" | H | ||
|} | |} | ||
'' | '''Gauge Increase''' | ||
{| border="1em" cellspacing="0" width="30%" style="border: 1px solid #999; background: none;" | |||
{| border="1em | |||
|- | |- | ||
| align="center" | ''' | | align="center" | '''Miss''' || align="center" | '''Blocked''' || align="center" | '''Hit''' || align="center" | '''Parry (Gauge for opponent)''' | ||
|- | |- | ||
| align="center" | | | align="center" | 0 || align="center" | 2 || align="center" | 3 || align="center" | 4 | ||
|} | |} | ||
[[Image:( | [[Image:(hugojmk).gif|none]] | ||
{| border="1em | Hugo's' j.mk works similarly to j.mp, however is better used on targets BELOW Hugo, whether grounded or airbourne. This move can do enough hit-stun to follow up with a combo, though again, 99% of the time this is a bad idea. High situational. | ||
{| border="1em" cellspacing="0" width="60%" style="border: 1px solid #999; background: none;" | |||
|- | |- | ||
| align="center" | '''Move''' || align="center" | '''Motion''' || align="center" | '''Damage''' || align="center" | '''Stun Damage''' | | align="center" | '''Move''' || align="center" | '''Motion''' || align="center" | '''Damage''' || align="center" | '''Stun Damage''' || align="center" | '''Chains into itself''' || align="center" | '''Special Cancel''' || align="center" | '''Super Cancel''' || align="center" | '''Juggle Value''' | ||
|- | |- | ||
| align="center" | | | align="center" | Jump Forward || align="center" | (Air) MK || align="center" | 100(17 life points) || align="center" | 11 || align="center" | No || align="center" | No || align="center" | No | ||
|} | |} | ||
'' | '''Frame Data''' | ||
{| border="1em" cellspacing="0" width="60%" style="border: 1px solid #999; background: none;" | |||
{| border="1em | |||
|- | |- | ||
| align="center" | ''' | | align="center" | '''Startup''' || align="center" | '''Hit''' || align="center" | '''Recovery''' || align="center" | '''Blocked Advantage''' || align="center" | '''Hit Advantage''' || align="center" | '''Crouching Hit Advantage''' || align="center" | '''Guard''' || align="center" | '''Parry''' | ||
|- | |- | ||
| align="center" | | | align="center" | 5 || align="center" | 7 || align="center" | - || align="center" | -4~+10/-5~+10 || align="center" | -4~+10/-5~+10 || align="center" | +2~+10/+3~+10 || align="center" | H || align="center" | H | ||
|} | |} | ||
'' | '''Gauge Increase''' | ||
{| border="1em" cellspacing="0" width="30%" style="border: 1px solid #999; background: none;" | |||
{| border="1em | |||
|- | |- | ||
| align="center" | ''' | | align="center" | '''Miss''' || align="center" | '''Blocked''' || align="center" | '''Hit''' || align="center" | '''Parry (Gauge for opponent)''' | ||
|- | |- | ||
| align="center" | | | align="center" | 2 || align="center" | 5 || align="center" | 9 || align="center" | 4 | ||
|} | |} | ||
[[Image:(hugojhk).gif|none]] | [[Image:(hugojhk).gif|none]] | ||
{| border="1em" | J.hk hits deeper than Hugo's other airbourne normals. This makes it a better choice against shorter characters such as the Twins, or Makoto. | ||
{| border="1em" cellspacing="0" width="60%" style="border: 1px solid #999; background: none;" | |||
|- | |||
| align="center" | '''Move''' || align="center" | '''Motion''' || align="center" | '''Damage''' || align="center" | '''Stun Damage''' || align="center" | '''Chains into itself''' || align="center" | '''Special Cancel''' || align="center" | '''Super Cancel''' || align="center" | '''Juggle Value''' | |||
|- | |||
| align="center" | Jump Roundhouse || align="center" | (Air) HK || align="center" | 130(26 life points) || align="center" | 15 || align="center" | No || align="center" | No || align="center" | No | |||
|} | |||
'''Frame Data''' | |||
{| border="1em" cellspacing="0" width="60%" style="border: 1px solid #999; background: none;" | |||
|- | |||
| align="center" | '''Startup''' || align="center" | '''Hit''' || align="center" | '''Recovery''' || align="center" | '''Blocked Advantage''' || align="center" | '''Hit Advantage''' || align="center" | '''Crouching Hit Advantage''' || align="center" | '''Guard''' || align="center" | '''Parry''' | |||
|- | |||
| align="center" | 11 || align="center" | 7 || align="center" | - || align="center" | -1~+13/-2~+13 || align="center" | -1~+13/-2~+13 || align="center" | +7~+13/+9~+13 || align="center" | H || align="center" | H | |||
|} | |||
'''Gauge Increase''' | |||
{| border="1em" cellspacing="0" width="30%" style="border: 1px solid #999; background: none;" | |||
|- | |- | ||
| align="center" | ''' | | align="center" | '''Miss''' || align="center" | '''Blocked''' || align="center" | '''Hit''' || align="center" | '''Parry (Gauge for opponent)''' | ||
|- | |- | ||
| align="center" | | | align="center" | 3 || align="center" | 7 || align="center" | 15 || align="center" | 4 | ||
|} | |} | ||
[[Image:( | [[Image:(hugouoh).gif|none]] | ||
{| border="1em" | Hugo's universal overhead has number of interesting properties: | ||
* It can be kara'd easily with mk to increase its range. | |||
* It can travel '''over''' moves such Yun's shoulder, though this is (impossible) very difficult to do on reaction. | |||
* When used at the right range, Hugo will travel over low normals, landing for a 360/720. | |||
* It can trade with late air normals, making it a further tool in Hugo's weak anti-air toolset. | |||
{| border="1em" cellspacing="0" width="60%" style="border: 1px solid #999; background: none;" | |||
|- | |||
| align="center" | '''Move''' || align="center" | '''Motion''' || align="center" | '''Damage''' || align="center" | '''Stun Damage''' || align="center" | '''Chains into itself''' || align="center" | '''Special Cancel''' || align="center" | '''Super Cancel''' || align="center" | '''Juggle Value''' | |||
|- | |||
| align="center" | Universal Overhead || align="center" | MP+MK || align="center" | 40(7 life points) || align="center" | 3 || align="center" | No || align="center" | No || align="center" | No | |||
|} | |||
'''Frame Data''' | |||
{| border="1em" cellspacing="0" width="60%" style="border: 1px solid #999; background: none;" | |||
|- | |||
| align="center" | '''Startup''' || align="center" | '''Hit''' || align="center" | '''Recovery''' || align="center" | '''Blocked Advantage''' || align="center" | '''Hit Advantage''' || align="center" | '''Crouching Hit Advantage''' || align="center" | '''Guard''' || align="center" | '''Parry''' | |||
|- | |||
| align="center" | 15 || align="center" | 10 || align="center" | 5 || align="center" | -5~+7 || align="center" | 0~+8 || align="center" | +1~+9 || align="center" | H || align="center" | H | |||
|} | |||
'''Gauge Increase''' | |||
{| border="1em" cellspacing="0" width="30%" style="border: 1px solid #999; background: none;" | |||
|- | |- | ||
| align="center" | ''' | | align="center" | '''Miss''' || align="center" | '''Blocked''' || align="center" | '''Hit''' || align="center" | '''Parry (Gauge for opponent)''' | ||
|- | |- | ||
| align="center" | | | align="center" | 0 || align="center" | 1 || align="center" | 2 || align="center" | 4 | ||
|} | |} | ||
==== Throws ==== | ==== Throws ==== | ||
{| border="1em | [[Image:(hugonht).gif|none]] | ||
After a successful grab midscreen, quickly use an MK backbreaker to arrive at oki range. | |||
After a successful grab in the corner, either use c.mp to combo, or stand jab to reset. Typically I would recommend the stand jab, as this gives the opponent less thinking time to response to the next mixup. | |||
{| border="1em" cellspacing="0" width="50%" style="border: 1px solid #999; background: none;" | |||
|- | |- | ||
| align="center" | '''Move''' || align="center" | '''Motion''' || align="center" | '''Damage''' || align="center" | '''Stun Damage'''|| align="center" | '''Throw Range''' | | align="center" | '''Move''' || align="center" | '''Motion''' || align="center" | '''Damage''' || align="center" | '''Stun Damage''' || align="center" | '''Throw Range''' | ||
|- | |- | ||
| align="center" | Neck Hanging Three || align="center" | LP LK || align="center" | 30x8 || align="center" | 5x8 || align="center" | 32 | | align="center" | Neck Hanging Three || align="center" | LP+LK || align="center" | 130(30x8)(21 life points) || align="center" | 24(5x8) || align="center" | 32 | ||
|} | |} | ||
'''Frame Data''' | |||
{| border="1em" cellspacing="0" width="65%" style="border: 1px solid #999; background: none;" | |||
{| border="1em" | |- | ||
| align="center" | '''Startup''' || align="center" | '''Hit''' || align="center" | '''Recovery''' || align="center" | '''Blocked Advantage''' || align="center" | '''Hit Advantage''' || align="center" | '''Crouching Hit Advantage''' || align="center" | '''Guard''' || align="center" | '''Parry''' | |||
|- | |||
| align="center" | 2 || align="center" | 1 || align="center" | 21 || align="center" | - || align="center" | - || align="center" | - || align="center" | LP+LK || align="center" | - | |||
|} | |||
'''Gauge Increase''' | |||
{| border="1em" cellspacing="0" width="25%" style="border: 1px solid #999; background: none;" | |||
|- | |- | ||
| align="center" | ''' | | align="center" | '''Miss''' || align="center" | '''Blocked''' || align="center" | '''Hit''' | ||
|- | |- | ||
| align="center" | | | align="center" | 0 || align="center" | 7 (for the player who blocked) || align="center" | 24(3?x8) | ||
|} | |} | ||
[[Image:( | [[Image:(hugobs).gif|none]] | ||
{| border="1em" | {| border="1em" cellspacing="0" width="65%" style="border: 1px solid #999; background: none;" | ||
|- | |||
| align="center" | '''Move''' || align="center" | '''Motion''' || align="center" | '''Damage''' || align="center" | '''Stun Damage''' || align="center" | '''Throw Range''' || align="center" | '''Kara-Throw''' || align="center" | '''Kara-Throw Range''' | |||
|- | |||
| align="center" | Body Slam || align="center" | F+LP+LK or B+LP+LK || align="center" | 160(28 life points) || align="center" | 13 || align="center" | 32 || align="center" | MK/HP || align="center" | ??/?? | |||
|} | |||
'''Frame Data''' | |||
{| border="1em" cellspacing="0" width="65%" style="border: 1px solid #999; background: none;" | |||
|- | |||
| align="center" | '''Startup''' || align="center" | '''Hit''' || align="center" | '''Recovery''' || align="center" | '''Blocked Advantage''' || align="center" | '''Hit Advantage''' || align="center" | '''Crouching Hit Advantage''' || align="center" | '''Guard''' || align="center" | '''Parry''' | |||
|- | |||
| align="center" | 2 || align="center" | 1 || align="center" | 21 || align="center" | - || align="center" | - || align="center" | - || align="center" | LP+LK || align="center" | - | |||
|} | |||
'''Gauge Increase''' | |||
{| border="1em" cellspacing="0" width="25%" style="border: 1px solid #999; background: none;" | |||
|- | |- | ||
| align="center" | ''' | | align="center" | '''Miss''' || align="center" | '''Blocked''' || align="center" | '''Hit''' | ||
|- | |- | ||
| align="center" | | | align="center" | 0 || align="center" | 7 (for the player who blocked) || align="center" | 7 | ||
|} | |} | ||
''Comments here'' | |||
==== Crouching Normals ==== | |||
[[Image:(hugoclp).gif|none]] | [[Image:(hugoclp).gif|none]] | ||
{| border="1em | Not quite as fast as c.lk, and can be parried H+L, so generally not preferred, however is still a good option to chain to confirm sa3, and set up other further damage. | ||
Shares similar frames to c.mp, abuse this. | |||
{| border="1em" cellspacing="0" width="60%" style="border: 1px solid #999; background: none;" | |||
|- | |- | ||
| align="center" | '''Move''' || align="center" | '''Motion''' || align="center" | '''Damage''' || align="center" | '''Stun Damage''' | | align="center" | '''Move''' || align="center" | '''Motion''' || align="center" | '''Damage''' || align="center" | '''Stun Damage''' || align="center" | '''Chains into itself''' || align="center" | '''Special Cancel''' || align="center" | '''Super Cancel''' || align="center" | '''Juggle Value''' | ||
|- | |- | ||
| align="center" | | | align="center" | Crouch Jab || align="center" | C+LP || align="center" | 30(7 life points) || align="center" | 3 || align="center" | Yes || align="center" | Yes || align="center" | Yes | ||
|} | |||
'''Frame Data''' | |||
{| border="1em" cellspacing="0" width="60%" style="border: 1px solid #999; background: none;" | |||
|- | |||
| align="center" | '''Startup''' || align="center" | '''Hit''' || align="center" | '''Recovery''' || align="center" | '''Blocked Advantage''' || align="center" | '''Hit Advantage''' || align="center" | '''Crouching Hit Advantage''' || align="center" | '''Guard''' || align="center" | '''Parry''' | |||
|- | |||
| align="center" | 4 || align="center" | 3 || align="center" | 8 || align="center" | -1 || align="center" | -1 || align="center" | -1 || align="center" | HL || align="center" | HL | |||
|} | |||
'''Gauge Increase''' | |||
{| border="1em" cellspacing="0" width="30%" style="border: 1px solid #999; background: none;" | |||
|- | |||
| align="center" | '''Miss''' || align="center" | '''Blocked''' || align="center" | '''Hit''' || align="center" | '''Parry (Gauge for opponent)''' | |||
|- | |||
| align="center" | 0 || align="center" | 2 || align="center" | 3 || align="center" | 4 | |||
|} | |} | ||
[[Image:(hugocmp).gif|none]] | [[Image:(hugocmp).gif|none]] | ||
{| border="1em | One of the very best pokes Hugo has. Use this button to punish missed tackles, bad pokes, mis-spaced fireballs, the list goes on. Isn't super safe, but feels like a more secure option than mp, with a few less negative frames on block. | ||
Shares similar frames to c.lp, abuse this. | |||
{| border="1em" cellspacing="0" width="60%" style="border: 1px solid #999; background: none;" | |||
|- | |- | ||
| align="center" | '''Move''' || align="center" | '''Motion''' || align="center" | '''Damage''' || align="center" | '''Stun Damage''' | | align="center" | '''Move''' || align="center" | '''Motion''' || align="center" | '''Damage''' || align="center" | '''Stun Damage''' || align="center" | '''Chains into itself''' || align="center" | '''Special Cancel''' || align="center" | '''Super Cancel''' || align="center" | '''Juggle Value''' | ||
|- | |- | ||
| align="center" | | | align="center" | Crouch Strong || align="center" | C+MP || align="center" | 120(17 life points) || align="center" | 13 || align="center" | No || align="center" | No || align="center" | No | ||
|} | |||
'''Frame Data''' | |||
{| border="1em" cellspacing="0" width="60%" style="border: 1px solid #999; background: none;" | |||
|- | |||
| align="center" | '''Startup''' || align="center" | '''Hit''' || align="center" | '''Recovery''' || align="center" | '''Blocked Advantage''' || align="center" | '''Hit Advantage''' || align="center" | '''Crouching Hit Advantage''' || align="center" | '''Guard''' || align="center" | '''Parry''' | |||
|- | |||
| align="center" | 7 || align="center" | 5 || align="center" | 12 || align="center" | -2 || align="center" | -1 || align="center" | 0 || align="center" | HL || align="center" | HL | |||
|} | |||
'''Gauge Increase''' | |||
{| border="1em" cellspacing="0" width="30%" style="border: 1px solid #999; background: none;" | |||
|- | |||
| align="center" | '''Miss''' || align="center" | '''Blocked''' || align="center" | '''Hit''' || align="center" | '''Parry (Gauge for opponent)''' | |||
|- | |||
| align="center" | 2 || align="center" | 5 || align="center" | 9 || align="center" | 4 | |||
|} | |} | ||
[[Image:(hugochp).gif|none]] | [[Image:(hugochp).gif|none]] | ||
{| border="1em" | This move ''can'' be used as an anti-air, however because it's relatively slow, and only hits once, it will usually be parried. Hugo recovers crouching, which means he is extremely vulnerable for a long time. | ||
{| border="1em" cellspacing="0" width="60%" style="border: 1px solid #999; background: none;" | |||
|- | |||
| align="center" | '''Move''' || align="center" | '''Motion''' || align="center" | '''Damage''' || align="center" | '''Stun Damage''' || align="center" | '''Chains into itself''' || align="center" | '''Special Cancel''' || align="center" | '''Super Cancel''' || align="center" | '''Juggle Value''' | |||
|- | |||
| align="center" | Crouch Fierce || align="center" | C+HP || align="center" | 110(26 life points) || align="center" | 13 || align="center" | No || align="center" | No || align="center" | No | |||
|} | |||
'''Frame Data''' | |||
{| border="1em" cellspacing="0" width="60%" style="border: 1px solid #999; background: none;" | |||
|- | |||
| align="center" | '''Startup''' || align="center" | '''Hit''' || align="center" | '''Recovery''' || align="center" | '''Blocked Advantage''' || align="center" | '''Hit Advantage''' || align="center" | '''Crouching Hit Advantage''' || align="center" | '''Guard''' || align="center" | '''Parry''' | |||
|- | |||
| align="center" | 13 || align="center" | 10 || align="center" | 37 || align="center" | -29 || align="center" | Down || align="center" | Down || align="center" | HL || align="center" | HL | |||
|} | |||
'''Gauge Increase''' | |||
{| border="1em" cellspacing="0" width="30%" style="border: 1px solid #999; background: none;" | |||
|- | |- | ||
| align="center" | ''' | | align="center" | '''Miss''' || align="center" | '''Blocked''' || align="center" | '''Hit''' || align="center" | '''Parry (Gauge for opponent)''' | ||
|- | |- | ||
| align="center" | | | align="center" | 3 || align="center" | 7 || align="center" | 15 || align="center" | 4 | ||
|} | |} | ||
[[Image:(hugoclk).gif|none]] | [[Image:(hugoclk).gif|none]] | ||
{| border="1em" | This is Hugo's best button. Fast enough to react to Makoto dashing in, or any other BS. Pushes back a good distance, and is cancelable into special and super moves. Thus begins the level 1 mixup for Hugo: "Am I going to use c.lk or SPD?" | ||
If you're using Gigas, you want to be using this button as your fastest way to store 360 motions, without leaving the ground. "Always be buffering" | |||
{| border="1em" cellspacing="0" width="60%" style="border: 1px solid #999; background: none;" | |||
|- | |||
| align="center" | '''Move''' || align="center" | '''Motion''' || align="center" | '''Damage''' || align="center" | '''Stun Damage''' || align="center" | '''Chains into itself''' || align="center" | '''Special Cancel''' || align="center" | '''Super Cancel''' || align="center" | '''Juggle Value''' | |||
|- | |||
| align="center" | Crouch Short || align="center" | C+LK || align="center" | 40(7 life points) || align="center" | 3 || align="center" | No || align="center" | Yes || align="center" | Yes | |||
|} | |||
'''Frame Data''' | |||
{| border="1em" cellspacing="0" width="60%" style="border: 1px solid #999; background: none;" | |||
|- | |- | ||
| align="center" | ''' | | align="center" | '''Startup''' || align="center" | '''Hit''' || align="center" | '''Recovery''' || align="center" | '''Blocked Advantage''' || align="center" | '''Hit Advantage''' || align="center" | '''Crouching Hit Advantage''' || align="center" | '''Guard''' || align="center" | '''Parry''' | ||
|- | |- | ||
| align="center" | | | align="center" | 3 || align="center" | 3 || align="center" | 7 || align="center" | +2 || align="center" | +2 || align="center" | +2 || align="center" | L || align="center" | L | ||
|} | |||
'''Gauge Increase''' | |||
{| border="1em" cellspacing="0" width="30%" style="border: 1px solid #999; background: none;" | |||
|- | |||
| align="center" | '''Miss''' || align="center" | '''Blocked''' || align="center" | '''Hit''' || align="center" | '''Parry (Gauge for opponent)''' | |||
|- | |||
| align="center" | 0 || align="center" | 2 || align="center" | 3 || align="center" | 4 | |||
|} | |} | ||
[[Image:(hugocmk).gif|none]] | [[Image:(hugocmk).gif|none]] | ||
{| border="1em" | A very useful poke, has a lot of range and will send the opponent back and knockdown. This is Hugo's normal sweep move. It is slow, and best used sparingly, however it's essential to master. It shines best in matchups such as vs Chun-Li, where Hugo wants to score a knockdown at max range, without taking huge risks. | ||
Don't depend on this button too heavily, as if parried your opponent has a free shot at you in crouch state. | |||
{| border="1em" cellspacing="0" width="60%" style="border: 1px solid #999; background: none;" | |||
|- | |||
| align="center" | '''Move''' || align="center" | '''Motion''' || align="center" | '''Damage''' || align="center" | '''Stun Damage''' || align="center" | '''Chains into itself''' || align="center" | '''Special Cancel''' || align="center" | '''Super Cancel''' || align="center" | '''Juggle Value''' | |||
|- | |||
| align="center" | Crouch Forward || align="center" | C+MK || align="center" | 100(17 life points) || align="center" | 3 || align="center" | No || align="center" | No || align="center" | No | |||
|} | |||
'''Frame Data''' | |||
{| border="1em" cellspacing="0" width="60%" style="border: 1px solid #999; background: none;" | |||
|- | |- | ||
| align="center" | ''' | | align="center" | '''Startup''' || align="center" | '''Hit''' || align="center" | '''Recovery''' || align="center" | '''Blocked Advantage''' || align="center" | '''Hit Advantage''' || align="center" | '''Crouching Hit Advantage''' || align="center" | '''Guard''' || align="center" | '''Parry''' | ||
|- | |- | ||
| align="center" | | | align="center" | 8 || align="center" | 5 || align="center" | 17 || align="center" | -5 || align="center" | Down || align="center" | Down || align="center" | L || align="center" | L | ||
|} | |||
'''Gauge Increase''' | |||
{| border="1em" cellspacing="0" width="30%" style="border: 1px solid #999; background: none;" | |||
|- | |||
| align="center" | '''Miss''' || align="center" | '''Blocked''' || align="center" | '''Hit''' || align="center" | '''Parry (Gauge for opponent)''' | |||
|- | |||
| align="center" | 2 || align="center" | 5 || align="center" | 9 || align="center" | 4 | |||
|} | |} | ||
[[Image:(hugochk).gif|none]] | [[Image:(hugochk).gif|none]] | ||
{| border="1em" | tldr; if you use this move, you are leaving Hugo's fate in god's hands | ||
This move is tricky, knocks down if hits, hits low at point blank or very close to the enemy, and hits high when you are at D+MK range, this means if enemy is guarding low and you do D+HK at D+MK range, he will get hit and be knocked down again, use this "overhead" move combined with D+MK for knocking down repeatedly a "teenage mutant ninja TURTLE" opponent, entering into a guessing game. But remember that, if enemy blocks or parry the D+HK move, you will be comboed or take huge damage. Watch out for reversals also. | |||
{| border="1em" cellspacing="0" width="60%" style="border: 1px solid #999; background: none;" | |||
|- | |||
| align="center" | '''Move''' || align="center" | '''Motion''' || align="center" | '''Damage''' || align="center" | '''Stun Damage''' || align="center" | '''Chains into itself''' || align="center" | '''Special Cancel''' || align="center" | '''Super Cancel''' || align="center" | '''Juggle Value''' | |||
|- | |||
| align="center" | Crouch Roundhouse || align="center" | C+HK || align="center" | 170(30 life points) || align="center" | 13 || align="center" | No || align="center" | No || align="center" | No | |||
|} | |||
'''Frame Data''' | |||
{| border="1em" cellspacing="0" width="70%" style="border: 1px solid #999; background: none;" | |||
|- | |||
| align="center" | '''Startup''' || align="center" | '''Hit''' || align="center" | '''Recovery''' || align="center" | '''Blocked Advantage''' || align="center" | '''Hit Advantage''' || align="center" | '''Crouching Hit Advantage''' || align="center" | '''Guard''' || align="center" | '''Parry''' | |||
|- | |||
| align="center" | 11 || align="center" | 23 || align="center" | 24~38 || align="center" | -43 ~ -18 || align="center" | Down || align="center" | Down || align="center" | H(far) or L(close) || align="center" | H(far) or L(close) | |||
|} | |||
'''Gauge Increase''' | |||
{| border="1em" cellspacing="0" width="30%" style="border: 1px solid #999; background: none;" | |||
|- | |- | ||
| align="center" | ''' | | align="center" | '''Miss''' || align="center" | '''Blocked''' || align="center" | '''Hit''' || align="center" | '''Parry (Gauge for opponent)''' | ||
|- | |- | ||
| align="center" | | | align="center" | 3 || align="center" | 7 || align="center" | 15 || align="center" | 4 | ||
|} | |} | ||
==== Command Normals ==== | |||
Not safe enough for use in neutral, antiair etc. Just avoid using it, unless as a combo ender. | |||
[[Image:( | [[Image:(hugofhp).gif|none]] | ||
{| border="1em" | {| border="1em" cellspacing="0" width="60%" style="border: 1px solid #999; background: none;" | ||
|- | |||
| align="center" | '''Move''' || align="center" | '''Motion''' || align="center" | '''Damage''' || align="center" | '''Stun Damage''' || align="center" | '''Chains into itself''' || align="center" | '''Special Cancel''' || align="center" | '''Super Cancel''' || align="center" | '''Juggle Value''' | |||
|- | |||
| align="center" | Hammer Hook || align="center" | F+HP || align="center" | 160(28 life points) || align="center" | 21 || align="center" | No || align="center" | No || align="center" | No | |||
|} | |||
'''Frame Data''' | |||
{| border="1em" cellspacing="0" width="60%" style="border: 1px solid #999; background: none;" | |||
|- | |||
| align="center" | '''Startup''' || align="center" | '''Hit''' || align="center" | '''Recovery''' || align="center" | '''Blocked Advantage''' || align="center" | '''Hit Advantage''' || align="center" | '''Crouching Hit Advantage''' || align="center" | '''Guard''' || align="center" | '''Parry''' | |||
|- | |||
| align="center" | 14 || align="center" | 4 || align="center" | 33 || align="center" | -14 || align="center" | +4 || align="center" | +4 || align="center" | HL || align="center" | H | |||
|} | |||
'''Gauge Increase''' | |||
{| border="1em" cellspacing="0" width="30%" style="border: 1px solid #999; background: none;" | |||
|- | |- | ||
| align="center" | ''' | | align="center" | '''Miss''' || align="center" | '''Blocked''' || align="center" | '''Hit''' || align="center" | '''Parry (Gauge for opponent)''' | ||
|- | |- | ||
| align="center" | | | align="center" | 3 || align="center" | 7 || align="center" | 15 || align="center" | 4 | ||
|} | |} | ||
[[Image:( | [[Image:(hugojhk).gif|none]] | ||
{| border="1em" | Never safe to use, but can be fun to use. 👌 | ||
{| border="1em" cellspacing="0" width="60%" style="border: 1px solid #999; background: none;" | |||
|- | |||
| align="center" | '''Move''' || align="center" | '''Motion''' || align="center" | '''Damage''' || align="center" | '''Stun Damage''' || align="center" | '''Chains into itself''' || align="center" | '''Special Cancel''' || align="center" | '''Super Cancel''' || align="center" | '''Juggle Value''' | |||
|- | |||
| align="center" | Drop Kick || align="center" | F+HK or B+HK || align="center" | 150(26 life points) || align="center" | 19 || align="center" | No || align="center" | No || align="center" | No | |||
|} | |||
'''Frame Data''' | |||
{| border="1em" cellspacing="0" width="60%" style="border: 1px solid #999; background: none;" | |||
|- | |- | ||
| align="center" | ''' | | align="center" | '''Startup''' || align="center" | '''Hit''' || align="center" | '''Recovery''' || align="center" | '''Blocked Advantage''' || align="center" | '''Hit Advantage''' || align="center" | '''Crouching Hit Advantage''' || align="center" | '''Guard''' || align="center" | '''Parry''' | ||
|- | |- | ||
| align="center" | | | align="center" | 21 || align="center" | 8 || align="center" | 27 || align="center" | -12 || align="center" | +4 || align="center" | +4 || align="center" | H || align="center" | H | ||
|} | |||
'''Gauge Increase''' | |||
{| border="1em" cellspacing="0" width="30%" style="border: 1px solid #999; background: none;" | |||
|- | |- | ||
| align="center" | | | align="center" | '''Miss''' || align="center" | '''Blocked''' || align="center" | '''Hit''' || align="center" | '''Parry (Gauge for opponent)''' | ||
|- | |- | ||
| align="center" | | | align="center" | 3 || align="center" | 7 || align="center" | 15 || align="center" | 4 | ||
|} | |} | ||
{| border="1em" | [[Image:(hugojdhp).gif|none]] | ||
{| border="1em" cellspacing="0" width="60%" style="border: 1px solid #999; background: none;" | |||
|- | |||
| align="center" | '''Move''' || align="center" | '''Motion''' || align="center" | '''Damage''' || align="center" | '''Stun Damage''' || align="center" | '''Chains into itself''' || align="center" | '''Special Cancel''' || align="center" | '''Super Cancel''' || align="center" | '''Juggle Value''' | |||
|- | |||
| align="center" | Body Press || align="center" | JF, D+HP || align="center" | 100(17 life points) || align="center" | 17 || align="center" | No || align="center" | No || align="center" | No | |||
|} | |||
'''Frame Data''' | |||
{| border="1em" cellspacing="0" width="65%" style="border: 1px solid #999; background: none;" | |||
|- | |- | ||
| align="center" | ''' | | align="center" | '''Startup''' || align="center" | '''Hit''' || align="center" | '''Recovery''' || align="center" | '''Blocked Advantage''' || align="center" | '''Hit Advantage''' || align="center" | '''Crouching Hit Advantage''' || align="center" | '''Guard''' || align="center" | '''Parry''' | ||
|- | |- | ||
| align="center" | | | align="center" | 9 || align="center" | Until landing || align="center" | - || align="center" | - || align="center" | - || align="center" | - || align="center" | H || align="center" | H | ||
|} | |||
'''Gauge Increase''' | |||
{| border="1em" cellspacing="0" width="30%" style="border: 1px solid #999; background: none;" | |||
|- | |- | ||
| align="center" | | | align="center" | '''Miss''' || align="center" | '''Blocked''' || align="center" | '''Hit''' || align="center" | '''Parry (Gauge for opponent)''' | ||
|- | |- | ||
| align="center" | | | align="center" | 3 || align="center" | 7 || align="center" | 15 || align="center" | 4 | ||
|} | |} | ||
' | Nice for cross-ups, but rarely you will have the chance to do it. If you throw the opponent (Body Slam) and he doesnt do a tech wakeup, go for the cross-up with Body Press, also after a succesful Moonsault Press, if enemy doesnt do a tech wakeup, superjump to the opponent when you touch the ground (will not work on characters that have quick wakeup, such as Dudley, Remy, etc). | ||
Remember also, even if the Body Press gets blocked (cross-up or not) a nice thing to do after it is a standing HP, or standing LK followed by Giant Palm Bomber (LP), and even a LK Meat Squasher to put the opponent into the corner. | |||
You'll want to practice using the body splash as late as possible. This makes it very difficult for an opponent to jump back safely, to avoid an upcoming SPD. | |||
=== Special Moves === | |||
[[Image:( | [[Image:(hugogpb).gif|none]] | ||
{| border="1em" | [[Image:Handy infographic2.png|none]] | ||
{| border="1em" cellspacing="0" width="65%" style="border: 1px solid #999; background: none;" | |||
|- | |||
| align="center" | '''Move''' || align="center" | '''Motion''' || align="center" | '''Damage''' || align="center" | '''Blocked Damage''' || align="center" | '''Stun Damage''' || align="center" | '''Super Cancel''' || align="center" | '''Juggle Value''' | |||
|- | |||
| align="center" | Giant Palm Bomber (Jab) || align="center" | QCB+LP || align="center" | 110(19 life points) || align="center" | 14 || align="center" | 15 || align="center" | Yes | |||
|- | |||
| align="center" | Giant Palm Bomber (Strong) || align="center" | QCB+MP || align="center" | 125(22 life points) || align="center" | 16 || align="center" | 17 || align="center" | Yes | |||
|- | |||
| align="center" | Giant Palm Bomber (Fierce) || align="center" | QCB+HP || align="center" | 140(29 life points) || align="center" | 18 || align="center" | 19 || align="center" | Yes | |||
|} | |||
'''Frame Data''' | |||
{| border="1em" cellspacing="0" width="80%" style="border: 1px solid #999; background: none;" | |||
|- | |- | ||
| align="center" | '''Move''' || align="center" | ''' | | align="center" | '''Move''' || align="center" | '''Startup''' || align="center" | '''Hit''' || align="center" | '''Recovery''' || align="center" | '''Blocked Advantage''' || align="center" | '''Hit Advantage''' || align="center" | '''Crouching Hit Advantage''' || align="center" | '''Guard''' || align="center" | '''Parry''' | ||
|- | |- | ||
| align="center" | | | align="center" | Giant Palm Bomber (Jab) || align="center" | 17 || align="center" | 2 || align="center" | 9 || align="center" | +11 || align="center" | +13 || align="center" | +15 || align="center" | HL || align="center" | H | ||
|- | |- | ||
| align="center" | | | align="center" | Giant Palm Bomber (Strong) || align="center" | 19 || align="center" | 2 || align="center" | 7 || align="center" | +16 || align="center" | +18 || align="center" | +20 || align="center" | HL || align="center" | H | ||
|- | |- | ||
| align="center" | | | align="center" | Giant Palm Bomber (Fierce) || align="center" | 22 || align="center" | 2 || align="center" | 6 || align="center" | +19 || align="center" | +21 || align="center" | +23 || align="center" | HL || align="center" | H | ||
|} | |} | ||
'' | '''Gauge Increase''' | ||
{| border="1em" cellspacing="0" width="50%" style="border: 1px solid #999; background: none;" | |||
{| border="1em | |||
|- | |- | ||
| align="center" | '''Move''' || align="center" | ''' | | align="center" | '''Move''' || align="center" | '''Miss''' || align="center" | '''Blocked''' || align="center" | '''Hit''' || align="center" | '''Parry (Gauge for opponent)''' | ||
|- | |- | ||
| align="center" | | | align="center" | Giant Palm Bomber (Jab) || align="center" | 3 || align="center" | 8 || align="center" | 16 || align="center" | 4 | ||
|- | |- | ||
| align="center" | | | align="center" | Giant Palm Bomber (Strong) || align="center" | 3 || align="center" | 8 || align="center" | 16 || align="center" | 4 | ||
|- | |- | ||
| align="center" | | | align="center" | Giant Palm Bomber (Fierce) || align="center" | 3 || align="center" | 8 || align="center" | 16 || align="center" | 4 | ||
|} | |} | ||
'' | One of Hugo's best special moves, it have very slow startup, specially HP version, but when hit or blocked, it have a large amount of frame advantage. Normally you can combo the HP version into the MP one and then into LP (only when opponent is crouching), but MP doesn't seems to connect with LP when opponent is standing, also looking at the Frame Datas, the timing is very strict, so combo the HP version into the LP one, then standing MP to a nice 3hit combo. You can try the LP version into a Meat Squasher (LK), but don't do it with HP version, enemy will be stuned by the hit and the Meat Squasher will whiff. You can also use this move as a mixup after its blocked, going for a dash followed by Moonsault/Gigas, Meat Squasher, Close HP as overhead, low LK and LP GPB again, etc... | ||
Giant Palm Bomber (HP) is a good move to do when opponent its on wakeup state, it have very good priority, you can even trade damage with a reversal Shoryuken, and if you time it right, beat it. If its parried, you have a lot of frame advantage for blocking almost anything the opponent can do after the parry. Use standing mk to kara. | |||
{| border="1em | [[Image:(hugomsp).gif|none]] | ||
{| border="1em" cellspacing="0" width="65%" style="border: 1px solid #999; background: none;" | |||
|- | |- | ||
| align="center" | '''Move''' || align="center" | '''Motion''' || align="center" | '''Damage''' || align="center" | '''Stun Damage'''|| align="center" | '''Throw Range''' | | align="center" | '''Move''' || align="center" | '''Motion''' || align="center" | '''Damage''' || align="center" | '''Blocked Damage''' || align="center" | '''Stun Damage''' || align="center" | '''Throw Range''' || align="center" | '''Super Cancel''' || align="center" | '''Juggle Value''' | ||
|- | |- | ||
| align="center" | | | align="center" | Moonsault Press (Jab) || align="center" | 360+LP || align="center" | 240(42 life points) || align="center" | - || align="center" | 19 || align="center" | 59 || align="center" | No | ||
|- | |- | ||
| align="center" | | | align="center" | Moonsault Press (Strong) || align="center" | 360+MP || align="center" | 255(45 life points) || align="center" | - || align="center" | 19 || align="center" | 53 || align="center" | No | ||
|- | |- | ||
| align="center" | | | align="center" | Moonsault Press (Fierce) || align="center" | 360+HP || align="center" | 280(49 life points) || align="center" | - || align="center" | 19 || align="center" | 47 || align="center" | No | ||
|} | |} | ||
'' | '''Frame Data''' | ||
{| border="1em" cellspacing="0" width="80%" style="border: 1px solid #999; background: none;" | |||
{| border="1em | |||
|- | |- | ||
| align="center" | '''Move''' || align="center" | ''' | | align="center" | '''Move''' || align="center" | '''Startup''' || align="center" | '''Hit''' || align="center" | '''Recovery''' || align="center" | '''Blocked Advantage''' || align="center" | '''Hit Advantage''' || align="center" | '''Crouching Hit Advantage''' || align="center" | '''Guard''' || align="center" | '''Parry''' | ||
|- | |- | ||
| align="center" | | | align="center" | Moonsault Press (Jab) || align="center" | 2 || align="center" | 2 || align="center" | 36 || align="center" | - || align="center" | Down || align="center" | Down || align="center" | Impossible || align="center" | Impossible | ||
|- | |- | ||
| align="center" | | | align="center" | Moonsault Press (Strong) || align="center" | 2 || align="center" | 2 || align="center" | 36 || align="center" | - || align="center" | Down || align="center" | Down || align="center" | Impossible || align="center" | Impossible | ||
|- | |- | ||
| align="center" | | | align="center" | Moonsault Press (Fierce) || align="center" | 2 || align="center" | 2 || align="center" | 36 || align="center" | - || align="center" | Down || align="center" | Down || align="center" | Impossible || align="center" | Impossible | ||
|} | |} | ||
'' | '''Gauge Increase''' | ||
{| border="1em" cellspacing="0" width="50%" style="border: 1px solid #999; background: none;" | |||
{| border="1em | |||
|- | |- | ||
| align="center" | '''Move''' || align="center" | ''' | | align="center" | '''Move''' || align="center" | '''Miss''' || align="center" | '''Blocked''' || align="center" | '''Hit''' || align="center" | '''Parry (Gauge for opponent)''' | ||
|- | |- | ||
| align="center" | | | align="center" | Moonsault Press (Jab) || align="center" | 5 || align="center" | - || align="center" | 31 || align="center" | - | ||
|- | |- | ||
| align="center" | ( | | align="center" | Moonsault Press (Strong) || align="center" | 5 || align="center" | - || align="center" | 31 || align="center" | - | ||
|- | |- | ||
| align="center" | ( | | align="center" | Moonsault Press (Fierce) || align="center" | 5 || align="center" | - || align="center" | 31 || align="center" | - | ||
|} | |} | ||
'' | Another good special move for Hugo, it takes a large amount of life, but the motion it's tricky, why? well, because if you do the Moonsault without jumping (and that's how need to be done), sometimes you will not make the motion well, and you can "launch" a HP Giant Palm Bomber when you really need the fast startup damaging Moonsault, as a result, enemy will kick you, so master well the motion. | ||
As we can see it the tables, LP does less damage than HP, but it have more throw range. So make right desicions during a match and see what punch you have to use. A whiffed Moonsault its somewhat punishable. Even sometimes a Moonsault on wakeup seems a nice idea when done as a reversal, to people who likes to stay near you during a wakeup doing crouching LKs or LPs, but BEWARE of Universal Overhead moves, they are in the air and if you do a Moonsault Press before they hit you, you will not grab them, and they will hit you. | |||
[[Image:(hugoml).gif|none]] | [[Image:(hugoml).gif|none]] | ||
{| border="1em" | {| border="1em" cellspacing="0" width="65%" style="border: 1px solid #999; background: none;" | ||
|- | |||
| align="center" | '''Move''' || align="center" | '''Motion''' || align="center" | '''Damage''' || align="center" | '''Blocked Damage''' || align="center" | '''Stun Damage''' || align="center" | '''Super Cancel''' || align="center" | '''Juggle Value''' | |||
|- | |||
| align="center" | Monster Lariat (Short) || align="center" | QCF+LK || align="center" | 150(26 life points) || align="center" | 19 || align="center" | 11 || align="center" | No | |||
|- | |||
| align="center" | Monster Lariat (Forward) || align="center" | QCF+MK || align="center" | 160(28 life points) || align="center" | 20 || align="center" | 13 || align="center" | No | |||
|- | |||
| align="center" | Monster Lariat (Roundhouse) || align="center" | QCF+HK || align="center" | 170(30 life points) || align="center" | 21 || align="center" | 15 || align="center" | No | |||
|} | |||
'''Frame Data''' | |||
{| border="1em" cellspacing="0" width="80%" style="border: 1px solid #999; background: none;" | |||
|- | |||
| align="center" | '''Move''' || align="center" | '''Startup''' || align="center" | '''Hit''' || align="center" | '''Recovery''' || align="center" | '''Blocked Advantage''' || align="center" | '''Hit Advantage''' || align="center" | '''Crouching Hit Advantage''' || align="center" | '''Guard''' || align="center" | '''Parry''' | |||
|- | |||
| align="center" | Monster Lariat (Short) || align="center" | 11 || align="center" | 5 || align="center" | 21~25 || align="center" | -8 || align="center" | Down || align="center" | Down || align="center" | HL || align="center" | H | |||
|- | |||
| align="center" | Monster Lariat (Forward) || align="center" | 15 || align="center" | 5 || align="center" | 23~27 || align="center" | -10 || align="center" | Down || align="center" | Down || align="center" | HL || align="center" | H | |||
|- | |||
| align="center" | Monster Lariat (Roundhouse) || align="center" | 24 || align="center" | 5 || align="center" | 24~28 || align="center" | -11 || align="center" | Down || align="center" | Down || align="center" | HL || align="center" | H | |||
|} | |||
'''Gauge Increase''' | |||
{| border="1em" cellspacing="0" width="50%" style="border: 1px solid #999; background: none;" | |||
|- | |||
| align="center" | '''Move''' || align="center" | '''Miss''' || align="center" | '''Blocked''' || align="center" | '''Hit''' || align="center" | '''Parry (Gauge for opponent)''' | |||
|- | |||
| align="center" | Monster Lariat (Short) || align="center" | 3 || align="center" | 8 || align="center" | 13 || align="center" | 4 | |||
|- | |- | ||
| align="center" | | | align="center" | Monster Lariat (Forward) || align="center" | 3 || align="center" | 8 || align="center" | 13 || align="center" | 4 | ||
|- | |- | ||
| align="center" | Monster Lariat ( | | align="center" | Monster Lariat (Roundhouse) || align="center" | 3 || align="center" | 8 || align="center" | 13 || align="center" | 4 | ||
|} | |} | ||
''Comments here'' | ''Comments here'' | ||
[[Image:(hugosbb).gif|none]] | |||
{| border="1em" cellspacing="0" width="100%" style="border: 1px solid #999; background: none;" | |||
{| border="1em | |||
|- | |- | ||
| align="center" | '''Move''' || align="center" | '''Motion''' || align="center" | '''Damage''' || align="center" | '''Stun Damage'''|| align="center" | '''Throw Range''' | | align="center" | '''Move''' || align="center" | '''Motion''' || align="center" | '''Damage''' || align="center" | '''Blocked Damage''' || align="center" | '''Stun Damage''' || align="center" | '''Throw Range (Front)''' || align="center" | '''Throw Range (Up & Down)''' || align="center" | '''Super Cancel''' || align="center" | '''Juggle Value''' | ||
|- | |- | ||
| align="center" | | | align="center" | Shootdown Backbreaker (Short) || align="center" | F, D, DF+LK || align="center" | 180(32 life points) || align="center" | - || align="center" | 15 || align="center" | 21 || align="center" | 71~122 || align="center" | No | ||
|- | |- | ||
| align="center" | | | align="center" | Shootdown Backbreaker (Forward) || align="center" | F, D, DF+MK || align="center" | 200(32 life points) || align="center" | - || align="center" | 15 || align="center" | 38 || align="center" | 75~110 || align="center" | No | ||
|- | |- | ||
| align="center" | ( | | align="center" | Shootdown Backbreaker (Roundhouse) || align="center" | F, D, DF+HK || align="center" | 220(32 life points) || align="center" | - || align="center" | 15 || align="center" | 29 || align="center" | 76~117 || align="center" | No | ||
|} | |} | ||
'' | '''Frame Data''' | ||
{| border="1em" cellspacing="0" width="85%" style="border: 1px solid #999; background: none;" | |||
|- | |||
{| border="1em | | align="center" | '''Move''' || align="center" | '''Startup''' || align="center" | '''Hit''' || align="center" | '''Recovery''' || align="center" | '''Blocked Advantage''' || align="center" | '''Hit Advantage''' || align="center" | '''Crouching Hit Advantage''' || align="center" | '''Guard''' || align="center" | '''Parry''' | ||
|- | |- | ||
| align="center" | | | align="center" | Shootdown Backbreaker (Short) || align="center" | 5 || align="center" | 9 || align="center" | 30 || align="center" | - || align="center" | Down || align="center" | Down || align="center" | Impossible || align="center" | Impossible | ||
|- | |- | ||
| align="center" | | | align="center" | Shootdown Backbreaker (Forward) || align="center" | 17 || align="center" | 10 || align="center" | 25 || align="center" | - || align="center" | Down || align="center" | Down || align="center" | Impossible || align="center" | Impossible | ||
|- | |- | ||
| align="center" | ( | | align="center" | Shootdown Backbreaker (Roundhouse) || align="center" | 12 || align="center" | 12 || align="center" | 29 || align="center" | - || align="center" | Down || align="center" | Down || align="center" | Impossible || align="center" | Impossible | ||
|} | |||
'''Gauge Increase''' | |||
{| border="1em" cellspacing="0" width="50%" style="border: 1px solid #999; background: none;" | |||
|- | |- | ||
| align="center" | | | align="center" | '''Move''' || align="center" | '''Miss''' || align="center" | '''Blocked''' || align="center" | '''Hit''' || align="center" | '''Parry (Gauge for opponent)''' | ||
|- | |- | ||
| align="center" | ( | | align="center" | Shootdown Backbreaker (Short) || align="center" | 5 || align="center" | - || align="center" | 31 || align="center" | - | ||
|- | |- | ||
| align="center" | | | align="center" | Shootdown Backbreaker (Forward) || align="center" | 5 || align="center" | - || align="center" | 31 || align="center" | - | ||
|- | |- | ||
| align="center" | ( | | align="center" | Shootdown Backbreaker (Roundhouse) || align="center" | 5 || align="center" | - || align="center" | 31 || align="center" | - | ||
|} | |} | ||
'' | Hugo's anti-air special move, but it doesn't have ANY priority, meaning you only can catch them if the opponent doesn't do any attack during a jump, you must grab it cleanly to success. With Air Tatsumakis, well, its a lotto, sometimes you grab them, sometimes you get hit. Use it after a succesfull Ultra Throw. Keep in mind that it have terrible recovery, don't do this move randomly or prepare yourself. You can use this move as a teleport, if you're cornered, the HK version travels very far, so you can go to the middle of the screen with this move. Also you can even try to use this move as an anti-fireball, but its very risky to do it. If the opponent is the Ansatsuken Type (note: NOT REMY) and you expect a fireball from far away, do this move with HK version (yes, you need to do this move before Ryu, Ken or Akuma launch a Hadouken), then when you're going to reach the ground, do the 360motion and try to moonsaultpress them when they are recovering from the Hadouken. Althrough this option its not the most safe (because if done late you're at point blank in front of an Ansatsuken, and you have some recovery from the move), its an idea to have in mind. | ||
And another important thing to keep it, after a succesful Shootdown Backbreaker, you can taunt safely. Yes, taunt. 4 taunts gives you 25% more defense, and this means Hugo's defense is higher than a 2-times-taunted-Q. | |||
[[Image:( | [[Image:(hugomsquasher).gif|none]] | ||
{| border="1em" | {| border="1em" cellspacing="0" width="70%" style="border: 1px solid #999; background: none;" | ||
|- | |||
| align="center" | '''Move''' || align="center" | '''Motion''' || align="center" | '''Damage''' || align="center" | '''Blocked Damage''' || align="center" | '''Stun Damage''' || align="center" | '''Throw Range''' || align="center" | '''Super Cancel''' || align="center" | '''Juggle Value''' | |||
|- | |||
| align="center" | Meat Squasher (Short) || align="center" | 360+LK || align="center" | 160(28 life points) || align="center" | - || align="center" | 13 || align="center" | 34 || align="center" | No | |||
|- | |||
| align="center" | Meat Squasher (Forward) || align="center" | 360+MK || align="center" | 160(28 life points) || align="center" | - || align="center" | 13 || align="center" | 34 || align="center" | No | |||
|- | |||
| align="center" | Meat Squasher (Roundhouse) || align="center" | 360+HK || align="center" | 160(28 life points) || align="center" | - || align="center" | 13 || align="center" | 34 || align="center" | No | |||
|} | |||
'''Frame Data''' | |||
{| border="1em" cellspacing="0" width="80%" style="border: 1px solid #999; background: none;" | |||
|- | |||
| align="center" | '''Move''' || align="center" | '''Startup''' || align="center" | '''Hit''' || align="center" | '''Recovery''' || align="center" | '''Blocked Advantage''' || align="center" | '''Hit Advantage''' || align="center" | '''Crouching Hit Advantage''' || align="center" | '''Guard''' || align="center" | '''Parry''' | |||
|- | |||
| align="center" | Meat Squasher (Short) || align="center" | 20~24 || align="center" | 2 || align="center" | 30 || align="center" | - || align="center" | Down || align="center" | Down || align="center" | Impossible || align="center" | Impossible | |||
|- | |- | ||
| align="center" | | | align="center" | Meat Squasher (Forward) || align="center" | 30~52 || align="center" | 2 || align="center" | 33 || align="center" | - || align="center" | Down || align="center" | Down || align="center" | Impossible || align="center" | Impossible | ||
|- | |- | ||
| align="center" | | | align="center" | Meat Squasher (Roundhouse) || align="center" | 47~67 || align="center" | 2 || align="center" | 36 || align="center" | - || align="center" | Down || align="center" | Down || align="center" | Impossible || align="center" | Impossible | ||
|} | |||
'''Gauge Increase''' | |||
{| border="1em" cellspacing="0" width="50%" style="border: 1px solid #999; background: none;" | |||
|- | |- | ||
| align="center" | | | align="center" | '''Move''' || align="center" | '''Miss''' || align="center" | '''Blocked''' || align="center" | '''Hit''' || align="center" | '''Parry (Gauge for opponent)''' | ||
|- | |- | ||
| align="center" | ( | | align="center" | Meat Squasher (Short) || align="center" | 3 || align="center" | - || align="center" | 22 || align="center" | - | ||
|- | |- | ||
| align="center" | ( | | align="center" | Meat Squasher (Forward) || align="center" | 3 || align="center" | - || align="center" | 22 || align="center" | - | ||
|- | |- | ||
| align="center" | ( | | align="center" | Meat Squasher (Roundhouse) || align="center" | 3 || align="center" | - || align="center" | 22 || align="center" | - | ||
|} | |} | ||
Very hard to connect, but if doing well, Hugo takes the opponent and puts them cornered in a side of the screen, and here's when Hugo can take advantage of the match. It doesn't do a lot of damage, but setups the opponent for you. Use the LK version inmediately after a Body Press or when enemy likes to crouch in the middle of the screen, after a succesful parry from an air attack, or during a parry on a ground attack. In those cases you can also do a Moonsault Press for the punish, but depend of your mixup game, the desicion is yours to decide which attack you want to do, corner the enemy or punish him with a Moonsault. During the frames Hugo is running towards in this move, he cannot be throwed by regular throws, but he can be throw during the startup before running. | |||
[[Image:(hugout).gif|none]] | |||
{| border=" | {| border="1em" cellspacing="0" width="70%" style="border: 1px solid #999; background: none;" | ||
|- | |- | ||
| | | align="center" | '''Move''' || align="center" | '''Motion''' || align="center" | '''Damage''' || align="center" | '''Blocked Damage''' || align="center" | '''Stun Damage''' || align="center" | '''Throw Range''' || align="center" | '''Super Cancel''' || align="center" | '''Juggle Value''' | ||
| align="center | |||
| | |||
| align="center | |||
| | |||
| align="center | |||
| | |||
| align="center | |||
| align="center | |||
| | |||
| | |||
|- | |- | ||
| | | align="center" | Ultra Throw (Short) || align="center" | HCB+LK || align="center" | 70(12 life points) || align="center" | - || align="center" | 7 || align="center" | 38 || align="center" | No | ||
| align="center" | | |||
| | |||
| align="center" | | |||
| | |||
| align="center" | - | |||
| align="center" | | |||
| align="center" | | |||
| | |||
|- | |- | ||
| | | align="center" | Ultra Throw (Forward) || align="center" | HCB+MK || align="center" | 70(12 life points) || align="center" | - || align="center" | 7 || align="center" | 38 || align="center" | No | ||
| align="center | |||
| align="center | |||
| align="center | |||
| align="center | |||
| | |||
| align="center | |||
| | |||
|- | |- | ||
| | | align="center" | Ultra Throw (Roundhouse) || align="center" | HCB+HK || align="center" | 70(12 life points) || align="center" | - || align="center" | 7 || align="center" | 38 || align="center" | No | ||
| align="center" | | |} | ||
| align="center" | | '''Frame Data''' | ||
{| border="1em" cellspacing="0" width="80%" style="border: 1px solid #999; background: none;" | |||
| align="center" | - | |||
| align="center" | | |||
| align="center" | | |||
| align="center" | | |||
| | |||
| | |||
|- | |- | ||
| | | align="center" | '''Move''' || align="center" | '''Startup''' || align="center" | '''Hit''' || align="center" | '''Recovery''' || align="center" | '''Blocked Advantage''' || align="center" | '''Hit Advantage''' || align="center" | '''Crouching Hit Advantage''' || align="center" | '''Guard''' || align="center" | '''Parry''' | ||
| align="center" | |||
| align="center" | |||
| align="center | |||
| align="center | |||
| | |||
| align="center | |||
| align="center | |||
| | |||
| | |||
| | |||
|- | |- | ||
| | | align="center" | Ultra Throw (Short) || align="center" | 7 || align="center" | 2 || align="center" | 36 || align="center" | - || align="center" | Down || align="center" | Down || align="center" | Impossible || align="center" | Impossible | ||
| align="center" | | |||
| align="center" | | |||
| align="center" | | |||
| align="center" | - | |||
| align="center" | | |||
| align="center" | | |||
| | |||
| | |||
|- | |- | ||
| | | align="center" | Ultra Throw (Forward) || align="center" | 7 || align="center" | 2 || align="center" | 36 || align="center" | - || align="center" | Down || align="center" | Down || align="center" | Impossible || align="center" | Impossible | ||
| align="center | |||
| align="center" | |||
| align="center | |||
| align="center | |||
| align="center | |||
| align="center | |||
| | |||
| | |||
|- | |- | ||
| | | align="center" | Ultra Throw (Roundhouse) || align="center" | 7 || align="center" | 2 || align="center" | 36 || align="center" | - || align="center" | Down || align="center" | Down || align="center" | Impossible || align="center" | Impossible | ||
| align="center" | | |} | ||
| align="center" | | '''Gauge Increase''' | ||
| align="center" | | {| border="1em" cellspacing="0" width="50%" style="border: 1px solid #999; background: none;" | ||
| align="center" | - | |||
| align="center" | | |||
| align="center" | | |||
| align="center" | | |||
| align="center" | | |||
| | |||
| | |||
|- | |- | ||
| | | align="center" | '''Move''' || align="center" | '''Miss''' || align="center" | '''Blocked''' || align="center" | '''Hit''' || align="center" | '''Parry (Gauge for opponent)''' | ||
| align="center | |||
| align="center | |||
| align="center | |||
| | |||
| align="center | |||
|- | |- | ||
| | | align="center" | Ultra Throw (Short) || align="center" | 5 || align="center" | - || align="center" | 22 || align="center" | - | ||
| align="center" | 5 | |||
| align="center" | - | |||
| align="center" | | |||
| align="center" | - | |||
|- | |- | ||
| align="center" | Ultra Throw (Forward) || align="center" | 5 || align="center" | - || align="center" | 22 || align="center" | - | |||
| align="center" | |||
| | |||
| align="center | |||
| | |||
| align="center | |||
| align="center | |||
| | |||
| align="center | |||
|- | |- | ||
| | | align="center" | Ultra Throw (Roundhouse) || align="center" | 5 || align="center" | - || align="center" | 22 || align="center" | - | ||
| align="center" | | |||
| | |||
| align="center" | - | |||
| align="center" | | |||
| | |||
| align="center" | | |||
|} | |} | ||
''Comments here'' | |||
=== | === EX Moves === | ||
{| border=" | Ex clap is rarely worth the meter. Instead save it for super moves which provide greater utility. | ||
[[Image:(hugogpbex).gif|none]] | |||
{| border="1em" cellspacing="0" width="65%" style="border: 1px solid #999; background: none;" | |||
|- | |||
| align="center" | '''Move''' || align="center" | '''Motion''' || align="center" | '''Gauge Needed''' || align="center" | '''Damage''' || align="center" | '''Blocked Damage''' || align="center" | '''Stun Damage''' || align="center" | '''Super Cancel''' || align="center" | '''Juggle Value''' | |||
|- | |||
| align="center" | Giant Palm Bomber (EX) || align="center" | QCB+PP || align="center" | 40 || align="center" | 220*(36 life points) || align="center" | 23** || align="center" | 15*** || align="center" | Yes | |||
|} | |||
{| border="1em" cellspacing="0" width="30%" style="border: 1px solid #999; background: none;" | |||
|- | |- | ||
| | |* (20+60+140) Damage is when all hits connect. | ||
|- | |- | ||
| | |** (?+?+?) Damage is when all hits connect. | ||
|- | |||
|*** (3+3+9) Damage is when all hits connect. | |||
| | |||
|} | |} | ||
'''Frame Data''' | |||
{| border="1em" cellspacing="0" width="80%" style="border: 1px solid #999; background: none;" | |||
{| border=" | |- | ||
| align="center" | '''Move''' || align="center" | '''Startup''' || align="center" | '''Hit''' || align="center" | '''Recovery''' || align="center" | '''Blocked Advantage''' || align="center" | '''Hit Advantage''' || align="center" | '''Crouching Hit Advantage''' || align="center" | '''Guard''' || align="center" | '''Parry''' | |||
|- | |||
| align="center" | Giant Palm Bomber (EX) || align="center" | 22 || align="center" | 1 || align="center" | 10 || align="center" | +10 || align="center" | Down || align="center" | Down || align="center" | HL/HL/HL || align="center" | H/H/H | |||
|} | |||
'''Gauge Increase''' | |||
{| border="1em" cellspacing="0" width="50%" style="border: 1px solid #999; background: none;" | |||
|- | |- | ||
| | | align="center" | '''Move''' || align="center" | '''Miss''' || align="center" | '''Blocked''' || align="center" | '''Hit''' || align="center" | '''Parry (Gauge for opponent)''' | ||
| align="center" | | |||
| align="center" | | |||
| align="center" | | |||
| align="center" | | |||
|- | |- | ||
| | | align="center" | Giant Palm Bomber (EX) || align="center" | - || align="center" | - || align="center" | - || align="center" | 12(4+4+4) | ||
| | |} | ||
| align="center | |||
| | |||
| align="center | [[Image:(hugomlex).gif|none]] | ||
| align="center | Is good to use after a big clap combo, if hammer mountain is not available for any reason. Though be cautious, retaining Gigas is always better than spending meter on ex moves. This move is a decent chip option for Hugo if you can guarantee it will hit unaware. | ||
| align="center | {| border="1em" cellspacing="0" width="65%" style="border: 1px solid #999; background: none;" | ||
| | |||
| | |||
|- | |- | ||
| | | align="center" | '''Move''' || align="center" | '''Motion''' || align="center" | '''Gauge Needed''' || align="center" | '''Damage''' || align="center" | '''Blocked Damage''' || align="center" | '''Stun Damage''' || align="center" | '''Super Cancel''' || align="center" | '''Juggle Value''' | ||
| align="center" | | |||
| | |||
| align="center" | | |||
| align="center" | | |||
| | |||
| align="center" | | |||
| | |||
| align="center" | | |||
| | |||
| | |||
|- | |- | ||
| | | align="center" | Monster Lariat (EX) || align="center" | QCF+KK || align="center" | 40 || align="center" | 140~180(24 life points) || align="center" | 18~23 || align="center" | 13~17 || align="center" | No | ||
| align="center" | |} | ||
| align="center" | '''Frame Data''' | ||
| align="center" | {| border="1em" cellspacing="0" width="80%" style="border: 1px solid #999; background: none;" | ||
| align="center" | |||
| align="center | |||
| | |||
| align="center | |||
| | |||
| | |||
|- | |- | ||
| | | align="center" | '''Move''' || align="center" | '''Startup''' || align="center" | '''Hit''' || align="center" | '''Recovery''' || align="center" | '''Blocked Advantage''' || align="center" | '''Hit Advantage''' || align="center" | '''Crouching Hit Advantage''' || align="center" | '''Guard''' || align="center" | '''Parry''' | ||
| align="center" | | |||
| align="center" | | |||
| align="center" | | |||
| align="center" | | |||
| align="center" | | |||
| align="center" | | |||
| | |||
| | |||
|- | |- | ||
| | | align="center" | Monster Lariat (EX) || align="center" | 6~26 || align="center" | 6 || align="center" | 31~35 || align="center" | -22 || align="center" | Down || align="center" | Down || align="center" | HL || align="center" | H | ||
| align="center" | |} | ||
| align="center" | '''Gauge Increase''' | ||
| align="center" | {| border="1em" cellspacing="0" width="50%" style="border: 1px solid #999; background: none;" | ||
| align="center | |||
| align="center" | |||
| align="center" | |||
| align="center" | |||
| align="center | |||
| | |||
| | |||
|- | |- | ||
| | | align="center" | '''Move''' || align="center" | '''Miss''' || align="center" | '''Blocked''' || align="center" | '''Hit''' || align="center" | '''Parry (Gauge for opponent)''' | ||
| | |||
| align="center" | | |||
| align="center" | | |||
| align="center" | | |||
| align="center" | | |||
|- | |- | ||
| | | align="center" | Monster Lariat (EX) || align="center" | - || align="center" | - || align="center" | - || align="center" | 4 | ||
| | |||
| align="center | |||
| | |||
| align="center | |||
| | |||
| align="center | |||
| | |||
| | |||
|} | |} | ||
=== | === Super Arts === | ||
{| border=" | [[Image:(hugosa1).gif|none]] | ||
{| border="1em" cellspacing="0" width="75%" style="border: 1px solid #999; background: none;" | |||
|- | |||
| align="center" | '''Num.''' || align="center" | '''Super Art''' || align="center" | '''Super Art Stock''' || align="center" | '''Motion''' || align="center" | '''Damage''' || align="center" | '''Blocked Damage''' || align="center" | '''Stun Damage''' || align="center" | '''Throw Range''' || align="center" | '''Damage/Gauge''' | |||
|- | |||
| align="center" | I || align="center" | Gigas Breaker || align="center" | 1 bar (128) || align="center" | 720+P || align="center" | 610*(102 life points) || align="center" | - || align="center" | 5** || align="center" | 70 || align="center" | 4,76 | |||
|} | |||
{| border="1em" cellspacing="0" width="30%" style="border: 1px solid #999; background: none;" | |||
|- | |- | ||
| | |* (180?+180?+270?) Damage is when all hits connect. | ||
|- | |- | ||
| | |** (?+?+?) Damage is when all hits connect. | ||
| | |} | ||
'''Frame Data''' | |||
{| border="1em" cellspacing="0" width="65%" style="border: 1px solid #999; background: none;" | |||
|- | |- | ||
| | | align="center" | '''Startup''' || align="center" | '''Hit''' || align="center" | '''Recovery''' || align="center" | '''Blocked Advantage''' || align="center" | '''Hit Advantage''' || align="center" | '''Crouching Hit Advantage''' || align="center" | '''Guard''' || align="center" | '''Parry''' | ||
| align="center" | | |||
| align="center" | | |||
| align="center" | | |||
| align="center" | | |||
| align="center" | | |||
| align="center" | | |||
| | |||
|- | |- | ||
| | | align="center" | 0 || align="center" | 2 || align="center" | 36 || align="center" | - || align="center" | Down || align="center" | Down || align="center" | Impossible || align="center" | Impossible | ||
| align="center | |} | ||
| align="center" | <gallery> | ||
| align="center" | File:Handy infographic-1.png | ||
| align="center" | </gallery> | ||
| align="center" | Hugo's most powerful Super Art, one of the most damaging in the game. A pseudo invincible grab, with excellent range and instant startup. | ||
| | |||
Gigas does not require a full 720 motion. Instead 540 degrees, most usually executed as: 6321478963214 is enough. Only the cardinal directions are required. | |||
Good opponents will dramatically change their playstyle when this super is ready, in order to avoid a quick and painful death. | |||
[[Image:(hugosa2).gif|none]] | |||
{| border="1em" cellspacing="0" width="95%" style="border: 1px solid #999; background: none;" | |||
|- | |- | ||
| align="center" | ''' | | align="center" | '''Num.''' || align="center" | '''Super Art''' || align="center" | '''Super Art Stock''' || align="center" | '''Motion''' || align="center" | '''Damage''' || align="center" | '''Blocked Damage''' || align="center" | '''Stun Damage''' || align="center" | '''Throw Range (Front/Up&Down)''' || align="center" | '''Damage/Gauge''' | ||
| align="center" | | |||
| align="center" | | |||
| align="center" | | |||
| align="center" | | |||
| align="center" | | |||
| align="center" | | |||
| align="center" | | |||
| | |||
|- | |- | ||
| | | align="center" | II || align="center" | Megaton Press || align="center" | 2 bars (112 each bar) || align="center" | QCF QCF+K || align="center" | 450*(75 life points) || align="center" | - || align="center" | 25** || align="center" | 50/60~133 || align="center" | 4,01(x2) | ||
| align="center | |} | ||
| align="center" | {| border="1em" cellspacing="0" width="30%" style="border: 1px solid #999; background: none;" | ||
| align="center" | |||
| align="center" | |||
| align="center" | |||
| | |||
|- | |- | ||
| | |* (70?+380?) Damage is when all hits connect. | ||
|- | |- | ||
| | |** (?+?) Damage is when all hits connect. | ||
| | |} | ||
'''Frame Data''' | |||
{| border="1em" cellspacing="0" width="80%" style="border: 1px solid #999; background: none;" | |||
|- | |- | ||
| | | align="center" | '''Super Art Name''' || align="center" | '''Startup''' || align="center" | '''Hit''' || align="center" | '''Recovery''' || align="center" | '''Blocked Advantage''' || align="center" | '''Hit Advantage''' || align="center" | '''Crouching Hit Advantage''' || align="center" | '''Guard''' || align="center" | '''Parry''' | ||
| align="center" | | |||
| align="center" | | |||
| align="center" | | |||
| align="center" | | |||
| align="center" | | |||
| align="center" | | |||
| align="center" | | |||
| | |||
|- | |- | ||
| | | align="center" | Megaton Press (Short) || align="center" | 3 || align="center" | 12 || align="center" | 30 || align="center" | - || align="center" | Down || align="center" | Down || align="center" | Impossible || align="center" | Impossible | ||
| align="center" | |||
| align="center" | |||
| align="center" | |||
| align="center | |||
| align="center" | |||
| align="center" | |||
| align="center" | |||
| | |||
|- | |- | ||
| | | align="center" | Megaton Press (Forward) || align="center" | 5 || align="center" | 16 || align="center" | 34 || align="center" | - || align="center" | Down || align="center" | Down || align="center" | Impossible || align="center" | Impossible | ||
| align="center" | | |||
| align="center" | | |||
| align="center" | | |||
| align="center" | - | |||
| align="center" | | |||
| align="center" | | |||
| align="center" | | |||
| | |||
|- | |- | ||
| | | align="center" | Megaton Press (Roundhouse) || align="center" | 7 || align="center" | 20 || align="center" | 36 || align="center" | - || align="center" | Down || align="center" | Down || align="center" | Impossible || align="center" | Impossible | ||
| align="center | |} | ||
| align="center" | ''Comments here'' | ||
| align="center" | |||
| align="center" | |||
| align="center" | [[Image:(hugosa3).gif|none]] | ||
| | {| border="1em" cellspacing="0" width="75%" style="border: 1px solid #999; background: none;" | ||
|- | |- | ||
| | | align="center" | '''Num.''' || align="center" | '''Super Art''' || align="center" | '''Super Art Stock''' || align="center" | '''Motion''' || align="center" | '''Damage''' || align="center" | '''Blocked Damage''' || align="center" | '''Stun Damage''' || align="center" | '''Damage/Gauge''' | ||
| align="center" | | |||
| align="center" | | |||
| align="center" | | |||
| align="center" | | |||
| align="center" | | |||
| align="center" | | |||
| | |||
|- | |- | ||
| | | align="center" | III || align="center" | Hammer Frenzy || align="center" | 2 bars (88 each bar) || align="center" | QCF QCF+P || align="center" | 390*(64 life points) || align="center" | 98** || align="center" | 20*** || align="center" | 4,43(x2) | ||
| align="center" | |} | ||
| align="center" | {| border="1em" cellspacing="0" width="35%" style="border: 1px solid #999; background: none;" | ||
| align="center" | |||
| align="center" | |||
| align="center" | |||
| | |||
|- | |- | ||
| | |* (80?+90?+80?+60?+120?) Damage is when all hits connect. | ||
|- | |- | ||
| | |** (?+?+?+?+?) Damage is when all hits connect. | ||
|- | |- | ||
| | |*** (?+?+?+?+?) Damage is when all hits connect. | ||
| | |} | ||
'''Frame Data''' | |||
{| border="1em" cellspacing="0" width="70%" style="border: 1px solid #999; background: none;" | |||
|- | |- | ||
| | | align="center" | '''Startup''' || align="center" | '''Hit''' || align="center" | '''Recovery''' || align="center" | '''Blocked Advantage''' || align="center" | '''Hit Advantage''' || align="center" | '''Crouching Hit Advantage''' || align="center" | '''Guard''' || align="center" | '''Parry''' | ||
| align="center" | |||
| align="center" | |||
| align="center" | |||
| align="center" | |||
| align="center" | |||
| align="center | |||
| | |||
|- | |- | ||
| | | align="center" | 4 || align="center" | 5 || align="center" | 47 || align="center" | -29 || align="center" | Down || align="center" | Down || align="center" | HL/HL/H/H/HL || align="center" | HL/HL/H/H/HL | ||
| align="center" | | |||
| align="center" | | |||
| | |||
| align="center" | - | |||
| align="center" | | |||
| align="center" | | |||
| align="center" | | |||
| | |||
|} | |} | ||
Nice damage, Stun Damage its good also, allows you to hit-confirm to land it safe, have tiny bars so you can use it a couple of times, and allows to EX moves. Not a bad Super Art. | |||
= Combos = | |||
=== Midscreen === | |||
==== Everyone ==== | |||
{| border="1em" cellspacing="0" width="80%" style="border: 1px solid #999; background: none;" | |||
{| border=" | |- | ||
| align="center" | '''1st Move''' || align="center" | '''2nd Move''' || align="center" | '''3rd Move''' || align="center" | '''4th Move''' || align="center" | '''Damage''' || align="center" | '''Stun Damage''' | |||
|- | |- | ||
| | | align="center" | Body Press || align="center" | Crouch LK || align="center" | Monster Lariat (EX) || align="center" | - || align="center" | 265 (23%) || align="center" | 28 | ||
| align="center" | | |||
| align="center" | | |||
| | |||
| align="center" | - | |||
| align="center" | | |||
| align="center" | | |||
|- | |- | ||
| align="center" | | | align="center" | Giant Palm Bomber (HP) || align="center" | Giant Palm Bomber (MP) || align="center" | MP || align="center" | - || align="center" | ??? (??%) || align="center" | ?? | ||
| align="center" | |||
| align="center" | |||
| align="center | |||
| | |||
| align="center | |||
| align="center | |||
|- | |- | ||
| | | align="center" | Giant Palm Bomber (HP) || align="center" | Giant Palm Bomber (MP) || align="center" | Crouch MK || align="center" | - || align="center" | ??? (??%) || align="center" | ?? | ||
| align="center" | | |||
| align="center" | | |||
| | |||
| align="center" | - | |||
| align="center" | | |||
| align="center" | | |||
|- | |- | ||
| align="center" | | | align="center" | Giant Palm Bomber (HP) || align="center" | Giant Palm Bomber (MP) || align="center" | Giant Palm Bomber (LP) || align="center" | - || align="center" | ??? (??%) || align="center" | ?? | ||
| align="center" | |||
| align="center" | |||
| align="center | |||
| | |||
| align="center | |||
| | |||
| align="center | |||
|- | |- | ||
| | | align="center" | Giant Palm Bomber (HP) || align="center" | Giant Palm Bomber (MP) || align="center" | Monster Lariat (EX) || align="center" | - || align="center" | ??? (??%) || align="center" | ?? | ||
| align="center" | | |||
| align="center" | | |||
| | |||
| align="center" | - | |||
| align="center" | | |||
| | |||
| align="center" | | |||
|- | |- | ||
| align="center" | | | align="center" | Giant Palm Bomber (EX) || align="center" | Shootdown Backbreaker (HK) || align="center" | - || align="center" | - || align="center" | ??? (??%) || align="center" | ?? | ||
| align="center" | |} | ||
| align="center | In order to do the 3 Giant Palm Bomber combo, enemy must be crouching, otherwise Giant Palm Bomber (MP) with not combo into the LP one. | ||
| align="center" | |||
| align="center | === Corner === | ||
| | ==== Everyone ==== | ||
| | {| border="1em" cellspacing="0" width="80%" style="border: 1px solid #999; background: none;" | ||
|- | |- | ||
| | | align="center" | '''1st Move''' || align="center" | '''2nd Move''' || align="center" | '''3rd Move''' || align="center" | '''4th Move''' || align="center" | '''Damage''' || align="center" | '''Stun Damage''' | ||
| align="center" | | |||
| align="center" | | |||
| align="center" | | |||
| align="center" | | |||
| align="center" | | |||
|- | |- | ||
| align="center" | | | align="center" | Ultra Throw (HK) || align="center" | Giant Palm Bomber (LP) || align="center" | Shootdown Backbreaker (LK) || align="center" | - || align="center" | 334 (29%) || align="center" | 25 | ||
| align="center" | |||
| align="center" | |||
| align="center | |||
| | |||
| align="center | |||
| | |||
| align="center | |||
|- | |- | ||
| | | align="center" | Ultra Throw (HK) || align="center" | Giant Palm Bomber (HP) || align="center" | Shootdown Backbreaker (HK) || align="center" | - || align="center" | ??? (??%) || align="center" | ?? | ||
| align="center" | | |||
| align="center" | | |||
| align="center" | - | |||
| | |||
| align="center" | | |||
| align="center" | | |||
|- | |- | ||
| align="center" | | | align="center" | Ultra Throw (HK) || align="center" | Giant Palm Bomber (EX) (2 hits) || align="center" | Hammer Hook || align="center" | - || align="center" | ??? (??%) || align="center" | ?? | ||
| | |||
| align="center | |||
| align="center" | |||
| align="center | |||
| align="center | |||
| align="center | |||
|- | |- | ||
| align="center" | | | align="center" | Ultra Throw (HK) || align="center" | Giant Palm Bomber (EX) (2 hits) || align="center" | Shootdown Backbreaker (HK) || align="center" | - || align="center" | ??? (??%) || align="center" | ?? | ||
| align="center" | | |} | ||
| align="center" | | |||
| align="center" | - | === Hit Confirms === | ||
| align="center" | | ==== Everyone ==== | ||
| align="center" | | {| border="1em" cellspacing="0" width="80%" style="border: 1px solid #999; background: none;" | ||
| | |||
|- | |- | ||
| align="center" | ''' | | align="center" | '''1st Move''' || align="center" | '''2nd Move''' || align="center" | '''3rd Move''' || align="center" | '''4th Move''' || align="center" | '''Damage''' || align="center" | '''Stun Damage''' | ||
| align="center" | |||
| align="center" | |||
| align="center | |||
| | |||
| align="center | |||
| align="center | |||
|- | |- | ||
| align="center" | | | align="center" | Crouch LP || align="center" | Crouch LP || align="center" | - || align="center" | - || align="center" | ??? (??%) || align="center" | ?? | ||
| align="center" | | |||
| align="center" | | |||
| | |||
| align="center" | - | |||
| align="center" | | |||
| align="center" | | |||
|} | |} | ||
Beyond c.lp chain, Hugo can quite easily confirm into lariat, backbreaker or SA3 from any clap, with heavy clap being the easiest. | |||
=== | === Super Art 2 === | ||
=== Midscreen === | |||
{| border=" | ==== Everyone ==== | ||
{| border="1em" cellspacing="0" width="80%" style="border: 1px solid #999; background: none;" | |||
|- | |- | ||
| align="center" | '''1st Move''' || align="center" | '''2nd Move''' || align="center" | '''3rd Move''' || align="center" | '''4th Move''' || align="center" | '''Damage''' || align="center" | '''Stun Damage''' | |||
|- | |- | ||
| | | align="center" | Giant Palm Bomber (EX) || align="center" | Super Art 2 || align="center" | - || align="center" | - || align="center" | 403 (35%) || align="center" | 28 | ||
| | |||
| | |||
| | |||
| align="center | |||
|} | |} | ||
=== Corner === | |||
''' | {| border="1em" cellspacing="0" width="80%" style="border: 1px solid #999; background: none;" | ||
|- | |||
| align="center" | '''1st Move''' || align="center" | '''2nd Move''' || align="center" | '''3rd Move''' || align="center" | '''4th Move''' || align="center" | '''Damage''' || align="center" | '''Stun Damage''' | |||
|- | |- | ||
| align="center" | Ultra Throw (HK) || align="center" | Giant Palm Bomber (EX) (3 hits) || align="center" | Super Art 2 || align="center" | - || align="center" | ??? (??%) || align="center" | ? | |||
|- | |- | ||
| | | align="center" | Ultra Throw (HK) || align="center" | Giant Palm Bomber (HP) || align="center" | Super Art 2 || align="center" | - || align="center" | 483 (42%) || align="center" | 40 | ||
| | |||
| | |||
| | |||
| align="center | |||
|} | |} | ||
=== | === Super Art 3 === | ||
{| border=" | ==== Everyone ==== | ||
{| border="1em" cellspacing="0" width="80%" style="border: 1px solid #999; background: none;" | |||
|- | |- | ||
| | | align="center" | '''1st Move''' || align="center" | '''2nd Move''' || align="center" | '''3rd Move''' || align="center" | '''4th Move''' || align="center" | '''Damage''' || align="center" | '''Stun Damage''' | ||
| align="center" | | |||
|- | |- | ||
| | | align="center" | Crouch LP || align="center" | Crouch LP || align="center" | Super Art 3 || align="center" | - || align="center" | 437 (38%) || align="center" | 22 | ||
| align="center" | |||
|- | |- | ||
| | | align="center" | Giant Palm Bomber (HP) || align="center" | Giant Palm Bomber (LP) || align="center" | Super Art 3 || align="center" | - || align="center" | 460 (40%) || align="center" | 50 | ||
| align="center" | | |||
|- | |- | ||
| | | align="center" | Giant Palm Bomber (HP) || align="center" | Giant Palm Bomber (MP) || align="center" | Giant Palm Bomber (LP) || align="center" | Super Art 3 || align="center" | 630? (??%) || align="center" | 55? | ||
| | |} | ||
In order to do the 3 Giant Palm Bomber combo, enemy must be crouching and you be at point blank, otherwise Giant Palm Bomber (MP) with not combo into the LP one. Timing for the palms are very strict. Also the 2nd secret about this combo is, when executing the Super Art 3, you MUST DELAY (by holding P) exactly 1 Hugo step. If you don't delay this step at the startup of the Super Art 3, the first hit will whiff, and opponent can block or parry the rest of the Super Art. This combo does BIG damage, it just does more damage than a Gigas Breaker! It also does 100% of Stun Damage in Remy or Akuma, and about 95% on characters with normal Stun Bar. Anyway, chances to hit a crouching opponent with a HP Giant Palm Bomber at point blank are minimal, but everybody can "miss" a reversal Shoryuken on wakeup ;). | |||
===Stun Finisher=== | |||
*HCB HK-->Standing MP (x4)-->F, D, DF LK | |||
*HCB HK-->Standing MP (x3)-->QCF LK | |||
*HCB HK-->Standing MP (x3)-->SA II | |||
=== 100% Combo === | |||
==== Specific to: ==== | |||
Akuma | |||
{| border="1em" cellspacing="0" width="100%" style="border: 1px solid #999; background: none;" | |||
|- | |- | ||
| | | align="center" | '''1st Move''' || align="center" | '''2nd Move''' || align="center" | '''3rd Move''' || align="center" | '''4th Move''' || align="center" | '''5th Move''' || align="center" | '''6th Move''' || align="center" | '''7th Move''' || align="center" | '''Damage''' || align="center" | '''Stun Damage''' | ||
| align="center" | | |||
|- | |- | ||
| | | align="center" | Giant Palm Bomber (HP) || align="center" | Giant Palm Bomber (MP) || align="center" | Giant Palm Bomber (LP) || align="center" | Super Art 3 || align="center" | Giant Palm Bomber (HP) || align="center" | Giant Palm Bomber (MP) || align="center" | MP || align="center" | 985 (??%) || align="center" | ?? | ||
| align="center" | |- | ||
| align="center" | Giant Palm Bomber (HP) || align="center" | Giant Palm Bomber (MP) || align="center" | Giant Palm Bomber (LP) || align="center" | Super Art 3 || align="center" | Giant Palm Bomber (HP) || align="center" | Super Art 3 || align="center" | - || align="center" | 990 (??%) || align="center" | - | |||
|} | |} | ||
The first combo does 100% damage, but Akuma doesn't get KO, it just empty his health bar to zero. The 2nd one really KO him. | |||
For both combos, you must connect the first GPB HP when he is crouching, then combo the 2 other ones and also Super Art 3. After the 4th move (SA3), he is stunned, so finish him off with GPB HP and another Super Art 3. | |||
= Strategies = | |||
=== Overview === | === Overview === | ||
As said in the introduction, Hugo is not an offensive character. You have to be patient, and get close to the opponent to unleash command grabs in a safe way. Mix dashes and jumps to avoid a "pattern", and poke sparingly while you're advancing. With jumps the best you can use is HP (when far) or Body Splash (when near). When you're near, you can start your offense. Basically scoring a knockdown at point blank its the best possible option. You can go for a crossup with Body Splash, followed by low LK (and confirming with Monster Lariat (EX)), GPB HP to MP combos, missing GPB for a Moonsault Press, tick throw with Gigas Breaker using LK. | |||
=== Super Art Selection === | === Super Art Selection === | ||
The SA you choose will depend on your preference and the matchup. The two most used supers are Gigas Breaker and Hammer Mountain. | The SA you choose will depend on your preference and the matchup. The two most used supers are Gigas Breaker and Hammer Mountain. | ||
Gigas Breaker is great because it creates a sense of fear in your opponent, has great comeback potential and can be setup in a variety of ways including an SJ cancel called a Tachi or standing gigas. It can also be buffered in a dash, but is mostly used in a situation where a parry or block can lead to fat ass damage. Drawbacks include a lack of combo-ability and loss of some EX potential. Hayao is arguably the best known SAI player, also notable is Eriho. | '''Gigas Breaker''' is great because it creates a sense of fear in your opponent, has great comeback potential and can be setup in a variety of ways including an SJ cancel called a Tachi or standing gigas. It can also be buffered in a dash, but is mostly used in a situation where a parry or block can lead to fat ass damage. Drawbacks include a lack of combo-ability and loss of some EX potential. Hayao is arguably the best known SAI player, also notable is Eriho. | ||
* Does incredible damage. | |||
* Instant startup, beats many moves. | |||
* Is a larger meter - hard to fill. | |||
* If missed, Hugo is screwed. | |||
* Create unique dynamics in matches. | |||
* Free setups after, on opponent's wakeup. | |||
* Always be buffering 360 motions into your normals, jumps and other moves. This allows you to execute a second 360 on reaction, and thus Gigas on demand, without jumping. | |||
'''Megaton Press''' isn't used much, but can be used a lot like Gief's Aerial Russian Slam. It has very low priority and is hard to land versuss an aware opponent. It can be used to counter characters who want to be in the air a lot, like Oro and Ibuki and force them to play a ground game. It can also be used after an ultra throw, and in the corner after ultra throw and a clap. Does decent damage and allows for EX uses, most people pass it up to have either the power of Gigas or the flexibility of Hammer Mountain. | |||
* Does good damage. | |||
* If missed, Hugo is screwed. | |||
* Easily beaten by other moves. | |||
Hammer Mountain is Hugo's most flexible SA. It deals decent damage, can be used on wakeup or to charge through poke strings and as a whiff punisher. Deals excellent stun damage. Can be comboed from claps, | '''Hammer Mountain''' is Hugo's most flexible SA. It deals decent damage, can be used on wakeup or to charge through poke strings and as a whiff punisher. Deals excellent stun damage. Can be comboed from claps, c.lks, j.hk, bodysplash, c.lk and allows for EX usage. It is one of two ways Hugo can deal big damage with a combo, the other is a clap comboed into EX clothesline. The best known SAIII player is YSB. ''Hammer mountain is the best choice if you want to player more hit-confirm based play-style, as oppossed to the reactive style of Gigas.'' | ||
* Does great damage. | |||
* Has running/cancel gimmick, which is useful for longer range confirms. | |||
* Easily beats other moves. | |||
* A few options to confirms into it. | |||
=== Kara-Techniques === | === Kara-Techniques === | ||
* Kara UOH with MK. (strong) | |||
* Kara any clap with MK. (strong) | |||
* Kara backbreaker with HP. (useless) | |||
<gallery> | |||
<img src="https://i.ibb.co/ysGS2Rf/handy-infographic2.png" alt="Girl in a jacket"> | |||
</gallery> | |||
=== Zoning === | === Zoning === | ||
In the air, Hugo's zoning options are primarily hp and mp. | |||
=== Mixups === | === Mixups === | ||
c.lp OR c.lk OR lk -> any clap OR meatsquasher | |||
Jumping attack on grounded opponent -> (c.lp OR c.lk OR lk) OR (wait for hitstun to end -> any command throw) | |||
Whiff air normal, landing into SPD. | |||
Whiff clap -> SPD | |||
Buffer 720 into anything. | |||
HP clap, buffer Gigas and execute on parried opponents. | |||
=== Additional Notes === | === Additional Notes === | ||
| Line 1,429: | Line 1,395: | ||
*Hugo has one of the highest stun bar. | *Hugo has one of the highest stun bar. | ||
=Match-ups= | |||
===Serious Advantage Match-ups=== | ===Serious Advantage Match-ups=== | ||
Hugo has no matchups where he is at a serious advantage. | Hugo has no matchups where he is at a serious advantage. ''However'' he is capable of beating all of the cast in the right hands. Outside of a very high level play, Hugo's high damage output, stun output, defence and corner pressure all make him a decent choice. | ||
===Advantage Match-ups=== | ===Advantage Match-ups=== | ||
Sean | * Sean | ||
Sean has a vast array of moves which are SPD punishable, making it awful for him to play close. At longer ranges, Hugo's air normals zone Sean well. There's very little Sean can do to push an advantage in this matchup. The Sean's best bet is to abuse techniques known to be strong against taller characters, such as jump-back hk on wakeup. | |||
===Fair Match-ups=== | ===Fair Match-ups=== | ||
Q | * Q | ||
Both Hugo and Q possess similar capabilities in terms of air-normals. Hugo's best tool for handling Q is j.HP - which will hit him standing, even at long ranges. Furthermore, it will stop random dash-punch attempts. Hugo should avoid being command thrown at all costs - to achieve this c.lk must be used, as it's the only normal fast enough to interupt the startup of Q's command through. | |||
To punish Q's taunts, HK lariat can be used to quickly close the distance, and earn a knockdown on Q. | |||
'''Under no circumstance should you engage in a "taunt war". Hugo's taunt health-buff is simply worse than Q's.''' | |||
===Disadvantage Match-ups=== | ===Disadvantage Match-ups=== | ||
Yun | * Yun | ||
Yun is the antithesis of Hugo. Because Yun is able to build meter so quickly, being able defend against Genei Jin is a requirement to win. Look for gaps in Genei Jin pressure to use c.lk if safe. This will push Yun back, wasting his super-time and stopping immidiate overheads. | |||
Landing Gigas will win a round outright most of the time. Aim to build meter quickly. Be aware of how the Yun's behaviour changes once you have Gigas. | |||
If at all possible, run down weaker Yuns, and abuse the fact that the defence rating difference between the two of you is so great. | |||
Backbreaker is geerally too slow to respond to divekicks on reaction, instead position so it's hard for them to connect. | |||
Hugo's UOH will cross-over Yun shoulder-charge, earning a 360 if done correctly. | |||
* Ken | |||
Ken's normals are ideal for keeping Hugo at distance, and avoiding ranges where SPD can be earned. Air ex-tatsu is deadly, and extremely difficult to avoid/parry when used correctly due to Hugo's height and width. Ken has a unique hit-confirm against Hugo (Far HP -> SA3). | |||
<gallery> | |||
Hugoredparrylow.gif | |||
</gallery> | |||
Hugo should look to earn red parry -> SPD where possible from low light chains, back+mk and from the standing target combo. All of these scenarios are perfectly reactable. | |||
Claps will trade favourably with ex-DP on wakeup. | |||
Makoto | * Makoto | ||
If the Makoto does too much dashing or Hayates, they can be stuffed with lk/clk/clp and anticipation mp/cmk. If she tries to fight on the ground and use the general Makoto playstyle, she'll likely get destroyed. Earthquake Bombs/Gigas will own her dash punches and close attacks that get blocked or parried. All of her useful pokes can be high parried besides clk and chp. Her only ground poke that can beat Hugo's crouching pokes is cmk which trades w/ Hugo's sweep. (in your favor) If the Makoto knows that she can't do a lot to Hugo on the ground, he will likely play it safe and try to hit with cmk on the ground, jumping tsurugi and safe (to parry/grab) jump ins. You have to then rely on Hugo's pretty bad anti airs and Backbreakers, try to bait her to jump with cmp and pokes, if she jumps for a tsurugi you can sometimes backbreak it on reaction. Cornering Makoto is the best thing you can do in this match... no need to worry so much with the big man about her Karakusa bullshit, she won't likely be able to land it due to Hugo's various throws beating hers and the aforementioned countering her ground offense. SAIII is recommended cause you can use it for another anti air and you're unlikely to Gigas a smart Makoto. | If the Makoto does too much dashing or Hayates, they can be stuffed with lk/clk/clp and anticipation mp/cmk. If she tries to fight on the ground and use the general Makoto playstyle, she'll likely get destroyed. Earthquake Bombs/Gigas will own her dash punches and close attacks that get blocked or parried. All of her useful pokes can be high parried besides clk and chp. Her only ground poke that can beat Hugo's crouching pokes is cmk which trades w/ Hugo's sweep. (in your favor) If the Makoto knows that she can't do a lot to Hugo on the ground, he will likely play it safe and try to hit with cmk on the ground, jumping tsurugi and safe (to parry/grab) jump ins. You have to then rely on Hugo's pretty bad anti airs and Backbreakers, try to bait her to jump with cmp and pokes, if she jumps for a tsurugi you can sometimes backbreak it on reaction. Cornering Makoto is the best thing you can do in this match... no need to worry so much with the big man about her Karakusa bullshit, she won't likely be able to land it due to Hugo's various throws beating hers and the aforementioned countering her ground offense. SAIII is recommended cause you can use it for another anti air and you're unlikely to Gigas a smart Makoto. | ||
Yang | * Yang | ||
With SA3, Yang has the ability to set-up unblockables on Hugo midscreen and in the corner. Attempt to escape this pressure with wakeup lk backbreaker - if the Yang mistimes their unblockable, you get off the ground, get hit, then reset next to Yang, for a 360 or 720, ending the scenario. | |||
Akuma | * Akuma | ||
Use j.HP to zone the life out of Gouki. Respect his zoning, and defend against it well enough to force Gouki to come close where he can be pinned down. | |||
Akuma's forward+mp is throw invulnerable. Wait about 10 frames after parrying it, before executing a 360/720. | |||
All of Gouki's tatsus can be punish with 360/720 on block. | |||
* Ibuki | |||
Ibuki's range of OTG normals make her a pain to deal with. To win, you must zone effectively with your air normals, whilst reliably punishing thoughtless positioning. | |||
* Necro | |||
Use stand-jab to push Necro back after the twirly dive. Show respect to both SA1 and SA3 - they are great antiairs vs Hugo. | |||
If Hugo parries a slow long range move (HP for example), he can punish with Hammer Mountain by holding down punch to delay the super activation. | |||
Necro can chain HP into itself when Hugo is cornered. Play very carefully around the corner. | |||
* Oro | |||
Oro has all the tools he need to evade Hugo and zone effectively. | |||
Be aware, Oro sometimes lands from ex-DP in a crouching state. This allows you to use the triple clap combo, scoring great damage. | |||
* Ryu | |||
Denjin is the real danger here. Look to punish all failed specials with SPD. Backdash is a useful answer to Ryu jumping in - you can buffer a Gigas and punish accordingly. | |||
* Alex | |||
Alex is a difficult matchup, with most of Hugo's normals trading unfavourably. I don't have any good advice here, you'll need someone smarter than me! | |||
* Remy | |||
The ultimate keep-away match. I've heard some say this is 8-2 in Remy's favour, but I don't agree. Stand MP is an awesome tool to trade at mid range with any fireball. Win round 1 with full meter, then go into round 2, land Gigas, then literally anything will kill Remy. | |||
Parrying divekicks on reaction is very possible if you try hard. | |||
* Elena | |||
Many of Elena's normals hit at odd angles or make her OTG. This can make landing a command grab challenging. | |||
Because Elena is quick relative to Hugo, she has no issues using Healing after a decent knockdown. Even with Hammer Mountain stocked, very little can be done. | |||
SA2 and backbreaker will beat many of elena's specials, uoh and stand roundhouse. | |||
Twelve | * Twelve | ||
This is Hugo's worst matchup by far. Twelve has all the tools needed to zone and run away all day. With this being said, your normals do MUCH more damage than his, so don't be afraid to take trades and risky engagements. | |||
===Serious Disadvantage Match-ups=== | ===Serious Disadvantage Match-ups=== | ||
Chun Li | * Chun Li | ||
Chun is the master of ground combat, she can zone you really easily with her long high priority pokes and can | Chun is the master of ground combat, she can zone you really easily with her long high priority pokes and can trade with everything Hugo has. | ||
Dudley | If the Chun is a novice, abuse the air to quickly bully chun and start mixing her up. Hp clap and c.mk can be very useful. | ||
* Dudley | |||
Dudley has the ability to outzone you with his long fierce and forward fierce, there isn't much to retalliate against this with rather than trading hits. His hits also do a lot of damage, but most importantly is the fact that his hitbox is strange so he is harder to throw. That combined with the powerful backswing blow makes this match difficult for Hugo. Even if you close the distance, he can still slip out, SAIII is generally preferred in this matchup, and your objective is to corner him and then control him there being mindful of his EX Uppercut. | Dudley has the ability to outzone you with his long fierce and forward fierce, there isn't much to retalliate against this with rather than trading hits. His hits also do a lot of damage, but most importantly is the fact that his hitbox is strange so he is harder to throw. That combined with the powerful backswing blow makes this match difficult for Hugo. Even if you close the distance, he can still slip out, SAIII is generally preferred in this matchup, and your objective is to corner him and then control him there being mindful of his EX Uppercut. | ||
==Video | Zoning with air hp can be very useful. | ||
==Video matches & further resources== | |||
===Hayao=== | ===Hayao=== | ||
Hayao (はやお) is Japan's best Hugo player, and one of the most skilled Hugo's in the world (if not the best) using Gigas Breaker. Here you have a list of videos about some of his matches. Look at them and learn from the best Hugo player how you should play. Doing nice combos, opportunities to using SA1, poking, parry attacks, when a move should be used, what moves can be countered, and what to do against certain opponents. | |||
Vs. Akuma [http://www.youtube.com/watch?v=rnDYiZARAtY (Fume)] [http://youtube.com/watch?v=EzW25syi3SA (Yuki)] | |||
Vs. Chun-Li [http://www.youtube.com/watch?v=qcWea8WdnxI (Koshun)] [http://www.youtube.com/watch?v=yeQjBVGSkg0 (Koshun No Deshi)] [http://www.youtube.com/watch?v=FwP6yD72WQA (Umezono)] | |||
Vs. Dudley [http://www.youtube.com/watch?v=yJ8GDQZYnrg (Fujiwara)] [http://www.youtube.com/watch?v=XgZ7f1Faous (Kokuzin)] [http://www.youtube.com/watch?v=FekBWqE9ueA (Jima)] | |||
Vs. Ibuki [http://www.youtube.com/watch?v=_EIIdfxZ9co (Fume)] | |||
Vs. Ken [http://www.youtube.com/watch?v=yILMLyJE4Qc (Teruchika)] [http://www.youtube.com/watch?v=pH7EqLB52ho (Haitani)] [http://www.youtube.com/watch?v=kIO20PfFruo (??)] | |||
Vs. Makoto [http://www.youtube.com/watch?v=HPMpaY2ejso (Shiroitachi)] | |||
Vs. Necro [http://www.youtube.com/watch?v=x_Scq5Xw5oM (PinoAB7)] | |||
Vs. Q [http://youtube.com/watch?v=AbXVF4LrRCY&NR=1 (Afro)] | |||
Vs. Sean [http://es.youtube.com/watch?v=JnTermwMuYc (Mokomokofu)] | |||
Vs. Urien [http://www.youtube.com/watch?v=j8PQLUXGO3Y (ABE)] [http://www.youtube.com/watch?v=o57PYK0vs08 (Ramen)] [http://www.youtube.com/watch?v=RRcGwf0Jcas (Afro)] | |||
Vs. Yun [http://www.youtube.com/watch?v=Z-2ZiWjgCew (KO)] [http://www.youtube.com/watch?v=dtYHavbk5iw (Towel)] [http://www.youtube.com/watch?v=1T52Iu3lp1k (S)] [http://www.youtube.com/watch?v=y83BMxGZZQQ (Bagon)] [http://www.youtube.com/watch?v=gInih0yrLHI (BillyKane)] | |||
[http://www.youtube.com/watch?v=lN0iVprW43U (??)] | |||
===YSB=== | |||
YSB is another amazing japanese Hugo player, using Hammer Frenzy as his main Super Art. Perhaps he is not as good as Hayao when it comes to parrying, but he's one of the most scary Hugo players. | |||
<youtube>uA_kpayFIOE</youtube> | |||
[http://www.youtube.com/watch?v= | Vs. Alex [http://www.youtube.com/watch?v=XzVDJtfD3_c (Genki)] [http://www.youtube.com/watch?v=qUeSlRFtDT0 (Zangoef)] | ||
[http://www.youtube.com/watch?v= | Vs. Chun-Li [http://www.youtube.com/watch?v=SKfiN6otL7U (Raou)] [http://www.youtube.com/watch?v=l72bW_5ZZ5E (Tokido)] | ||
[http://www.youtube.com/watch?v= | Vs. Hugo [http://www.youtube.com/watch?v=pHExrFjHlk4 (Eriho)] | ||
[http://www.youtube.com/watch?v= | Vs. Ibuki [http://www.youtube.com/watch?v=sL3NCf02BQA (Aruka)] | ||
[http://www.youtube.com/watch?v= | Vs. Ken [http://www.youtube.com/watch?v=ZS6ZFNH7s7E (T)] [http://www.youtube.com/watch?v=3FRCUAAK8SU (Matsuken)] | ||
[http://www.youtube.com/watch?v= | Vs. Necro [http://www.youtube.com/watch?v=sgdHrzM1P9k (Sugiyama)] | ||
[http://www.youtube.com/watch?v= | Vs. Remy [http://www.youtube.com/watch?v=tSnbFEshjH0 (Ryo-chin)] | ||
[http://www.youtube.com/watch?v= | Vs. Ryu [http://www.youtube.com/watch?v=WHhYKBuBzho (Vanao)] | ||
[http://www.youtube.com/watch?v= | Vs. Twelve [http://www.youtube.com/watch?v=5cKHmpKyHq0 (Yamazaki)] | ||
[http://www.youtube.com/watch?v= | Vs. Urien [http://www.youtube.com/watch?v=Tf4fjUSTuHg (RX)] [http://www.youtube.com/watch?v=Ullv9s4mrks (Messatsu)] | ||
[http://www.youtube.com/watch?v= | Vs. Yang [http://www.youtube.com/watch?v=FKxRiB0Bsfw (KO)] [http://www.youtube.com/watch?v=I1LhAnLZHYU (Rohishikari)] | ||
[http://www.youtube.com/watch?v= | Vs. Yun [http://www.youtube.com/watch?v=Su5Vnp3moWs (KO)] [http://www.youtube.com/watch?v=67thJCKrWhE (Issay)] | ||
===Sandybags=== | |||
Sandybags is widely considered to be the best USA Hugo. | |||
[ | Vs. Various [https://www.youtube.com/watch?v=deNBV4MKWfg (Nica KO)] | ||
[ | Vs. Ken [https://www.youtube.com/watch?v=h4vQBCWSFxM (Surewin)] | ||
[ | ===grgrpon=== | ||
grgrpon is a Japanese YouTuber who uploads every available streamed Hugo match from Japan and internationally. [https://www.youtube.com/channel/UC0dlG9q8CxgFvKtbt-2u3sQ Their channel] is a great resource for Hugo content, and features playlists for each matchup, sorted by super-art. | |||
<youtube>X6JyeSebaio</youtube> | |||
[ | ===AutoMattock=== | ||
AutoMattock is an American Hugo player, widely regarded to be one of the best USA Hugos. [https://www.youtube.com/results?search_query=Automattock+hugo You can find a range of tutorials on Youtube from him]. | |||
<youtube>PwaiBuaHlYI</youtube> | |||
===Feuras=== | |||
Feuras is a UK Hugo player, who's YouTube channel features a handy guide for understanding the basics of Hugo. | |||
<youtube>67wPuGGapJ8</youtube> | |||
===Renic=== | |||
Renic offers a good primer video that covers the basics of Hugo. | |||
<youtube>XHgMlwJaYpI</youtube> | |||
==Discussion== | |||
[http://forums.shoryuken.com/forumdisplay.php?f=86 SRK Forums - 3rd Strike - Hugo] | |||
{{Navbox-3S}} | |||
[[Category: Street Fighter 3: 3rd Strike]] | [[Category: Street Fighter 3: 3rd Strike]] | ||
Latest revision as of 19:24, 23 June 2024
Updated version available!
You're reading the old version of this page. Click here to read the (in-progress) updated version!
Introduction
Hugo is 3rd Strike's most straightforward grappler, moreso than Alex, and as such, requires exceptional patience to play. He can do a highly impressive amount of damage with only a few moves (theoretically capable of KOing Chun-Li with only 4 uses of his main command grab, the Moonsault Press), but getting within range is certainly not easy. Hugo is also the largest character in 3rd Strike, meaning he has a big set of hitboxes, which other characters can use to easily hit-confirm many combos and Super Arts. He is also the slowest among them, so most of the time, blocking a move from the opponent doesn't automatically mean you have the opportunity to counteract with a combo or command grab, like other characters can do, such as Chun-Li. So it's easy to say that Hugo’s punishing game off of blocks isn't all that strong.
To master our good Andore, one must also master the 360 motion. It is vital to remember that when the opponent comes near and you parry their attack, a simple throw isn't any good compared to the damage a Moonsault can do. Punishing with a normal throw is just as impractical with Hugo as it is with any other character, although for different reasons, as most others would resort to a combo or Super Art for optimal damage. With Hugo, more than anyone else, you must exploit any and all whiffed moves or successful parries on point blank attacks to Moonsault them, because Hugo is no Shoto, and as stated before, getting in close is not an easy task.
Four unheld taunts with Hugo gains him 25% more defense, and with this, he obtains the 2nd highest defense rating in the game (only Q after 3 taunts surpassing him).
| Strengths | Weaknesses |
|---|---|
|
|
Specific Character Information
- Stamina: 1385, 1400 with 1 taunt, 1535 with 2 taunts, 1670 with 3 taunts, 1870 with 4 taunts.
- Stun Bar Length (in pixels): 72 (Long)
- Stun Bar Recovery (frames it takes to recover 1 pixel): 21
- Taunt:
Unheld taunt - Increases damage for the next hit/combo (not throw) by 18.8% (maximum 1 taunt). Also increases defense for the rest of the round by 6.3% per taunt (maximum 4 taunts, 25% bonus) Held taunt - Increases damage for the next hit/combo/throw by 25%. One taunt is the maximum.
- Best Kara-Throw: MK
Character Colors
Moves List
Throws
| Neck Hanging Three | |
| Body Slam |
Command Moves
| Hammer Hook | |
| Drop Kick | |
| Poison Secret Taunt | Hold S then |
| Body Press | Air |
Special Moves
| Giant Palm Bomber | EX SC | |
| Monster Lariat | EX | |
| Ultra Throw | Close | |
| Moonsault Press | Close | |
| Meat Squasher | ||
| Shootdown Backbreaker |
Super Arts
| I | Gigas Breaker | Close |
128 Gauge Dots | 1 Stock | 3.1 EX Uses |
| II | Megaton Press | 112 Gauge Dots | 2 Stocks | 5.5 EX Uses | |
| III | Hammer Frenzy | 88 Gauge Dots | 2 Stocks | 4.3 EX Uses |
Move Analysis
- All those sprites are taken from the site http://www.zweifuss.ca/
- All Framedatas in "Move Analysis" section are taken from Game Restaurant , this means the Framedata isn't from the Dreamcast version like Karathrow site, it's from Arcade version.
Please note that the images show in this section are for the 1st frame it hits, so this means the opponent is taking the hit in the image shown on the move. I use the 1st frame of every move (except taunt, jump, dash and 2nd throw image sprites) because you will see the maximum range of every attack (mostly of the attacks). Note also that those images are ACCURATE, they are exactly the 1rst frame it hits, so enemy takes damage but they still dont make the "pain" frame.
General
- Move: Move name
- Motion: What you must do to execute the move
- Damage: Damage it does (in pixels)
- Stun Damage: Stun Damage it does (in pixels)
- Chains into itself: If you can combo into the same movement
- Special Cancel: If you can cancel the move into a Special Move
- Super Cancel: If you can cancel the move into a Super Art
- Throw Range: Range of the throw (in pixels)
- Throw Range (Front): Range of the throw in front of your character (in pixels)
- Throw Range (Up & Down): Range of the throw, up and down from your character (in pixels)
- Gauge Needed: Gauge you need to execute the EX move (in pixels)
- Num.: Super Art number
- Super Art: Super Art name
- Super Art Stock: Number of Gauge Bars the Super Art have, also the lenght of each bar (in pixels)
Frame Data
- Startup: Number of frames it takes to start the move
- Hit: Number of frames that can hit the opponent
- Recovery: Number of frames it takes to recover from the move
- Blocked Advantage: Number of frames you are in advantage/disadvantage after opponent have been blocked the hit
- Hit Advantage: Number of frames you are in advantage/disadvantage after opponent have been take the hit
- Crouching Hit Advantage: Number of frames you are in advantage/disadvantage after opponent have been take the hit while he is crouching
- + # : You have # frames of advantage
- - # : You have # frames of disadvantage
- # ~ # : Advantage/disadvantage can vary from # to #
- Down: Enemy gets knocked down
- Guard: How opponent must guard the move, High (H), Low (L) or both (HL)
- Parry: How opponent must parry the move, High (H), Low (L) or both (HL)
Gauge Increase
- Miss: Gauge you gain if you miss the move (in pixels)
- Blocked: Gauge you gain if the move gets blocked (in pixels)
- Hit: Gauge you gain if you hit the opponent with the move (in pixels)
- Parry: Gauge opponent gains when he parry the move (in pixels)
Basic Moves
| Move | Total frames |
|---|---|
| Dash Forward | 22 if cancelled |
Hugo's forward dash has the interesting property of making him airbourne for a handful of frames in the middle. This can allow you to dash over low moves, including the c.mk of many characters. By the same merit, Hugo can be anti-aired out of dash, though this typically isn't an issue.
| Move | Total frames |
|---|---|
| Dash Backwards | 20 |
Hugo is technically airbourne during backdash, though this property is rarely useful.
| Move | Motion | Startup Frames |
| Jump | BU or U or FU | 5 |
| Move | Motion | Startup Frames |
| Super Jump | DBU or DU or DFU | 7 |
Hugo's jumps are just fine. Overall his jump startup is longer than other members of the cast, which is useful, providing more time to input SPD. You will be often cancelling the startup of a jump into an SPD with Hugo. This longer startup also allows for the Tachi Gigas technique.
| Move | Motion | Frames |
| Normal Wakeup | - | 69 |
Comments here
| Move | Motion | Frames |
| Quick Stand | Tap D when hitting the ground | 54 |
Comments here
| Move | Motion | Frames | Gauge Increase |
| Unheld Taunt | HP+HK | 68? | 6 |
An unheld taunt can be safely used after a neutral throw or c.mk vs many characters. Beware: often you're better to close the distance and apply pressure. Hugo requires 4 taunts to get the full buff, which is practically unachievable.
| Move | Motion | Frames | Gauge Increase |
| Held Taunt | Hold HP+HK | 95? | 6 |
Largely impossible to use, as it's duration is really long. The buff to throw damage is excellent, however is typically never worth using.
| Move | Motion |
| Parry (High) | Tap F when about taking a hit |
| Parry (Low) | Tap D when about taking a hit |
| Parry (Air) | Tap F in air when about taking a hit |
Frame Data
| Move | Frames you're frozen | Frames opponent is frozen | Frame Advantage when parry is successful | Frames before you can try another parry |
| Parry (High) | 16 | 16 | +4(LP/LK) +3(MP/MK) +2(HP/HK) 0(Special/Super) -16(Fireball) | 24(19 when attack comes from the air)*,** |
| Parry (Low) | 16 | 16 | +4(LP/LK) +3(MP/MK) +2(HP/HK) 0(Special/Super) -16(Fireball) | 24(19 when attack comes from the air)*,** |
| Parry (Air) | 16 | 16 | +4(LP/LK) +3(MP/MK) +2(HP/HK) 0(Special/Super) -16(Fireball) | 21(19 when attack comes from the air)*,** |
| * (If a parry attempt is successful, the 19/21/24 frame restriction is taken away and you can attempt another parry immediately) |
| ** (If another attack connects within 2 frames of your parry, it will automatically be parried) |
Gauge Increase
| Move | Gauge Increase |
| Parry (High) | 4*** |
| Parry (Low) | 4*** |
| Parry (Air) | 4*** |
| *** (You gain 4 of gauge for whatever attack parried, and for whatever hit you parry during multihit attack) |
You can buffer any motion during High or Low parry, but NOT during Air parry, also parry resets the juggle count (and thus resets all scaling).
- Parry information is taken from Shoryuken Forums, more exactly, from user JinraiPVC. Thanks for this information dude
Normal Moves
Standing Normals
The jab appears to hit high enough to be useful as an anti-air, however this is not the case. The active hitbox of the jab runs UNDERNEATH Hugo's arm, meaning it hits far lower than you might expect. For this reason, the move is best against airbourne opponenets who are very close to the ground (think Necro twirling).
Standing jab is also excellent for spacing claps. If it just whiffs, they're in a good range for any clap. If it hits, you push them back to a suitable range for a clap. Simple!
| Move | Motion | Damage | Stun Damage | Chains into itself | Special Cancel | Super Cancel | Juggle Value |
| Jab | LP | 35(6 life points) | 5 | Yes | No | No |
Frame Data
| Startup | Hit | Recovery | Blocked Advantage | Hit Advantage | Crouching Hit Advantage | Guard | Parry |
| 4 | 4 | 8 | -1 | -1 | -1 | HL | HL |
Gauge Increase
| Miss | Blocked | Hit | Parry (Gauge for opponent) |
| 0 | 2 | 3 | 4 |
Hugo's MP is a really fun button, and a great poke for beginners. It can easily destroy low skill level players, with excellent reach and decent damage. However, the move is unsafe on block, meaning at higher levels it is rarely used. When Ken players start punishing MP on block with SA3, you'll know it's time to stop using this move.
| Move | Motion | Damage | Stun Damage | Chains into itself | Special Cancel | Super Cancel | Juggle Value |
| Strong | MP | 120(21 life points) | 13 | No | No | No |
Frame Data
| Startup | Hit | Recovery | Blocked Advantage | Hit Advantage | Crouching Hit Advantage | Guard | Parry |
| 10 | 7 | 12 | -5 | 0 | +1 | HL | H |
Gauge Increase
| Miss | Blocked | Hit | Parry (Gauge for opponent) |
| 2 | 5 | 9 | 4 |
This is an overhead move which does great stun and damamge. The move is slow enough to be visually reacted to, however very few players have enough experience fighting against Hugo to do this reliably. You won't regularly see high level Hugos using this move frequently. It's used very sparingly, perhaps once a match as an option to force a bad decision or end the round.
| Move | Motion | Damage | Stun Damage | Chains into itself | Special Cancel | Super Cancel | Juggle Value |
| Fierce | HP | 170(30 life points) | 21 | No | No | No |
Frame Data
| Startup | Hit | Recovery | Blocked Advantage | Hit Advantage | Crouching Hit Advantage | Guard | Parry |
| 16 | 7 | 15 | -3 | -1 | +1 | HL | HL |
Gauge Increase
| Miss | Blocked | Hit | Parry (Gauge for opponent) |
| 3 | 7 | 15 | 4 |
An essential poke. Use it to set up frame traps with Giant Palm or an LK Meat Squasher.
LK will often reach over low moves, such as sweep and low-forward. This means it can be used sparingly to apply pressure against character's attempting to bully with superior low normals.
| Move | Motion | Damage | Stun Damage | Chains into itself | Special Cancel | Super Cancel | Juggle Value |
| Short | LK | 50(8 life points) | 3 | No | Yes | Yes |
Frame Data
| Startup | Hit | Recovery | Blocked Advantage | Hit Advantage | Crouching Hit Advantage | Guard | Parry |
| 5 | 4 | 9 | +1 | +1 | +1 | HL | HL |
Gauge Increase
| Miss | Blocked | Hit | Parry (Gauge for opponent) |
| 0 | 2 | 3 | 4 |
This move has no real uses. If you're already good at Hugo I'm sure you can find a situational application, however for 99% of players 99% of the time, this is garbage move that should never be used.
2-hit attack, and the 2nd hit is an overhead. The first hit of MK hits higher, before the leg descends.
| Move | Motion | Damage | Stun Damage | Chains into itself | Special Cancel | Super Cancel | Juggle Value |
| Forward | MK | 115(70+50)(19 life points) | 13(9+5) | No | No | No |
Frame Data
| Startup | Hit | Recovery | Blocked Advantage | Hit Advantage | Crouching Hit Advantage | Guard | Parry |
| 9/14 | 2/4 | 23 | -4 | +1 | +3 | HL/H | H/H |
Gauge Increase
| Miss | Blocked | Hit | Parry (Gauge for opponent) |
| 7 | 5 | 11 | 8(4+4) |
This move is useless on paper, however has a few saving graces which make it suitable for use maybe once in every ten games: Firstly, it shares an animation with j.HK, which can make it hard to respond to when unexpected. Secondly, it does good stun and damage, which means there's OK reward for the risk you're taking. Finally, it trades well with a number of options, including wakeup shoto DP when timed correctly.
Again, this move is uselesss on paper. The recovery is giant, and all characters have good punish options. For this reason it is highly situational, and shouldn't be used by 99% of players 99% of the time.
| Move | Motion | Damage | Stun Damage | Chains into itself | Special Cancel | Super Cancel | Juggle Value |
| Roundhouse | HK | 150(26 life points) | 19 | No | No | No |
Frame Data
| Startup | Hit | Recovery | Blocked Advantage | Hit Advantage | Crouching Hit Advantage | Guard | Parry |
| 21 | 8 | 28 | -13 | +3 | +3 | H | H |
Gauge Increase
| Miss | Blocked | Hit | Parry (Gauge for opponent) |
| 3 | 7 | 15 | 4 |
Jumping Normals
Jumping jab is a fine move. That's it.
| Move | Motion | Damage | Stun Damage | Chains into itself | Special Cancel | Super Cancel | Juggle Value |
| Jump Jab | (Air) LP | 40(7 life points) | 9 | No | No | No |
Frame Data
| Startup | Hit | Recovery | Blocked Advantage | Hit Advantage | Crouching Hit Advantage | Guard | Parry |
| 3 | 11 | - | -3~+7/-2~+7 | -3~+7/-2~+7 | +5~+7/+6~+7 | H | H |
Gauge Increase
| Miss | Blocked | Hit | Parry (Gauge for opponent) |
| 0 | 2 | 3 | 4 |
Jump MP is fantastic button (if not Hugo's best) for quick air-to-air situations, with good speed, range and damage. It can be used to hit grounded targets, however typically other air normals are better for this purpose.
| Move | Motion | Damage | Stun Damage | Chains into itself | Special Cancel | Super Cancel | Juggle Value |
| Jump Strong | (Air) MP | 100(17 life points) | 13 | No | No | No |
Frame Data
| Startup | Hit | Recovery | Blocked Advantage | Hit Advantage | Crouching Hit Advantage | Guard | Parry |
| 6 | 8 | - | 0~+10/+2~+10 | 0~+10/+2~+10 | +8~+10/+10 | H | H |
Gauge Increase
| Miss | Blocked | Hit | Parry (Gauge for opponent) |
| 2 | 5 | 9 | 4 |
Hugo's best poke in the air when enemy is not close, otherwise a Body Slam is prefered. Very nice range, and has good priority. Use it when you're going to reach the ground and enemy is far, so it will prevent oponents jumps while you're in the air or landing, or you can hit them even on the ground, but beware because for some characters, this move will whiff when they are standing.
Jump back HP can be a great option versus character's who's dominant strategy is to control the air - think Oro, Ibuki, Akuma etc.
This move is very strong, and not taking advantage of that would be a mistake.
| Move | Motion | Damage | Stun Damage | Chains into itself | Special Cancel | Super Cancel | Juggle Value |
| Jump Fierce | (Air) HP | 150(26 life points) | 17 | No | No | No |
Frame Data
| Startup | Hit | Recovery | Blocked Advantage | Hit Advantage | Crouching Hit Advantage | Guard | Parry |
| 11 | 5 | - | +4~+13/+6~+13 | +4~+13/+6~+13 | +12~+13 | H | H |
Gauge Increase
| Miss | Blocked | Hit | Parry (Gauge for opponent) |
| 3 | 7 | 15 | 4 |
It's a j.lk! Nothing special.
| Move | Motion | Damage | Stun Damage | Chains into itself | Special Cancel | Super Cancel | Juggle Value |
| Jump Short | (Air) LK | 60(10 life points) | 7 | No | No | No |
Frame Data
| Startup | Hit | Recovery | Blocked Advantage | Hit Advantage | Crouching Hit Advantage | Guard | Parry |
| 3 | 16 | - | -9~+7/-8~+7 | -9~+7/-8~+7 | +1~+7/+2~+7 | H | H |
Gauge Increase
| Miss | Blocked | Hit | Parry (Gauge for opponent) |
| 0 | 2 | 3 | 4 |
Hugo's' j.mk works similarly to j.mp, however is better used on targets BELOW Hugo, whether grounded or airbourne. This move can do enough hit-stun to follow up with a combo, though again, 99% of the time this is a bad idea. High situational.
| Move | Motion | Damage | Stun Damage | Chains into itself | Special Cancel | Super Cancel | Juggle Value |
| Jump Forward | (Air) MK | 100(17 life points) | 11 | No | No | No |
Frame Data
| Startup | Hit | Recovery | Blocked Advantage | Hit Advantage | Crouching Hit Advantage | Guard | Parry |
| 5 | 7 | - | -4~+10/-5~+10 | -4~+10/-5~+10 | +2~+10/+3~+10 | H | H |
Gauge Increase
| Miss | Blocked | Hit | Parry (Gauge for opponent) |
| 2 | 5 | 9 | 4 |
J.hk hits deeper than Hugo's other airbourne normals. This makes it a better choice against shorter characters such as the Twins, or Makoto.
| Move | Motion | Damage | Stun Damage | Chains into itself | Special Cancel | Super Cancel | Juggle Value |
| Jump Roundhouse | (Air) HK | 130(26 life points) | 15 | No | No | No |
Frame Data
| Startup | Hit | Recovery | Blocked Advantage | Hit Advantage | Crouching Hit Advantage | Guard | Parry |
| 11 | 7 | - | -1~+13/-2~+13 | -1~+13/-2~+13 | +7~+13/+9~+13 | H | H |
Gauge Increase
| Miss | Blocked | Hit | Parry (Gauge for opponent) |
| 3 | 7 | 15 | 4 |
Hugo's universal overhead has number of interesting properties:
- It can be kara'd easily with mk to increase its range.
- It can travel over moves such Yun's shoulder, though this is (impossible) very difficult to do on reaction.
- When used at the right range, Hugo will travel over low normals, landing for a 360/720.
- It can trade with late air normals, making it a further tool in Hugo's weak anti-air toolset.
| Move | Motion | Damage | Stun Damage | Chains into itself | Special Cancel | Super Cancel | Juggle Value |
| Universal Overhead | MP+MK | 40(7 life points) | 3 | No | No | No |
Frame Data
| Startup | Hit | Recovery | Blocked Advantage | Hit Advantage | Crouching Hit Advantage | Guard | Parry |
| 15 | 10 | 5 | -5~+7 | 0~+8 | +1~+9 | H | H |
Gauge Increase
| Miss | Blocked | Hit | Parry (Gauge for opponent) |
| 0 | 1 | 2 | 4 |
Throws
After a successful grab midscreen, quickly use an MK backbreaker to arrive at oki range. After a successful grab in the corner, either use c.mp to combo, or stand jab to reset. Typically I would recommend the stand jab, as this gives the opponent less thinking time to response to the next mixup.
| Move | Motion | Damage | Stun Damage | Throw Range |
| Neck Hanging Three | LP+LK | 130(30x8)(21 life points) | 24(5x8) | 32 |
Frame Data
| Startup | Hit | Recovery | Blocked Advantage | Hit Advantage | Crouching Hit Advantage | Guard | Parry |
| 2 | 1 | 21 | - | - | - | LP+LK | - |
Gauge Increase
| Miss | Blocked | Hit |
| 0 | 7 (for the player who blocked) | 24(3?x8) |
| Move | Motion | Damage | Stun Damage | Throw Range | Kara-Throw | Kara-Throw Range |
| Body Slam | F+LP+LK or B+LP+LK | 160(28 life points) | 13 | 32 | MK/HP | ??/?? |
Frame Data
| Startup | Hit | Recovery | Blocked Advantage | Hit Advantage | Crouching Hit Advantage | Guard | Parry |
| 2 | 1 | 21 | - | - | - | LP+LK | - |
Gauge Increase
| Miss | Blocked | Hit |
| 0 | 7 (for the player who blocked) | 7 |
Comments here
Crouching Normals
Not quite as fast as c.lk, and can be parried H+L, so generally not preferred, however is still a good option to chain to confirm sa3, and set up other further damage.
Shares similar frames to c.mp, abuse this.
| Move | Motion | Damage | Stun Damage | Chains into itself | Special Cancel | Super Cancel | Juggle Value |
| Crouch Jab | C+LP | 30(7 life points) | 3 | Yes | Yes | Yes |
Frame Data
| Startup | Hit | Recovery | Blocked Advantage | Hit Advantage | Crouching Hit Advantage | Guard | Parry |
| 4 | 3 | 8 | -1 | -1 | -1 | HL | HL |
Gauge Increase
| Miss | Blocked | Hit | Parry (Gauge for opponent) |
| 0 | 2 | 3 | 4 |
One of the very best pokes Hugo has. Use this button to punish missed tackles, bad pokes, mis-spaced fireballs, the list goes on. Isn't super safe, but feels like a more secure option than mp, with a few less negative frames on block.
Shares similar frames to c.lp, abuse this.
| Move | Motion | Damage | Stun Damage | Chains into itself | Special Cancel | Super Cancel | Juggle Value |
| Crouch Strong | C+MP | 120(17 life points) | 13 | No | No | No |
Frame Data
| Startup | Hit | Recovery | Blocked Advantage | Hit Advantage | Crouching Hit Advantage | Guard | Parry |
| 7 | 5 | 12 | -2 | -1 | 0 | HL | HL |
Gauge Increase
| Miss | Blocked | Hit | Parry (Gauge for opponent) |
| 2 | 5 | 9 | 4 |
This move can be used as an anti-air, however because it's relatively slow, and only hits once, it will usually be parried. Hugo recovers crouching, which means he is extremely vulnerable for a long time.
| Move | Motion | Damage | Stun Damage | Chains into itself | Special Cancel | Super Cancel | Juggle Value |
| Crouch Fierce | C+HP | 110(26 life points) | 13 | No | No | No |
Frame Data
| Startup | Hit | Recovery | Blocked Advantage | Hit Advantage | Crouching Hit Advantage | Guard | Parry |
| 13 | 10 | 37 | -29 | Down | Down | HL | HL |
Gauge Increase
| Miss | Blocked | Hit | Parry (Gauge for opponent) |
| 3 | 7 | 15 | 4 |
This is Hugo's best button. Fast enough to react to Makoto dashing in, or any other BS. Pushes back a good distance, and is cancelable into special and super moves. Thus begins the level 1 mixup for Hugo: "Am I going to use c.lk or SPD?"
If you're using Gigas, you want to be using this button as your fastest way to store 360 motions, without leaving the ground. "Always be buffering"
| Move | Motion | Damage | Stun Damage | Chains into itself | Special Cancel | Super Cancel | Juggle Value |
| Crouch Short | C+LK | 40(7 life points) | 3 | No | Yes | Yes |
Frame Data
| Startup | Hit | Recovery | Blocked Advantage | Hit Advantage | Crouching Hit Advantage | Guard | Parry |
| 3 | 3 | 7 | +2 | +2 | +2 | L | L |
Gauge Increase
| Miss | Blocked | Hit | Parry (Gauge for opponent) |
| 0 | 2 | 3 | 4 |
A very useful poke, has a lot of range and will send the opponent back and knockdown. This is Hugo's normal sweep move. It is slow, and best used sparingly, however it's essential to master. It shines best in matchups such as vs Chun-Li, where Hugo wants to score a knockdown at max range, without taking huge risks.
Don't depend on this button too heavily, as if parried your opponent has a free shot at you in crouch state.
| Move | Motion | Damage | Stun Damage | Chains into itself | Special Cancel | Super Cancel | Juggle Value |
| Crouch Forward | C+MK | 100(17 life points) | 3 | No | No | No |
Frame Data
| Startup | Hit | Recovery | Blocked Advantage | Hit Advantage | Crouching Hit Advantage | Guard | Parry |
| 8 | 5 | 17 | -5 | Down | Down | L | L |
Gauge Increase
| Miss | Blocked | Hit | Parry (Gauge for opponent) |
| 2 | 5 | 9 | 4 |
tldr; if you use this move, you are leaving Hugo's fate in god's hands
This move is tricky, knocks down if hits, hits low at point blank or very close to the enemy, and hits high when you are at D+MK range, this means if enemy is guarding low and you do D+HK at D+MK range, he will get hit and be knocked down again, use this "overhead" move combined with D+MK for knocking down repeatedly a "teenage mutant ninja TURTLE" opponent, entering into a guessing game. But remember that, if enemy blocks or parry the D+HK move, you will be comboed or take huge damage. Watch out for reversals also.
| Move | Motion | Damage | Stun Damage | Chains into itself | Special Cancel | Super Cancel | Juggle Value |
| Crouch Roundhouse | C+HK | 170(30 life points) | 13 | No | No | No |
Frame Data
| Startup | Hit | Recovery | Blocked Advantage | Hit Advantage | Crouching Hit Advantage | Guard | Parry |
| 11 | 23 | 24~38 | -43 ~ -18 | Down | Down | H(far) or L(close) | H(far) or L(close) |
Gauge Increase
| Miss | Blocked | Hit | Parry (Gauge for opponent) |
| 3 | 7 | 15 | 4 |
Command Normals
Not safe enough for use in neutral, antiair etc. Just avoid using it, unless as a combo ender.
| Move | Motion | Damage | Stun Damage | Chains into itself | Special Cancel | Super Cancel | Juggle Value |
| Hammer Hook | F+HP | 160(28 life points) | 21 | No | No | No |
Frame Data
| Startup | Hit | Recovery | Blocked Advantage | Hit Advantage | Crouching Hit Advantage | Guard | Parry |
| 14 | 4 | 33 | -14 | +4 | +4 | HL | H |
Gauge Increase
| Miss | Blocked | Hit | Parry (Gauge for opponent) |
| 3 | 7 | 15 | 4 |
Never safe to use, but can be fun to use. 👌
| Move | Motion | Damage | Stun Damage | Chains into itself | Special Cancel | Super Cancel | Juggle Value |
| Drop Kick | F+HK or B+HK | 150(26 life points) | 19 | No | No | No |
Frame Data
| Startup | Hit | Recovery | Blocked Advantage | Hit Advantage | Crouching Hit Advantage | Guard | Parry |
| 21 | 8 | 27 | -12 | +4 | +4 | H | H |
Gauge Increase
| Miss | Blocked | Hit | Parry (Gauge for opponent) |
| 3 | 7 | 15 | 4 |
| Move | Motion | Damage | Stun Damage | Chains into itself | Special Cancel | Super Cancel | Juggle Value |
| Body Press | JF, D+HP | 100(17 life points) | 17 | No | No | No |
Frame Data
| Startup | Hit | Recovery | Blocked Advantage | Hit Advantage | Crouching Hit Advantage | Guard | Parry |
| 9 | Until landing | - | - | - | - | H | H |
Gauge Increase
| Miss | Blocked | Hit | Parry (Gauge for opponent) |
| 3 | 7 | 15 | 4 |
Nice for cross-ups, but rarely you will have the chance to do it. If you throw the opponent (Body Slam) and he doesnt do a tech wakeup, go for the cross-up with Body Press, also after a succesful Moonsault Press, if enemy doesnt do a tech wakeup, superjump to the opponent when you touch the ground (will not work on characters that have quick wakeup, such as Dudley, Remy, etc). Remember also, even if the Body Press gets blocked (cross-up or not) a nice thing to do after it is a standing HP, or standing LK followed by Giant Palm Bomber (LP), and even a LK Meat Squasher to put the opponent into the corner. You'll want to practice using the body splash as late as possible. This makes it very difficult for an opponent to jump back safely, to avoid an upcoming SPD.
Special Moves
| Move | Motion | Damage | Blocked Damage | Stun Damage | Super Cancel | Juggle Value |
| Giant Palm Bomber (Jab) | QCB+LP | 110(19 life points) | 14 | 15 | Yes | |
| Giant Palm Bomber (Strong) | QCB+MP | 125(22 life points) | 16 | 17 | Yes | |
| Giant Palm Bomber (Fierce) | QCB+HP | 140(29 life points) | 18 | 19 | Yes |
Frame Data
| Move | Startup | Hit | Recovery | Blocked Advantage | Hit Advantage | Crouching Hit Advantage | Guard | Parry |
| Giant Palm Bomber (Jab) | 17 | 2 | 9 | +11 | +13 | +15 | HL | H |
| Giant Palm Bomber (Strong) | 19 | 2 | 7 | +16 | +18 | +20 | HL | H |
| Giant Palm Bomber (Fierce) | 22 | 2 | 6 | +19 | +21 | +23 | HL | H |
Gauge Increase
| Move | Miss | Blocked | Hit | Parry (Gauge for opponent) |
| Giant Palm Bomber (Jab) | 3 | 8 | 16 | 4 |
| Giant Palm Bomber (Strong) | 3 | 8 | 16 | 4 |
| Giant Palm Bomber (Fierce) | 3 | 8 | 16 | 4 |
One of Hugo's best special moves, it have very slow startup, specially HP version, but when hit or blocked, it have a large amount of frame advantage. Normally you can combo the HP version into the MP one and then into LP (only when opponent is crouching), but MP doesn't seems to connect with LP when opponent is standing, also looking at the Frame Datas, the timing is very strict, so combo the HP version into the LP one, then standing MP to a nice 3hit combo. You can try the LP version into a Meat Squasher (LK), but don't do it with HP version, enemy will be stuned by the hit and the Meat Squasher will whiff. You can also use this move as a mixup after its blocked, going for a dash followed by Moonsault/Gigas, Meat Squasher, Close HP as overhead, low LK and LP GPB again, etc... Giant Palm Bomber (HP) is a good move to do when opponent its on wakeup state, it have very good priority, you can even trade damage with a reversal Shoryuken, and if you time it right, beat it. If its parried, you have a lot of frame advantage for blocking almost anything the opponent can do after the parry. Use standing mk to kara.
| Move | Motion | Damage | Blocked Damage | Stun Damage | Throw Range | Super Cancel | Juggle Value |
| Moonsault Press (Jab) | 360+LP | 240(42 life points) | - | 19 | 59 | No | |
| Moonsault Press (Strong) | 360+MP | 255(45 life points) | - | 19 | 53 | No | |
| Moonsault Press (Fierce) | 360+HP | 280(49 life points) | - | 19 | 47 | No |
Frame Data
| Move | Startup | Hit | Recovery | Blocked Advantage | Hit Advantage | Crouching Hit Advantage | Guard | Parry |
| Moonsault Press (Jab) | 2 | 2 | 36 | - | Down | Down | Impossible | Impossible |
| Moonsault Press (Strong) | 2 | 2 | 36 | - | Down | Down | Impossible | Impossible |
| Moonsault Press (Fierce) | 2 | 2 | 36 | - | Down | Down | Impossible | Impossible |
Gauge Increase
| Move | Miss | Blocked | Hit | Parry (Gauge for opponent) |
| Moonsault Press (Jab) | 5 | - | 31 | - |
| Moonsault Press (Strong) | 5 | - | 31 | - |
| Moonsault Press (Fierce) | 5 | - | 31 | - |
Another good special move for Hugo, it takes a large amount of life, but the motion it's tricky, why? well, because if you do the Moonsault without jumping (and that's how need to be done), sometimes you will not make the motion well, and you can "launch" a HP Giant Palm Bomber when you really need the fast startup damaging Moonsault, as a result, enemy will kick you, so master well the motion. As we can see it the tables, LP does less damage than HP, but it have more throw range. So make right desicions during a match and see what punch you have to use. A whiffed Moonsault its somewhat punishable. Even sometimes a Moonsault on wakeup seems a nice idea when done as a reversal, to people who likes to stay near you during a wakeup doing crouching LKs or LPs, but BEWARE of Universal Overhead moves, they are in the air and if you do a Moonsault Press before they hit you, you will not grab them, and they will hit you.
| Move | Motion | Damage | Blocked Damage | Stun Damage | Super Cancel | Juggle Value |
| Monster Lariat (Short) | QCF+LK | 150(26 life points) | 19 | 11 | No | |
| Monster Lariat (Forward) | QCF+MK | 160(28 life points) | 20 | 13 | No | |
| Monster Lariat (Roundhouse) | QCF+HK | 170(30 life points) | 21 | 15 | No |
Frame Data
| Move | Startup | Hit | Recovery | Blocked Advantage | Hit Advantage | Crouching Hit Advantage | Guard | Parry |
| Monster Lariat (Short) | 11 | 5 | 21~25 | -8 | Down | Down | HL | H |
| Monster Lariat (Forward) | 15 | 5 | 23~27 | -10 | Down | Down | HL | H |
| Monster Lariat (Roundhouse) | 24 | 5 | 24~28 | -11 | Down | Down | HL | H |
Gauge Increase
| Move | Miss | Blocked | Hit | Parry (Gauge for opponent) |
| Monster Lariat (Short) | 3 | 8 | 13 | 4 |
| Monster Lariat (Forward) | 3 | 8 | 13 | 4 |
| Monster Lariat (Roundhouse) | 3 | 8 | 13 | 4 |
Comments here
| Move | Motion | Damage | Blocked Damage | Stun Damage | Throw Range (Front) | Throw Range (Up & Down) | Super Cancel | Juggle Value |
| Shootdown Backbreaker (Short) | F, D, DF+LK | 180(32 life points) | - | 15 | 21 | 71~122 | No | |
| Shootdown Backbreaker (Forward) | F, D, DF+MK | 200(32 life points) | - | 15 | 38 | 75~110 | No | |
| Shootdown Backbreaker (Roundhouse) | F, D, DF+HK | 220(32 life points) | - | 15 | 29 | 76~117 | No |
Frame Data
| Move | Startup | Hit | Recovery | Blocked Advantage | Hit Advantage | Crouching Hit Advantage | Guard | Parry |
| Shootdown Backbreaker (Short) | 5 | 9 | 30 | - | Down | Down | Impossible | Impossible |
| Shootdown Backbreaker (Forward) | 17 | 10 | 25 | - | Down | Down | Impossible | Impossible |
| Shootdown Backbreaker (Roundhouse) | 12 | 12 | 29 | - | Down | Down | Impossible | Impossible |
Gauge Increase
| Move | Miss | Blocked | Hit | Parry (Gauge for opponent) |
| Shootdown Backbreaker (Short) | 5 | - | 31 | - |
| Shootdown Backbreaker (Forward) | 5 | - | 31 | - |
| Shootdown Backbreaker (Roundhouse) | 5 | - | 31 | - |
Hugo's anti-air special move, but it doesn't have ANY priority, meaning you only can catch them if the opponent doesn't do any attack during a jump, you must grab it cleanly to success. With Air Tatsumakis, well, its a lotto, sometimes you grab them, sometimes you get hit. Use it after a succesfull Ultra Throw. Keep in mind that it have terrible recovery, don't do this move randomly or prepare yourself. You can use this move as a teleport, if you're cornered, the HK version travels very far, so you can go to the middle of the screen with this move. Also you can even try to use this move as an anti-fireball, but its very risky to do it. If the opponent is the Ansatsuken Type (note: NOT REMY) and you expect a fireball from far away, do this move with HK version (yes, you need to do this move before Ryu, Ken or Akuma launch a Hadouken), then when you're going to reach the ground, do the 360motion and try to moonsaultpress them when they are recovering from the Hadouken. Althrough this option its not the most safe (because if done late you're at point blank in front of an Ansatsuken, and you have some recovery from the move), its an idea to have in mind. And another important thing to keep it, after a succesful Shootdown Backbreaker, you can taunt safely. Yes, taunt. 4 taunts gives you 25% more defense, and this means Hugo's defense is higher than a 2-times-taunted-Q.
| Move | Motion | Damage | Blocked Damage | Stun Damage | Throw Range | Super Cancel | Juggle Value |
| Meat Squasher (Short) | 360+LK | 160(28 life points) | - | 13 | 34 | No | |
| Meat Squasher (Forward) | 360+MK | 160(28 life points) | - | 13 | 34 | No | |
| Meat Squasher (Roundhouse) | 360+HK | 160(28 life points) | - | 13 | 34 | No |
Frame Data
| Move | Startup | Hit | Recovery | Blocked Advantage | Hit Advantage | Crouching Hit Advantage | Guard | Parry |
| Meat Squasher (Short) | 20~24 | 2 | 30 | - | Down | Down | Impossible | Impossible |
| Meat Squasher (Forward) | 30~52 | 2 | 33 | - | Down | Down | Impossible | Impossible |
| Meat Squasher (Roundhouse) | 47~67 | 2 | 36 | - | Down | Down | Impossible | Impossible |
Gauge Increase
| Move | Miss | Blocked | Hit | Parry (Gauge for opponent) |
| Meat Squasher (Short) | 3 | - | 22 | - |
| Meat Squasher (Forward) | 3 | - | 22 | - |
| Meat Squasher (Roundhouse) | 3 | - | 22 | - |
Very hard to connect, but if doing well, Hugo takes the opponent and puts them cornered in a side of the screen, and here's when Hugo can take advantage of the match. It doesn't do a lot of damage, but setups the opponent for you. Use the LK version inmediately after a Body Press or when enemy likes to crouch in the middle of the screen, after a succesful parry from an air attack, or during a parry on a ground attack. In those cases you can also do a Moonsault Press for the punish, but depend of your mixup game, the desicion is yours to decide which attack you want to do, corner the enemy or punish him with a Moonsault. During the frames Hugo is running towards in this move, he cannot be throwed by regular throws, but he can be throw during the startup before running.
| Move | Motion | Damage | Blocked Damage | Stun Damage | Throw Range | Super Cancel | Juggle Value |
| Ultra Throw (Short) | HCB+LK | 70(12 life points) | - | 7 | 38 | No | |
| Ultra Throw (Forward) | HCB+MK | 70(12 life points) | - | 7 | 38 | No | |
| Ultra Throw (Roundhouse) | HCB+HK | 70(12 life points) | - | 7 | 38 | No |
Frame Data
| Move | Startup | Hit | Recovery | Blocked Advantage | Hit Advantage | Crouching Hit Advantage | Guard | Parry |
| Ultra Throw (Short) | 7 | 2 | 36 | - | Down | Down | Impossible | Impossible |
| Ultra Throw (Forward) | 7 | 2 | 36 | - | Down | Down | Impossible | Impossible |
| Ultra Throw (Roundhouse) | 7 | 2 | 36 | - | Down | Down | Impossible | Impossible |
Gauge Increase
| Move | Miss | Blocked | Hit | Parry (Gauge for opponent) |
| Ultra Throw (Short) | 5 | - | 22 | - |
| Ultra Throw (Forward) | 5 | - | 22 | - |
| Ultra Throw (Roundhouse) | 5 | - | 22 | - |
Comments here
EX Moves
Ex clap is rarely worth the meter. Instead save it for super moves which provide greater utility.
| Move | Motion | Gauge Needed | Damage | Blocked Damage | Stun Damage | Super Cancel | Juggle Value |
| Giant Palm Bomber (EX) | QCB+PP | 40 | 220*(36 life points) | 23** | 15*** | Yes |
| * (20+60+140) Damage is when all hits connect. |
| ** (?+?+?) Damage is when all hits connect. |
| *** (3+3+9) Damage is when all hits connect. |
Frame Data
| Move | Startup | Hit | Recovery | Blocked Advantage | Hit Advantage | Crouching Hit Advantage | Guard | Parry |
| Giant Palm Bomber (EX) | 22 | 1 | 10 | +10 | Down | Down | HL/HL/HL | H/H/H |
Gauge Increase
| Move | Miss | Blocked | Hit | Parry (Gauge for opponent) |
| Giant Palm Bomber (EX) | - | - | - | 12(4+4+4) |
Is good to use after a big clap combo, if hammer mountain is not available for any reason. Though be cautious, retaining Gigas is always better than spending meter on ex moves. This move is a decent chip option for Hugo if you can guarantee it will hit unaware.
| Move | Motion | Gauge Needed | Damage | Blocked Damage | Stun Damage | Super Cancel | Juggle Value |
| Monster Lariat (EX) | QCF+KK | 40 | 140~180(24 life points) | 18~23 | 13~17 | No |
Frame Data
| Move | Startup | Hit | Recovery | Blocked Advantage | Hit Advantage | Crouching Hit Advantage | Guard | Parry |
| Monster Lariat (EX) | 6~26 | 6 | 31~35 | -22 | Down | Down | HL | H |
Gauge Increase
| Move | Miss | Blocked | Hit | Parry (Gauge for opponent) |
| Monster Lariat (EX) | - | - | - | 4 |
Super Arts
| Num. | Super Art | Super Art Stock | Motion | Damage | Blocked Damage | Stun Damage | Throw Range | Damage/Gauge |
| I | Gigas Breaker | 1 bar (128) | 720+P | 610*(102 life points) | - | 5** | 70 | 4,76 |
| * (180?+180?+270?) Damage is when all hits connect. |
| ** (?+?+?) Damage is when all hits connect. |
Frame Data
| Startup | Hit | Recovery | Blocked Advantage | Hit Advantage | Crouching Hit Advantage | Guard | Parry |
| 0 | 2 | 36 | - | Down | Down | Impossible | Impossible |
Hugo's most powerful Super Art, one of the most damaging in the game. A pseudo invincible grab, with excellent range and instant startup.
Gigas does not require a full 720 motion. Instead 540 degrees, most usually executed as: 6321478963214 is enough. Only the cardinal directions are required.
Good opponents will dramatically change their playstyle when this super is ready, in order to avoid a quick and painful death.
| Num. | Super Art | Super Art Stock | Motion | Damage | Blocked Damage | Stun Damage | Throw Range (Front/Up&Down) | Damage/Gauge |
| II | Megaton Press | 2 bars (112 each bar) | QCF QCF+K | 450*(75 life points) | - | 25** | 50/60~133 | 4,01(x2) |
| * (70?+380?) Damage is when all hits connect. |
| ** (?+?) Damage is when all hits connect. |
Frame Data
| Super Art Name | Startup | Hit | Recovery | Blocked Advantage | Hit Advantage | Crouching Hit Advantage | Guard | Parry |
| Megaton Press (Short) | 3 | 12 | 30 | - | Down | Down | Impossible | Impossible |
| Megaton Press (Forward) | 5 | 16 | 34 | - | Down | Down | Impossible | Impossible |
| Megaton Press (Roundhouse) | 7 | 20 | 36 | - | Down | Down | Impossible | Impossible |
Comments here
| Num. | Super Art | Super Art Stock | Motion | Damage | Blocked Damage | Stun Damage | Damage/Gauge |
| III | Hammer Frenzy | 2 bars (88 each bar) | QCF QCF+P | 390*(64 life points) | 98** | 20*** | 4,43(x2) |
| * (80?+90?+80?+60?+120?) Damage is when all hits connect. |
| ** (?+?+?+?+?) Damage is when all hits connect. |
| *** (?+?+?+?+?) Damage is when all hits connect. |
Frame Data
| Startup | Hit | Recovery | Blocked Advantage | Hit Advantage | Crouching Hit Advantage | Guard | Parry |
| 4 | 5 | 47 | -29 | Down | Down | HL/HL/H/H/HL | HL/HL/H/H/HL |
Nice damage, Stun Damage its good also, allows you to hit-confirm to land it safe, have tiny bars so you can use it a couple of times, and allows to EX moves. Not a bad Super Art.
Combos
Midscreen
Everyone
| 1st Move | 2nd Move | 3rd Move | 4th Move | Damage | Stun Damage |
| Body Press | Crouch LK | Monster Lariat (EX) | - | 265 (23%) | 28 |
| Giant Palm Bomber (HP) | Giant Palm Bomber (MP) | MP | - | ??? (??%) | ?? |
| Giant Palm Bomber (HP) | Giant Palm Bomber (MP) | Crouch MK | - | ??? (??%) | ?? |
| Giant Palm Bomber (HP) | Giant Palm Bomber (MP) | Giant Palm Bomber (LP) | - | ??? (??%) | ?? |
| Giant Palm Bomber (HP) | Giant Palm Bomber (MP) | Monster Lariat (EX) | - | ??? (??%) | ?? |
| Giant Palm Bomber (EX) | Shootdown Backbreaker (HK) | - | - | ??? (??%) | ?? |
In order to do the 3 Giant Palm Bomber combo, enemy must be crouching, otherwise Giant Palm Bomber (MP) with not combo into the LP one.
Corner
Everyone
| 1st Move | 2nd Move | 3rd Move | 4th Move | Damage | Stun Damage |
| Ultra Throw (HK) | Giant Palm Bomber (LP) | Shootdown Backbreaker (LK) | - | 334 (29%) | 25 |
| Ultra Throw (HK) | Giant Palm Bomber (HP) | Shootdown Backbreaker (HK) | - | ??? (??%) | ?? |
| Ultra Throw (HK) | Giant Palm Bomber (EX) (2 hits) | Hammer Hook | - | ??? (??%) | ?? |
| Ultra Throw (HK) | Giant Palm Bomber (EX) (2 hits) | Shootdown Backbreaker (HK) | - | ??? (??%) | ?? |
Hit Confirms
Everyone
| 1st Move | 2nd Move | 3rd Move | 4th Move | Damage | Stun Damage |
| Crouch LP | Crouch LP | - | - | ??? (??%) | ?? |
Beyond c.lp chain, Hugo can quite easily confirm into lariat, backbreaker or SA3 from any clap, with heavy clap being the easiest.
Super Art 2
Midscreen
Everyone
| 1st Move | 2nd Move | 3rd Move | 4th Move | Damage | Stun Damage |
| Giant Palm Bomber (EX) | Super Art 2 | - | - | 403 (35%) | 28 |
Corner
| 1st Move | 2nd Move | 3rd Move | 4th Move | Damage | Stun Damage |
| Ultra Throw (HK) | Giant Palm Bomber (EX) (3 hits) | Super Art 2 | - | ??? (??%) | ? |
| Ultra Throw (HK) | Giant Palm Bomber (HP) | Super Art 2 | - | 483 (42%) | 40 |
Super Art 3
Everyone
| 1st Move | 2nd Move | 3rd Move | 4th Move | Damage | Stun Damage |
| Crouch LP | Crouch LP | Super Art 3 | - | 437 (38%) | 22 |
| Giant Palm Bomber (HP) | Giant Palm Bomber (LP) | Super Art 3 | - | 460 (40%) | 50 |
| Giant Palm Bomber (HP) | Giant Palm Bomber (MP) | Giant Palm Bomber (LP) | Super Art 3 | 630? (??%) | 55? |
In order to do the 3 Giant Palm Bomber combo, enemy must be crouching and you be at point blank, otherwise Giant Palm Bomber (MP) with not combo into the LP one. Timing for the palms are very strict. Also the 2nd secret about this combo is, when executing the Super Art 3, you MUST DELAY (by holding P) exactly 1 Hugo step. If you don't delay this step at the startup of the Super Art 3, the first hit will whiff, and opponent can block or parry the rest of the Super Art. This combo does BIG damage, it just does more damage than a Gigas Breaker! It also does 100% of Stun Damage in Remy or Akuma, and about 95% on characters with normal Stun Bar. Anyway, chances to hit a crouching opponent with a HP Giant Palm Bomber at point blank are minimal, but everybody can "miss" a reversal Shoryuken on wakeup ;).
Stun Finisher
- HCB HK-->Standing MP (x4)-->F, D, DF LK
- HCB HK-->Standing MP (x3)-->QCF LK
- HCB HK-->Standing MP (x3)-->SA II
100% Combo
Specific to:
Akuma
| 1st Move | 2nd Move | 3rd Move | 4th Move | 5th Move | 6th Move | 7th Move | Damage | Stun Damage |
| Giant Palm Bomber (HP) | Giant Palm Bomber (MP) | Giant Palm Bomber (LP) | Super Art 3 | Giant Palm Bomber (HP) | Giant Palm Bomber (MP) | MP | 985 (??%) | ?? |
| Giant Palm Bomber (HP) | Giant Palm Bomber (MP) | Giant Palm Bomber (LP) | Super Art 3 | Giant Palm Bomber (HP) | Super Art 3 | - | 990 (??%) | - |
The first combo does 100% damage, but Akuma doesn't get KO, it just empty his health bar to zero. The 2nd one really KO him.
For both combos, you must connect the first GPB HP when he is crouching, then combo the 2 other ones and also Super Art 3. After the 4th move (SA3), he is stunned, so finish him off with GPB HP and another Super Art 3.
Strategies
Overview
As said in the introduction, Hugo is not an offensive character. You have to be patient, and get close to the opponent to unleash command grabs in a safe way. Mix dashes and jumps to avoid a "pattern", and poke sparingly while you're advancing. With jumps the best you can use is HP (when far) or Body Splash (when near). When you're near, you can start your offense. Basically scoring a knockdown at point blank its the best possible option. You can go for a crossup with Body Splash, followed by low LK (and confirming with Monster Lariat (EX)), GPB HP to MP combos, missing GPB for a Moonsault Press, tick throw with Gigas Breaker using LK.
Super Art Selection
The SA you choose will depend on your preference and the matchup. The two most used supers are Gigas Breaker and Hammer Mountain.
Gigas Breaker is great because it creates a sense of fear in your opponent, has great comeback potential and can be setup in a variety of ways including an SJ cancel called a Tachi or standing gigas. It can also be buffered in a dash, but is mostly used in a situation where a parry or block can lead to fat ass damage. Drawbacks include a lack of combo-ability and loss of some EX potential. Hayao is arguably the best known SAI player, also notable is Eriho.
- Does incredible damage.
- Instant startup, beats many moves.
- Is a larger meter - hard to fill.
- If missed, Hugo is screwed.
- Create unique dynamics in matches.
- Free setups after, on opponent's wakeup.
- Always be buffering 360 motions into your normals, jumps and other moves. This allows you to execute a second 360 on reaction, and thus Gigas on demand, without jumping.
Megaton Press isn't used much, but can be used a lot like Gief's Aerial Russian Slam. It has very low priority and is hard to land versuss an aware opponent. It can be used to counter characters who want to be in the air a lot, like Oro and Ibuki and force them to play a ground game. It can also be used after an ultra throw, and in the corner after ultra throw and a clap. Does decent damage and allows for EX uses, most people pass it up to have either the power of Gigas or the flexibility of Hammer Mountain.
- Does good damage.
- If missed, Hugo is screwed.
- Easily beaten by other moves.
Hammer Mountain is Hugo's most flexible SA. It deals decent damage, can be used on wakeup or to charge through poke strings and as a whiff punisher. Deals excellent stun damage. Can be comboed from claps, c.lks, j.hk, bodysplash, c.lk and allows for EX usage. It is one of two ways Hugo can deal big damage with a combo, the other is a clap comboed into EX clothesline. The best known SAIII player is YSB. Hammer mountain is the best choice if you want to player more hit-confirm based play-style, as oppossed to the reactive style of Gigas.
- Does great damage.
- Has running/cancel gimmick, which is useful for longer range confirms.
- Easily beats other moves.
- A few options to confirms into it.
Kara-Techniques
- Kara UOH with MK. (strong)
- Kara any clap with MK. (strong)
- Kara backbreaker with HP. (useless)
Zoning
In the air, Hugo's zoning options are primarily hp and mp.
Mixups
c.lp OR c.lk OR lk -> any clap OR meatsquasher
Jumping attack on grounded opponent -> (c.lp OR c.lk OR lk) OR (wait for hitstun to end -> any command throw)
Whiff air normal, landing into SPD.
Whiff clap -> SPD
Buffer 720 into anything.
HP clap, buffer Gigas and execute on parried opponents.
Additional Notes
- Personal Action: Attack and Defense up, max 4 per round. Holding HP HK = Throw damage up.
- Hugo has a very high defense (only taunted Q surpass it).
- Hugo has one of the highest stun bar.
Match-ups
Serious Advantage Match-ups
Hugo has no matchups where he is at a serious advantage. However he is capable of beating all of the cast in the right hands. Outside of a very high level play, Hugo's high damage output, stun output, defence and corner pressure all make him a decent choice.
Advantage Match-ups
- Sean
Sean has a vast array of moves which are SPD punishable, making it awful for him to play close. At longer ranges, Hugo's air normals zone Sean well. There's very little Sean can do to push an advantage in this matchup. The Sean's best bet is to abuse techniques known to be strong against taller characters, such as jump-back hk on wakeup.
Fair Match-ups
- Q
Both Hugo and Q possess similar capabilities in terms of air-normals. Hugo's best tool for handling Q is j.HP - which will hit him standing, even at long ranges. Furthermore, it will stop random dash-punch attempts. Hugo should avoid being command thrown at all costs - to achieve this c.lk must be used, as it's the only normal fast enough to interupt the startup of Q's command through.
To punish Q's taunts, HK lariat can be used to quickly close the distance, and earn a knockdown on Q.
Under no circumstance should you engage in a "taunt war". Hugo's taunt health-buff is simply worse than Q's.
Disadvantage Match-ups
- Yun
Yun is the antithesis of Hugo. Because Yun is able to build meter so quickly, being able defend against Genei Jin is a requirement to win. Look for gaps in Genei Jin pressure to use c.lk if safe. This will push Yun back, wasting his super-time and stopping immidiate overheads.
Landing Gigas will win a round outright most of the time. Aim to build meter quickly. Be aware of how the Yun's behaviour changes once you have Gigas.
If at all possible, run down weaker Yuns, and abuse the fact that the defence rating difference between the two of you is so great.
Backbreaker is geerally too slow to respond to divekicks on reaction, instead position so it's hard for them to connect.
Hugo's UOH will cross-over Yun shoulder-charge, earning a 360 if done correctly.
- Ken
Ken's normals are ideal for keeping Hugo at distance, and avoiding ranges where SPD can be earned. Air ex-tatsu is deadly, and extremely difficult to avoid/parry when used correctly due to Hugo's height and width. Ken has a unique hit-confirm against Hugo (Far HP -> SA3).
Hugo should look to earn red parry -> SPD where possible from low light chains, back+mk and from the standing target combo. All of these scenarios are perfectly reactable.
Claps will trade favourably with ex-DP on wakeup.
- Makoto
If the Makoto does too much dashing or Hayates, they can be stuffed with lk/clk/clp and anticipation mp/cmk. If she tries to fight on the ground and use the general Makoto playstyle, she'll likely get destroyed. Earthquake Bombs/Gigas will own her dash punches and close attacks that get blocked or parried. All of her useful pokes can be high parried besides clk and chp. Her only ground poke that can beat Hugo's crouching pokes is cmk which trades w/ Hugo's sweep. (in your favor) If the Makoto knows that she can't do a lot to Hugo on the ground, he will likely play it safe and try to hit with cmk on the ground, jumping tsurugi and safe (to parry/grab) jump ins. You have to then rely on Hugo's pretty bad anti airs and Backbreakers, try to bait her to jump with cmp and pokes, if she jumps for a tsurugi you can sometimes backbreak it on reaction. Cornering Makoto is the best thing you can do in this match... no need to worry so much with the big man about her Karakusa bullshit, she won't likely be able to land it due to Hugo's various throws beating hers and the aforementioned countering her ground offense. SAIII is recommended cause you can use it for another anti air and you're unlikely to Gigas a smart Makoto.
- Yang
With SA3, Yang has the ability to set-up unblockables on Hugo midscreen and in the corner. Attempt to escape this pressure with wakeup lk backbreaker - if the Yang mistimes their unblockable, you get off the ground, get hit, then reset next to Yang, for a 360 or 720, ending the scenario.
- Akuma
Use j.HP to zone the life out of Gouki. Respect his zoning, and defend against it well enough to force Gouki to come close where he can be pinned down.
Akuma's forward+mp is throw invulnerable. Wait about 10 frames after parrying it, before executing a 360/720.
All of Gouki's tatsus can be punish with 360/720 on block.
- Ibuki
Ibuki's range of OTG normals make her a pain to deal with. To win, you must zone effectively with your air normals, whilst reliably punishing thoughtless positioning.
- Necro
Use stand-jab to push Necro back after the twirly dive. Show respect to both SA1 and SA3 - they are great antiairs vs Hugo.
If Hugo parries a slow long range move (HP for example), he can punish with Hammer Mountain by holding down punch to delay the super activation.
Necro can chain HP into itself when Hugo is cornered. Play very carefully around the corner.
- Oro
Oro has all the tools he need to evade Hugo and zone effectively.
Be aware, Oro sometimes lands from ex-DP in a crouching state. This allows you to use the triple clap combo, scoring great damage.
- Ryu
Denjin is the real danger here. Look to punish all failed specials with SPD. Backdash is a useful answer to Ryu jumping in - you can buffer a Gigas and punish accordingly.
- Alex
Alex is a difficult matchup, with most of Hugo's normals trading unfavourably. I don't have any good advice here, you'll need someone smarter than me!
- Remy
The ultimate keep-away match. I've heard some say this is 8-2 in Remy's favour, but I don't agree. Stand MP is an awesome tool to trade at mid range with any fireball. Win round 1 with full meter, then go into round 2, land Gigas, then literally anything will kill Remy.
Parrying divekicks on reaction is very possible if you try hard.
- Elena
Many of Elena's normals hit at odd angles or make her OTG. This can make landing a command grab challenging.
Because Elena is quick relative to Hugo, she has no issues using Healing after a decent knockdown. Even with Hammer Mountain stocked, very little can be done.
SA2 and backbreaker will beat many of elena's specials, uoh and stand roundhouse.
- Twelve
This is Hugo's worst matchup by far. Twelve has all the tools needed to zone and run away all day. With this being said, your normals do MUCH more damage than his, so don't be afraid to take trades and risky engagements.
Serious Disadvantage Match-ups
- Chun Li
Chun is the master of ground combat, she can zone you really easily with her long high priority pokes and can trade with everything Hugo has.
If the Chun is a novice, abuse the air to quickly bully chun and start mixing her up. Hp clap and c.mk can be very useful.
- Dudley
Dudley has the ability to outzone you with his long fierce and forward fierce, there isn't much to retalliate against this with rather than trading hits. His hits also do a lot of damage, but most importantly is the fact that his hitbox is strange so he is harder to throw. That combined with the powerful backswing blow makes this match difficult for Hugo. Even if you close the distance, he can still slip out, SAIII is generally preferred in this matchup, and your objective is to corner him and then control him there being mindful of his EX Uppercut.
Zoning with air hp can be very useful.
Video matches & further resources
Hayao
Hayao (はやお) is Japan's best Hugo player, and one of the most skilled Hugo's in the world (if not the best) using Gigas Breaker. Here you have a list of videos about some of his matches. Look at them and learn from the best Hugo player how you should play. Doing nice combos, opportunities to using SA1, poking, parry attacks, when a move should be used, what moves can be countered, and what to do against certain opponents.
Vs. Chun-Li (Koshun) (Koshun No Deshi) (Umezono)
Vs. Dudley (Fujiwara) (Kokuzin) (Jima)
Vs. Ibuki (Fume)
Vs. Ken (Teruchika) (Haitani) (??)
Vs. Makoto (Shiroitachi)
Vs. Necro (PinoAB7)
Vs. Q (Afro)
Vs. Sean (Mokomokofu)
Vs. Urien (ABE) (Ramen) (Afro)
Vs. Yun (KO) (Towel) (S) (Bagon) (BillyKane) (??)
YSB
YSB is another amazing japanese Hugo player, using Hammer Frenzy as his main Super Art. Perhaps he is not as good as Hayao when it comes to parrying, but he's one of the most scary Hugo players.
Vs. Hugo (Eriho)
Vs. Ibuki (Aruka)
Vs. Ken (T) (Matsuken)
Vs. Necro (Sugiyama)
Vs. Remy (Ryo-chin)
Vs. Ryu (Vanao)
Vs. Twelve (Yamazaki)
Vs. Urien (RX) (Messatsu)
Vs. Yang (KO) (Rohishikari)
Sandybags
Sandybags is widely considered to be the best USA Hugo.
Vs. Various (Nica KO)
Vs. Ken (Surewin)
grgrpon
grgrpon is a Japanese YouTuber who uploads every available streamed Hugo match from Japan and internationally. Their channel is a great resource for Hugo content, and features playlists for each matchup, sorted by super-art.
AutoMattock
AutoMattock is an American Hugo player, widely regarded to be one of the best USA Hugos. You can find a range of tutorials on Youtube from him.
Feuras
Feuras is a UK Hugo player, who's YouTube channel features a handy guide for understanding the basics of Hugo.
Renic
Renic offers a good primer video that covers the basics of Hugo.
Discussion
SRK Forums - 3rd Strike - Hugo

