|
|
| (3 intermediate revisions by 2 users not shown) |
| Line 1: |
Line 1: |
| [[File:avg2_satomi.jpg|right|to win, you must punch more gooder]]
| | {{AVG2 Character Intro|char=satomi|short=sat|content= |
|
| |
|
| == Introduction == | | == Introduction == |
| ''Satomi is gonna swing her arms around like this, and if you get hit, it's your own fault.'' | | ''Satomi is gonna swing her arms around like this, and if you get hit, it's your own fault.'' |
|
| |
|
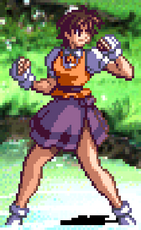
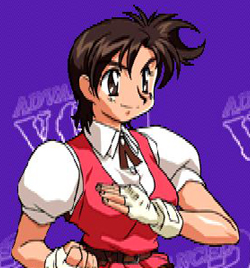
| Satomi is one of the strongest characters in the game thanks to her straightforward, but overwhelmingly effective gameplan. Her {{hp}} button gives her some of the most fearsome normals in the game, giving her a top-class footsie game. Combined with a powerful anti-air in Kaenzan, and a simple but highly effective mixup thanks to her high-hitting Gokuenshou special, she can punish both impatience and passivity with ease. However, with her strengths concentrated in such specific areas, she can suffer from an overall linearity with her gameplan, especially when she comes up against a patient opponent who is able to limit her opportunities to score big damage. Satomi is a character who is easy to learn, but can be quite demanding at high levels of play, requiring a lot of creativity and a strong conditioning game. | | Satomi is your go-to girl if you're tired of being nice. Sporting fearsome normals, including a HP button that would make CVS2 Sagat shed a tear, an unreactable overhead in {{Tooltip|text=Gokuenshou|hovertext=214K}} and the undisputed best DP in the game in {{Tooltip|text=Kaenzan|hovertext=421P}}, Satomi is a character whose primary goal is to respond to everything the opponent tries to do with a resounding "no", tidily controlling the pace of neutral in the process. However, because her strengths are concentrated in such specific areas of her kit, she has a tendency to be overly linear at times, which can lead to her getting shut down by more patient opponents. This in turn hinders her ability to score meaningful damage, as her combos, while powerful, provide very few situations to confirm into them, forcing her to rely on risky mixups to bring opponents down. |
|
| |
|
| {{StrengthsAndWeaknesses | | {{StrengthsAndWeaknesses |
| | intro = | | | intro = [[File:avg2 satomi mini.png|20px]] '''Satomi''' is the resident "gorilla" character who wants to use her strong pokes and powerful defensive tools to bully opponents into submission, allowing her to enforce her unreactable 50/50 mixups. |
| | pros = | | | pros = |
| * Extremely powerful normals, especially on her {{hp}} button | | * '''Incredible Neutral:''' With her 5HP, Kaenzan and even a very strong projectile reflector in {{Tooltip|text=Ouho|hovertext=214P}}, Satomi is able to handle just about any neutral or defensive situation you can throw at her, and then some. |
| * Kaenzan is arguably the best reversal in the game | | * '''Unassailable Defense:''' Kaenzan really is just that good. A fast DP with generous invincibility, a hitbox that covers both sides of Satomi, and recovery that makes it very difficult to meaningfully punish, Satomi can get away with mashing DP far more than she really should. |
| * Gokuenshou gives her an unreactable overhead
| | * '''Unseeable Mixups:''' Gokuenshou is a lightning-fast overhead that knocks the opponent down on hit, meaning that when she's in range, she can skip the pressure and go straight to running completely unreactable mixups between 2LK and Gokuenshou, all leading to an okizeme situation that sets up the mixup once again. |
| | cons = | | | cons = |
| * Linear gameplan that requires a strong ability to condition the opponent to be effective | | * '''Linear:''' Satomi has a bunch of strong tools, but her strength being concentrated in such specific parts of her kit means that she's liable to be much more predictable than other characters, and in turn, easier to read and punish. |
| * Patient opponents can severely limit Satomi's primary means of scoring damage | | * '''Limited Opportunites For Big Damage:''' Satomi is capable of some serious damage, but opportunities to score that damage are very limited, thanks to a generally low capacity to confirm hits into meaningful combos, which means Satomi can inadvertently give her opponent more chances to make a comeback than other characters. |
| }} | | }} |
|
| |
|
| == Movelist == | | == Stats == |
| ----
| | {{AVG2 Character Data |
| {{MoveData | | | atk = A |
| |image=AVG2_Satomi_stLP.jpg
| | | def = C |
| |caption=
| | | djump = Yes |
| |name=st.{{Icon-Capcom|LP}}
| | | dbrake = No |
| |data=
| | | bd = 28F (Throw Invul) |
| {{AttackData-AVG2
| | | wkup = 12F |
| |damage=-
| |
| |guard= Mid
| |
| |startup=
| |
| |active=-
| |
| |recovery=-
| |
| |frameAdv=-
| |
| |description= A quick backfist strike that is an awesome button. Good speed and range and it chains into all other standing normals as well as crLP.
| |
| }}
| |
| }} | | }} |
| ----
| |
| {{MoveData
| |
| |image=AVG2_Satomi_stLK.jpg
| |
| |caption=
| |
| |name=st.{{Icon-Capcom|LK}}
| |
| |data=
| |
| {{AttackData-AVG2
| |
| |damage=-
| |
| |guard= Mid
| |
| |startup=
| |
| |active=-
| |
| |recovery=-
| |
| |frameAdv=-
| |
| |description= A low-looking shin kick, still a mid but it easily links into itself multiple times and can special cancel, meaning you can get Gokuensho as an ender.
| |
| }}
| |
| }}
| |
| ----
| |
| {{MoveData
| |
| |image=AVG2_Satomi_stHP.jpg
| |
| |caption=
| |
| |name=st.{{Icon-Capcom|HP}}
| |
| |data=
| |
| {{AttackData-AVG2
| |
| |damage=-
| |
| |guard= Mid
| |
| |startup= 5
| |
| |active=-
| |
| |recovery=-
| |
| |frameAdv=-
| |
| |description= The button of all time. Satomi lets loose a killer poke with only 5f of start-up. Outside of some interactions where it can be low-profiled, this button can strike fear into the opponent with it's speed and range. Not only that, but because it's also her dashing attack she can give this bad boy crazy momentum by doing the dashing version. stHP is one of the strongest single buttons in the game and enables Satomi to out footsie most characters without breaking a sweat. This does chain into stHK, but it will never connect.
| |
| }}
| |
| }}
| |
| ----
| |
| {{MoveData
| |
| |image=AVG2_Satomi_stHK.jpg
| |
| |caption=
| |
| |name=st.{{Icon-Capcom|HK}}
| |
| |data=
| |
| {{AttackData-AVG2
| |
| |damage=-
| |
| |guard= Mid
| |
| |startup=
| |
| |active=-
| |
| |recovery=-+1
| |
| |frameAdv=-
| |
| |description= An inside spinning roundhouse that could have used some additional frames of animation to get that across. While it does special cancel, it's range is inferior to stHP. However once inside the oppoenent's range this becomes more useful as it is +1 on block.
| |
| }}
| |
| }}
| |
| ----
| |
| {{MoveData
| |
| |image=AVG2_Satomi_crLP.jpg
| |
| |caption=
| |
| |name=cr.{{Icon-Capcom|LP}}
| |
| |data=
| |
| {{AttackData-AVG2
| |
| |damage=-
| |
| |guard= Mid
| |
| |startup=
| |
| |active=-
| |
| |recovery=-
| |
| |frameAdv=-
| |
| |description= A quick elbow jab, the range is stubby but it has awesome chain routes. You can chain to stLP, chain to crHP for a juggle, or chain into crLK > crHK for a knockdown.
| |
| }}
| |
| }}
| |
| ----
| |
| {{MoveData
| |
| |image=AVG2_Satomi_crLK.jpg
| |
| |caption=
| |
| |name=cr.{{Icon-Capcom|LK}}
| |
| |data=
| |
| {{AttackData-AVG2
| |
| |damage=-
| |
| |guard= Low
| |
| |startup=
| |
| |active=-
| |
| |recovery=-
| |
| |frameAdv=-
| |
| |description= No links, no chains, but with the threat of a Gokuensho overhead it doesn't necessarily need it. Because of how fast Gokuensho is, crLK can just pressure them to block low or if they really want to block Gokuensho, allow her to get free crLK's in.
| |
| }}
| |
| }}
| |
| ----
| |
| {{MoveData
| |
| |image=AVG2_Satomi_crHP.jpg
| |
| |caption=
| |
| |name=cr.{{Icon-Capcom|HP}}
| |
| |data=
| |
| {{AttackData-AVG2
| |
| |damage=-
| |
| |guard= Mid
| |
| |startup=
| |
| |active=-
| |
| |recovery=-
| |
| |frameAdv=-
| |
| |description= The button of all time's little brother. While not quite as good as stHP, crHP has the advantage of not being about to be low-profiled. Because of this Satomi can switch between the two depending on her needs to bully the opponent at range.
| |
| }}
| |
| }}
| |
| ----
| |
| {{MoveData
| |
| |image=AVG2_Satomi_crHK.jpg
| |
| |caption=
| |
| |name=cr.{{Icon-Capcom|HK}}
| |
| |data=
| |
| {{AttackData-AVG2
| |
| |damage=-
| |
| |guard= Low
| |
| |startup=
| |
| |active=-
| |
| |recovery=-
| |
| |frameAdv=-
| |
| |description= A sweep that actually juggles, so you can sore some extra damage off of it.
| |
| }}
| |
| }}
| |
| ----
| |
| {{MoveData
| |
| |image=AVG2_Satomi_jLP.jpg
| |
| |caption=
| |
| |name=j.{{Icon-Capcom|LP}}
| |
| |data=
| |
| {{AttackData-AVG2
| |
| |damage=-
| |
| |guard=High
| |
| |startup=
| |
| |active=-
| |
| |recovery=-
| |
| |frameAdv=-
| |
| |description= A small karate chop, it's downward hitbox is actually quite good and it can cross up the opponent. Standard jHP and jHK chains
| |
| }}
| |
| }}
| |
| ----
| |
| {{MoveData
| |
| |image=AVG2_Satomi_jLK.jpg
| |
| |caption=
| |
| |name=j.{{Icon-Capcom|LK}}
| |
| |data=
| |
| {{AttackData-AVG2
| |
| |damage=-
| |
| |guard= High
| |
| |startup=
| |
| |active=-
| |
| |recovery=-
| |
| |frameAdv=-
| |
| |description= Satomi's best ranged air normal, it's got the biggest hitbox and controls space quite nicely. Also standard jHP and jHK chains
| |
| }}
| |
| }}
| |
| ----
| |
| {{MoveData
| |
| |image=AVG2_Satomi_jHP.jpg
| |
| |caption=
| |
| |name=j.{{Icon-Capcom|HP}}
| |
| |data=
| |
| {{AttackData-AVG2
| |
| |damage=-
| |
| |guard= High
| |
| |startup=
| |
| |active=-
| |
| |recovery=-
| |
| |frameAdv=-
| |
| |description= A fierce downward punch. Not particularly special, but good as a jump-in tool.
| |
| }}
| |
| }}
| |
| ----
| |
| {{MoveData
| |
| |image=AVG2_Satomi_jHK.jpg
| |
| |caption=
| |
| |name=j.{{Icon-Capcom|HK}}
| |
| |data=
| |
| {{AttackData-AVG2
| |
| |damage=-
| |
| |guard= High
| |
| |startup=
| |
| |active=-
| |
| |recovery=-
| |
| |frameAdv=-
| |
| |description= You would like to believe this kick has a good hitbox, but it actually has less range than crLK. Really a bit of a shame.
| |
| }}
| |
| }}
| |
| ----
| |
| '''Command Normals'''<br>
| |
| {{MoveData
| |
| |image=AVG2_Satomi_3HP.jpg
| |
| |caption=
| |
| |name={{Motion|3}}+{{Icon-Capcom|HP}}
| |
| |data=
| |
| {{AttackData-AVG2
| |
| |damage=-
| |
| |guard= Mid
| |
| |startup=
| |
| |active=-
| |
| |recovery=-
| |
| |frameAdv=-
| |
| |description= A command launcher. It could probably do as an anti-air in a pinch, but this is Satomi we are talking about, she has much better AA options.
| |
| }}
| |
| }}
| |
| ----
| |
| {{MoveData
| |
| |image=AVG2_Satomi_3HK.jpg
| |
| |caption=
| |
| |name={{Motion|3}}+{{Icon-Capcom|HK}}
| |
| |data=
| |
| {{AttackData-AVG2
| |
| |damage=-
| |
| |guard= Low
| |
| |startup=
| |
| |active=-
| |
| |recovery=-
| |
| |frameAdv=-
| |
| |description= Instantly gives her low-profile and has excellent range, meaning it can be a terror to deal with in neutral.
| |
| }}
| |
| }}
| |
| ----
| |
| '''Target Combos'''<br>
| |
| st.LP > (st.HP > st.HK)/(st.HK > st.HP)<br>
| |
| st.LP > (cr.LP) > st.LK > (cr.LK) > (st.HP > st.HK)/(st.HK > st.HP)<br>
| |
| st.HP > st.HK<br>
| |
| cr.LP > cr.HP<br>
| |
| cr.LP > (st.LP) > cr.LK > cr.HK<br>
| |
| st.LK > cr.LK<br>
| |
|
| |
| j.LP/LK > j.HP/j.HK
| |
|
| |
| '''Guard Cancels'''<br>
| |
| LP: st.LP<br>
| |
| LK: st.LK<br>
| |
| HP: LK Gokuensho<br>
| |
| HK: LP Kaenzan<br>
| |
|
| |
| LP has the best reward on hit, but LK is more reliable in more situations, and HP is a good catch-all guard cancel for knockdowns. HK has the best hitbox, but its speed as a guard cancel is strangely slow, making it somewhat unreliable.
| |
|
| |
|
| === Special Moves === | | == Color Options == |
| {{MoveData
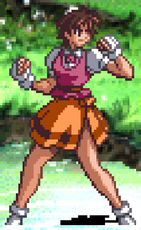
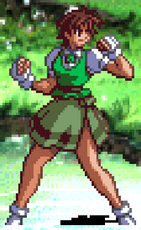
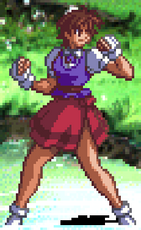
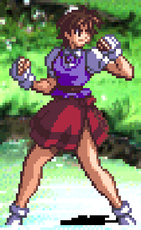
| | {{ColorGallery | filePrefix=AVG2_Satomi_Color_| imageWidths=187| colors= |
| |image=AVG2_Satomi_Kaenzan.jpg
| | {{ColorGallery/Color|Circle| text=Circle (Default) }} |
| |caption= {{Motion|421}} + {{Icon-Capcom|P}}
| | {{ColorGallery/Color|Triangle| text=Triangle }} |
| |name=Kaenzan
| | {{ColorGallery/Color|Square| text=Square }} |
| |data=
| | {{ColorGallery/Color|R1| text=R1 }} |
| {{AttackData-AVG2
| | {{ColorGallery/Color|R2| text=R2 }} |
| |version={{Icon-Capcom|LP}}
| | {{ColorGallery/Color|Start| text=Start (Hidden) }} |
| |damage=-
| |
| |guard= Mid
| |
| |startup=
| |
| |active=-
| |
| |recovery=-
| |
| |frameAdv=-
| |
| |description= Satomi hops upward, spinning her arms with accompanying flames. An incredible anti-air, not only is it useful in stopping air advances, but Satomi is considered airborne during her entire recovery. Now this does not necessarily stop her from being punished, but any opponent thinking they are going to get a grounded punish will have their combo whiff.
| |
| }}
| |
| {{AttackData-AVG2
| |
| |header=no
| |
| |version={{Icon-Capcom|HP}}
| |
| |damage=-
| |
| |guard= Mid
| |
| |startup=
| |
| |active=-
| |
| |recovery=-
| |
| |frameAdv=-
| |
| |description= Satomi jumps a noticeable amount higher for the HP version
| |
| }}
| |
| {{AttackData-AVG2
| |
| |header=no
| |
| |version={{Icon-Capcom|LP}} + {{Icon-Capcom|HP}}
| |
| |damage=-
| |
| |guard= Mid
| |
| |startup=
| |
| |active=-
| |
| |recovery=-
| |
| |frameAdv=-
| |
| |description= Bar none the best anti-air in the game. The hitbox on EX Kaenzan is so big that it will even catch cross-up attempts. Not only that but anyone hit by EX Kaenzan will warp in front of Satomi, which is important because she can link a second EX Kaenzan afterwards. Always keep meter on deck for this, as it shuts down any aerial option the opponent has.
| |
| }}
| |
| }}
| |
| ----
| |
| {{MoveData
| |
| |image=AVG2_Satomi_Gokuensho.jpg
| |
| |caption= {{Motion|214}} + {{Icon-Capcom|K}}
| |
| |name=Gokuensho
| |
| |data=
| |
| {{AttackData-AVG2
| |
| |version={{Icon-Capcom|LK}}
| |
| |damage=-
| |
| |guard= High
| |
| |startup=
| |
| |active=-
| |
| |recovery=-
| |
| |frameAdv=-
| |
| |description= A mad quick overhead, it does cause a knockdown so she cannot use it as a combo starter but mixing it with crLK is a legitimate mixup when pressuring the opponent.
| |
| }}
| |
| {{AttackData-AVG2
| |
| |header=no
| |
| |version={{Icon-Capcom|HK}}
| |
| |damage=-
| |
| |guard=
| |
| |startup=
| |
| |active=-
| |
| |recovery=-
| |
| |frameAdv=-
| |
| |description= LK is your mixup tool, but HK is slower and more damaging which means its best for combos.
| |
| }}
| |
| {{AttackData-AVG2
| |
| |header=no
| |
| |version={{Icon-Capcom|LK}} + {{Icon-Capcom|HK}} | |
| |damage=- | |
| |guard=
| |
| |startup=
| |
| |active=-
| |
| |recovery=-
| |
| |frameAdv=-
| |
| |description= A triple series of flame wheel kicks that comes out fast and recovers even faster on hit. You can link out of this.
| |
| }}
| |
| }}
| |
| ----
| |
| {{MoveData
| |
| |image=AVG2_Satomi_Shinku_Karatake_Wari.jpg
| |
| |caption= {{Motion|41236}} + {{Icon-Capcom|P}}
| |
| |name=Shinku Karatake Wari
| |
| |data=
| |
| {{AttackData-AVG2
| |
| |version={{Icon-Capcom|LP}} | |
| |damage=-
| |
| |guard= High | |
| |startup=
| |
| |active=-
| |
| |recovery=-
| |
| |frameAdv=-
| |
| |description= Satomi leaps high, like REAL high in the air and comes down with a flaming chop. Practically useless because the start-up is monumental. You can directionally influence Satomi's trajectory in air with either left or right and after she lands you can hit HP for a non-combo follow-up flame swipe.
| |
| }}
| |
| {{AttackData-AVG2 | |
| |header=no
| |
| |version={{Icon-Capcom|HP}}
| |
| |damage=-
| |
| |guard= High
| |
| |startup=
| |
| |active=-
| |
| |recovery=-
| |
| |frameAdv=- | |
| |description= Seriously, Satomi jumps off the screen in this version. It takes forever.
| |
| }}
| |
| {{AttackData-AVG2 | |
| |header=no
| |
| |version={{Icon-Capcom|LP}} + {{Icon-Capcom|HP}}
| |
| |damage=- | |
| |guard=
| |
| |startup=
| |
| |active=-
| |
| |recovery=-
| |
| |frameAdv=-
| |
| |description= Satomi engulfs herself in flames on the way up, meaning she's an active hitbox before leaving the ground. This is an inherently much more useful version of Shinku Karatake Wari, but it's true power is hitting during a juggle. If you EX Shinku Karatake Wari after a launcher like 3HP Satomi deals way more damage while in the air if her body arcs where they are. This is very tricky to time correctly, but off the right juggle you can make bank.
| |
| }}
| |
| }}
| |
| ----
| |
| {{MoveData
| |
| |image=AVG2_Satomi_Ouhou.jpg
| |
| |caption= {{Motion|214}} + {{Icon-Capcom|P}}
| |
| |name=Ouhou
| |
| |data=
| |
| {{AttackData-AVG2
| |
| |version={{Icon-Capcom|LP}} | |
| |damage=-
| |
| |guard= | |
| |startup=
| |
| |active=-
| |
| |recovery=-
| |
| |frameAdv=-
| |
| |description= Projectile reflector. A big help against the more zoning-heavy characters as Satomi doesn't really have any other tools to help against zoning. There is a strike attached to it but the range and damage are absolutely pitiful.
| |
| }}
| |
| {{AttackData-AVG2 | |
| |header=no
| |
| |version={{Icon-Capcom|HP}}
| |
| |damage=-
| |
| |guard=
| |
| |startup=
| |
| |active=-
| |
| |recovery=-
| |
| |frameAdv=- | |
| |description= With roughly the same startup and only slightly less pitiful damage, the HP version is fundamentally the same.
| |
| }}
| |
| }} | | }} |
| ----
| |
|
| |
|
| === Super Moves ===
| |
| {{MoveData
| |
| |image=AVG2_Satomi_Hissatsu_Kyokushinken.jpg
| |
| |caption= {{Motion|6}}{{Motion|41236}} + {{Icon-Capcom|K}}
| |
| |name=Hissatsu Kyokushinken
| |
| |data=
| |
| {{AttackData-AVG2
| |
| |damage=-
| |
| |guard=
| |
| |startup=
| |
| |active=-
| |
| |recovery=-
| |
| |frameAdv=-
| |
| |description= A dashing 2 bar ranbu super, deals awesome damage if done raw but with no fixed damage it will scale when in combos. Regardless, it is a useful way to cash out meter.
| |
| }}
| |
| }} | | }} |
| ----
| |
|
| |
| == Combos ==
| |
| '''Basic Combos'''<br>
| |
|
| |
| '''Anti-Air Combos'''<br>
| |
|
| |
| '''Guard Break String'''<br>
| |
|
| |
| '''Misc. Combo'''<br>
| |
|
| |
|
| {{Navbox-AVG2}} | | {{Navbox-AVG2}} |
|
| |
| [[Category:Advanced V.G. 2]] | | [[Category:Advanced V.G. 2]] |
