|
|
| (16 intermediate revisions by 3 users not shown) |
| Line 1: |
Line 1: |
| [[File:avg2_chiho.jpg|right|gee chiho why does tgl let you have genei jin and seiei enbu]]
| | {{AVG2 Character Intro|char=chiho|short=chi|content= |
| | |
| = Introduction = | |
|
| |
|
| | == Introduction == |
| ''Chiho is a ninja, trained from birth in the ways of having bullshit custom combo supers.'' | | ''Chiho is a ninja, trained from birth in the ways of having bullshit custom combo supers.'' |
|
| |
|
| An archetypical ninja character, Chiho is very speedy, sporting a set of fast normals, great mixup options and some of the best mobility in the game, which can be backed up by her excellent fireball. However, with speed comes fragility -- Chiho has a very low defense value, which means she takes punishment harder than most other characters. Her general damage output is also quite low, meaning you'll largely be trying to play carefully, scouting out openings and finding approaches with your fireball. This low damage output can be offset by her extremely threatening Zanei Jin combos, but the difficulty of these combos means that playing Chiho has a fairly high execution demand.
| | Chiho is the resident speedy, technical rushdown character who uses her best-in-class mobility and powerful suite of offensive tools to get in the opponent's face and stay there, smothering them with relentless pressure, mixups, and even unblockable setups. Her speed and offensive prowess come at a cost, however -- she has both poor attack and defense modifiers, which means many risks she takes are not in her favour. She can offset this to some degree with the use of her install supers, Zanei Jin and Genei Jin, which both grant her some of the game's strongest (and longest) combo conversions, but this focus on complex, technical combos creates one of the highest execution demands in the game. |
|
| |
|
| {{StrengthsAndWeaknesses | | {{StrengthsAndWeaknesses |
| | intro = | | | intro = [[File: avg2 chiho mini.png|20px]] '''Chiho''' is a nimble rushdown character who uses her install supers to create brutal setplay situations and devastating combos. |
| | pros = | | | pros = |
| * Solid neutral presence thanks to her fast buttons, fireball and general mobility | | * '''Solid Neutral Game:''' On top of sporting strong general mobility, Chiho also has access to a suite of fast pokes and a great fireball in {{Tooltip| text=Shisen Ken| hovertext=214P}}, which allows her to effectively control space and push inward. |
| * Strong up-close mixups thanks to a unique overhead and a command grab | | * '''Powerful Offense:''' Chiho has pretty easy access to frame advantage when on the offense, which allows her to push strong stagger pressure, rewarding strike/throw mixups, and when meter is on the table, smothering pressure that can be nearly impossible to block. |
| * Insane combo potential with Zanei Jin
| | * '''High Reward With Meter:''' Chiho's install supers, {{Tooltip| text=Zanei Jin| hovertext=22PP}} and {{Tooltip| text=Genei Jin| hovertext=22KK}}, afford her a high degree of flexibility with her neutral, offense and even defense. Zanei Jin in particular leads to some of the highest reward in the game for just one bar, including extended looping combos and genuine unblockable setups. |
| | cons = | | | cons = |
| * Low defense value | | * '''Speed, No Weight:''' Chiho's speed and mobility is, predictably, offset by both low damage and a poor defense modifier, which means that many of the risks she has to take on offense and defense do not carry favourable risk-reward for her without meter to back them up. |
| * Somewhat weak anti-airs force her to rely on air-to-air options to stuff approaches | | * '''Poor Anti-Air Options:''' Despite how some of her kit might look, Chiho is sorely lacking in grounded anti-air options, even by the standards of AVG2. This means that Chiho needs to use primarily air-to-airs in order to intercept aerial approaches from her opponent, and scrambling in this way is often riskier for Chiho than it is for other characters. |
| * Overall damage output without Zanei Jin is quite low | | * '''Low Reward Without Meter:''' While Zanei Jin does provide incredible reward when used correctly, Chiho's low overall damage output means that, in some ways, she doesn't really come "online" until she's got a bar stocked, forcing her to take on extra risk in neutral. |
| | }} |
| | == Stats == |
| | {{AVG2 Character Data |
| | | atk = D- |
| | | def = D |
| | | djump = Yes |
| | | dbrake = Yes |
| | | bd = 26F (Throw Invul) |
| | | wkup = 16F |
| }} | | }} |
|
| |
|
| = Movelist = | | == Color Options == |
| {{MoveData
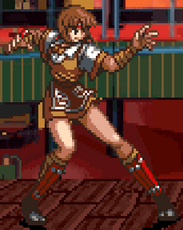
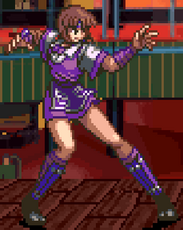
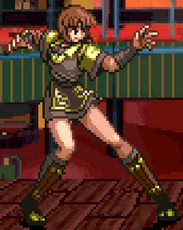
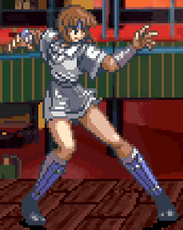
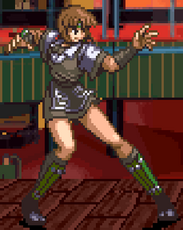
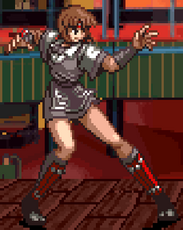
| | {{ColorGallery | filePrefix=AVG2_Chiho_Color_| imageWidths=187| colors= |
| |image=
| | {{ColorGallery/Color|Circle| text=Circle (Default) }} |
| |caption=
| | {{ColorGallery/Color|Triangle| text=Triangle }} |
| |name=st.{{Icon-Capcom|LP}}
| | {{ColorGallery/Color|Square| text=Square }} |
| |data=
| | {{ColorGallery/Color|R1| text=R1 }} |
| {{AttackData-AVG2
| | {{ColorGallery/Color|R2| text=R2 }} |
| |damage=8
| | {{ColorGallery/Color|Start| text=Start (Hidden) }} |
| |guard= Mid
| |
| |startup=3
| |
| |active=- | |
| |recovery=-
| |
| |frameAdv=-+3
| |
| |description=
| |
| }}
| |
| }}
| |
| ----
| |
| {{MoveData | |
| |image=
| |
| |caption= | |
| |name=st.{{Icon-Capcom|LK}} | |
| |data=
| |
| {{AttackData-AVG2 | |
| |damage=13
| |
| |guard= Mid
| |
| |startup=5
| |
| |active=-
| |
| |recovery=-
| |
| |frameAdv=-+2
| |
| |description=
| |
| }}
| |
| }}
| |
| ----
| |
| {{MoveData
| |
| |image=
| |
| |caption=
| |
| |name=Far{{Icon-Capcom|HP}}
| |
| |data=
| |
| {{AttackData-AVG2 | |
| |damage=28
| |
| |guard= Mid
| |
| |startup=7
| |
| |active=-
| |
| |recovery=-
| |
| |frameAdv=--5 | |
| |description=
| |
| }}
| |
| }}
| |
| ----
| |
| {{MoveData
| |
| |image=
| |
| |caption=
| |
| |name=cl.{{Icon-Capcom|HP}}
| |
| |data=
| |
| {{AttackData-AVG2 | |
| |damage=28, 28
| |
| |guard= Mid
| |
| |startup=5, 23
| |
| |active=- | |
| |recovery=-
| |
| |frameAdv=--2
| |
| |description=
| |
| }}
| |
| }}
| |
| ----
| |
| {{MoveData
| |
| |image=
| |
| |caption=
| |
| |name=st.{{Icon-Capcom|HK}}
| |
| |data=
| |
| {{AttackData-AVG2 | |
| |damage=32
| |
| |guard= Mid
| |
| |startup= 8
| |
| |active=- | |
| |recovery=-
| |
| |frameAdv=--11
| |
| |description=
| |
| }}
| |
| }} | |
| ----
| |
| {{MoveData
| |
| |image=
| |
| |caption=
| |
| |name=cr.{{Icon-Capcom|LP}}
| |
| |data=
| |
| {{AttackData-AVG2 | |
| |damage=8
| |
| |guard= Low
| |
| |startup= 4 | |
| |active=-
| |
| |recovery=-
| |
| |frameAdv=-+4
| |
| |description=
| |
| }}
| |
| }} | |
| ----
| |
| {{MoveData
| |
| |image=
| |
| |caption=
| |
| |name=cr.{{Icon-Capcom|LK}}
| |
| |data=
| |
| {{AttackData-AVG2 | |
| |damage=13
| |
| |guard= Low
| |
| |startup= 3 | |
| |active=-
| |
| |recovery=-
| |
| |frameAdv=-+4
| |
| |description=
| |
| }}
| |
| }}
| |
| ----
| |
| {{MoveData
| |
| |image=
| |
| |caption=
| |
| |name=cr.{{Icon-Capcom|HP}}
| |
| |data=
| |
| {{AttackData-AVG2
| |
| |damage=28
| |
| |guard= Mid
| |
| |startup= 5(->8)
| |
| |active=-
| |
| |recovery=-
| |
| |frameAdv=--9
| |
| |description=
| |
| }}
| |
| }}
| |
| ----
| |
| {{MoveData
| |
| |image=
| |
| |caption=
| |
| |name=cr.{{Icon-Capcom|HK}}
| |
| |data=
| |
| {{AttackData-AVG2
| |
| |damage=32
| |
| |guard= Low
| |
| |startup= 9
| |
| |active=-
| |
| |recovery=-
| |
| |frameAdv=--9
| |
| |description=
| |
| }}
| |
| }} | | }} |
| ----
| |
| {{MoveData
| |
| |image=
| |
| |caption=
| |
| |name=j.{{Icon-Capcom|LP}}
| |
| |data=
| |
| {{AttackData-AVG2
| |
| |damage=8
| |
| |guard=High
| |
| |startup= 4
| |
| |active=-
| |
| |recovery=-
| |
| |frameAdv=-
| |
| |description=
| |
| }}
| |
| }}
| |
| ----
| |
| {{MoveData
| |
| |image=
| |
| |caption=
| |
| |name=j.{{Icon-Capcom|LK}}
| |
| |data=
| |
| {{AttackData-AVG2
| |
| |damage=13
| |
| |guard= High
| |
| |startup= 4
| |
| |active=-
| |
| |recovery=-
| |
| |frameAdv=-
| |
| |description=
| |
| }}
| |
| }}
| |
| ----
| |
| {{MoveData
| |
| |image=
| |
| |caption=
| |
| |name=j.{{Icon-Capcom|HP}}
| |
| |data=
| |
| {{AttackData-AVG2
| |
| |damage=28
| |
| |guard= High
| |
| |startup= 5
| |
| |active=-
| |
| |recovery=-
| |
| |frameAdv=-
| |
| |description=
| |
| }}
| |
| }}
| |
| ----
| |
| {{MoveData
| |
| |image=
| |
| |caption=
| |
| |name=j.{{Icon-Capcom|HK}}
| |
| |data=
| |
| {{AttackData-AVG2
| |
| |damage=28
| |
| |guard= High
| |
| |startup= 8 (->12)
| |
| |active=-
| |
| |recovery=-
| |
| |frameAdv=-
| |
| |description=
| |
| }}
| |
| }}
| |
| ----
| |
| {{MoveData
| |
| |image=
| |
| |caption=
| |
| |name=nj.{{Icon-Capcom|HK}}
| |
| |data=
| |
| {{AttackData-AVG2
| |
| |damage=28
| |
| |guard= High
| |
| |startup= 9
| |
| |active=-
| |
| |recovery=-
| |
| |frameAdv=-
| |
| |description=
| |
| }}
| |
| }}
| |
| ----
| |
| '''Command Moves'''<br>
| |
| {{MoveData
| |
| |image=
| |
| |caption=Sankaku Tobi
| |
| |name=j.{{Motion|9}} Near Wall
| |
| |data=
| |
| {{AttackData-AVG2
| |
| |damage=-
| |
| |guard=-
| |
| |startup=-
| |
| |active=-
| |
| |recovery=-
| |
| |frameAdv=-
| |
| |description= Wall Jump
| |
| }}
| |
| }}
| |
| ----
| |
| {{MoveData
| |
| |image=
| |
| |caption=Izuna Otoshi
| |
| |name=Direction +{{Icon-Capcom|HP}} in air
| |
| |data=
| |
| {{AttackData-AVG2
| |
| |damage=-
| |
| |guard=
| |
| |startup=
| |
| |active=-
| |
| |recovery=-
| |
| |frameAdv=-
| |
| |description= air throw
| |
| }}
| |
| }}
| |
| ----
| |
| {{MoveData
| |
| |image=
| |
| |caption=
| |
| |name={{Motion|3}}+{{Icon-Capcom|LK}}
| |
| |data=
| |
| {{AttackData-AVG2
| |
| |damage=26
| |
| |guard=
| |
| |startup= 15
| |
| |active=-
| |
| |recovery=-
| |
| |frameAdv=--13
| |
| |description= Command launcher
| |
| }}
| |
| }}
| |
| ----
| |
| {{MoveData
| |
| |image=
| |
| |caption=
| |
| |name={{Motion|3}}+{{Icon-Capcom|HK}}
| |
| |data=
| |
| {{AttackData-AVG2
| |
| |damage=32
| |
| |guard=
| |
| |startup= 6
| |
| |active=-
| |
| |recovery=-
| |
| |frameAdv=--10~+4
| |
| |description= Command launcher
| |
| }}
| |
| }}
| |
| ----
| |
| {{MoveData
| |
| |image=
| |
| |caption=
| |
| |name={{Motion|6}}+{{Icon-Capcom|HK}}
| |
| |data=
| |
| {{AttackData-AVG2
| |
| |damage=34
| |
| |guard= High
| |
| |startup= 9
| |
| |active=-
| |
| |recovery=-
| |
| |frameAdv=--14
| |
| |description= Advancing knee that launches for a small juggle follow-up. More useful than df+LK
| |
| }}
| |
| }}
| |
| ----
| |
| {{MoveData
| |
| |image=
| |
| |caption=
| |
| |name={{Icon-Capcom|LP}}+{{Icon-Capcom|HP}}
| |
| |data=
| |
| {{AttackData-AVG2
| |
| |damage=28
| |
| |guard= High
| |
| |startup= 18
| |
| |active=-
| |
| |recovery=-
| |
| |frameAdv=--11
| |
| |description= Hopping overhead, kind of like a 3rd Strike UOH
| |
| }}
| |
| }}
| |
| ----
| |
| '''Target Combos'''<br>
| |
| st.LP > st.LK > st.HP > st.HK/f+HK<br>
| |
| st.LP > st.HP > st.HK/f+HK<br>
| |
| st.LP > st.HK > st.HP<br>
| |
| st.LP > st.HK/f+HK<br>
| |
| st.LP > st.LK > st.HK > st.HP<br>
| |
| st.HP > st.HK/f+HK<br>
| |
| st.HK > st.LK > f+LK<br>
| |
| j.LP/LK > j.HP/HK
| |
|
| |
|
| '''Guard Cancels'''<br>
| |
| LP: st.HP<br>
| |
| LK: st.HK. Holding f during the freeze will make f+HK come out instead.<br>
| |
| HP: Shisen Ken (qcb+P)<br>
| |
| HK: Hien Geki (charge b,f+P)
| |
|
| |
| f+LK guard cancel is generally the most rewarding one to use, since it leads to strong combo follow-ups. However, depending on the move being gc'd it can be risky to go for, in which case the LP guard cancel will cancel into anything else you want.
| |
|
| |
| == Special Moves ==
| |
| {{MoveData
| |
| |image=AVG2_Chiho_Shisen_Ken.jpg
| |
| |caption= {{Motion|214}} + {{Icon-Capcom|P}}
| |
| |name=Shisen Ken
| |
| |data=
| |
| {{AttackData-AVG2
| |
| |version={{Icon-Capcom|LP}}
| |
| |damage=27
| |
| |guard= Mid
| |
| |startup= 12
| |
| |active=-
| |
| |recovery=-
| |
| |frameAdv=--6
| |
| |description=Chiho's fireball. The LP version is exceptionally useful, as its slow travel speed makes it fantastic for covering grounded approaches and setting up annoying pressure strings in the corner.
| |
| }}
| |
| {{AttackData-AVG2
| |
| |header=no
| |
| |version={{Icon-Capcom|HP}}
| |
| |damage=34
| |
| |guard= Mid
| |
| |startup= 16
| |
| |active=-
| |
| |recovery=-
| |
| |frameAdv=--10
| |
| |description=
| |
| }}
| |
| {{AttackData-AVG2
| |
| |header=no
| |
| |version={{Icon-Capcom|LP}} + {{Icon-Capcom|HP}}
| |
| |damage=34 (3x)
| |
| |guard= Mid
| |
| |startup= 3
| |
| |active=-
| |
| |recovery=-
| |
| |frameAdv=-+25
| |
| |description=EX version throws three powered projectiles, but doesn't really provide enough benefits to be worth spending the meter on it.
| |
| }}
| |
| {{AttackData-AVG2
| |
| |header=no
| |
| |version={{Motion|63214}} + {{Icon-Capcom|HP}}{{Icon-Capcom|HK}}
| |
| |damage=
| |
| |guard= Mid
| |
| |startup=
| |
| |active=-
| |
| |recovery=-
| |
| |frameAdv=-
| |
| |description= SECRET: More or less like throwing only one of the EX projectiles. Can be useful if you need something faster and slightly more durable in a fireball war, but not something you need to be worrying about a whole lot.
| |
| }}
| |
| }} | | }} |
| ----
| |
| {{MoveData
| |
| |image=AVG2_Chiho_Hien_Geki.jpg
| |
| |caption= {{Motion|4}}(Charge){{Motion|6}} + {{Icon-Capcom|P}}
| |
| |name=Hien Geki
| |
| |data=
| |
| {{AttackData-AVG2
| |
| |version={{Icon-Capcom|LP}}
| |
| |damage=31
| |
| |guard= Mid
| |
| |startup= 9
| |
| |active=-
| |
| |recovery=-
| |
| |frameAdv=--18~-6
| |
| |description=Chiho's primary combo ender.
| |
| }}
| |
| {{AttackData-AVG2
| |
| |header=no
| |
| |version={{Icon-Capcom|HP}}
| |
| |damage=20 (5x)
| |
| |guard= Mid
| |
| |startup= 9
| |
| |active=-
| |
| |recovery=-
| |
| |frameAdv=--3
| |
| |description=
| |
| }}
| |
| {{AttackData-AVG2
| |
| |header=no
| |
| |version={{Icon-Capcom|LP}} + {{Icon-Capcom|HP}}
| |
| |damage=105
| |
| |guard= Mid
| |
| |startup= 0
| |
| |active=-
| |
| |recovery=-
| |
| |frameAdv=--18~-6
| |
| |description=The EX version is an instant super, which gives it some defensive utility that Chiho desperately needs.
| |
| }}
| |
| }}
| |
| ----
| |
| {{MoveData
| |
| |image=AVG2_Chiho_Enraku_Satsu.jpg
| |
| |caption= cl.{{Motion|63214}} + {{Icon-Capcom|HK}}
| |
| |name=Hien Geki
| |
| |data=
| |
| {{AttackData-AVG2
| |
| |damage=15,30
| |
| |guard= Mid
| |
| |startup= 1
| |
| |active=-
| |
| |recovery=-
| |
| |frameAdv=-0
| |
| |description=Chiho's command grab. A good option to have, especially since it leads to combos. Has two follow-ups.
| |
| }}
| |
| }}
| |
| {{MoveData
| |
| |image=AVG2_Chiho_Izuna_Otoshi.jpg
| |
| |caption= cl.{{Motion|63214}} + {{Icon-Capcom|HK}} ~ {{Motion|63214}} + {{Icon-Capcom|HK}}
| |
| |name=Izuna Otoshi
| |
| |data=
| |
| {{AttackData-AVG2
| |
| |damage=40
| |
| |guard= Mid
| |
| |startup=-
| |
| |active=-
| |
| |recovery=-
| |
| |frameAdv=-
| |
| |description=It's an izuna drop. Adds on extra damage and leaves the opponent close to you if you choose not to use the final follow-up
| |
| }}
| |
| }}
| |
| {{MoveData
| |
| |image=AVG2_Chiho_Senshuu_Jin.jpg
| |
| |caption= cl.{{Motion|63214}} + {{Icon-Capcom|HK}} ~ {{Motion|63214}} + {{Icon-Capcom|HK}} ~ {{Motion|63214}} + {{Icon-Capcom|HK}}
| |
| |name=Senshuu Jin
| |
| |data=
| |
| {{AttackData-AVG2
| |
| |damage=16
| |
| |guard= Mid
| |
| |startup=-
| |
| |active=-
| |
| |recovery=-
| |
| |frameAdv=-
| |
| |description=A final kick that tacks on some extra damage and knocks the opponent far away from you. Leaves them at a distance where you can reliably come in with a sj.LK, so whether or not you use it is up to you.
| |
| }}
| |
| }}
| |
| ----
| |
| == Super Moves ==
| |
| {{MoveData
| |
| |image=AVG2_Chiho_Zanei_Jin.jpg
| |
| |caption={{Motion|2}}{{Motion|2}} + {{Icon-Capcom|LP}}{{Icon-Capcom|HP}}
| |
| |name=Zanei Jin
| |
| |data=
| |
| {{AttackData-AVG2
| |
| |damage=N/A
| |
| |guard= N/A
| |
| |startup=0
| |
| |active=-
| |
| |recovery=-
| |
| |frameAdv=-
| |
| |description= Shadow super. Chiho gets stupid combos with this. She loses access to her normal throw and her command throw for its duration, but it's not a big deal since you get unblockables instead. Also of note is that Chiho's attacks still build meter while Zanei Jin is active.
| |
| }}
| |
| }}
| |
| ----
| |
| {{MoveData
| |
| |image=AVG2_Chiho_Genei_Jin.jpg
| |
| |caption={{Motion|2}}{{Motion|2}} + {{Icon-Capcom|LK}}{{Icon-Capcom|HK}}
| |
| |name=Genei Jin
| |
| |data=
| |
| {{AttackData-AVG2
| |
| |damage=N/A
| |
| |guard= N/A
| |
| |startup=0
| |
| |active=-
| |
| |recovery=-
| |
| |frameAdv=-
| |
| |description= Makes Chiho's movement and attacks faster for its duration. Not as useful as the classic 3rd Strike Genei Jin and also not as useful as Chiho's other install super.
| |
| }}
| |
| }}
| |
| ----
| |
| {{MoveData
| |
| |image=AVG2_Chiho_Shin_Kuuga_Zan.jpg
| |
| |caption={{Motion|214}}{{Motion|6}} + {{Icon-Capcom|K}}
| |
| |name=Shin Kuuga Zan
| |
| |data=
| |
| {{AttackData-AVG2
| |
| |damage=144
| |
| |guard=
| |
| |startup=4
| |
| |active=-
| |
| |recovery=-
| |
| |frameAdv=-+8
| |
| |description=Fast super that tracks to the opponent's position, coming down on the opponent with a single attack. These two factors make it an exceptionally good tool for stuffing approaches and even anti-airing, but the trade-off is that the damage is the lowest of any Super in the game. Use carefully, because unless it will kill, your opponent may be okay with taking the damage if it means you're down two bars of meter.
| |
| }}
| |
| }}
| |
|
| |
| = Strategy =
| |
| Chiho is best suited to rushing the opponent down, using a mixture of fireballs, df+HK slides, dashing HP and j.LK to aggressively approach the opponent and establish pressure. This is important for two reasons: the first is that the generally low damage output of her normals means that Chiho will generally fare worse in a careful footsie game compared to most other characters. The second is that the reward Chiho gets from her pressure is high, since Hien Geki gives her combos exceptional corner carry. The corner is where the real fun begins -- not only do you have access to all of your other mixup options, but you also gain access to a very annoying pressure sequence of dashing HP xx LP fireball, which you're free to change the timing of in order to bait reversals or guard cancels, as well as your terrifying (and exceptionally meter-efficient) Zanei Jin combos. If you find yourself on the defensive, look for opportunities to wall jump away from the opponent, or try to land EX Hien Geki if you're comfortable spending the meter.
| |
|
| |
| ''Zanei Jin Unblockables''<br>
| |
| Due to the nature of the shadows attached to Zanei Jin, Chiho is able to set up unblockables in the corner by activating Zanei Jin after scoring a knockdown, timing LP+HP so that the shadows hit meaty, and then following up with cr.LK. You can use this to make waking up an incredibly scary proposition for your opponent, but you'll need to properly adjust for the opponent choosing to quick getup or not.
| |
|
| |
| == Combos ==
| |
| '''Basic Combos'''<br>
| |
| cr.LK, cr.LP, st.LP > f+HK, cl.HP xx HP Hien Geki<br>
| |
| (corner) cr.LK, cr.LP, st.LP > st.HK xx LP Hien Geki, cl.HP xx HP Hien Geki<br>
| |
| Enraku Satsu, sj.LK > j.HK, land HP Hien Geki<br>
| |
|
| |
| '''Anti-Air Combos'''<br>
| |
| j.LK > j.HK, HP Hien Geki<br>
| |
| cl.HP/cr.HP xx LP Shisen Ken, EX Hien Geki<br>
| |
|
| |
| '''Zanei Jin Combo'''<br>
| |
| cr.LK, cr.LP, st.LP > st.HP xx Zanei Jin {dash HP, st.LK, cr.LP, st.LP x2, cr.LP, st.LP}, st.LP x3, st.LP > st.HK xx LP Hien Geki, cl.HP xx Hien Geki<br>
| |
| ''Corner combo. Hold forward during Zanei Jin to auto-walk forward and keep yourself close enough. Do this for the st.LP links after the super ends as well. Instead of going into the st.HK combo, you can chain st.LP > st.HP and start the Zanei Jin combo again -- this leads into an almost touch-of-death on basically every character in the corner.''
| |
|
| |
|
| {{Navbox-AVG2}} | | {{Navbox-AVG2}} |
|
| |
|
| [[Category:Advanced V.G. 2]] | | [[Category:Advanced V.G. 2]] |
