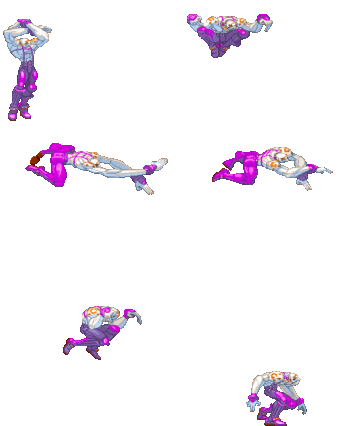
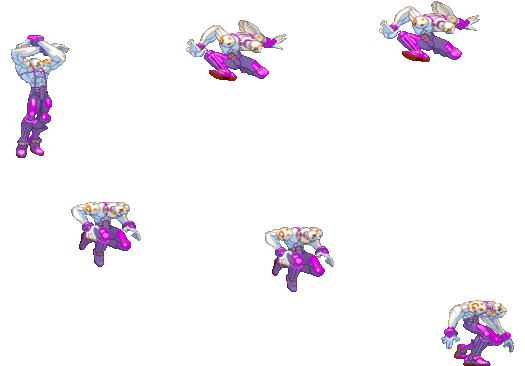
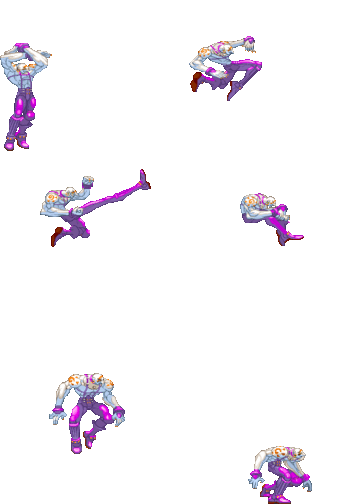
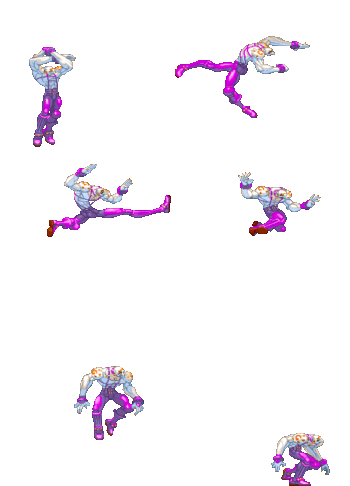
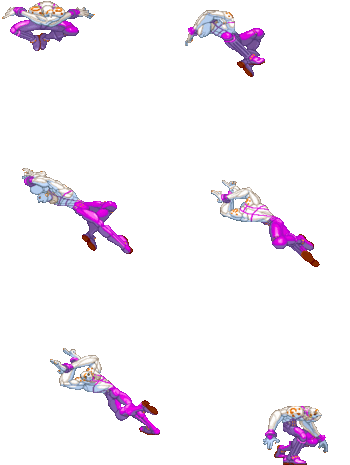
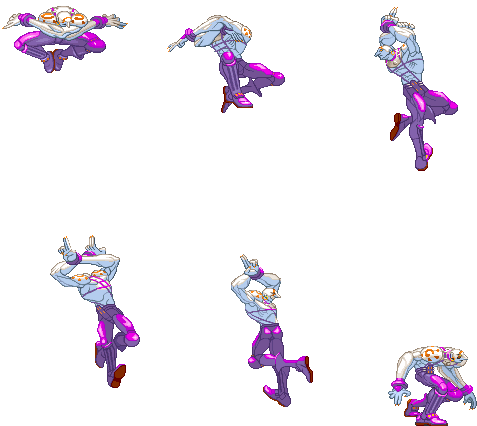
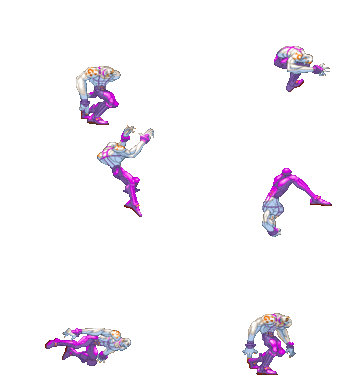
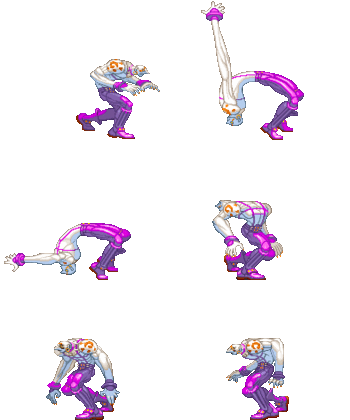
RaVen-ahzi (talk | contribs) (Created page with "{{Infobox Character 3S |name=Necro |hash=NE |image=Necro3sport.gif |health=1120 |stun=64 |SA1=1/88 |SA2=1/104 |SA3=2/72 |fDash=23/28 |bDash=21/27 |nJump=48(5+42+1) |bJump=48(5...") |
(→214K) |
||
| (38 intermediate revisions by 7 users not shown) | |||
| Line 1: | Line 1: | ||
{{TOClimit|3}} | |||
{{Infobox Character 3S | {{Infobox Character 3S | ||
|name=Necro | |name=Necro | ||
|hash=NE | |hash=NE | ||
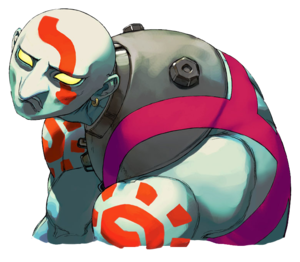
|image= | |image=3S_Necro_Art.png | ||
|health=1120 | |health=1120 | ||
|stun=64 | |stun=64 | ||
| Line 8: | Line 10: | ||
|SA2=1/104 | |SA2=1/104 | ||
|SA3=2/72 | |SA3=2/72 | ||
|fDash= | |fDash=22 (132px) | ||
|bDash= | |bDash=20 (123px) | ||
|nJump=48(5+42+1) | |nJump=48(5+42+1) | ||
|bJump=48(5+42+1) | |bJump=48(5+42+1) | ||
| Line 23: | Line 25: | ||
== Frame Data == | == Frame Data == | ||
====Standing Normals==== | |||
=====<font style="visibility:hidden; float:right">5LP</font>===== | =====<font style="visibility:hidden; float:right">5LP</font>===== | ||
{{MoveData | {{MoveData | ||
| Line 36: | Line 39: | ||
|onHitCrouch=2 | |onHitCrouch=2 | ||
|onBlock=2 | |onBlock=2 | ||
|parry= | |guard=HL | ||
|parry=HL | |||
|damage=5 | |damage=5 | ||
|stun=3 | |stun=3 | ||
| Line 65: | Line 69: | ||
* Self meter gain: Whiff: 2, Hit: 11, Block: 6. | * Self meter gain: Whiff: 2, Hit: 11, Block: 6. | ||
* Opponent meter gain: Whiff: 0, Hit: 2, Block: 0. | * Opponent meter gain: Whiff: 0, Hit: 2, Block: 0. | ||
Solid button for catching dashes, whiff punishing, and counter poking. Also combos into SA3. | |||
{{3S Button FAT|link=https://fullmeter.com/fatonline/#/framedata/movedetail/3S/Necro/normal/Stand%20MP}} | {{3S Button FAT|link=https://fullmeter.com/fatonline/#/framedata/movedetail/3S/Necro/normal/Stand%20MP}} | ||
}} | }} | ||
| Line 88: | Line 93: | ||
* Self meter gain: Whiff: 3, Hit: 19, Block: 10. | * Self meter gain: Whiff: 3, Hit: 19, Block: 10. | ||
* Opponent meter gain: Whiff: 0, Hit: 4, Block: 0. | * Opponent meter gain: Whiff: 0, Hit: 4, Block: 0. | ||
A near fullscreen poke. Useful for catching anyone for building meter through whiffing normals, or just holding forward. Use sparingly however, as its poor hurtbox timing and lengthy recovery leaves it open to being easily parried and punished through overuse, especially in the Chun-Li matchup. | |||
{{3S Button FAT|link=https://fullmeter.com/fatonline/#/framedata/movedetail/3S/Necro/normal/Stand%20HP}} | {{3S Button FAT|link=https://fullmeter.com/fatonline/#/framedata/movedetail/3S/Necro/normal/Stand%20HP}} | ||
}} | }} | ||
| Line 110: | Line 116: | ||
|description= | |description= | ||
* Cancel options: sp su | * Cancel options: sp su | ||
Situational space-creation button for Necro during his blockstrings. | |||
{{3S Button FAT|link=https://fullmeter.com/fatonline/#/framedata/movedetail/3S/Necro/normal/Stand%20LK}} | {{3S Button FAT|link=https://fullmeter.com/fatonline/#/framedata/movedetail/3S/Necro/normal/Stand%20LK}} | ||
}} | }} | ||
| Line 132: | Line 139: | ||
* Self meter gain: Whiff: 2, Hit: 11, Block: 6. | * Self meter gain: Whiff: 2, Hit: 11, Block: 6. | ||
* Opponent meter gain: Whiff: 0, Hit: 2, Block: 0. | * Opponent meter gain: Whiff: 0, Hit: 2, Block: 0. | ||
Another space creation tool in block strings. Often used after 5LK to setup a Snake Fang with maximum spacing. | |||
{{3S Button FAT|link=https://fullmeter.com/fatonline/#/framedata/movedetail/3S/Necro/normal/Stand%20MK}} | {{3S Button FAT|link=https://fullmeter.com/fatonline/#/framedata/movedetail/3S/Necro/normal/Stand%20MK}} | ||
}} | }} | ||
| Line 155: | Line 163: | ||
* Self meter gain: Whiff: 3, Hit: 19, Block: 10. | * Self meter gain: Whiff: 3, Hit: 19, Block: 10. | ||
* Opponent meter gain: Whiff: 0, Hit: 4, Block: 0. | * Opponent meter gain: Whiff: 0, Hit: 4, Block: 0. | ||
Shares a use case with 5HP, but it can catch the early frames of forward jumps. Best used against slower, bulkier characters as a result. | |||
{{3S Button FAT|link=https://fullmeter.com/fatonline/#/framedata/movedetail/3S/Necro/normal/Stand%20HK}} | {{3S Button FAT|link=https://fullmeter.com/fatonline/#/framedata/movedetail/3S/Necro/normal/Stand%20HK}} | ||
}} | }} | ||
| Line 204: | Line 213: | ||
* Self meter gain: Whiff: 2, Hit: 11, Block: 6. | * Self meter gain: Whiff: 2, Hit: 11, Block: 6. | ||
* Opponent meter gain: Whiff: 0, Hit: 2, Block: 0. | * Opponent meter gain: Whiff: 0, Hit: 2, Block: 0. | ||
Easily one of Necro's most important buttons. Used to combo into super, build meter in neutral, and create space in block strings. It combos into Light, Medium and EX Spin Hook, and can do the same with Snake Fang on crouching opponents. Can be used to confirm into Electric Snake or Magnetic Storm, and is fast enough to be used as a wakeup or reversal button while you still have throw invulnerability. | |||
{{3S Button FAT|link=https://fullmeter.com/fatonline/#/framedata/movedetail/3S/Necro/normal/Back%20MP}} | {{3S Button FAT|link=https://fullmeter.com/fatonline/#/framedata/movedetail/3S/Necro/normal/Back%20MP}} | ||
}} | }} | ||
| Line 228: | Line 238: | ||
* Self meter gain: Whiff: 3, Hit: 19, Block: 10. | * Self meter gain: Whiff: 3, Hit: 19, Block: 10. | ||
* Opponent meter gain: Whiff: 0, Hit: 4, Block: 0. | * Opponent meter gain: Whiff: 0, Hit: 4, Block: 0. | ||
High damage anti-air, throw whiff punisher, and combos into fantastic corner carry normals. Can combo into 1HP, 4HK, or any version of DP. | |||
{{3S Button FAT|link=https://fullmeter.com/fatonline/#/framedata/movedetail/3S/Necro/normal/Back%20HP}} | {{3S Button FAT|link=https://fullmeter.com/fatonline/#/framedata/movedetail/3S/Necro/normal/Back%20HP}} | ||
}} | }} | ||
| Line 250: | Line 261: | ||
|description= | |description= | ||
* Cancel options: self sp su | * Cancel options: self sp su | ||
Necro's fastest button, though very stubby. Best used in tick throws. It can also combo into SA3 thanks to the 5MP target combo. | |||
{{3S Button FAT|link=https://fullmeter.com/fatonline/#/framedata/movedetail/3S/Necro/normal/Back%20LK}} | {{3S Button FAT|link=https://fullmeter.com/fatonline/#/framedata/movedetail/3S/Necro/normal/Back%20LK}} | ||
}} | }} | ||
| Line 275: | Line 287: | ||
* Self meter gain: Whiff: 2, Hit: 11, Block: 6. | * Self meter gain: Whiff: 2, Hit: 11, Block: 6. | ||
* Opponent meter gain: Whiff: 0, Hit: 2, Block: 0. | * Opponent meter gain: Whiff: 0, Hit: 2, Block: 0. | ||
Premier combo button, can go into Light, Medium, EX Spin Hook, and can do the same with Snake Fang on crouching opponents. It also cancels into SA3. | |||
{{3S Button FAT|link=https://fullmeter.com/fatonline/#/framedata/movedetail/3S/Necro/normal/Back%20MK}} | {{3S Button FAT|link=https://fullmeter.com/fatonline/#/framedata/movedetail/3S/Necro/normal/Back%20MK}} | ||
}} | }} | ||
| Line 281: | Line 294: | ||
=====<font style="visibility:hidden; float:right">4HK</font>===== | =====<font style="visibility:hidden; float:right">4HK</font>===== | ||
{{MoveData | {{MoveData | ||
|name= | |name=Knee Missile | ||
|input={{b}}+{{hk}} | |input={{b}}+{{hk}} | ||
|subtitle=4HK | |||
|image=(necrobhk).gif | |image=(necrobhk).gif | ||
|data= | |data= | ||
| Line 299: | Line 313: | ||
* Self meter gain: Whiff: 3, Hit: 19, Block: 10. | * Self meter gain: Whiff: 3, Hit: 19, Block: 10. | ||
* Opponent meter gain: Whiff: 0, Hit: 4, Block: 0. | * Opponent meter gain: Whiff: 0, Hit: 4, Block: 0. | ||
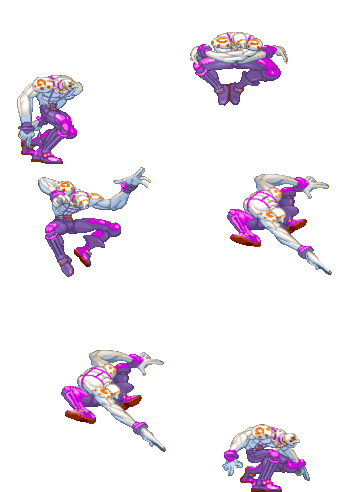
Commonly used in post-taunt or post-stun situations due to its high damage and stun output. Combos into 1HP, EX Spin hook, and can combo into SA3 by linking into 2LP/LK or 5MP. Also comically plus on block, but tends to whiff on crouchers, and has quite a bit of pushback. | |||
{{3S Button FAT|link=https://fullmeter.com/fatonline/#/framedata/movedetail/3S/Necro/normal/Back%20HK}} | {{3S Button FAT|link=https://fullmeter.com/fatonline/#/framedata/movedetail/3S/Necro/normal/Back%20HK}} | ||
}} | }} | ||
| Line 307: | Line 322: | ||
|name=Elbow Cannon | |name=Elbow Cannon | ||
|input={{db}}+{{hp}} | |input={{db}}+{{hp}} | ||
|subtitle=1HP | |||
|image=(necrodbhp).gif | |image=(necrodbhp).gif | ||
|data= | |data= | ||
| Line 322: | Line 338: | ||
* Self meter gain: Whiff: 3, Hit: 19, Block: 10. | * Self meter gain: Whiff: 3, Hit: 19, Block: 10. | ||
* Opponent meter gain: Whiff: 0, Hit: 4, Block: 0. | * Opponent meter gain: Whiff: 0, Hit: 4, Block: 0. | ||
Another high damage normal. Grants fantastic corner carry, and is an important tool in Necro's infamous stun juggles and neutral throw combos. If done correctly, you can get up to six consecutive Elbow Cannons in the corner against Urien, Alex, and Hugo (and still juggle Magnetic Storm afterwards, or Slam Dance after five Elbow Cannons). | |||
Do note that during its active frames, it temporarily shifts Necro's throwbox (but not his actual position) forward, which can lead to being caught by command grabs at surprisingly long range. | |||
{{3S Button FAT|link=https://fullmeter.com/fatonline/#/framedata/movedetail/3S/Necro/normal/Elbow%20Cannon}} | {{3S Button FAT|link=https://fullmeter.com/fatonline/#/framedata/movedetail/3S/Necro/normal/Elbow%20Cannon}} | ||
}} | }} | ||
| Line 328: | Line 347: | ||
<br> | <br> | ||
<br> | <br> | ||
==== Crouching Normals ==== | ==== Crouching Normals ==== | ||
=====<font style="visibility:hidden; float:right">2LP</font>===== | =====<font style="visibility:hidden; float:right">2LP</font>===== | ||
| Line 347: | Line 367: | ||
|description= | |description= | ||
* Cancel options: sp su | * Cancel options: sp su | ||
Best used to punish whiffed normals and stop dash-ins. Combos into Light Spin Hook, Light DP, and SA3. | |||
{{3S Button FAT|link=https://fullmeter.com/fatonline/#/framedata/movedetail/3S/Necro/normal/Crouch%20LP}} | {{3S Button FAT|link=https://fullmeter.com/fatonline/#/framedata/movedetail/3S/Necro/normal/Crouch%20LP}} | ||
}} | }} | ||
| Line 369: | Line 390: | ||
* Self meter gain: Whiff: 2, Hit: 11, Block: 6. | * Self meter gain: Whiff: 2, Hit: 11, Block: 6. | ||
* Opponent meter gain: Whiff: 0, Hit: 2, Block: 0. | * Opponent meter gain: Whiff: 0, Hit: 2, Block: 0. | ||
Powerful anti-air, be it reaction or read. Be cautious with overuse, as it hits once, so switch between it, DP, and 4HP. | |||
{{3S Button FAT|link=https://fullmeter.com/fatonline/#/framedata/movedetail/3S/Necro/normal/Crouch%20MP}} | {{3S Button FAT|link=https://fullmeter.com/fatonline/#/framedata/movedetail/3S/Necro/normal/Crouch%20MP}} | ||
}} | }} | ||
| Line 392: | Line 414: | ||
* Self meter gain: Whiff: 3, Hit: 19, Block: 10. | * Self meter gain: Whiff: 3, Hit: 19, Block: 10. | ||
* Opponent meter gain: Whiff: 0, Hit: 4, Block: 0. | * Opponent meter gain: Whiff: 0, Hit: 4, Block: 0. | ||
Slightly farther hitting, though slower traveling fullscreen poke, ala 5HP. Use sparingly. | |||
{{3S Button FAT|link=https://fullmeter.com/fatonline/#/framedata/movedetail/3S/Necro/normal/Crouch%20HP}} | {{3S Button FAT|link=https://fullmeter.com/fatonline/#/framedata/movedetail/3S/Necro/normal/Crouch%20HP}} | ||
}} | }} | ||
| Line 414: | Line 437: | ||
|description= | |description= | ||
* Cancel options: self sp su | * Cancel options: self sp su | ||
Same use case as 2LP. As a refresher, whiff punish, dash-in counter, and combos into Light Spin Hook, Light DP, and SA3. | |||
{{3S Button FAT|link=https://fullmeter.com/fatonline/#/framedata/movedetail/3S/Necro/normal/Crouch%20LK}} | {{3S Button FAT|link=https://fullmeter.com/fatonline/#/framedata/movedetail/3S/Necro/normal/Crouch%20LK}} | ||
}} | }} | ||
| Line 437: | Line 461: | ||
* Self meter gain: Whiff: 2, Hit: 11, Block: 6. | * Self meter gain: Whiff: 2, Hit: 11, Block: 6. | ||
* Opponent meter gain: Whiff: 0, Hit: 2, Block: 0. | * Opponent meter gain: Whiff: 0, Hit: 2, Block: 0. | ||
Half-screen poke. Best used to stuff dash ins, but in certain matchups, its easily punished or outright avoided (See: Dudley and Chun-li) | |||
{{3S Button FAT|link=https://fullmeter.com/fatonline/#/framedata/movedetail/3S/Necro/normal/Crouch%20MK}} | {{3S Button FAT|link=https://fullmeter.com/fatonline/#/framedata/movedetail/3S/Necro/normal/Crouch%20MK}} | ||
}} | }} | ||
| Line 460: | Line 485: | ||
* Self meter gain: Whiff: 3, Hit: 19, Block: 10. | * Self meter gain: Whiff: 3, Hit: 19, Block: 10. | ||
* Opponent meter gain: Whiff: 0, Hit: 4, Block: 0. | * Opponent meter gain: Whiff: 0, Hit: 4, Block: 0. | ||
Just below half-screen sweep. Use sparingly. | |||
{{3S Button FAT|link=https://fullmeter.com/fatonline/#/framedata/movedetail/3S/Necro/normal/Crouch%20HK}} | {{3S Button FAT|link=https://fullmeter.com/fatonline/#/framedata/movedetail/3S/Necro/normal/Crouch%20HK}} | ||
}} | }} | ||
| Line 535: | Line 561: | ||
* Self meter gain: Whiff: 2, Hit: 11, Block: 6. | * Self meter gain: Whiff: 2, Hit: 11, Block: 6. | ||
* Opponent meter gain: Whiff: 0, Hit: 2, Block: 0. | * Opponent meter gain: Whiff: 0, Hit: 2, Block: 0. | ||
The god button. It can halt any neutral approach, can be used in combination with up-backing when Necro is cornered, and is obnoxious otherwise due to its overhead property. Also annoyingly difficult to punish with anything beyond an air-to-air. Use and abuse it, though be wary of parries due to its single hit nature. | |||
{{3S Button FAT|link=https://fullmeter.com/fatonline/#/framedata/movedetail/3S/Necro/normal/Jump%20MP}} | {{3S Button FAT|link=https://fullmeter.com/fatonline/#/framedata/movedetail/3S/Necro/normal/Jump%20MP}} | ||
}} | }} | ||
| Line 554: | Line 581: | ||
* Self meter gain: Whiff: 3, Hit: 19, Block: 10. | * Self meter gain: Whiff: 3, Hit: 19, Block: 10. | ||
* Opponent meter gain: Whiff: 0, Hit: 4, Block: 0. | * Opponent meter gain: Whiff: 0, Hit: 4, Block: 0. | ||
Used sparingly as a space control tool on landing. Its lengthy start-up makes it difficult to use as a jump-in combo tool, and leaves Necro vulnerable to punishes for dropping these as a result. | |||
{{3S Button FAT|link=https://fullmeter.com/fatonline/#/framedata/movedetail/3S/Necro/normal/Jump%20HP}} | {{3S Button FAT|link=https://fullmeter.com/fatonline/#/framedata/movedetail/3S/Necro/normal/Jump%20HP}} | ||
}} | }} | ||
| Line 590: | Line 618: | ||
* Self meter gain: Whiff: 2, Hit: 11, Block: 6. | * Self meter gain: Whiff: 2, Hit: 11, Block: 6. | ||
* Opponent meter gain: Whiff: 0, Hit: 2, Block: 0. | * Opponent meter gain: Whiff: 0, Hit: 2, Block: 0. | ||
A rising air-to-air. Used sparingly, as Necro is far better at stopping jumps from the ground than by ascending with the opponent. | |||
{{3S Button FAT|link=https://fullmeter.com/fatonline/#/framedata/movedetail/3S/Necro/normal/Jump%20MK}} | {{3S Button FAT|link=https://fullmeter.com/fatonline/#/framedata/movedetail/3S/Necro/normal/Jump%20MK}} | ||
}} | }} | ||
| Line 609: | Line 638: | ||
* Self meter gain: Whiff: 3, Hit: 19, Block: 10. | * Self meter gain: Whiff: 3, Hit: 19, Block: 10. | ||
* Opponent meter gain: Whiff: 0, Hit: 4, Block: 0. | * Opponent meter gain: Whiff: 0, Hit: 4, Block: 0. | ||
Best jump-in combo starter, goes into SA3 quite handily, especially when linked into 5MP. | |||
{{3S Button FAT|link=https://fullmeter.com/fatonline/#/framedata/movedetail/3S/Necro/normal/Jump%20HK}} | {{3S Button FAT|link=https://fullmeter.com/fatonline/#/framedata/movedetail/3S/Necro/normal/Jump%20HK}} | ||
}} | }} | ||
}} | }} | ||
=====<font style="visibility:hidden; float:right"> | =====<font style="visibility:hidden; float:right">2K (air)</font>===== | ||
{{MoveData | {{MoveData | ||
|name=Drill Kick | |name=Drill Kick | ||
| Line 633: | Line 663: | ||
* Self meter gain: Whiff: 2, Hit: 12, Block: 5. | * Self meter gain: Whiff: 2, Hit: 12, Block: 5. | ||
* Opponent meter gain: Whiff: 0, Hit: 2, Block: 0. | * Opponent meter gain: Whiff: 0, Hit: 2, Block: 0. | ||
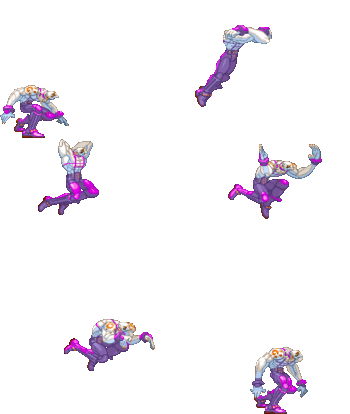
One of the only airborne attacks in the game that can be low-parried. Note that this is not subject to an anti-air parry window penalty (5f instead of 10f). | |||
Best used to escape the corner against shorter characters. Travels the farthest distance out of the divekicks. | |||
{{3S Button FAT|link=https://fullmeter.com/fatonline/#/framedata/movedetail/3S/Necro/normal/LK%20Drill%20Kick}} | {{3S Button FAT|link=https://fullmeter.com/fatonline/#/framedata/movedetail/3S/Necro/normal/LK%20Drill%20Kick}} | ||
}} | }} | ||
| Line 644: | Line 676: | ||
* Self meter gain: Whiff: 2, Hit: 11, Block: 5. | * Self meter gain: Whiff: 2, Hit: 11, Block: 5. | ||
* Opponent meter gain: Whiff: 0, Hit: 2, Block: 0. | * Opponent meter gain: Whiff: 0, Hit: 2, Block: 0. | ||
One of the only airborne attacks in the game that can be low-parried. Note that this is not subject to an anti-air parry window penalty (5f instead of 10f). | |||
Pressure tool, and comboable out of through cross-up okizeme setups. | |||
{{3S Button FAT|link=https://fullmeter.com/fatonline/#/framedata/movedetail/3S/Necro/normal/MK%20Drill%20Kick}} | {{3S Button FAT|link=https://fullmeter.com/fatonline/#/framedata/movedetail/3S/Necro/normal/MK%20Drill%20Kick}} | ||
}} | }} | ||
| Line 655: | Line 689: | ||
* Self meter gain: Whiff: 3, Hit: 18, Block: 8. | * Self meter gain: Whiff: 3, Hit: 18, Block: 8. | ||
* Opponent meter gain: Whiff: 0, Hit: 4, Block: 0. | * Opponent meter gain: Whiff: 0, Hit: 4, Block: 0. | ||
One of the only airborne attacks in the game that can be low-parried. Note that this is not subject to an anti-air parry window penalty (5f instead of 10f). | |||
Travels the shortest distance out of all the drills, and is the premier cross-up tool on okizeme as a result. Use early in the jump for a same-side, or late in the jump to cross-up. | |||
{{3S Button FAT|link=https://fullmeter.com/fatonline/#/framedata/movedetail/3S/Necro/normal/HK%20Drill%20Kick}} | {{3S Button FAT|link=https://fullmeter.com/fatonline/#/framedata/movedetail/3S/Necro/normal/HK%20Drill%20Kick}} | ||
}} | }} | ||
| Line 661: | Line 697: | ||
<br> | <br> | ||
<br> | <br> | ||
==== Target Combos ==== | |||
<br> | |||
<br> | |||
<br> | |||
==== Throws ==== | ==== Throws ==== | ||
=====<font style="visibility:hidden; float:right">LPLK</font>===== | =====<font style="visibility:hidden; float:right">LPLK</font>===== | ||
| Line 676: | Line 719: | ||
|description= | |description= | ||
* 26 throw range | * 26 throw range | ||
Insane corner carry. Infinitely more terrifying in the corner thanks to it allowing for juggle combos. | |||
{{3S Button FAT|link=https://fullmeter.com/fatonline/#/framedata/movedetail/3S/Necro/normal/Shoulder%20Attack}} | {{3S Button FAT|link=https://fullmeter.com/fatonline/#/framedata/movedetail/3S/Necro/normal/Shoulder%20Attack}} | ||
}} | }} | ||
| Line 694: | Line 738: | ||
|description= | |description= | ||
* 26 throw range | * 26 throw range | ||
A side-switching throw that does a surprising amount of stun damage; in fact, the highest stunning single hit throw in the game. Outside of the corner, use this to close out opponents at 3/4ths stun that are afraid of taking additional hits. | |||
{{3S Button FAT|link=https://fullmeter.com/fatonline/#/framedata/movedetail/3S/Necro/normal/Frankensteiner}} | {{3S Button FAT|link=https://fullmeter.com/fatonline/#/framedata/movedetail/3S/Necro/normal/Frankensteiner}} | ||
}} | }} | ||
| Line 712: | Line 757: | ||
* Self meter gain: Whiff: 8, Hit: 0, Block: ---. | * Self meter gain: Whiff: 8, Hit: 0, Block: ---. | ||
* Opponent meter gain: Whiff: 0, Hit: 0, Block: ---. | * Opponent meter gain: Whiff: 0, Hit: 0, Block: ---. | ||
Same purpose as back-throw, just way more situational. | |||
{{3S Button FAT|link=https://fullmeter.com/fatonline/#/framedata/movedetail/3S/Necro/normal/German%20Suplex%20(Throw)}} | {{3S Button FAT|link=https://fullmeter.com/fatonline/#/framedata/movedetail/3S/Necro/normal/German%20Suplex%20(Throw)}} | ||
}} | }} | ||
| Line 733: | Line 779: | ||
|stun=3 | |stun=3 | ||
|description= | |description= | ||
Much like other UOHs, if done meaty, can combo into a super. Otherwise, it allows Necro to avoid low-pokes/projectiles at close ranges. | |||
{{3S Button FAT|link=https://fullmeter.com/fatonline/#/framedata/movedetail/3S/Necro/normal/Finger%20Attack}} | {{3S Button FAT|link=https://fullmeter.com/fatonline/#/framedata/movedetail/3S/Necro/normal/Finger%20Attack}} | ||
}} | }} | ||
| Line 758: | Line 805: | ||
* Self meter gain: Whiff: 4, Hit: 7, Block: 6. | * Self meter gain: Whiff: 4, Hit: 7, Block: 6. | ||
* Opponent meter gain: Whiff: 0, Hit: 0, Block: 0. | * Opponent meter gain: Whiff: 0, Hit: 0, Block: 0. | ||
Necro's Taunt is easy to use safely, especially given his stun output, and only needs to be pressed once for the damage buff. | |||
{{3S Button FAT|link=https://fullmeter.com/fatonline/#/framedata/movedetail/3S/Necro/normal/Tongue%20Waving}} | {{3S Button FAT|link=https://fullmeter.com/fatonline/#/framedata/movedetail/3S/Necro/normal/Tongue%20Waving}} | ||
}} | }} | ||
| Line 778: | Line 826: | ||
|recovery=16 | |recovery=16 | ||
|onBlock=-10 | |onBlock=-10 | ||
|guard=HL | |||
|parry=H | |parry=H | ||
|damage=10 | |damage=10 | ||
| Line 785: | Line 834: | ||
* Self meter gain: Whiff: 3, Hit: 19, Block: 10. | * Self meter gain: Whiff: 3, Hit: 19, Block: 10. | ||
* Opponent meter gain: Whiff: 0, Hit: 4, Block: 0. | * Opponent meter gain: Whiff: 0, Hit: 4, Block: 0. | ||
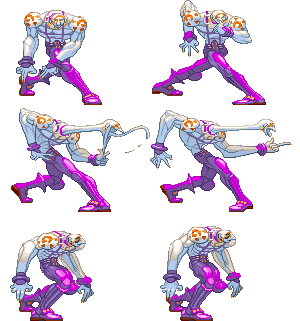
Great anti-air with good combo opportunities, solid damage. Also has significant forward movement, causing opponents to miss their parry direction if jumping in from close range. On the ground, buffering super behind it is a good way to catch dash-ins. LP version duration can be extended by mashing on whiff, but will end after one hit. | |||
{{3S Button FAT|link=https://fullmeter.com/fatonline/#/framedata/movedetail/3S/Necro/normal/LP%20Electric%20Shock}} | {{3S Button FAT|link=https://fullmeter.com/fatonline/#/framedata/movedetail/3S/Necro/normal/LP%20Electric%20Shock}} | ||
}} | }} | ||
| Line 793: | Line 843: | ||
|recovery=33 | |recovery=33 | ||
|onBlock=-26 | |onBlock=-26 | ||
|guard=HL | |||
|parry=H | |parry=H | ||
|damage=29 | |damage=29 | ||
| Line 800: | Line 851: | ||
* Self meter gain: Whiff: 3, Hit: 21, Block: 11. | * Self meter gain: Whiff: 3, Hit: 21, Block: 11. | ||
* Opponent meter gain: Whiff: 0, Hit: 4, Block: 0. | * Opponent meter gain: Whiff: 0, Hit: 4, Block: 0. | ||
Slower DP with higher damage, combo tool. Can be extended to 21 consecutive hits with mashing against a parrying opponent. | |||
{{3S Button FAT|link=https://fullmeter.com/fatonline/#/framedata/movedetail/3S/Necro/normal/MP%20Electric%20Shock}} | {{3S Button FAT|link=https://fullmeter.com/fatonline/#/framedata/movedetail/3S/Necro/normal/MP%20Electric%20Shock}} | ||
}} | }} | ||
| Line 808: | Line 860: | ||
|recovery=35 | |recovery=35 | ||
|onBlock=-28 | |onBlock=-28 | ||
|guard=HL | |||
|parry=H | |parry=H | ||
|damage=38 | |damage=38 | ||
| Line 815: | Line 868: | ||
* Self meter gain: Whiff: 3, Hit: 22, Block: 12. | * Self meter gain: Whiff: 3, Hit: 22, Block: 12. | ||
* Opponent meter gain: Whiff: 0, Hit: 4, Block: 0. | * Opponent meter gain: Whiff: 0, Hit: 4, Block: 0. | ||
Slowest DP with higher damage, still a combo tool. Can be extended to 41 consecutive hits with mashing against a parrying opponent. | |||
{{3S Button FAT|link=https://fullmeter.com/fatonline/#/framedata/movedetail/3S/Necro/normal/HP%20Electric%20Shock}} | {{3S Button FAT|link=https://fullmeter.com/fatonline/#/framedata/movedetail/3S/Necro/normal/HP%20Electric%20Shock}} | ||
}} | }} | ||
| Line 831: | Line 885: | ||
|active=1 | |active=1 | ||
|recovery=28 | |recovery=28 | ||
|guard=L | |||
|parry= | |||
|onBlock=-13 | |onBlock=-13 | ||
|damage=24 | |damage=24 | ||
| Line 838: | Line 894: | ||
* Self meter gain: Whiff: 2, Hit: 10, Block: 6. | * Self meter gain: Whiff: 2, Hit: 10, Block: 6. | ||
* Opponent meter gain: Whiff: 0, Hit: 2, Block: 0. | * Opponent meter gain: Whiff: 0, Hit: 2, Block: 0. | ||
Low hit-grab that cannot be parried. Best used to whiff punish at max range, and at the end of properly spaced strings to ensure its as safe as possible. It's also useful for grabbing opponents who like to red-parry your cancelable normals (usually back MP) into Tornado Hook. It also has terrifying corner carry. Slower versions are best avoided due to how incredibly minus they are on block. While it can be comboed out of, the throw often deals more damage than the actual combo, so avoid that unless aiming to optimize stun. Cannot be quick-recovered, granting additional time for oki setup. | |||
{{3S Button FAT|link=https://fullmeter.com/fatonline/#/framedata/movedetail/3S/Necro/normal/LK%20Snake%20Fang}} | {{3S Button FAT|link=https://fullmeter.com/fatonline/#/framedata/movedetail/3S/Necro/normal/LK%20Snake%20Fang}} | ||
}} | }} | ||
| Line 845: | Line 902: | ||
|active=1 | |active=1 | ||
|recovery=30 | |recovery=30 | ||
|guard=L | |||
|parry= | |||
|onBlock=-15 | |onBlock=-15 | ||
|damage=26 | |damage=26 | ||
| Line 859: | Line 918: | ||
|active=1 | |active=1 | ||
|recovery=32 | |recovery=32 | ||
|guard=L | |||
|parry= | |||
|onBlock=-17 | |onBlock=-17 | ||
|damage=28 | |damage=28 | ||
| Line 885: | Line 946: | ||
|recovery=13 | |recovery=13 | ||
|onBlock=1 | |onBlock=1 | ||
|guard=HL | |||
|parry=H | |parry=H | ||
|damage=19 | |damage=19 | ||
| Line 892: | Line 954: | ||
* Self meter gain: Whiff: 3, Hit: 14, Block: 6. | * Self meter gain: Whiff: 3, Hit: 14, Block: 6. | ||
* Opponent meter gain: Whiff: 0, Hit: 3, Block: 0. | * Opponent meter gain: Whiff: 0, Hit: 3, Block: 0. | ||
+1 on block. Nice combo option with good corner carry and fast enough to connect from light attacks, though it can be punished through a parry if overused. | |||
{{3S Button FAT|link=https://fullmeter.com/fatonline/#/framedata/movedetail/3S/Necro/normal/LP%20Tornado%20Hook}} | {{3S Button FAT|link=https://fullmeter.com/fatonline/#/framedata/movedetail/3S/Necro/normal/LP%20Tornado%20Hook}} | ||
}} | }} | ||
| Line 900: | Line 963: | ||
|recovery=18 | |recovery=18 | ||
|onBlock=-4 | |onBlock=-4 | ||
|guard=HL | |||
|parry=H | |parry=H | ||
|damage=21 | |damage=21 | ||
| Line 907: | Line 971: | ||
* Self meter gain: Whiff: 3, Hit: 14, Block: 6. | * Self meter gain: Whiff: 3, Hit: 14, Block: 6. | ||
* Opponent meter gain: Whiff: 0, Hit: 3, Block: 0. | * Opponent meter gain: Whiff: 0, Hit: 3, Block: 0. | ||
-4 on block. A BNB combo tool, and is easily red parried, so avoid it in strings. | |||
{{3S Button FAT|link=https://fullmeter.com/fatonline/#/framedata/movedetail/3S/Necro/normal/MP%20Tornado%20Hook}} | {{3S Button FAT|link=https://fullmeter.com/fatonline/#/framedata/movedetail/3S/Necro/normal/MP%20Tornado%20Hook}} | ||
}} | }} | ||
| Line 915: | Line 980: | ||
|recovery=19 | |recovery=19 | ||
|onBlock=-18 | |onBlock=-18 | ||
|guard=HL | |||
|parry=H | |parry=H | ||
|damage=24 | |damage=24 | ||
| Line 922: | Line 988: | ||
* Self meter gain: Whiff: 3, Hit: 15, Block: 7. | * Self meter gain: Whiff: 3, Hit: 15, Block: 7. | ||
* Opponent meter gain: Whiff: 0, Hit: 3, Block: 0. | * Opponent meter gain: Whiff: 0, Hit: 3, Block: 0. | ||
Best used only after stun. It inflicts backturn on the opponent, allowing for lengthy combos. -18 on block, so avoid it outside of this scenario. | |||
{{3S Button FAT|link=https://fullmeter.com/fatonline/#/framedata/movedetail/3S/Necro/normal/HP%20Tornado%20Hook}} | {{3S Button FAT|link=https://fullmeter.com/fatonline/#/framedata/movedetail/3S/Necro/normal/HP%20Tornado%20Hook}} | ||
}} | }} | ||
| Line 930: | Line 997: | ||
|recovery=23 | |recovery=23 | ||
|onBlock=-9 | |onBlock=-9 | ||
|guard=HL | |||
|parry=H | |parry=H | ||
|damage=39 | |damage=39 | ||
| Line 937: | Line 1,005: | ||
* Self meter gain: Whiff: -40, Hit: -40, Block: -40. | * Self meter gain: Whiff: -40, Hit: -40, Block: -40. | ||
* Opponent meter gain: Whiff: 0, Hit: 0, Block: 0. | * Opponent meter gain: Whiff: 0, Hit: 0, Block: 0. | ||
-9 on block. Best used in combos, and after HP Tornado Hook backturn. Insane corner carry otherwise. | |||
{{3S Button FAT|link=https://fullmeter.com/fatonline/#/framedata/movedetail/3S/Necro/normal/EX%20Tornado%20Hook}} | {{3S Button FAT|link=https://fullmeter.com/fatonline/#/framedata/movedetail/3S/Necro/normal/EX%20Tornado%20Hook}} | ||
}} | }} | ||
| Line 956: | Line 1,025: | ||
|recovery=17 | |recovery=17 | ||
|onBlock=-3 | |onBlock=-3 | ||
|guard=H | |||
|parry=H | |parry=H | ||
|damage=21 | |damage=21 | ||
| Line 962: | Line 1,032: | ||
* Self meter gain: Whiff: 3, Hit: 19, Block: 10. | * Self meter gain: Whiff: 3, Hit: 19, Block: 10. | ||
* Opponent meter gain: Whiff: 0, Hit: 4, Block: 0. | * Opponent meter gain: Whiff: 0, Hit: 4, Block: 0. | ||
A mediocre mix-up tool you're best off using as a string ender. Can fly past your opponent if done too close. | |||
{{3S Button FAT|link=https://fullmeter.com/fatonline/#/framedata/movedetail/3S/Necro/normal/LP%20Flying%20Viper}} | {{3S Button FAT|link=https://fullmeter.com/fatonline/#/framedata/movedetail/3S/Necro/normal/LP%20Flying%20Viper}} | ||
}} | }} | ||
| Line 970: | Line 1,041: | ||
|recovery=15 | |recovery=15 | ||
|onBlock=-2 | |onBlock=-2 | ||
|guard=H | |||
|parry=H | |parry=H | ||
|damage=24 | |damage=24 | ||
| Line 976: | Line 1,048: | ||
* Self meter gain: Whiff: 3, Hit: 19, Block: 10. | * Self meter gain: Whiff: 3, Hit: 19, Block: 10. | ||
* Opponent meter gain: Whiff: 0, Hit: 4, Block: 0. | * Opponent meter gain: Whiff: 0, Hit: 4, Block: 0. | ||
Travels slightly further than LP version but has identical startup. Still pretty slow. | |||
{{3S Button FAT|link=https://fullmeter.com/fatonline/#/framedata/movedetail/3S/Necro/normal/MP%20Flying%20Viper}} | {{3S Button FAT|link=https://fullmeter.com/fatonline/#/framedata/movedetail/3S/Necro/normal/MP%20Flying%20Viper}} | ||
}} | }} | ||
| Line 984: | Line 1,057: | ||
|recovery=14 | |recovery=14 | ||
|onBlock=-2 | |onBlock=-2 | ||
|guard=H | |||
|parry=H | |parry=H | ||
|damage=28 | |damage=28 | ||
| Line 990: | Line 1,064: | ||
* Self meter gain: Whiff: 3, Hit: 19, Block: 10. | * Self meter gain: Whiff: 3, Hit: 19, Block: 10. | ||
* Opponent meter gain: Whiff: 0, Hit: 4, Block: 0. | * Opponent meter gain: Whiff: 0, Hit: 4, Block: 0. | ||
Travels slightly further than MP version and is a little slower on startup. However, it has the best active and recovery speed so it may be useful in some oki setups, but you're usually better off using Drill Kick in most circumstances. | |||
{{3S Button FAT|link=https://fullmeter.com/fatonline/#/framedata/movedetail/3S/Necro/normal/HP%20Flying%20Viper}} | {{3S Button FAT|link=https://fullmeter.com/fatonline/#/framedata/movedetail/3S/Necro/normal/HP%20Flying%20Viper}} | ||
}} | }} | ||
| Line 998: | Line 1,073: | ||
|recovery=14 | |recovery=14 | ||
|onBlock=2 | |onBlock=2 | ||
|parry=H | |guard=H, H | ||
|parry=H, H | |||
|damage=34 | |damage=34 | ||
|stun=15 | |stun=15 | ||
| Line 1,004: | Line 1,080: | ||
* Self meter gain: Whiff: -40, Hit: -40, Block: -40. | * Self meter gain: Whiff: -40, Hit: -40, Block: -40. | ||
* Opponent meter gain: Whiff: 0, Hit: 0, Block: 0. | * Opponent meter gain: Whiff: 0, Hit: 0, Block: 0. | ||
An average mix-up tool, best ticked into after 2LK/LP. Doesn't knockdown on hit, so its best used to end rounds or catch the opponent unawares. Can be used as a meaty mixup to trick the opponent into trying to parry twice (by whiffing the first hit), leading to a throw opportunity. | |||
{{3S Button FAT|link=https://fullmeter.com/fatonline/#/framedata/movedetail/3S/Necro/normal/EX%20Flying%20Viper}} | {{3S Button FAT|link=https://fullmeter.com/fatonline/#/framedata/movedetail/3S/Necro/normal/EX%20Flying%20Viper}} | ||
}} | }} | ||
| Line 1,023: | Line 1,100: | ||
|recovery=17 | |recovery=17 | ||
|onBlock=-5 | |onBlock=-5 | ||
|guard=H | |||
|parry=H | |parry=H | ||
|damage=23 | |damage=23 | ||
| Line 1,029: | Line 1,107: | ||
* Self meter gain: Whiff: 3, Hit: 13, Block: 5. | * Self meter gain: Whiff: 3, Hit: 13, Block: 5. | ||
* Opponent meter gain: Whiff: 0, Hit: 3, Block: 0. | * Opponent meter gain: Whiff: 0, Hit: 3, Block: 0. | ||
Best left to blockstrings or after Drill Kick to catch crouchers. Also has a larger parry window than Flying Viper since it's a ground-based attack. Can briefly low-profile and reverse-dodge some attacks but it's not a significant change in his hitbox and position. | |||
{{3S Button FAT|link=https://fullmeter.com/fatonline/#/framedata/movedetail/3S/Necro/normal/LK%20Raging%20Cobra}} | {{3S Button FAT|link=https://fullmeter.com/fatonline/#/framedata/movedetail/3S/Necro/normal/LK%20Raging%20Cobra}} | ||
}} | }} | ||
| Line 1,037: | Line 1,116: | ||
|recovery=17 | |recovery=17 | ||
|onBlock=-5 | |onBlock=-5 | ||
|guard=H | |||
|parry=H | |parry=H | ||
|damage=26 | |damage=26 | ||
| Line 1,051: | Line 1,131: | ||
|recovery=17 | |recovery=17 | ||
|onBlock=-5 | |onBlock=-5 | ||
|guard=H | |||
|parry=H | |parry=H | ||
|damage=30 | |damage=30 | ||
| Line 1,065: | Line 1,146: | ||
|recovery=17 | |recovery=17 | ||
|onBlock=-3 | |onBlock=-3 | ||
|parry=H | |guard=H, H | ||
|parry=H, H | |||
|damage=35 | |damage=35 | ||
|stun=13 | |stun=13 | ||
| Line 1,071: | Line 1,153: | ||
* Self meter gain: Whiff: -40, Hit: -40, Block: -40. | * Self meter gain: Whiff: -40, Hit: -40, Block: -40. | ||
* Opponent meter gain: Whiff: 0, Hit: 0, Block: 0. | * Opponent meter gain: Whiff: 0, Hit: 0, Block: 0. | ||
Like EX Flying Viper, can be used to bait opponents into parrying twice but it has worse recovery time. | |||
{{3S Button FAT|link=https://fullmeter.com/fatonline/#/framedata/movedetail/3S/Necro/normal/EX%20Raging%20Cobra}} | {{3S Button FAT|link=https://fullmeter.com/fatonline/#/framedata/movedetail/3S/Necro/normal/EX%20Raging%20Cobra}} | ||
}} | }} | ||
| Line 1,077: | Line 1,160: | ||
<br> | <br> | ||
<br> | <br> | ||
==== | |||
==== Super Arts ==== | |||
=====<font style="visibility:hidden; float:right">236236P (mash P) (SA1)</font>===== | =====<font style="visibility:hidden; float:right">236236P (mash P) (SA1)</font>===== | ||
{{MoveData | {{MoveData | ||
| Line 1,086: | Line 1,170: | ||
{{AttackData-3S | {{AttackData-3S | ||
|startup=2 | |startup=2 | ||
|active=18 | |active=18 - 54 | ||
|recovery=22 | |recovery=22 | ||
|onHit=D | |||
|onHitCrouch=D | |||
|onBlock=-12 | |onBlock=-12 | ||
|attackLevel=H | |||
|parry=A | |parry=A | ||
|damage=40 | |damage=40 | ||
|stun=0 | |||
|description= | |description= | ||
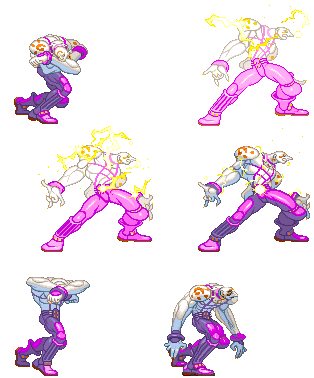
Necro turns his normal DP into a ball of electricity. Obnoxious defensive super that makes for a fantastic anti-air or wakeup tool, but it only stocks 1 bar, limiting EX usage. Best used in matchups where Necro plays defense (Twins, Dudley). Also really annoying to parry and/or punish, as it can be mashed to extend its duration, or can be left to rip and end early. When canceled out of Electric Blast as an anti-air, can cause very confusing mixup situations for parry-happy opponents due to its forward position-shift (on top of the already considerable forward position-shift from Electric Blast). | |||
Has 2f of startup invulnerability but can be grabbed by meaty throws and command throws. | |||
{{3S Button FAT|link=https://fullmeter.com/fatonline/#/framedata/movedetail/3S/Necro/normal/Magnetic%20Storm}} | {{3S Button FAT|link=https://fullmeter.com/fatonline/#/framedata/movedetail/3S/Necro/normal/Magnetic%20Storm}} | ||
}} | }} | ||
| Line 1,106: | Line 1,197: | ||
|active=6 | |active=6 | ||
|recovery=8 | |recovery=8 | ||
|onHit=D | |||
|onHitCrouch=D | |||
|onBlock=- | |||
|attackLevel=T | |||
|parry=N | |||
|damage=80 | |damage=80 | ||
|stun=18 | |stun=18 | ||
|description= | |description= | ||
* 61 throw range | * 61 throw range | ||
Necro grabs the opponent, and throws them behind him. Not recommended due to being jumpable after the flash, and the only option to combo into it spends more meter and deals less damage than combos that use 1 EX move. However, if used as an anti-air tool instead of a command grab, its 3f invulnerability and extended active frames can be surprisingly useful. It also recovers faster than any throw in the game, allowing you to bait opponents into jumping and getting hit by an anti-air to close out rounds. | |||
{{3S Button FAT|link=https://fullmeter.com/fatonline/#/framedata/movedetail/3S/Necro/normal/Slam%20Dance}} | {{3S Button FAT|link=https://fullmeter.com/fatonline/#/framedata/movedetail/3S/Necro/normal/Slam%20Dance}} | ||
}} | }} | ||
| Line 1,121: | Line 1,218: | ||
|data= | |data= | ||
{{AttackData-3S | {{AttackData-3S | ||
|startup=3 | |startup=3, 11, 21 | ||
|recovery=39 | |recovery=39 | ||
|onHit=D | |||
|onHitCrouch=D | |||
|onBlock=-11 | |onBlock=-11 | ||
|attackLevel=L | |||
|parry=L | |parry=L | ||
|damage=47 | |damage=47 | ||
|stun=24 | |stun=24 | ||
|description= | |description= | ||
Necro crouches and shocks the entire stage with lightning. His best super due to its comical stun output, giving a solid threat to his offense. As a super, it also benefits from an extended knockdown period that cannot be quick-recovered, allowing for an additional mixup setup on okizeme in conjunction with his Drill Kick. In the corner, you can follow this up with additional hits to accumulate a ridiculous amount of total stun (from his standard 4MK to MP Tornado Hook in the corner, Necro can inflict around 50 points of stun on many characters, or 54 points of stun on Remy.) | |||
It also low profiles many things, namely fireballs. Keep in mind that Necro is considered crouching for its entire duration, however. | |||
Has 3f of startup invulnerability and will not perform its full number of hits if it trades on startup (unlike most projectile supers, this is three separate projectiles coming out on separate startup frames). Can also be thrown out of startup. | |||
{{3S Button FAT|link=https://fullmeter.com/fatonline/#/framedata/movedetail/3S/Necro/normal/Electric%20Snake}} | {{3S Button FAT|link=https://fullmeter.com/fatonline/#/framedata/movedetail/3S/Necro/normal/Electric%20Snake}} | ||
}} | }} | ||
| Line 1,135: | Line 1,238: | ||
{{Navbox-3S}} | {{Navbox-3S}} | ||
[[Category:Street Fighter | [[Category:Street Fighter 3: 3rd Strike]] | ||
Latest revision as of 20:34, 17 March 2025
Introduction
Necro, real name Illia, is a Russian who was genetically experimented on by the Secret Society, leaving him with the ability to stretch his limbs like rubber and create electrical currents throughout his body. He first appears in Street Fighter III: New Generation.
He's equipped some incredibly long normals, high damage combos, good high/low game, and the ability to build stun at startling rates (with the use of Electric Snake especially). He also has divekicks to allow his offense to start when spaced well. His jump is very floaty which can be strange to adjust to, and give your opponent more time to react. With his long range buttons, also comes the downside of very extended hurtboxes so he takes smart decisions to avoid being easily counterpoked. A lot of his moves are unsafe as well, so picking your options wisely is important especially given his lower Health. His unorthodox playstyle is a double edged sword, requiring players to utilize a unique set of tools to succeed. Making the right decision can be immensely rewarding though, with his damage, corner pressure, and stun output (along with great stun juggles in the corner) allowing him to win a round off a single situation.
Super Arts
SA1: Magnetic Storm
An annoying anti-air/wake-up reversal super. Its lack of stock cripples Necro across the board somewhat, as it forces a decision between EX moves or a defensive option. Obnoxious to punish otherwise, even if baited, due to its variable length and subtle recovery animation. Best used in matchups where Necro plays a lot of defense or against highly agile opponents who don't stay on the ground for long.
SA2: Slam Dance
Generally considered his weakest super. Having a command grab for mixups sounds appealing, but it can be jumped on reaction after the super freeze. You can combo into it after Heavy Spin Hook, but HP Spin Hook, b.MK, EX Spin Hook does almost as much damage for less meter. It is, however, effective as an anti-air due to its extended invulnerability and active frames, as well as its almost instant recovery time allowing you to catch jump-outs with one of Necro's HPs.
SA3: Electric Snake
Best super by far, due to its high stun output, lending a substantial threat to Necro's offense. The 2 short-medium stocks also allow for EX move usage, greatly improving Necro's gameplan as a whole. Its relative speed renders it the best combo ender as well, and it can low-profile fireballs and standing pokes, allowing for whiff punish opportunities. Used in most every matchup.
| Strengths | Weaknesses |
|---|---|
|
|
| Necro #3S_NE | |
|---|---|
| Vitals | |
| Life Points | 1120 |
| Stun Points | 64 |
| Super Art Stock/Size | |
| SA1 | 1/88 |
| SA2 | 1/104 |
| SA3 | 2/72 |
| Ground Movement | |
| Forward Dash duration/distance | 22 (132px) |
| Back Dash duration/distance | 20 (123px) |
| Jumping | |
| Back Jump duration | 48(5+42+1) |
| Neutral Jump duration | 48(5+42+1) |
| Forward Jump duration | 49(5+43+1) |
| Back Super Jump duration | 60(6+53+1) |
| Neutral Super Jump duration | 60(6+53+1) |
| Forward Super Jump duration | 60(6+53+1) |
| Wake up | |
| Wake up duration | 59 |
| Quick rise duration | 53 |
| 3S Frame Data Glossary | |
|---|---|
| Active |
How many frames a move remains active (can hurt opponents) for. Consecutive sets of active frames on a multi-hit move are separated by an asterisk (ex: 3*5). If there is a gap between sets of active frames, the gap is denoted by a number in parentheses (ex: 2(4)2) |
| Attack |
Attack level is L for low attacks (must be blocked crouching), H is for High attacks (which can be blocked high or low) and M for overhead (must be blocked standing). T is for throw attacks (which cannot be blocked). |
| Cancel options |
Available cancel options.
|
| Damage |
Attack damage on hit in life points. Notation may denote multi-hit or "sweet spot" damage values on certain frames. |
| Hit/Block |
These are frame advantage values when the attack hits or is blocked. If the number is positive, then the move will end before the defender can act again. If the number is negative, the defender will be able to act before the attacker and maybe even punish. D refers to knockdown on hit. "Cr. Hit" is an additional frame advantage value denoting if the advantage on hit changes when the defender is being hit while crouching. |
| Kara Range |
Almost all normal attacks can be canceled into a special or a multi-button command within three frames of startup. During that time, some attacks will shift position forward or backward and affect the reach of the special or command accordingly. This is denoted in pixels of range. There are a handful of moves in the game that can be kara-canceled after this initial window and will be denoted as a late kara-cancel. |
| Link |
A combo that is performed by inputting the second move after the first move has completely recovered (as opposed to cancelling the first move's animation). In 3S, the final frame of a move's hitstun allows a character to block a normal or special move, as well as some projectile supers. Therefore, an attack's frame advantage must be 2 frames greater than the followup move's startup in order to link. Ex: a +6 normal can link into a 4f normal/special, or a 5f super. |
| Parry |
This field will show a value of A if the attack can be parried standing or crouching, H if it must be parried standing or L if it must be parried crouching. |
| Recovery |
How many frames it takes for a move to finish after it's been active. |
| Startup |
How many frames it takes before the move becomes 'active' or has a hitbox. 3S uses classic startup notation, which does not include the first active frame. A move with 3 startup becomes active on frame 4. |
| Stun |
Amount of stun added to the opponent's stun bar on hit. |
| Throw range |
Range in pixels from the center of the character to the center of the opponent which allows a grab to connect. |
Frame Data
Standing Normals
5LP
5MP
5HP
5LK
5MK
5HK
Command Normals
4LP
4MP
4HP
4LK
4MK
4HK
1HP
Crouching Normals
2LP
2MP
2HP
2LK
2MK
2HK
Jumping Normals
8LP
j.LP
8MP
j.MP
j.HP
j.LK
j.MK
j.HK
2K (air)
Target Combos
Throws
LPLK
4LPLK
LPLK (opp turn)
Universal Overhead
MPMK
Taunt
HPHK
Special Moves
623P
41236K
41236P
214P
214K
