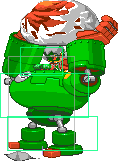
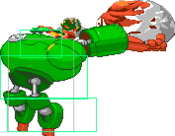
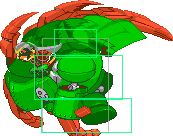
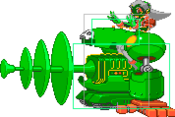
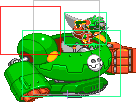
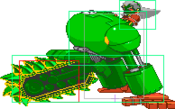
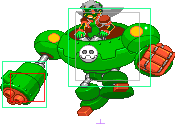
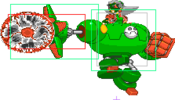
m (fix motion tags) |
No edit summary |
||
| (9 intermediate revisions by 6 users not shown) | |||
| Line 1: | Line 1: | ||
{{MVC2 Character Intro|char= tron bonne|full=Tron Bonne|short=TRN|content= | |||
== Introduction == | |||
{{ | |||
= Introduction = | |||
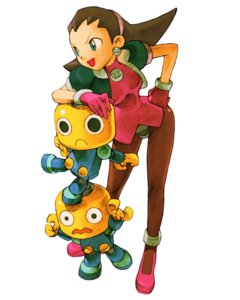
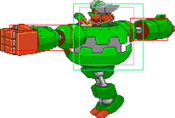
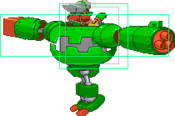
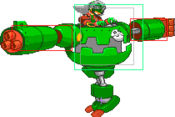
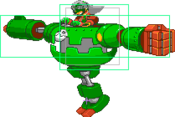
Tron Bonne was first seen in the [[Mega Man (MvC2)|Megaman]] game "Megaman Legends". She later appeared in her own game, "The Misadventures of Tron Bonne." She is a member of the Bonne pirate clan. Her older brother is Teisel, and her younger brother is Bon (aka Baby Bonne). She is 15 years old, and has a crush on Megaman. She is a mechanical genius (which explains her Gustaff) and is assisted by her [[Servbot (MvC2)|Kobuns]] (known as Servbots outside of Japan). | Tron Bonne was first seen in the [[Mega Man (MvC2)|Megaman]] game "Megaman Legends". She later appeared in her own game, "The Misadventures of Tron Bonne." She is a member of the Bonne pirate clan. Her older brother is Teisel, and her younger brother is Bon (aka Baby Bonne). She is 15 years old, and has a crush on Megaman. She is a mechanical genius (which explains her Gustaff) and is assisted by her [[Servbot (MvC2)|Kobuns]] (known as Servbots outside of Japan). | ||
Tron Bonne is most notable for her projectile assist, which does more damage then it should, and resets combo damage as well. | |||
'''TO-DO''': Add frame data, as well as missing sprites | |||
== Gameplay == | |||
{{2 Column Flex|flex1=6|flex2=4 | |||
|content1= | |||
{{Content Box|content='''Tron''' is a zoner/brawler with that has many different projectiles. Her main strengths lies in her damage and assist, her main weakness is mobility. | |||
{{ProConTable | |||
|pros= | |||
* '''Assist Damage:''' Her projectile assist has 3 hits, each one dealing 15, allowing for huge meterless damage off an assist. | |||
* '''Healthy:''' With a 93% damage modifier, Tron can take a lot of damage. | |||
|cons= | |||
* '''Larger body:''' The mech suit that Tron is in makes her more vulnerable to combos and zoning. | |||
}} | |||
}} | |||
|content2= | |||
{{Content Box|content= | |||
<center><youtube>https://youtu.be/Ebjdj0sUOyk?si=77N9jD8uHjxf4m9H</youtube></center> | |||
| | |||
| | |||
| | |||
| | |||
| | |||
| | |||
| | |||
}} | }} | ||
}} | }} | ||
}} | }} | ||
{| | == Character Summary == | ||
{{3 Column Flex | |||
|content1= | |||
{{Content Box|header=Special Moves |content= | |||
| | ;Beacon Bomb | ||
| | *{{qcf}}+{{p}} | ||
| | ;Kobun Launch | ||
*{{dp}}+{{p}} | |||
;Bonne Strike {{airok}} | |||
*{{qcf}}+{{k}} | |||
;Air Dash | |||
| | *While airborne {{f}}{{f}} or {{lp}}{{hp}} Unlimited amount | ||
| | }} | ||
|content2= | |||
{{Content Box|header=Hyper Combos |content= | |||
;Lunch Rush | |||
{{ | *{{qcf}}+{{lp}}{{hp}} | ||
{{ | ;King Kobun | ||
*{{qcb}}+{{lp}}{{hp}} | |||
;Hyper Lunch Rush | |||
*{{a1}}+{{a2}} Tron A only; Rush always happens. | |||
}} | |||
|content3= | |||
{{Content Box|header=Assist Types |content= | |||
;Type α - Throw Type | |||
*Assist: {{hp}} Throw | |||
*Counter: {{hk}} Bonne Strike | |||
*Combination: Hyper Lunch Rush | |||
;Type β - Anti Air Type | |||
*Assist: {{mk}} | |||
*Counter: {{mk}} | |||
*Combination: King Kobun | |||
;Type γ - Balance Type | |||
*Assist: {{d}}{{mp}} | |||
*Counter: {{d}}{{mp}} | |||
*Combination: King Kobun | |||
}} | }} | ||
}} | }} | ||
== Moves List == | |||
=== Assists === | |||
{{MoveData | |||
|image= | |||
|caption={{hp}} Throw | |||
|name=Throw | |||
|subtitle=[[File:Alpha.png]] | |||
|input={{a1}} // {{a2}} | |||
|data= | |||
{{AssistData-MVSC2 | |||
|Damage= | |||
|Startup= | |||
|Active= | |||
|Recovery= | |||
|AlphaCounter={{hk}} Bonne Strike | |||
|TeamHyperCombo=Hyper Lunch Rush | |||
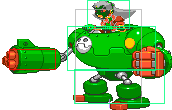
|description= Unblockable, but very short range. Note that her Lunch Rush THC comes out even if the gun doesn't hit. | |||
}} | |||
}}<br> | |||
{{MoveData | |||
|image= | |||
|caption={{mk}} Gustaff Fire | |||
|name=Anti-air | |||
|subtitle=[[File:Beta.png]] | |||
|input={{a1}} // {{a2}} | |||
|data= | |||
{{AssistData-MVSC2 | |||
|Damage= | |||
|Startup= | |||
|Active= | |||
|Recovery= | |||
|AlphaCounter={{mk}} | |||
|TeamHyperCombo=King Kobun | |||
|description= Tron does her standing MK fire attack. | |||
}} | |||
}}<br> | |||
== | {{MoveData | ||
|image= | |||
|caption={{d}}{{mp}} Rings | |||
|name=Projectile | |||
|subtitle=[[File:Gamma.png]] | |||
|input={{a1}} // {{a2}} | |||
|data= | |||
{{AssistData-MVSC2 | |||
|Damage= | |||
|Startup= | |||
|Active= | |||
|Recovery= | |||
|AlphaCounter={{d}}{{mp}} | |||
|TeamHyperCombo=King Kobun | |||
|description= One of the best assists in the game. This is a glitched version of her MP that hits three times (as normal) but does 15 pts of damage per hit (not normal). The third ring hits at a slight delay, allowing for some mind games. Note that the Tron-Y alpha counter is surprisingly safe. | |||
}} | |||
}}<br> | |||
=== Normal Moves === | |||
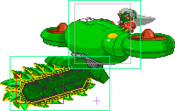
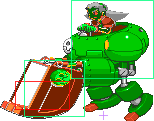
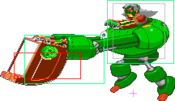
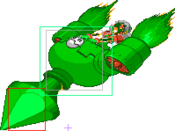
-When grounded, Tron has the 2-Hit type [[Marvel_vs_Capcom_2/System#The_Magic_Series|Magic Series]], meaning they can follow the {{lp}}/{{lk}} > {{mp}}/{{mk}}/{{hp}}/{{hk}} cancel tree. | |||
==== Ground Normals ==== | |||
= | {{MoveData | ||
|image= MVC2_Tron_5LP_02.png | |||
== | |caption= | ||
|name= Light Punch | |||
|linkname= 5LP | |||
|input= 5{{lp}} | |||
|data= | |||
{{AttackData-MVSC2 | |||
|Damage= | |||
|Startup= | |||
|Active= | |||
|Recovery= | |||
|Guard= | |||
|Special Property= | |||
|Cancel= | |||
|Adv. Hit= | |||
|Adv. Guard= | |||
|Adv. Pushblock= | |||
|description= | |||
}} | |||
}}<br> | |||
- | {{MoveData | ||
|image= MVC2_Tron_5MP_01.png | |||
|image=MVC2_Tron_5MP_02.png | |||
|caption= Drill baby, drill! | |||
|name= Medium Punch | |||
|linkname= 5MP | |||
|input= 5{{lp}} after a {{lp}} or {{lk}} connects | |||
|data= | |||
{{AttackData-MVSC2 | |||
|Damage= | |||
|Startup= | |||
|Active= | |||
|Recovery= | |||
|Guard= | |||
|Special Property= | |||
|Cancel= | |||
|Adv. Hit= | |||
|Adv. Guard= | |||
|Adv. Pushblock= | |||
|description= | |||
}} | |||
}}<br> | |||
- | {{MoveData | ||
|image= MVC2_Tron_5HP_01.png | |||
|image2=MVC2_Tron_5HP_02.png | |||
|image3=MVC2_Tron_5HP_03.png | |||
|image4=MVC2_Tron_5HP_04.png | |||
|image5=MVC2_Tron_5HP_05.png | |||
|caption= | |||
|name= Heavy Punch | |||
|linkname= 5HP | |||
|input= 5{{hp}} | |||
|data= | |||
{{AttackData-MVSC2 | |||
|Damage= | |||
|Startup= | |||
|Active= | |||
|Recovery= | |||
|Guard= | |||
|Special Property= | |||
|Cancel= | |||
|Adv. Hit= | |||
|Adv. Guard= | |||
|Adv. Pushblock= | |||
|description= | |||
}} | |||
}}<br> | |||
{{MoveData | |||
|image= MVC2_Tron_5LK_01.png | |||
|image2= MVC2_Tron_5LK_02.png | |||
|caption= | |||
|name= Light Kick | |||
|linkname= 5LK | |||
|input= 5{{lk}} | |||
|data= | |||
{{AttackData-MVSC2 | |||
|Damage= | |||
|Startup= | |||
|Active= | |||
|Recovery= | |||
|Guard= | |||
|Special Property= | |||
|Cancel= | |||
|Adv. Hit= | |||
|Adv. Guard= | |||
|Adv. Pushblock= | |||
|description= | |||
}} | |||
}}<br> | |||
- | {{MoveData | ||
|image= MVC2_Tron_5MK_01.png | |||
|caption= | |||
|name= Medium Kick | |||
|linkname= 5MK | |||
|input= 5{{lk}} after a {{lp}}, {{lk}}, or {{mp}} connects | |||
|data= | |||
{{AttackData-MVSC2 | |||
|Damage= | |||
|Startup= | |||
|Active= | |||
|Recovery= | |||
|Guard= | |||
|Special Property= | |||
|Cancel= | |||
|Adv. Hit= | |||
|Adv. Guard= | |||
|Adv. Pushblock= | |||
|description= | |||
}} | |||
}}<br> | |||
{{MoveData | |||
|image= MVC2_Tron_5HK_01.png | |||
|image2= MVC2_Tron_5HK_02.png | |||
|image3= MVC2_Tron_5HK_03.png | |||
|image4= MVC2_Tron_5HK_04.png | |||
|image5= MVC2_Tron_5HK_05.png | |||
|caption= | |||
|name= Heavy Kick | |||
|linkname= 5HK | |||
|input= 5{{hk}} | |||
|data= | |||
{{AttackData-MVSC2 | |||
|Damage= | |||
|Startup= | |||
|Active= | |||
|Recovery= | |||
|Guard= | |||
|Special Property= {{projectile}} | |||
|Cancel= | |||
|Adv. Hit= | |||
|Adv. Guard= | |||
|Adv. Pushblock= | |||
|description= | |||
}} | |||
}}<br> | |||
- | {{MoveData | ||
|image= Tron_c.lp.png | |||
|caption= | |||
|name= Crouching Light Punch | |||
|linkname= 2LP | |||
|input= 2{{lp}} | |||
|data= | |||
{{AttackData-MVSC2 | |||
|Damage= | |||
|Startup= | |||
|Active= | |||
|Recovery= | |||
|Guard= | |||
|Special Property= | |||
|Cancel= | |||
|Adv. Hit= | |||
|Adv. Guard= | |||
|Adv. Pushblock= | |||
|description= | |||
}} | |||
}}<br> | |||
- | {{MoveData | ||
|image= MVC2_Tron_2MP_01.png | |||
|caption= | |||
|name= Crouching Medium Punch | |||
|linkname= 2MP | |||
|input= 2{{lp}} after a {{lp}} or {{lk}} connects | |||
|data= | |||
{{AttackData-MVSC2 | |||
|Damage= | |||
|Startup= | |||
|Active= | |||
|Recovery= | |||
|Guard= | |||
|Special Property= {{projectile}} | |||
|Cancel= | |||
|Adv. Hit= | |||
|Adv. Guard= | |||
|Adv. Pushblock= | |||
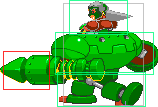
|description= Note that her crouching MP (rings) hits three times - the third ring can often come out after you cancel into Lunch Rush, which will knock your opponent out of it. As such, it is not recommended to combo from the rings into the Lunch Rush. | |||
}} | |||
}}<br> | |||
- | {{MoveData | ||
|image= MVC2_Tron_2HP_01.png | |||
|image2= MVC2_Tron_2HP_02.png | |||
|caption= | |||
|name= Crouching Heavy Punch | |||
|linkname= 2HP | |||
|input= 2{{hp}} | |||
|data= | |||
{{AttackData-MVSC2 | |||
|Damage= | |||
|Startup= | |||
|Active= | |||
|Recovery= | |||
|Guard= | |||
|Special Property= {{launch}} | |||
|Cancel= | |||
|Adv. Hit= | |||
|Adv. Guard= | |||
|Adv. Pushblock= | |||
|description= | |||
}} | |||
}}<br> | |||
{{MoveData | |||
|image= MVC2_Tron_2LK_01.png | |||
|caption= | |||
|name= Crouching Light Kick | |||
|linkname= 2LK | |||
|input= 2{{lk}} | |||
|data= | |||
{{AttackData-MVSC2 | |||
|Damage= | |||
|Startup= | |||
|Active= | |||
|Recovery= | |||
|Guard= | |||
|Special Property= {{otg}} | |||
|Cancel= | |||
|Adv. Hit= | |||
|Adv. Guard= | |||
|Adv. Pushblock= | |||
|description= | |||
}} | |||
}}<br> | |||
- | {{MoveData | ||
|image= MVC2_Tron_2MK_01.png | |||
|image2=MVC2_Tron_2MK_02.png | |||
|caption= | |||
|name= Crouching Medium Kick | |||
|linkname= 2MK | |||
|input= 2{{lk}} after a {{lp}}, {{lk}}, or {{mp}} connects | |||
|data= | |||
{{AttackData-MVSC2 | |||
|Damage= | |||
|Startup= | |||
|Active= | |||
|Recovery= | |||
|Guard= | |||
|Special Property= {{otg}} | |||
|Cancel= | |||
|Adv. Hit= | |||
|Adv. Guard= | |||
|Adv. Pushblock= | |||
|description= | |||
}} | |||
}}<br> | |||
== | {{MoveData | ||
|image= MVC2_Tron_2HK_01.png | |||
|caption= | |||
|name= Crouching Heavy Kick | |||
|linkname= 2HK | |||
|input= 2{{hk}} | |||
|data= | |||
{{AttackData-MVSC2 | |||
|Damage= | |||
|Startup= | |||
|Active= | |||
|Recovery= | |||
|Guard= | |||
|Special Property= {{otg}} | |||
|Cancel= | |||
|Adv. Hit= | |||
|Adv. Guard= | |||
|Adv. Pushblock= | |||
|description= | |||
}} | |||
}}<br> | |||
==== Air Normals ==== | |||
-When in the Normal Jump state, Tron has the 2-Hit type [[Marvel_vs_Capcom_2/System#The_Magic_Series|Magic Series]], meaning they can follow the {{lp}}/{{lk}} > {{mp}}/{{mk}}/{{hp}}/{{hk}} cancel tree. | |||
{{MoveData | |||
|image= MVC2_Tron_j.LP_01.png | |||
|caption= | |||
|name= Air Light Punch | |||
|linkname= j.LP | |||
|input= j.{{lp}} | |||
|data= | |||
{{AttackData-MVSC2 | |||
|Damage= | |||
|Startup= | |||
|Active= | |||
|Recovery= | |||
|Guard= | |||
|Special Property= | |||
|Cancel= | |||
|Adv. Hit= | |||
|Adv. Guard= | |||
|Adv. Pushblock= | |||
|description= | |||
}} | |||
}}<br> | |||
{{MoveData | |||
|image= MVC2_Tron_j.MP_01.png | |||
|caption= | |||
|name= Air Medium Punch | |||
|linkname= j.MP | |||
|input= {{lp}} after a {{lp}} or {{lk}} connects | |||
|data= | |||
{{AttackData-MVSC2 | |||
|Damage= | |||
|Startup= | |||
|Active= | |||
|Recovery= | |||
|Guard= | |||
|Special Property= | |||
|Cancel= | |||
|Adv. Hit= | |||
|Adv. Guard= | |||
|Adv. Pushblock= | |||
|description= | |||
}} | |||
}}<br> | |||
{{MoveData | |||
|image= MVC2_Tron_j.HP_01.png | |||
|image2=MVC2_Tron_j.HP_02.png | |||
|image3=MVC2_Tron_j.HP_03.png | |||
|image4=MVC2_Tron_j.HP_04.png | |||
|image5=MVC2_Tron_j.HP_05.png | |||
|caption= | |||
|name= Air Heavy Punch | |||
|linkname= j.HP | |||
|input= j.{{hp}} | |||
|data= | |||
{{AttackData-MVSC2 | |||
|Damage= | |||
|Startup= | |||
|Active= | |||
|Recovery= | |||
|Guard= | |||
|Special Property= {{aircombofinisher}} | |||
|Cancel= | |||
|Adv. Hit= | |||
|Adv. Guard= | |||
|Adv. Pushblock= | |||
|description= | |||
}} | |||
}}<br> | |||
{{MoveData | |||
|image= MVC2_Tron_j.LK_01.png | |||
|caption= | |||
|name= Air Light Kick | |||
|linkname= j.LK | |||
|input= j.{{lk}} | |||
|data= | |||
{{AttackData-MVSC2 | |||
|Damage= | |||
|Startup= | |||
|Active= | |||
|Recovery= | |||
|Guard= | |||
|Special Property= | |||
|Cancel= | |||
|Adv. Hit= | |||
|Adv. Guard= | |||
|Adv. Pushblock= | |||
|description= Her jumping Short has a stunningly good hit box and beats all sorts of things you wouldn't expect it to. | |||
}} | |||
}}<br> | |||
{{MoveData | |||
|image= MVC2_Tron_j.MK_01.png | |||
|image2=MVC2_Tron_j.MK_02.png | |||
|caption= | |||
|name= Air Medium Kick | |||
|linkname= j.MK | |||
|input= {{lk}} after a j.{{lp}}, j.{{lk}}, or j.{{mp}} connects | |||
|data= | |||
{{AttackData-MVSC2 | |||
|Damage= | |||
|Startup= | |||
|Active= | |||
|Recovery= | |||
|Guard= | |||
|Special Property= | |||
|Cancel= | |||
|Adv. Hit= | |||
|Adv. Guard= | |||
|Adv. Pushblock= | |||
|description= | |||
}} | |||
}}<br> | |||
{{MoveData | |||
|image= MVC2_Tron_j.HK_01.png | |||
|caption= | |||
|name= Air Heavy Kick | |||
|linkname= j.HK | |||
|input= j.{{hk}} | |||
|data= | |||
{{AttackData-MVSC2 | |||
|Damage= | |||
|Startup= | |||
|Active= | |||
|Recovery= | |||
|Guard= | |||
|Special Property= {{aircombofinisher}} | |||
|Cancel= | |||
|Adv. Hit= | |||
|Adv. Guard= | |||
|Adv. Pushblock= | |||
|description= | |||
}} | |||
}}<br> | |||
==== Command Normals ==== | |||
{{MoveData | |||
|image= | |||
|caption= | |||
|name=Air dash | |||
|linkname=Air dash | |||
|input=While airborne: {{f}},{{f}}, or {{lp}}{{hp}} | |||
|data= | |||
{{AttackData-MVSC2 | |||
|Damage= | |||
|Startup= | |||
|Active= | |||
|Recovery= | |||
|Guard= | |||
|Special Property= | |||
|Cancel= | |||
|Adv. Hit= | |||
|Adv. Guard= | |||
|Adv. Pushblock= | |||
|description= Unlimited uses, only goes forward. | |||
}} | |||
}}<br> | |||
=== Universal Mechanics === | |||
{{MoveData | |||
|image= | |||
|caption= | |||
|name= Universal Launcher (Punch) | |||
|linkname= Universal Launcher (Punch) | |||
|input= 3{{hp}} | |||
|data= | |||
{{AttackData-MVSC2 | |||
|Damage= | |||
|Startup= | |||
|Active= | |||
|Recovery= | |||
|Guard= | |||
|Special Property= Launcher (away) | |||
|Cancel= | |||
|Adv. Hit= | |||
|Adv. Guard= | |||
|Adv. Pushblock= | |||
|description= | |||
}} | |||
}}<br> | |||
=== | {{MoveData | ||
|image= | |||
|caption= | |||
|name= Throw (Punch) | |||
|linkname= Throw (Punch) | |||
|input= 6{{hp}} // 4{{hp}} near opponent | |||
|data= | |||
{{AttackData-MVSC2 | |||
|Damage= | |||
|Startup= | |||
|Active= | |||
|Recovery= | |||
|Guard= | |||
|Special Property= | |||
|Cancel= | |||
|Adv. Hit= | |||
|Adv. Guard= | |||
|Adv. Pushblock= | |||
|description= | |||
}} | |||
}}<br> | |||
=== | {{MoveData | ||
|image= | |||
|caption= | |||
|name= Air Throw (Punch) | |||
|linkname= Air Throw (Punch) | |||
|input= j.6{{hp}} // j.4{{hp}} near airborne opponent | |||
|data= | |||
{{AttackData-MVSC2 | |||
|Damage= | |||
|Startup= | |||
|Active= | |||
|Recovery= | |||
|Guard= | |||
|Special Property= | |||
|Cancel= | |||
|Adv. Hit= | |||
|Adv. Guard= | |||
|Adv. Pushblock= | |||
|description= | |||
}} | |||
}}<br> | |||
=== | {{MoveData | ||
|image= | |||
|caption= | |||
|name= Raw Tag | |||
|linkname= Raw Tag | |||
|input= {{lp}}+{{lk}} // {{hp}}+{{hk}} | |||
|data= | |||
{{AttackData-MVSC2 | |||
|Damage= | |||
|Startup= | |||
|Active= | |||
|Recovery= | |||
|Guard= | |||
|Special Property= | |||
|Cancel= | |||
|Adv. Hit= | |||
|Adv. Guard= | |||
|Adv. Pushblock= | |||
|description= | |||
}} | |||
}}<br> | |||
=== | {{MoveData | ||
|image= | |||
|caption= | |||
|name= Snap Back | |||
|linkname= Snap Back | |||
|input= {{qcf}} + A1 / A2 | |||
|data= | |||
{{AttackData-MVSC2 | |||
|Damage= | |||
|Startup= | |||
|Active= | |||
|Recovery= | |||
|Guard= | |||
|Special Property= | |||
|Cancel= | |||
|Adv. Hit= | |||
|Adv. Guard= | |||
|Adv. Pushblock= | |||
|description= {{hp}} This is a nerfed version of her Fierce. | |||
}} | |||
}} | |||
== | === Special Moves === | ||
=== | ====Specials==== | ||
{{MoveData | |||
|image= | |||
|caption= | |||
|name= Beacon Bomb | |||
|linkname= Beacon Bomb | |||
|input= {{qcf}}+{{p}} | |||
|data= | |||
{{AttackData-MVSC2 | |||
|Damage= | |||
|Startup= | |||
|Active= | |||
|Recovery= | |||
|Guard= | |||
|Special Property= | |||
|Cancel= | |||
|Adv. Hit= - | |||
|Adv. Guard= - | |||
|Adv. Pushblock= - | |||
|description=Capture state is counter mashable. | |||
}} | |||
}}<br> | |||
{{MoveData | |||
|image= | |||
|caption= Shikidan | |||
|name= Kobun Launch | |||
|linkname= Kobun Launch | |||
|input= {{dp}}+{{p}} | |||
|input2= | |||
|data= | |||
{{AttackData-MVSC2 | |||
|Damage= | |||
|Startup= | |||
|Active= | |||
|Recovery= | |||
|Guard= | |||
|Special Property= | |||
|Cancel= | |||
|Adv. Hit= - | |||
|Adv. Guard= - | |||
|Adv. Pushblock= - | |||
|description= | |||
}} | |||
}}<br> | |||
{{MoveData | |||
|image= | |||
|caption= | |||
|name= Bonne Strike | |||
|linkname= Bonne Strike | |||
|input= {{qcf}}+{{k}} {{airok}} | |||
|data= | |||
{{AttackData-MVSC2 | |||
|Damage= | |||
|Startup= | |||
|Active= | |||
|Recovery= | |||
|Guard= | |||
|Special Property= | |||
|Cancel= | |||
|Adv. Hit= - | |||
|Adv. Guard= - | |||
|Adv. Pushblock= - | |||
|description= Mash attack buttons for more hits. | |||
}} | |||
}}<br> | |||
=== Hyper Combos === | |||
{{MoveData | |||
|image= | |||
|caption= Chuushoku Rush | |||
|name= Lunch Rush | |||
|linkname= Lunch Rush | |||
|input= {{qcf}}+{{lp}}{{hp}} | |||
|data= | |||
{{AttackData-MVSC2 | |||
|Damage= | |||
|Startup= | |||
|Active= | |||
|Recovery= | |||
|Guard= | |||
|Special Property= | |||
|Cancel= | |||
|Adv. Hit= | |||
|Adv. Guard= | |||
|Adv. Pushblock= | |||
|description= Tron shoots a short-range beam that hits up to about the top of normal screen height, down to her waist, about half a character length in front of her, and very slightly behind her. If it hits, a Kobun yells "Gohan desu yo!" (Meal is ready!), and the 39 others Kobuns (plus Data the monkey) charge through to eat, hitting the opponent. It does very good damage. If the gun misses, the Kobuns do not come out and the recovery is horrible. It can only be DHCd within a very small window - King Kobun is the better super to DHC out of. The first Kobun OTGs the opponent, so if you have already used your OTG (for example, on a switch-in that hits, cLK (OTG), Lunch Rush), the Lunch Rush Kobuns will be blockable. It generally will not work on Captain Commando in the corner due to his tall/thin body. A Lunch Rush against two opponents will *hit* with the gun and send them flying, but the Lunch Rush itself will only damage the first character hit by the Kobuns. | |||
}} | |||
}}<br> | |||
=== | {{MoveData | ||
|image= | |||
|caption= | |||
|name= King Kobun | |||
|linkname= King Kobun | |||
|input= {{qcb}}+{{lp}}{{hp}} | |||
|data= | |||
{{AttackData-MVSC2 | |||
|Damage= | |||
|Startup= | |||
|Active= | |||
|Recovery= | |||
|Guard= | |||
|Special Property= | |||
|Cancel= | |||
|Adv. Hit= | |||
|Adv. Guard= | |||
|Adv. Pushblock= | |||
|description= The Kobun grows to giant size and smashes the opponent with his squeaky hammer. You are pretty much guaranteed that the hammer will swing/hit once, which means it can be used to trade in some situations. If it is not combo'd into, the opponent can jump or superjump (required for large characters) out of it. It can not be cancelled to into cleanly - any cancel will allow your opponent to jump or superjump out of it at the least, or even walk forward or throw you before King Kobun can swing the hammer. Once started, the hammer will cancel nearly all off-screen projectiles (such as Doom's air super), even though the projectiles look as if they will go over the hammer. | |||
}} | |||
}}<br> | |||
{{MoveData | |||
|image= | |||
|caption= | |||
|name= Hyper Lunch Rush | |||
|linkname= Hyper Lunch Rush | |||
|input= {{a1}}{{a2}} | |||
|data= | |||
{{AttackData-MVSC2 | |||
|Damage= | |||
|Startup= | |||
|Active= | |||
|Recovery= | |||
|Guard= | |||
|Special Property= | |||
|Cancel= | |||
|Adv. Hit= | |||
|Adv. Guard= | |||
|Adv. Pushblock= | |||
|description= Only available with the A Throw assist. The rush always happens regardless of if the gun hits. | |||
}} | |||
}}<br> | |||
== Other == | |||
= | === Colors === | ||
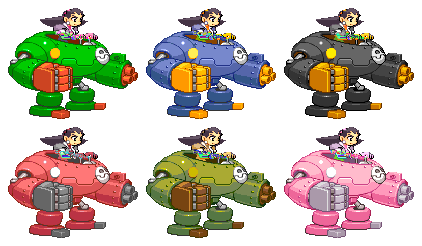
First row: {{lp}}, {{hp}}, {{A1}}. Second row: {{lk}}, {{hk}}, {{A2}}. | |||
[[Image:Mvc2-tron.png]] | |||
[[Category:Marvel Vs. Capcom 2]] | {{Navbox-MVC2}} | ||
[[Category: Marvel Vs. Capcom 2]] | |||
Latest revision as of 16:14, 9 September 2024
Introduction
Tron Bonne was first seen in the Megaman game "Megaman Legends". She later appeared in her own game, "The Misadventures of Tron Bonne." She is a member of the Bonne pirate clan. Her older brother is Teisel, and her younger brother is Bon (aka Baby Bonne). She is 15 years old, and has a crush on Megaman. She is a mechanical genius (which explains her Gustaff) and is assisted by her Kobuns (known as Servbots outside of Japan).
Tron Bonne is most notable for her projectile assist, which does more damage then it should, and resets combo damage as well.
TO-DO: Add frame data, as well as missing sprites
Gameplay
Tron is a zoner/brawler with that has many different projectiles. Her main strengths lies in her damage and assist, her main weakness is mobility.
| Strengths | Weaknesses |
|---|---|
|
|
Character Summary
- Beacon Bomb
 +
+
- Kobun Launch
 +
+
- Bonne Strike

 +
+
- Air Dash
- While airborne

 or
or 
 Unlimited amount
- Lunch Rush
 +
+

- King Kobun
 +
+

- Hyper Lunch Rush
 +
+ Tron A only; Rush always happens.
- Type α - Throw Type
- Assist:
 Throw
Throw - Counter:
 Bonne Strike
 - Combination: Hyper Lunch Rush
- Type β - Anti Air Type
- Assist:

- Counter:

- Combination: King Kobun
- Type γ - Balance Type
- Assist:


- Counter:


- Combination: King Kobun
Moves List
Assists
| Damage | Startup | Active | Recovery | Alpha Counter | Team Hyper Combo |
|---|---|---|---|---|---|
| - | - | - | - | Hyper Lunch Rush | |
|
Unblockable, but very short range. Note that her Lunch Rush THC comes out even if the gun doesn't hit. | |||||
| Damage | Startup | Active | Recovery | Alpha Counter | Team Hyper Combo |
|---|---|---|---|---|---|
| - | - | - | - | King Kobun | |
|
Tron does her standing MK fire attack. | |||||
| Damage | Startup | Active | Recovery | Alpha Counter | Team Hyper Combo |
|---|---|---|---|---|---|
| - | - | - | - | King Kobun | |
|
One of the best assists in the game. This is a glitched version of her MP that hits three times (as normal) but does 15 pts of damage per hit (not normal). The third ring hits at a slight delay, allowing for some mind games. Note that the Tron-Y alpha counter is surprisingly safe. | |||||
Normal Moves
-When grounded, Tron has the 2-Hit type Magic Series, meaning they can follow the ![]() /
/![]() >
> ![]() /
/![]() /
/![]() /
/![]() cancel tree.
cancel tree.
Ground Normals
| Damage | Startup | Active | Recovery | Guard |
|---|---|---|---|---|
| - | - | - | - | - |
| Special Property | Cancel | Adv. Hit | Adv. Guard | Adv. Pushblock |
| - | - | - | - | - |
| Damage | Startup | Active | Recovery | Guard |
|---|---|---|---|---|
| - | - | - | - | - |
| Special Property | Cancel | Adv. Hit | Adv. Guard | Adv. Pushblock |
| - | - | - | - | - |
| Damage | Startup | Active | Recovery | Guard |
|---|---|---|---|---|
| - | - | - | - | - |
| Special Property | Cancel | Adv. Hit | Adv. Guard | Adv. Pushblock |
| - | - | - | - | - |
| Damage | Startup | Active | Recovery | Guard |
|---|---|---|---|---|
| - | - | - | - | - |
| Special Property | Cancel | Adv. Hit | Adv. Guard | Adv. Pushblock |
| - | - | - | - | - |
| Damage | Startup | Active | Recovery | Guard |
|---|---|---|---|---|
| - | - | - | - | - |
| Special Property | Cancel | Adv. Hit | Adv. Guard | Adv. Pushblock |
| - | - | - | - | - |
| Damage | Startup | Active | Recovery | Guard |
|---|---|---|---|---|
| - | - | - | - | - |
| Special Property | Cancel | Adv. Hit | Adv. Guard | Adv. Pushblock |
| Template:Projectile | - | - | - | - |
| Damage | Startup | Active | Recovery | Guard |
|---|---|---|---|---|
| - | - | - | - | - |
| Special Property | Cancel | Adv. Hit | Adv. Guard | Adv. Pushblock |
| - | - | - | - | - |
| Damage | Startup | Active | Recovery | Guard | |
|---|---|---|---|---|---|
| - | - | - | - | - | |
| Special Property | Cancel | Adv. Hit | Adv. Guard | Adv. Pushblock | |
| Template:Projectile | - | - | - | - | |
|
Note that her crouching MP (rings) hits three times - the third ring can often come out after you cancel into Lunch Rush, which will knock your opponent out of it. As such, it is not recommended to combo from the rings into the Lunch Rush. | |||||
| Damage | Startup | Active | Recovery | Guard |
|---|---|---|---|---|
| - | - | - | - | - |
| Special Property | Cancel | Adv. Hit | Adv. Guard | Adv. Pushblock |
| - | - | - | - |
| Damage | Startup | Active | Recovery | Guard |
|---|---|---|---|---|
| - | - | - | - | - |
| Special Property | Cancel | Adv. Hit | Adv. Guard | Adv. Pushblock |
| - | - | - | - |
| Damage | Startup | Active | Recovery | Guard |
|---|---|---|---|---|
| - | - | - | - | - |
| Special Property | Cancel | Adv. Hit | Adv. Guard | Adv. Pushblock |
| - | - | - | - |
| Damage | Startup | Active | Recovery | Guard |
|---|---|---|---|---|
| - | - | - | - | - |
| Special Property | Cancel | Adv. Hit | Adv. Guard | Adv. Pushblock |
| - | - | - | - |
Air Normals
-When in the Normal Jump state, Tron has the 2-Hit type Magic Series, meaning they can follow the ![]() /
/![]() >
> ![]() /
/![]() /
/![]() /
/![]() cancel tree.
cancel tree.
| Damage | Startup | Active | Recovery | Guard |
|---|---|---|---|---|
| - | - | - | - | - |
| Special Property | Cancel | Adv. Hit | Adv. Guard | Adv. Pushblock |
| - | - | - | - | - |
| Damage | Startup | Active | Recovery | Guard |
|---|---|---|---|---|
| - | - | - | - | - |
| Special Property | Cancel | Adv. Hit | Adv. Guard | Adv. Pushblock |
| - | - | - | - | - |
| Damage | Startup | Active | Recovery | Guard |
|---|---|---|---|---|
| - | - | - | - | - |
| Special Property | Cancel | Adv. Hit | Adv. Guard | Adv. Pushblock |
| - | - | - | - |
| Damage | Startup | Active | Recovery | Guard | |
|---|---|---|---|---|---|
| - | - | - | - | - | |
| Special Property | Cancel | Adv. Hit | Adv. Guard | Adv. Pushblock | |
| - | - | - | - | - | |
|
Her jumping Short has a stunningly good hit box and beats all sorts of things you wouldn't expect it to. | |||||
| Damage | Startup | Active | Recovery | Guard |
|---|---|---|---|---|
| - | - | - | - | - |
| Special Property | Cancel | Adv. Hit | Adv. Guard | Adv. Pushblock |
| - | - | - | - | - |
| Damage | Startup | Active | Recovery | Guard |
|---|---|---|---|---|
| - | - | - | - | - |
| Special Property | Cancel | Adv. Hit | Adv. Guard | Adv. Pushblock |
| - | - | - | - |
Command Normals
| Damage | Startup | Active | Recovery | Guard | |
|---|---|---|---|---|---|
| - | - | - | - | - | |
| Special Property | Cancel | Adv. Hit | Adv. Guard | Adv. Pushblock | |
| - | - | - | - | - | |
|
Unlimited uses, only goes forward. | |||||
Universal Mechanics
| Damage | Startup | Active | Recovery | Guard |
|---|---|---|---|---|
| - | - | - | - | - |
| Special Property | Cancel | Adv. Hit | Adv. Guard | Adv. Pushblock |
| Launcher (away) | - | - | - | - |
| Damage | Startup | Active | Recovery | Guard |
|---|---|---|---|---|
| - | - | - | - | - |
| Special Property | Cancel | Adv. Hit | Adv. Guard | Adv. Pushblock |
| - | - | - | - | - |
| Damage | Startup | Active | Recovery | Guard |
|---|---|---|---|---|
| - | - | - | - | - |
| Special Property | Cancel | Adv. Hit | Adv. Guard | Adv. Pushblock |
| - | - | - | - | - |
| Damage | Startup | Active | Recovery | Guard |
|---|---|---|---|---|
| - | - | - | - | - |
| Special Property | Cancel | Adv. Hit | Adv. Guard | Adv. Pushblock |
| - | - | - | - | - |
| Damage | Startup | Active | Recovery | Guard | |
|---|---|---|---|---|---|
| - | - | - | - | - | |
| Special Property | Cancel | Adv. Hit | Adv. Guard | Adv. Pushblock | |
| - | - | - | - | - | |
|
| |||||
Special Moves
Specials
| Damage | Startup | Active | Recovery | Guard | |
|---|---|---|---|---|---|
| - | - | - | - | - | |
| Special Property | Cancel | Adv. Hit | Adv. Guard | Adv. Pushblock | |
| - | - | - | - | - | |
|
Capture state is counter mashable. | |||||
| Damage | Startup | Active | Recovery | Guard |
|---|---|---|---|---|
| - | - | - | - | - |
| Special Property | Cancel | Adv. Hit | Adv. Guard | Adv. Pushblock |
| - | - | - | - | - |
| Damage | Startup | Active | Recovery | Guard | |
|---|---|---|---|---|---|
| - | - | - | - | - | |
| Special Property | Cancel | Adv. Hit | Adv. Guard | Adv. Pushblock | |
| - | - | - | - | - | |
|
Mash attack buttons for more hits. | |||||
Hyper Combos
| Damage | Startup | Active | Recovery | Guard | |
|---|---|---|---|---|---|
| - | - | - | - | - | |
| Special Property | Cancel | Adv. Hit | Adv. Guard | Adv. Pushblock | |
| - | - | - | - | - | |
|
Tron shoots a short-range beam that hits up to about the top of normal screen height, down to her waist, about half a character length in front of her, and very slightly behind her. If it hits, a Kobun yells "Gohan desu yo!" (Meal is ready!), and the 39 others Kobuns (plus Data the monkey) charge through to eat, hitting the opponent. It does very good damage. If the gun misses, the Kobuns do not come out and the recovery is horrible. It can only be DHCd within a very small window - King Kobun is the better super to DHC out of. The first Kobun OTGs the opponent, so if you have already used your OTG (for example, on a switch-in that hits, cLK (OTG), Lunch Rush), the Lunch Rush Kobuns will be blockable. It generally will not work on Captain Commando in the corner due to his tall/thin body. A Lunch Rush against two opponents will *hit* with the gun and send them flying, but the Lunch Rush itself will only damage the first character hit by the Kobuns. | |||||
| Damage | Startup | Active | Recovery | Guard | |
|---|---|---|---|---|---|
| - | - | - | - | - | |
| Special Property | Cancel | Adv. Hit | Adv. Guard | Adv. Pushblock | |
| - | - | - | - | - | |
|
The Kobun grows to giant size and smashes the opponent with his squeaky hammer. You are pretty much guaranteed that the hammer will swing/hit once, which means it can be used to trade in some situations. If it is not combo'd into, the opponent can jump or superjump (required for large characters) out of it. It can not be cancelled to into cleanly - any cancel will allow your opponent to jump or superjump out of it at the least, or even walk forward or throw you before King Kobun can swing the hammer. Once started, the hammer will cancel nearly all off-screen projectiles (such as Doom's air super), even though the projectiles look as if they will go over the hammer. | |||||
| Damage | Startup | Active | Recovery | Guard | |
|---|---|---|---|---|---|
| - | - | - | - | - | |
| Special Property | Cancel | Adv. Hit | Adv. Guard | Adv. Pushblock | |
| - | - | - | - | - | |
|
Only available with the A Throw assist. The rush always happens regardless of if the gun hits. | |||||
Other
Colors
First row: ![]() ,
, ![]() ,
, ![]() . Second row:
. Second row: ![]() ,
, ![]() ,
, ![]() .
.
