Story
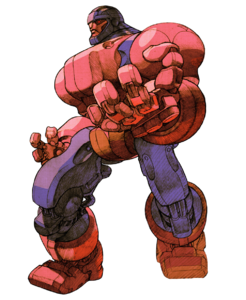
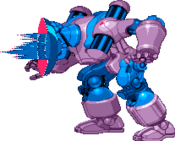
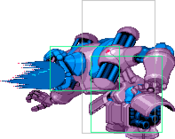
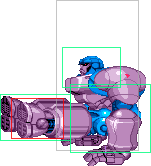
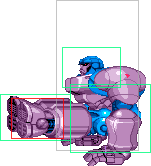
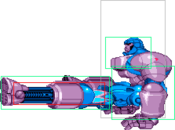
The Sentinel is a character from the X-Men series by Marvel. Created by scientist and anti-mutant bigot Bolivar Trask to protect humanity from the 'mutant threat,' Sentinels are equipped with advanced A.I. and incredibly powerful attacks designed to combat specific mutant abilities.
The Sentinel that appears in the series has the model number COTA-94, debuting as a playable character in X-Men: Children of the Atom. It reappeared in Marvel vs. Capcom 2: New Age of Heroes, Marvel vs. Capcom 3: Fate of Two Worlds and Ultimate Marvel vs. Capcom 3. It is a secret assist character in Marvel vs. Capcom: Clash of Super Heroes.
Gameplay
Sentinel is a beast in MvC2. A high-level Sentinel stomping on the opponent and then hitting the next character coming in with an unblockable renders about 3/4 of the game's characters nearly unplayable. He is God Tier, and one of the best characters in the game.
| Strengths | Weaknesses |
|---|---|
|
|
Character Summary
- Rocket Punch (Air OK)
- Down:
 +
+ 
- Forward:
 +
+ 
- Up:
 +
+  or
or 
- Retract early:
 +
+  or
or 
- Sentinel Force
- Control:
 +
+  , Hold or release
 - Carpet Bomb:
 +
+  , Hold to delay
- Hover (Air OK)
 +
+  +
+  , press again to end
- Plasma Storm
 +
+  +
+  (Mashable)
- Hyper Sentinel Force
 +
+  +
+ 
- Hard Drive (Air Only)
 +
+  +
+ 
- Type α - Projectile Type
- Assist:
 Rocket Punch
 - Counter:
 Rocket Punch
 - Combination: Hyper Sentinel Force
- Type β - Launcher Type
- Assist:

- Counter:

- Combination: Hyper Sentinel Force
- Type γ - Ground Type
- Assist:
 Sentinel Force
 - Counter:
 Sentinel Force
 - Combination: Hyper Sentinel Force
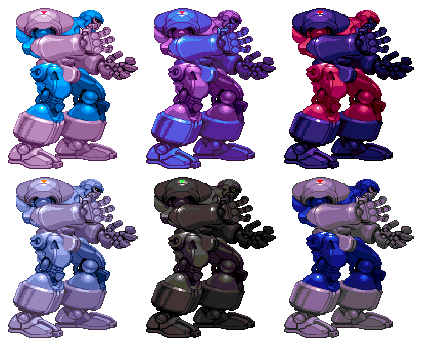
Colors
First row: ![]() ,
, ![]() , A1. Second row:
, A1. Second row: ![]() ,
, ![]() , A2.
, A2.
Moves List
Normal Moves
Ground Normals
| Damage | Startup | Active | Recovery | Guard | |
|---|---|---|---|---|---|
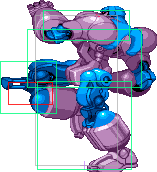
| 6 | 9 | 4 | 12 | HL | |
| Special Property | Cancel | Adv. Hit | Adv. Guard | Adv. Pushblock | |
| None | Chain, Special, SJ, Super | - | - | - | |
|
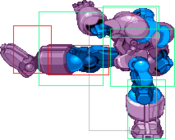
Very slow for a jab. | |||||
| Damage | Startup | Active | Recovery | Guard | |
|---|---|---|---|---|---|
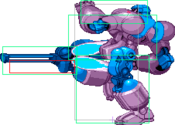
| 6+3 | 7 | 6(3)6 | 29 | HL | |
| Special Property | Cancel | Adv. Hit | Adv. Guard | Adv. Pushblock | |
| None | Special, Super, SJ cancellable frames 17~33 | - | - | - | |
|
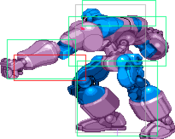
Massive range with a disjointed hitbox, fortunately it’s mostly used as combo filler. | |||||
| Damage | Startup | Active | Recovery | Guard | |
|---|---|---|---|---|---|
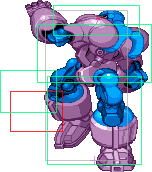
| 10+10 | 21 | 39 | 40 | HL | |
| Special Property | Cancel | Adv. Hit | Adv. Guard | Adv. Pushblock | |
| None | Special, SJ, Super | - | - | - | |
|
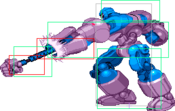
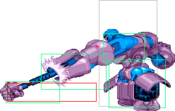
Fires a beam across the screen, active for a while. Whiffs on some smaller characters. Can randomly hit twice on 27th frame. Takes 6 frames for beam to hit edge of screen. | |||||
| Damage | Startup | Active | Recovery | Guard | |
|---|---|---|---|---|---|
| 5 | 7 | 2 | 17 | HL | |
| Special Property | Cancel | Adv. Hit | Adv. Guard | Adv. Pushblock | |
| None | Chain, Special, SJ, Super | - | - | - | |
|
His fastest normal and best abare option. Still slower than most of the roster’s jabs | |||||
| Damage | Startup | Active | Recovery | Guard | |
|---|---|---|---|---|---|
| 5 | 10 | 3 | 18 | HL | |
| Special Property | Cancel | Adv. Hit | Adv. Guard | Adv. Pushblock | |
| None | Special, SJ, Super | - | - | - | |
|
Mostly combo filler. | |||||
| Damage | Startup | Active | Recovery | Guard | |
|---|---|---|---|---|---|
| 18 | 13 | 2, 2, 2 | 35 | HL | |
| Special Property | Cancel | Adv. Hit | Adv. Guard | Adv. Pushblock | |
| Launcher | Special, SJ, Super | - | - | - | |
|
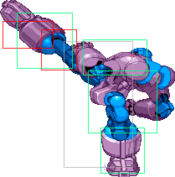
Sent’s main launcher. Chaining from this into an air combo can lead to huge damage off a BnB. | |||||
| Damage | Startup | Active | Recovery | Guard | |
|---|---|---|---|---|---|
| 6 | 8 | 2 | 16 | HL | |
| Special Property | Cancel | Adv. Hit | Adv. Guard | Adv. Pushblock | |
| None | Chain, Special, Super | - | - | - | |
|
Crouching jab, one frame faster than s.LP | |||||
| Damage | Startup | Active | Recovery | Guard | |
|---|---|---|---|---|---|
| 6+3 | 13 | 3(3)3 | 28 | HL | |
| Special Property | Cancel | Adv. Hit | Adv. Guard | Adv. Pushblock | |
| None | Chain, Special, Super, SJ Cancellable 22~38 | - | - | - | |
|
Placeholder text | |||||
| Damage | Startup | Active | Recovery | Guard | |
|---|---|---|---|---|---|
| 10+10 | 16 | 36 | 39 | HL | |
| Special Property | Cancel | Adv. Hit | Adv. Guard | Adv. Pushblock | |
| 2nd hit unblockable | Special, SJ, Super | - | - | - | |
|
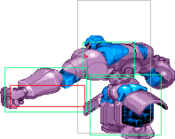
st.HP but lower to the ground, also much faster. Would be risky to whiff if wasn’t for flight cancel. 7 frames to reach edge of screen. Unblockable in certain contexts. | |||||
| Damage | Startup | Active | Recovery | Guard | |
|---|---|---|---|---|---|
| 6 | 9 | 3 | 20 | L | |
| Special Property | Cancel | Adv. Hit | Adv. Guard | Adv. Pushblock | |
| None | Chain, Special, SJ, Super | - | - | - | |
|
Sent’s main low, slow but gets the job done. | |||||
| Damage | Startup | Active | Recovery | Guard | |
|---|---|---|---|---|---|
| 6+3 | 12 | 2(9)2 | 28 | L | |
| Special Property | Cancel | Adv. Hit | Adv. Guard | Adv. Pushblock | |
| None | Special, Super SJ cancellable 22・42 | - | - | - | |
|
Low hit-confirm. | |||||
| Damage | Startup | Active | Recovery | Guard | |
|---|---|---|---|---|---|
| 6+6+6 | 12 | 2(9)2(4)2 | 36 | L | |
| Special Property | Cancel | Adv. Hit | Adv. Guard | Adv. Pushblock | |
| - | - | - | - | - | |
|
Placeholder text | |||||
Air Normals
| Damage | Startup | Active | Recovery | Guard | |
|---|---|---|---|---|---|
| 5 | 6 | 4 | 16 | H | |
| Special Property | Cancel | Adv. Hit | Adv. Guard | Adv. Pushblock | |
| None | Chain, Special, Super | - | - | - | |
|
Somewhat mediocre horizontal range, but a disgusting vertical hitbox makes up for it. Great for swatting away people right below you. | |||||
| Damage | Startup | Active | Recovery | Guard | |
|---|---|---|---|---|---|
| 8 | 8 | 3 | 22 | H | |
| Special Property | Cancel | Adv. Hit | Adv. Guard | Adv. Pushblock | |
| None | Special, Super | - | - | - | |
|
Placeholder text | |||||
| Damage | Startup | Active | Recovery | Guard | |
|---|---|---|---|---|---|
| 18 | 12 | 4 | 34 | H | |
| Special Property | Cancel | Adv. Hit | Adv. Guard | Adv. Pushblock | |
| Flying screen | Special, Super | - | - | - | |
|
Huge disjoint, basically creates a moving impenetrable wall in front of Sent. | |||||
| Damage | Startup | Active | Recovery | Guard | |
|---|---|---|---|---|---|
| 5 | 6 | 5 | 21 | H | |
| Special Property | Cancel | Adv. Hit | Adv. Guard | Adv. Pushblock | |
| None | Chain, Special, Super | - | - | - | |
|
Makes up for jLP’s lacking horizontal range, stomps on any opponent beneath you. | |||||
| Damage | Startup | Active | Recovery | Guard | |
|---|---|---|---|---|---|
| 8 | 9 | 4 | 28 | H | |
| Special Property | Cancel | Adv. Hit | Adv. Guard | Adv. Pushblock | |
| None | Special, Super | - | - | - | |
|
Thank fucking god this normal is regulated to combo filler. | |||||
| Damage | Startup | Active | Recovery | Guard | |
|---|---|---|---|---|---|
| 15 | 11 | 5 | 23 | H | |
| Special Property | Cancel | Adv. Hit | Adv. Guard | Adv. Pushblock | |
| Flying Screen | Special, Super | - | - | - | |
|
jLK but trades speed for double the range. | |||||
Universal Mechanics
| Damage | Startup | Active | Recovery | Guard |
|---|---|---|---|---|
| - | - | - | - | HL |
| Special Property | Cancel | Adv. Hit | Adv. Guard | Adv. Pushblock |
| Template:Launcher | - | - | - | - |
Special Moves
| Damage | Startup | Active | Recovery | Guard | |
|---|---|---|---|---|---|
| - | - | - | - | - | |
| Special Property | Cancel | Adv. Hit | Adv. Guard | Adv. Pushblock | |
| - | - | - | - | - | |
|
Written as 'RP' further into this article.
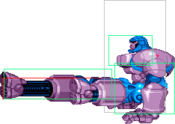
Probably Sentinel's single most used special move in the game, due to his bread-and-butter hp>RP. This move can be done with either The rocket punch can be chained from the lp>mp>short/hard RP or from | |||||
| Damage | Startup | Active | Recovery | Guard | |
|---|---|---|---|---|---|
| - | - | - | - | - | |
| Special Property | Cancel | Adv. Hit | Adv. Guard | Adv. Pushblock | |
| - | - | - | - | - | |
|
Using
| |||||
| Damage | Startup | Active | Recovery | Guard | |
|---|---|---|---|---|---|
| - | - | - | - | - | |
| Special Property | Cancel | Adv. Hit | Adv. Guard | Adv. Pushblock | |
| - | - | - | - | - | |
|
Repeat to end. You can't block in flight mode, but you are way more mobile and can call assists if they come near. This is your bread and butter. Fly and show them your boots of love or your frying pan of justice. If your Sentinel doesn't fly, you're going to get killed. | |||||
Hyper Combos
| Damage | Startup | Active | Recovery | Guard | |
|---|---|---|---|---|---|
| - | - | - | - | - | |
| Special Property | Cancel | Adv. Hit | Adv. Guard | Adv. Pushblock | |
| - | - | - | - | - | |
|
Mash buttons for more damage. This is a less useful super, though if it connects, it can be very damaging. See Bread-and-Butter Combos. | |||||
| Damage | Startup | Active | Recovery | Guard | |
|---|---|---|---|---|---|
| - | - | - | - | - | |
| Special Property | Cancel | Adv. Hit | Adv. Guard | Adv. Pushblock | |
| - | - | - | - | - | |
|
Written as 'HSF' further into this article.
Note: Can be comboed into and out of, especially with bread-and-butter | |||||
| Damage | Startup | Active | Recovery | Guard | |
|---|---|---|---|---|---|
| - | - | - | - | - | |
| Special Property | Cancel | Adv. Hit | Adv. Guard | Adv. Pushblock | |
| - | - | - | - | - | |
|
Air only. This move is one of the more useless of the supers. The best use for this super is as a DHC (such as the hailstorm), or his his launcher xx sj.lp>sj.lk>sj.lp xx HD | |||||
Variable Assists
| Damage | Startup | Active | Recovery | Guard | |
|---|---|---|---|---|---|
| Placeholder | Placeholder | Placeholder | Placeholder | Placeholder | |
| Special Property | Cancel | Adv. Hit | Adv. Guard | Adv. Pushblock | |
| Placeholder | Placeholder | Placeholder | Placeholder | - | |
|
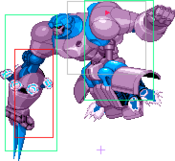
This is primarily used for rushdown play and as a combo-starter for many air combos, including some infinites. Recommended for rushdown and high-pressure play UP CLOSE. Don't send this assist out randomly, as it will leave Sent open for massive combos. | |||||
| Damage | Startup | Active | Recovery | Guard | |
|---|---|---|---|---|---|
| Placeholder | Placeholder | Placeholder | Placeholder | Placeholder | |
| Special Property | Cancel | Adv. Hit | Adv. Guard | Adv. Pushblock | |
| Placeholder | Placeholder | Placeholder | Placeholder | - | |
|
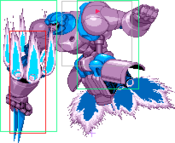
Standing Launcher. This is a nearly useless assist when faced with his ground and projectile assists. Just don't use it. | |||||
| Damage | Startup | Active | Recovery | Guard | |
|---|---|---|---|---|---|
| Placeholder | Placeholder | Placeholder | Placeholder | Placeholder | |
| Special Property | Cancel | Adv. Hit | Adv. Guard | Adv. Pushblock | |
| Placeholder | Placeholder | Placeholder | Placeholder | - | |
|
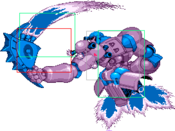
This is a great assist for pressuring and chipping enemy characters. Being a 3-hit assist, it will also neutralize many opposing assists if used earlier. Also something to note, since the drones hit some time apart and keep your enemy stunned for a moment, it creates a great opportunity to rush in and start a combo, also giving you time to decide what to do, since it gives you such a larger window than his projectile assist. Use it if you plan to keep-away, chip, or trap enemies. Widely used in crossups and traps. | |||||
