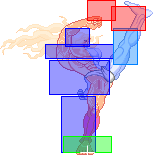
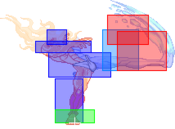
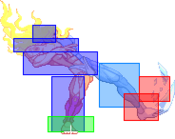
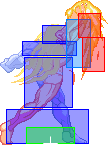
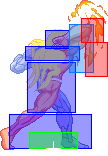
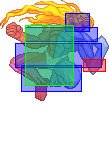
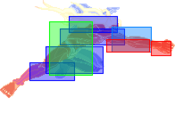
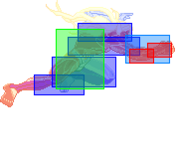
m (rv) |
No edit summary |
||
| (429 intermediate revisions by 25 users not shown) | |||
| Line 1: | Line 1: | ||
{{TOClimit|3}} | |||
Character | {{Infobox Character 3S | ||
|name=Gill | |||
{{ | |hash=GI | ||
|image=3S_Gill_Art.png | |||
|health=1300 | |||
|stun=72 | |||
|SA1=1/120 | |||
|SA2=1/120 | |||
|SA3=1/120 | |||
|fDash=15 (17)<br>(143px) | |||
|bDash=19 (104px) | |||
|nJump=38(5+32+1) | |||
|bJump=38(5+32+1) | |||
|fJump=38(5+32+1) | |||
|nSuperJump=51(7+43+1) | |||
|bSuperJump=51(7+43+1) | |||
|fSuperJump=51(7+43+1) | |||
|wakeupNormal=76 | |||
|wakeupQuick=56 | |||
}} | |||
== Frame Data == | |||
ALL DAMAGE INDICATED IN THE FRAME DATA WAS DONE AGAINST AKUMA, WHO HAS THE LOWEST HP IN THE GAME. | |||
IN-DEPTH FRAMEDATA INFORMATION CAN BE FOUND [http://baston.esn3s.com/index.php?id=0 HERE]. | |||
====Standing Normals==== | |||
=====<font style="visibility:hidden; float:right">5LP</font>===== | |||
{{MoveData | |||
|name=Stand LP | |||
|input={{lp}} | |||
|image=3S_GILL_5LP.png | |||
|data= | |||
{{AttackData-3S | |||
|startup=5 | |||
|active=6 | |||
|recovery=7 | |||
|onHit=+10 | |||
|onHitCrouch=+12 | |||
|onBlock=+10 | |||
|parry= Mid | |||
|guard= Mid | |||
|damage=6 | |||
|stun=6 | |||
|attackLevel= Light | |||
|description= | |||
* Cancel options: NC. | |||
* Self meter gain: Whiff: 0, Hit: 2, Block: 1. | |||
* Opponent meter gain: Whiff: 0, Hit: 0, Block: 0. | |||
* 0 Kara Range. | |||
}} | |||
}} | |||
=====<font style="visibility:hidden; float:right">5MP</font>===== | |||
{{MoveData | |||
|name=Stand MP | |||
|input={{mp}} | |||
|image=3S_GILL_5MP.png | |||
|data= | |||
{{AttackData-3S | |||
|startup=4 | |||
|active=6 | |||
|recovery=9 | |||
|onHit=+1 | |||
|onHitCrouch=+2 | |||
|onBlock=+0 | |||
|parry= High | |||
|guard= Mid | |||
|damage=19 | |||
|stun=14 | |||
|attackLevel=Mid | |||
|description= | |||
* Cancel options: NULL. | |||
* Self meter gain: Whiff: 2, Hit: 6, Block: 4. | |||
* Opponent meter gain: Whiff: 0, Hit: 1, Block: 0. | |||
* 0 Kara Range. | |||
}} | |||
}} | |||
=====<font style="visibility:hidden; float:right">5HP</font>===== | |||
{{MoveData | |||
|name=Stand HP | |||
|input={{hp}} | |||
|image= 3S_GILL_5HP_F11-12.png | |||
|image2= 3S_GILL_5HP_F13-15.png | |||
|caption=Framea 11-12 | |||
|caption2=Frames 13-15* | |||
|data= | |||
{{AttackData-3S | |||
|startup=10 | |||
|active=5 | |||
|recovery=16 | |||
|onHit=-3 | |||
|onHitCrouch=-1 | |||
|onBlock=-5 | |||
|guard= Mid | |||
|parry= High | |||
|damage=28 | |||
|stun=18 | |||
|attackLevel=Mid | |||
|description= | |||
* Cancel options: NULL. | |||
* Self meter gain: Whiff: 3, Hit: 9, Block: 7. | |||
* Opponent meter gain: Whiff: 0, Hit: 1, Block: 0. | |||
* -6 Kara Range. | |||
* *Due to how SuperCombo wiki processes PNGs, the 2nd PNG's framedata is represented as being similar to the 1st PNG's framedata. Reffer to [http://baston.esn3s.com/hitboxesDisplay_spritesheet.php?iChar=0&sMoveType=fd_normals&iMove=3 Baston's Gill 5HP Framedata] for what the two PNGs actually look like. | |||
}} | |||
}} | |||
=====<font style="visibility:hidden; float:right">5LK</font>===== | |||
{{MoveData | |||
|name=Stand LK | |||
|input={{lk}} | |||
|image=3S_GILL_5LK.png | |||
|data= | |||
{{AttackData-3S | |||
|startup=3 | |||
|active=1 | |||
|recovery=7 | |||
|onHit=+3 | |||
|onHitCrouch=+3 | |||
|onBlock=+3 | |||
|guard= Mid | |||
|attackLevel= Mid | |||
|parry= Mid | |||
|damage=7 | |||
|stun=8 | |||
|description= | |||
* Cancel options: SC + NC. | |||
* Self meter gain: Whiff: 0, Hit: 2, Block: 1. | |||
* Opponent meter gain: Whiff: 0, Hit: 0, Block: 0. | |||
* 0 Kara Range. | |||
}} | |||
}} | |||
=====<font style="visibility:hidden; float:right">5MK</font>===== | |||
{{MoveData | |||
|name=Stand MK | |||
|input={{mk}} | |||
|image=3S_GILL_5MK_F7-8.png | |||
|image2=3S_GILL_5MK_F9-11.png | |||
|caption= Frames 7-8 | |||
|caption2= Frames 9-11* | |||
|data= | |||
{{AttackData-3S | |||
|startup=6 | |||
|active=5 | |||
|recovery=14 | |||
|onHit=-3 | |||
|onHitCrouch=-2 | |||
|onBlock=-4 | |||
|guard=Mid | |||
|parry=High | |||
|damage=17 | |||
|stun=14 | |||
|description= | |||
* Cancel options: Null. | |||
* Self meter gain: Whiff: 2, Hit: 6, Block: 4. | |||
* Opponent meter gain: Whiff: 0, Hit: 1, Block: 0. | |||
* 0 Kara Range. | |||
* *Due to how SuperCombo wiki processes PNGs, the 2nd PNG's framedata is represented as being similar to the 1st PNG's framedata. Reffer to [http://baston.esn3s.com/hitboxesDisplay_spritesheet.php?iChar=0&sMoveType=fd_normals&iMove=11 Baston's Gill 5MK Framedata] for what the two PNGs actually look like. | |||
}} | |||
}} | |||
=====<font style="visibility:hidden; float:right">5HK</font>===== | |||
{{MoveData | |||
|name=Stand HK | |||
|input={{hk}} | |||
|image= 3S_GILL_5HK_F17-19.png | |||
|image2= 3S_GILL_5HK_F20-21.png | |||
|image3= 3S_GILL_5HK_F22-23.png | |||
|caption=Frames 17-19 | |||
|caption2=Frames 20-21* | |||
|caption3=Frame 22-23* | |||
|data= | |||
{{AttackData-3S | |||
|startup=16 | |||
|active=7 | |||
|recovery=22 | |||
|onHit=-8 | |||
|onHitCrouch=-6 | |||
|onBlock=-10 | |||
|guard= Overhead | |||
|parry= High | |||
|damage=19 | |||
|stun=18 | |||
|attackLevel= Overhead | |||
|description= | |||
* Cancel options: NULL. | |||
* Self meter gain: Whiff: 3, Hit: 5, Block: 4. | |||
* Opponent meter gain: Whiff: 0, Hit: 0, Block: 0. | |||
* -10 Kara Range. | |||
* *Due to how SuperCombo wiki processes PNGs, the 2nd PNG's and 3rd PNG's framedata is represented as being worse than's 1st PNG's framedata. Reffer to [http://baston.esn3s.com/hitboxesDisplay_spritesheet.php?iChar=0&sMoveType=fd_normals&iMove=12 Baston's Gill 5HK Framedata] for what the three PNGs actually look like. | |||
}} | |||
}} | |||
<br> | |||
<br> | |||
<br> | |||
==== Crouching Normals ==== | |||
=====<font style="visibility:hidden; float:right">Crouching LP</font>===== | |||
{{MoveData | |||
|name=Crouching LP | |||
|input={{d}}+{{lp}} | |||
|image=3S_GILL_2LP.png | |||
|data= | |||
{{AttackData-3S | |||
|startup=3 | |||
|active=1 | |||
|recovery=7 | |||
|onHit=3 | |||
|onBlock=3 | |||
|onHitCrouch=3 | |||
|guard= Mid | |||
|parry= Mid | |||
|damage=3 | |||
|stun=6 | |||
|attackLevel= Light | |||
|description= | |||
* Cancel options: SC. | |||
* Self meter gain: Whiff: 0, Hit: 2, Block: 1. | |||
* Opponent meter gain: Whiff: 0, Hit: 0, Block: 0. | |||
* 0 Kara Range. | |||
}} | |||
}} | |||
=====<font style="visibility:hidden; float:right">Crouching MP</font>===== | |||
{{MoveData | |||
|name=Crouching MP | |||
|input={{d}}+{{mp}} | |||
|image= 3S_GILL_2MP_F7-8.png | |||
|image2= 3S_GILL_2MP_F9-12.png | |||
|caption= Frames 7-8 | |||
|caption2= Frames 9-12* | |||
|data= | |||
{{AttackData-3S | |||
|startup=6 | |||
|active=6 | |||
|recovery=8 | |||
|onHit=0 | |||
|onBlock=-1 | |||
|onHitCrouch=1 | |||
|guard= Low | |||
|parry= Low | |||
|damage=14 | |||
|stun=14 | |||
|attackLevel= Medium | |||
|description= | |||
* Cancel options: NULL. | |||
* Self meter gain: Whiff: 2, Hit: 6, Block: 4. | |||
* Opponent meter gain: Whiff: 0, Hit: 1, Block: 0. | |||
* 0 Kara Range. | |||
* *Due to how SuperCombo wiki processes PNGs, the 2nd PNG's framedata is represented as being similar to the 1st PNG's framedata. Reffer to [http://baston.esn3s.com/hitboxesDisplay_spritesheet.php?iChar=0&sMoveType=fd_normals&iMove=5 Baston's Gill 2MP Framedata] for what the two PNGs actually look like. | |||
}} | |||
}} | |||
=====<font style="visibility:hidden; float:right">Crouching HP</font>===== | |||
{{MoveData | |||
|name=Crouching HP | |||
|input={{d}}+{{hp}} | |||
|image= 3S_GILL_2HP_F6.png | |||
|image2= 3S_GILL_2HP_F7-8.png | |||
|image3= 3S_GILL_2HP_F9.png | |||
|caption= Frame 6 | |||
|caption2= Frames 7-8* | |||
|caption3= Frame 9* | |||
|data= | |||
{{AttackData-3S | |||
|startup= 5 | |||
|active= 5 | |||
|recovery= 17 | |||
|onHit= Juggle State | |||
|onBlock= -3 | |||
|onHitCrouch= Juggle State | |||
|guard= Low | |||
|parry= Low | |||
|damage=27 | |||
|stun=17 | |||
|attackLevel= Heavy | |||
|description= | |||
* Cancel options: SA + SP (first hit only). | |||
* Self meter gain: Whiff: 3, Hit: 8, Block: 7. | |||
* Opponent meter gain: Whiff: 0, Hit: 1, Block: 0. | |||
* 2 Kara Range. | |||
* *Due to how SuperCombo wiki processes PNGs, the 2nd PNG's and 3rd PNG's framedata is represented as being similar than the 1st PNG's framedata. Reffer to [http://baston.esn3s.com/hitboxesDisplay_spritesheet.php?iChar=0&sMoveType=fd_normals&iMove=6 Baston's Gill 2HP Framedata] for what the three PNGs actually look like. | |||
}} | |||
}} | |||
=====<font style="visibility:hidden; float:right">Crouching LK</font>===== | |||
{{MoveData | |||
|name=Crouching LK | |||
|input={{d}}+{{lk}} | |||
|image=3S_GILL_2LK.png | |||
|data= | |||
{{AttackData-3S | |||
|startup=3 | |||
|active=2 | |||
|recovery=5 | |||
|onHit=4 | |||
|onBlock=4 | |||
|onHitCrouch=4 | |||
|guard= Low | |||
|parry= Low | |||
|damage=3 | |||
|stun=4 | |||
|attackLevel= Light | |||
|description= | |||
* Cancel options: SC + NC. | |||
* Self meter gain: Whiff: 0, Hit: 2, Block: 1. | |||
* Opponent meter gain: Whiff: 0, Hit: 0, Block: 0. | |||
* 0 Kara Range. | |||
}} | |||
}} | |||
=====<font style="visibility:hidden; float:right">Crouching MK</font>===== | |||
{{MoveData | |||
|name=Crouching MK | |||
|input={{d}}+{{mk}} | |||
|image=3S_GILL_2MK.png | |||
|data= | |||
{{AttackData-3S | |||
|startup=2 | |||
|active=1 | |||
|recovery=12 | |||
|onHit=1 | |||
|onBlock=0 | |||
|onHitCrouch=2 | |||
|guard= Low | |||
|parry= Low | |||
|damage=16 | |||
|stun=8 | |||
|attackLevel= Medium | |||
|description= | |||
* Cancel options: NULL. | |||
* Self meter gain: Whiff: 2, Hit: 6, Block: 4. | |||
* Opponent meter gain: Whiff: 0, Hit: 1, Block: 0. | |||
* 0 Kara Range. | |||
}} | |||
}} | |||
=====<font style="visibility:hidden; float:right">Crouching HK</font>===== | |||
{{MoveData | |||
|name=Crouching HK | |||
|input={{d}}+{{hk}} | |||
|image=3S_GILL_2HK.png | |||
|data= | |||
{{AttackData-3S | |||
|startup=7 | |||
|active=4 | |||
|recovery=13 | |||
|onHit=Soft Knockdown | |||
|onBlock=-6 | |||
|onHitCrouch=Soft Knockdown | |||
|guard= Low | |||
|parry= Low | |||
|damage=23 | |||
|stun=10 | |||
|attackLevel= High | |||
|description= | |||
* Cancel options: NULL. | |||
* Self meter gain: Whiff: 0, Hit: 0, Block: 0. | |||
* Opponent meter gain: Whiff: 0, Hit: 0, Block: 0. | |||
* 0 Kara Range. | |||
}} | |||
}} | |||
<br> | |||
<br> | |||
<br> | |||
==== Jumping Normals ==== | |||
=====<font style="visibility:hidden; float:right">j.LP</font>===== | |||
{{MoveData | |||
|name=Jump LP | |||
|input={{u}}/{{uf}}+{{lp}} | |||
|image=3S_GILL_JLP.png | |||
|data= | |||
{{AttackData-3S | |||
|startup=4 | |||
|active=∞ | |||
|recovery= N/A | |||
|parry= High | |||
|guard= High | |||
|damage=10 | |||
|stun=10 | |||
|onHit=-5~+6 | |||
|onHitCrouch=+4~+7 | |||
|onBlock=-5~+7 | |||
|attackLevel=Overhead | |||
|description= | |||
* Self meter gain: Whiff: 0, Hit: 2, Block: 1. | |||
* Opponent meter gain: Whiff: 0, Hit: 0, Block: 0. | |||
}} | |||
}} | |||
=====<font style="visibility:hidden; float:right">j.MP</font>===== | |||
{{MoveData | |||
|name=Jump MP | |||
|input={{u}}/{{uf}}+{{mp}} | |||
|image=3S_GILL_JMP_F6-7.png | |||
|image2=3S_GILL_JMP_F8-10.png | |||
|caption=Frame 6-7 | |||
|caption2=Frames 8-10* | |||
|data= | |||
{{AttackData-3S | |||
|startup=5 | |||
|active=5 | |||
|recovery= N/A | |||
|parry= High | |||
|guard= High | |||
|damage=17 | |||
|stun=14 | |||
|onHit=+3~+10 | |||
|onHitCrouch=+9~+10 | |||
|onBlock=+3~+10 | |||
|attackLevel=Overhead | |||
|description= | |||
* Self meter gain: Whiff: 2, Hit: 6, Block: 4. | |||
* Opponent meter gain: Whiff: 0, Hit: 1, Block: 0. | |||
* *Due to how SuperCombo wiki processes PNGs, the 2nd PNG's framedata is represented as being similar to the 1st PNG's framedata. Reffer to [http://baston.esn3s.com/hitboxesDisplay_spritesheet.php?iChar=0&sMoveType=fd_normals&iMove=8 Baston's Gill j.MP Framedata] for what the two PNGs actually look like. | |||
}} | |||
}} | |||
=====<font style="visibility:hidden; float:right">j.HP</font>===== | |||
{{MoveData | |||
|name=Jump HP | |||
|input={{u}}/{{uf}}+{{hp}} | |||
|image=3S_GILL_JHP_F7.png | |||
|image2=3S_GILL_JHP_F8-9.png | |||
|caption=Frame 7 | |||
|caption2=Frames 8-9* | |||
|data= | |||
{{AttackData-3S | |||
|startup=6 | |||
|active=3 | |||
|recovery= N/A | |||
|parry= High | |||
|guard= High | |||
|damage=24 | |||
|stun=18 | |||
|onHit=+2~+12 | |||
|onHitCrouch=+11~+12 | |||
|onBlock=+5~+13 | |||
|attackLevel=Overhead | |||
|description= | |||
* Self meter gain: Whiff: 3, Hit: 9, Block: 7. | |||
* Opponent meter gain: Whiff: 0, Hit: 1, Block: 0. | |||
* *These two PNGs are similar enough in size that they are represented accurately, but if you still want to see the move animation's frame data, reffer to [http://baston.esn3s.com/hitboxesDisplay_spritesheet.php?iChar=0&sMoveType=fd_normals&iMove=9 Baston's Gill j.HP Framedata]. | |||
}} | |||
}} | |||
=====<font style="visibility:hidden; float:right">j.LK</font>===== | |||
{{MoveData | |||
|name=Jump LK | |||
|input={{u}}/{{uf}}+{{lk}} | |||
|image=3S_GILL_JLK.png | |||
|data= | |||
{{AttackData-3S | |||
|startup=3 | |||
|active=5 | |||
|recovery= N/A | |||
|parry= High | |||
|guard= High | |||
|damage=10 | |||
|stun=10 | |||
|onHit=+2~+12 | |||
|onHitCrouch=+11~+12 | |||
|onBlock=+5~+13 | |||
|attackLevel=Overhead | |||
|description= | |||
* Self meter gain: Whiff: 0, Hit: 2, Block: 1. | |||
* Opponent meter gain: Whiff: 0, Hit: 0, Block: 0. | |||
{{3S Button FAT|link=https://fullmeter.com/fatonline/#/framedata/movedetail/3S/Urien/normal/Jump%20LK}} | |||
}} | |||
}} | |||
=====<font style="visibility:hidden; float:right">j.MK</font>===== | |||
{{MoveData | |||
|name=Jump MK | |||
|input={{u}}/{{uf}}+{{mk}} | |||
|image=3S_GILL_JMK_F6.png | |||
|image2=3S_GILL_JMK_F7-10.png | |||
|caption= Frame 6 | |||
|caption2= Frames 7-10* | |||
|data= | |||
{{AttackData-3S | |||
|startup=5 | |||
|active=5 | |||
|recovery= N/A | |||
|parry= High | |||
|guard= High | |||
|damage=17 | |||
|stun=14 | |||
|onHit=+3~+10 | |||
|onHitCrouch=+9~+10 | |||
|onBlock=+2~+10 | |||
|attackLevel=Overhead | |||
|description= | |||
* Self meter gain: Whiff: 2, Hit: 6, Block: 4. | |||
* Opponent meter gain: Whiff: 0, Hit: 1, Block: 0 | |||
* *Due to how SuperCombo wiki processes PNGs, the 2nd PNG's framedata is represented as being similar to the 1st PNG's framedata. Reffer to [http://baston.esn3s.com/hitboxesDisplay_spritesheet.php?iChar=0&sMoveType=fd_normals&iMove=17 Baston's Gill j.MK Framedata] for what the two PNGs actually look like. | |||
}} | |||
}} | |||
=====<font style="visibility:hidden; float:right">j.HK</font>===== | |||
{{MoveData | |||
|name=Jump HK | |||
|input={{u}}/{{uf}}+{{hk}} | |||
|image=3S_GILL_JHK.png | |||
|data= | |||
{{AttackData-3S | |||
|startup=9 | |||
|active=3 | |||
|recovery= N/A | |||
|parry= High | |||
|guard= High | |||
|damage=24 | |||
|stun=18 | |||
|onHit=+1~+13 | |||
|onHitCrouch=+9~+13 | |||
|onBlock=-4~+12 | |||
|attackLevel=Overhead | |||
|description= | |||
* Self meter gain: Whiff: 3, Hit: 9, Block: 7. | |||
* Opponent meter gain: Whiff: 0, Hit: 1, Block: 0. | |||
}} | |||
}} | |||
<br> | |||
<br> | |||
<br> | |||
==== Command Normals ==== | |||
=====<font style="visibility:hidden; float:right">6MP</font>===== | |||
{{MoveData | |||
|name=Upwards Head Strike | |||
|input={{b}}+{{mp}} | |||
|image= 3S_GILL_4MP_F7.png | |||
|image2= 3S_GILL_4MP_F8-9.png | |||
|caption= Frame 7 | |||
|caption2= Frames 8-9* | |||
|data= | |||
{{AttackData-3S | |||
|startup=6 | |||
|active=3 | |||
|recovery=16 | |||
|onHit=-5 | |||
|onBlock=-6 | |||
|onHitCrouch=-4 | |||
|guard= Mid | |||
|parry= High | |||
|damage=21 | |||
|stun=14 | |||
|attackLevel= Mid | |||
|description= | |||
* Cancel options: SA + SP. | |||
* Self meter gain: Whiff: 2, Hit: 6, Block: 4. | |||
* Opponent meter gain: Whiff: 0, Hit: 2, Block: 0. | |||
* +2 Kara Range. | |||
* *Due to how SuperCombo wiki processes PNGs, the 2nd PNG's framedata is represented as being similar to the 1st PNG's framedata. Reffer to [http://baston.esn3s.com/hitboxesDisplay_spritesheet.php?iChar=0&sMoveType=fd_normals&iMove=19 Baston's Gill 4MP Framedata] for what the two PNGs actually look like. | |||
}} | |||
}} | |||
=====<font style="visibility:hidden; float:right">6MK</font>===== | |||
{{MoveData | |||
|name=Quarrel Kick | |||
|input={{f}}+{{mk}} | |||
|image= 3S_GILL_6MK_F13-15.png | |||
|image2= 3S_GILL_6MK_F16-18.png | |||
|caption= Frames 13-15 | |||
|caption2= Frames 16-18* | |||
|data= | |||
{{AttackData-3S | |||
|startup=12 | |||
|active=6 | |||
|recovery=10 | |||
|onHit=-3 | |||
|onBlock=-2 | |||
|onHitCrouch=-1 | |||
|guard= Mid | |||
|parry= High | |||
|damage=17 | |||
|stun=14 | |||
|attackLevel= | |||
|description= | |||
* Self meter gain: Whiff: 2, Hit: 6, Block: 4. | |||
* Opponent meter gain: Whiff: 0, Hit: 1, Block: 0. | |||
* 0 Kara Range. | |||
* *Due to how SuperCombo wiki processes PNGs, the 2nd PNG's framedata is represented as being similar to the 1st PNG's framedata. Reffer to [http://baston.esn3s.com/hitboxesDisplay_spritesheet.php?iChar=0&sMoveType=fd_normals&iMove=20 Baston's Gill 6MK Framedata] for what the two PNGs actually look like. | |||
}} | |||
}} | |||
<br> | |||
<br> | |||
<br> | |||
==== Target Combos ==== | |||
=====<font style="visibility:hidden; float:right">Target Combo 1</font>===== | |||
{{MoveData | |||
|name=5LP > 5MP | |||
|input={{lp}}>{{mp}} | |||
|image=3S_GILL_5LP.png | |||
|image2=3S_GILL_5MP.png | |||
|data= | |||
{{AttackData-3S | |||
|startup= | |||
|active= | |||
|recovery= | |||
|onHit= | |||
|onHitCrouch= | |||
|onBlock= | |||
|parry= | |||
|damage= | |||
|stun= | |||
|attackLevel= | |||
|description= | |||
Due to how SuperCombo wiki processes PNGs, the 2nd PNG's framedata is represented as being similar to the 1st PNG's framedata. Reffer to [http://baston.esn3s.com/hitboxesDisplay_spritesheet.php?iChar=0&sMoveType=fd_normals&iMove=1 Baston's Gill 5LP Framedata] and [http://baston.esn3s.com/hitboxesDisplay_spritesheet.php?iChar=0&sMoveType=fd_normals&iMove=2 Baston's Gill 5MP Framedata] for what the two PNGs actually look like. | |||
}} | |||
}} | |||
=====<font style="visibility:hidden; float:right">Target Combo 2</font>===== | |||
{{MoveData | |||
|name=2LK > 2MK | |||
|input={{d}}{{lk}}>{{d}}{{mk}} | |||
|image=3S_GILL_2LK.png | |||
|image2=3S_GILL_2MK.png | |||
|data= | |||
{{AttackData-3S | |||
|startup= | |||
|active= | |||
|recovery= | |||
|onHit= | |||
|onHitCrouch= | |||
|onBlock= | |||
|parry= | |||
|damage= | |||
|stun= | |||
|attackLevel= | |||
|description= | |||
Due to how SuperCombo wiki processes PNGs, the 2nd PNG's framedata is represented as being similar to the 1st PNG's framedata. Reffer to [http://baston.esn3s.com/hitboxesDisplay_spritesheet.php?iChar=0&sMoveType=fd_normals&iMove=13 Baston's Gill 2LK Framedata] and [http://baston.esn3s.com/hitboxesDisplay_spritesheet.php?iChar=0&sMoveType=fd_normals&iMove=14 Baston's Gill 2MK Framedata] for what the two PNGs actually look like. | |||
}} | |||
}} | |||
<br> | |||
<br> | |||
<br> | |||
==== Throws ==== | |||
=====<font style="visibility:hidden; float:right">LPLK</font>===== | |||
{{MoveData | |||
|name=Destroy Claw | |||
|input={{lp}}+{{lk}} | |||
|image= 3S_GILL_LPLK.png | |||
|image2= 3S_GILL_LPLK_NEUTRAL.gif | |||
|imageSize2=250px | |||
|data= | |||
{{AttackData-3S | |||
|startup=2 | |||
|active=1 | |||
|recovery=21 | |||
|onBlock= N/A | |||
|guard= NULL | |||
|parry= Grab | |||
|onHit=Soft Knockdown | |||
|onHitCrouch=Soft Knockdown | |||
|damage=33 | |||
|stun=27 | |||
|attackLevel=Throw | |||
|description= | |||
* Self meter gain: Whiff: 0, Hit: 7, Block: 0. | |||
* Opponent meter gain: Whiff: 0, Hit: 0, Block: 7. | |||
* 26 Throw Range. | |||
}} | |||
}} | |||
=====<font style="visibility:hidden; float:right">4/6LPK</font>===== | |||
{{MoveData | |||
|name=Spartan Bomb | |||
|input={{b}}/{{f}}+{{lp}}+{{lk}} | |||
|image=3S_GILL_LPLK.png | |||
|image2=3S_GILL_LPLK_MOVING.gif | |||
|imageSize2=250px | |||
|data= | |||
{{AttackData-3S | |||
|startup=2 | |||
|active=1 | |||
|recovery=21 | |||
|onBlock= N/A | |||
|guard= NULL | |||
|parry= Grab | |||
|onHit=Soft Knockdown | |||
|onHitCrouch=Soft Knockdown | |||
|damage=35 | |||
|attackLevel=Throw | |||
|stun=19 | |||
|description= | |||
* Self meter gain: Whiff: 0, Hit: 8, Block: 0. | |||
* Opponent meter gain: Whiff: 0, Hit: 2, Block: 7. | |||
* 26 Throw Range. | |||
}} | |||
}} | |||
<br> | |||
<br> | |||
<br> | |||
==== Universal Overhead ==== | |||
=====<font style="visibility:hidden; float:right">MPMK</font>===== | |||
{{MoveData | |||
|name=Elbow Strike | |||
|input={{mp}}+{{mk}} | |||
|image=3S_GILL_MPMK.png | |||
|data= | |||
{{AttackData-3S | |||
|startup=15 | |||
|active=10 | |||
|recovery=5 | |||
|parry=H | |||
|damage=7 | |||
|onHit=0~+8 | |||
|onHitCrouch=+1~+9 | |||
|onBlock=-5~0 | |||
|stun=4 | |||
|attackLevel=Mid | |||
|description= | |||
* Self meter gain: Whiff: 0, Hit: 2, Block: 1. | |||
* Opponent meter gain: Whiff: 0, Hit: 0, Block: 0. | |||
}} | |||
}} | |||
<br> | |||
<br> | |||
<br> | |||
==== Taunts ==== | |||
=====<font style="visibility:hidden; float:right">HPHK</font>===== | |||
{{MoveData | |||
|name=Laughter (笑い) | |||
|input={{hp}}+{{hk}} | |||
|image=3S_GILL_HPHK.gif | |||
|imageSize=250px | |||
|data= | |||
{{AttackData-3S | |||
|startup=N/A | |||
|active=>100 | |||
|recovery=N/A | |||
|guard=NULL | |||
|parry=NULL | |||
|damage=NULL | |||
|stun=NULL | |||
|onHit=NULL | |||
|onHitCrouch=NULL | |||
|onBlock=NULL | |||
|attackLevel=NULL | |||
|description= | |||
* Cancel options: NULL. | |||
* Self meter gain: Whiff: 4, Hit: 6, Block: 5. | |||
* Opponent meter gain: Whiff: 0, Hit: 0, Block: 0. | |||
* Gill starts laughing really loudly for >110 frames. This taunt is gimicky, on the one hand, it provides an insanely high damage boost of (PLACEHOLDER), but it has the longest startup of any taunt in the game, making it impossible to use it viably as even if the opponent didn't mash out of stun, combos would drop if you did this taunt. Furthermore, the taunt bonuses aren't provided if you get hit during the taunt, and considering Gill's damage output, there isn't any reason to do this taunt in the first place assides from post-KO disrespect. | |||
* If CPU-Gill preforms this taunt, the game's difficulty get's decreased by 1, taking "adding insult to injury" to a whole new level. | |||
}} | |||
}} | |||
<br> | |||
<br> | |||
<br> | |||
==== Special Moves ==== | |||
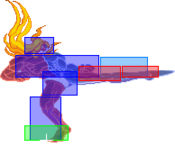
=====<font style="visibility:hidden; float:right">236P (P1 SIDE)</font>===== | |||
{{MoveData | |||
|name= Pyrokenesis | |||
|input={{qcf}}+{{p}} (P1 SIDE) | |||
|image=3S_GILL_236P_LEFT.png | |||
|data= | |||
{{AttackData-3S | |||
|attackLevel=Mid | |||
|startup=14 | |||
|recovery=37 | |||
|onHit= N/A | |||
|onHitCrouch= N/A | |||
|onBlock=-9 (POINT BLANK) | |||
|parry= High | |||
|damage=13 | |||
|stun=7 | |||
|guard= High | |||
|description= | |||
* Cancel options: NULL (SA in Dreamcast Port). | |||
* Self meter gain: Whiff: 0, Hit: 3, Block: 2. | |||
* Opponent meter gain: Whiff: 0, Hit: 0, Block: 0. | |||
* Somehow Pyrokenesis is more unsafe than Cryokenesis. | |||
}} | |||
}} | |||
=====<font style="visibility:hidden; float:right">236P (P2 SIDE)</font>===== | |||
{{MoveData | |||
|name= Cryokenesis | |||
|input={{qcb}}+{{p}} (P2 SIDE) | |||
|image=3S_GILL_236P_RIGHT.png | |||
|data= | |||
{{AttackData-3S | |||
|attackLevel=Mid | |||
|startup=14 | |||
|recovery=37 | |||
|onHit= N/A | |||
|onHitCrouch= N/A | |||
|onBlock=-7 (POINT BLANK) | |||
|parry= High | |||
|damage=13 | |||
|stun=7 | |||
|guard= High | |||
|description= | |||
* Cancel options: NULL (SA in Dreamcast Port). | |||
* Self meter gain: Whiff: 0, Hit: 3, Block: 2. | |||
* Opponent meter gain: Whiff: 0, Hit: 0, Block: 0. | |||
* Somehow Cryokenesis is more safe than Pyrokenesis. | |||
}} | |||
}} | |||
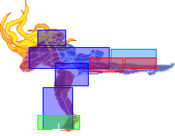
=====<font style="visibility:hidden; float:right">623P (P1 SIDE)</font>===== | |||
{{MoveData | |||
|name= Cyber Lariat: Pyro Heat | |||
|input={{dp}}+{{p}} (P1 SIDE) | |||
|image=3S_GILL_623P_LEFT_F5-12.png | |||
|image2=3S_GILL_623P_LEFT_F15-17.png | |||
|caption= Frames 5-12 | |||
|caption2= Frames 15-17* | |||
|data= | |||
{{AttackData-3S | |||
|attackLevel=Special | |||
|startup=4 | |||
|active=11 | |||
|recovery=20 | |||
|damage=14-35 (Distance Dependant) | |||
|stun=18-6 (Distance Dependant) | |||
|onBlock= -5 | |||
|onHit= N/A | |||
|onHitCrouch= N/A | |||
|parry= High | |||
|guard= High | |||
|description= | |||
* Cancel options: NULL. | |||
* Self meter gain (CLOSE): Whiff: 3, Hit: 9, Block: 8. | |||
* Opponent meter gain (CLOSE): Whiff: 0, Hit: 1, Block: 0. | |||
* Self meter gain (FAR): Whiff: 3, Hit: 5, Block: 4. | |||
* Opponent meter gain (FAR): Whiff: 0, Hit: 0, Block: 0. | |||
* *Due to how SuperCombo wiki processes PNGs, the 2nd PNG's framedata is represented as being similar to the 1st PNG's framedata. Reffer to [http://baston.esn3s.com/hitboxesDisplay_spritesheet.php?iChar=0&sMoveType=fd_normals&iMove=27 Baston's Gill Cyber Lariat: Pyro Heat Framedata] for what the two PNGs actually look like. | |||
}} | |||
}} | |||
=====<font style="visibility:hidden; float:right">623P (P2 SIDE)</font>===== | |||
{{MoveData | |||
|name= Cyber Lariat: Cryo Heat | |||
|input={{rdp}}+{{p}} (P2 SIDE) | |||
|image=3S_GILL_623P_RIGHT_F5-12.png | |||
|image2=3S_GILL_623P_RIGHT_F15-17.png | |||
|caption= Frames 5-12 | |||
|caption2= Frames 15-17* | |||
|data= | |||
{{AttackData-3S | |||
|attackLevel=Special | |||
|startup=4 | |||
|active=11 | |||
|recovery=20 | |||
|damage=14-35 (Distance Dependant) | |||
|stun=18-6 (Distance Dependant) | |||
|onBlock= -5 | |||
|onHit= N/A | |||
|onHitCrouch= N/A | |||
|parry= High | |||
|guard= High | |||
|description= | |||
* Cancel options: NULL. | |||
* Self meter gain (CLOSE): Whiff: 3, Hit: 9, Block: 8. | |||
* Opponent meter gain (CLOSE): Whiff: 0, Hit: 1, Block: 0. | |||
* Self meter gain (FAR): Whiff: 3, Hit: 5, Block: 4. | |||
* Opponent meter gain (FAR): Whiff: 0, Hit: 0, Block: 0. | |||
* *Due to how SuperCombo wiki processes PNGs, the 2nd PNG's framedata is represented as being similar to the 1st PNG's framedata. Reffer to [http://baston.esn3s.com/hitboxesDisplay_spritesheet.php?iChar=0&sMoveType=fd_normals&iMove=29 Baston's Gill Cyber Lariat: Cryo Heat Framedata] for what the two PNGs actually look like. | |||
}} | |||
}} | |||
=====<font style="visibility:hidden; float:right">214P</font>===== | |||
{{MoveData | |||
|name= Psycho Headbutt | |||
|input={{qcb}}+{{p}} | |||
|image=3S_GILL_214P.png | |||
|data= | |||
{{AttackData-3S | |||
|attackLevel=Special | |||
|startup=9 | |||
|active=4 | |||
|recovery=17 | |||
|damage=23 | |||
|stun=20 | |||
|onBlock=-5 | |||
|onHit= N/A | |||
|onHitCrouch= N/A | |||
|parry= High | |||
|guard= High | |||
|description= | |||
* Cancel options: NULL. | |||
* Self meter gain: Whiff: 2, Hit: 6, Block: 4. | |||
* Opponent meter gain: Whiff: 0, Hit: 1, Block: 0. | |||
}} | |||
}} | |||
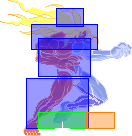
=====<font style="visibility:hidden; float:right">63214K</font>===== | |||
{{MoveData | |||
|name= Moonsault Kneedrop | |||
|input={{hcb}}+{{k}} | |||
|image=3S_GILL_63214K.png | |||
|data= | |||
{{AttackData-3S | |||
|attackLevel=Special | |||
|startup=40 | |||
|active=2 | |||
|recovery=5 | |||
|damage=34 | |||
|stun=23 | |||
|onBlock= -19 | |||
|onHit= N/A | |||
|onHitCrouch= N/A | |||
|parry= High | |||
|guard= High | |||
|description= | |||
* Cancel options: NULL. | |||
* Self meter gain: Whiff: 2, Hit: 7, Block: 5. | |||
* Opponent meter gain: Whiff: 0, Hit: 1, Block: 0. | |||
* This move with its long startup comvined with the fact that it is very minus on hit makes it one of Gill's spscials, so don't bother using it unless you want to eat a giant fat punish. | |||
}} | |||
}} | |||
<br> | |||
<br> | |||
<br> | |||
==== Super Arts ==== | |||
=====<font style="visibility:hidden; float:right">Meteor Strike</font>===== | |||
{{MoveData | |||
|name= Meteor Strike | |||
|input= {{qcf}}{{qcf}}+{{P}} | |||
|image= 3S_GILL_SA1.png | |||
|data= | |||
{{AttackData-3S | |||
|startup=1 | |||
|active=N/A | |||
|recovery=N/A | |||
|onHit=N/A | |||
|onBlock=-17 | |||
|onHitCrouch=-17 | |||
|guard= High | |||
|parry= High | |||
|damage=113 | |||
|stun=27 | |||
|attackLevel= High | |||
|description= | |||
Gill flexes his arm that is facing towards the screen in a similar fashion to one of his win poses as he bellows "WELCOME TO YOUR DEATH" as a plethora of Pyrokenesis and Cryokenesis balls hurtle down from the heavens above, their pattern varrying depending on what side the super was activated from. | |||
}} | |||
}} | |||
=====<font style="visibility:hidden; float:right">Seraphic Wings</font>===== | |||
{{MoveData | |||
|name= Seraphic Wings | |||
|input= {{qcf}}{{qcf}}+{{K}} | |||
|image= 3S_GILL_SA2.gif | |||
|data= | |||
{{AttackData-3S | |||
|startup=50 (1) | |||
|active=139 | |||
|recovery=N/A | |||
|onHit=N/A | |||
|onBlock=-60 | |||
|onHitCrouch=-60 | |||
|guard= Mid | |||
|parry= Mid | |||
|damage=117 | |||
|stun=35 | |||
|attackLevel= Super | |||
|description= | |||
Gill ascends upwards at a 45° angle as he opens his arms, while 3 pairs of wings sprout from his back, as he bellows "LET ME BE THE BLESSER OF ALL SOULS" as powerful shockwaves cover the entire screen. | |||
First hit is unparryable. | |||
}} | |||
}} | |||
=====<font style="visibility:hidden; float:right">Ressurection</font>===== | |||
{{MoveData | |||
|name= Ressurection | |||
|input= Die with full meter | |||
|image= 3S_GILL_SA3.gif | |||
|data= | |||
{{AttackData-3S | |||
|startup=N/A | |||
|active=N/A | |||
|recovery=N/A | |||
|onHit=NULL | |||
|onBlock=NULL | |||
|onHitCrouch=NULL | |||
|guard= NULL | |||
|parry= NULL | |||
|damage= NULL | |||
|stun= NULL | |||
|attackLevel= Super | |||
|description= | |||
Gill gets knocked down as usual during a KO, but the Announcer never says "KO", as soon after Gill gets back up and starts ascending upwards as he rapidly regenerates his HP while bellowing "RESSURECTION"! | |||
If this super comes out, your meter becomes permenantly broken, disabling you from using Supers for the rest of the match. | |||
}} | |||
}} | |||
<br> | |||
<br> | |||
<br> | |||
{{Navbox-3S}} | |||
[[Category:Street Fighter III: 3rd Strike]] | |||
Latest revision as of 15:38, 13 July 2024
Introduction
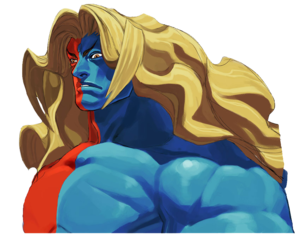
Gill (ギル Giru) is the leader of a mysterious cult-like organization called the Secret Society which has manipulated world events for over 2000 years, and is dedicated to the salvation of mankind, and creation of a new utopia. His desire is to control the world (or in the case of 3rd Strike, the console port tierlist), but he's neither a villain or hero. Gill was first introduced in Street Fighter III: New Generation.
Gill is a boss character that can be best described as a far better version of Urien (in terms of normals). They both have similar sprites, hitboxes, and hurtboxes, but Gill's moves come out far faster and / or do more damage and stun. He has a headbutt like Urien, but it isn't a charge move, and unlike Urien, he has a Lariat. He is also arguably the strongest character in the game both in the arcade version and in the console port where he is buffed slightly (Pyrokenesis / Cryokenesis becomes super cancellable in the console port). Gill is a damage machine, having almost no bad moves, and is capable of getting a TOD from any part of the screen on either side from a single crouching HP.
Super Arts
While Gill has access to all three of his supers at all times, it is still important to know which supers are good, and which supers are bad.
Meteor Strike
Recommended
Ideal combo ender for TODs involving beefier characters
Seraphic Wings
Not Recommended
Minus as hell, and only really practical in the console ports; which most people reading this wiki will not care for.
Resurrection
Not recommended, even if it is unavoidable
To be honest if you die as Gill, it is kind of on you if this super comes out.
| Strengths | Weaknesses |
|---|---|
|
|
| Gill #3S_GI | |
|---|---|
| Vitals | |
| Life Points | 1300 |
| Stun Points | 72 |
| Super Art Stock/Size | |
| SA1 | 1/120 |
| SA2 | 1/120 |
| SA3 | 1/120 |
| Ground Movement | |
| Forward Dash duration/distance | 15 (17) (143px) |
| Back Dash duration/distance | 19 (104px) |
| Jumping | |
| Back Jump duration | 38(5+32+1) |
| Neutral Jump duration | 38(5+32+1) |
| Forward Jump duration | 38(5+32+1) |
| Back Super Jump duration | 51(7+43+1) |
| Neutral Super Jump duration | 51(7+43+1) |
| Forward Super Jump duration | 51(7+43+1) |
| Wake up | |
| Wake up duration | 76 |
| Quick rise duration | 56 |
Frame Data
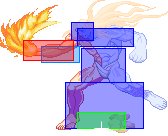
ALL DAMAGE INDICATED IN THE FRAME DATA WAS DONE AGAINST AKUMA, WHO HAS THE LOWEST HP IN THE GAME. IN-DEPTH FRAMEDATA INFORMATION CAN BE FOUND HERE.
Standing Normals
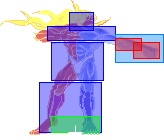
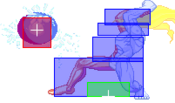
5LP
| Startup | Active | Recovery | Block | Hit | Cr. Hit | Damage | Stun | Kara | Guard Level | Parry Level |
|---|---|---|---|---|---|---|---|---|---|---|
| 5 | 6 | 7 | +10 | +10 | +12 | 6 | 6 | - | Mid | Mid |
| Cancel Options | Self Meter Gain | Whiff | Hit | Block / Tech | Opponent Meter Gain | Hit | Block / Tech | |||
| - | - | - | - | - | - | |||||
| ||||||||||
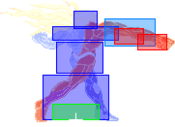
5MP
| Startup | Active | Recovery | Block | Hit | Cr. Hit | Damage | Stun | Kara | Guard Level | Parry Level |
|---|---|---|---|---|---|---|---|---|---|---|
| 4 | 6 | 9 | +0 | +1 | +2 | 19 | 14 | - | Mid | High |
| Cancel Options | Self Meter Gain | Whiff | Hit | Block / Tech | Opponent Meter Gain | Hit | Block / Tech | |||
| - | - | - | - | - | - | |||||
| ||||||||||
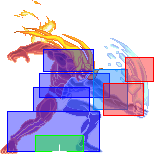
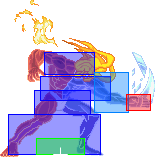
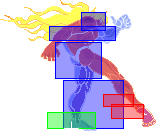
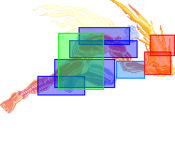
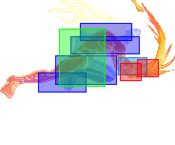
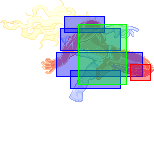
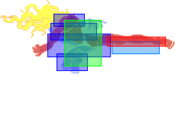
5HP
| Startup | Active | Recovery | Block | Hit | Cr. Hit | Damage | Stun | Kara | Guard Level | Parry Level |
|---|---|---|---|---|---|---|---|---|---|---|
| 10 | 5 | 16 | -5 | -3 | -1 | 28 | 18 | - | Mid | High |
| Cancel Options | Self Meter Gain | Whiff | Hit | Block / Tech | Opponent Meter Gain | Hit | Block / Tech | |||
| - | - | - | - | - | - | |||||
| ||||||||||
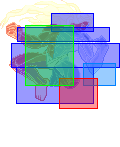
5LK
| Startup | Active | Recovery | Block | Hit | Cr. Hit | Damage | Stun | Kara | Guard Level | Parry Level |
|---|---|---|---|---|---|---|---|---|---|---|
| 3 | 1 | 7 | +3 | +3 | +3 | 7 | 8 | - | Mid | Mid |
| Cancel Options | Self Meter Gain | Whiff | Hit | Block / Tech | Opponent Meter Gain | Hit | Block / Tech | |||
| - | - | - | - | - | - | |||||
| ||||||||||
5MK
| Startup | Active | Recovery | Block | Hit | Cr. Hit | Damage | Stun | Kara | Guard Level | Parry Level |
|---|---|---|---|---|---|---|---|---|---|---|
| 6 | 5 | 14 | -4 | -3 | -2 | 17 | 14 | - | Mid | High |
| Cancel Options | Self Meter Gain | Whiff | Hit | Block / Tech | Opponent Meter Gain | Hit | Block / Tech | |||
| - | - | - | - | - | - | |||||
| ||||||||||
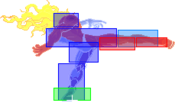
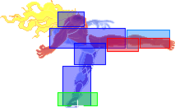
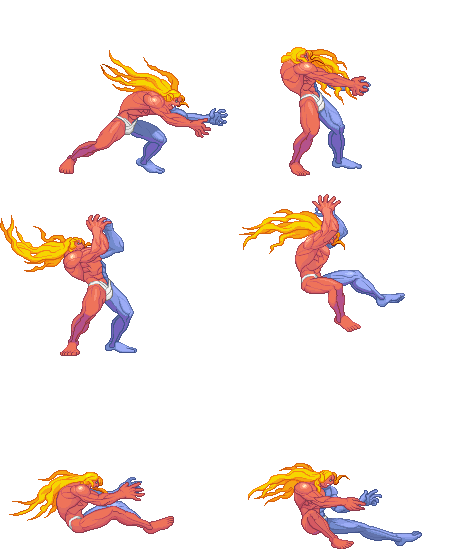
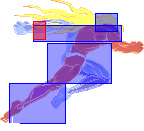
5HK
| Startup | Active | Recovery | Block | Hit | Cr. Hit | Damage | Stun | Kara | Guard Level | Parry Level |
|---|---|---|---|---|---|---|---|---|---|---|
| 16 | 7 | 22 | -10 | -8 | -6 | 19 | 18 | - | Overhead | High |
| Cancel Options | Self Meter Gain | Whiff | Hit | Block / Tech | Opponent Meter Gain | Hit | Block / Tech | |||
| - | - | - | - | - | - | |||||
| ||||||||||
Crouching Normals
Crouching LP
| Startup | Active | Recovery | Block | Hit | Cr. Hit | Damage | Stun | Kara | Guard Level | Parry Level |
|---|---|---|---|---|---|---|---|---|---|---|
| 3 | 1 | 7 | 3 | 3 | 3 | 3 | 6 | - | Mid | Mid |
| Cancel Options | Self Meter Gain | Whiff | Hit | Block / Tech | Opponent Meter Gain | Hit | Block / Tech | |||
| - | - | - | - | - | - | |||||
| ||||||||||
Crouching MP
| Startup | Active | Recovery | Block | Hit | Cr. Hit | Damage | Stun | Kara | Guard Level | Parry Level |
|---|---|---|---|---|---|---|---|---|---|---|
| 6 | 6 | 8 | -1 | 0 | 1 | 14 | 14 | - | Low | Low |
| Cancel Options | Self Meter Gain | Whiff | Hit | Block / Tech | Opponent Meter Gain | Hit | Block / Tech | |||
| - | - | - | - | - | - | |||||
| ||||||||||
Crouching HP
| Startup | Active | Recovery | Block | Hit | Cr. Hit | Damage | Stun | Kara | Guard Level | Parry Level |
|---|---|---|---|---|---|---|---|---|---|---|
| 5 | 5 | 17 | -3 | Juggle State | Juggle State | 27 | 17 | - | Low | Low |
| Cancel Options | Self Meter Gain | Whiff | Hit | Block / Tech | Opponent Meter Gain | Hit | Block / Tech | |||
| - | - | - | - | - | - | |||||
| ||||||||||
Crouching LK
| Startup | Active | Recovery | Block | Hit | Cr. Hit | Damage | Stun | Kara | Guard Level | Parry Level |
|---|---|---|---|---|---|---|---|---|---|---|
| 3 | 2 | 5 | 4 | 4 | 4 | 3 | 4 | - | Low | Low |
| Cancel Options | Self Meter Gain | Whiff | Hit | Block / Tech | Opponent Meter Gain | Hit | Block / Tech | |||
| - | - | - | - | - | - | |||||
| ||||||||||
Crouching MK
| Startup | Active | Recovery | Block | Hit | Cr. Hit | Damage | Stun | Kara | Guard Level | Parry Level |
|---|---|---|---|---|---|---|---|---|---|---|
| 2 | 1 | 12 | 0 | 1 | 2 | 16 | 8 | - | Low | Low |
| Cancel Options | Self Meter Gain | Whiff | Hit | Block / Tech | Opponent Meter Gain | Hit | Block / Tech | |||
| - | - | - | - | - | - | |||||
| ||||||||||
Crouching HK
| Startup | Active | Recovery | Block | Hit | Cr. Hit | Damage | Stun | Kara | Guard Level | Parry Level |
|---|---|---|---|---|---|---|---|---|---|---|
| 7 | 4 | 13 | -6 | Soft Knockdown | Soft Knockdown | 23 | 10 | - | Low | Low |
| Cancel Options | Self Meter Gain | Whiff | Hit | Block / Tech | Opponent Meter Gain | Hit | Block / Tech | |||
| - | - | - | - | - | - | |||||
| ||||||||||
Jumping Normals
j.LP
| Startup | Active | Recovery | Block | Hit | Cr. Hit | Damage | Stun | Kara | Guard Level | Parry Level |
|---|---|---|---|---|---|---|---|---|---|---|
| 4 | ∞ | N/A | -5~+7 | -5~+6 | +4~+7 | 10 | 10 | - | High | High |
| Cancel Options | Self Meter Gain | Whiff | Hit | Block / Tech | Opponent Meter Gain | Hit | Block / Tech | |||
| - | - | - | - | - | - | |||||
| ||||||||||
j.MP
| Startup | Active | Recovery | Block | Hit | Cr. Hit | Damage | Stun | Kara | Guard Level | Parry Level |
|---|---|---|---|---|---|---|---|---|---|---|
| 5 | 5 | N/A | +3~+10 | +3~+10 | +9~+10 | 17 | 14 | - | High | High |
| Cancel Options | Self Meter Gain | Whiff | Hit | Block / Tech | Opponent Meter Gain | Hit | Block / Tech | |||
| - | - | - | - | - | - | |||||
| ||||||||||
j.HP
| Startup | Active | Recovery | Block | Hit | Cr. Hit | Damage | Stun | Kara | Guard Level | Parry Level |
|---|---|---|---|---|---|---|---|---|---|---|
| 6 | 3 | N/A | +5~+13 | +2~+12 | +11~+12 | 24 | 18 | - | High | High |
| Cancel Options | Self Meter Gain | Whiff | Hit | Block / Tech | Opponent Meter Gain | Hit | Block / Tech | |||
| - | - | - | - | - | - | |||||
| ||||||||||
j.LK
j.MK
| Startup | Active | Recovery | Block | Hit | Cr. Hit | Damage | Stun | Kara | Guard Level | Parry Level |
|---|---|---|---|---|---|---|---|---|---|---|
| 5 | 5 | N/A | +2~+10 | +3~+10 | +9~+10 | 17 | 14 | - | High | High |
| Cancel Options | Self Meter Gain | Whiff | Hit | Block / Tech | Opponent Meter Gain | Hit | Block / Tech | |||
| - | - | - | - | - | - | |||||
| ||||||||||
j.HK
| Startup | Active | Recovery | Block | Hit | Cr. Hit | Damage | Stun | Kara | Guard Level | Parry Level |
|---|---|---|---|---|---|---|---|---|---|---|
| 9 | 3 | N/A | -4~+12 | +1~+13 | +9~+13 | 24 | 18 | - | High | High |
| Cancel Options | Self Meter Gain | Whiff | Hit | Block / Tech | Opponent Meter Gain | Hit | Block / Tech | |||
| - | - | - | - | - | - | |||||
| ||||||||||
Command Normals
6MP
| Startup | Active | Recovery | Block | Hit | Cr. Hit | Damage | Stun | Kara | Guard Level | Parry Level |
|---|---|---|---|---|---|---|---|---|---|---|
| 6 | 3 | 16 | -6 | -5 | -4 | 21 | 14 | - | Mid | High |
| Cancel Options | Self Meter Gain | Whiff | Hit | Block / Tech | Opponent Meter Gain | Hit | Block / Tech | |||
| - | - | - | - | - | - | |||||
| ||||||||||
6MK
| Startup | Active | Recovery | Block | Hit | Cr. Hit | Damage | Stun | Kara | Guard Level | Parry Level |
|---|---|---|---|---|---|---|---|---|---|---|
| 12 | 6 | 10 | -2 | -3 | -1 | 17 | 14 | - | Mid | High |
| Cancel Options | Self Meter Gain | Whiff | Hit | Block / Tech | Opponent Meter Gain | Hit | Block / Tech | |||
| - | - | - | - | - | - | |||||
| ||||||||||
Target Combos
Target Combo 1
| Startup | Active | Recovery | Block | Hit | Cr. Hit | Damage | Stun | Kara | Guard Level | Parry Level |
|---|---|---|---|---|---|---|---|---|---|---|
| - | - | - | - | - | - | - | - | - | - | - |
| Cancel Options | Self Meter Gain | Whiff | Hit | Block / Tech | Opponent Meter Gain | Hit | Block / Tech | |||
| - | - | - | - | - | - | |||||
|
Due to how SuperCombo wiki processes PNGs, the 2nd PNG's framedata is represented as being similar to the 1st PNG's framedata. Reffer to Baston's Gill 5LP Framedata and Baston's Gill 5MP Framedata for what the two PNGs actually look like. | ||||||||||
Target Combo 2
| Startup | Active | Recovery | Block | Hit | Cr. Hit | Damage | Stun | Kara | Guard Level | Parry Level |
|---|---|---|---|---|---|---|---|---|---|---|
| - | - | - | - | - | - | - | - | - | - | - |
| Cancel Options | Self Meter Gain | Whiff | Hit | Block / Tech | Opponent Meter Gain | Hit | Block / Tech | |||
| - | - | - | - | - | - | |||||
|
Due to how SuperCombo wiki processes PNGs, the 2nd PNG's framedata is represented as being similar to the 1st PNG's framedata. Reffer to Baston's Gill 2LK Framedata and Baston's Gill 2MK Framedata for what the two PNGs actually look like. | ||||||||||
Throws
LPLK
| Startup | Active | Recovery | Block | Hit | Cr. Hit | Damage | Stun | Kara | Guard Level | Parry Level |
|---|---|---|---|---|---|---|---|---|---|---|
| 2 | 1 | 21 | N/A | Soft Knockdown | Soft Knockdown | 33 | 27 | - | NULL | Grab |
| Cancel Options | Self Meter Gain | Whiff | Hit | Block / Tech | Opponent Meter Gain | Hit | Block / Tech | |||
| - | - | - | - | - | - | |||||
| ||||||||||
4/6LPK
| Startup | Active | Recovery | Block | Hit | Cr. Hit | Damage | Stun | Kara | Guard Level | Parry Level |
|---|---|---|---|---|---|---|---|---|---|---|
| 2 | 1 | 21 | N/A | Soft Knockdown | Soft Knockdown | 35 | 19 | - | NULL | Grab |
| Cancel Options | Self Meter Gain | Whiff | Hit | Block / Tech | Opponent Meter Gain | Hit | Block / Tech | |||
| - | - | - | - | - | - | |||||
| ||||||||||
Universal Overhead
MPMK
| Startup | Active | Recovery | Block | Hit | Cr. Hit | Damage | Stun | Kara | Guard Level | Parry Level |
|---|---|---|---|---|---|---|---|---|---|---|
| 15 | 10 | 5 | -5~0 | 0~+8 | +1~+9 | 7 | 4 | - | - | H |
| Cancel Options | Self Meter Gain | Whiff | Hit | Block / Tech | Opponent Meter Gain | Hit | Block / Tech | |||
| - | - | - | - | - | - | |||||
| ||||||||||
Taunts
HPHK
| Startup | Active | Recovery | Block | Hit | Cr. Hit | Damage | Stun | Kara | Guard Level | Parry Level |
|---|---|---|---|---|---|---|---|---|---|---|
| N/A | >100 | N/A | NULL | NULL | NULL | NULL | NULL | - | NULL | NULL |
| Cancel Options | Self Meter Gain | Whiff | Hit | Block / Tech | Opponent Meter Gain | Hit | Block / Tech | |||
| - | - | - | - | - | - | |||||
| ||||||||||
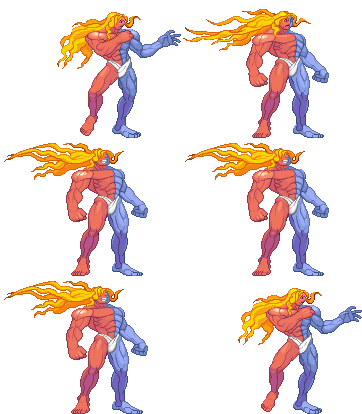
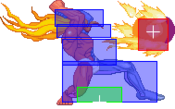
Special Moves
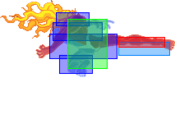
236P (P1 SIDE)
| Startup | Active | Recovery | Block | Hit | Cr. Hit | Damage | Stun | Kara | Guard Level | Parry Level |
|---|---|---|---|---|---|---|---|---|---|---|
| 14 | - | 37 | -9 (POINT BLANK) | N/A | N/A | 13 | 7 | - | High | High |
| Cancel Options | Self Meter Gain | Whiff | Hit | Block / Tech | Opponent Meter Gain | Hit | Block / Tech | |||
| - | - | - | - | - | - | |||||
| ||||||||||
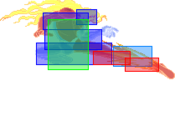
236P (P2 SIDE)
| Startup | Active | Recovery | Block | Hit | Cr. Hit | Damage | Stun | Kara | Guard Level | Parry Level |
|---|---|---|---|---|---|---|---|---|---|---|
| 14 | - | 37 | -7 (POINT BLANK) | N/A | N/A | 13 | 7 | - | High | High |
| Cancel Options | Self Meter Gain | Whiff | Hit | Block / Tech | Opponent Meter Gain | Hit | Block / Tech | |||
| - | - | - | - | - | - | |||||
| ||||||||||
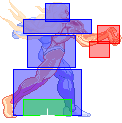
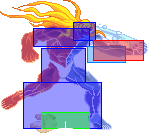
623P (P1 SIDE)
| Startup | Active | Recovery | Block | Hit | Cr. Hit | Damage | Stun | Kara | Guard Level | Parry Level |
|---|---|---|---|---|---|---|---|---|---|---|
| 4 | 11 | 20 | -5 | N/A | N/A | 14-35 (Distance Dependant) | 18-6 (Distance Dependant) | - | High | High |
| Cancel Options | Self Meter Gain | Whiff | Hit | Block / Tech | Opponent Meter Gain | Hit | Block / Tech | |||
| - | - | - | - | - | - | |||||
| ||||||||||
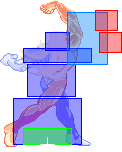
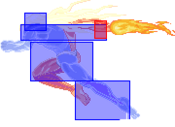
623P (P2 SIDE)
| Startup | Active | Recovery | Block | Hit | Cr. Hit | Damage | Stun | Kara | Guard Level | Parry Level |
|---|---|---|---|---|---|---|---|---|---|---|
| 4 | 11 | 20 | -5 | N/A | N/A | 14-35 (Distance Dependant) | 18-6 (Distance Dependant) | - | High | High |
| Cancel Options | Self Meter Gain | Whiff | Hit | Block / Tech | Opponent Meter Gain | Hit | Block / Tech | |||
| - | - | - | - | - | - | |||||
| ||||||||||
214P
| Startup | Active | Recovery | Block | Hit | Cr. Hit | Damage | Stun | Kara | Guard Level | Parry Level |
|---|---|---|---|---|---|---|---|---|---|---|
| 9 | 4 | 17 | -5 | N/A | N/A | 23 | 20 | - | High | High |
| Cancel Options | Self Meter Gain | Whiff | Hit | Block / Tech | Opponent Meter Gain | Hit | Block / Tech | |||
| - | - | - | - | - | - | |||||
| ||||||||||
63214K
| Startup | Active | Recovery | Block | Hit | Cr. Hit | Damage | Stun | Kara | Guard Level | Parry Level |
|---|---|---|---|---|---|---|---|---|---|---|
| 40 | 2 | 5 | -19 | N/A | N/A | 34 | 23 | - | High | High |
| Cancel Options | Self Meter Gain | Whiff | Hit | Block / Tech | Opponent Meter Gain | Hit | Block / Tech | |||
| - | - | - | - | - | - | |||||
| ||||||||||
Super Arts
Meteor Strike
| Startup | Active | Recovery | Block | Hit | Cr. Hit | Damage | Stun | Kara | Guard Level | Parry Level |
|---|---|---|---|---|---|---|---|---|---|---|
| 1 | N/A | N/A | -17 | N/A | -17 | 113 | 27 | - | High | High |
| Cancel Options | Self Meter Gain | Whiff | Hit | Block / Tech | Opponent Meter Gain | Hit | Block / Tech | |||
| - | - | - | - | - | - | |||||
|
Gill flexes his arm that is facing towards the screen in a similar fashion to one of his win poses as he bellows "WELCOME TO YOUR DEATH" as a plethora of Pyrokenesis and Cryokenesis balls hurtle down from the heavens above, their pattern varrying depending on what side the super was activated from. | ||||||||||
Seraphic Wings
| Startup | Active | Recovery | Block | Hit | Cr. Hit | Damage | Stun | Kara | Guard Level | Parry Level |
|---|---|---|---|---|---|---|---|---|---|---|
| 50 (1) | 139 | N/A | -60 | N/A | -60 | 117 | 35 | - | Mid | Mid |
| Cancel Options | Self Meter Gain | Whiff | Hit | Block / Tech | Opponent Meter Gain | Hit | Block / Tech | |||
| - | - | - | - | - | - | |||||
|
Gill ascends upwards at a 45° angle as he opens his arms, while 3 pairs of wings sprout from his back, as he bellows "LET ME BE THE BLESSER OF ALL SOULS" as powerful shockwaves cover the entire screen. First hit is unparryable. | ||||||||||
Ressurection
| Startup | Active | Recovery | Block | Hit | Cr. Hit | Damage | Stun | Kara | Guard Level | Parry Level |
|---|---|---|---|---|---|---|---|---|---|---|
| N/A | N/A | N/A | NULL | NULL | NULL | NULL | NULL | - | NULL | NULL |
| Cancel Options | Self Meter Gain | Whiff | Hit | Block / Tech | Opponent Meter Gain | Hit | Block / Tech | |||
| - | - | - | - | - | - | |||||
|
Gill gets knocked down as usual during a KO, but the Announcer never says "KO", as soon after Gill gets back up and starts ascending upwards as he rapidly regenerates his HP while bellowing "RESSURECTION"! If this super comes out, your meter becomes permenantly broken, disabling you from using Supers for the rest of the match. | ||||||||||
