|
|
| (32 intermediate revisions by 4 users not shown) |
| Line 1: |
Line 1: |
| [[File:avg2_kyoko.jpg|right|"hahahahaha. this sucks, man."]]
| | {{AVG2 Character Intro|char=kyoko|short=kyo|content= |
| | |
| = Introduction = | |
|
| |
|
| | == Introduction == |
| ''Kyoko doesn't even want to be here.'' | | ''Kyoko doesn't even want to be here.'' |
|
| |
|
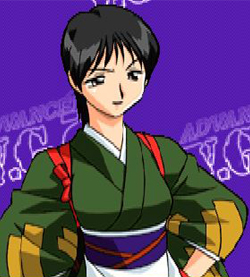
| At a glance, you might think that Kyoko is a grappler character. However, while she does sport a command grab and a unique anti-air grab special, Kyoko is, surprisingly, far more well-suited to a close-range pressure game laden with powerful strikes. Sporting strong combos, one of the few four-hit aerial chains in the game, and powerful okizeme with EX Sazanka, Kyoko excels at overwhelming the opponent and not giving them a chance to breathe. However, this strength comes at the cost of a somewhat linear neutral game -- with her aerial normals being her primary way to start offense, she suffers against characters with good space control options. She also very heavily relies on meter to get going, so properly managing your resources is paramount to making Kyoko work.
| | With her command grab, anti-air throw and suite of catch counters, you'd be forgiven for thinking that Kyoko is best played as a grappler. But despite what her kit might tell you, Kyoko is a character who relies much more on her powerful striking attacks to set up looping 50/50 setplay. With one of the game's few four-hit aerial chains, high damage combos and consistent access to hard knockdowns with {{Tooltip|text=Sazanka|hovertext=623K}}, Kyoko is more than capable of overwhelming the opponent with her offense and not giving them a chance to breathe. Unfortunately, this powerful offense comes at the expense of a linear neutral game -- with her air normals being her primary means of establishing space control and approaching, she can suffer against patient opponents who are willing and able to control her movement. |
| | |
| {|
| |
| |-style="text-align:left;"
| |
| ! Strengths !! Weaknesses
| |
| |- style="vertical-align:top;text-align:left"
| |
| | style="width: 50%;"|
| |
| *Great combo damage
| |
| *Fantastic air normals and a four-hit air chain help bolster her aerial presence
| |
| *Absolutely terrifying okizeme
| |
| | style="width: 50%;"|
| |
| *Weak long-distance options force her to take to the skies, leaving her open to anti-airs
| |
| *Lack of ground chains makes it difficult for her to confirm combos
| |
| *High dependence on meter forces her to be very mindful of her resources
| |
| |-
| |
| |}
| |
| = Movelist =
| |
| '''Command Moves'''<br>
| |
| b+HP: A short-range command elbow. Special cancels, but doesn't really do a whole lot for you.
| |
| | |
| '''Target Combos'''<br>
| |
| st.HP > st.HK/cr.HK
| |
| | |
| (j.LP > j.LK) or (j.LK > j.LP) > (j.HP > j.HK) or (j.HK > j.HP)<br>
| |
| (j.HP > j.HK) or (j.HK > j.HP)
| |
| | |
| '''Guard Cancels'''<br>
| |
| LP: st.HP<br>
| |
| LK: st.HK<br>
| |
| HP: LP Ominaeshi (qcf+LP)<br>
| |
| HK: LK Sazanka (dp+K)
| |
| | |
| Kyoko will usually get the most mileage out of her LP and LK guard cancels. LP works best for airborne opponents, LK is best for grounded opponents due to its horizontal range. In either case, your goal is to convert into Ominaeshi to score a combo.
| |
| | |
| == Special Moves ==
| |
| '''Ominaeshi (qcf+P~P):''' A short-range elbow attack. The LP version stays in place, the HP version moves forward slightly. Has a follow-up called '''Otokoeshi''', performed by pressing P again. The strength of Otokoeshi is determined by the version of Ominaeshi used, so you want to use HP Ominaeshi in combos. EX version has both hits come out automatically, deals strong damage and has some defensive utility, so it's worth keeping a bar stocked for this if you need it.
| |
| | |
| '''SECRET Ominasehi (hcf+HP+HK)):''' Essentially HP Ominaeshi, but with a notable difference to Otokoeshi: in exchange for a smaller hitbox and incredibly reduced damage (only dealing 1pt), it builds significantly more meter than other versions of the move -- a quarter of a bar on whiff, and half a bar on hit! Unlike most other secret moves, this is extremely useful for Kyoko, since meter is so important to the rest of her gameplan. However, bear in mind that when in range, Jinchouge will take priority over this move.
| |
| | |
| '''Shakunage (rdp+P):''' A series of three catch counters. LP version catches jumping normals and overheads, HP and LP+HP versions both catch grounded mids. Shakunage cannot catch lows or projectiles. All versions launch for a juggle follow-up, but the LP+HP version side swaps. Good way to catch people out for being too predictable with their buttons in neutral.
| |
| | |
| '''Sazanka (dp+K):''' Leaping anti-air grab. Even though it's unblockable, the lack of invincibility makes this move difficult to use as an anti-air. Its use in combos is higly valuable, though, since it provides a hard knockdown, setting up Kyoko's incredibly scary okizeme. The EX version is particularly useful in this regard, since it deals more damage and is easily confirmable as a super cancel from Ominaeshi.
| |
| | |
| '''SECRET Sazanka (f,hcf+LK+HK):''' Effectively the same as HK Sazanka, except it travels the same height as the EX version. Jinchouge will take priority at close range (Housenka if you have 2 or more meters), while EX Sazanka will take priority if you have at least one meter.
| |
| | |
| '''Jinchouge (close hcf+K):''' Kyoko's command grab. A nice option to have against people who are turtling up too much against your offense. In the corner, this can net you a combo with an OTG pickup, so it becomes doubly useful there. Bear in mind, though, that you need to be careful when executing this move from a dash -- if you have no meter you'll often get Sazanka, and if you have two bars you might accidentally let Hosenka rip. Best to try and tick into it.
| |
| | |
| == Super Moves ==
| |
| '''Housenka (close f,hcf+K):''' 1F command grab super that's unjumpable after the flash. Because of the way the final group of hits work, the best damage will often come from landing this in the center of the screen (not the centre of the stage). However, you can combo after this in the corner by following up with Ominaeshi (it will whiff, but Otokoeshi will hit), which you can then extend with a super cancel if you feel like dumping meter.
| |
| | |
| = Combos =
| |
| ''For all combos ending with Ominaeshi, Otokoeshi is assumed unless you're super cancelling. If you are, you can cash out some meter by cancelling Ominaeshi into EX Sazanka, or cancelling Otokoeshi into EX Ominaeshi xx EX Sazanka.''
| |
| | |
| '''Basic Combos'''<br>
| |
| st.LP, cr.HP, sj.HK > j.HP, st.HP > st.HK xx Ominaeshi<br>
| |
| (corner) st.LP, cr.HP, cr.HP x2, st.HP > st.HK xx Ominaeshi<br>
| |
| | |
| '''Anti-Air Combos'''<br>
| |
| EX Ominaeshi xx EX Sazanka<br>
| |
| st.LP x1-2, sj.LK > j.HK > j.HP xx LP Ominaeshi<br>
| |
|
| |
|
| '''Throw Combos'''<br> | | {{StrengthsAndWeaknesses |
| Jinchouge, OTG cr.HK<br>
| | | intro = [[File:avg2 kyoko mini.png|20px]] '''Kyoko''' is an aggressive setplay character who uses her dominant aerial options to score knockdowns that set up ambiguous left/right okizeme. |
| (corner) Jinchouge, walk OTG cr.HK xx LP Ominaeshi, cr.HP, cr.HP xx LK Sazanka<br>
| | | pros = |
| (corner) Jinchouge, walk OTG cr.HK xx LP Ominaeshi, cr.HP, HP Ominaeshi > Ender<br>
| | * '''Powerful Aerial Presence:''' Kyoko has fantastic aerial normals, and her ability to chain all four of them together gives her exceptional space control options in the air. |
| | * '''High Combo Damage:''' Kyoko's combos consistently lead to very high damage, especially when she's willing to spend meter. |
| | * '''Oppressive Setplay Mixups:''' Kyoko's easy access to hard knockdowns in her combos allows her to set up dangerous looping okizeme, making it very possible for her to win the entire round off one touch. |
| | | cons = |
| | * '''Weak Ground Game:''' Kyoko is not particularly well-equipped to play at further distances on the ground, which often forces her into the skies, leaving her open to anti-airs or aerial intercepts by smart opponents. |
| | * '''Limited Combo Routes:''' While Kyoko's combo damage is quite high, her grounded chain options are highly limited, making her options for confirming combos a little more specific than she would often like. |
| | }} |
|
| |
|
| '''Counter Combo'''<br>
| | == Stats == |
| LP Shakunage, sj.LK > j.HK, st.HP > st.HK xx Ominaeshi<br>
| | {{AVG2 Character Data |
| HP Shakunage, HP Ominaeshi<br>
| | | atk = C |
| LP+HP Shakunage, OTG cr.HK xx HP Ominaeshi<br>
| | | def = A |
| | | djump = Yes |
| | | dbrake = Yes |
| | | bd = 21F (Throw Invul) |
| | | wkup = 24F |
| | }} |
|
| |
|
| = Frame Data = | | == Color Options == |
| Soon.
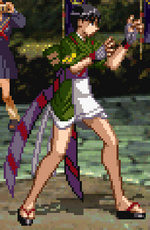
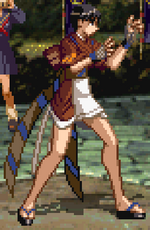
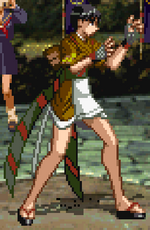
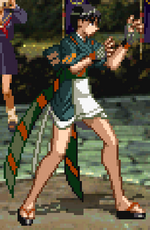
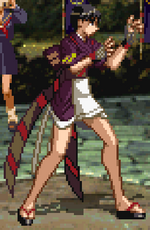
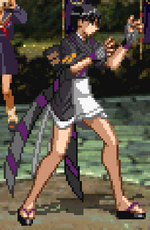
| | {{ColorGallery | filePrefix=AVG2_Kyoko_Color_| imageWidths=187| colors= |
| | {{ColorGallery/Color|Circle| text=Circle (Default) }} |
| | {{ColorGallery/Color|Triangle| text=Triangle }} |
| | {{ColorGallery/Color|Square| text=Square }} |
| | {{ColorGallery/Color|R1| text=R1 }} |
| | {{ColorGallery/Color|R2| text=R2 }} |
| | {{ColorGallery/Color|Start| text=Start (Hidden) }} |
| | }} |
|
| |
|
| {{Template:Advanced V.G. 2}}
| | }} |
|
| |
|
| | {{Navbox-AVG2}} |
| [[Category:Advanced V.G. 2]] | | [[Category:Advanced V.G. 2]] |
