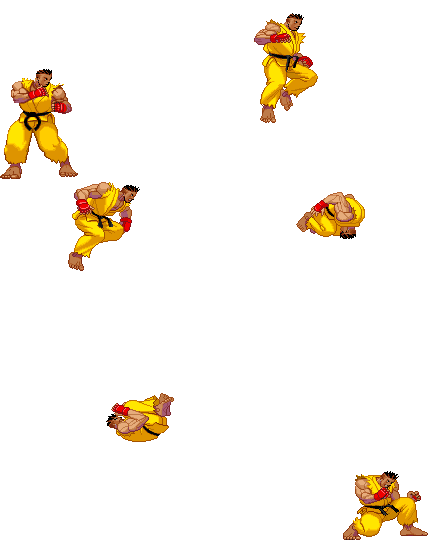
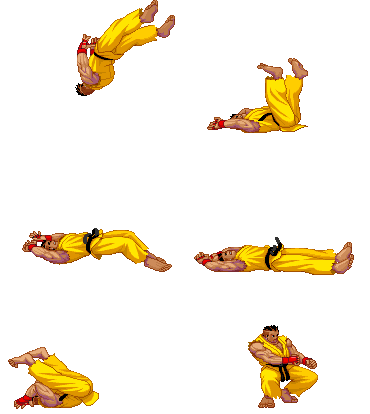
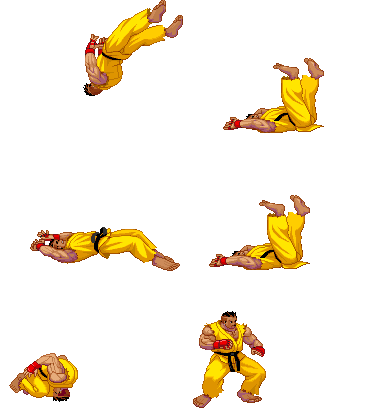
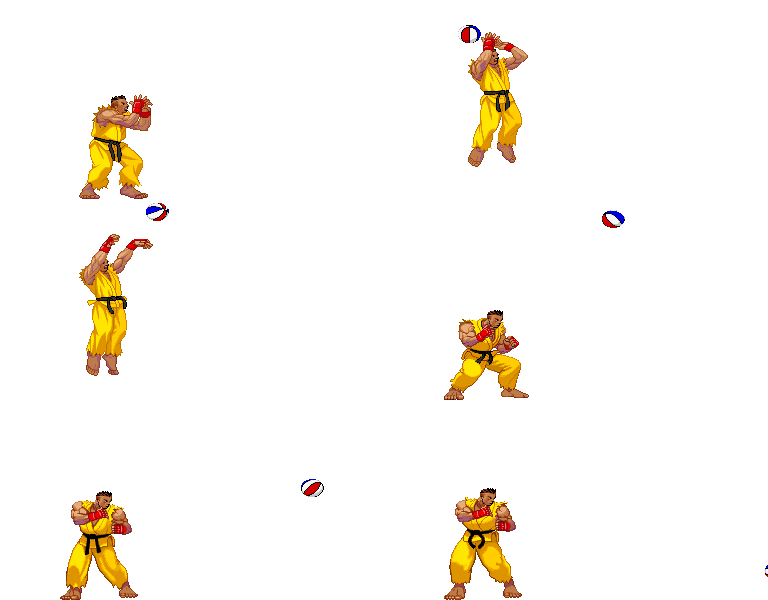
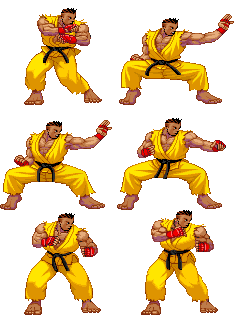
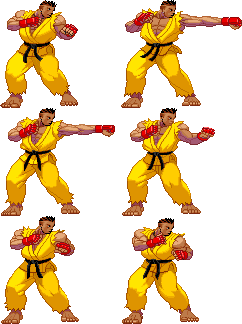
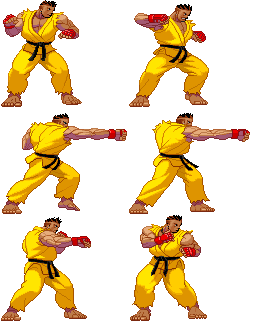
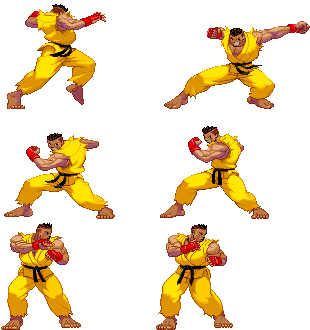
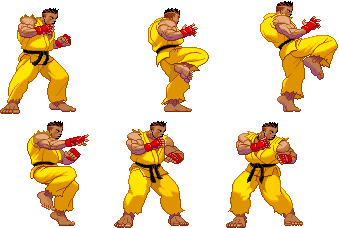
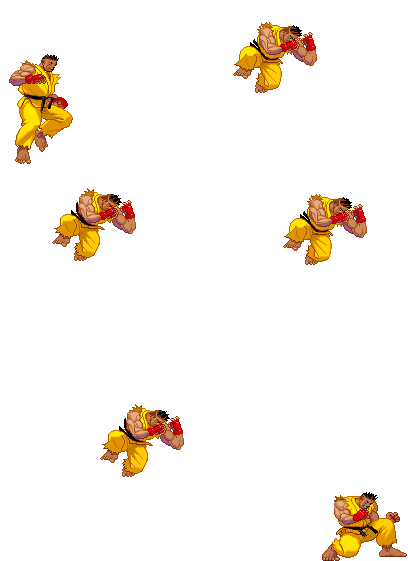
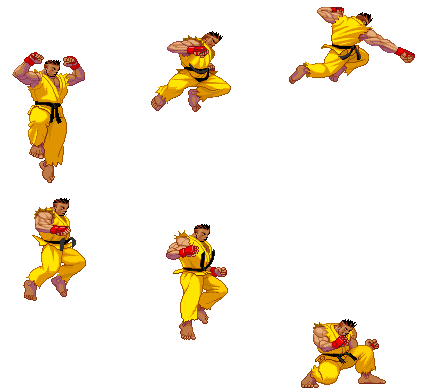
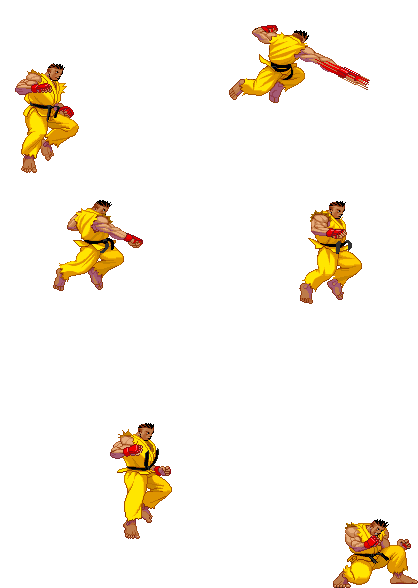
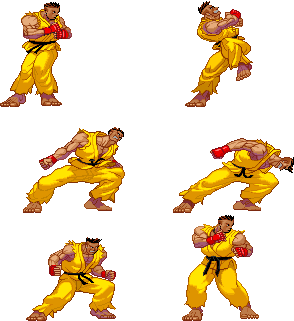
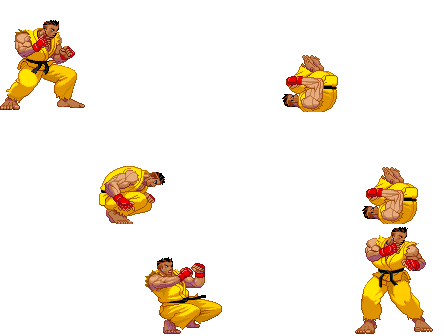
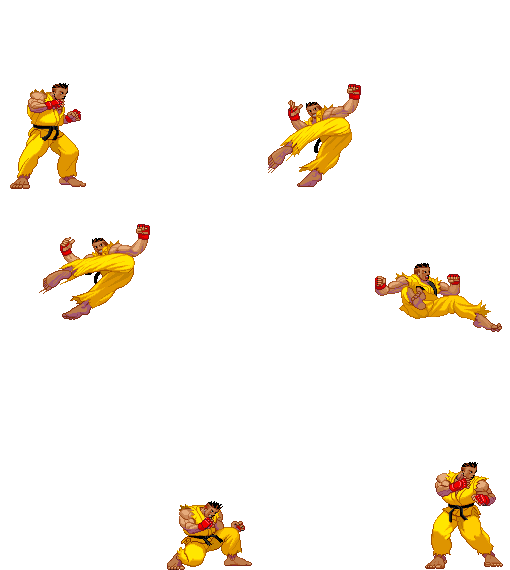
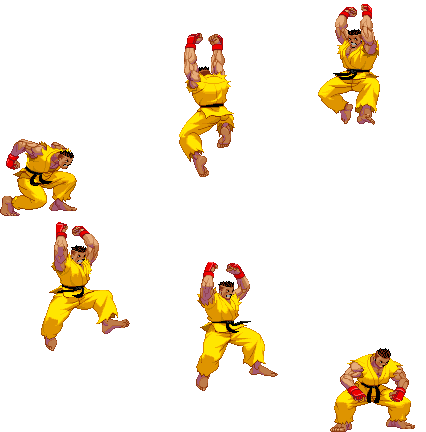
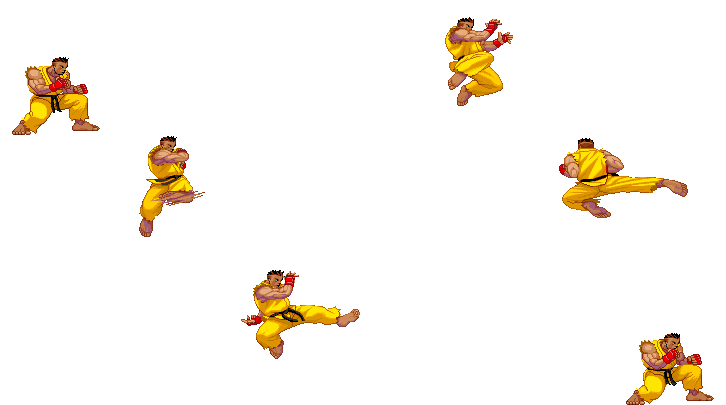
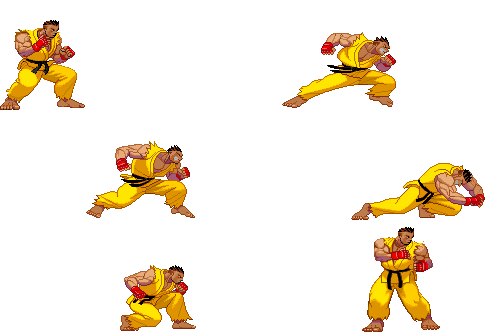
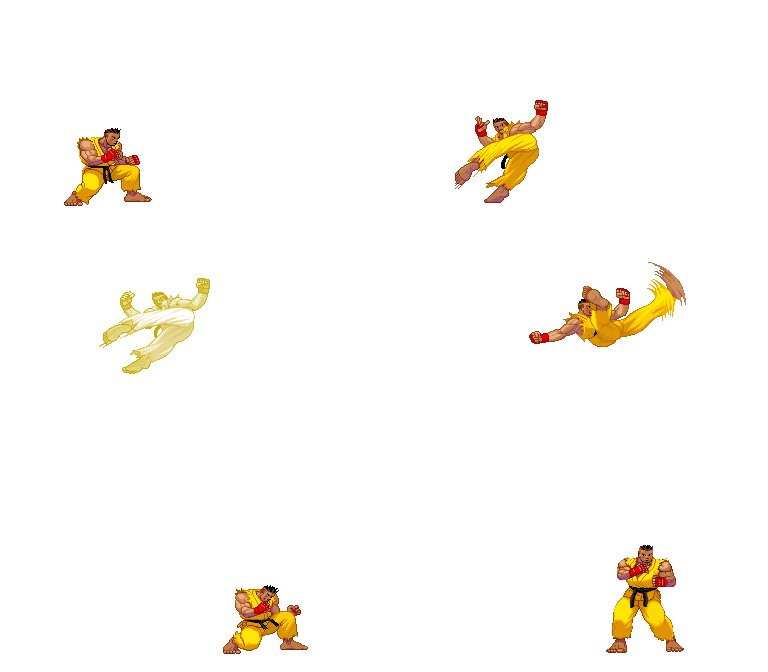
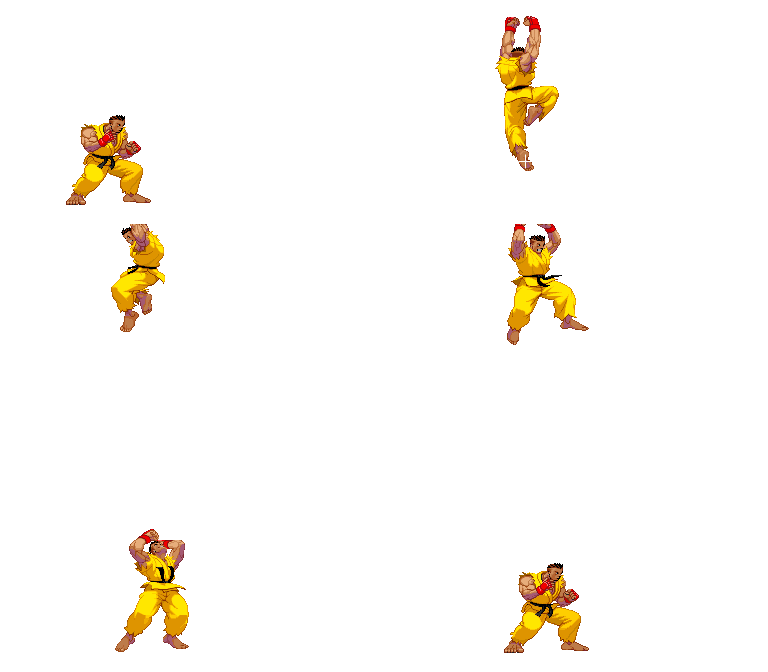
(→Combos) |
Scatteraxis (talk | contribs) m (Scatteraxis moved page Street Fighter 3: 3rd Strike/Sean to Street Fighter 3: 3rd Strike/Sean/Archive without leaving a redirect) |
||
| (498 intermediate revisions by 8 users not shown) | |||
| Line 1: | Line 1: | ||
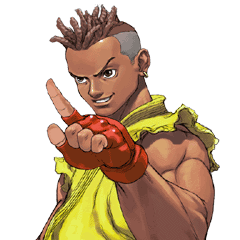
[[Image:Sean3sport.gif|frame|right|Sean's Character Select Portrait]] | [[Image:Sean3sport.gif|frame|right|Sean's Character Select Portrait]] | ||
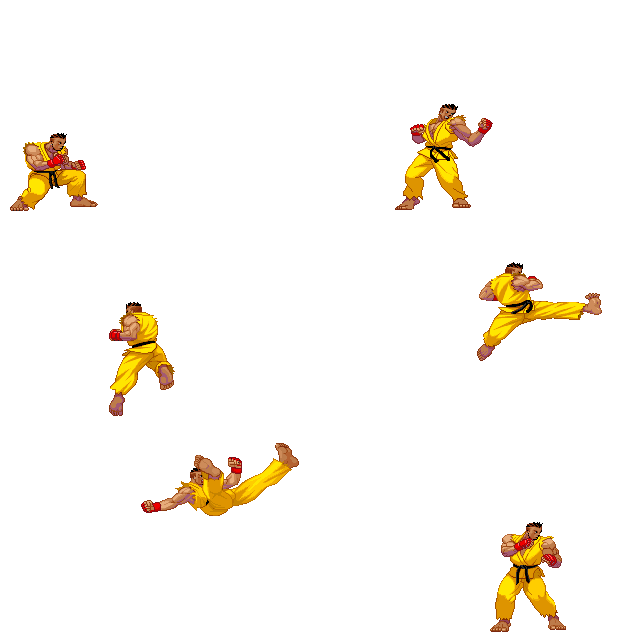
[[Image:Sean3s-stance.gif |frame|right|Sean's Neutral Stance]] | [[Image:Sean3s-stance.gif |frame|right|Sean's Neutral Stance]] | ||
==Updated version available!== | |||
You're reading the old version of this page. [https://srk.shib.live/w/Street_Fighter_3:_3rd_Strike/Sean/2021 Click here] to read the (in-progress) updated version! | |||
==Introduction== | ==Introduction== | ||
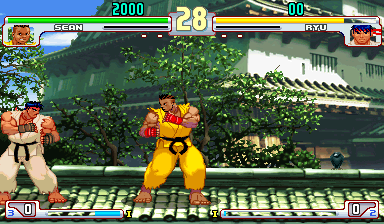
Sean is perhaps the most efficient definition of an underrated character in the history of fighting games. In the 2nd version of Street Fighter III, 2nd Impact, he was pretty much totally broken, doing tons of damage off of his lengthy combo strings. In response to this, Capcom did the responsible thing and made him an original character, as opposed to a black Ken in a yellow gi. | Sean is perhaps the most efficient definition of an underrated character in the history of fighting games. In the 2nd version of Street Fighter III, 2nd Impact, he was pretty much totally broken, doing tons of damage off of his lengthy combo strings. In response to this, Capcom did the responsible thing and made him an original character, as opposed to a black Ken in a yellow gi. | ||
| Line 7: | Line 9: | ||
Well, they did it a little too well. | Well, they did it a little too well. | ||
Other than being extremely hard to use and situational because of his hit-box placement and frame advantage (Dragon Smash's hit-box is located over his head), 3s makes Sean much more of a defensive counter character. When you play as him you have to understand that he does have a lot of good points, such as his MP-HK target combo, Cl.HK, | Other than being extremely hard to use and situational because of his hit-box placement and frame advantage (Dragon Smash's hit-box is located over his head), 3s makes Sean much more of a defensive counter character. When you play as him you have to understand that he does have a lot of good points, such as his MP-HK target combo, Cl.HK/Shoto normals, EX Tornado, and his supers. He trades pretty well if used properly with the right SA's against the right match-ups. He also has an assortment of AAs to choose from. | ||
{{ ProConTable | |||
| pros= | |||
* Tricky moves that can be annoying for unexperienced opponent to understand | |||
* Good Health and stun for a defensive style character | |||
* Still has some decent pokes and anti airs, inherently as a shoto | |||
* Deals higher than average damage per single hit | |||
* quickest dashes in the game | |||
| cons= | |||
* underwhelming combo ability, hard to guarantee a knockdown or good damage | |||
* Worst dp in the game, | |||
* Lineal and predictable offensive presence, limited tech and few tools | |||
* Many moves are unsafe or - on block | |||
}} | |||
==Specific Character Information== | ==Specific Character Information== | ||
| Line 32: | Line 38: | ||
*Quick Stand (frames): 50 | *Quick Stand (frames): 50 | ||
= | =Move List= | ||
''' | |||
==Throws== | |||
{| border="1em" cellspacing="0" width="45%" style="border: 1px solid #999; background: none;"|- | |||
| Seoi Throw || [[File:Lp.png]]+[[File:Lk.png]] | |||
|- | |||
| Tomoe Throw || [[File:B.png]]+[[File:Lp.png]]+[[File:Lk.png]] | |||
|} | |||
==Command Moves== | |||
{| border="1em" cellspacing="0" width="45%" style="border: 1px solid #999; background: none;"|- | |||
| Sean Pachiki || [[File:F.png]]+[[File:Hp.png]] | |||
|- | |||
| Rolling Sobat || [[File:F.png]]+[[File:Hk.png]] | |||
|} | |||
==Special Moves== | |||
{| border="1em" cellspacing="0" width="45%" style="border: 1px solid #999; background: none;"|- | |||
| Sean Tackle || [[File:Hcf.png]]+Hold P EX | |||
|- | |||
| Dragon Smash || [[File:Dp.png]]+[[File:P.png]] || EX SC | |||
|- | |||
| `SC on 1st hit | |||
|- | |||
| Tornado || [[File:Qcb.png]]+[[File:K.png]] || EX | |||
|- | |||
| Ryuubi Kyaku || [[File:Qcf.png]]+[[File:K.png]] || EX | |||
|- | |||
| Zenten || [[File:Qcb.png]]+[[File:P.png]] | |||
|} | |||
==Super Arts== | |||
{| border="1em" cellspacing="0" width="45%" style="border: 1px solid #999; background: none;"|- | |||
| I || Hadou Burst || [[File:Qcf.png]][[File:Qcf.png]]+[[File:P.png]] || 72 Gauge Dots || 3 Stocks || 5.4 EX Uses | |||
|- | |||
| II || Shouryuu Cannon || [[File:Qcf.png]][[File:Qcf.png]]+Mash [[File:P.png]] || 96 Gauge Dots || 2 Stocks || 4.5 EX Uses | |||
|- | |||
| III || Hyper Tornado || [[File:Qcf.png]][[File:Qcf.png]]+[[File:P.png]] || 120 Gauge Dots || 1 Stock || 3.0 EX Uses | |||
|} | |||
==Target Combo== | |||
{| border="1em" cellspacing="0" width="45%" style="border: 1px solid #999; background: none;"|- | |||
|- | |||
| [[File:Mp.png]]c[[File:Hk.png]] | |||
|- | |||
| [[File:Hp.png]]c[[File:F.png]]+[[File:Hp.png]](2hit) | |||
|} | |||
=Move Analysis= | |||
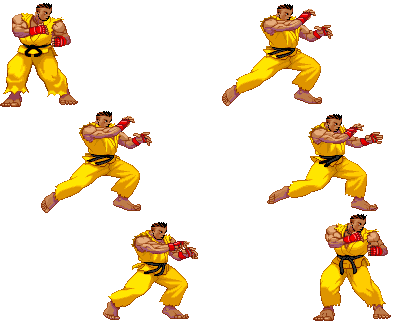
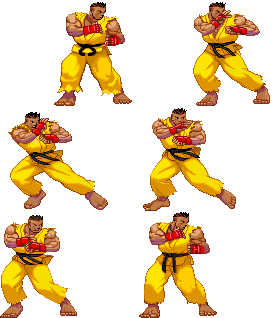
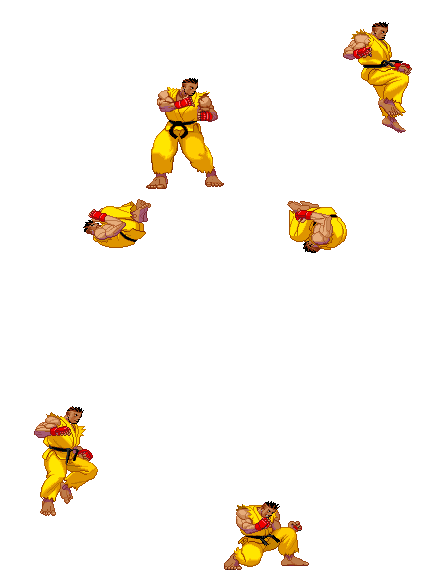
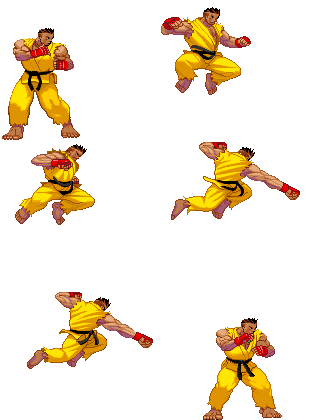
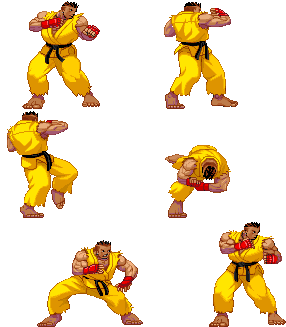
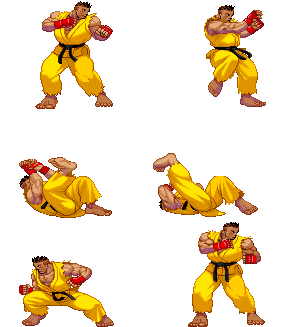
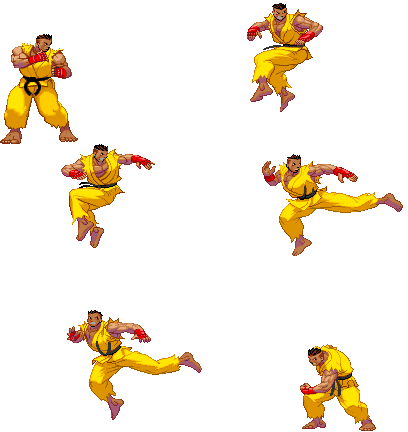
*All those sprites are taken from the site https://www.justnopoint.com/zweifuss/ | |||
*All frame datas in "Move Analysis" section are taken from [http://gr.qee.jp/01_3rd/index.html Game Restaurant] , this means the frame data isn't from the Dreamcast version like Karathrow site, it's from the Arcade version. | |||
General | |||
*'''Move''': Move name | |||
*'''Motion''': What you must do to execute the move | |||
*'''Damage''': Damage it does (in pixels) | |||
*'''Stun Damage''': Stun Damage it does (in pixels) | |||
*'''Chains into itself''': If you can combo into the same movement | |||
*'''Special Cancel''': If you can cancel the move into a Special Move | |||
*'''Super Cancel''': If you can cancel the move into a Super Art | |||
*'''Throw Range''': Range of the throw (in pixels) | |||
*'''Num.''': Super Art number | |||
*'''Super Art''': Super Art name | |||
*'''Super Art Stock''': Number of Gauge Bars the Super Art have, also the length of each bar (in pixels) | |||
Frame Data | |||
*'''Startup''': Number of frames it takes to start the move | |||
*'''Hit''': Number of frames that can hit the opponent | |||
*'''Recovery''': Number of frames it takes to recover from the move | |||
*'''Blocked Advantage''': Number of frames you are in advantage/disadvantage after opponent have been blocked the hit | |||
*'''Hit Advantage''': Number of frames you are in advantage/disadvantage after opponent have been take the hit | |||
*'''Crouching Hit Advantage''': Number of frames you are in advantage/disadvantage after opponent have been take the hit while he's crouching | |||
* + # : You have # frames of advantage | |||
* - # : You have # frames of disadvantage | |||
* # ~ # : Advantage/disadvantage can vary from # to # | |||
*Down: Enemy gets knocked down | |||
*'''Guard''': How opponent must guard the move, High (H), Low (L) or both (HL) | |||
*'''Parry''': How opponent must parry the move, High (H), Low (L) or both (HL) | |||
Gauge Increase | |||
*'''Miss''': Gauge you gain if you miss the move (in pixels) | |||
*'''Blocked''': Gauge you gain if the move gets blocked (in pixels) | |||
*'''Hit''': Gauge you gain if you hit the opponent with the move (in pixels) | |||
*'''Parry''': Gauge opponent gains when he parry the move (in pixels) | |||
=== Basic Moves === | |||
[[Image:(seandf).gif|none]] | |||
{| border="1em" cellspacing="0" width="60%" style="border: 1px solid #999; background: none;" | |||
|- | |||
! align="center" | Move | |||
! align="center" | Start-up frames | |||
! align="center" | In ground frames | |||
! align="center" | In air frames | |||
! align="center" | Recovery frames | |||
! align="center" | Total frames | |||
|- | |||
| align="center" | Dash Forward | |||
| align="center" | 2? | |||
| align="center" | 8? | |||
| align="center" | - | |||
| align="center" | 4? | |||
| align="center" | 14 | |||
|} | |||
[[Image:(seandb).gif|none]] | |||
{| border="1em" cellspacing="0" width="60%" style="border: 1px solid #999; background: none;" | |||
|- | |||
! align="center" | Move | |||
! align="center" | Start-up frames | |||
! align="center" | In ground frames | |||
! align="center" | In air frames | |||
! align="center" | Recovery frames | |||
! align="center" | Total frames | |||
|- | |||
| align="center" | Dash Backwards | |||
| align="center" | 4? | |||
| align="center" | 4? | |||
| align="center" | - | |||
| align="center" | 8? | |||
| align="center" | 16 | |||
|} | |||
[[Image:(seanbjump).gif|none]] | |||
[[Image:(seanjump).gif|none]] | |||
[[Image:(seanfjump).gif|none]] | |||
{| border="1em" cellspacing="0" width="30%" style="border: 1px solid #999; background: none;" | |||
|- | |||
| align="center" | '''Move''' || align="center" | '''Motion''' || align="center" | '''Startup Frames''' | |||
|- | |||
| align="center" | Jump || align="center" | BU or U or FU || align="center" | 4 | |||
|} | |||
{| border="1em" cellspacing="0" width="30%" style="border: 1px solid #999; background: none;" | |||
|- | |||
| align="center" | '''Move''' || align="center" | '''Motion''' || align="center" | '''Startup Frames''' | |||
|- | |||
| align="center" | Super Jump || align="center" | DBU or DU or DFU || align="center" | 7 | |||
|} | |||
''Comments here'' | |||
[[Image:(seanw).gif|none]] | |||
{| border="1em" cellspacing="0" width="30%" style="border: 1px solid #999; background: none;" | |||
|- | |||
| align="center" | '''Move''' || align="center" | '''Motion''' || align="center" | '''Frames''' | |||
|- | |||
| align="center" | Normal Wakeup || align="center" | - || align="center" | 77 | |||
|} | |||
[[Image:(seantqw).gif|none]] | |||
{| border="1em" cellspacing="0" width="30%" style="border: 1px solid #999; background: none;" | |||
|- | |||
| align="center" | '''Move''' || align="center" | '''Motion''' || align="center" | '''Frames''' | |||
|- | |||
| align="center" | Quick Stand || align="center" | Tap D when hitting the ground || align="center" | 50 | |||
|} | |||
[[Image:(seant).gif|none]] | |||
{| border="1em" cellspacing="0" width="60%" style="border: 1px solid #999; background: none;" | |||
|- | |||
| align="center" | '''Move''' || align="center" | '''Motion''' || align="center" | '''Damage''' || align="center" | '''Stun Damage''' || align="center" | '''Chains into itself''' || align="center" | '''Special Cancel''' || align="center" | '''Super Cancel''' || align="center" | '''Juggle Value''' | |||
|- | |||
| align="center" | Taunt || align="center" | HP+HK || align="center" | 1 || align="center" | 0 || align="center" | No || align="center" | No || align="center" | No | |||
|} | |||
'''Frame Data''' | |||
{| border="1em" cellspacing="0" width="60%" style="border: 1px solid #999; background: none;" | |||
|- | |||
| align="center" | '''Startup''' || align="center" | '''Hit''' || align="center" | '''Recovery''' || align="center" | '''Blocked Advantage''' || align="center" | '''Hit Advantage''' || align="center" | '''Crouching Hit Advantage''' || align="center" | '''Guard''' || align="center" | '''Parry''' | |||
|- | |||
| align="center" | 31 || align="center" | - || align="center" | 19 || align="center" | - || align="center" | - || align="center" | - || align="center" | HL || align="center" | HL | |||
|} | |||
'''Gauge Increase''' | |||
{| border="1em" cellspacing="0" width="30%" style="border: 1px solid #999; background: none;" | |||
|- | |||
| align="center" | '''Miss''' || align="center" | '''Blocked''' || align="center" | '''Hit''' || align="center" | '''Parry (Gauge for opponent)''' | |||
|- | |||
| align="center" | 4 || align="center" | 7 || align="center" | 11 || align="center" | 4 | |||
|} | |||
''Adds 12.5% stun to the next hit/combo with the maximum amount being 37.5% (3 times). '' | |||
[[Image:(seanhparry).gif|none]] | |||
[[Image:(seanlparry).gif|none]] | |||
{| border="1em" cellspacing="0" width="35%" style="border: 1px solid #999; background: none;" | |||
|- | |||
| align="center" | '''Move''' || align="center" | '''Motion''' | |||
|- | |||
| align="center" | Parry (High) || align="center" | Tap F when about taking a hit | |||
|- | |||
| align="center" | Parry (Low) || align="center" | Tap D when about taking a hit | |||
|- | |||
| align="center" | Parry (Air) || align="center" | Tap F in air when about taking a hit | |||
|} | |||
'''Frame Data''' | |||
{| border="1em" cellspacing="0" width="95%" style="border: 1px solid #999; background: none;" | |||
|- | |||
| align="center" | '''Move''' || align="center" | '''Frames you're frozen''' || align="center" | '''Frames opponent is frozen''' || align="center" | '''Frame Advantage when parry is successful''' || align="center" | '''Frames before you can try another parry''' | |||
|- | |||
| align="center" | Parry (High) || align="center" | 16 || align="center" | 16 || align="center" | +4(LP/LK) +3(MP/MK) +2(HP/HK) 0(Special/Super) -16(Fireball) || align="center" | 24(19 when attack comes from the air)*,** | |||
|- | |||
| align="center" | Parry (Low) || align="center" | 16 || align="center" | 16 || align="center" | +4(LP/LK) +3(MP/MK) +2(HP/HK) 0(Special/Super) -16(Fireball) || align="center" | 24(19 when attack comes from the air)*,** | |||
|- | |||
| align="center" | Parry (Air) || align="center" | 16 || align="center" | 16 || align="center" | +4(LP/LK) +3(MP/MK) +2(HP/HK) 0(Special/Super) -16(Fireball) || align="center" | 21(19 when attack comes from the air)*,** | |||
|} | |||
{| border="1em" cellspacing="0" width="70%" style="border: 1px solid #999; background: none;" | |||
|- | |||
|* (If a parry attempt is successful, the 19/21/24 frame restriction is taken away and you can attempt another parry immediately) | |||
|- | |||
|** (If another attack connects within 2 frames of your parry, it will automatically be parried) | |||
|} | |||
'''Gauge Increase''' | |||
{| border="1em" cellspacing="0" width="30%" style="border: 1px solid #999; background: none;" | |||
|- | |||
| align="center" | '''Move''' || align="center" | '''Gauge Increase''' | |||
|- | |||
| align="center" | Parry (High) || align="center" | 4*** | |||
|- | |||
| align="center" | Parry (Low) || align="center" | 4*** | |||
|- | |||
| align="center" | Parry (Air) || align="center" | 4*** | |||
|} | |||
{| border="1em" cellspacing="0" width="57%" style="border: 1px solid #999; background: none;" | |||
|- | |||
|*** (You gain 4 of gauge for whatever attack parried, and for whatever hit you parry during multihit attack) | |||
|} | |||
You can buffer any motion during High or Low parry, but NOT during Air parry, also parry resets the juggle count (and thus resets all scaling). | |||
*'''Parry information is taken from Shoryuken Forums, more exactly, from user JinraiPVC. Thanks for this information dude''' | |||
=== Normal Moves === | |||
==== Standing Normals ==== | |||
[[Image:(seanlp).gif|none]] | |||
{| border="1em" cellspacing="0" width="60%" style="border: 1px solid #999; background: none;" | |||
|- | |||
| align="center" | '''Move''' || align="center" | '''Motion''' || align="center" | '''Damage''' || align="center" | '''Stun Damage''' || align="center" | '''Chains into itself''' || align="center" | '''Special Cancel''' || align="center" | '''Super Cancel''' || align="center" | '''Juggle Value''' | |||
|- | |||
| align="center" | Jab || align="center" | LP || align="center" | 20(3 life points) || align="center" | 3 || align="center" | Yes || align="center" | Yes || align="center" | Yes | |||
|} | |||
'''Frame Data''' | |||
{| border="1em" cellspacing="0" width="60%" style="border: 1px solid #999; background: none;" | |||
|- | |||
| align="center" | '''Startup''' || align="center" | '''Hit''' || align="center" | '''Recovery''' || align="center" | '''Blocked Advantage''' || align="center" | '''Hit Advantage''' || align="center" | '''Crouching Hit Advantage''' || align="center" | '''Guard''' || align="center" | '''Parry''' | |||
|- | |||
| align="center" | 3 || align="center" | 2 || align="center" | 5 || align="center" | +5 || align="center" | +5 || align="center" | +5 || align="center" | HL || align="center" | HL | |||
|} | |||
'''Gauge Increase''' | |||
{| border="1em" cellspacing="0" width="30%" style="border: 1px solid #999; background: none;" | |||
|- | |||
| align="center" | '''Miss''' || align="center" | '''Blocked''' || align="center" | '''Hit''' | |||
|- | |||
| align="center" | 0 || align="center" | 1 || align="center" | 2 | |||
|} | |||
[[Image:(seanmp).gif|none]] | |||
{| border="1em" cellspacing="0" width="60%" style="border: 1px solid #999; background: none;" | |||
|- | |||
| align="center" | '''Move''' || align="center" | '''Motion''' || align="center" | '''Damage''' || align="center" | '''Stun Damage''' || align="center" | '''Chains into itself''' || align="center" | '''Special Cancel''' || align="center" | '''Super Cancel''' || align="center" | '''Juggle Value''' | |||
|- | |||
| align="center" | Far Strong || align="center" | MP || align="center" | 80(14 life points) || align="center" | 11 || align="center" | No || align="center" | No || align="center" | No | |||
|} | |||
'''Frame Data''' | |||
{| border="1em" cellspacing="0" width="60%" style="border: 1px solid #999; background: none;" | |||
|- | |||
| align="center" | '''Startup''' || align="center" | '''Hit''' || align="center" | '''Recovery''' || align="center" | '''Blocked Advantage''' || align="center" | '''Hit Advantage''' || align="center" | '''Crouching Hit Advantage''' || align="center" | '''Guard''' || align="center" | '''Parry''' | |||
|- | |||
| align="center" | 5 || align="center" | 4 || align="center" | 13 || align="center" | 0 || align="center" | +1 || align="center" | +2 || align="center" | HL || align="center" | HL | |||
|} | |||
'''Gauge Increase''' | |||
{| border="1em" cellspacing="0" width="30%" style="border: 1px solid #999; background: none;" | |||
|- | |||
| align="center" | '''Miss''' || align="center" | '''Blocked''' || align="center" | '''Hit''' | |||
|- | |||
| align="center" | 2 || align="center" | 6 || align="center" | 11 | |||
|} | |||
[[Image:(seanhp).gif|none]] | |||
{| border="1em" cellspacing="0" width="60%" style="border: 1px solid #999; background: none;" | |||
|- | |||
| align="center" | '''Move''' || align="center" | '''Motion''' || align="center" | '''Damage''' || align="center" | '''Stun Damage''' || align="center" | '''Chains into itself''' || align="center" | '''Special Cancel''' || align="center" | '''Super Cancel''' || align="center" | '''Juggle Value''' | |||
|- | |||
| align="center" | Far Fierce || align="center" | HP || align="center" | 120(21 life points) || align="center" | 10 || align="center" | No || align="center" | No || align="center" | No | |||
|} | |||
'''Frame Data''' | |||
{| border="1em" cellspacing="0" width="60%" style="border: 1px solid #999; background: none;" | |||
|- | |||
| align="center" | '''Startup''' || align="center" | '''Hit''' || align="center" | '''Recovery''' || align="center" | '''Blocked Advantage''' || align="center" | '''Hit Advantage''' || align="center" | '''Crouching Hit Advantage''' || align="center" | '''Guard''' || align="center" | '''Parry''' | |||
|- | |||
| align="center" | 9 || align="center" | 4 || align="center" | 23 || align="center" | -7 || align="center" | -5 or -4 || align="center" | -3 to -1 || align="center" | HL || align="center" | H | |||
|} | |||
'''Gauge Increase''' | |||
{| border="1em" cellspacing="0" width="30%" style="border: 1px solid #999; background: none;" | |||
|- | |||
| align="center" | '''Miss''' || align="center" | '''Blocked''' || align="center" | '''Hit''' | |||
|- | |||
| align="center" | 2 || align="center" | 6 || align="center" | 11 | |||
|} | |||
[[Image:(seanclosemp).gif|none]] | |||
{| border="1em" cellspacing="0" width="60%" style="border: 1px solid #999; background: none;" | |||
|- | |||
| align="center" | '''Move''' || align="center" | '''Motion''' || align="center" | '''Damage''' || align="center" | '''Stun Damage''' || align="center" | '''Chains into itself''' || align="center" | '''Special Cancel''' || align="center" | '''Super Cancel''' || align="center" | '''Juggle Value''' | |||
|- | |||
| align="center" | Close Strong || align="center" | (Close to opponent) MP || align="center" | 90(16 life points) || align="center" | 9 || align="center" | No || align="center" | Yes || align="center" | Yes | |||
|} | |||
'''Frame Data''' | |||
{| border="1em" cellspacing="0" width="60%" style="border: 1px solid #999; background: none;" | |||
|- | |||
| align="center" | '''Startup''' || align="center" | '''Hit''' || align="center" | '''Recovery''' || align="center" | '''Blocked Advantage''' || align="center" | '''Hit Advantage''' || align="center" | '''Crouching Hit Advantage''' || align="center" | '''Guard''' || align="center" | '''Parry''' | |||
|- | |||
| align="center" | 4 || align="center" | 5 || align="center" | 13 || align="center" | 0 || align="center" | +1 || align="center" | +2 || align="center" | HL || align="center" | H | |||
|} | |||
'''Gauge Increase''' | |||
{| border="1em" cellspacing="0" width="30%" style="border: 1px solid #999; background: none;" | |||
|- | |||
| align="center" | '''Miss''' || align="center" | '''Blocked''' || align="center" | '''Hit''' | |||
|- | |||
| align="center" | 2 || align="center" | 6 || align="center" | 11 | |||
|} | |||
[[Image:(seanclosehp).gif|none]] | |||
{| border="1em" cellspacing="0" width="65%" style="border: 1px solid #999; background: none;" | |||
|- | |||
| align="center" | '''Move''' || align="center" | '''Motion''' || align="center" | '''Damage''' || align="center" | '''Stun Damage''' || align="center" | '''Chains into itself''' || align="center" | '''Special Cancel''' || align="center" | '''Super Cancel''' || align="center" | '''Juggle Value''' | |||
|- | |||
| align="center" | Close Fierce || align="center" | (Close to opponent) HP || align="center" | 120(21 life points) || align="center" | 13 || align="center" | No || align="center" | Yes || align="center" | Yes | |||
|} | |||
'''Frame Data''' | |||
{| border="1em" cellspacing="0" width="60%" style="border: 1px solid #999; background: none;" | |||
|- | |||
| align="center" | '''Startup''' || align="center" | '''Hit''' || align="center" | '''Recovery''' || align="center" | '''Blocked Advantage''' || align="center" | '''Hit Advantage''' || align="center" | '''Crouching Hit Advantage''' || align="center" | '''Guard''' || align="center" | '''Parry''' | |||
|- | |||
| align="center" | 5 || align="center" | 5 || align="center" | 20 || align="center" | -4 || align="center" | -2 || align="center" | 0 || align="center" | HL || align="center" | H | |||
|} | |||
'''Gauge Increase''' | |||
{| border="1em" cellspacing="0" width="30%" style="border: 1px solid #999; background: none;" | |||
|- | |||
| align="center" | '''Miss''' || align="center" | '''Blocked''' || align="center" | '''Hit''' | |||
|- | |||
| align="center" | 3 || align="center" | 10 || align="center" | 19 | |||
|} | |||
[[Image:(seanlk).gif|none]] | |||
{| border="1em" cellspacing="0" width="65%" style="border: 1px solid #999; background: none;" | |||
|- | |||
| align="center" | '''Move''' || align="center" | '''Motion''' || align="center" | '''Damage''' || align="center" | '''Stun Damage''' || align="center" | '''Chains into itself''' || align="center" | '''Special Cancel''' || align="center" | '''Super Cancel''' || align="center" | '''Juggle Value''' | |||
|- | |||
| align="center" | Short || align="center" | LK || align="center" | 30(5 life points) || align="center" | 3 || align="center" | No || align="center" | No || align="center" | No | |||
|} | |||
'''Frame Data''' | |||
{| border="1em" cellspacing="0" width="60%" style="border: 1px solid #999; background: none;" | |||
|- | |||
| align="center" | '''Startup''' || align="center" | '''Hit''' || align="center" | '''Recovery''' || align="center" | '''Blocked Advantage''' || align="center" | '''Hit Advantage''' || align="center" | '''Crouching Hit Advantage''' || align="center" | '''Guard''' || align="center" | '''Parry''' | |||
|- | |||
| align="center" | 4 || align="center" | 4 || align="center" | 8 || align="center" | +2 || align="center" | +2 || align="center" | +2 || align="center" | HL || align="center" | HL | |||
|} | |||
'''Gauge Increase''' | |||
{| border="1em" cellspacing="0" width="30%" style="border: 1px solid #999; background: none;" | |||
|- | |||
| align="center" | '''Miss''' || align="center" | '''Blocked''' || align="center" | '''Hit''' | |||
|- | |||
| align="center" | 0 || align="center" | 1 || align="center" | 2 | |||
|} | |||
[[Image:(seanmk).gif|none]] | |||
{| border="1em" cellspacing="0" width="65%" style="border: 1px solid #999; background: none;" | |||
|- | |||
| align="center" | '''Move''' || align="center" | '''Motion''' || align="center" | '''Damage''' || align="center" | '''Stun Damage''' || align="center" | '''Chains into itself''' || align="center" | '''Special Cancel''' || align="center" | '''Super Cancel''' || align="center" | '''Juggle Value''' | |||
|- | |||
| align="center" | Forward || align="center" | MK || align="center" | 90(16 life points) || align="center" | 5 || align="center" | No || align="center" | No || align="center" | No | |||
|} | |||
'''Frame Data''' | |||
{| border="1em" cellspacing="0" width="60%" style="border: 1px solid #999; background: none;" | |||
|- | |||
| align="center" | '''Startup''' || align="center" | '''Hit''' || align="center" | '''Recovery''' || align="center" | '''Blocked Advantage''' || align="center" | '''Hit Advantage''' || align="center" | '''Crouching Hit Advantage''' || align="center" | '''Guard''' || align="center" | '''Parry''' | |||
|- | |||
| align="center" | 6 || align="center" | 4 || align="center" | 15 || align="center" | -2 || align="center" | -1 || align="center" | 0 || align="center" | HL || align="center" | HL | |||
|} | |||
'''Gauge Increase''' | |||
{| border="1em" cellspacing="0" width="30%" style="border: 1px solid #999; background: none;" | |||
|- | |||
| align="center" | '''Miss''' || align="center" | '''Blocked''' || align="center" | '''Hit''' | |||
|- | |||
| align="center" | 2 || align="center" | 6 || align="center" | 11 | |||
|} | |||
[[Image:(seanfhk).gif|none]] | |||
{| border="1em" cellspacing="0" width="60%" style="border: 1px solid #999; background: none;" | |||
|- | |||
| align="center" | '''Move''' || align="center" | '''Motion''' || align="center" | '''Damage''' || align="center" | '''Stun Damage''' || align="center" | '''Chains into itself''' || align="center" | '''Special Cancel''' || align="center" | '''Super Cancel''' || align="center" | '''Juggle Value''' | |||
|- | |||
| align="center" | Far Roundhouse || align="center" | (When far away) HK || align="center" | 120(21 life points) || align="center" | 11 || align="center" | No || align="center" | No || align="center" | No | |||
|} | |||
'''Frame Data''' | |||
{| border="1em" cellspacing="0" width="65%" style="border: 1px solid #999; background: none;" | |||
|- | |||
| align="center" | '''Startup''' || align="center" | '''Hit''' || align="center" | '''Recovery''' || align="center" | '''Blocked Advantage''' || align="center" | '''Hit Advantage''' || align="center" | '''Crouching Hit Advantage''' || align="center" | '''Guard''' || align="center" | '''Parry''' | |||
|- | |||
| align="center" | 7 || align="center" | 4 || align="center" | 25 || align="center" | -9 || align="center" | -7 || align="center" | -5 || align="center" | H || align="center" | H | |||
|} | |||
'''Gauge Increase''' | |||
{| border="1em" cellspacing="0" width="30%" style="border: 1px solid #999; background: none;" | |||
|- | |||
| align="center" | '''Miss''' || align="center" | '''Blocked''' || align="center" | '''Hit''' | |||
|- | |||
| align="center" | 3 || align="center" | 6 || align="center" | 14 | |||
|} | |||
[[Image:(seanclosehk).gif|none]] | |||
{| border="1em" cellspacing="0" width="65%" style="border: 1px solid #999; background: none;" | |||
|- | |||
| align="center" | '''Move''' || align="center" | '''Motion''' || align="center" | '''Damage''' || align="center" | '''Stun Damage''' || align="center" | '''Chains into itself''' || align="center" | '''Special Cancel''' || align="center" | '''Super Cancel''' || align="center" | '''Juggle Value''' | |||
|- | |||
| align="center" | Close Roundhouse || align="center" | (Close to opponent) HK || align="center" | 145(25 life points) || align="center" | 11 || align="center" | No || align="center" | Yes || align="center" | Yes | |||
|} | |||
'''Frame Data''' | |||
{| border="1em" cellspacing="0" width="60%" style="border: 1px solid #999; background: none;" | |||
|- | |||
| align="center" | '''Startup''' || align="center" | '''Hit''' || align="center" | '''Recovery''' || align="center" | '''Blocked Advantage''' || align="center" | '''Hit Advantage''' || align="center" | '''Crouching Hit Advantage''' || align="center" | '''Guard''' || align="center" | '''Parry''' | |||
|- | |||
| align="center" | 5 || align="center" | 5 || align="center" | 14 || align="center" | +2 || align="center" | +4 || align="center" | +6 || align="center" | HL || align="center" | H | |||
|} | |||
'''Gauge Increase''' | |||
{| border="1em" cellspacing="0" width="30%" style="border: 1px solid #999; background: none;" | |||
|- | |||
| align="center" | '''Miss''' || align="center" | '''Blocked''' || align="center" | '''Hit''' | |||
|- | |||
| align="center" | 3 || align="center" | 10 || align="center" | 19 | |||
|} | |||
==== Jumping Normals ==== | |||
[[Image:(seanjlp).gif|none]] | |||
{| border="1em" cellspacing="0" width="65%" style="border: 1px solid #999; background: none;" | |||
|- | |||
| align="center" | '''Move''' || align="center" | '''Motion''' || align="center" | '''Damage''' || align="center" | '''Stun Damage''' || align="center" | '''Chains into itself''' || align="center" | '''Special Cancel''' || align="center" | '''Super Cancel''' || align="center" | '''Juggle Value''' | |||
|- | |||
| align="center" | Jump Jab || align="center" | (Air) LP || align="center" | 50 (40 if neutral jump) (8/7 life points) || align="center" | 7 || align="center" | No || align="center" | No || align="center" | No | |||
|} | |||
'''Frame Data''' | |||
{| border="1em" cellspacing="0" width="70%" style="border: 1px solid #999; background: none;" | |||
|- | |||
| align="center" | '''Startup''' || align="center" | '''Hit''' || align="center" | '''Recovery''' || align="center" | '''Blocked Advantage''' || align="center" | '''Hit Advantage''' || align="center" | '''Crouching Hit Advantage''' || align="center" | '''Guard''' || align="center" | '''Parry''' | |||
|- | |||
| align="center" | 4 (5 if neutral jump) || align="center" | Until landing || align="center" | - || align="center" | -5~+7 || align="center" | -5~+7 || align="center" | +4~+7 || align="center" | H || align="center" | H | |||
|} | |||
'''Gauge Increase''' | |||
{| border="1em" cellspacing="0" width="30%" style="border: 1px solid #999; background: none;" | |||
|- | |||
| align="center" | '''Miss''' || align="center" | '''Blocked''' || align="center" | '''Hit''' | |||
|- | |||
| align="center" | 0 || align="center" | 1 || align="center" | 2 | |||
|} | |||
[[Image:(seanjmp).gif|none]] | |||
{| border="1em" cellspacing="0" width="60%" style="border: 1px solid #999; background: none;" | |||
|- | |||
| align="center" | '''Move''' || align="center" | '''Motion''' || align="center" | '''Damage''' || align="center" | '''Stun Damage''' || align="center" | '''Chains into itself''' || align="center" | '''Special Cancel''' || align="center" | '''Super Cancel''' || align="center" | '''Juggle Value''' | |||
|- | |||
| align="center" | Jump Strong || align="center" | (Air) MP || align="center" | 90(16 life points) || align="center" | 9 (11 if Neutral Jump) || align="center" | No || align="center" | No || align="center" | No | |||
|} | |||
'''Frame Data''' | |||
{| border="1em" cellspacing="0" width="65%" style="border: 1px solid #999; background: none;" | |||
|- | |||
| align="center" | '''Startup''' || align="center" | '''Hit''' || align="center" | '''Recovery''' || align="center" | '''Blocked Advantage''' || align="center" | '''Hit Advantage''' || align="center" | '''Crouching Hit Advantage''' || align="center" | '''Guard''' || align="center" | '''Parry''' | |||
|- | |||
| align="center" | 5 (6 if neutral jump) || align="center" | 5 || align="center" | - || align="center" | -2~+10 || align="center" | -2~+10 || align="center" | +7~+10 || align="center" | H || align="center" | H | |||
|} | |||
'''Gauge Increase''' | |||
{| border="1em" cellspacing="0" width="30%" style="border: 1px solid #999; background: none;" | |||
|- | |||
| align="center" | '''Miss''' || align="center" | '''Blocked''' || align="center" | '''Hit''' | |||
|- | |||
| align="center" | 2 || align="center" | 6 || align="center" | 11 | |||
|} | |||
[[Image:(seajhp).gif|none]] | |||
{| border="1em" cellspacing="0" width="60%" style="border: 1px solid #999; background: none;" | |||
|- | |||
| align="center" | '''Move''' || align="center" | '''Motion''' || align="center" | '''Damage''' || align="center" | '''Stun Damage''' || align="center" | '''Chains into itself''' || align="center" | '''Special Cancel''' || align="center" | '''Super Cancel''' || align="center" | '''Juggle Value''' | |||
|- | |||
| align="center" | Jump Fierce || align="center" | (Air) HP || align="center" | 130(23 life points) || align="center" | 13 (15 if Neutral Jump) || align="center" | No || align="center" | No || align="center" | No | |||
|} | |||
'''Frame Data''' | |||
{| border="1em" cellspacing="0" width="65%" style="border: 1px solid #999; background: none;" | |||
|- | |||
| align="center" | '''Startup''' || align="center" | '''Hit''' || align="center" | '''Recovery''' || align="center" | '''Blocked Advantage''' || align="center" | '''Hit Advantage''' || align="center" | '''Crouching Hit Advantage''' || align="center" | '''Guard''' || align="center" | '''Parry''' | |||
|- | |||
| align="center" | 6 (7 if Neutral Jump) || align="center" | 4 (3 if Neutral Jump) || align="center" | - || align="center" | -4~+10/+4~+10 || align="center" | -4~+10/+4~+10 || align="center" | +4~+10/+10 || align="center" | H || align="center" | H | |||
|} | |||
'''Gauge Increase''' | |||
{| border="1em" cellspacing="0" width="30%" style="border: 1px solid #999; background: none;" | |||
|- | |||
| align="center" | '''Miss''' || align="center" | '''Blocked''' || align="center" | '''Hit''' | |||
|- | |||
| align="center" | 3 || align="center" | 10 || align="center" | 19 | |||
|} | |||
[[Image:(seannjhp).gif|none]] | |||
{| border="1em" cellspacing="0" width="60%" style="border: 1px solid #999; background: none;" | |||
|- | |||
| align="center" | '''Move''' || align="center" | '''Motion''' || align="center" | '''Damage''' || align="center" | '''Stun Damage''' || align="center" | '''Chains into itself''' || align="center" | '''Special Cancel''' || align="center" | '''Super Cancel''' || align="center" | '''Juggle Value''' | |||
|- | |||
| align="center" | Neutral Jump Fierce || align="center" | (Air) HP || align="center" | 130(23 life points) || align="center" | 15 || align="center" | No || align="center" | No || align="center" | No | |||
|} | |||
'''Frame Data''' | |||
{| border="1em" cellspacing="0" width="65%" style="border: 1px solid #999; background: none;" | |||
|- | |||
| align="center" | '''Startup''' || align="center" | '''Hit''' || align="center" | '''Recovery''' || align="center" | '''Blocked Advantage''' || align="center" | '''Hit Advantage''' || align="center" | '''Crouching Hit Advantage''' || align="center" | '''Guard''' || align="center" | '''Parry''' | |||
|- | |||
| align="center" | 7 || align="center" | 3 if Neutral Jump || align="center" | - || align="center" | -4~+10/+4~+10 || align="center" | -4~+10/+4~+10 || align="center" | +4~+10/+10 || align="center" | H || align="center" | H | |||
|} | |||
'''Gauge Increase''' | |||
{| border="1em" cellspacing="0" width="30%" style="border: 1px solid #999; background: none;" | |||
|- | |||
| align="center" | '''Miss''' || align="center" | '''Blocked''' || align="center" | '''Hit''' | |||
|- | |||
| align="center" | 3 || align="center" | 10 || align="center" | 19 | |||
|} | |||
[[Image:(seanjlk).gif|none]] | |||
{| border="1em" cellspacing="0" width="60%" style="border: 1px solid #999; background: none;" | |||
|- | |||
| align="center" | '''Move''' || align="center" | '''Motion''' || align="center" | '''Damage''' || align="center" | '''Stun Damage''' || align="center" | '''Chains into itself''' || align="center" | '''Special Cancel''' || align="center" | '''Super Cancel''' || align="center" | '''Juggle Value''' | |||
|- | |||
| align="center" | Jump Short || align="center" | (Air) LK || align="center" | 50(8 life points) || align="center" | 5 (7 if neutral jump) || align="center" | No || align="center" | No || align="center" | No | |||
|} | |||
'''Frame Data''' | |||
{| border="1em" cellspacing="0" width="75%" style="border: 1px solid #999; background: none;" | |||
|- | |||
| align="center" | '''Startup''' || align="center" | '''Hit''' || align="center" | '''Recovery''' || align="center" | '''Blocked Advantage''' || align="center" | '''Hit Advantage''' || align="center" | '''Crouching Hit Advantage''' || align="center" | '''Guard''' || align="center" | '''Parry''' | |||
|- | |||
| align="center" | 4 (5 if neutral jump) || align="center" | 10 (19 if neutral jump) || align="center" | - || align="center" | -8~+7 || align="center" | -8~+7 || align="center" | 0~+7 || align="center" | H || align="center" | H | |||
|} | |||
'''Gauge Increase''' | |||
{| border="1em" cellspacing="0" width="30%" style="border: 1px solid #999; background: none;" | |||
|- | |||
| align="center" | '''Miss''' || align="center" | '''Blocked''' || align="center" | '''Hit''' | |||
|- | |||
| align="center" | 0 || align="center" | 1 || align="center" | 2 | |||
|} | |||
[[Image:(seanjmk).gif|none]] | |||
{| border="1em" cellspacing="0" width="60%" style="border: 1px solid #999; background: none;" | |||
|- | |||
| align="center" | '''Move''' || align="center" | '''Motion''' || align="center" | '''Damage''' || align="center" | '''Stun Damage''' || align="center" | '''Chains into itself''' || align="center" | '''Special Cancel''' || align="center" | '''Super Cancel''' || align="center" | '''Juggle Value''' | |||
|- | |||
| align="center" | Jump Forward || align="center" | (Air) MK || align="center" | 90(16 life points) || align="center" | 9 || align="center" | No || align="center" | No || align="center" | No | |||
|} | |||
'''Frame Data''' | |||
{| border="1em" cellspacing="0" width="65%" style="border: 1px solid #999; background: none;" | |||
|- | |||
| align="center" | '''Startup''' || align="center" | '''Hit''' || align="center" | '''Recovery''' || align="center" | '''Blocked Advantage''' || align="center" | '''Hit Advantage''' || align="center" | '''Crouching Hit Advantage''' || align="center" | '''Guard''' || align="center" | '''Parry''' | |||
|- | |||
| align="center" | 5 || align="center" | 6 || align="center" | - || align="center" | -3~+10 || align="center" | -3~+10 || align="center" | +6~+10 || align="center" | H || align="center" | H | |||
|} | |||
'''Gauge Increase''' | |||
{| border="1em" cellspacing="0" width="30%" style="border: 1px solid #999; background: none;" | |||
|- | |||
| align="center" | '''Miss''' || align="center" | '''Blocked''' || align="center" | '''Hit''' | |||
|- | |||
| align="center" | 2 || align="center" | 6 || align="center" | 11 | |||
|} | |||
[[Image:(seannjmk).gif|none]] | |||
{| border="1em" cellspacing="0" width="60%" style="border: 1px solid #999; background: none;" | |||
|- | |||
| align="center" | '''Move''' || align="center" | '''Motion''' || align="center" | '''Damage''' || align="center" | '''Stun Damage''' || align="center" | '''Chains into itself''' || align="center" | '''Special Cancel''' || align="center" | '''Super Cancel''' || align="center" | '''Juggle Value''' | |||
|- | |||
| align="center" | Neutral Jump Forward || align="center" | (Air) MK || align="center" | 90(16 life points) || align="center" | 9 || align="center" | No || align="center" | No || align="center" | No | |||
|} | |||
'''Frame Data''' | |||
{| border="1em" cellspacing="0" width="65%" style="border: 1px solid #999; background: none;" | |||
|- | |||
| align="center" | '''Startup''' || align="center" | '''Hit''' || align="center" | '''Recovery''' || align="center" | '''Blocked Advantage''' || align="center" | '''Hit Advantage''' || align="center" | '''Crouching Hit Advantage''' || align="center" | '''Guard''' || align="center" | '''Parry''' | |||
|- | |||
| align="center" | 5 || align="center" | 6 || align="center" | - || align="center" | -2~+10 || align="center" | -2~+10 || align="center" | +6~+10 || align="center" | H || align="center" | H | |||
|} | |||
'''Gauge Increase''' | |||
{| border="1em" cellspacing="0" width="30%" style="border: 1px solid #999; background: none;" | |||
|- | |||
| align="center" | '''Miss''' || align="center" | '''Blocked''' || align="center" | '''Hit''' | |||
|- | |||
| align="center" | 2 || align="center" | 6 || align="center" | 11 | |||
|} | |||
[[Image:(seanjhk).gif|none]] | |||
{| border="1em" cellspacing="0" width="60%" style="border: 1px solid #999; background: none;" | |||
|- | |||
| align="center" | '''Move''' || align="center" | '''Motion''' || align="center" | '''Damage''' || align="center" | '''Stun Damage''' || align="center" | '''Chains into itself''' || align="center" | '''Special Cancel''' || align="center" | '''Super Cancel''' || align="center" | '''Juggle Value''' | |||
|- | |||
| align="center" | Jump Roundhouse || align="center" | (Air) HK || align="center" | 110(22 life points) || align="center" | 13 || align="center" | No || align="center" | No || align="center" | No | |||
|} | |||
'''Frame Data''' | |||
{| border="1em" cellspacing="0" width="65%" style="border: 1px solid #999; background: none;" | |||
|- | |||
| align="center" | '''Startup''' || align="center" | '''Hit''' || align="center" | '''Recovery''' || align="center" | '''Blocked Advantage''' || align="center" | '''Hit Advantage''' || align="center" | '''Crouching Hit Advantage''' || align="center" | '''Guard''' || align="center" | '''Parry''' | |||
|- | |||
| align="center" | 6 || align="center" | 4 || align="center" | - || align="center" | -1~+10 || align="center" | -1~+10 || align="center" | +4~+10 || align="center" | H || align="center" | H | |||
|} | |||
'''Gauge Increase''' | |||
{| border="1em" cellspacing="0" width="30%" style="border: 1px solid #999; background: none;" | |||
|- | |||
| align="center" | '''Miss''' || align="center" | '''Blocked''' || align="center" | '''Hit''' | |||
|- | |||
| align="center" | 3 || align="center" | 10 || align="center" | 19 | |||
|} | |||
[[Image:(seannjhk).gif|none]] | |||
{| border="1em" cellspacing="0" width="65%" style="border: 1px solid #999; background: none;" | |||
|- | |||
| align="center" | '''Move''' || align="center" | '''Motion''' || align="center" | '''Damage''' || align="center" | '''Stun Damage''' || align="center" | '''Chains into itself''' || align="center" | '''Special Cancel''' || align="center" | '''Super Cancel''' || align="center" | '''Juggle Value''' | |||
|- | |||
| align="center" | Neutral Jump Roundhouse || align="center" | (Air) HK || align="center" | 130(23 life points) || align="center" | 13 || align="center" | No || align="center" | No || align="center" | No | |||
|} | |||
'''Frame Data''' | |||
{| border="1em" cellspacing="0" width="65%" style="border: 1px solid #999; background: none;" | |||
|- | |||
| align="center" | '''Startup''' || align="center" | '''Hit''' || align="center" | '''Recovery''' || align="center" | '''Blocked Advantage''' || align="center" | '''Hit Advantage''' || align="center" | '''Crouching Hit Advantage''' || align="center" | '''Guard''' || align="center" | '''Parry''' | |||
|- | |||
| align="center" | 7 || align="center" | 5 || align="center" | - || align="center" | +2~+10 || align="center" | +2~+10 || align="center" | +7~+10 || align="center" | H || align="center" | H | |||
|} | |||
'''Gauge Increase''' | |||
{| border="1em" cellspacing="0" width="30%" style="border: 1px solid #999; background: none;" | |||
|- | |||
| align="center" | '''Miss''' || align="center" | '''Blocked''' || align="center" | '''Hit''' | |||
|- | |||
| align="center" | 3 || align="center" | 10 || align="center" | 19 | |||
|} | |||
[[Image:(seanuoh).gif|none]] | |||
{| border="1em" cellspacing="0" width="60%" style="border: 1px solid #999; background: none;" | |||
|- | |||
| align="center" | '''Move''' || align="center" | '''Motion''' || align="center" | '''Damage''' || align="center" | '''Stun Damage''' || align="center" | '''Chains into itself''' || align="center" | '''Special Cancel''' || align="center" | '''Super Cancel''' || align="center" | '''Juggle Value''' | |||
|- | |||
| align="center" | Universal Overhead || align="center" | MP+MK || align="center" | 40(7 life points) || align="center" | 3 || align="center" | No || align="center" | No || align="center" | No | |||
|} | |||
'''Frame Data''' | |||
{| border="1em" cellspacing="0" width="65%" style="border: 1px solid #999; background: none;" | |||
|- | |||
| align="center" | '''Startup''' || align="center" | '''Hit''' || align="center" | '''Recovery''' || align="center" | '''Blocked Advantage''' || align="center" | '''Hit Advantage''' || align="center" | '''Crouching Hit Advantage''' || align="center" | '''Guard''' || align="center" | '''Parry''' | |||
|- | |||
| align="center" | 15 || align="center" | 8 || align="center" | 7 || align="center" | -5~+7 || align="center" | 0~+8 || align="center" | +1~+9 || align="center" | H || align="center" | H | |||
|} | |||
'''Gauge Increase''' | |||
{| border="1em" cellspacing="0" width="30%" style="border: 1px solid #999; background: none;" | |||
|- | |||
| align="center" | '''Miss''' || align="center" | '''Blocked''' || align="center" | '''Hit''' | |||
|- | |||
| align="center" | 0 || align="center" | 1 || align="center" | 2 | |||
|} | |||
==== Throws ==== | |||
[[Image:(seanhg).gif|none]] | |||
{| border="1em" cellspacing="0" width="70%" style="border: 1px solid #999; background: none;" | |||
|- | |||
| align="center" | '''Move''' || align="center" | '''Motion''' || align="center" | '''Damage''' || align="center" | '''Stun Damage''' || align="center" | '''Throw Range''' || align="center" | '''Kara-Throw''' || align="center" | '''Kara-Throw Range''' | |||
|- | |||
| align="center" | Seoi Throw|| align="center" | LP+LK || align="center" | 120(21 life points) || align="center" | 10 || align="center" | 20 || align="center" | Far + HP/F + HP/Far HK/Cr.MK/Cr.HK || align="center" | 32/34/28/33/33 | |||
|} | |||
'''Frame Data''' | |||
{| border="1em" cellspacing="0" width="65%" style="border: 1px solid #999; background: none;" | |||
|- | |||
| align="center" | '''Startup''' || align="center" | '''Hit''' || align="center" | '''Recovery''' || align="center" | '''Blocked Advantage''' || align="center" | '''Hit Advantage''' || align="center" | '''Crouching Hit Advantage''' || align="center" | '''Guard''' || align="center" | '''Parry''' | |||
|- | |||
| align="center" | 2 || align="center" | 1 || align="center" | 21 || align="center" | - || align="center" | - || align="center" | - || align="center" | LP+LK || align="center" | - | |||
|} | |||
'''Gauge Increase''' | |||
{| border="1em" cellspacing="0" width="25%" style="border: 1px solid #999; background: none;" | |||
|- | |||
| align="center" | '''Miss''' || align="center" | '''Blocked''' || align="center" | '''Hit''' | |||
|- | |||
| align="center" | 0 || align="center" | 7 (for the player who teched) || align="center" | 2 | |||
|} | |||
[[Image:(seansn).gif|none]] | |||
{| border="1em" cellspacing="0" width="70%" style="border: 1px solid #999; background: none;" | |||
|- | |||
| align="center" | '''Move''' || align="center" | '''Motion''' || align="center" | '''Damage''' || align="center" | '''Stun Damage''' || align="center" | '''Throw Range''' || align="center" | '''Kara-Throw''' || align="center" | '''Kara-Throw Range''' | |||
|- | |||
| align="center" | Tomoe Throw || align="center" | B + LP + LK || align="center" | 140(24 life points) || align="center" | 4 || align="center" | 20 || align="center" | Far + HP/F + HP/Far HK/Cr.MK/Cr.HK || align="center" | 32/34/28/33/33 | |||
|} | |||
'''Frame Data''' | |||
{| border="1em" cellspacing="0" width="65%" style="border: 1px solid #999; background: none;" | |||
|- | |||
| align="center" | '''Startup''' || align="center" | '''Hit''' || align="center" | '''Recovery''' || align="center" | '''Blocked Advantage''' || align="center" | '''Hit Advantage''' || align="center" | '''Crouching Hit Advantage''' || align="center" | '''Guard''' || align="center" | '''Parry''' | |||
|- | |||
| align="center" | 2 || align="center" | 1 || align="center" | 21 || align="center" | - || align="center" | - || align="center" | - || align="center" | LP+LK || align="center" | - | |||
|} | |||
'''Gauge Increase''' | |||
{| border="1em" cellspacing="0" width="25%" style="border: 1px solid #999; background: none;" | |||
|- | |||
| align="center" | '''Miss''' || align="center" | '''Blocked''' || align="center" | '''Hit''' | |||
|- | |||
| align="center" | 0 || align="center" | 7 (for the player who teched) || align="center" | 2 | |||
|} | |||
====Crouching Normals==== | |||
[[Image:(seanclp).gif|none]] | |||
{| border="1em" cellspacing="0" width="60%" style="border: 1px solid #999; background: none;" | |||
|- | |||
| align="center" | '''Move''' || align="center" | '''Motion''' || align="center" | '''Damage''' || align="center" | '''Stun Damage''' || align="center" | '''Chains into itself''' || align="center" | '''Special Cancel''' || align="center" | '''Super Cancel''' || align="center" | '''Juggle Value''' | |||
|- | |||
| align="center" | Crouch Jab || align="center" | D + LP || align="center" | 20(3 life points) || align="center" | 3 || align="center" | Yes || align="center" | Yes || align="center" | Yes | |||
|} | |||
'''Frame Data''' | |||
{| border="1em" cellspacing="0" width="65%" style="border: 1px solid #999; background: none;" | |||
|- | |||
| align="center" | '''Startup''' || align="center" | '''Hit''' || align="center" | '''Recovery''' || align="center" | '''Blocked Advantage''' || align="center" | '''Hit Advantage''' || align="center" | '''Crouching Hit Advantage''' || align="center" | '''Guard''' || align="center" | '''Parry''' | |||
|- | |||
| align="center" | 4 || align="center" | 3 || align="center" | 7 || align="center" | +3 || align="center" | +3 || align="center" | +3 || align="center" | HL || align="center" | HL | |||
|} | |||
'''Gauge Increase''' | |||
{| border="1em" cellspacing="0" width="30%" style="border: 1px solid #999; background: none;" | |||
|- | |||
| align="center" | '''Miss''' || align="center" | '''Blocked''' || align="center" | '''Hit''' | |||
|- | |||
| align="center" | 0 || align="center" | 1 || align="center" | 2 | |||
|} | |||
[[Image:(seancmp).gif|none]] | |||
{| border="1em" cellspacing="0" width="60%" style="border: 1px solid #999; background: none;" | |||
|- | |||
| align="center" | '''Move''' || align="center" | '''Motion''' || align="center" | '''Damage''' || align="center" | '''Stun Damage''' || align="center" | '''Chains into itself''' || align="center" | '''Special Cancel''' || align="center" | '''Super Cancel''' || align="center" | '''Juggle Value''' | |||
|- | |||
| align="center" | Crouch Strong || align="center" | D + MP || align="center" | 80(14 life points) || align="center" | 7 || align="center" | No || align="center" | Yes || align="center" | Yes | |||
|} | |||
'''Frame Data''' | |||
{| border="1em" cellspacing="0" width="65%" style="border: 1px solid #999; background: none;" | |||
|- | |||
| align="center" | '''Startup''' || align="center" | '''Hit''' || align="center" | '''Recovery''' || align="center" | '''Blocked Advantage''' || align="center" | '''Hit Advantage''' || align="center" | '''Crouching Hit Advantage''' || align="center" | '''Guard''' || align="center" | '''Parry''' | |||
|- | |||
| align="center" | 5 || align="center" | 4 || align="center" | 10 || align="center" | +3 || align="center" | +4 || align="center" | +5 || align="center" | HL || align="center" | HL | |||
|} | |||
'''Gauge Increase''' | |||
{| border="1em" cellspacing="0" width="30%" style="border: 1px solid #999; background: none;" | |||
|- | |||
| align="center" | '''Miss''' || align="center" | '''Blocked''' || align="center" | '''Hit''' | |||
|- | |||
| align="center" | 2 || align="center" | 6 || align="center" | 11 | |||
|} | |||
[[Image:(seanchp).gif|none]] | |||
{| border="1em" cellspacing="0" width="60%" style="border: 1px solid #999; background: none;" | |||
|- | |||
| align="center" | '''Move''' || align="center" | '''Motion''' || align="center" | '''Damage''' || align="center" | '''Stun Damage''' || align="center" | '''Chains into itself''' || align="center" | '''Special Cancel''' || align="center" | '''Super Cancel''' || align="center" | '''Juggle Value''' | |||
|- | |||
| align="center" | Crouch Fierce || align="center" | D + HP || align="center" | 120(21 life points) || align="center" | 13 || align="center" | No || align="center" | Yes || align="center" | Yes | |||
|} | |||
'''Frame Data''' | |||
{| border="1em" cellspacing="0" width="65%" style="border: 1px solid #999; background: none;" | |||
|- | |||
| align="center" | '''Startup''' || align="center" | '''Hit''' || align="center" | '''Recovery''' || align="center" | '''Blocked Advantage''' || align="center" | '''Hit Advantage''' || align="center" | '''Crouching Hit Advantage''' || align="center" | '''Guard''' || align="center" | '''Parry''' | |||
|- | |||
| align="center" | 7 || align="center" | 5 || align="center" | 22 || align="center" | -9 || align="center" | -7 || align="center" | -5 || align="center" | HL || align="center" | HL | |||
|} | |||
'''Gauge Increase''' | |||
{| border="1em" cellspacing="0" width="30%" style="border: 1px solid #999; background: none;" | |||
|- | |||
| align="center" | '''Miss''' || align="center" | '''Blocked''' || align="center" | '''Hit''' | |||
|- | |||
| align="center" | 3 || align="center" | 10 || align="center" | 19 | |||
|} | |||
== | [[Image:(seanclk).gif|none]] | ||
{| border="1em" cellspacing="0" width="60%" style="border: 1px solid #999; background: none;" | |||
|- | |||
| align="center" | '''Move''' || align="center" | '''Motion''' || align="center" | '''Damage''' || align="center" | '''Stun Damage''' || align="center" | '''Chains into itself''' || align="center" | '''Special Cancel''' || align="center" | '''Super Cancel''' || align="center" | '''Juggle Value''' | |||
|- | |||
| align="center" | Crouch Short || align="center" | D + LK || align="center" | 20(3 life points) || align="center" | 3 || align="center" | Yes || align="center" | Yes || align="center" | Yes | |||
|} | |||
'''Frame Data''' | |||
{| border="1em" cellspacing="0" width="65%" style="border: 1px solid #999; background: none;" | |||
|- | |||
| align="center" | '''Startup''' || align="center" | '''Hit''' || align="center" | '''Recovery''' || align="center" | '''Blocked Advantage''' || align="center" | '''Hit Advantage''' || align="center" | '''Crouching Hit Advantage''' || align="center" | '''Guard''' || align="center" | '''Parry''' | |||
|- | |||
| align="center" | 5 || align="center" | 3 || align="center" | 7 || align="center" | +1 || align="center" | +1 || align="center" | +1 || align="center" | L || align="center" | L | |||
|} | |||
'''Gauge Increase''' | |||
{| border="1em" cellspacing="0" width="30%" style="border: 1px solid #999; background: none;" | |||
|- | |||
| align="center" | '''Miss''' || align="center" | '''Blocked''' || align="center" | '''Hit''' | |||
|- | |||
| align="center" | 0 || align="center" | 1 || align="center" | 2 | |||
|} | |||
[[Image:(seancmk).gif|none]] | |||
{| border="1em" cellspacing="0" width="60%" style="border: 1px solid #999; background: none;" | |||
|- | |||
| align="center" | '''Move''' || align="center" | '''Motion''' || align="center" | '''Damage''' || align="center" | '''Stun Damage''' || align="center" | '''Chains into itself''' || align="center" | '''Special Cancel''' || align="center" | '''Super Cancel''' || align="center" | '''Juggle Value''' | |||
|- | |||
| align="center" | Crouch Forward || align="center" | D + MK || align="center" | 70(15 life points) || align="center" | 3 || align="center" | No || align="center" | Yes || align="center" | Yes | |||
|} | |||
'''Frame Data''' | |||
{| border="1em" cellspacing="0" width="65%" style="border: 1px solid #999; background: none;" | |||
|- | |||
| align="center" | '''Startup''' || align="center" | '''Hit''' || align="center" | '''Recovery''' || align="center" | '''Blocked Advantage''' || align="center" | '''Hit Advantage''' || align="center" | '''Crouching Hit Advantage''' || align="center" | '''Guard''' || align="center" | '''Parry''' | |||
|- | |||
| align="center" | 7 || align="center" | 5 || align="center" | 17 || align="center" | -4 || align="center" | -3 || align="center" | -2 || align="center" | L || align="center" | L | |||
|} | |||
'''Gauge Increase''' | |||
{| border="1em" cellspacing="0" width="30%" style="border: 1px solid #999; background: none;" | |||
|- | |||
| align="center" | '''Miss''' || align="center" | '''Blocked''' || align="center" | '''Hit''' | |||
|- | |||
| align="center" | 2 || align="center" | 6 || align="center" | 11 | |||
|} | |||
[[Image:(seanchk).gif|none]] | |||
{| border="1em" cellspacing="0" width="60%" style="border: 1px solid #999; background: none;" | |||
|- | |||
| align="center" | '''Move''' || align="center" | '''Motion''' || align="center" | '''Damage''' || align="center" | '''Stun Damage''' || align="center" | '''Chains into itself''' || align="center" | '''Special Cancel''' || align="center" | '''Super Cancel''' || align="center" | '''Juggle Value''' | |||
|- | |||
| align="center" | Crouch Roundhouse || align="center" | D + HK || align="center" | 120(21 life points) || align="center" | 3 || align="center" | No || align="center" | No || align="center" | No | |||
|} | |||
'''Frame Data''' | |||
{| border="1em" cellspacing="0" width="65%" style="border: 1px solid #999; background: none;" | |||
|- | |||
| align="center" | '''Startup''' || align="center" | '''Hit''' || align="center" | '''Recovery''' || align="center" | '''Blocked Advantage''' || align="center" | '''Hit Advantage''' || align="center" | '''Crouching Hit Advantage''' || align="center" | '''Guard''' || align="center" | '''Parry''' | |||
|- | |||
| align="center" | 8 || align="center" | 5 || align="center" | 30 || align="center" | -16 || align="center" | Down || align="center" | Down || align="center" | L || align="center" | L | |||
|} | |||
'''Gauge Increase''' | |||
{| border="1em" cellspacing="0" width="30%" style="border: 1px solid #999; background: none;" | |||
|- | |||
| align="center" | '''Miss''' || align="center" | '''Blocked''' || align="center" | '''Hit''' | |||
|- | |||
| align="center" | 3 || align="center" | 10 || align="center" | 19 | |||
|} | |||
====Command Normals==== | ====Command Normals==== | ||
[[Image:(seanthk).gif|none]] | |||
{| border="1em" cellspacing="0" width="60%" style="border: 1px solid #999; background: none;" | |||
|- | |||
| align="center" | '''Move''' || align="center" | '''Motion''' || align="center" | '''Damage''' || align="center" | '''Stun Damage''' || align="center" | '''Chains into itself''' || align="center" | '''Special Cancel''' || align="center" | '''Super Cancel''' || align="center" | '''Juggle Value''' | |||
|- | |||
| align="center" | Rolling Sabat || align="center" | F+HK || align="center" | 90(70)(16 life points) || align="center" | 9 || align="center" | No || align="center" | No || align="center" | No | |||
|} | |||
'''Frame Data''' | |||
{| border="1em" cellspacing="0" width="65%" style="border: 1px solid #999; background: none;" | |||
|- | |||
| align="center" | '''Startup''' || align="center" | '''Hit''' || align="center" | '''Recovery''' || align="center" | '''Blocked Advantage''' || align="center" | '''Hit Advantage''' || align="center" | '''Crouching Hit Advantage''' || align="center" | '''Guard''' || align="center" | '''Parry''' | |||
|- | |||
| align="center" | 15 || align="center" | 5 || align="center" | 18 || align="center" | -5 || align="center" | Down || align="center" | Down || align="center" | H || align="center" | H | |||
|} | |||
'''Gauge Increase''' | |||
{| border="1em" cellspacing="0" width="30%" style="border: 1px solid #999; background: none;" | |||
|- | |||
| align="center" | '''Miss''' || align="center" | '''Blocked''' || align="center" | '''Hit''' | |||
|- | |||
| align="center" | 2 || align="center" | 6 || align="center" | 11 | |||
|} | |||
[[Image:(seanthp).gif|none]] | |||
{| border="1em" cellspacing="0" width="65%" style="border: 1px solid #999; background: none;" | |||
|- | |||
| align="center" | '''Move''' || align="center" | '''Motion''' || align="center" | '''Damage''' || align="center" | '''Stun Damage''' || align="center" | '''Chains into itself''' || align="center" | '''Special Cancel''' || align="center" | '''Super Cancel''' || align="center" | '''Juggle Value''' | |||
|- | |||
| align="center" | Sean Pachiki || align="center" | F+HP || align="center" | 140(60+80)(22 life points) || align="center" | 13 || align="center" | No || align="center" | No || align="center" | No | |||
|} | |||
'''Frame Data''' | |||
{| border="1em" cellspacing="0" width="70%" style="border: 1px solid #999; background: none;" | |||
|- | |||
| align="center" | '''Startup''' || align="center" | '''Hit''' || align="center" | '''Recovery''' || align="center" | '''Blocked Advantage''' || align="center" | '''Hit Advantage''' || align="center" | '''Crouching Hit Advantage''' || align="center" | '''Guard''' || align="center" | '''Parry''' | |||
|- | |||
| align="center" | 21 || align="center" | 7 || align="center" | 24 || align="center" | -6 || align="center" | -4 || align="center" | -2 || align="center" | H/H || align="center" | H/H | |||
|} | |||
'''Gauge Increase''' | |||
{| border="1em" cellspacing="0" width="35%" style="border: 1px solid #999; background: none;" | |||
|- | |||
| align="center" | '''Miss''' || align="center" | '''Blocked''' || align="center" | '''Hit''' | |||
|- | |||
| align="center" | 3 || align="center" | 8 || align="center" | 18 | |||
|} | |||
===Target Combos=== | |||
{| border="1em" cellspacing="0" width="65%" style="border: 1px solid #999; background: none;" | |||
|- | |||
| align="center" | '''Move''' || align="center" | '''Motion''' || align="center" | '''Damage''' || align="center" | '''Stun Damage''' || align="center" | '''Chains into itself''' || align="center" | '''Special Cancel''' || align="center" | '''Super Cancel''' || align="center" | '''Juggle Value''' | |||
|- | |||
| align="center" | Target Combo || align="center" | Close MP -> Close HK || align="center" | 90+50 || align="center" | 10 || align="center" | No || align="center" | Yes/No || align="center" | Yes/No (*Yes) | |||
|} | |||
'''Frame Data''' | |||
{| border="1em" cellspacing="0" width="65%" style="border: 1px solid #999; background: none;" | |||
|- | |||
| align="center" | '''Startup''' || align="center" | '''Hit''' || align="center" | '''Recovery''' || align="center" | '''Blocked Advantage''' || align="center" | '''Hit Advantage''' || align="center" | '''Crouching Hit Advantage''' || align="center" | '''Guard''' || align="center" | '''Parry''' | |||
|- | |||
| align="center" | 4 || align="center" | - || align="center" | 22 || align="center" | -2 || align="center" | 0 || align="center" | +2 to +6 || align="center" | HL/HL || align="center" | H/H | |||
|} | |||
'''Gauge Increase''' | |||
{| border="1em" cellspacing="0" width="30%" style="border: 1px solid #999; background: none;" | |||
|- | |||
| align="center" | '''Miss''' || align="center" | '''Blocked''' || align="center" | '''Hit''' | |||
|- | |||
| align="center" | 2 || align="center" | 7 || align="center" | 12 | |||
|} | |||
''*Links into super on Makoto while standing and Ibuki while crouching with a slight delay in-between MP and HK.'' | |||
{| border="1em" cellspacing="0" width="65%" style="border: 1px solid #999; background: none;" | |||
|- | |||
| align="center" | '''Move''' || align="center" | '''Motion''' || align="center" | '''Damage''' || align="center" | '''Stun Damage''' || align="center" | '''Chains into itself''' || align="center" | '''Special Cancel''' || align="center" | '''Super Cancel''' || align="center" | '''Juggle Value''' | |||
|- | |||
| align="center" | Close Fierce + Sean Pachiki || align="center" | Close HP -> F+HP || align="center" | 120+50+60 || align="center" | 18 || align="center" | No || align="center" | Yes/No || align="center" | Yes/No | |||
|} | |||
'''Frame Data''' | |||
{| border="1em" cellspacing="0" width="65%" style="border: 1px solid #999; background: none;" | |||
|- | |||
| align="center" | '''Startup''' || align="center" | '''Hit''' || align="center" | '''Recovery''' || align="center" | '''Blocked Advantage''' || align="center" | '''Hit Advantage''' || align="center" | '''Crouching Hit Advantage''' || align="center" | '''Guard''' || align="center" | '''Parry''' | |||
|- | |||
| align="center" | 5 || align="center" | - || align="center" | 45 || align="center" | -6 || align="center" | -4 || align="center" | -2 || align="center" | HL/H || align="center" | H/H | |||
|} | |||
'''Gauge Increase''' | |||
{| border="1em" cellspacing="0" width="30%" style="border: 1px solid #999; background: none;" | |||
|- | |||
| align="center" | '''Miss''' || align="center" | '''Blocked''' || align="center" | '''Hit''' | |||
|- | |||
| align="center" | 3 || align="center" | 15 || align="center" | 30 | |||
|} | |||
''More of a Target "link" rather than combo since it doesn't combo but it scales like one.'' | |||
=== Special Moves === | |||
[[Image:(seanzenten).gif|none]] | |||
{| border="1em" cellspacing="0" width="60%" style="border: 1px solid #999; background: none;" | |||
|- | |||
| align="center" | '''Move''' || align="center" | '''Motion''' || align="center" | '''Damage''' || align="center" | '''Blocked Damage''' || align="center" | '''Stun Damage''' || align="center" | '''Super Cancel''' || align="center" | '''Juggle Value''' | |||
|- | |||
| align="center" | Zenten || align="center" | QCB + P || align="center" | 0 || align="center" | 0|| align="center" | 0 || align="center" | No | |||
|} | |||
'''Frame Data''' | |||
{| border="1em" cellspacing="0" width="65%" style="border: 1px solid #999; background: none;" | |||
|- | |||
| align="center" | '''Startup''' || align="center" | '''Hit''' || align="center" | '''Recovery''' || align="center" | '''Blocked Advantage''' || align="center" | '''Hit Advantage''' || align="center" | '''Crouching Hit Advantage''' || align="center" | '''Guard''' || align="center" | '''Parry''' | |||
|- | |||
| align="center" | 2 || align="center" | 17/27/41 || align="center" | 7 || align="center" | - || align="center" | - || align="center" | - || align="center" | - || align="center" | - | |||
|} | |||
'''Gauge Increase''' | |||
{| border="1em" cellspacing="0" width="30%" style="border: 1px solid #999; background: none;" | |||
|- | |||
| align="center" | '''Miss''' || align="center" | '''Blocked''' || align="center" | '''Hit''' || align="center" | '''Parry (Gauge for opponent)''' | |||
|- | |||
| align="center" | 0 || align="center" | 0 || align="center" | 0 || align="center" | 0 | |||
|} | |||
''Zenten lowers his hit-box to the ground which allows him to avoid throws and projectiles for however long its out on screen. It can even avoid high hitting supers altogether when done early enough. Its parry bait as well since opponents who know about this move will stick lows/overheads out constantly to punish you for using this. Its throw invincible though not attack invincible. It can help you out every once in a while to get out of pressure but its not recommended to do it all the time. | |||
'''The | ''Tip: Parry and use this against advancing supers to trap the opponent in a corner (if using SA2). Also, mix up which of the Zentens you use (LP/MP/HP).'' | ||
[[Image:(seanwheel).gif|none]] | |||
{| border="1em" cellspacing="0" width="60%" style="border: 1px solid #999; background: none;" | |||
|- | |||
| align="center" | '''Move''' || align="center" | '''Motion''' || align="center" | '''Damage''' || align="center" | '''Blocked Damage''' || align="center" | '''Stun Damage''' || align="center" | '''Super Cancel''' || align="center" | '''Juggle Value''' | |||
|- | |||
| align="center" | Ryuubi Kyaku || align="center" | QCF + K || align="center" | 120(21 life points) || align="center" | 15 || align="center" | 19 || align="center" | No | |||
|} | |||
'''Frame Data''' | |||
{| border="1em" cellspacing="0" width="65%" style="border: 1px solid #999; background: none;" | |||
|- | |||
| align="center" | '''Startup''' || align="center" | '''Hit''' || align="center" | '''Recovery''' || align="center" | '''Blocked Advantage''' || align="center" | '''Hit Advantage''' || align="center" | '''Crouching Hit Advantage''' || align="center" | '''Guard''' || align="center" | '''Parry''' | |||
|- | |||
| align="center" | 25 || align="center" | 8 || align="center" | 15 || align="center" | -5 to +2 || align="center" | -5 to +2 || align="center" | -3 to 0 || align="center" | H || align="center" | H | |||
|} | |||
'''Gauge Increase''' | |||
{| border="1em" cellspacing="0" width="30%" style="border: 1px solid #999; background: none;" | |||
|- | |||
| align="center" | '''Miss''' || align="center" | '''Blocked''' || align="center" | '''Hit''' || align="center" | '''Parry (Gauge for opponent)''' | |||
|- | |||
| align="center" | 3 || align="center" | 15 || align="center" | 21 || align="center" | 4 | |||
|} | |||
''The secondary special AA that Sean has. The range of this move is deceptive, it can hit very high in the air and even stuff out some of the other shoto's air tatsu's. Useful for when the opponent tries to jump out of the corner and you smack them back down into there with it. The EX can hit up to 3 times if you catch an Opp. jumping away or if you're up close (Akuma, Remy, Urien and Hugo). Like the tackle, you can also combo into this off the basketball taunt, you know, for style. This move is one that opponents tend to look out for or bait out the most because of how easy it is to parry it, even the EX so be careful. | |||
''The frame Adv. of the Non-EX RK's vary depending on who you're playing against and how far away you are. On block up close for taller characters its -5, but on a shorter character (like Yun) its 0. On hit, its about the same, though on shorter characters its -2 up to +2 (on twins). If you hit with this move from the maximum distance of each of the 3 buttons, its 0 to +2 (twins) on hit and block. This also applies to the EX Wheel as well.'' | |||
'''The | [[Image:(seands).gif|none]] | ||
{| border="1em" cellspacing="0" width="65%" style="border: 1px solid #999; background: none;" | |||
|- | |||
| align="center" | '''Move''' || align="center" | '''Motion''' || align="center" | '''Damage''' || align="center" | '''Blocked Damage''' || align="center" | '''Stun Damage''' || align="center" | '''Super Cancel''' || align="center" | '''Juggle Value''' | |||
|- | |||
| align="center" | Dragon Smash (Jab) || align="center" | F, D, DF + LP || align="center" | 130(23 life points) || align="center" | 16 || align="center" | 11 || align="center" | Yes | |||
|- | |||
| align="center" | Dragon Smash (Strong) || align="center" | F, D, DF + MP || align="center" | 130(23 life points) || align="center" | 16 || align="center" | 11 || align="center" | Yes | |||
|- | |||
| align="center" | Dragon Smash (Fierce) || align="center" | F, D, DF + HP || align="center" | 130(23 life points) || align="center" | 16 || align="center" | 11 || align="center" | Yes | |||
|} | |||
'''Frame Data''' | |||
{| border="1em" cellspacing="0" width="85%" style="border: 1px solid #999; background: none;" | |||
|- | |||
| align="center" | '''Move''' || align="center" | '''Startup''' || align="center" | '''Hit''' || align="center" | '''Recovery''' || align="center" | '''Blocked Advantage''' || align="center" | '''Hit Advantage''' || align="center" | '''Crouching Hit Advantage''' || align="center" | '''Guard''' || align="center" | '''Parry''' | |||
|- | |||
| align="center" | Dragon Smash (Jab) || align="center" | 5 || align="center" | 6 || align="center" | 36 || align="center" | -24 || align="center" | Down || align="center" | Down || align="center" | HL || align="center" | HL | |||
|- | |||
| align="center" | Dragon Smash (Strong) || align="center" | 7 || align="center" | 8 || align="center" | 39 || align="center" | -30 || align="center" | Down || align="center" | Down || align="center" | HL || align="center" | HL | |||
|- | |||
| align="center" | Dragon Smash (Fierce) || align="center" | 9 || align="center" | 10 || align="center" | 42 || align="center" | -34 || align="center" | Down || align="center" | Down || align="center" | HL || align="center" | HL | |||
|} | |||
'''Gauge Increase''' | |||
{| border="1em" cellspacing="0" width="50%" style="border: 1px solid #999; background: none;" | |||
|- | |||
| align="center" | '''Move''' || align="center" | '''Miss''' || align="center" | '''Blocked''' || align="center" | '''Hit''' | |||
|- | |||
| align="center" | Dragon Smash (Jab) || align="center" | 2 || align="center" | 6 || align="center" | 11 | |||
|- | |||
| align="center" | Dragon Smash (Strong) || align="center" | 2 || align="center" | 6 || align="center" | 11 | |||
|- | |||
| align="center" | Dragon Smash (Fierce) || align="center" | 2 || align="center" | 6 || align="center" | 11 | |||
|} | |||
''Sean's version of the Shoryuken. The variations come out in 5/7/8/9 frames respectively, but do all the same damage (except EX) and can cancel into Hadou Burst and Shoryu Cannon. Be for-warned, you can't treat this like a normal DP. Its slower by a few frames and it has most of its priority over Sean's head. It also doesn't have much range either, so it has a high chance of whiff-ing plus you can't combo into it off of Cl.HK (only on Dudley, Urien, Elena, and Twelve) and he can be grabbed out of it as well (all versions).'' | |||
''If you trade/collide with someone jumping in using this, you can SA1 them before they hit the ground which does a few points less than what it normally does but it's still good damage nonetheless.'' | |||
''Advice: Learn how to quickly cancel Cr.LK or Cr.LP into Dragon Smash (LP or MP only).'' | |||
[[Image:(seandtornadokick).gif|none]] | |||
{| border="1em" cellspacing="0" width="65%" style="border: 1px solid #999; background: none;" | |||
|- | |||
| align="center" | '''Move''' || align="center" | '''Motion''' || align="center" | '''Damage''' || align="center" | '''Blocked Damage''' || align="center" | '''Stun Damage''' || align="center" | '''Super Cancel''' || align="center" | '''Juggle Value''' | |||
|- | |||
| align="center" | Tornado (Short) || align="center" | QCB + LK || align="center" | 100(50+50)(16 life points) || align="center" | 9 || align="center" | 10(5+5) || align="center" | No | |||
|- | |||
| align="center" | Tornado (Forward) || align="center" | QCB + MK || align="center" | 150(50x3)(24 life points) || align="center" | 13 || align="center" | 15(5x3) || align="center" | No | |||
|- | |||
| align="center" | Tornado (Roundhouse) || align="center" | QCB + HK || align="center" | 160(50+40×3(26 life points) || align="center" | 14 || align="center" | 18(5x4) || align="center" | No | |||
|} | |||
'''Frame Data''' | |||
{| border="1em" cellspacing="0" width="85%" style="border: 1px solid #999; background: none;" | |||
|- | |||
| align="center" | '''Move''' || align="center" | '''Startup''' || align="center" | '''Hit''' || align="center" | '''Recovery''' || align="center" | '''Blocked Advantage''' || align="center" | '''Hit Advantage''' || align="center" | '''Crouching Hit Advantage''' || align="center" | '''Guard''' || align="center" | '''Parry''' | |||
|- | |||
| align="center" | Tornado (Short) || align="center" | 11 || align="center" | 2 || align="center" | 21 || align="center" | -7 || align="center" | -5 || align="center" | -5 to -2 || align="center" | HL/HL || align="center" | H/H | |||
|- | |||
| align="center" | Tornado (Forward) || align="center" | 14|| align="center" | 2 || align="center" | 21 || align="center" | -6 || align="center" | -4 || align="center" | -4 to -2 || align="center" | HL/HL/HL || align="center" | H/H/H | |||
|- | |||
| align="center" | Tornado (Roundhouse) || align="center" | 16 || align="center" | 3 || align="center" | 21 || align="center" | -6 || align="center" | -4 || align="center" | -4 to -2 || align="center" | HL/HL/HL/HL || align="center" | H/H/H/H | |||
|} | |||
'''Gauge Increase''' | |||
{| border="1em" cellspacing="0" width="60%" style="border: 1px solid #999; background: none;" | |||
|- | |||
| align="center" | '''Move''' || align="center" | '''Miss''' || align="center" | '''Blocked''' || align="center" | '''Hit''' || align="center" | '''Parry (Gauge for opponent)''' | |||
|- | |||
| align="center" | Tornado (Short) || align="center" | 3 || align="center" | 13 || align="center" | 19 || align="center" | 8 | |||
|- | |||
| align="center" | Tornado (Forward) || align="center" | 3 || align="center" | 14 || align="center" | 20 || align="center" | 12 | |||
|- | |||
| align="center" | Tornado (Roundhouse) || align="center" | 3 || align="center" | 15 || align="center" | 21 || align="center" | 16 | |||
|} | |||
''This is Sean's version of the tatsu. Its easy to combo into (LK/MK/EX versions) from HK, MP, etc. Does good damage and its useful for pressuring opponents. The LK tornado can be used as an anti-air and combo'd into SA1 before they hit the ground (in the corner only). Also the HK or MK versions are great for chip out wins. All variations of Tornado are unsafe on hit AND block (except for EX which is 99% safe) and comboing into the HK tornado works only vs Crouching opponents (still very unsafe). The first hit all of the Tornadoes force stand which makes the move even more unsafe than it should be.'' | |||
''All variations of Tornado are better used as an "out of range" footsie against crouchers, especially the Roundhouse/EX version. This will actually make the move safer but not by much (becomes -2 to -3 on hit instead of -3/-4).'' | |||
[[Image:(seantacklefull).gif|none]] | |||
{| border="1em" cellspacing="0" width="70%" style="border: 1px solid #999; background: none;" | |||
|- | |||
| align="center" | '''Move''' || align="center" | '''Motion''' || align="center" | '''Damage''' || align="center" | '''Blocked Damage''' || align="center" | '''Stun Damage''' || align="center" | '''Super Cancel''' || align="center" | '''Juggle Value''' | |||
|- | |||
| align="center" | Tackle (Jab) || align="center" | HCF + LP || align="center" | 180(30 life points) || align="center" | 0 || align="center" | 16 || align="center" | No | |||
|- | |||
| align="center" | Tackle (Strong) || align="center" | HCF + MP || align="center" | 180(30 life points) || align="center" | 0 || align="center" | 16 || align="center" | No | |||
|- | |||
| align="center" | Tackle (Fierce) || align="center" | HCF + HP || align="center" | 180(30 life points) || align="center" | 0|| align="center" | 16 || align="center" | No | |||
|} | |||
'''Frame Data''' | |||
{| border="1em" cellspacing="0" width="85%" style="border: 1px solid #999; background: none;" | |||
|- | |||
| align="center" | '''Move''' || align="center" | '''Startup''' || align="center" | '''Hit''' || align="center" | '''Recovery''' || align="center" | '''Blocked Advantage''' || align="center" | '''Hit Advantage''' || align="center" | '''Crouching Hit Advantage''' || align="center" | '''Guard''' || align="center" | '''Parry''' | |||
|- | |||
| align="center" | Tackle (Jab) || align="center" | 18 || align="center" | 2 || align="center" | 28 || align="center" | -14 || align="center" | Down || align="center" | Down || align="center" | L || align="center" | L | |||
|- | |||
| align="center" | Tackle (Strong) || align="center" | 22 || align="center" | 2 || align="center" | 28 || align="center" | -14 || align="center" | Down || align="center" | Down || align="center" | L || align="center" | L | |||
|- | |||
| align="center" | Tackle (Fierce) || align="center" | 26 || align="center" | 2 || align="center" | 28 || align="center" | -14 || align="center" | Down || align="center" | Down || align="center" | L || align="center" | L | |||
|} | |||
'''Gauge Increase''' | |||
{| border="1em" cellspacing="0" width="60%" style="border: 1px solid #999; background: none;" | |||
|- | |||
| align="center" | '''Move''' || align="center" | '''Miss''' || align="center" | '''Blocked''' || align="center" | '''Hit''' || align="center" | '''Parry (Gauge for opponent)''' | |||
|- | |||
| align="center" | Tackle (Jab) || align="center" | 0 || align="center" | 0 || align="center" | 11 || align="center" | 4 | |||
|- | |||
| align="center" | Tackle (Strong) || align="center" | 0 || align="center" | 0 || align="center" | 11 || align="center" | 4 | |||
|- | |||
| align="center" | Tackle (Fierce) || align="center" | 0 || align="center" | 0 || align="center" | 11 || align="center" | 4 | |||
|} | |||
''This is another source of mobility in addition to Sean's already fast and lengthy dash. Its recovery is low to the ground which gives him a 2nd move that goes underneath projectiles (the first being Zenten). Useful to close distance from you to the opponent when used just for the dash itself. The tackle itself is meant to be used defensively when you parry an attack with a long recovery from a long distance but it can be used to catch whiffed lows or dashes when in close enough range. You can cancel into this (LP version) from his any of his close normals for fake outs into grab/EX DS/super but be for-warned doing this against someone who's quick enough to punish you. You can combo into this off of his taunt for style. Be warned, the attack is not a grab and the attack doesn't have the "duck" property (like Yun's jump kick and Dudley's rush attack or Sean's Zenten). It's a move that has 0 priority until the actual tackle attack and even then its really slow.'' | |||
''Tip: If your AA get's parried, cancel into an empty tackle for a mix-up. To actually tackle, you have to bait out crouching moves before using it. In this scenario, LP or MP tackle depending on how far away you are, should hit when they whiff.'' | |||
=== EX Moves === | |||
''' | [[Image:(seanhdkex).gif|none]] | ||
{| border="1em" cellspacing="0" width="65%" style="border: 1px solid #999; background: none;" | |||
|- | |||
| align="center" | '''Move''' || align="center" | '''Motion''' || align="center" | '''Gauge Needed''' || align="center" | '''Damage''' || align="center" | '''Blocked Damage''' || align="center" | '''Stun Damage''' || align="center" | '''Super Cancel''' || align="center" | '''Juggle Value''' | |||
|- | |||
| align="center" | Ryuubi Kyaku (EX) || align="center" | QCF + KK || align="center" | 40 || align="center" | 200(60+70+70)(32 life points) || align="center" | 17(5+6+6) || align="center" | 21(7×3) || align="center" | No | |||
|} | |||
'''Frame Data''' | |||
{| border="1em" cellspacing="0" width="80%" style="border: 1px solid #999; background: none;" | |||
|- | |||
| align="center" | '''Move''' || align="center" | '''Startup''' || align="center" | '''Hit''' || align="center" | '''Recovery''' || align="center" | '''Blocked Advantage''' || align="center" | '''Hit Advantage''' || align="center" | '''Crouching Hit Advantage''' || align="center" | '''Guard''' || align="center" | '''Parry''' | |||
|- | |||
| align="center" | Ryuubi Kyaku (EX) || align="center" | 25・27・29・31 || align="center" | 2・2・2・2 || align="center" | 19 || align="center" | -1 to +2 || align="center" | -1 to +2 || align="center" | -1 || align="center" | H || align="center" | H | |||
|} | |||
'''Gauge Increase''' | |||
{| border="1em" cellspacing="0" width="50%" style="border: 1px solid #999; background: none;" | |||
|- | |||
| align="center" | '''Move''' || align="center" | '''Miss''' || align="center" | '''Blocked''' || align="center" | '''Hit''' || align="center" | '''Parry (Gauge for opponent)''' | |||
|- | |||
| align="center" | Ryuubi Kyaku (EX) || align="center" | - || align="center" | - || align="center" | - || align="center" | 8 (12 if hits 3 times) | |||
|} | |||
''Generally its -1 on hit/block but like Non-EX Wheel Kicks it depends on the distance away and/or the character. Its off the ground in 11 frames as opposed to 15 frames (Non-EX) and hits up to 3 times.'' | |||
[[Image:(seansrkex).gif|none]] | |||
{| border="1em" cellspacing="0" width="65%" style="border: 1px solid #999; background: none;" | |||
|- | |||
| align="center" | '''Move''' || align="center" | '''Motion''' || align="center" | '''Gauge Needed''' || align="center" | '''Damage''' || align="center" | '''Blocked Damage''' || align="center" | '''Stun Damage''' || align="center" | '''Super Cancel''' || align="center" | '''Juggle Value''' | |||
|- | |||
| align="center" | Dragon Smash (EX) || align="center" | F, D, DF + PP || align="center" | 40 || align="center" | 180(90+90(60))(31 life points) || align="center" | 18(11+7) || align="center" | 16 || align="center" | Yes/No | |||
|} | |||
'''Frame Data''' | |||
{| border="1em" cellspacing="0" width="80%" style="border: 1px solid #999; background: none;" | |||
|- | |||
| align="center" | '''Move''' || align="center" | '''Startup''' || align="center" | '''Hit''' || align="center" | '''Recovery''' || align="center" | '''Blocked Advantage''' || align="center" | '''Hit Advantage''' || align="center" | '''Crouching Hit Advantage''' || align="center" | '''Guard''' || align="center" | '''Parry''' | |||
|- | |||
| align="center" | Dragon Smash (EX) || align="center" | 8・9 || align="center" | 1・11 || align="center" | 42 || align="center" | -37 || align="center" | Down || align="center" | Down || align="center" | HL || align="center" | HL | |||
|} | |||
'''Gauge Increase''' | |||
{| border="1em" cellspacing="0" width="50%" style="border: 1px solid #999; background: none;" | |||
|- | |||
| align="center" | '''Move''' || align="center" | '''Miss''' || align="center" | '''Blocked''' || align="center" | '''Hit''' || align="center" | '''Parry (Gauge for opponent)''' | |||
|- | |||
| align="center" | Dragon Smash (EX) || align="center" | - || align="center" | - || align="center" | - || align="center" | 8 | |||
|} | |||
''Sean's EX Dragon Smash has the most invincibility of all the shoto DPs (8 frames) and the most hit frames and height out of the other Dragon Smashes. He ''can'' be thrown out of this usually but there are situations where he can't.'' | |||
''' | [[Image:(seantskex).gif|none]] | ||
{| border="1em" cellspacing="0" width="70%" style="border: 1px solid #999; background: none;" | |||
|- | |||
| align="center" | '''Move''' || align="center" | '''Motion''' || align="center" | '''Gauge Needed''' || align="center" | '''Damage''' || align="center" | '''Blocked Damage''' || align="center" | '''Stun Damage''' || align="center" | '''Super Cancel''' || align="center" | '''Juggle Value''' | |||
|- | |||
| align="center" | Tornado (EX) || align="center" | QCB + KK || align="center" | 40 || align="center" | 175(60+40×3)(28 life points) || align="center" | 15 || align="center" | 22(9+5×3) || align="center" | No | |||
|} | |||
'''Frame Data''' | |||
{| border="1em" cellspacing="0" width="80%" style="border: 1px solid #999; background: none;" | |||
|- | |||
| align="center" | '''Move''' || align="center" | '''Startup''' || align="center" | '''Hit''' || align="center" | '''Recovery''' || align="center" | '''Blocked Advantage''' || align="center" | '''Hit Advantage''' || align="center" | '''Crouching Hit Advantage''' || align="center" | '''Guard''' || align="center" | '''Parry''' | |||
|- | |||
| align="center" | Tornado (EX) || align="center" | 9・21・30・40 || align="center" | 2・3・4・2 || align="center" | 17 || align="center" | -3 || align="center" | -1 || align="center" | -1 to +1 || align="center" | HL || align="center" | H | |||
|} | |||
'''Gauge Increase''' | |||
{| border="1em" cellspacing="0" width="50%" style="border: 1px solid #999; background: none;" | |||
|- | |||
| align="center" | '''Move''' || align="center" | '''Miss''' || align="center" | '''Blocked''' || align="center" | '''Hit''' || align="center" | '''Parry (Gauge for opponent)''' | |||
|- | |||
| align="center" | Tornado (EX) || align="center" | - || align="center" | - || align="center" | - || align="center" | 16 | |||
|} | |||
''EX Tornado can leave you at -1, 0 or +1 on hit depending on the situation: | |||
*-1: The move's normal frame advantage. Its -1 on hit even if canceled from Cl.HK or Cl.MP due to the first hit of the tatsu inducing stand | |||
* 0: Even though its -1 on hit, you can't be punished by 1 frame supers (except gigas) or 1 frame moves | |||
*+1: If you don't hit with the first hit of the tatsu, its plus on hit only vs. Crouchers.'' | |||
[[Image:(seanatskex).gif|none]] | |||
{| border="1em" cellspacing="0" width="70%" style="border: 1px solid #999; background: none;" | |||
|- | |||
| align="center" | '''Move''' || align="center" | '''Motion''' || align="center" | '''Gauge Needed''' || align="center" | '''Damage''' || align="center" | '''Blocked Damage''' || align="center" | '''Stun Damage''' || align="center" | '''Super Cancel''' || align="center" | '''Juggle Value''' | |||
|- | |||
| align="center" | Tackle (EX) || align="center" | HCF + PP || align="center" | 40 || align="center" | 260(40 life points) || align="center" | 0 || align="center" | 25 || align="center" | No | |||
|} | |||
'''Frame Data''' | |||
{| border="1em" cellspacing="0" width="80%" style="border: 1px solid #999; background: none;" | |||
|- | |||
| align="center" | '''Move''' || align="center" | '''Startup''' || align="center" | '''Hit''' || align="center" | '''Recovery''' || align="center" | '''Blocked Advantage''' || align="center" | '''Hit Advantage''' || align="center" | '''Crouching Hit Advantage''' || align="center" | '''Guard''' || align="center" | '''Parry''' | |||
|- | |||
| align="center" | Tackle (EX) || align="center" | 28 || align="center" | 2 || align="center" | 28 || align="center" | -14 || align="center" | Down || align="center" | Down || align="center" | L || align="center" | L | |||
|} | |||
'''Gauge Increase''' | |||
{| border="1em" cellspacing="0" width="50%" style="border: 1px solid #999; background: none;" | |||
|- | |||
| align="center" | '''Move''' || align="center" | '''Miss''' || align="center" | '''Blocked''' || align="center" | '''Hit''' || align="center" | '''Parry (Gauge for opponent)''' | |||
|- | |||
| align="center" | Tackle (EX) || align="center" | - || align="center" | - || align="center" | - || align="center" | 4 | |||
|} | |||
''EX version of Sean tackle, one of his most damaging moves (does the same as Hadou Burst). It can cover a good distance quickly and can also be used to escape jump-ins if your AA gets parried. Its also possible to punish with this on parry against long recovery moves such as sweeps. Has the most stun of any special move that the shotos have and you can combo this off a taunt for style.'' | |||
=== Super Arts === | |||
[[Image:(seansa1).gif|none]] | |||
{| border="1em" cellspacing="0" width="70%" style="border: 1px solid #999; background: none;" | |||
|- | |||
| align="center" | '''Super Art''' || align="center" | '''Super Art Name''' || align="center" | '''Super Art Stock''' || align="center" | '''Motion''' || align="center" | '''Damage''' || align="center" | '''Blocked Damage''' || align="center" | '''Stun Damage''' || align="center" | '''Damage/Gauge''' | |||
|- | |||
| align="center" | I || align="center" | Hadou Burst || align="center" | 3 bars (72 each bar) || align="center" | QCF QCF+P || align="center" | 220(39 life points) || align="center" | 14 || align="center" | 9 || align="center" | 3, 05(x3) | |||
|} | |||
''' | '''Frame Data''' | ||
{| border="1em" cellspacing="0" width="65%" style="border: 1px solid #999; background: none;" | |||
|- | |||
| align="center" | '''Startup''' || align="center" | '''Hit''' || align="center" | '''Recovery''' || align="center" | '''Blocked Advantage''' || align="center" | '''Hit Advantage''' || align="center" | '''Crouching Hit Advantage''' || align="center" | '''Guard''' || align="center" | '''Parry''' | |||
|- | |||
| align="center" | 2 || align="center" | 1 || align="center" | 61 || align="center" | -29 || align="center" | Down || align="center" | Down || align="center" | HL || align="center" | H | |||
|} | |||
[[Image:(seansa2).gif|none]] | |||
{| border="1em" cellspacing="0" width="80%" style="border: 1px solid #999; background: none;" | |||
|- | |||
| align="center" | '''Super Art''' || align="center" | '''Super Art Name''' || align="center" | '''Super Art Stock''' || align="center" | '''Motion''' || align="center" | '''Damage''' || align="center" | '''Blocked Damage''' || align="center" | '''Stun Damage''' || align="center" | '''Damage/Gauge''' | |||
|- | |||
| align="center" | II || align="center" | Shoryu Cannon || align="center" | 2 bars (96 each bar) || align="center" | QCF QCF+P (Press P rapidly) || align="center" | 390(14 hits(80+50+35+35+40×9)(38 life points) || align="center" | 90 (or less) || align="center" | 0 || align="center" | 4,75 | |||
|} | |||
{| border="1em" cellspacing="0" width="40%" style="border: 1px solid #999; background: none;" | |||
|- | |||
|* 80+50+35+35+(40x9) Damage is when all hits connect. | |||
|- | |||
|** 18+(12x6) Damage is when all hits connect. | |||
|} | |||
'''Frame Data''' | |||
{| border="1em" cellspacing="0" width="65%" style="border: 1px solid #999; background: none;" | |||
|- | |||
| align="center" | '''Startup''' || align="center" | '''Hit''' || align="center" | '''Recovery''' || align="center" | '''Blocked Advantage''' || align="center" | '''Hit Advantage''' || align="center" | '''Crouching Hit Advantage''' || align="center" | '''Guard''' || align="center" | '''Parry''' | |||
|- | |||
| align="center" | 1・3・28・30・32・34・36・38・40・42・44・46・48・50・52・54 || align="center" | 2・7・2・2・2・(1×10) || align="center" | 36 || align="center" | -43 || align="center" | Down || align="center" | Down || align="center" | HLx1~9 || align="center" | HLx1~14 | |||
|} | |||
[[Image:(seansa3).gif|none]] | |||
{| border="1em" cellspacing="0" width="70%" style="border: 1px solid #999; background: none;" | |||
|- | |||
| align="center" | '''Super Art''' || align="center" | '''Super Art Name''' || align="center" | '''Super Art Stock''' || align="center" | '''Motion''' || align="center" | '''Damage''' || align="center" | '''Blocked Damage''' || align="center" | '''Stun Damage''' || align="center" | '''Damage/Gauge''' | |||
|- | |||
| align="center" | III || align="center" | Hyper Tornado || align="center" | 1 bars (120) || align="center" | QCF QCF+P || align="center" | 460(76 life points) || align="center" | 10 || align="center" | 14 || align="center" | 3, 8 | |||
|} | |||
''' | '''Frame Data''' | ||
{| border="1em" cellspacing="0" width="65%" style="border: 1px solid #999; background: none;" | |||
|- | |||
| align="center" | '''Startup''' || align="center" | '''Hit''' || align="center" | '''Recovery''' || align="center" | '''Blocked Advantage''' || align="center" | '''Hit Advantage''' || align="center" | '''Crouching Hit Advantage''' || align="center" | '''Guard''' || align="center" | '''Parry''' | |||
|- | |||
| align="center" | 2 || align="center" | 14 || align="center" | 53 || align="center" | -31 || align="center" | Down || align="center" | Down || align="center" | HL || align="center" | HL | |||
|} | |||
=Combos= | |||
'''''Damages measured against Gouki (lowest health in the game)'' | |||
''' | |||
===Meter-less=== | ===Meter-less=== | ||
{| border="1em" cellspacing="0" width="80%" style="border: 1px solid #999; background: none;" | |||
|- | |||
| align="center" | '''1st Move''' || align="center" | '''2nd Move''' || align="center" | '''3rd Move''' || align="center" | '''4th Move''' || align="center" | '''Damage''' || align="center" | '''Stun Damage''' | |||
|- | |||
| align="center" | Crouch MK || align="center" | Tornado (LK) || align="center" | - || align="center" | - || align="center" | 28 (17%) || align="center" | 9 | |||
|- | |||
| align="center" | Close MP || align="center" | Close HK || align="center" | - || align="center" | - || align="center" | 24 (15%) || align="center" | 10 | |||
|- | |||
| align="center" | Crouch MK || align="center" | Dragon Smash || align="center" | - || align="center" | - || align="center" | 33 (20%) || align="center" | 12 | |||
|- | |||
| align="center" | Close MP || align="center" | Dragon Smash || align="center" | - || align="center" | - || align="center" | 37 (23%) || align="center" | 18 | |||
|- | |||
| align="center" | Close HP || align="center" | Dragon Smash || align="center" | - || align="center" | - || align="center" | 41 (25%) || align="center" | 22 | |||
|- | |||
| align="center" | Close HK || align="center" | Tornado (MK) || align="center" | - || align="center" | - || align="center" | 47 (29%) || align="center" | 21 | |||
|- | |||
| align="center" | Jump HP || align="center" | Close MP || align="center" | HP Dragon Smash || align="center" | - || align="center" | 57 (35%) || align="center" | 28 | |||
|} | |||
'''Specific to: | |||
Twelve, Elena, Urien and Dudley''' | |||
{| border="1em" cellspacing="0" width="80%" style="border: 1px solid #999; background: none;" | |||
|- | |||
| align="center" | '''1st Move''' || align="center" | '''2nd Move''' || align="center" | '''3rd Move''' || align="center" | '''4th Move''' || align="center" | '''Damage''' || align="center" | '''Stun Damage''' | |||
|- | |||
| align="center" | Close HK || align="center" | Dragon Smash || align="center" | - || align="center" | - || align="center" | 46 (28%) || align="center" | 20 | |||
|} | |||
Crouching | '''''Crouching:''''' | ||
Close | {| border="1em" cellspacing="0" width="80%" style="border: 1px solid #999; background: none;" | ||
|- | |||
| align="center" | '''1st Move''' || align="center" | '''2nd Move''' || align="center" | '''3rd Move''' || align="center" | '''4th Move''' || align="center" | '''Damage''' || align="center" | '''Stun Damage''' | |||
|- | |||
| align="center" | Close HP || align="center" | Tornado (HK) || align="center" | - || align="center" | - || align="center" | 51 (31%) || align="center" | 26 | |||
|- | |||
| align="center" | Close HK || align="center" | Tornado (HK) || align="center" | - || align="center" | - || align="center" | 57 (35%) || align="center" | 24 | |||
|- | |||
| align="center" | Jump HK || align="center" | Close HP || align="center" | Tornado (HK) || align="center" | - || align="center" | 69 (43%) || align="center" | 35 | |||
|- | |||
| align="center" | Jump HP || align="center" | Close HP || align="center" | Tornado (HK) || align="center" | - || align="center" | 73 (45%) || align="center" | 36 | |||
|- | |||
| align="center" | Jump HP|| align="center" | Close HK || align="center" | Tornado (HK) || align="center" | - || align="center" | 78 (48%) || align="center" | 34 | |||
|} | |||
===EX moves=== | ===EX moves=== | ||
{| border="1em" cellspacing="0" width="80%" style="border: 1px solid #999; background: none;" | |||
|- | |||
| align="center" | '''1st Move''' || align="center" | '''2nd Move''' || align="center" | '''3rd Move''' || align="center" | '''4th Move''' || align="center" | '''Damage''' || align="center" | '''Stun Damage''' | |||
|- | |||
| align="center" | Crouch MK || align="center" | Tornado (EX) || align="center" | - || align="center" | - || align="center" | 38 (23%) || align="center" | 20 | |||
|- | |||
| align="center" | Close MP || align="center" | Tornado (EX) || align="center" | - || align="center" | - || align="center" | 42 (26%) || align="center" | 25 | |||
|- | |||
| align="center" | Close HP || align="center" | Tornado (EX) || align="center" | - || align="center" | - || align="center" | 46 (28%) || align="center" | 30 | |||
|- | |||
| align="center" | Close HP || align="center" | Dragon Smash (EX) || align="center" | - || align="center" | - || align="center" | 48 (30%) || align="center" | 28 | |||
|- | |||
| align="center" | Close HK || align="center" | Tornado (EX) || align="center" | - || align="center" | - || align="center" | 50 (31%) || align="center" | 28 | |||
|- | |||
| align="center" | Forward/Neutral Jump HP || align="center" | Close MP || align="center" | Tornado (EX) || align="center" | - || align="center" | 61 (38%) || align="center" | 35/37 | |||
|- | |||
| align="center" | Forward/Neutral Jump HP || align="center" | Close HP || align="center" | Tornado (EX) || align="center" | - || align="center" | 63 (39%) || align="center" | 39/41 | |||
|- | |||
| align="center" | Forward/Neutral Jump HP || align="center" | Close HK || align="center" | Tornado (EX) || align="center" | - || align="center" | 67 (41%) || align="center" | 37/39 | |||
|} | |||
===Super Art I=== | |||
{| border="1em" cellspacing="0" width="80%" style="border: 1px solid #999; background: none;" | |||
|- | |||
| align="center" | '''1st Move''' || align="center" | '''2nd Move''' || align="center" | '''3rd Move''' || align="center" | '''4th Move''' || align="center" | '''Damage''' || align="center" | '''Stun Damage''' | |||
|- | |||
| align="center" | Crouch LK || align="center" | Crouch LP || align="center" | Crouch LK || align="center" | SA1 || align="center" | 46 (28%) || align="center" | 13 | |||
|- | |||
| align="center" | Close LK || align="center" | Dragon Smash (LP or MP) || align="center" | SA1 || align="center" | - || align="center" | 54 (33%) || align="center" | 19 | |||
|- | |||
| align="center" | Crouch MK || align="center" | Dragon Smash || align="center" | SA1 || align="center" | - || align="center" | 59 (36%) || align="center" | 19 | |||
|- | |||
| align="center" | Close HP || align="center" | Dragon Smash || align="center" | SA1 || align="center" | - || align="center" | 65 (40%) || align="center" | 29 | |||
|- | |||
| align="center" | Close HK || align="center" | Dragon Smash || align="center" | SA1 || align="center" | - || align="center" | 70 (43%) || align="center" | 27 | |||
|- | |||
| align="center" | Forward/Neutral Jump HP || align="center" | Close HP || align="center" | SA1 || align="center" | - || align="center" | 70 (43%) || align="center" | 31/33 | |||
|- | |||
| align="center" | Forward/Neutral Jump HP || align="center" | Close HK || align="center" | SA1 || align="center" | - || align="center" | 74 (46%) || align="center" | 29/31 | |||
|- | |||
| align="center" | Jump HP|| align="center" | Close MP || align="center" | Dragon Smash (HP) || align="center" | SA1 || align="center" | 80 (50%) || align="center" | 35 | |||
|} | |||
'''Specific to: | |||
Elena''' | |||
{| border="1em" cellspacing="0" width="80%" style="border: 1px solid #999; background: none;" | |||
|- | |||
| align="center" | '''1st Move''' || align="center" | '''2nd Move''' || align="center" | '''3rd Move''' || align="center" | '''4th Move''' || align="center" | '''Damage''' || align="center" | '''Stun Damage''' | |||
|- | |||
| align="center" | Neutral Jump HK || align="center" | Close HK || align="center" | Dragon Smash (HP) || align="center" | SA1 || align="center" | 72 (45%) || align="center" | 37 | |||
|} | |||
===Super Art II=== | |||
{| border="1em" cellspacing="0" width="80%" style="border: 1px solid #999; background: none;" | |||
|- | |||
| align="center" | '''1st Move''' || align="center" | '''2nd Move''' || align="center" | '''3rd Move''' || align="center" | '''4th Move''' || align="center" | '''5th Move''' || align="center" | '''6th Move''' || align="center" | '''7th Move''' || align="center" | '''Damage''' || align="center" | '''Stun Damage''' | |||
|- | |||
| align="center" | Crouch MK || align="center" | SA2 || align="center" | - || align="center" | - || align="center" | - || align="center" | - || align="center" | - || align="center" | 73 (45%) || align="center" | 2 | |||
|- | |||
| align="center" | Close HP || align="center" | Dragon Smash || align="center" | SA2 || align="center" | - || align="center" | - || align="center" | - || align="center" | - || align="center" | 79 (49%) || align="center" | 22 | |||
|- | |||
| align="center" | Close HK || align="center" | SA2 || align="center" | - || align="center" | - || align="center" | - || align="center" | - || align="center" | - || align="center" | 82 (51%) || align="center" | 11 | |||
|- | |||
| align="center" | Jump HP || align="center" | Close HK || align="center" | SA2 || align="center" | - || align="center" | - || align="center" | - || align="center" | - || align="center" | 94 (58%) || align="center" | 22 | |||
|- | |||
| align="center" | Jump HP || align="center" | Close HK || align="center" | SA2 || align="center" | Dragon Smash || align="center" | SA2 || align="center" | Close HK || align="center" | - || align="center" | 102 (63%) || align="center" | 19 | |||
|} | |||
'''Add a Close HK in the corner for 6 more points of damage, Far MP for 3 more points.''' | |||
'''''Specific to: | |||
Necro''''' | |||
{| border="1em" cellspacing="0" width="80%" style="border: 1px solid #999; background: none;" | |||
|- | |||
| align="center" | '''1st Move''' || align="center" | '''2nd Move''' || align="center" | '''3rd Move''' || align="center" | '''4th Move''' || align="center" | '''5th Move''' || align="center" | '''6th Move''' || align="center" | '''7th Move''' || align="center" | '''Damage''' || align="center" | '''Stun Damage''' | |||
|- | |||
| align="center" | Jump HP || align="center" | Close HK || align="center" | SA2 || align="center" | EX Dragon Smash || align="center" | - || align="center" | - || align="center" | - || align="center" | 73 (45%) || align="center" | 19 | |||
|} | |||
===Super Art III=== | |||
{| border="1em" cellspacing="0" width="80%" style="border: 1px solid #999; background: none;" | |||
|- | |||
| align="center" | '''1st Move''' || align="center" | '''2nd Move''' || align="center" | '''3rd Move''' || align="center" | '''4th Move''' || align="center" | '''Damage''' || align="center" | '''Stun Damage''' | |||
|- | |||
| align="center" | Crouch LK || align="center" | Crouch LP || align="center" | Crouch LK || align="center" | SA3 || align="center" | 83 (51%) || align="center" | 11 | |||
|- | |||
| align="center" | Crouch MP || align="center" | SA3 || align="center" | - || align="center" | - || align="center" | 84 (52%) || align="center" | 15 | |||
|- | |||
| align="center" | Close HP || align="center" | SA3 || align="center" | - || align="center" | - || align="center" | 86 (53%) || align="center" | 21 | |||
|- | |||
| align="center" | Close HK || align="center" | SA3 || align="center" | - || align="center" | - || align="center" | 90 (56%) || align="center" | 19 | |||
|- | |||
| align="center" | Forward/Neutral Jump HP || align="center" | Close HP || align="center" | SA3 || align="center" | - || align="center" | 95 (59%) || align="center" | 31/33 | |||
|- | |||
| align="center" | Forward/Neutral Jump HP || align="center" | Jump HK || align="center" | SA3 || align="center" | - || align="center" | 99 (61%) || align="center" | 29/31 | |||
|} | |||
===Links=== | |||
'''''Crouching (Meaty):''''' | |||
{| border="1em" cellspacing="0" width="80%" style="border: 1px solid #999; background: none;" | |||
|- | |||
| align="center" | '''1st Move''' || align="center" | '''2nd Move''' || align="center" | '''3rd Move''' || align="center" | '''4th Move''' || align="center" | '''Damage''' || align="center" | '''Stun Damage''' | |||
|- | |||
| align="center" | Close HK || align="center" | Crouch LK || align="center" | - || align="center" | - || align="center" | 34 (21%) || align="center" | N/A | |||
|- | |||
| align="center" | Close HK || align="center" | Crouch MK || align="center" | - || align="center" | - || align="center" | 46 (29%) || align="center" | N/A | |||
|- | |||
| align="center" | Close HK || align="center" | Stand MK || align="center" | - || align="center" | - || align="center" | 51 (31%) || align="center" | N/A | |||
|} | |||
=Strategy= | |||
'''Chippiness''' | |||
Sean can deal alot of damage to your Stun meter in small "chips" at a time.You see since he can't combo very well he needs to hit you more over the duration of the match to break even. He's not ranked very high because "chippy" (High/mid damage : Low combo ability) characters in tournaments fall apart because professional players will not give you a chance to hit them many times and they don't make many mistakes. So try to find ways to chip until you have meter then use your SAs to deal large damage to break even. | |||
'''Parrying with Sean''' | |||
You '''need''' to parry and parry well to use Sean. Jump into/out of parry dash in/dash back into parry. Parry makes Sean a good character. If you do not use it he '''will''' suck. | |||
A lot of his moves are extremely situational/impractical or have a strange hit-box placement. You need the parry and other tech to setup into said moves. | |||
Learn to red parry a lot things that can help you in match-ups as well (multi-hit overheads, Ken's SA3, Chun's SA2, etc.). | |||
'''EX Tornado''' | |||
After a EX tornado, you have 8 different options you can choose from while your opponent typically only has 5 (but be ready to gamble): | |||
*Block [Loses to grabs but wins against reversals and super] | |||
*Throw/tech throw (Regular or Kara) [Loses to reversals, evasive maneuvers, super but wins against blocking] | |||
*Parry/SGGK/OS [Least amount of risk that involves 2 or more options at once] | |||
*EX Dragon Smash [Loses to throw, blocking, reversals, evasive maneuvers and super but wins against throws that come out too early or attacks that don't have enough priority] | |||
*Zenten [Loses to blocking, reversals and super but wins against throws and certain attacks] | |||
*Dash Backwards [Loses to super but wins against throws and reversals] | |||
*Jump forward/backwards [Loses to reversals but wins against throws] | |||
*Super (SA2 only) [Loses to blocking but wins against everything else] | |||
'''The strongest one-off attacks Sean can do safely at any given moment are:''' | |||
*''Cl.HK'' - The strongest hit confirm normal of the shotos and builds great meter on hit or block. Comes out in 5 frames and is safe all across the board. Its a great AA that you can cancel into SA2 with and its great for Meaties. Look to land this particular normal the most in a match. Does 25 DMG Standing/32 Crouching (Akuma). Cl.HK confirms into super can '''outdamage''' super confirms that involve Dragon Smash, especially if caught crouching. | |||
*''Target Combo'' - A quick and simple 2 hit combo that does 24 DMG Standing/29 Crouching, and another one of Sean's good AA's. Target Combo on hit is 0 Standing/+2 Crouching and -2 on block. Even though its -2 on block, its completely safe and in fact, its best to buffer parry after this in case the opponent tries to punish what can't be punished. It puts you near half screen on block, even further if you delay the 2nd hit of the combo. It ''can'' link into super but only on Makoto standing and Ibuki crouching (w/Delay). | |||
*''Back + Throw'' - Sean's Back throw does 4 points more DMG than the other shotos which means that at mid-screen, you should be looking to do this to put the opponent into the corner. Using Sean's Far Fierce, you can Kara Back + Throw giving him more reach to grab. Its a great way to end a match if you have the opponent trapped in the corner. | |||
'''Block-strings:''' | |||
*''Cr.LK - St.LK - St.MK | |||
*Cl.HK - St.MK | |||
*St.LP - St.LP - St.MP | |||
*St.LP - ''Target Combo'' | |||
*Cl.MP - Cl.HK | |||
*St.LP - Cl.HP'' | |||
==Offense== | |||
Sean has the basic Shoto mix-ups that allow him to confuse and knock down his opponent repeatedly (albeit to a lesser degree but still effective). If you're not sure on what these mix ups are (tick throw, high/low, Kara throwing, etc.) please consult the Ryu section for examples. | |||
'''Always minimize the risk.''' | |||
Sean is most effective either in '''close''' proximity or within a '''far''' distance from the opponent. His best close normals are: | |||
*Close Strong/Fierce/Roundhouse | |||
*Crouching Strong | |||
From a distance, the main normals to use are: | |||
*Standing Forward | |||
*Far Standing Fierce | |||
*Crouching Forward | |||
*Crouching Roundhouse | |||
*Towards Roundhouse | |||
=== Wake-up === | |||
''Things you can do on the opponent's wake-up:'' | |||
*Close HP into Sean Pachiki (TC) | |||
*Crouching LK, Crouching LK | |||
*Crouching LK, Standing LP (whiff), Kara-throw [vs. crouching] | |||
*Crouching LK, step back 2 frames then Kara-throw | |||
*Walk in, step back, Kara-throw | |||
*Meaty UOH [can link into super] | |||
*Meaty Close HK into Crouching LK/Standing MK/Crouching MK or Super | |||
*Standing MK, walk forward and Kara throw | |||
*Cross-up j.MK | |||
*Cross-up j.MK, Crouching LK, Kara throw | |||
*Jump back HK (HK after jump back must be done fast) | |||
*Jump at same time opponent is getting up and parry his reversal | |||
*Throw opponent few times and jump at same time your opponent is getting up | |||
*Throw opponent few times then dash backwards. If the opponent tried to tech the next throw punish him with a combo | |||
*Standing LP, Target Combo (1-frame link) [vs. Standing] | |||
*Any one of his block strings | |||
*UOH (whiff), Close HP/MP/HK, Super | |||
*Close Strong* | |||
''*Close Strong can lead into TC (which then can also lead into Hyper Tornado but only on specific characters), Crouching LK x2, Close HP/HK (after a step forward), and Throw (Kara if possible)'' | |||
=== Meaty Attacks === | |||
*Close/Crouching Strong | |||
*Close Fierce/Roundhouse | |||
*Standing Forward | |||
*UOH | |||
*LK Wheel Kick | |||
The best Meaties for Sean are Close Roundhouse and Close/Crouching Strong. On Meaty, Close Roundhouse's advantage increases to +9 (if crouching), allowing him to link Crouching LK or his Forward kicks (Stand and Crouch). 2 of those 3 can link into Hadou Burst or Hyper Tornado for the same amount of damage as a jump in. | |||
=== Meter Building === | |||
There are 4 things that Sean can do to build meter. They are: | |||
*Crouching Strong | |||
*Close Roundhouse | |||
*Jump Backwards HK (whiff) | |||
*Taunt | |||
A whiffed Crouch Strong builds 2 points of meter and it recovers quick. As said above, Close Roundhouse should be his go-to button whenever possible whether on block or hit. His taunt builds quite a bit of meter as well, anywhere from 4-11 points depending on if the opponent parries or blocks. Jump Back HK is one of the few safe things Sean can do to build meter. | |||
''A trick to meter build a bit quicker would be to Close Roundhouse (as an AA) then cancel into the Taunt. Gives about 23 or 24 points of meter instead of the normal 19 with Close Roundhouse by itself. | |||
=== Notable Combos === | |||
Crouching | *''Jump Fierce/Roundhouse x Crouching Forward x Dragon Smash'' | ||
A standard shoto combo that's very important for Sean. Builds the most meter (half a stock of Hadou Burst) and does good damage that scores a knockdown. Two things about this combo: Whiffing a single Crouch Strong right after or Parrying an Anti-air then going right into this combo will give Sean '''exactly''' enough meter to use EX's. Its also possible to D.E.D OS with this combo if you have half of the meter filled. | |||
*''Jump Fierce/Roundhouse x Close Strong x HP Dragon Smash'' | |||
Another standard shoto combo that's important. This is the most damage Sean can do that builds a good amount of meter and knocks down. Its a bit harder to land Close Strong than Crouch Forward since you have to hit Jump Fierce high on a Jump-in. Excellent combo to use while the opponent is stunned since this combo with Hadou Burst at the end of it is among the ''strongest'' he has. | |||
*''Close Fierce/Roundhouse/Strong x Dragon Smash'' | |||
The main combo to punish with after a parry. Close Strong is the most reliable but weakest, Close Fierce is stronger but lacks range, and Close Roundhouse is the strongest but only possible on a few characters. | |||
== | == Defense == | ||
As said above, Parrying is paramount when playing as Sean. Knowing the opponent's options at all times and how to deal with them as Sean will be key to winning with him. | |||
=== Anti-throw moves === | |||
*Zenten (3rd frame throw invincible) | |||
*UOH (airborne in 5 frames) | |||
*Towards Roundhouse (airborne in 6 frames) | |||
*Wheel Kicks (airborne in 15 normally, 13 EX) | |||
*Shoryu Cannon (1-frame start-up, 10 frame invincibility) | |||
*Hyper Tornado (3-frame start-up, 12 frame invincibility) | |||
=== Wake-up === | |||
*UOH | |||
*EX Dragon Smash (Warning: He '''CAN''' be thrown out of this) | |||
*Zenten | |||
*EX Wheel Kick | |||
*Super | |||
*Guard Jump (Backwards/Forward) | |||
*OS Throw | |||
*HJC Specials (Zenten, Tackle, etc.) | |||
=== Anti-Airs === | |||
''Sean has a wide selection of AA's to choose from:'' | |||
*Crouching Fierce | |||
*Close Roundhouse (Steep jump in) | |||
*Dragon Smash (Over or near Sean's head only) | |||
*LK Tornado (Steep jump in) | |||
*Wheel Kick (Mid-far jump in but don't kick into them, use the correct strength of W.K) | |||
*Towards Fierce | |||
*All variations of MP (Far, Close, and Crouching) [Close can lead into TC] | |||
*Far Roundhouse (Good for angled jump-in) | |||
*Close Fierce (Close) | |||
*Towards Roundhouse (Far jump-in) | |||
*Standing Forward (Does well against Cross-ups) | |||
*Far Fierce (Far jump in) | |||
*Standing Jab (Close) | |||
*Hadou Burst | |||
*Shoryu Cannon | |||
=== Specials === | |||
Some of his specials have better usage ''defensively'' rather than offensively, especially the non-EX's. | |||
====Dragon Smash==== | |||
''Dragon Smash doesn't have the same amount of priority or range as the other Shoto DPs but it's good against dive-kicks and moves that leaves limbs extended. The attacks will either get stuffed out or will trade in Sean's favor and send them flying. It's also anti-Demon Flip too. Since it can go high in the air, if it hits and he lands and recovers while they're still in mid-air, a Hadou Burst will hit them before they hit the ground. | |||
Sean can do the ''Anti-Parry OS'' too (like the other Shotos) where they late-cancel into the DP on parry. This requires ''meter'' however, since only EX Dragon Smash has invincibility but its another option to consider. This situation is probably the only one where he cannot be grabbed out of it like he usually can. | |||
Crouching | EX Dragon Smash can bail Sean out of projectile traps like Ken's Crouching Forward x EX Hadou if parried. | ||
EX Dragon Smash, if done late enough, can stuff out other invincible DPs.'' | |||
==== Sean Tackle ==== | |||
''Tackle is the one special he has that is effective both offensively and defensively. As such, this is his most important one. Defensively, its his strongest punish (that knocks down) from a distance if he doesn't have meter after a parry against attacks that stay out too long. Normals such as Chun's Standing Fierce or Ryu/Akuma Towards Strong can be punished with Tackle. Against normals with even '''longer''' recovery (like Sweeps), EX tackle can be used. | |||
If Sean's cancel-able Anti-air gets parried, cancel into the Tackle and it will be safe.'' | |||
==== Zenten ==== | |||
''Defensively, Zenten can be effective when in close proximity of the opponent. It can save you from throw/zone/kunai set-ups and like the tackle, if you cancel into it off a parried Anti-air, its safe. Parry then roll '''up close''' has a good chance of avoiding what the opponent puts out on the screen, even supers.'' | |||
==== Tornado ==== | |||
''If a cancel-able normal as an AA gets parried, cancel into the Short Tornado (LK) to send them flying. If near the corner, a Hadou Burst will hit them before they fall. | |||
'' | |||
=Basketball= | |||
===Beginner Basketball Combos=== | ===Beginner Basketball Combos=== | ||
In addition to adding stun once thrown, the basketball taunt can be used in combos to apply a fair amount of mix-up on the opponent (granted they aren't teching every knockdown except for SA2 or SA3): | |||
*BB - Sean Tackle (All variations) | |||
BB - | *BB - Wheel Kick (All variations) | ||
BB - | *BB - Target Combo | ||
BB - | *BB - Headbutt | ||
Etc. | Etc. | ||
| Line 263: | Line 1,764: | ||
Another thing to note about the basketball is that once you throw it, you gain stance value for the next few moves you do. This allows you to land combos such as Cl.HK- Dragon Smash which you wouldn't be able to normally. After you throw the basketball, there's a small window of time that allows you to put a Jab (easy to time) or Short (harder to time) before the ball actually hits then after that you can do many things. | Another thing to note about the basketball is that once you throw it, you gain stance value for the next few moves you do. This allows you to land combos such as Cl.HK - Dragon Smash which you wouldn't be able to normally. After you throw the basketball, there's a small window of time that allows you to put a Jab (easy to time) or Short (harder to time) before the ball actually hits then after that you can do many things. | ||
LP/LK - BB - Target Combo (4 hits) - SA3 (Makoto only) | *LP/LK - BB - Target Combo (4 hits) - SA3 (Makoto only) | ||
LP/LK - BB - Dragon Smash (All versions) - SA1 or 2 | *LP/LK - BB - Dragon Smash (All versions) - SA1 or 2 | ||
LP/LK - BB - HP/HK - EX Tornado | *LP/LK - BB - HP/HK - EX Tornado | ||
LP/LK - BB - MP/HP/HK - SA1/2/3 | *LP/LK - BB - MP/HP/HK - SA1/2/3 | ||
Cl.HK - BB - Dragon Smash - SA1 or 2 | *Cl.HK - BB - Dragon Smash - SA1 or 2 | ||
Fr.MP - BB - SA3 | *Fr.MP - BB - SA3 | ||
===Advanced Basketball Combos=== | ===Advanced Basketball Combos=== | ||
After throwing a basketball, you can hit with a Cl.MP into another Cl.MP/HP/HK but this is really difficult and only possible on the shorter characters (Yun, Yang, Chun, etc.). In this situation, the basketball acts as a "hit-stun extender" and allows you to connect things you normally wouldn't be able to. For confirmation that you have hit the Cl.MP correctly, the ball will hit and fall to the side instead of just falling on the top of the head. | After throwing a basketball, you can hit with a Cl.MP/HK into another Cl.MP/HP/HK but this is really difficult and only possible on the shorter characters (Yun, Yang, Chun, etc.) or the taller characters get caught crouching. In this situation, the basketball acts as a "hit-stun extender" and allows you to connect things you normally wouldn't be able to. For confirmation that you have hit the Cl.MP correctly, the ball will hit and fall to the side instead of just falling on the top of the head. These do the same amount of damage as a jump-in combo and as such its just as hard to do. | ||
*Cl.MP - BB - Target Combo - SA3 (Makoto only) | |||
*Cl.MP - BB - Cl.HP - EX Tornado or SA1/2/3 | |||
*Cl.MP - BB - Cl.HK - SA1/2/3 | |||
*Fr.MP - BB - Fr.MP | |||
'''''NOT ALL COMBOS POSSIBLE LISTED''''' | |||
=Overview= | |||
'''The cons that you have to consider while playing Sean are:''' | |||
*No reliable reversal without meter (depends on the match-up) | |||
*Over-reliance on parries | |||
*Specials are very unsafe on block/hit and leaves him crouching on block | |||
*Some of his normals start-up/recover slower and/or do less damage than the other shotos | |||
*Has a bit of trouble building meter (there '''are''' ways around this) | |||
*Less advantage on Jump-ins than the other shotos | |||
'''However, the pros to playing him are:''' | |||
*He's the most defensive shoto | |||
*High stun potential | |||
*Above average damage output | |||
*Has the most powerful cancel-able normal in the game that isn't Gill's (Close Roundhouse) | |||
*Has the strongest normal throw of the shotos (Ken's Knee-bash is the strongest but you can mash to reduce the damage significantly unlike Sean's) | |||
*Great mobility (standard dash + Sean Tackle) | |||
*Has more cancel frames on some of his normals than the other shotos | |||
*Good Kara Throw | |||
*Can potentially deal over 50% damage and with all 3 supers | |||
*Has 2 of the most out-prioritizing/invincible supers in the game (Shoryu Cannon and Hyper Tornado) and all 3 are viable | |||
*Great Mix-ups (especially with the taunt) | |||
*Decent selection of Anti-airs | |||
*Certain attacks get safer against smaller characters (''may apply to everyone else as well'') | |||
*Normals are more ''active'' than the other shotos generally | |||
'''Differences in Sean's normals vs. the other Shotos:''' | |||
<table border="1" cellpadding="10"> | |||
<tr> | |||
<td>'''Normal'''</td> | |||
<td>'''Comments'''</td> | |||
</tr> | |||
<tr> | |||
<td>Close Strong</td> | |||
<td>Starts up in 4 frames (like Ken's) with 13 frames of recovery (the slowest) but has the most cancel frames and does the most stun of the shotos (9 pts.)</td> | |||
</tr> | |||
<tr> | |||
<td>Close Fierce</td> | |||
<td>Starts up in 5 frames (a frame slower than Ryu's and Akuma's but a frame faster than Ken's) and recovers in 20 like Ryu/Akuma's. Ties with Akuma for most cancel frames on this particular normal. | |||
</td> | |||
</tr> | |||
<tr> | |||
<td>Far Strong</td> | |||
<td>Starts up in 5 frames (same as Akuma/Ryu and is a frame faster than Ken's) but has the most recovery at 13 frames and no cancellation. | |||
</td> | |||
</tr> | |||
<tr> | |||
<td>Crouching Forward</td> | |||
<td>Starts up in 7 frames (like Ryu's) and recovers in 17 (like Ken's). Has the most cancel frames of all the Shoto's Crouch Forwards. </td> | |||
</tr> | |||
<tr> | |||
<td>Crouching Roundhouse</td> | |||
<td>Starts up in 8 frames (the slowest) and recovers in 30 (like Ken's) </td> | |||
</tr> | |||
<tr> | |||
<td>Crouching Fierce</td> | |||
<td>Starts up in 7 frames and recovers in 22 (like Ken's). | |||
</td> | |||
</tr> | |||
</table> | </table> | ||
| Line 1,140: | Line 1,864: | ||
*Utilize the Cl.MP-HK Target Combo as it is truly safe on block and hit. It even serves nicely as a nice AA as well. | *Utilize the Cl.MP-HK Target Combo as it is truly safe on block and hit. It does 1 less point of damage shy of Cl.Roundhouse. It even serves nicely as a nice AA as well. | ||
*Cl.HK is your friend. | *Cl.HK is your friend. | ||
| Line 1,146: | Line 1,870: | ||
*Don't be scared to wake up with a EX Dragon Smash (seldom) | *Don't be scared to wake up with a EX Dragon Smash (seldom) | ||
*Use St. MK to out-prioritize lows when in the correct range | *Use St.MK to out-prioritize lows when in the correct range | ||
===Super Art Selection=== | ===Super Art Selection=== | ||
*''' | *'''Hadou Burst''' | ||
** <font color=green>'' | ** <font color=green>''More Hit-Confirms''</font> | ||
** <font color=green>'' | ** <font color=green>''Situational Closer/Punisher''</font> | ||
** <font color=green>''Anti-Air''</font> | |||
** <font color=green>''More than 50% damage potential''</font> | |||
** <font color=green>''50% stun potential''</font> | |||
** <font color=green>''Consumes 1-hit projectiles''</font> | |||
** <font color=green>''Small Meter Length''</font> | |||
** <font color=green>''Fast travel speed''</font> | |||
** <font color=red>''Easy to Parry''</font> | ** <font color=red>''Easy to Parry''</font> | ||
*** | ** <font color=red>''Slightly long recovery''</font> | ||
*** ''Game-plan: 4 Close Roundhouses can fill up a bar of Hadou Burst and you have 5 EX's in total. From a long range, the go-to confirm is Cr.MK. Up close, you have either Cl.HK, Cl.HP, Cr.MP or Cr.LK x2. After a parry, you have 3 choices: Cr.MP, Cr.MK and Cr.HP. Cr.HP is good against moves with long reach that recovers late and does great damage, Cr.MK is the standard, and Cr.MP is faster than the other 2 but you need to be within range. This super, like his others can link of a UOH. Parry -> Hadou Burst vs. certain "Parry-Bait Supers" near the corner can ''potentially'' deal near 50% if you have 2 stocks. To properly Anti-Air into this super, it has to be done off Cl.MP since that button doesn't reset the juggle counter like the other cancel-able ones. Be looking for opportunities to punish with this move, especially against crouching attacks. Sean can do a lot of "dash-back" set-ups with this super. The max damage output of this super can rival the max damage output of Ken's SA3. | |||
'' | |||
*'''Shoryu Cannon''' | |||
*''' | ** <font color=green>''More than 50% damage potential''</font> | ||
** <font color=green>''Corner Juggles''</font> | ** <font color=green>''Corner Juggles''</font> | ||
** <font color=red>''Bad recovery''</font> | ** <font color=green>''True Anti-Air''</font> | ||
*** | ** <font color=green>''Situational Closer/Punisher''</font> | ||
** <font color=green>''High invincibility''</font> | |||
** <font color=green>''Grants a free Mix-up afterwards''</font> | |||
** <font color=green>''Goes through projectiles''</font> | |||
** <font color=red>''Bad recovery and range''</font> | |||
*** ''Game-plan: 6 Close Roundhouses fill up a bar and its 4 EX's in total. Cr.LK x 2 or Cl.HK are the go-to confirms for this super. It's main usage is as an Anti-air but still has to be timed correctly or many of the hits will whiff. Cl.HK x SA2 is the primary Anti-air, and should be one of the few things to go for when a super is stocked. This can punish moves that leave opponents too close on block (overheads, Sean tornado, Remy CBK's, etc). The strongest combo with a single stock of Shoryu Cannon (with the corner Cl.HK reset) is equal to Chun's strongest combo with Hoyokusen. With 2, it can deal from 70% to 80%. Beats a lot of Parry-baits with the exception of itself, Hyper Tornado, and a few other supers. It can link off of a UOH but only as a Meaty up close. It doesn't have much range so the main goal should be to always be close to the opponent. S.C. has 10 frames of invincibility and some of the highest priority in the game with the exception of a few supers.'' | |||
***Sean has '''3''' moves that can link into Shoryu Cannon: ''Standing Short, Standing Forward, and the Overhead Wheel Kicks''. Standing Forward has to be done on Meaty up close (against Crouchers) for it to work. Same with the Wheel Kick but its a Yun/Yang '''only''' link. | |||
*''' | *'''Hyper Tornado''' | ||
** <font color=green>'' | ** <font color=green>''True Punisher''</font> | ||
** <font color=green>''More than 50% damage potential''</font> | |||
** <font color=green>''Higher invincibility''</font> | |||
** <font color=green>''Travels through projectiles''</font> | |||
** <font color=green>''Great range''</font> | |||
** <font color=green>''50% stun potential''</font> | |||
** <font color=red>''Large Meter''</font> | ** <font color=red>''Large Meter''</font> | ||
** <font color=red>''Bad capacity for EX | ** <font color=red>''Bad capacity for EX''</font> | ||
*** | *** ''Game-plan: '''The Punisher'''. Meter building is very important for this super. It takes 7 Close Roundhouses to fill it and you only get 3 EX's. It starts up in 3 frames (like Ken's Shippu) which allows him to punish a lot of things in the game once stocked. H.T has the same confirms as Hadou Burst (minus the ones with Dragon Smash) and can ''almost'' cover the same amount of range. The go-to confirms are Cr.LK x 2, Cr.MK/MP, and Cl.HK. Hyper Tornado has very high invincibility, even higher than Shoryu Cannon which means it blows up Parry-Baits more reliably (except against itself and a few supers), and it can travel through projectiles too but the projectile has to be far from the opponent or you risk wasting the super. Like his other supers, H.T can be linked off of a UOH too. The maximum damage potential of this super is just shy of Hugo's Gigas by a few pixels.'' | ||
===Kara-Techniques=== | |||
Sean's main Kara grab buttons are Close Roundhouse, Far Fierce and Towards Fierce. The difference between Far and Towards is very minimal so it doesn't matter which one you use. Walking forward as you Kara will make it more effective too. The input is just F.HP ~ LP+LK. If you want to Kara into the Back throw just press back right as you do the input. If you mistime it, it'll move Sean out of range and it'll whiff. | |||
'''List of moves after which you can Kara-throw:''' | |||
<table border="1" cellpadding="10"> | |||
<tr> | |||
<td>'''Normal'''</td> | |||
<td>'''Comments'''</td> | |||
</tr> | |||
<tr> | |||
<td>Crouch LK</td> | |||
<td>(You will not be able to Kara-throw opponent within first 4 frames after Cr.LK. It's 6 frames on Chun-Li, Ryu, and Q)</td> | |||
</tr> | |||
<tr> | |||
<td>Standing LK</td> | |||
<td>(You will not be able to Kara-throw opponent within first 5 frames after Cr.LK. It's 7 frames on Chun-Li, Ryu, and Q) | |||
</td> | |||
</tr> | |||
<tr> | |||
<td>Close MP</td> | |||
<td>(You will not be able to Kara-throw opponent within first 4 frames after Cl.MP. It's 6 frames on Chun-Li, Ryu, and Q) | |||
</td> | |||
</tr> | |||
<tr> | |||
<td>Standing LP</td> | |||
<td>(You will not be able to Kara-throw opponent within first 6 frames after Cl.LP. It's 8 frames on Chun-Li, Ryu, and Q)</td> | |||
</tr> | |||
<tr> | |||
<td>Crouch LP</td> | |||
<td>(You will not be able to Kara-throw opponent within first 6 frames after Cl.LP. It's 8 frames on Chun-Li, Ryu, and Q)</td> | |||
</tr> | |||
<tr> | |||
</table> | |||
As for Close Roundhouse, it doesn't give any extra throw range '''''but''''', its very useful for SGGKs: | |||
Sean's option select Parry (SGGK) - Tap Forward/Down and press Attack button + Throw (for Kara Throw). When done at close range one of 2 things can happen: | |||
*If opponent attacked - Sean will parry the attack and hit with the move you used for Kara Throw. If you used cl.HK then Sean will hit with cl.HK, if you used cl.HP then Sean will hit with cl.HP etc. | |||
*If opponent was blocking or tried to parry - he will get thrown. | |||
'''Kara Throw Set-ups:''' | |||
*Cr.LK, St.LP (whiff), Kara-throw [vs. crouching] | |||
*Walk in, step back, Kara-throw | |||
*Cross-up j.MK, Cr.LK, Kara-throw | |||
*St.Mk, step forward, Kara-throw | |||
*Cr.LK, step back 2 frames, Kara-throw | |||
*LK Wheel Kick, walk forward, Kara-throw | |||
*T + HK, wait, take a step, Kara-throw | |||
*Shoryu Cannon, Cl.HK Reset, wait, Kara-throw | |||
*Walk in, back dash, walk in, Kara-throw | |||
*Taunt, wait and see if they blocked or parried, walk forward, Kara-throw | |||
*Jump MK/HK, back dash, walk in, Kara-throw | |||
''etc.'' | |||
'''Kara UOH:''' | |||
You can Kara into UOH using Far Fierce (since its easier) then again, walking forward and using Towards Fierce is more effective. The range on it is pretty good, and it gives Sean another option that can go into super (if stocked) from near half-screen. This is the maximum distance of where the UOH can hit from: | |||
[[File:Kara UOH Sean.png]] | |||
===Zoning=== | ===Zoning=== | ||
| Line 1,187: | Line 2,002: | ||
*All 3 variations of MP (cr/cl/fr) are very useful to keep the position as well, being that they're all safe on block and hit. | *All 3 variations of MP (cr/cl/fr) are very useful to keep the position as well, being that they're all safe on block and hit. | ||
*Don't be afraid to stick a cr.MK on the screen from time to time (just be careful doing so) | *Don't be afraid to stick a cr.MK or st/cr.LP on the screen from time to time (just be careful doing so) | ||
*You have a vast assortment of AAs so choose your AA's wisely | *You have a vast assortment of AAs so choose your AA's wisely | ||
| Line 1,476: | Line 2,286: | ||
Taken from japan's atwiki | Taken from japan's atwiki | ||
=Match-ups= | |||
''Sean has | |||
''Note: Sean has a disadvantage in ''almost'' every match-up. That means its up to you, the player, to overcome this with your skill. Luckily, Sean is one of the few characters that all 3 supers are viable. What this means is, is that generally you can choose between 2 of the 3 supers against some characters and some characters all 3 of them can be used.'' | |||
* Vs. Necro | |||
The Bad: His corner pressure is just as deadly as Dudley's, so you need to not let him corner you. That means no backing up, just advance forward only until you can corner him. Problem is, he can zone you out just like Remy can with his pokes (ground and air) so that means you need to parry to get inside on him. Learn how to parry his vortex punch, electric charge, and the overhead. It'll help you out quite a bit. He can also build up quite a bit of stun especially with SA3. His grabs have good range so watch out for that. | |||
The Good: He has a big hitbox, a really big one. Keep this in mind, things that ''normally'' wouldn't connect manage to actually hit him while he's still airborne. The Double DP works especially on his normal jump so keep that in mind if he tries to neutral jump in the corner. Say if you're just shy of 2 stocks of SA2, the best substitute would be to end the Shoryu Cannon with a EX Dragon Smash at the end (Corner) since it'll hit with both hits of the EX. Confirming into SA2 x2 in the corner vs. Necro is about 90-93 damage (more than half) if you can time it right. | |||
''Note: It's possible to hit him with Cl.HK x EX Dragon Smash, but this is due to the "doubling over" animation he has. If he does the "sway away" animation after getting hit w/Cl.HK then it'll whiff completely.'' | |||
Recommended super: Either Hadou Burst to punish him consistently or Shoryu Cannon for the power and corner juggles. | |||
* Vs. Remy | |||
This match-up depends on how well you can ''read/parry'' your opponent and how quick you are to ''react/reversal''. Its not easy for Sean to get in close to do damage when all Remy has to do is just zone you out. To get in close on a Remy player that knows what they're doing, you need to parry at least 1-4 times before trying anything (sometimes you might not have to) and this applies to jump-ins as well. From far range, you only have 4 options: EX Tackle/Wheel and SA1/3. EX tackle and Wheel have to be done ''psychically '' because they can be parried or met with retaliation by a Flash Kick, Dive Kick or LOV and SA1/3 have to be done on reaction which is not easy either. Be on the lookout for lows since alot of Remys like to test the waters with a few lows until they get the chance to cancel into the F.K. Sean Tackle will help you a bit here; It goes underneath the high LOV. Remy's will often throw them and then quickly dash up the screen to get to you to apply mix-up. So as soon as you see them start dashing, full Sean tackle underneath the L.O.V coming and grab them for approaching. You can do to some extent, the same with Zenten so get creative with this concept. Always keep one thing in mind, Remy's very susceptible to stun and Sean has the ability to stun him within 5 consecutive heavy hits so when you get the chance to pressure/trap him, do so and do it quickly. | |||
''Note: Remy can be hit with all 3 hits of the EX Wheel. When this happens its 0 on hit.'' | |||
Recommended Super: All 3 can be used. H.B or H.T against Remy's who zone with LOVs/SA1 or S.C vs. "In your face" Remy's or if you're confident getting past the zone. | |||
*Vs. Sean: | |||
As a Sean player you should already know most of the "Sean-nanigans" and what he is capable of. There are some who use his taunt as a main source of mix-up and that's not always a good thing to do. There are only 2 moves that can get to the other side of the screen in an instant and those are EX Tackle and EX Wheel Kick. As such, bait these 2 moves out. Be quick to react to any sudden Sean Tackles (empty or full) lest you want to be thrown. | |||
Recommended Super: All 3 can be used. Take your pick. | |||
*Vs. Ryu: | |||
Not a bad match-up overall. Be aware of the whiffed LK Tatsu since that's a common move to buffer parry into due to its deceptive recovery so just grab for free. The Fireball can be a big problem though if you aren't looking out for it. The Ryu player may throw it after a throw tech or crouch tech and might even throw multiple if they think you aren't paying attention. Watch out for the Kara-grab since Ryu has a good one. Resist jumping especially when you're trapped in the corner or you might get caught by the Donkey Kick as an AA. You have 6 ways of getting around his hadokens (Parry, Neutral jump, Zenten, Sean tackle, SA3 and Wheel Kicks). Once you let the opponent know this, they'll think twice before throwing them. | |||
Recommended Super: All 3 supers are good. SA3 works nicely against Denjin Ryu/Zone Ryu, SA2 works against ShinSho, and SA1 can be used against him as the standard. | |||
*Vs. Ken: | |||
From experience, I find this match-up to be the worst of the 3 top tiers for Sean. Ken far outclasses Sean in nearly everything shoto-esque. At least against Yun and Chun some moves/options get safer but against Ken, Sean is at his weakest. Shippu can punish about 85-90% of what Sean can do which means mistakes are not to be made. Ken, on wake-up can do either: low, high, overhead or grab. 3 of these options lead back to SA3. Guessing on wake-up against Ken (especially in the corner) can lead to a big amount of damage which means '''please be careful'''. Learn to red parry his MP-HP chain, his B-MK overhead, Cr.LK x2, and Shippu. In this match-up, you're going to have to 'out-Ken' Ken. At far range, the only 3 buttons you have to worry about is Standing and Crouching Roundhouse and Crouching Forward. Crouching Forward gets beat out by Sean's Standing Forward; You can punish Crouching Roundhouse with Cr.MK x Hadou Burst if you have the meter and Standing Roundhouse can be punished by raw Hadou Burst. I've seen alot of kens use EX Tatsu as a means to escape the corner. Sean can actually punish this 1 of 3 ways: EX Tackle, Hadou Burst or HP/EX Dragon Smash. HP/EX Dragon Smash goes up very high in the air and if it hits him, it will put him right back in the corner. If he manages to get over your head, EX Tackle or Hadou Burst and he'll land smack dab right on it. Parrying is important in this match-up, especially since you need to punish him whenever you can. | |||
Recommended Super: All 3 are good against Ken. | |||
*Vs. Oro | |||
Oro's objective in SA3 will be about filling his Super Art Gauge commonly zoning with pokes and turtling, or using his Chicken Wing mix ups, Zenten can be risky but useful against the first special one, try to dodge his projectiles jump in or with Overhead Turn Kick, you must overhead him a lot with Sean Pachiki because its a short height character and can be surprised even its a standing block, also you have better footsies than him, so having a crouching vs crouching battle its the main key to win, anyway after he gets the Tengu Stones best way to pass time is to poking with your standing normals, Sean Tackle with Jab its your only useful approach tool and also a good Chicken Wing evasion. | |||
Recommended: Shoryu Cannon or Hadou Burst. | |||
*Vs. Ibuki | |||
She is a hit and run match up, its a decent matchup because she lacks stamina and you have better footsies, if she is throwing Kunais do a Overhead Turn Kick for recovery punishment at far distance , and Dragon Smash for near and corner one specially, standing Forward can be a good punishment tool for her Neck Breaker fail, Jab Sean Tackle approach can be a good answer for her Tsuji Goe and Kasumi Gake, frustate her offensive strategy with good poking its your objective, Overhead Turn Kick can be useful against Kazekiri first frames,or you can wait and punish it with a Tackle. | |||
Basketball can be an offensive tool agasint Kunais but you'll be too vulnerable if fails. | |||
Recommended: Shoryu Cannon and Hyper Tornado (for low stamina characters) | |||
*Vs. Twelve: | |||
In my opinion, this is probably the ''only'' match-up where Sean is at an advantage. Twelve's health is just as bad as Akuma's and like Sean, a good amount of his special moves leave him crouching on block/parry. Twelve rules the air with his IAD's and wall bounces but Sean has '''''many''''' Anti-airs which means that you have half the match won if you can keep him out of the sky. Learn to parry his Cr.HP and Cr.HK as those moves are among the most risky in his arsenal to use. Towards Roundhouse is the perfect counter-poke to Twelve's Standing Roundhouse. | |||
Parrying is still important in this match-up, don't jump in the air without buffering first. Twelve is one of the very few who can be hit by Cl.HK x Dragon Smash (though its not as consistent). | |||
Recommended Super: All are damaging but, the benefits of SA2 by far out-weigh the other 2. Its the only super that can punish his EX Dive on block (that leaves him '''crouching'''), and it's one of Sean's Anti-airs. All it takes to win is just 2 parries with Cl.HK x Shoryu Cannon to punish him. | |||
*Vs. Yang: | |||
He is a rushdown character but with low stamina, also had decent footsies like you, try to punish his fails with SA2 and throw him if he activates SA3 | |||
*Vs. Alex: | |||
*Vs. Hugo: | |||
This is a difficult match up to over come. While its already difficult getting in close on some characters, getting in close proximity of Hugo can be | |||
very dangerous. You have a weapon in your arsenal that will help you out and that is Zenten. Since it's throw invincible you'll avoid the imminent danger of a SPD especially if you can telegraph it. Don't let him trap you in the corner either. Remember when I said the EX Tornado is 99% safe? Well, against SA1 Hugo it isn't. In fact, he can flat out punish you for doing it even though you normally can escape 1 frame supers. Gigas is the 1% exception so be very aware of this when playing. Also another thing, take heed to how many ways Gigas Breaker can be buffered (cross-up jump, clap, cr.LK, whiffed back-breaker, super jump, etc.). Don't jump too much or better yet, jump unpredictably as to bait out an occasional back-breaker whiff and punish as you see fit. As long as you play the full screen, getting your damage in and getting back out safely, you won't have too much trouble with this match-up. | |||
As for the recommended super: SA1 or SA2. Shoryu Cannon is good for damage and if you're confident in getting in and getting out. It will also save you in case Gigas comes out slower than it should. Hadou Burst is good to consistently punish Hugo whenever he makes a mistake. | |||
*Vs. Akuma: | |||
I find from experience that Sean Vs. Akuma matches go by very quickly and can go really either way. Sean can end Akuma just as quick (maybe even quicker) as he can end Sean. This is a match-up that, again, relies on how well you can parry AND deal with the resets. Red parrying Akuma's tatsu is a '''MUST'''. In this matchup, the tackle is of ''much'' benefit. If you can read when the Akuma player backs off to zone you out from the air from full screen, an EX tackle (or any tackle really depending on dist.) will go underneath the air projectile and tackle him for 26 stun (nearly half) or if you choose not to tackle, you can go for something else that's a bit more, ''damaging''. If you can properly set up Sean's stun from his basketballs, this will make his moves even more dangerous Vs. Akuma. Be ready to heavily punish any and every LK Tatsu on block. Dealing with Demon Flip mix-ups are tough, but if you can see the DF coming, either jump back HK/Cr.Fierce/or LP Dragon Smash him out of the air and SA1 him (if you picked it) before he hits the ground. Like Remy, all it takes is 5 fierces to stun so when you're going on the offensive keep this in mind. | |||
''Note: Akuma's hitbox is a bit bigger than the other shotos, meaning he can be hit with all 3 hits of the EX Wheel. On block or hit when this happens, its 0.'' | |||
Recommended Super: All 3 are highly damaging to Akuma's health. Any one will do in this MU. | |||
*Vs. Urien: | |||
Spectre General went into heavy detail on this match up in the Shoryuken Forums: | |||
[http://forums.shoryuken.com/discussion/146238/seans-terrible-matchups (Urien)] | |||
*Vs. Yun | |||
*Vs. Chun-Li | |||
*Vs. Dudley | |||
* | |||
{{Navbox-3S}} | |||
[[Category: Street Fighter 3: 3rd Strike]] | [[Category: Street Fighter 3: 3rd Strike]] | ||
Latest revision as of 19:55, 23 June 2024
Updated version available!
You're reading the old version of this page. Click here to read the (in-progress) updated version!
Introduction
Sean is perhaps the most efficient definition of an underrated character in the history of fighting games. In the 2nd version of Street Fighter III, 2nd Impact, he was pretty much totally broken, doing tons of damage off of his lengthy combo strings. In response to this, Capcom did the responsible thing and made him an original character, as opposed to a black Ken in a yellow gi.
Well, they did it a little too well.
Other than being extremely hard to use and situational because of his hit-box placement and frame advantage (Dragon Smash's hit-box is located over his head), 3s makes Sean much more of a defensive counter character. When you play as him you have to understand that he does have a lot of good points, such as his MP-HK target combo, Cl.HK/Shoto normals, EX Tornado, and his supers. He trades pretty well if used properly with the right SA's against the right match-ups. He also has an assortment of AAs to choose from.
| Strengths | Weaknesses |
|---|---|
|
|
Specific Character Information
- Stamina: 1120
- Stun Bar Length (pixels): 64 (Normal)
- Stun Bar Recovery (frames it takes to recover 1 pixel): 23rd frame
- Taunt: Increases stun damage for the next hit/combo by 12.5% per ball thrown. If Sean throws nothing (ie. another ball on the screen), there is no bonus. Maximum 3 balls thrown, 37.5% bonus.
- Best Kara-Throw: F+HP
- Standard Throw Range (pixels): 20
- Dash Forward (frames) / Moving Distance: 13 / 1
- Dash Backward (frames) / Moving Distance: 13 / 1
- Normal Wake up (frames): 77
- Quick Stand (frames): 50
Move List
Throws
| Seoi Throw | |
| Tomoe Throw |
Command Moves
| Sean Pachiki | |
| Rolling Sobat |
Special Moves
| Sean Tackle | ||
| Dragon Smash | EX SC | |
| `SC on 1st hit | ||
| Tornado | EX | |
| Ryuubi Kyaku | EX | |
| Zenten |
Super Arts
| I | Hadou Burst | 72 Gauge Dots | 3 Stocks | 5.4 EX Uses | |
| II | Shouryuu Cannon | 96 Gauge Dots | 2 Stocks | 4.5 EX Uses | |
| III | Hyper Tornado | 120 Gauge Dots | 1 Stock | 3.0 EX Uses |
Target Combo
Move Analysis
- All those sprites are taken from the site https://www.justnopoint.com/zweifuss/
- All frame datas in "Move Analysis" section are taken from Game Restaurant , this means the frame data isn't from the Dreamcast version like Karathrow site, it's from the Arcade version.
General
- Move: Move name
- Motion: What you must do to execute the move
- Damage: Damage it does (in pixels)
- Stun Damage: Stun Damage it does (in pixels)
- Chains into itself: If you can combo into the same movement
- Special Cancel: If you can cancel the move into a Special Move
- Super Cancel: If you can cancel the move into a Super Art
- Throw Range: Range of the throw (in pixels)
- Num.: Super Art number
- Super Art: Super Art name
- Super Art Stock: Number of Gauge Bars the Super Art have, also the length of each bar (in pixels)
Frame Data
- Startup: Number of frames it takes to start the move
- Hit: Number of frames that can hit the opponent
- Recovery: Number of frames it takes to recover from the move
- Blocked Advantage: Number of frames you are in advantage/disadvantage after opponent have been blocked the hit
- Hit Advantage: Number of frames you are in advantage/disadvantage after opponent have been take the hit
- Crouching Hit Advantage: Number of frames you are in advantage/disadvantage after opponent have been take the hit while he's crouching
- + # : You have # frames of advantage
- - # : You have # frames of disadvantage
- # ~ # : Advantage/disadvantage can vary from # to #
- Down: Enemy gets knocked down
- Guard: How opponent must guard the move, High (H), Low (L) or both (HL)
- Parry: How opponent must parry the move, High (H), Low (L) or both (HL)
Gauge Increase
- Miss: Gauge you gain if you miss the move (in pixels)
- Blocked: Gauge you gain if the move gets blocked (in pixels)
- Hit: Gauge you gain if you hit the opponent with the move (in pixels)
- Parry: Gauge opponent gains when he parry the move (in pixels)
Basic Moves
| Move | Start-up frames | In ground frames | In air frames | Recovery frames | Total frames |
|---|---|---|---|---|---|
| Dash Forward | 2? | 8? | - | 4? | 14 |
| Move | Start-up frames | In ground frames | In air frames | Recovery frames | Total frames |
|---|---|---|---|---|---|
| Dash Backwards | 4? | 4? | - | 8? | 16 |
| Move | Motion | Startup Frames |
| Jump | BU or U or FU | 4 |
| Move | Motion | Startup Frames |
| Super Jump | DBU or DU or DFU | 7 |
Comments here
| Move | Motion | Frames |
| Normal Wakeup | - | 77 |
| Move | Motion | Frames |
| Quick Stand | Tap D when hitting the ground | 50 |
| Move | Motion | Damage | Stun Damage | Chains into itself | Special Cancel | Super Cancel | Juggle Value |
| Taunt | HP+HK | 1 | 0 | No | No | No |
Frame Data
| Startup | Hit | Recovery | Blocked Advantage | Hit Advantage | Crouching Hit Advantage | Guard | Parry |
| 31 | - | 19 | - | - | - | HL | HL |
Gauge Increase
| Miss | Blocked | Hit | Parry (Gauge for opponent) |
| 4 | 7 | 11 | 4 |
Adds 12.5% stun to the next hit/combo with the maximum amount being 37.5% (3 times).
| Move | Motion |
| Parry (High) | Tap F when about taking a hit |
| Parry (Low) | Tap D when about taking a hit |
| Parry (Air) | Tap F in air when about taking a hit |
Frame Data
| Move | Frames you're frozen | Frames opponent is frozen | Frame Advantage when parry is successful | Frames before you can try another parry |
| Parry (High) | 16 | 16 | +4(LP/LK) +3(MP/MK) +2(HP/HK) 0(Special/Super) -16(Fireball) | 24(19 when attack comes from the air)*,** |
| Parry (Low) | 16 | 16 | +4(LP/LK) +3(MP/MK) +2(HP/HK) 0(Special/Super) -16(Fireball) | 24(19 when attack comes from the air)*,** |
| Parry (Air) | 16 | 16 | +4(LP/LK) +3(MP/MK) +2(HP/HK) 0(Special/Super) -16(Fireball) | 21(19 when attack comes from the air)*,** |
| * (If a parry attempt is successful, the 19/21/24 frame restriction is taken away and you can attempt another parry immediately) |
| ** (If another attack connects within 2 frames of your parry, it will automatically be parried) |
Gauge Increase
| Move | Gauge Increase |
| Parry (High) | 4*** |
| Parry (Low) | 4*** |
| Parry (Air) | 4*** |
| *** (You gain 4 of gauge for whatever attack parried, and for whatever hit you parry during multihit attack) |
You can buffer any motion during High or Low parry, but NOT during Air parry, also parry resets the juggle count (and thus resets all scaling).
- Parry information is taken from Shoryuken Forums, more exactly, from user JinraiPVC. Thanks for this information dude
Normal Moves
Standing Normals
| Move | Motion | Damage | Stun Damage | Chains into itself | Special Cancel | Super Cancel | Juggle Value |
| Jab | LP | 20(3 life points) | 3 | Yes | Yes | Yes |
Frame Data
| Startup | Hit | Recovery | Blocked Advantage | Hit Advantage | Crouching Hit Advantage | Guard | Parry |
| 3 | 2 | 5 | +5 | +5 | +5 | HL | HL |
Gauge Increase
| Miss | Blocked | Hit |
| 0 | 1 | 2 |
| Move | Motion | Damage | Stun Damage | Chains into itself | Special Cancel | Super Cancel | Juggle Value |
| Far Strong | MP | 80(14 life points) | 11 | No | No | No |
Frame Data
| Startup | Hit | Recovery | Blocked Advantage | Hit Advantage | Crouching Hit Advantage | Guard | Parry |
| 5 | 4 | 13 | 0 | +1 | +2 | HL | HL |
Gauge Increase
| Miss | Blocked | Hit |
| 2 | 6 | 11 |
| Move | Motion | Damage | Stun Damage | Chains into itself | Special Cancel | Super Cancel | Juggle Value |
| Far Fierce | HP | 120(21 life points) | 10 | No | No | No |
Frame Data
| Startup | Hit | Recovery | Blocked Advantage | Hit Advantage | Crouching Hit Advantage | Guard | Parry |
| 9 | 4 | 23 | -7 | -5 or -4 | -3 to -1 | HL | H |
Gauge Increase
| Miss | Blocked | Hit |
| 2 | 6 | 11 |
| Move | Motion | Damage | Stun Damage | Chains into itself | Special Cancel | Super Cancel | Juggle Value |
| Close Strong | (Close to opponent) MP | 90(16 life points) | 9 | No | Yes | Yes |
Frame Data
| Startup | Hit | Recovery | Blocked Advantage | Hit Advantage | Crouching Hit Advantage | Guard | Parry |
| 4 | 5 | 13 | 0 | +1 | +2 | HL | H |
Gauge Increase
| Miss | Blocked | Hit |
| 2 | 6 | 11 |
| Move | Motion | Damage | Stun Damage | Chains into itself | Special Cancel | Super Cancel | Juggle Value |
| Close Fierce | (Close to opponent) HP | 120(21 life points) | 13 | No | Yes | Yes |
Frame Data
| Startup | Hit | Recovery | Blocked Advantage | Hit Advantage | Crouching Hit Advantage | Guard | Parry |
| 5 | 5 | 20 | -4 | -2 | 0 | HL | H |
Gauge Increase
| Miss | Blocked | Hit |
| 3 | 10 | 19 |
| Move | Motion | Damage | Stun Damage | Chains into itself | Special Cancel | Super Cancel | Juggle Value |
| Short | LK | 30(5 life points) | 3 | No | No | No |
Frame Data
| Startup | Hit | Recovery | Blocked Advantage | Hit Advantage | Crouching Hit Advantage | Guard | Parry |
| 4 | 4 | 8 | +2 | +2 | +2 | HL | HL |
Gauge Increase
| Miss | Blocked | Hit |
| 0 | 1 | 2 |
| Move | Motion | Damage | Stun Damage | Chains into itself | Special Cancel | Super Cancel | Juggle Value |
| Forward | MK | 90(16 life points) | 5 | No | No | No |
Frame Data
| Startup | Hit | Recovery | Blocked Advantage | Hit Advantage | Crouching Hit Advantage | Guard | Parry |
| 6 | 4 | 15 | -2 | -1 | 0 | HL | HL |
Gauge Increase
| Miss | Blocked | Hit |
| 2 | 6 | 11 |
| Move | Motion | Damage | Stun Damage | Chains into itself | Special Cancel | Super Cancel | Juggle Value |
| Far Roundhouse | (When far away) HK | 120(21 life points) | 11 | No | No | No |
Frame Data
| Startup | Hit | Recovery | Blocked Advantage | Hit Advantage | Crouching Hit Advantage | Guard | Parry |
| 7 | 4 | 25 | -9 | -7 | -5 | H | H |
Gauge Increase
| Miss | Blocked | Hit |
| 3 | 6 | 14 |
| Move | Motion | Damage | Stun Damage | Chains into itself | Special Cancel | Super Cancel | Juggle Value |
| Close Roundhouse | (Close to opponent) HK | 145(25 life points) | 11 | No | Yes | Yes |
Frame Data
| Startup | Hit | Recovery | Blocked Advantage | Hit Advantage | Crouching Hit Advantage | Guard | Parry |
| 5 | 5 | 14 | +2 | +4 | +6 | HL | H |
Gauge Increase
| Miss | Blocked | Hit |
| 3 | 10 | 19 |
Jumping Normals
| Move | Motion | Damage | Stun Damage | Chains into itself | Special Cancel | Super Cancel | Juggle Value |
| Jump Jab | (Air) LP | 50 (40 if neutral jump) (8/7 life points) | 7 | No | No | No |
Frame Data
| Startup | Hit | Recovery | Blocked Advantage | Hit Advantage | Crouching Hit Advantage | Guard | Parry |
| 4 (5 if neutral jump) | Until landing | - | -5~+7 | -5~+7 | +4~+7 | H | H |
Gauge Increase
| Miss | Blocked | Hit |
| 0 | 1 | 2 |
| Move | Motion | Damage | Stun Damage | Chains into itself | Special Cancel | Super Cancel | Juggle Value |
| Jump Strong | (Air) MP | 90(16 life points) | 9 (11 if Neutral Jump) | No | No | No |
Frame Data
| Startup | Hit | Recovery | Blocked Advantage | Hit Advantage | Crouching Hit Advantage | Guard | Parry |
| 5 (6 if neutral jump) | 5 | - | -2~+10 | -2~+10 | +7~+10 | H | H |
Gauge Increase
| Miss | Blocked | Hit |
| 2 | 6 | 11 |
| Move | Motion | Damage | Stun Damage | Chains into itself | Special Cancel | Super Cancel | Juggle Value |
| Jump Fierce | (Air) HP | 130(23 life points) | 13 (15 if Neutral Jump) | No | No | No |
Frame Data
| Startup | Hit | Recovery | Blocked Advantage | Hit Advantage | Crouching Hit Advantage | Guard | Parry |
| 6 (7 if Neutral Jump) | 4 (3 if Neutral Jump) | - | -4~+10/+4~+10 | -4~+10/+4~+10 | +4~+10/+10 | H | H |
Gauge Increase
| Miss | Blocked | Hit |
| 3 | 10 | 19 |
| Move | Motion | Damage | Stun Damage | Chains into itself | Special Cancel | Super Cancel | Juggle Value |
| Neutral Jump Fierce | (Air) HP | 130(23 life points) | 15 | No | No | No |
Frame Data
| Startup | Hit | Recovery | Blocked Advantage | Hit Advantage | Crouching Hit Advantage | Guard | Parry |
| 7 | 3 if Neutral Jump | - | -4~+10/+4~+10 | -4~+10/+4~+10 | +4~+10/+10 | H | H |
Gauge Increase
| Miss | Blocked | Hit |
| 3 | 10 | 19 |
| Move | Motion | Damage | Stun Damage | Chains into itself | Special Cancel | Super Cancel | Juggle Value |
| Jump Short | (Air) LK | 50(8 life points) | 5 (7 if neutral jump) | No | No | No |
Frame Data
| Startup | Hit | Recovery | Blocked Advantage | Hit Advantage | Crouching Hit Advantage | Guard | Parry |
| 4 (5 if neutral jump) | 10 (19 if neutral jump) | - | -8~+7 | -8~+7 | 0~+7 | H | H |
Gauge Increase
| Miss | Blocked | Hit |
| 0 | 1 | 2 |
| Move | Motion | Damage | Stun Damage | Chains into itself | Special Cancel | Super Cancel | Juggle Value |
| Jump Forward | (Air) MK | 90(16 life points) | 9 | No | No | No |
Frame Data
| Startup | Hit | Recovery | Blocked Advantage | Hit Advantage | Crouching Hit Advantage | Guard | Parry |
| 5 | 6 | - | -3~+10 | -3~+10 | +6~+10 | H | H |
Gauge Increase
| Miss | Blocked | Hit |
| 2 | 6 | 11 |
| Move | Motion | Damage | Stun Damage | Chains into itself | Special Cancel | Super Cancel | Juggle Value |
| Neutral Jump Forward | (Air) MK | 90(16 life points) | 9 | No | No | No |
Frame Data
| Startup | Hit | Recovery | Blocked Advantage | Hit Advantage | Crouching Hit Advantage | Guard | Parry |
| 5 | 6 | - | -2~+10 | -2~+10 | +6~+10 | H | H |
Gauge Increase
| Miss | Blocked | Hit |
| 2 | 6 | 11 |
| Move | Motion | Damage | Stun Damage | Chains into itself | Special Cancel | Super Cancel | Juggle Value |
| Jump Roundhouse | (Air) HK | 110(22 life points) | 13 | No | No | No |
Frame Data
| Startup | Hit | Recovery | Blocked Advantage | Hit Advantage | Crouching Hit Advantage | Guard | Parry |
| 6 | 4 | - | -1~+10 | -1~+10 | +4~+10 | H | H |
Gauge Increase
| Miss | Blocked | Hit |
| 3 | 10 | 19 |
| Move | Motion | Damage | Stun Damage | Chains into itself | Special Cancel | Super Cancel | Juggle Value |
| Neutral Jump Roundhouse | (Air) HK | 130(23 life points) | 13 | No | No | No |
Frame Data
| Startup | Hit | Recovery | Blocked Advantage | Hit Advantage | Crouching Hit Advantage | Guard | Parry |
| 7 | 5 | - | +2~+10 | +2~+10 | +7~+10 | H | H |
Gauge Increase
| Miss | Blocked | Hit |
| 3 | 10 | 19 |
| Move | Motion | Damage | Stun Damage | Chains into itself | Special Cancel | Super Cancel | Juggle Value |
| Universal Overhead | MP+MK | 40(7 life points) | 3 | No | No | No |
Frame Data
| Startup | Hit | Recovery | Blocked Advantage | Hit Advantage | Crouching Hit Advantage | Guard | Parry |
| 15 | 8 | 7 | -5~+7 | 0~+8 | +1~+9 | H | H |
Gauge Increase
| Miss | Blocked | Hit |
| 0 | 1 | 2 |
Throws
| Move | Motion | Damage | Stun Damage | Throw Range | Kara-Throw | Kara-Throw Range |
| Seoi Throw | LP+LK | 120(21 life points) | 10 | 20 | Far + HP/F + HP/Far HK/Cr.MK/Cr.HK | 32/34/28/33/33 |
Frame Data
| Startup | Hit | Recovery | Blocked Advantage | Hit Advantage | Crouching Hit Advantage | Guard | Parry |
| 2 | 1 | 21 | - | - | - | LP+LK | - |
Gauge Increase
| Miss | Blocked | Hit |
| 0 | 7 (for the player who teched) | 2 |
| Move | Motion | Damage | Stun Damage | Throw Range | Kara-Throw | Kara-Throw Range |
| Tomoe Throw | B + LP + LK | 140(24 life points) | 4 | 20 | Far + HP/F + HP/Far HK/Cr.MK/Cr.HK | 32/34/28/33/33 |
Frame Data
| Startup | Hit | Recovery | Blocked Advantage | Hit Advantage | Crouching Hit Advantage | Guard | Parry |
| 2 | 1 | 21 | - | - | - | LP+LK | - |
Gauge Increase
| Miss | Blocked | Hit |
| 0 | 7 (for the player who teched) | 2 |
Crouching Normals
| Move | Motion | Damage | Stun Damage | Chains into itself | Special Cancel | Super Cancel | Juggle Value |
| Crouch Jab | D + LP | 20(3 life points) | 3 | Yes | Yes | Yes |
Frame Data
| Startup | Hit | Recovery | Blocked Advantage | Hit Advantage | Crouching Hit Advantage | Guard | Parry |
| 4 | 3 | 7 | +3 | +3 | +3 | HL | HL |
Gauge Increase
| Miss | Blocked | Hit |
| 0 | 1 | 2 |
| Move | Motion | Damage | Stun Damage | Chains into itself | Special Cancel | Super Cancel | Juggle Value |
| Crouch Strong | D + MP | 80(14 life points) | 7 | No | Yes | Yes |
Frame Data
| Startup | Hit | Recovery | Blocked Advantage | Hit Advantage | Crouching Hit Advantage | Guard | Parry |
| 5 | 4 | 10 | +3 | +4 | +5 | HL | HL |
Gauge Increase
| Miss | Blocked | Hit |
| 2 | 6 | 11 |
| Move | Motion | Damage | Stun Damage | Chains into itself | Special Cancel | Super Cancel | Juggle Value |
| Crouch Fierce | D + HP | 120(21 life points) | 13 | No | Yes | Yes |
Frame Data
| Startup | Hit | Recovery | Blocked Advantage | Hit Advantage | Crouching Hit Advantage | Guard | Parry |
| 7 | 5 | 22 | -9 | -7 | -5 | HL | HL |
Gauge Increase
| Miss | Blocked | Hit |
| 3 | 10 | 19 |
| Move | Motion | Damage | Stun Damage | Chains into itself | Special Cancel | Super Cancel | Juggle Value |
| Crouch Short | D + LK | 20(3 life points) | 3 | Yes | Yes | Yes |
Frame Data
| Startup | Hit | Recovery | Blocked Advantage | Hit Advantage | Crouching Hit Advantage | Guard | Parry |
| 5 | 3 | 7 | +1 | +1 | +1 | L | L |
Gauge Increase
| Miss | Blocked | Hit |
| 0 | 1 | 2 |
| Move | Motion | Damage | Stun Damage | Chains into itself | Special Cancel | Super Cancel | Juggle Value |
| Crouch Forward | D + MK | 70(15 life points) | 3 | No | Yes | Yes |
Frame Data
| Startup | Hit | Recovery | Blocked Advantage | Hit Advantage | Crouching Hit Advantage | Guard | Parry |
| 7 | 5 | 17 | -4 | -3 | -2 | L | L |
Gauge Increase
| Miss | Blocked | Hit |
| 2 | 6 | 11 |
| Move | Motion | Damage | Stun Damage | Chains into itself | Special Cancel | Super Cancel | Juggle Value |
| Crouch Roundhouse | D + HK | 120(21 life points) | 3 | No | No | No |
Frame Data
| Startup | Hit | Recovery | Blocked Advantage | Hit Advantage | Crouching Hit Advantage | Guard | Parry |
| 8 | 5 | 30 | -16 | Down | Down | L | L |
Gauge Increase
| Miss | Blocked | Hit |
| 3 | 10 | 19 |
Command Normals
| Move | Motion | Damage | Stun Damage | Chains into itself | Special Cancel | Super Cancel | Juggle Value |
| Rolling Sabat | F+HK | 90(70)(16 life points) | 9 | No | No | No |
Frame Data
| Startup | Hit | Recovery | Blocked Advantage | Hit Advantage | Crouching Hit Advantage | Guard | Parry |
| 15 | 5 | 18 | -5 | Down | Down | H | H |
Gauge Increase
| Miss | Blocked | Hit |
| 2 | 6 | 11 |
| Move | Motion | Damage | Stun Damage | Chains into itself | Special Cancel | Super Cancel | Juggle Value |
| Sean Pachiki | F+HP | 140(60+80)(22 life points) | 13 | No | No | No |
Frame Data
| Startup | Hit | Recovery | Blocked Advantage | Hit Advantage | Crouching Hit Advantage | Guard | Parry |
| 21 | 7 | 24 | -6 | -4 | -2 | H/H | H/H |
Gauge Increase
| Miss | Blocked | Hit |
| 3 | 8 | 18 |
Target Combos
| Move | Motion | Damage | Stun Damage | Chains into itself | Special Cancel | Super Cancel | Juggle Value |
| Target Combo | Close MP -> Close HK | 90+50 | 10 | No | Yes/No | Yes/No (*Yes) |
Frame Data
| Startup | Hit | Recovery | Blocked Advantage | Hit Advantage | Crouching Hit Advantage | Guard | Parry |
| 4 | - | 22 | -2 | 0 | +2 to +6 | HL/HL | H/H |
Gauge Increase
| Miss | Blocked | Hit |
| 2 | 7 | 12 |
*Links into super on Makoto while standing and Ibuki while crouching with a slight delay in-between MP and HK.
| Move | Motion | Damage | Stun Damage | Chains into itself | Special Cancel | Super Cancel | Juggle Value |
| Close Fierce + Sean Pachiki | Close HP -> F+HP | 120+50+60 | 18 | No | Yes/No | Yes/No |
Frame Data
| Startup | Hit | Recovery | Blocked Advantage | Hit Advantage | Crouching Hit Advantage | Guard | Parry |
| 5 | - | 45 | -6 | -4 | -2 | HL/H | H/H |
Gauge Increase
| Miss | Blocked | Hit |
| 3 | 15 | 30 |
More of a Target "link" rather than combo since it doesn't combo but it scales like one.
Special Moves
| Move | Motion | Damage | Blocked Damage | Stun Damage | Super Cancel | Juggle Value |
| Zenten | QCB + P | 0 | 0 | 0 | No |
Frame Data
| Startup | Hit | Recovery | Blocked Advantage | Hit Advantage | Crouching Hit Advantage | Guard | Parry |
| 2 | 17/27/41 | 7 | - | - | - | - | - |
Gauge Increase
| Miss | Blocked | Hit | Parry (Gauge for opponent) |
| 0 | 0 | 0 | 0 |
Zenten lowers his hit-box to the ground which allows him to avoid throws and projectiles for however long its out on screen. It can even avoid high hitting supers altogether when done early enough. Its parry bait as well since opponents who know about this move will stick lows/overheads out constantly to punish you for using this. Its throw invincible though not attack invincible. It can help you out every once in a while to get out of pressure but its not recommended to do it all the time.
Tip: Parry and use this against advancing supers to trap the opponent in a corner (if using SA2). Also, mix up which of the Zentens you use (LP/MP/HP).
| Move | Motion | Damage | Blocked Damage | Stun Damage | Super Cancel | Juggle Value |
| Ryuubi Kyaku | QCF + K | 120(21 life points) | 15 | 19 | No |
Frame Data
| Startup | Hit | Recovery | Blocked Advantage | Hit Advantage | Crouching Hit Advantage | Guard | Parry |
| 25 | 8 | 15 | -5 to +2 | -5 to +2 | -3 to 0 | H | H |
Gauge Increase
| Miss | Blocked | Hit | Parry (Gauge for opponent) |
| 3 | 15 | 21 | 4 |
The secondary special AA that Sean has. The range of this move is deceptive, it can hit very high in the air and even stuff out some of the other shoto's air tatsu's. Useful for when the opponent tries to jump out of the corner and you smack them back down into there with it. The EX can hit up to 3 times if you catch an Opp. jumping away or if you're up close (Akuma, Remy, Urien and Hugo). Like the tackle, you can also combo into this off the basketball taunt, you know, for style. This move is one that opponents tend to look out for or bait out the most because of how easy it is to parry it, even the EX so be careful.
The frame Adv. of the Non-EX RK's vary depending on who you're playing against and how far away you are. On block up close for taller characters its -5, but on a shorter character (like Yun) its 0. On hit, its about the same, though on shorter characters its -2 up to +2 (on twins). If you hit with this move from the maximum distance of each of the 3 buttons, its 0 to +2 (twins) on hit and block. This also applies to the EX Wheel as well.
| Move | Motion | Damage | Blocked Damage | Stun Damage | Super Cancel | Juggle Value |
| Dragon Smash (Jab) | F, D, DF + LP | 130(23 life points) | 16 | 11 | Yes | |
| Dragon Smash (Strong) | F, D, DF + MP | 130(23 life points) | 16 | 11 | Yes | |
| Dragon Smash (Fierce) | F, D, DF + HP | 130(23 life points) | 16 | 11 | Yes |
Frame Data
| Move | Startup | Hit | Recovery | Blocked Advantage | Hit Advantage | Crouching Hit Advantage | Guard | Parry |
| Dragon Smash (Jab) | 5 | 6 | 36 | -24 | Down | Down | HL | HL |
| Dragon Smash (Strong) | 7 | 8 | 39 | -30 | Down | Down | HL | HL |
| Dragon Smash (Fierce) | 9 | 10 | 42 | -34 | Down | Down | HL | HL |
Gauge Increase
| Move | Miss | Blocked | Hit |
| Dragon Smash (Jab) | 2 | 6 | 11 |
| Dragon Smash (Strong) | 2 | 6 | 11 |
| Dragon Smash (Fierce) | 2 | 6 | 11 |
Sean's version of the Shoryuken. The variations come out in 5/7/8/9 frames respectively, but do all the same damage (except EX) and can cancel into Hadou Burst and Shoryu Cannon. Be for-warned, you can't treat this like a normal DP. Its slower by a few frames and it has most of its priority over Sean's head. It also doesn't have much range either, so it has a high chance of whiff-ing plus you can't combo into it off of Cl.HK (only on Dudley, Urien, Elena, and Twelve) and he can be grabbed out of it as well (all versions).
If you trade/collide with someone jumping in using this, you can SA1 them before they hit the ground which does a few points less than what it normally does but it's still good damage nonetheless.
Advice: Learn how to quickly cancel Cr.LK or Cr.LP into Dragon Smash (LP or MP only).
| Move | Motion | Damage | Blocked Damage | Stun Damage | Super Cancel | Juggle Value |
| Tornado (Short) | QCB + LK | 100(50+50)(16 life points) | 9 | 10(5+5) | No | |
| Tornado (Forward) | QCB + MK | 150(50x3)(24 life points) | 13 | 15(5x3) | No | |
| Tornado (Roundhouse) | QCB + HK | 160(50+40×3(26 life points) | 14 | 18(5x4) | No |
Frame Data
| Move | Startup | Hit | Recovery | Blocked Advantage | Hit Advantage | Crouching Hit Advantage | Guard | Parry |
| Tornado (Short) | 11 | 2 | 21 | -7 | -5 | -5 to -2 | HL/HL | H/H |
| Tornado (Forward) | 14 | 2 | 21 | -6 | -4 | -4 to -2 | HL/HL/HL | H/H/H |
| Tornado (Roundhouse) | 16 | 3 | 21 | -6 | -4 | -4 to -2 | HL/HL/HL/HL | H/H/H/H |
Gauge Increase
| Move | Miss | Blocked | Hit | Parry (Gauge for opponent) |
| Tornado (Short) | 3 | 13 | 19 | 8 |
| Tornado (Forward) | 3 | 14 | 20 | 12 |
| Tornado (Roundhouse) | 3 | 15 | 21 | 16 |
This is Sean's version of the tatsu. Its easy to combo into (LK/MK/EX versions) from HK, MP, etc. Does good damage and its useful for pressuring opponents. The LK tornado can be used as an anti-air and combo'd into SA1 before they hit the ground (in the corner only). Also the HK or MK versions are great for chip out wins. All variations of Tornado are unsafe on hit AND block (except for EX which is 99% safe) and comboing into the HK tornado works only vs Crouching opponents (still very unsafe). The first hit all of the Tornadoes force stand which makes the move even more unsafe than it should be.
All variations of Tornado are better used as an "out of range" footsie against crouchers, especially the Roundhouse/EX version. This will actually make the move safer but not by much (becomes -2 to -3 on hit instead of -3/-4).
| Move | Motion | Damage | Blocked Damage | Stun Damage | Super Cancel | Juggle Value |
| Tackle (Jab) | HCF + LP | 180(30 life points) | 0 | 16 | No | |
| Tackle (Strong) | HCF + MP | 180(30 life points) | 0 | 16 | No | |
| Tackle (Fierce) | HCF + HP | 180(30 life points) | 0 | 16 | No |
Frame Data
| Move | Startup | Hit | Recovery | Blocked Advantage | Hit Advantage | Crouching Hit Advantage | Guard | Parry |
| Tackle (Jab) | 18 | 2 | 28 | -14 | Down | Down | L | L |
| Tackle (Strong) | 22 | 2 | 28 | -14 | Down | Down | L | L |
| Tackle (Fierce) | 26 | 2 | 28 | -14 | Down | Down | L | L |
Gauge Increase
| Move | Miss | Blocked | Hit | Parry (Gauge for opponent) |
| Tackle (Jab) | 0 | 0 | 11 | 4 |
| Tackle (Strong) | 0 | 0 | 11 | 4 |
| Tackle (Fierce) | 0 | 0 | 11 | 4 |
This is another source of mobility in addition to Sean's already fast and lengthy dash. Its recovery is low to the ground which gives him a 2nd move that goes underneath projectiles (the first being Zenten). Useful to close distance from you to the opponent when used just for the dash itself. The tackle itself is meant to be used defensively when you parry an attack with a long recovery from a long distance but it can be used to catch whiffed lows or dashes when in close enough range. You can cancel into this (LP version) from his any of his close normals for fake outs into grab/EX DS/super but be for-warned doing this against someone who's quick enough to punish you. You can combo into this off of his taunt for style. Be warned, the attack is not a grab and the attack doesn't have the "duck" property (like Yun's jump kick and Dudley's rush attack or Sean's Zenten). It's a move that has 0 priority until the actual tackle attack and even then its really slow.
Tip: If your AA get's parried, cancel into an empty tackle for a mix-up. To actually tackle, you have to bait out crouching moves before using it. In this scenario, LP or MP tackle depending on how far away you are, should hit when they whiff.
EX Moves
| Move | Motion | Gauge Needed | Damage | Blocked Damage | Stun Damage | Super Cancel | Juggle Value |
| Ryuubi Kyaku (EX) | QCF + KK | 40 | 200(60+70+70)(32 life points) | 17(5+6+6) | 21(7×3) | No |
Frame Data
| Move | Startup | Hit | Recovery | Blocked Advantage | Hit Advantage | Crouching Hit Advantage | Guard | Parry |
| Ryuubi Kyaku (EX) | 25・27・29・31 | 2・2・2・2 | 19 | -1 to +2 | -1 to +2 | -1 | H | H |
Gauge Increase
| Move | Miss | Blocked | Hit | Parry (Gauge for opponent) |
| Ryuubi Kyaku (EX) | - | - | - | 8 (12 if hits 3 times) |
Generally its -1 on hit/block but like Non-EX Wheel Kicks it depends on the distance away and/or the character. Its off the ground in 11 frames as opposed to 15 frames (Non-EX) and hits up to 3 times.
| Move | Motion | Gauge Needed | Damage | Blocked Damage | Stun Damage | Super Cancel | Juggle Value |
| Dragon Smash (EX) | F, D, DF + PP | 40 | 180(90+90(60))(31 life points) | 18(11+7) | 16 | Yes/No |
Frame Data
| Move | Startup | Hit | Recovery | Blocked Advantage | Hit Advantage | Crouching Hit Advantage | Guard | Parry |
| Dragon Smash (EX) | 8・9 | 1・11 | 42 | -37 | Down | Down | HL | HL |
Gauge Increase
| Move | Miss | Blocked | Hit | Parry (Gauge for opponent) |
| Dragon Smash (EX) | - | - | - | 8 |
Sean's EX Dragon Smash has the most invincibility of all the shoto DPs (8 frames) and the most hit frames and height out of the other Dragon Smashes. He can be thrown out of this usually but there are situations where he can't.
| Move | Motion | Gauge Needed | Damage | Blocked Damage | Stun Damage | Super Cancel | Juggle Value |
| Tornado (EX) | QCB + KK | 40 | 175(60+40×3)(28 life points) | 15 | 22(9+5×3) | No |
Frame Data
| Move | Startup | Hit | Recovery | Blocked Advantage | Hit Advantage | Crouching Hit Advantage | Guard | Parry |
| Tornado (EX) | 9・21・30・40 | 2・3・4・2 | 17 | -3 | -1 | -1 to +1 | HL | H |
Gauge Increase
| Move | Miss | Blocked | Hit | Parry (Gauge for opponent) |
| Tornado (EX) | - | - | - | 16 |
EX Tornado can leave you at -1, 0 or +1 on hit depending on the situation:
- -1: The move's normal frame advantage. Its -1 on hit even if canceled from Cl.HK or Cl.MP due to the first hit of the tatsu inducing stand
- 0: Even though its -1 on hit, you can't be punished by 1 frame supers (except gigas) or 1 frame moves
- +1: If you don't hit with the first hit of the tatsu, its plus on hit only vs. Crouchers.
| Move | Motion | Gauge Needed | Damage | Blocked Damage | Stun Damage | Super Cancel | Juggle Value |
| Tackle (EX) | HCF + PP | 40 | 260(40 life points) | 0 | 25 | No |
Frame Data
| Move | Startup | Hit | Recovery | Blocked Advantage | Hit Advantage | Crouching Hit Advantage | Guard | Parry |
| Tackle (EX) | 28 | 2 | 28 | -14 | Down | Down | L | L |
Gauge Increase
| Move | Miss | Blocked | Hit | Parry (Gauge for opponent) |
| Tackle (EX) | - | - | - | 4 |
EX version of Sean tackle, one of his most damaging moves (does the same as Hadou Burst). It can cover a good distance quickly and can also be used to escape jump-ins if your AA gets parried. Its also possible to punish with this on parry against long recovery moves such as sweeps. Has the most stun of any special move that the shotos have and you can combo this off a taunt for style.
Super Arts
| Super Art | Super Art Name | Super Art Stock | Motion | Damage | Blocked Damage | Stun Damage | Damage/Gauge |
| I | Hadou Burst | 3 bars (72 each bar) | QCF QCF+P | 220(39 life points) | 14 | 9 | 3, 05(x3) |
Frame Data
| Startup | Hit | Recovery | Blocked Advantage | Hit Advantage | Crouching Hit Advantage | Guard | Parry |
| 2 | 1 | 61 | -29 | Down | Down | HL | H |
| Super Art | Super Art Name | Super Art Stock | Motion | Damage | Blocked Damage | Stun Damage | Damage/Gauge |
| II | Shoryu Cannon | 2 bars (96 each bar) | QCF QCF+P (Press P rapidly) | 390(14 hits(80+50+35+35+40×9)(38 life points) | 90 (or less) | 0 | 4,75 |
| * 80+50+35+35+(40x9) Damage is when all hits connect. |
| ** 18+(12x6) Damage is when all hits connect. |
Frame Data
| Startup | Hit | Recovery | Blocked Advantage | Hit Advantage | Crouching Hit Advantage | Guard | Parry |
| 1・3・28・30・32・34・36・38・40・42・44・46・48・50・52・54 | 2・7・2・2・2・(1×10) | 36 | -43 | Down | Down | HLx1~9 | HLx1~14 |
| Super Art | Super Art Name | Super Art Stock | Motion | Damage | Blocked Damage | Stun Damage | Damage/Gauge |
| III | Hyper Tornado | 1 bars (120) | QCF QCF+P | 460(76 life points) | 10 | 14 | 3, 8 |
Frame Data
| Startup | Hit | Recovery | Blocked Advantage | Hit Advantage | Crouching Hit Advantage | Guard | Parry |
| 2 | 14 | 53 | -31 | Down | Down | HL | HL |
Combos
Damages measured against Gouki (lowest health in the game)
Meter-less
| 1st Move | 2nd Move | 3rd Move | 4th Move | Damage | Stun Damage |
| Crouch MK | Tornado (LK) | - | - | 28 (17%) | 9 |
| Close MP | Close HK | - | - | 24 (15%) | 10 |
| Crouch MK | Dragon Smash | - | - | 33 (20%) | 12 |
| Close MP | Dragon Smash | - | - | 37 (23%) | 18 |
| Close HP | Dragon Smash | - | - | 41 (25%) | 22 |
| Close HK | Tornado (MK) | - | - | 47 (29%) | 21 |
| Jump HP | Close MP | HP Dragon Smash | - | 57 (35%) | 28 |
Specific to:
Twelve, Elena, Urien and Dudley
| 1st Move | 2nd Move | 3rd Move | 4th Move | Damage | Stun Damage |
| Close HK | Dragon Smash | - | - | 46 (28%) | 20 |
Crouching:
| 1st Move | 2nd Move | 3rd Move | 4th Move | Damage | Stun Damage |
| Close HP | Tornado (HK) | - | - | 51 (31%) | 26 |
| Close HK | Tornado (HK) | - | - | 57 (35%) | 24 |
| Jump HK | Close HP | Tornado (HK) | - | 69 (43%) | 35 |
| Jump HP | Close HP | Tornado (HK) | - | 73 (45%) | 36 |
| Jump HP | Close HK | Tornado (HK) | - | 78 (48%) | 34 |
EX moves
| 1st Move | 2nd Move | 3rd Move | 4th Move | Damage | Stun Damage |
| Crouch MK | Tornado (EX) | - | - | 38 (23%) | 20 |
| Close MP | Tornado (EX) | - | - | 42 (26%) | 25 |
| Close HP | Tornado (EX) | - | - | 46 (28%) | 30 |
| Close HP | Dragon Smash (EX) | - | - | 48 (30%) | 28 |
| Close HK | Tornado (EX) | - | - | 50 (31%) | 28 |
| Forward/Neutral Jump HP | Close MP | Tornado (EX) | - | 61 (38%) | 35/37 |
| Forward/Neutral Jump HP | Close HP | Tornado (EX) | - | 63 (39%) | 39/41 |
| Forward/Neutral Jump HP | Close HK | Tornado (EX) | - | 67 (41%) | 37/39 |
Super Art I
| 1st Move | 2nd Move | 3rd Move | 4th Move | Damage | Stun Damage |
| Crouch LK | Crouch LP | Crouch LK | SA1 | 46 (28%) | 13 |
| Close LK | Dragon Smash (LP or MP) | SA1 | - | 54 (33%) | 19 |
| Crouch MK | Dragon Smash | SA1 | - | 59 (36%) | 19 |
| Close HP | Dragon Smash | SA1 | - | 65 (40%) | 29 |
| Close HK | Dragon Smash | SA1 | - | 70 (43%) | 27 |
| Forward/Neutral Jump HP | Close HP | SA1 | - | 70 (43%) | 31/33 |
| Forward/Neutral Jump HP | Close HK | SA1 | - | 74 (46%) | 29/31 |
| Jump HP | Close MP | Dragon Smash (HP) | SA1 | 80 (50%) | 35 |
Specific to:
Elena
| 1st Move | 2nd Move | 3rd Move | 4th Move | Damage | Stun Damage |
| Neutral Jump HK | Close HK | Dragon Smash (HP) | SA1 | 72 (45%) | 37 |
Super Art II
| 1st Move | 2nd Move | 3rd Move | 4th Move | 5th Move | 6th Move | 7th Move | Damage | Stun Damage |
| Crouch MK | SA2 | - | - | - | - | - | 73 (45%) | 2 |
| Close HP | Dragon Smash | SA2 | - | - | - | - | 79 (49%) | 22 |
| Close HK | SA2 | - | - | - | - | - | 82 (51%) | 11 |
| Jump HP | Close HK | SA2 | - | - | - | - | 94 (58%) | 22 |
| Jump HP | Close HK | SA2 | Dragon Smash | SA2 | Close HK | - | 102 (63%) | 19 |
Add a Close HK in the corner for 6 more points of damage, Far MP for 3 more points.
Specific to:
Necro
| 1st Move | 2nd Move | 3rd Move | 4th Move | 5th Move | 6th Move | 7th Move | Damage | Stun Damage |
| Jump HP | Close HK | SA2 | EX Dragon Smash | - | - | - | 73 (45%) | 19 |
Super Art III
| 1st Move | 2nd Move | 3rd Move | 4th Move | Damage | Stun Damage |
| Crouch LK | Crouch LP | Crouch LK | SA3 | 83 (51%) | 11 |
| Crouch MP | SA3 | - | - | 84 (52%) | 15 |
| Close HP | SA3 | - | - | 86 (53%) | 21 |
| Close HK | SA3 | - | - | 90 (56%) | 19 |
| Forward/Neutral Jump HP | Close HP | SA3 | - | 95 (59%) | 31/33 |
| Forward/Neutral Jump HP | Jump HK | SA3 | - | 99 (61%) | 29/31 |
Links
Crouching (Meaty):
| 1st Move | 2nd Move | 3rd Move | 4th Move | Damage | Stun Damage |
| Close HK | Crouch LK | - | - | 34 (21%) | N/A |
| Close HK | Crouch MK | - | - | 46 (29%) | N/A |
| Close HK | Stand MK | - | - | 51 (31%) | N/A |
Strategy
Chippiness
Sean can deal alot of damage to your Stun meter in small "chips" at a time.You see since he can't combo very well he needs to hit you more over the duration of the match to break even. He's not ranked very high because "chippy" (High/mid damage : Low combo ability) characters in tournaments fall apart because professional players will not give you a chance to hit them many times and they don't make many mistakes. So try to find ways to chip until you have meter then use your SAs to deal large damage to break even.
Parrying with Sean
You need to parry and parry well to use Sean. Jump into/out of parry dash in/dash back into parry. Parry makes Sean a good character. If you do not use it he will suck. A lot of his moves are extremely situational/impractical or have a strange hit-box placement. You need the parry and other tech to setup into said moves. Learn to red parry a lot things that can help you in match-ups as well (multi-hit overheads, Ken's SA3, Chun's SA2, etc.).
EX Tornado
After a EX tornado, you have 8 different options you can choose from while your opponent typically only has 5 (but be ready to gamble):
- Block [Loses to grabs but wins against reversals and super]
- Throw/tech throw (Regular or Kara) [Loses to reversals, evasive maneuvers, super but wins against blocking]
- Parry/SGGK/OS [Least amount of risk that involves 2 or more options at once]
- EX Dragon Smash [Loses to throw, blocking, reversals, evasive maneuvers and super but wins against throws that come out too early or attacks that don't have enough priority]
- Zenten [Loses to blocking, reversals and super but wins against throws and certain attacks]
- Dash Backwards [Loses to super but wins against throws and reversals]
- Jump forward/backwards [Loses to reversals but wins against throws]
- Super (SA2 only) [Loses to blocking but wins against everything else]
The strongest one-off attacks Sean can do safely at any given moment are:
- Cl.HK - The strongest hit confirm normal of the shotos and builds great meter on hit or block. Comes out in 5 frames and is safe all across the board. Its a great AA that you can cancel into SA2 with and its great for Meaties. Look to land this particular normal the most in a match. Does 25 DMG Standing/32 Crouching (Akuma). Cl.HK confirms into super can outdamage super confirms that involve Dragon Smash, especially if caught crouching.
- Target Combo - A quick and simple 2 hit combo that does 24 DMG Standing/29 Crouching, and another one of Sean's good AA's. Target Combo on hit is 0 Standing/+2 Crouching and -2 on block. Even though its -2 on block, its completely safe and in fact, its best to buffer parry after this in case the opponent tries to punish what can't be punished. It puts you near half screen on block, even further if you delay the 2nd hit of the combo. It can link into super but only on Makoto standing and Ibuki crouching (w/Delay).
- Back + Throw - Sean's Back throw does 4 points more DMG than the other shotos which means that at mid-screen, you should be looking to do this to put the opponent into the corner. Using Sean's Far Fierce, you can Kara Back + Throw giving him more reach to grab. Its a great way to end a match if you have the opponent trapped in the corner.
Block-strings:
- Cr.LK - St.LK - St.MK
- Cl.HK - St.MK
- St.LP - St.LP - St.MP
- St.LP - Target Combo
- Cl.MP - Cl.HK
- St.LP - Cl.HP
Offense
Sean has the basic Shoto mix-ups that allow him to confuse and knock down his opponent repeatedly (albeit to a lesser degree but still effective). If you're not sure on what these mix ups are (tick throw, high/low, Kara throwing, etc.) please consult the Ryu section for examples. Always minimize the risk.
Sean is most effective either in close proximity or within a far distance from the opponent. His best close normals are:
- Close Strong/Fierce/Roundhouse
- Crouching Strong
From a distance, the main normals to use are:
- Standing Forward
- Far Standing Fierce
- Crouching Forward
- Crouching Roundhouse
- Towards Roundhouse
Wake-up
Things you can do on the opponent's wake-up:
- Close HP into Sean Pachiki (TC)
- Crouching LK, Crouching LK
- Crouching LK, Standing LP (whiff), Kara-throw [vs. crouching]
- Crouching LK, step back 2 frames then Kara-throw
- Walk in, step back, Kara-throw
- Meaty UOH [can link into super]
- Meaty Close HK into Crouching LK/Standing MK/Crouching MK or Super
- Standing MK, walk forward and Kara throw
- Cross-up j.MK
- Cross-up j.MK, Crouching LK, Kara throw
- Jump back HK (HK after jump back must be done fast)
- Jump at same time opponent is getting up and parry his reversal
- Throw opponent few times and jump at same time your opponent is getting up
- Throw opponent few times then dash backwards. If the opponent tried to tech the next throw punish him with a combo
- Standing LP, Target Combo (1-frame link) [vs. Standing]
- Any one of his block strings
- UOH (whiff), Close HP/MP/HK, Super
- Close Strong*
*Close Strong can lead into TC (which then can also lead into Hyper Tornado but only on specific characters), Crouching LK x2, Close HP/HK (after a step forward), and Throw (Kara if possible)
Meaty Attacks
- Close/Crouching Strong
- Close Fierce/Roundhouse
- Standing Forward
- UOH
- LK Wheel Kick
The best Meaties for Sean are Close Roundhouse and Close/Crouching Strong. On Meaty, Close Roundhouse's advantage increases to +9 (if crouching), allowing him to link Crouching LK or his Forward kicks (Stand and Crouch). 2 of those 3 can link into Hadou Burst or Hyper Tornado for the same amount of damage as a jump in.
Meter Building
There are 4 things that Sean can do to build meter. They are:
- Crouching Strong
- Close Roundhouse
- Jump Backwards HK (whiff)
- Taunt
A whiffed Crouch Strong builds 2 points of meter and it recovers quick. As said above, Close Roundhouse should be his go-to button whenever possible whether on block or hit. His taunt builds quite a bit of meter as well, anywhere from 4-11 points depending on if the opponent parries or blocks. Jump Back HK is one of the few safe things Sean can do to build meter.
A trick to meter build a bit quicker would be to Close Roundhouse (as an AA) then cancel into the Taunt. Gives about 23 or 24 points of meter instead of the normal 19 with Close Roundhouse by itself.
Notable Combos
- Jump Fierce/Roundhouse x Crouching Forward x Dragon Smash
A standard shoto combo that's very important for Sean. Builds the most meter (half a stock of Hadou Burst) and does good damage that scores a knockdown. Two things about this combo: Whiffing a single Crouch Strong right after or Parrying an Anti-air then going right into this combo will give Sean exactly enough meter to use EX's. Its also possible to D.E.D OS with this combo if you have half of the meter filled.
- Jump Fierce/Roundhouse x Close Strong x HP Dragon Smash
Another standard shoto combo that's important. This is the most damage Sean can do that builds a good amount of meter and knocks down. Its a bit harder to land Close Strong than Crouch Forward since you have to hit Jump Fierce high on a Jump-in. Excellent combo to use while the opponent is stunned since this combo with Hadou Burst at the end of it is among the strongest he has.
- Close Fierce/Roundhouse/Strong x Dragon Smash
The main combo to punish with after a parry. Close Strong is the most reliable but weakest, Close Fierce is stronger but lacks range, and Close Roundhouse is the strongest but only possible on a few characters.
Defense
As said above, Parrying is paramount when playing as Sean. Knowing the opponent's options at all times and how to deal with them as Sean will be key to winning with him.
Anti-throw moves
- Zenten (3rd frame throw invincible)
- UOH (airborne in 5 frames)
- Towards Roundhouse (airborne in 6 frames)
- Wheel Kicks (airborne in 15 normally, 13 EX)
- Shoryu Cannon (1-frame start-up, 10 frame invincibility)
- Hyper Tornado (3-frame start-up, 12 frame invincibility)
Wake-up
- UOH
- EX Dragon Smash (Warning: He CAN be thrown out of this)
- Zenten
- EX Wheel Kick
- Super
- Guard Jump (Backwards/Forward)
- OS Throw
- HJC Specials (Zenten, Tackle, etc.)
Anti-Airs
Sean has a wide selection of AA's to choose from:
- Crouching Fierce
- Close Roundhouse (Steep jump in)
- Dragon Smash (Over or near Sean's head only)
- LK Tornado (Steep jump in)
- Wheel Kick (Mid-far jump in but don't kick into them, use the correct strength of W.K)
- Towards Fierce
- All variations of MP (Far, Close, and Crouching) [Close can lead into TC]
- Far Roundhouse (Good for angled jump-in)
- Close Fierce (Close)
- Towards Roundhouse (Far jump-in)
- Standing Forward (Does well against Cross-ups)
- Far Fierce (Far jump in)
- Standing Jab (Close)
- Hadou Burst
- Shoryu Cannon
Specials
Some of his specials have better usage defensively rather than offensively, especially the non-EX's.
Dragon Smash
Dragon Smash doesn't have the same amount of priority or range as the other Shoto DPs but it's good against dive-kicks and moves that leaves limbs extended. The attacks will either get stuffed out or will trade in Sean's favor and send them flying. It's also anti-Demon Flip too. Since it can go high in the air, if it hits and he lands and recovers while they're still in mid-air, a Hadou Burst will hit them before they hit the ground.
Sean can do the Anti-Parry OS too (like the other Shotos) where they late-cancel into the DP on parry. This requires meter however, since only EX Dragon Smash has invincibility but its another option to consider. This situation is probably the only one where he cannot be grabbed out of it like he usually can.
EX Dragon Smash can bail Sean out of projectile traps like Ken's Crouching Forward x EX Hadou if parried.
EX Dragon Smash, if done late enough, can stuff out other invincible DPs.
Sean Tackle
Tackle is the one special he has that is effective both offensively and defensively. As such, this is his most important one. Defensively, its his strongest punish (that knocks down) from a distance if he doesn't have meter after a parry against attacks that stay out too long. Normals such as Chun's Standing Fierce or Ryu/Akuma Towards Strong can be punished with Tackle. Against normals with even longer recovery (like Sweeps), EX tackle can be used. If Sean's cancel-able Anti-air gets parried, cancel into the Tackle and it will be safe.
Zenten
Defensively, Zenten can be effective when in close proximity of the opponent. It can save you from throw/zone/kunai set-ups and like the tackle, if you cancel into it off a parried Anti-air, its safe. Parry then roll up close has a good chance of avoiding what the opponent puts out on the screen, even supers.
Tornado
If a cancel-able normal as an AA gets parried, cancel into the Short Tornado (LK) to send them flying. If near the corner, a Hadou Burst will hit them before they fall.
Basketball
Beginner Basketball Combos
In addition to adding stun once thrown, the basketball taunt can be used in combos to apply a fair amount of mix-up on the opponent (granted they aren't teching every knockdown except for SA2 or SA3):
- BB - Sean Tackle (All variations)
- BB - Wheel Kick (All variations)
- BB - Target Combo
- BB - Headbutt
Etc.
Intermediate Basketball Combos
Another thing to note about the basketball is that once you throw it, you gain stance value for the next few moves you do. This allows you to land combos such as Cl.HK - Dragon Smash which you wouldn't be able to normally. After you throw the basketball, there's a small window of time that allows you to put a Jab (easy to time) or Short (harder to time) before the ball actually hits then after that you can do many things.
- LP/LK - BB - Target Combo (4 hits) - SA3 (Makoto only)
- LP/LK - BB - Dragon Smash (All versions) - SA1 or 2
- LP/LK - BB - HP/HK - EX Tornado
- LP/LK - BB - MP/HP/HK - SA1/2/3
- Cl.HK - BB - Dragon Smash - SA1 or 2
- Fr.MP - BB - SA3
Advanced Basketball Combos
After throwing a basketball, you can hit with a Cl.MP/HK into another Cl.MP/HP/HK but this is really difficult and only possible on the shorter characters (Yun, Yang, Chun, etc.) or the taller characters get caught crouching. In this situation, the basketball acts as a "hit-stun extender" and allows you to connect things you normally wouldn't be able to. For confirmation that you have hit the Cl.MP correctly, the ball will hit and fall to the side instead of just falling on the top of the head. These do the same amount of damage as a jump-in combo and as such its just as hard to do.
- Cl.MP - BB - Target Combo - SA3 (Makoto only)
- Cl.MP - BB - Cl.HP - EX Tornado or SA1/2/3
- Cl.MP - BB - Cl.HK - SA1/2/3
- Fr.MP - BB - Fr.MP
NOT ALL COMBOS POSSIBLE LISTED
Overview
The cons that you have to consider while playing Sean are:
- No reliable reversal without meter (depends on the match-up)
- Over-reliance on parries
- Specials are very unsafe on block/hit and leaves him crouching on block
- Some of his normals start-up/recover slower and/or do less damage than the other shotos
- Has a bit of trouble building meter (there are ways around this)
- Less advantage on Jump-ins than the other shotos
However, the pros to playing him are:
- He's the most defensive shoto
- High stun potential
- Above average damage output
- Has the most powerful cancel-able normal in the game that isn't Gill's (Close Roundhouse)
- Has the strongest normal throw of the shotos (Ken's Knee-bash is the strongest but you can mash to reduce the damage significantly unlike Sean's)
- Great mobility (standard dash + Sean Tackle)
- Has more cancel frames on some of his normals than the other shotos
- Good Kara Throw
- Can potentially deal over 50% damage and with all 3 supers
- Has 2 of the most out-prioritizing/invincible supers in the game (Shoryu Cannon and Hyper Tornado) and all 3 are viable
- Great Mix-ups (especially with the taunt)
- Decent selection of Anti-airs
- Certain attacks get safer against smaller characters (may apply to everyone else as well)
- Normals are more active than the other shotos generally
Differences in Sean's normals vs. the other Shotos:
| Normal | Comments |
| Close Strong | Starts up in 4 frames (like Ken's) with 13 frames of recovery (the slowest) but has the most cancel frames and does the most stun of the shotos (9 pts.) |
| Close Fierce | Starts up in 5 frames (a frame slower than Ryu's and Akuma's but a frame faster than Ken's) and recovers in 20 like Ryu/Akuma's. Ties with Akuma for most cancel frames on this particular normal. |
| Far Strong | Starts up in 5 frames (same as Akuma/Ryu and is a frame faster than Ken's) but has the most recovery at 13 frames and no cancellation. |
| Crouching Forward | Starts up in 7 frames (like Ryu's) and recovers in 17 (like Ken's). Has the most cancel frames of all the Shoto's Crouch Forwards. |
| Crouching Roundhouse | Starts up in 8 frames (the slowest) and recovers in 30 (like Ken's) |
| Crouching Fierce | Starts up in 7 frames and recovers in 22 (like Ken's). |
Basics
- Utilize the Cl.MP-HK Target Combo as it is truly safe on block and hit. It does 1 less point of damage shy of Cl.Roundhouse. It even serves nicely as a nice AA as well.
- Cl.HK is your friend.
- Don't be scared to wake up with a EX Dragon Smash (seldom)
- Use St.MK to out-prioritize lows when in the correct range
Super Art Selection
- Hadou Burst
- More Hit-Confirms
- Situational Closer/Punisher
- Anti-Air
- More than 50% damage potential
- 50% stun potential
- Consumes 1-hit projectiles
- Small Meter Length
- Fast travel speed
- Easy to Parry
- Slightly long recovery
- Game-plan: 4 Close Roundhouses can fill up a bar of Hadou Burst and you have 5 EX's in total. From a long range, the go-to confirm is Cr.MK. Up close, you have either Cl.HK, Cl.HP, Cr.MP or Cr.LK x2. After a parry, you have 3 choices: Cr.MP, Cr.MK and Cr.HP. Cr.HP is good against moves with long reach that recovers late and does great damage, Cr.MK is the standard, and Cr.MP is faster than the other 2 but you need to be within range. This super, like his others can link of a UOH. Parry -> Hadou Burst vs. certain "Parry-Bait Supers" near the corner can potentially deal near 50% if you have 2 stocks. To properly Anti-Air into this super, it has to be done off Cl.MP since that button doesn't reset the juggle counter like the other cancel-able ones. Be looking for opportunities to punish with this move, especially against crouching attacks. Sean can do a lot of "dash-back" set-ups with this super. The max damage output of this super can rival the max damage output of Ken's SA3.
- Shoryu Cannon
- More than 50% damage potential
- Corner Juggles
- True Anti-Air
- Situational Closer/Punisher
- High invincibility
- Grants a free Mix-up afterwards
- Goes through projectiles
- Bad recovery and range
- Game-plan: 6 Close Roundhouses fill up a bar and its 4 EX's in total. Cr.LK x 2 or Cl.HK are the go-to confirms for this super. It's main usage is as an Anti-air but still has to be timed correctly or many of the hits will whiff. Cl.HK x SA2 is the primary Anti-air, and should be one of the few things to go for when a super is stocked. This can punish moves that leave opponents too close on block (overheads, Sean tornado, Remy CBK's, etc). The strongest combo with a single stock of Shoryu Cannon (with the corner Cl.HK reset) is equal to Chun's strongest combo with Hoyokusen. With 2, it can deal from 70% to 80%. Beats a lot of Parry-baits with the exception of itself, Hyper Tornado, and a few other supers. It can link off of a UOH but only as a Meaty up close. It doesn't have much range so the main goal should be to always be close to the opponent. S.C. has 10 frames of invincibility and some of the highest priority in the game with the exception of a few supers.
- Sean has 3 moves that can link into Shoryu Cannon: Standing Short, Standing Forward, and the Overhead Wheel Kicks. Standing Forward has to be done on Meaty up close (against Crouchers) for it to work. Same with the Wheel Kick but its a Yun/Yang only link.
- Hyper Tornado
- True Punisher
- More than 50% damage potential
- Higher invincibility
- Travels through projectiles
- Great range
- 50% stun potential
- Large Meter
- Bad capacity for EX
- Game-plan: The Punisher. Meter building is very important for this super. It takes 7 Close Roundhouses to fill it and you only get 3 EX's. It starts up in 3 frames (like Ken's Shippu) which allows him to punish a lot of things in the game once stocked. H.T has the same confirms as Hadou Burst (minus the ones with Dragon Smash) and can almost cover the same amount of range. The go-to confirms are Cr.LK x 2, Cr.MK/MP, and Cl.HK. Hyper Tornado has very high invincibility, even higher than Shoryu Cannon which means it blows up Parry-Baits more reliably (except against itself and a few supers), and it can travel through projectiles too but the projectile has to be far from the opponent or you risk wasting the super. Like his other supers, H.T can be linked off of a UOH too. The maximum damage potential of this super is just shy of Hugo's Gigas by a few pixels.
Kara-Techniques
Sean's main Kara grab buttons are Close Roundhouse, Far Fierce and Towards Fierce. The difference between Far and Towards is very minimal so it doesn't matter which one you use. Walking forward as you Kara will make it more effective too. The input is just F.HP ~ LP+LK. If you want to Kara into the Back throw just press back right as you do the input. If you mistime it, it'll move Sean out of range and it'll whiff.
List of moves after which you can Kara-throw:
| Normal | Comments |
| Crouch LK | (You will not be able to Kara-throw opponent within first 4 frames after Cr.LK. It's 6 frames on Chun-Li, Ryu, and Q) |
| Standing LK | (You will not be able to Kara-throw opponent within first 5 frames after Cr.LK. It's 7 frames on Chun-Li, Ryu, and Q) |
| Close MP | (You will not be able to Kara-throw opponent within first 4 frames after Cl.MP. It's 6 frames on Chun-Li, Ryu, and Q) |
| Standing LP | (You will not be able to Kara-throw opponent within first 6 frames after Cl.LP. It's 8 frames on Chun-Li, Ryu, and Q) |
| Crouch LP | (You will not be able to Kara-throw opponent within first 6 frames after Cl.LP. It's 8 frames on Chun-Li, Ryu, and Q) |
As for Close Roundhouse, it doesn't give any extra throw range but, its very useful for SGGKs:
Sean's option select Parry (SGGK) - Tap Forward/Down and press Attack button + Throw (for Kara Throw). When done at close range one of 2 things can happen:
- If opponent attacked - Sean will parry the attack and hit with the move you used for Kara Throw. If you used cl.HK then Sean will hit with cl.HK, if you used cl.HP then Sean will hit with cl.HP etc.
- If opponent was blocking or tried to parry - he will get thrown.
Kara Throw Set-ups:
- Cr.LK, St.LP (whiff), Kara-throw [vs. crouching]
- Walk in, step back, Kara-throw
- Cross-up j.MK, Cr.LK, Kara-throw
- St.Mk, step forward, Kara-throw
- Cr.LK, step back 2 frames, Kara-throw
- LK Wheel Kick, walk forward, Kara-throw
- T + HK, wait, take a step, Kara-throw
- Shoryu Cannon, Cl.HK Reset, wait, Kara-throw
- Walk in, back dash, walk in, Kara-throw
- Taunt, wait and see if they blocked or parried, walk forward, Kara-throw
- Jump MK/HK, back dash, walk in, Kara-throw
etc.
Kara UOH:
You can Kara into UOH using Far Fierce (since its easier) then again, walking forward and using Towards Fierce is more effective. The range on it is pretty good, and it gives Sean another option that can go into super (if stocked) from near half-screen. This is the maximum distance of where the UOH can hit from:
Zoning
- Far HP will be the main tool you use to maintain your zone. Use it to smack away any dive kicks/jump-ins that come your way.
- All 3 variations of MP (cr/cl/fr) are very useful to keep the position as well, being that they're all safe on block and hit.
- Don't be afraid to stick a cr.MK or st/cr.LP on the screen from time to time (just be careful doing so)
- You have a vast assortment of AAs so choose your AA's wisely
EX Tornado
EX Tornado can be combo'd depending on the attack and the opponent's current state:
| Akuma, 12 | |||
| Attack/Opponent | Stand HK | Stand HP | Crouch MP |
|---|---|---|---|
| Stand Close | Yes | Yes | Yes |
| Stand Far | No | Yes | No |
| Crouch Close | Yes | Yes | No |
| Crouch Far | No | No | No |
| Hugo | |||
| Attack/Opponent | Stand HK | Stand HP | Crouch MP |
|---|---|---|---|
| Stand Close | Yes | Yes | Yes |
| Stand Far | No | Yes | No |
| Crouch Close | Yes | Yes | Yes |
| Crouch Far | No | Yes | No |
| Urien, Remy, Dudley | |||
| Attack/Opponent | Stand HK | Stand HP | Crouch MP |
|---|---|---|---|
| Stand Close | Yes | Yes | Yes |
| Stand Far | Yes | Yes | No |
| Crouch Close | Yes | Yes | Yes |
| Crouch Far | No | No | No |
| Oro | |||
| Attack/Opponent | Stand HK | Stand HP | Crouch MP |
|---|---|---|---|
| Stand Close | No | Yes | Yes |
| Stand Far | No | No | No |
| Crouch Close | No | Yes | Yes |
| Crouch Far | No | No | No |
| Ibuki, Q, Necro, Alex | |||
| Attack/Opponent | Stand HK | Stand HP | Crouch MP |
|---|---|---|---|
| Stand Close | Yes | Yes | Yes |
| Stand Far | No | Yes | No |
| Crouch Close | Yes | Yes | Yes |
| Crouch Far | No | No | No |
| Chun Li | |||
| Attack/Opponent | Stand HK | Stand HP | Crouch MP |
|---|---|---|---|
| Stand Close | Yes | Yes | Yes |
| Stand Far | No | Yes | No |
| Crouch Close | No | No | No |
| Crouch Far | No | No | No |
| Yang, Yun, Makoto, Ryu, Ken | |||
| Attack/Opponent | Stand HK | Stand HP | Crouch MP |
|---|---|---|---|
| Stand Close | Yes | Yes | Yes |
| Stand Far | No | Yes | No |
| Crouch Close | No | Yes | No |
| Crouch Far | No | No | No |
| Sean | |||
| Attack/Opponent | Stand HK | Stand HP | Crouch MP |
|---|---|---|---|
| Stand Close | Yes | Yes | Yes |
| Stand Far | Yes | Yes | No |
| Crouch Close | No | Yes | No |
| Crouch Far | No | No | No |
| Elena | |||
| Attack/Opponent | Stand HK | Stand HP | Crouch MP |
|---|---|---|---|
| Stand Close | Yes | Yes | Yes |
| Stand Far | Yes | Yes | No |
| Crouch Close | No | Yes | Yes |
| Crouch Far | No | No | No |
Taken from japan's atwiki
Match-ups
Note: Sean has a disadvantage in almost every match-up. That means its up to you, the player, to overcome this with your skill. Luckily, Sean is one of the few characters that all 3 supers are viable. What this means is, is that generally you can choose between 2 of the 3 supers against some characters and some characters all 3 of them can be used.
- Vs. Necro
The Bad: His corner pressure is just as deadly as Dudley's, so you need to not let him corner you. That means no backing up, just advance forward only until you can corner him. Problem is, he can zone you out just like Remy can with his pokes (ground and air) so that means you need to parry to get inside on him. Learn how to parry his vortex punch, electric charge, and the overhead. It'll help you out quite a bit. He can also build up quite a bit of stun especially with SA3. His grabs have good range so watch out for that.
The Good: He has a big hitbox, a really big one. Keep this in mind, things that normally wouldn't connect manage to actually hit him while he's still airborne. The Double DP works especially on his normal jump so keep that in mind if he tries to neutral jump in the corner. Say if you're just shy of 2 stocks of SA2, the best substitute would be to end the Shoryu Cannon with a EX Dragon Smash at the end (Corner) since it'll hit with both hits of the EX. Confirming into SA2 x2 in the corner vs. Necro is about 90-93 damage (more than half) if you can time it right.
Note: It's possible to hit him with Cl.HK x EX Dragon Smash, but this is due to the "doubling over" animation he has. If he does the "sway away" animation after getting hit w/Cl.HK then it'll whiff completely.
Recommended super: Either Hadou Burst to punish him consistently or Shoryu Cannon for the power and corner juggles.
- Vs. Remy
This match-up depends on how well you can read/parry your opponent and how quick you are to react/reversal. Its not easy for Sean to get in close to do damage when all Remy has to do is just zone you out. To get in close on a Remy player that knows what they're doing, you need to parry at least 1-4 times before trying anything (sometimes you might not have to) and this applies to jump-ins as well. From far range, you only have 4 options: EX Tackle/Wheel and SA1/3. EX tackle and Wheel have to be done psychically because they can be parried or met with retaliation by a Flash Kick, Dive Kick or LOV and SA1/3 have to be done on reaction which is not easy either. Be on the lookout for lows since alot of Remys like to test the waters with a few lows until they get the chance to cancel into the F.K. Sean Tackle will help you a bit here; It goes underneath the high LOV. Remy's will often throw them and then quickly dash up the screen to get to you to apply mix-up. So as soon as you see them start dashing, full Sean tackle underneath the L.O.V coming and grab them for approaching. You can do to some extent, the same with Zenten so get creative with this concept. Always keep one thing in mind, Remy's very susceptible to stun and Sean has the ability to stun him within 5 consecutive heavy hits so when you get the chance to pressure/trap him, do so and do it quickly.
Note: Remy can be hit with all 3 hits of the EX Wheel. When this happens its 0 on hit.
Recommended Super: All 3 can be used. H.B or H.T against Remy's who zone with LOVs/SA1 or S.C vs. "In your face" Remy's or if you're confident getting past the zone.
- Vs. Sean:
As a Sean player you should already know most of the "Sean-nanigans" and what he is capable of. There are some who use his taunt as a main source of mix-up and that's not always a good thing to do. There are only 2 moves that can get to the other side of the screen in an instant and those are EX Tackle and EX Wheel Kick. As such, bait these 2 moves out. Be quick to react to any sudden Sean Tackles (empty or full) lest you want to be thrown.
Recommended Super: All 3 can be used. Take your pick.
- Vs. Ryu:
Not a bad match-up overall. Be aware of the whiffed LK Tatsu since that's a common move to buffer parry into due to its deceptive recovery so just grab for free. The Fireball can be a big problem though if you aren't looking out for it. The Ryu player may throw it after a throw tech or crouch tech and might even throw multiple if they think you aren't paying attention. Watch out for the Kara-grab since Ryu has a good one. Resist jumping especially when you're trapped in the corner or you might get caught by the Donkey Kick as an AA. You have 6 ways of getting around his hadokens (Parry, Neutral jump, Zenten, Sean tackle, SA3 and Wheel Kicks). Once you let the opponent know this, they'll think twice before throwing them.
Recommended Super: All 3 supers are good. SA3 works nicely against Denjin Ryu/Zone Ryu, SA2 works against ShinSho, and SA1 can be used against him as the standard.
- Vs. Ken:
From experience, I find this match-up to be the worst of the 3 top tiers for Sean. Ken far outclasses Sean in nearly everything shoto-esque. At least against Yun and Chun some moves/options get safer but against Ken, Sean is at his weakest. Shippu can punish about 85-90% of what Sean can do which means mistakes are not to be made. Ken, on wake-up can do either: low, high, overhead or grab. 3 of these options lead back to SA3. Guessing on wake-up against Ken (especially in the corner) can lead to a big amount of damage which means please be careful. Learn to red parry his MP-HP chain, his B-MK overhead, Cr.LK x2, and Shippu. In this match-up, you're going to have to 'out-Ken' Ken. At far range, the only 3 buttons you have to worry about is Standing and Crouching Roundhouse and Crouching Forward. Crouching Forward gets beat out by Sean's Standing Forward; You can punish Crouching Roundhouse with Cr.MK x Hadou Burst if you have the meter and Standing Roundhouse can be punished by raw Hadou Burst. I've seen alot of kens use EX Tatsu as a means to escape the corner. Sean can actually punish this 1 of 3 ways: EX Tackle, Hadou Burst or HP/EX Dragon Smash. HP/EX Dragon Smash goes up very high in the air and if it hits him, it will put him right back in the corner. If he manages to get over your head, EX Tackle or Hadou Burst and he'll land smack dab right on it. Parrying is important in this match-up, especially since you need to punish him whenever you can.
Recommended Super: All 3 are good against Ken.
- Vs. Oro
Oro's objective in SA3 will be about filling his Super Art Gauge commonly zoning with pokes and turtling, or using his Chicken Wing mix ups, Zenten can be risky but useful against the first special one, try to dodge his projectiles jump in or with Overhead Turn Kick, you must overhead him a lot with Sean Pachiki because its a short height character and can be surprised even its a standing block, also you have better footsies than him, so having a crouching vs crouching battle its the main key to win, anyway after he gets the Tengu Stones best way to pass time is to poking with your standing normals, Sean Tackle with Jab its your only useful approach tool and also a good Chicken Wing evasion.
Recommended: Shoryu Cannon or Hadou Burst.
- Vs. Ibuki
She is a hit and run match up, its a decent matchup because she lacks stamina and you have better footsies, if she is throwing Kunais do a Overhead Turn Kick for recovery punishment at far distance , and Dragon Smash for near and corner one specially, standing Forward can be a good punishment tool for her Neck Breaker fail, Jab Sean Tackle approach can be a good answer for her Tsuji Goe and Kasumi Gake, frustate her offensive strategy with good poking its your objective, Overhead Turn Kick can be useful against Kazekiri first frames,or you can wait and punish it with a Tackle.
Basketball can be an offensive tool agasint Kunais but you'll be too vulnerable if fails.
Recommended: Shoryu Cannon and Hyper Tornado (for low stamina characters)
- Vs. Twelve:
In my opinion, this is probably the only match-up where Sean is at an advantage. Twelve's health is just as bad as Akuma's and like Sean, a good amount of his special moves leave him crouching on block/parry. Twelve rules the air with his IAD's and wall bounces but Sean has many Anti-airs which means that you have half the match won if you can keep him out of the sky. Learn to parry his Cr.HP and Cr.HK as those moves are among the most risky in his arsenal to use. Towards Roundhouse is the perfect counter-poke to Twelve's Standing Roundhouse. Parrying is still important in this match-up, don't jump in the air without buffering first. Twelve is one of the very few who can be hit by Cl.HK x Dragon Smash (though its not as consistent).
Recommended Super: All are damaging but, the benefits of SA2 by far out-weigh the other 2. Its the only super that can punish his EX Dive on block (that leaves him crouching), and it's one of Sean's Anti-airs. All it takes to win is just 2 parries with Cl.HK x Shoryu Cannon to punish him.
- Vs. Yang:
He is a rushdown character but with low stamina, also had decent footsies like you, try to punish his fails with SA2 and throw him if he activates SA3
- Vs. Alex:
- Vs. Hugo:
This is a difficult match up to over come. While its already difficult getting in close on some characters, getting in close proximity of Hugo can be very dangerous. You have a weapon in your arsenal that will help you out and that is Zenten. Since it's throw invincible you'll avoid the imminent danger of a SPD especially if you can telegraph it. Don't let him trap you in the corner either. Remember when I said the EX Tornado is 99% safe? Well, against SA1 Hugo it isn't. In fact, he can flat out punish you for doing it even though you normally can escape 1 frame supers. Gigas is the 1% exception so be very aware of this when playing. Also another thing, take heed to how many ways Gigas Breaker can be buffered (cross-up jump, clap, cr.LK, whiffed back-breaker, super jump, etc.). Don't jump too much or better yet, jump unpredictably as to bait out an occasional back-breaker whiff and punish as you see fit. As long as you play the full screen, getting your damage in and getting back out safely, you won't have too much trouble with this match-up.
As for the recommended super: SA1 or SA2. Shoryu Cannon is good for damage and if you're confident in getting in and getting out. It will also save you in case Gigas comes out slower than it should. Hadou Burst is good to consistently punish Hugo whenever he makes a mistake.
- Vs. Akuma:
I find from experience that Sean Vs. Akuma matches go by very quickly and can go really either way. Sean can end Akuma just as quick (maybe even quicker) as he can end Sean. This is a match-up that, again, relies on how well you can parry AND deal with the resets. Red parrying Akuma's tatsu is a MUST. In this matchup, the tackle is of much benefit. If you can read when the Akuma player backs off to zone you out from the air from full screen, an EX tackle (or any tackle really depending on dist.) will go underneath the air projectile and tackle him for 26 stun (nearly half) or if you choose not to tackle, you can go for something else that's a bit more, damaging. If you can properly set up Sean's stun from his basketballs, this will make his moves even more dangerous Vs. Akuma. Be ready to heavily punish any and every LK Tatsu on block. Dealing with Demon Flip mix-ups are tough, but if you can see the DF coming, either jump back HK/Cr.Fierce/or LP Dragon Smash him out of the air and SA1 him (if you picked it) before he hits the ground. Like Remy, all it takes is 5 fierces to stun so when you're going on the offensive keep this in mind.
Note: Akuma's hitbox is a bit bigger than the other shotos, meaning he can be hit with all 3 hits of the EX Wheel. On block or hit when this happens, its 0.
Recommended Super: All 3 are highly damaging to Akuma's health. Any one will do in this MU.
- Vs. Urien:
Spectre General went into heavy detail on this match up in the Shoryuken Forums:
- Vs. Yun
- Vs. Chun-Li
- Vs. Dudley
