m (→Super Moves) |
|||
| (25 intermediate revisions by 2 users not shown) | |||
| Line 3: | Line 3: | ||
}} | }} | ||
=Moves List= | |||
====Ground Normals==== | ====Ground Normals==== | ||
| Line 26: | Line 26: | ||
{{STDiagramCell| }} Hit Stun/Counter Hit|{{STDiagramCell| -7/-2}} | {{STDiagramCell| }} Hit Stun/Counter Hit|{{STDiagramCell| -7/-2}} | ||
|} | |} | ||
This is one of Zangief's most important moves. You can cancel this into Kara SPD or Suplex and take advantage of the maximum range. Nice Anti-Air. | |||
*<b>Standing Strong:</b> | *<b>Standing Strong:</b> | ||
{{STDiagramHeader}} | {{STDiagramHeader}} | ||
| Line 173: | Line 173: | ||
{{STDiagramCell| }} Hit Stun/Counter Hit|{{STDiagramCell| -8/-4}} | {{STDiagramCell| }} Hit Stun/Counter Hit|{{STDiagramCell| -8/-4}} | ||
|} | |} | ||
Very good Anti-Air | |||
*<b>Crouching Fierce:</b> | *<b>Crouching Fierce:</b> | ||
{{STDiagramHeader}} | {{STDiagramHeader}} | ||
| Line 536: | Line 536: | ||
[[image:left.gif|b]]/[[image:right.gif|f]]+[[image:2p.png|PP]] | [[image:left.gif|b]]/[[image:right.gif|f]]+[[image:2p.png|PP]] | ||
{{STDiagramHeader}} | {{STDiagramHeader}} | ||
{{STDiagramCell| Damage}} |{{STDiagramCell| 20}} |{{STDiagramImageCell| | {{STDiagramCell| Damage}} |{{STDiagramCell| 20}} |{{STDiagramImageCell| 5 | sfa3_zangief_p+kthrow.png}} | ||
|- | |- | ||
{{STDiagramCell| Stun}} |{{STDiagramCell| 0}} | {{STDiagramCell| Stun}} |{{STDiagramCell| 0}} | ||
|- | |||
{{STDiagramCell| Range}} |{{STDiagramCell| 36}} | |||
|- | |- | ||
{{STDiagramCell| Meter Gain}} |{{STDiagramCell| (A)1(XV)3}} | {{STDiagramCell| Meter Gain}} |{{STDiagramCell| (A)1(XV)3}} | ||
| Line 549: | Line 551: | ||
[[image:left.gif|b]]/[[image:right.gif|f]]+[[image:2k.png|KK]] | [[image:left.gif|b]]/[[image:right.gif|f]]+[[image:2k.png|KK]] | ||
{{STDiagramHeader}} | {{STDiagramHeader}} | ||
{{STDiagramCell| Damage}} |{{STDiagramCell| 8+2x (0~9)+4*1}} } |{{STDiagramImageCell| | {{STDiagramCell| Damage}} |{{STDiagramCell| 8+2x (0~9)+4*1}} } |{{STDiagramImageCell| 5 | sfa3_zangief_p+kthrow.png}} | ||
|- | |- | ||
{{STDiagramCell| Stun}} |{{STDiagramCell| 0}} | {{STDiagramCell| Stun}} |{{STDiagramCell| 0}} | ||
|- | |||
{{STDiagramCell| Range}} |{{STDiagramCell| 36}} | |||
|- | |- | ||
{{STDiagramCell| Meter on whiff/hit}} |{{STDiagramCell| (A)1(XV)3/(A)1(XV)3}} | {{STDiagramCell| Meter on whiff/hit}} |{{STDiagramCell| (A)1(XV)3/(A)1(XV)3}} | ||
| Line 562: | Line 566: | ||
[[image:Downleft.gif|dl]]/[[image:Downright.gif|dr]]+[[image:2p.png|PP]] | [[image:Downleft.gif|dl]]/[[image:Downright.gif|dr]]+[[image:2p.png|PP]] | ||
{{STDiagramHeader}} | {{STDiagramHeader}} | ||
{{STDiagramCell| Damage}} |{{STDiagramCell| 8+2x (2~11)*1}} |{{STDiagramImageCell| | {{STDiagramCell| Damage}} |{{STDiagramCell| 8+2x (2~11)*1}} |{{STDiagramImageCell| 5 | sfa3_zangief_stomachclaw.png}} | ||
|- | |- | ||
{{STDiagramCell| Stun}} |{{STDiagramCell| 0}} | {{STDiagramCell| Stun}} |{{STDiagramCell| 0}} | ||
|- | |||
{{STDiagramCell| Range}} |{{STDiagramCell| 36}} | |||
|- | |- | ||
{{STDiagramCell| Meter on whiff/hit}} |{{STDiagramCell| (A)1(XV)3/(A)1(XV)3}} | {{STDiagramCell| Meter on whiff/hit}} |{{STDiagramCell| (A)1(XV)3/(A)1(XV)3}} | ||
| Line 575: | Line 581: | ||
[[image:Downleft.gif|dl]]/[[image:Downright.gif|dr]]+[[image:2k.png|KK]] | [[image:Downleft.gif|dl]]/[[image:Downright.gif|dr]]+[[image:2k.png|KK]] | ||
{{STDiagramHeader}} | {{STDiagramHeader}} | ||
{{STDiagramCell| Damage}} |{{STDiagramCell| 20}} |{{STDiagramImageCell| | {{STDiagramCell| Damage}} |{{STDiagramCell| 20}} |{{STDiagramImageCell| 5 | sfa3_zangief_p+kthrow.png}} | ||
|- | |- | ||
{{STDiagramCell| Stun}} |{{STDiagramCell| 0}} | {{STDiagramCell| Stun}} |{{STDiagramCell| 0}} | ||
|- | |||
{{STDiagramCell| Range}} |{{STDiagramCell| 36}} | |||
|- | |- | ||
{{STDiagramCell| Meter on whiff/hit}} |{{STDiagramCell| (A)1(XV)3/(A)1(XV)3}} | {{STDiagramCell| Meter on whiff/hit}} |{{STDiagramCell| (A)1(XV)3/(A)1(XV)3}} | ||
| Line 589: | Line 597: | ||
*[[Glossary A-H#Air_Throw|Air Throw]] | *[[Glossary A-H#Air_Throw|Air Throw]] | ||
{{STDiagramHeader}} | {{STDiagramHeader}} | ||
{{STDiagramCell| Damage}} |{{STDiagramCell| 20}} |{{STDiagramImageCell| | {{STDiagramCell| Damage}} |{{STDiagramCell| 20}} |{{STDiagramImageCell| 5 | sfa3_zangief_pairthrow.png}} | ||
|- | |- | ||
{{STDiagramCell| Stun}} |{{STDiagramCell| 0}} | {{STDiagramCell| Stun}} |{{STDiagramCell| 0}} | ||
|- | |||
{{STDiagramCell| Range}} |{{STDiagramCell| 21}} | |||
|- | |- | ||
{{STDiagramCell| Meter on whiff/hit}} |{{STDiagramCell| 1/(A)1(XV)3}} | {{STDiagramCell| Meter on whiff/hit}} |{{STDiagramCell| 1/(A)1(XV)3}} | ||
| Line 635: | Line 645: | ||
|- | |- | ||
{{STDiagramCell| Frame Count}} |{{STDiagramCell| 1}} | {{STDiagramCell| Frame Count}} |{{STDiagramCell| 1}} | ||
|- | |||
{{STDiagramCellColSpan| 2 | Range}} |{{STDiagramCell| 68}} |{{STDiagramCell| 84}} | |||
|} | |} | ||
| Line 648: | Line 660: | ||
|- | |- | ||
{{STDiagramCell| Frame Count}} |{{STDiagramCell| 1}} | {{STDiagramCell| Frame Count}} |{{STDiagramCell| 1}} | ||
|- | |||
{{STDiagramCellColSpan| 2 | Range}} |{{STDiagramCell| 64}} |{{STDiagramCell| 80}} | |||
|} | |} | ||
| Line 661: | Line 675: | ||
|- | |- | ||
{{STDiagramCell| Frame Count}} |{{STDiagramCell| 1}} | {{STDiagramCell| Frame Count}} |{{STDiagramCell| 1}} | ||
|- | |||
{{STDiagramCellColSpan| 2 | Range}} |{{STDiagramCell| 60}} |{{STDiagramCell| 76}} | |||
|} | |} | ||
| Line 688: | Line 704: | ||
|- | |- | ||
{{STDiagramCellColSpan| 2 | Frame Count}} |{{STDiagramCellColSpan| 3 | 1}} | {{STDiagramCellColSpan| 2 | Frame Count}} |{{STDiagramCellColSpan| 3 | 1}} | ||
|- | |||
{{STDiagramCellColSpan| 5 | Range}} |{{STDiagramCell| 56}} |{{STDiagramCell| 64}} | |||
|} | |} | ||
| Line 696: | Line 714: | ||
*<b>Short Version:</b> | *<b>Short Version:</b> | ||
{{STDiagramHeader}} | {{STDiagramHeader}} | ||
{{STDiagramCell| Damage}} |{{STDiagramCell| 19}} |{{STDiagramImageCell| | {{STDiagramCell| Damage}} |{{STDiagramCell| 19}} |{{STDiagramImageCell| 4 | sfa3_zangief_runningbeargrabstartup.gif}} |{{STDiagramImageCell| 4 | sfa3_zangief_runningbeargrabshort1.png}} |{{STDiagramImageCell| 4 | sfa3_zangief_runningbeargrabshort2.png}} |{{STDiagramImageCell| 4 | sfa3_zangief_runningbeargrabshort3.png}} |{{STDiagramImageCell| 4 | sfa3_zangief_runningbeargrabshort4.png}} | ||
|- | |- | ||
{{STDiagramCell| Stun}} |{{STDiagramCell| 0}} | {{STDiagramCell| Stun}} |{{STDiagramCell| 0}} | ||
|- | |||
{{STDiagramCell| Range}} |{{STDiagramCell| 48}} | |||
|- | |- | ||
{{STDiagramCell| Meter Gain}} |{{STDiagramCell| (A)9(XV)13}} | {{STDiagramCell| Meter Gain}} |{{STDiagramCell| (A)9(XV)13}} | ||
| Line 707: | Line 727: | ||
*<b>Forward Version:</b> | *<b>Forward Version:</b> | ||
{{STDiagramHeader}} | {{STDiagramHeader}} | ||
{{STDiagramCell| Damage}} |{{STDiagramCell| 20}} |{{STDiagramImageCell| | {{STDiagramCell| Damage}} |{{STDiagramCell| 20}} |{{STDiagramImageCell| 4 | sfa3_zangief_runningbeargrabstartup.gif}} |{{STDiagramImageCell| 4 | sfa3_zangief_runningbeargrabforward1.png}} |{{STDiagramImageCell| 4 | sfa3_zangief_runningbeargrabforward2.png}} |{{STDiagramImageCell| 4 | sfa3_zangief_runningbeargrabforward3.png}} |{{STDiagramImageCell| 4 | sfa3_zangief_runningbeargrabforward4.png}} | ||
|- | |- | ||
{{STDiagramCell| Stun}} |{{STDiagramCell| 0}} | {{STDiagramCell| Stun}} |{{STDiagramCell| 0}} | ||
|- | |||
{{STDiagramCell| Range}} |{{STDiagramCell| 48}} | |||
|- | |- | ||
{{STDiagramCell| Meter Gain}} |{{STDiagramCell| (A)9(XV)13}} | {{STDiagramCell| Meter Gain}} |{{STDiagramCell| (A)9(XV)13}} | ||
| Line 718: | Line 740: | ||
*<b>Roundhouse Version:</b> | *<b>Roundhouse Version:</b> | ||
{{STDiagramHeader}} | {{STDiagramHeader}} | ||
{{STDiagramCell| Damage}} |{{STDiagramCell| 21}} |{{STDiagramImageCell| | {{STDiagramCell| Damage}} |{{STDiagramCell| 21}} |{{STDiagramImageCell| 4 | sfa3_zangief_runningbeargrabstartup.gif}} |{{STDiagramImageCell| 4 | sfa3_zangief_runningbeargrabroundhouse1.png}} |{{STDiagramImageCell| 4 | sfa3_zangief_runningbeargrabroundhouse2.png}} |{{STDiagramImageCell| 4 | sfa3_zangief_runningbeargrabroundhouse3.png}} |{{STDiagramImageCell| 4 | sfa3_zangief_runningbeargrabroundhouse4.png}} | ||
|- | |- | ||
{{STDiagramCell| Stun}} |{{STDiagramCell| 0}} | {{STDiagramCell| Stun}} |{{STDiagramCell| 0}} | ||
|- | |||
{{STDiagramCell| Range}} |{{STDiagramCell| 48}} | |||
|- | |- | ||
{{STDiagramCell| Meter Gain}} |{{STDiagramCell| (A)9(XV)13}} | {{STDiagramCell| Meter Gain}} |{{STDiagramCell| (A)9(XV)13}} | ||
| Line 740: | Line 764: | ||
'''Double Lariat [[File:X-ISM.png|f]][[File:A-ISM.png|f]][[File:V-ISM.png|f]]:''' | '''Double Lariat [[File:X-ISM.png|f]][[File:A-ISM.png|f]][[File:V-ISM.png|f]]:''' | ||
[[File:3p.png]] | [[File:3p.png]] | ||
*<b>Startup:</b> | |||
{{STDiagramHeader}} | |||
{{STDiagramCell|}} |{{STDiagramImageCell| 1 | Sfa3_zangief_plariat1a.png}} |{{STDiagramImageCell| 1 | Sfa3_zangief_plariat1.png}} | |||
|- | |||
{{STDiagramCell| Frame Count}} |{{STDiagramCellColSpan| 3 | 4 }} | |||
|} | |||
*<b> | *<b>Active:</b> | ||
{{STDiagramHeader}} | {{STDiagramHeader}} | ||
{{STDiagramCellNull| 1}} |{{STDiagramCellMinWidth| Initial}} |{{STDiagramCellMinWidth| Follow up | {{STDiagramCellNull| 1}} |{{STDiagramCellMinWidth| Initial}} |{{STDiagramCellMinWidth| Follow up}} |{{STDiagramImageCell| 4 | Sfa3_zangief_plariat2.png}} |{{STDiagramImageCell| 4 | Sfa3_zangief_plariat0.png}} |{{STDiagramImageCell| 4 | Sfa3_zangief_plariat3.png}} |{{STDiagramImageCell| 4 | Sfa3_zangief_plariat4.png}} |{{STDiagramImageCell| 4 | Sfa3_zangief_plariat5.png}} | ||
|- | |- | ||
{{STDiagramCell| Damage}} |{{STDiagramCell| 14}} |{{STDiagramCell| 12+10+8+6x6}} | {{STDiagramCell| Damage}} |{{STDiagramCell| 14}} |{{STDiagramCell| 12+10+8+6x6}} | ||
| Line 751: | Line 781: | ||
{{STDiagramCell| Meter Gain}} |{{STDiagramCellColSpan| 2 | 4(A)6(XV))}} | {{STDiagramCell| Meter Gain}} |{{STDiagramCellColSpan| 2 | 4(A)6(XV))}} | ||
|- | |- | ||
{{STDiagramCellColSpan| 3 | Frame Count | {{STDiagramCellColSpan| 3 | Frame Count}} |{{STDiagramCellColSpan| 1 | 2 }} |{{STDiagramCellColSpan| 2 | 4 }} |{{STDiagramCellColSpan| 1 | 4 }} |{{STDiagramCellColSpan| 1 | 3 }} | ||
|} | |} | ||
| Line 818: | Line 848: | ||
*<b>Active:</b> | *<b>Active:</b> | ||
{{STDiagramHeader}} | {{STDiagramHeader}} | ||
{{STDiagramCellNull| 2}} |{{STDiagramCellMinWidth| Jab}} |{{STDiagramCellMinWidth| Strong}} |{{STDiagramCellMinWidth| Fierce}} |{{STDiagramCellColSpan| | {{STDiagramCellNull| 2}} |{{STDiagramCellMinWidth| Jab}} |{{STDiagramCellMinWidth| Strong}} |{{STDiagramCellMinWidth| Fierce}} |{{STDiagramCellColSpan| 1 | Jab}} |{{STDiagramCellColSpan| 1 | Strong}} |{{STDiagramCellColSpan| 1 | Fierce}} | ||
|- | |- | ||
{{STDiagramCellColSpan| 2 | Damage}} |{{STDiagramCell| 16}} |{{STDiagramCell| 17}} |{{STDiagramCell| 18 | {{STDiagramCellColSpan| 2 | Damage}} |{{STDiagramCell| 16}} |{{STDiagramCell| 17}} |{{STDiagramCell| 18}} |{{STDiagramImageCellBorderRight| 5 | Sfa3_zangief_bfjab2.png}} |{{STDiagramImageCellBorderRight| 5 | Sfa3_zangief_bfstrong2.png}} |{{STDiagramImageCell| 5 | Sfa3_zangief_bffierce2.png}} | ||
|- | |- | ||
{{STDiagramCellColSpan| 2 | Stun}} |{{STDiagramCellColSpan| 3 | 0}} | {{STDiagramCellColSpan| 2 | Stun}} |{{STDiagramCellColSpan| 3 | 0}} | ||
| Line 830: | Line 860: | ||
{{STDiagramCellColSpan| 2 | Hit Stun/Counter Hit}} |{{STDiagramCellColSpan| 1 | -4}} |{{STDiagramCellColSpan| 1 | -5}} |{{STDiagramCellColSpan| 1 | -8}} | {{STDiagramCellColSpan| 2 | Hit Stun/Counter Hit}} |{{STDiagramCellColSpan| 1 | -4}} |{{STDiagramCellColSpan| 1 | -5}} |{{STDiagramCellColSpan| 1 | -8}} | ||
|- | |- | ||
{{STDiagramCellColSpan| 5 | Frame Count}} |{{STDiagramCellColSpan| | {{STDiagramCellColSpan| 5 | Frame Count}} |{{STDiagramCellColSpan| 1 | 8}} |{{STDiagramCellColSpan| 1 | 10}} |{{STDiagramCellColSpan| 1 | 12}} | ||
|} | |} | ||
| Line 846: | Line 876: | ||
====Super Moves==== | ====Super Moves==== | ||
'''Final Atomic Buster [ X | '''Final Atomic Buster [[File:X-ISM.png|f]][[File:A-ISM.png|f]]:''' | ||
[[File:360.png]][[File:360.png]]+[[File:P.png]] | [[File:360.png]][[File:360.png]]+[[File:P.png]] | ||
*<b>Startup+Active</b> | *<b>Startup+Active:</b> | ||
{{STDiagramHeader}} | {{STDiagramHeader}} | ||
{{STDiagramCellNull| 1}} |{{STDiagramCellMinWidth| Lvl 1}} |{{STDiagramCellMinWidth| Lvl 2}} |{{STDiagramCellMinWidth| Lvl 3}} |{{STDiagramImageCell| | {{STDiagramCellNull| 1}} |{{STDiagramCellMinWidth| Lvl 1}} |{{STDiagramCellMinWidth| Lvl 2}} |{{STDiagramCellMinWidth| Lvl 3}} |{{STDiagramImageCell| 5 | Sfa3_zangief_fab1.png}} |{{STDiagramImageCell| 5 | Sfa3_zangief_fab2.png}} | ||
|- | |- | ||
{{STDiagramCell| Damage}} |{{STDiagramCell| 12+24}} |{{STDiagramCell| 12x2+30}} |{{STDiagramCell| 13+12+13+31}} | {{STDiagramCell| Damage}} |{{STDiagramCell| 12+24}} |{{STDiagramCell| 12x2+30}} |{{STDiagramCell| 13+12+13+31}} | ||
|- | |- | ||
{{STDiagramCell| Stun}} |{{STDiagramCellColSpan| 3 | 0}} | {{STDiagramCell| Stun}} |{{STDiagramCellColSpan| 3 | 0}} | ||
|- | |||
{{STDiagramCell| Range}} |{{STDiagramCellColSpan| 3 | 76}} | |||
|- | |- | ||
{{STDiagramCell| Invincibility}} |{{STDiagramCellColSpan| 3 | 5}} | {{STDiagramCell| Invincibility}} |{{STDiagramCellColSpan| 3 | 5}} | ||
| Line 862: | Line 894: | ||
|} | |} | ||
*<b>Whiff</b> | *<b>Whiff:</b> | ||
{{STDiagramHeader}} | {{STDiagramHeader}} | ||
{{STDiagramCell|}} |{{STDiagramImageCell| 1 | Sfa3_zangief_grabrecovery1.png}} |{{STDiagramImageCell| 1 | Sfa3_zangief_grabrecovery2.png}} |{{STDiagramImageCell| 1 | Sfa3_zangief_grabrecovery3.png}} |{{STDiagramImageCell| 1 | Sfa3_zangief_grabrecovery4.png}} |{{STDiagramImageCell| 1 | Sfa3_zangief_grabrecovery5.png}} |{{STDiagramImageCell| 1 | Sfa3_zangief_grabrecovery6.png}} | {{STDiagramCell|}} |{{STDiagramImageCell| 1 | Sfa3_zangief_grabrecovery1.png}} |{{STDiagramImageCell| 1 | Sfa3_zangief_grabrecovery2.png}} |{{STDiagramImageCell| 1 | Sfa3_zangief_grabrecovery3.png}} |{{STDiagramImageCell| 1 | Sfa3_zangief_grabrecovery4.png}} |{{STDiagramImageCell| 1 | Sfa3_zangief_grabrecovery5.png}} |{{STDiagramImageCell| 1 | Sfa3_zangief_grabrecovery6.png}} | ||
| Line 869: | Line 901: | ||
|} | |} | ||
'''Aerial Russian Slam [ A ]:''' | '''Aerial Russian Slam [[File:A-ISM.png|f]]:''' | ||
[[File:Qcf.png]][[File:Qcf.png]]+ [[File:K.png]] | [[File:Qcf.png]][[File:Qcf.png]]+ [[File:K.png]] | ||
{{STDiagramHeader}} | {{STDiagramHeader}} | ||
{{STDiagramCellNull| 1}} |{{STDiagramCellMinWidth| Lvl 1}} |{{STDiagramCellMinWidth| Lvl 2}} |{{STDiagramCellMinWidth| Lvl 3}} |{{STDiagramImageCell| | {{STDiagramCellNull| 1}} |{{STDiagramCellMinWidth| Lvl 1}} |{{STDiagramCellMinWidth| Lvl 2}} |{{STDiagramCellMinWidth| Lvl 3}} |{{STDiagramImageCell| 5 | Sfa3_zangief_ars0.png}} |{{STDiagramImageCell| 5 | Sfa3_zangief_ars1.png}} |{{STDiagramImageCell| 5 | Sfa3_zangief_ars2.png}} |{{STDiagramImageCell| 5 | Sfa3_zangief_ars3.png}} |{{STDiagramImageCell| 5 | Sfa3_zangief_ars4.png}} |{{STDiagramImageCell| 5 | Sfa3_zangief_ars5.png}} | ||
|- | |- | ||
{{STDiagramCell| Damage}} |{{STDiagramCell| 30}} |{{STDiagramCell| 45}} |{{STDiagramCell| 60}} | {{STDiagramCell| Damage}} |{{STDiagramCell| 30}} |{{STDiagramCell| 45}} |{{STDiagramCell| 60}} | ||
|- | |- | ||
{{STDiagramCell| Stun}} |{{STDiagramCellColSpan| 3 | 0}} | {{STDiagramCell| Stun}} |{{STDiagramCellColSpan| 3 | 0}} | ||
|- | |||
{{STDiagramCell| Range}} |{{STDiagramCellColSpan| 3 | 32}} | |||
|- | |- | ||
{{STDiagramCell| Invincibility}} |{{STDiagramCellColSpan| 3 | 10}} | {{STDiagramCell| Invincibility}} |{{STDiagramCellColSpan| 3 | 10}} | ||
| Line 884: | Line 918: | ||
|} | |} | ||
==Which Ism? | =Miscellaneous= | ||
*<b>Idle, Crouching, Airborne:</b> | |||
{{STDiagramHeader}} | |||
{{STDiagramImageCell| | Sfa3_zangief_idle.png }} |{{STDiagramImageCell| | Sfa3_zangief_crouching.png }} |{{STDiagramImageCell| | Sfa3_zangief_jump.png }} | |||
|} | |||
Zangief's airborne hurtbox is smaller than his sprite and is shifted more to the back and doesn't extend all the way down to his feet making an empty jumping gief very deceptive. He can bait anti airs vs less experienced players easily because of this. | |||
=The Basics= | |||
=Which Ism?= | |||
V-ISM. Great customs solve a lot of his issues. | V-ISM. Great customs solve a lot of his issues. | ||
<b>A-ISM:</b> | |||
Solid overall. Great supers. Lack of counter activate means you can no longer abuse your amazing jump-ins against V-ISM characters with strong anti-air customs. | Solid overall. Great supers. Lack of counter activate means you can no longer abuse your amazing jump-ins against V-ISM characters with strong anti-air customs. | ||
<b>V-ISM:</b> | |||
One of the strongest characters in the game. Customs shore up many of his weaknesses and give him a reliable way to punish projectiles from almost anywhere. Comboing into command grabs during activations makes closing rounds insanely easy. | One of the strongest characters in the game. Customs shore up many of his weaknesses and give him a reliable way to punish projectiles from almost anywhere. Comboing into command grabs during activations makes closing rounds insanely easy. | ||
<b>X-ISM:</b> | |||
Against non-V-ISM characters, is maybe the most brain dead character in the game. Splash damage becomes obscene and many characters who have difficulty anti-airing him can be overwhelmed by constantly trading or being hit by his aerials. Gains a decent CPS1 chain and an altered green hand motion. Dies for free to V-ISM unfortunately and lack of air block makes his bad match-ups even worse. | Against non-V-ISM characters, is maybe the most brain dead character in the game. Splash damage becomes obscene and many characters who have difficulty anti-airing him can be overwhelmed by constantly trading or being hit by his aerials. Gains a decent CPS1 chain and an altered green hand motion. Dies for free to V-ISM unfortunately and lack of air block makes his bad match-ups even worse. | ||
| Line 900: | Line 950: | ||
= Combos = | = Combos = | ||
*<b>Basic Combos:</b> | |||
<youtube>394EmyF2-AA</youtube> | <youtube>394EmyF2-AA</youtube> | ||
*<b>V-ISM Combos:</b> | |||
<youtube>IMx1LlkDaUo</youtube> | <youtube>IMx1LlkDaUo</youtube> | ||
| Line 909: | Line 959: | ||
= Match-ups = | = Match-ups = | ||
'''vs. V-Ryu''' | |||
5-5 | |||
'''vs. V-Ken''' | |||
4-6 | |||
'''vs. V-Chun-li''' | |||
4-6 | |||
'''vs. V-Sagat''' | |||
4-6 | |||
'''vs. V-Adon''' | |||
4-6 | |||
'''vs. V-Birdie''' | |||
8-2 | |||
'''vs A-Guy''' | |||
4-6 | |||
'''vs. V-Sodom''' | |||
2-8 | |||
'''vs. V-Charlie''' | |||
4-6 | |||
'''vs. V-Rose''' | |||
5.5-5 | |||
'''vs. A-Dictator''' | |||
5-5 | |||
'''vs. V-Akuma''' | |||
4-6 | |||
'''vs. V-Dan''' | |||
7-3 | |||
'''vs. V-Dhalsim''' | |||
3-7 | |||
'''vs. V-Zangief (Mirror Match)''' | |||
5-5 | |||
'''vs. A-Gen''' | |||
4-6 | |||
'''vs. V-Rolento''' | |||
8-2 | |||
'''vs. V-Sakura''' | |||
4-6 | |||
'''vs. A-Blanka''' | |||
6-4 | |||
'''vs. V-E.Honda''' | |||
7-3 | |||
'''vs. V-Claw''' | |||
4-6 | |||
'''vs. V-Cammy''' | |||
4-6 | |||
'''vs. V-Cody''' | |||
4-6 | |||
'''vs. A-R.Mika''' | |||
7-3 | |||
'''vs. V-Karin''' | |||
2-8 | |||
'''vs. A-Boxer''' | |||
9-1 | |||
'''vs. V-Juli''' | |||
7-3 | |||
'''vs. Juni-V''' | |||
6-4 | |||
Dhalsim, Sakura, Sodom, and Karin can be very tough match-ups | Dhalsim, Sakura, Sodom, and Karin can be very tough match-ups | ||
| Line 980: | Line 1,143: | ||
=== Latin America === | === Latin America === | ||
GanFleim! (V-Zangief) | |||
Shadowonlive (V-Zangief) | Shadowonlive (V-Zangief) | ||
| Line 988: | Line 1,149: | ||
Scott (V-Zangief) | Scott (V-Zangief) | ||
Comboman/Zangief X-ISM/MACRO_DETECTOR (V-Zangief) | |||
Zangief X-ISM (V-Zangief) | |||
{{Navbox-SFA3}} | {{Navbox-SFA3}} | ||
Latest revision as of 17:50, 22 May 2025
Introduction
Fearing the dangerous power of Shadaloo, the president of Russia sends out their national hero Zangief to combat the threat. Along the way, he befriended rivals like E. Honda and R. Mika who aided him on his journey.
| Pros | Cons |
|
|
Color Options
| X-Ism | A-Ism | V-Ism | |||
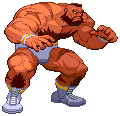 |
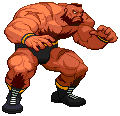 |
 |
 |
 |
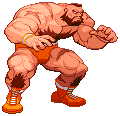
|
| Punch | Kick | Punch | Kick | Punch | Kick |
Moves List
Ground Normals
- Standing Jab:
| Damage | 5,7 | 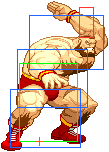 |
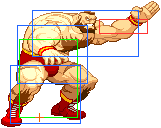
|
| Stun | 0 | ||
| Chain Cancel | No | ||
| Special Cancel | Yes | ||
| Super Cancel | Yes | ||
| Meter on whiff/hit | 0/0 | ||
| Frame Count | 4/4/18 | ||
| Block Stun | -8 | ||
| Hit Stun/Counter Hit | -7/-2 |
This is one of Zangief's most important moves. You can cancel this into Kara SPD or Suplex and take advantage of the maximum range. Nice Anti-Air.
- Standing Strong:
| Damage | 15 | 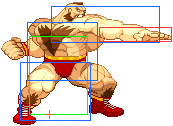
|
| Stun | 0 | |
| Chain Cancel | No | |
| Special Cancel | No | |
| Super Cancel | No | |
| Meter on whiff/hit | 1/0 | |
| Frame Count | 10/3/22 | |
| Block Stun | -6 | |
| Hit Stun/Counter Hit | -5/-1 |
- Standing Fierce:
| Damage | 21 | 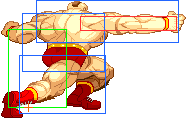
|
| Stun | 0 | |
| Chain Cancel | No | |
| Special Cancel | No | |
| Super Cancel | No | |
| Meter on whiff/hit | 1/0 | |
| Frame Count | 13/2/15 | |
| Block Stun | -4 | |
| Hit Stun/Counter Hit | -3/launch |
- Standing Short:
| Damage | 8 | 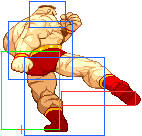
|
| Stun | 0 | |
| Chain Cancel | No | |
| Special Cancel | Yes | |
| Super Cancel | Yes | |
| Meter on whiff/hit | 0/0 | |
| Frame Count | 7/5/15 | |
| Block Stun | -6 | |
| Hit Stun/Counter Hit | -5/0 |
- standing Forward:
| Damage | 14 | 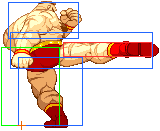
|
| Stun | 0 | |
| Chain Cancel | No | |
| Special Cancel | No | |
| Super Cancel | No | |
| Meter on whiff/hit | 1/0 | |
| Frame Count | 7/6/20 | |
| Block Stun | -7 | |
| Hit Stun/Counter Hit | -6/-2 |
- Standing Roundhouse:
| Damage | 20,19 | 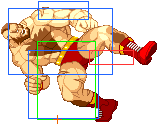 |
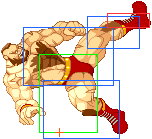
|
| Stun | 0 | ||
| Chain Cancel | No | ||
| Special Cancel | No | ||
| Super Cancel | No | ||
| Meter on whiff/hit | 1/0 | ||
| Frame Count | 12/4/33 | ||
| Block Stun | -14 | ||
| Hit Stun/Counter Hit | -13/launch |
- Crouching Jab:
| Damage | 5 | 
|
| Stun | 0 | |
| Chain Cancel | Yes | |
| Special Cancel | Yes | |
| Super Cancel | Yes | |
| Meter on whiff/hit | 0/0 | |
| Frame Count | 4/4/16 | |
| Block Stun | -6 | |
| Hit Stun/Counter Hit | -5/0 |
- Crouching Strong:
| Damage | 14 | 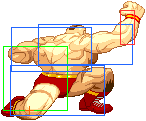
|
| Stun | 0 | |
| Chain Cancel | No | |
| Special Cancel | No | |
| Super Cancel | No | |
| Meter on whiff/hit | 1/0 | |
| Frame Count | 8/1/27 | |
| Block Stun | -9 | |
| Hit Stun/Counter Hit | -8/-4 |
Very good Anti-Air
- Crouching Fierce:
| Damage | 18 | 
|
| Stun | 0 | |
| Chain Cancel | No | |
| Special Cancel | No | |
| Super Cancel | No | |
| Meter on whiff/hit | 1/0 | |
| Frame Count | 12/5/23 | |
| Block Stun | -5 | |
| Hit Stun/Counter Hit | -4/launch |
- Crouching Short:
| Damage | 7 | 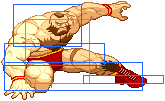
|
| Stun | 0 | |
| Chain Cancel | No | |
| Special Cancel | Yes | |
| Super Cancel | Yes | |
| Meter on whiff/hit | 0/0 | |
| Frame Count | 5/4/16 | |
| Block Stun | -6 | |
| Hit Stun/Counter Hit | -5/0 |
- Crouching Forward:
| Damage | 13 | 
|
| Stun | 0 | |
| Chain Cancel | No | |
| Special Cancel | No | |
| Super Cancel | No | |
| Meter on whiff/hit | 1/0 | |
| Frame Count | 10/2/25 | |
| Block Stun | -8 | |
| Hit Stun/Counter Hit | -7/-3 |
- Crouching Roundhouse:
| Damage | 17 | 
|
| Stun | 0 | |
| Chain Cancel | No | |
| Special Cancel | No | |
| Super Cancel | No | |
| Meter on whiff/hit | 1/0 | |
| Frame Count | 10/4/33 | |
| Block Stun | -14 | |
| Hit Stun/Counter Hit | - |
Air Normals
- Neutral Jump Jab:
| Damage | 8 | 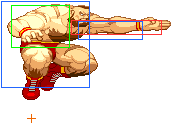
|
| Stun | 0 | |
| Meter on whiff/hit | 0/0 | |
| Frame Count | 4/8/9 |
- Diagonal Jump Jab:
| Damage | 8 | 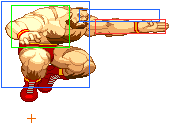
|
| Stun | 0 | |
| Meter on whiff/hit | 0/0 | |
| Frame Count | 5/8/9 |
- Neutral Jump Strong:
| Damage | 13 | 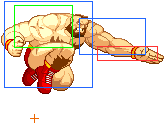
|
| Stun | 0 | |
| Meter on whiff/hit | 1/0 | |
| Frame Count | 6/4/17 |
- Diagonal Jump Strong:
| Damage | 13 | 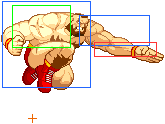
|
| Stun | 0 | |
| Meter on whiff/hit | 1/0 | |
| Frame Count | 6/4/17 |
- Neutral Jump Fierce:
| Damage | 19 | 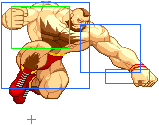
|
| Stun | 0 | |
| Meter on whiff/hit | 1/0 | |
| Frame Count | 10/4/11 |
- Diagonal Jump Fierce:
| Damage | 19 | 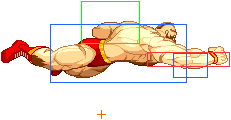
|
| Stun | 0 | |
| Meter on whiff/hit | 1/0 | |
| Frame Count | 10/6/7 |
- Neutral Jump Short:
| Damage | 9 | 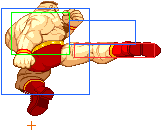
|
| Stun | 0 | |
| Meter on whiff/hit | 0/0 | |
| Frame Count | 6/10/12 |
- Diagonal Jump Short:
| Damage | 9 | 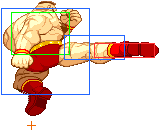
|
| Stun | 0 | |
| Meter on whiff/hit | 0/0 | |
| Frame Count | 6/8/16 |
- Neutral Jump Forward:
| Damage | 14 | 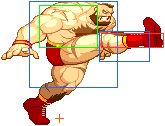
|
| Stun | 0 | |
| Meter on whiff/hit | 1/0 | |
| Frame Count | 8/8/11 |
- Diagonal Jump Forward:
| Damage | 14 | 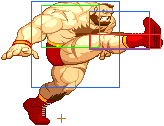
|
| Stun | 0 | |
| Meter on whiff/hit | 1/0 | |
| Frame Count | 8/6/11 |
- Neutral Jump Roundhouse:
| Damage | 19 | 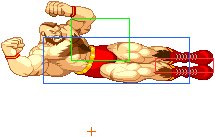
|
| Stun | 0 | |
| Meter on whiff/hit | 1/0 | |
| Frame Count | 10/4/24 |
- Diagonal Jump Roundhouse:
| Damage | 20 | 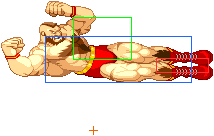
|
| Stun | 0 | |
| Meter on whiff/hit | 1/0 | |
| Frame Count | 10/4/24 |
Command Normals
| Damage | 14 | 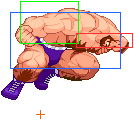
|
| Stun | 0 | |
| Chain Cancel | No | |
| Special Cancel | No | |
| Super Cancel | No | |
| Meter on whiff/hit | 1/0 | |
| Frame Count | 12/8/18 | |
| Block Stun | 0 | |
| Hit Stun/Counter Hit | ?/? |
| Damage | 17 | 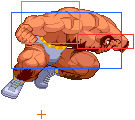
|
| Stun | 0 | |
| Chain Cancel | No | |
| Special Cancel | No | |
| Super Cancel | No | |
| Meter on whiff/hit | 1/0 | |
| Frame Count | 15/8/15 | |
| Block Stun | ? | |
| Hit Stun/Counter Hit | ?/? |
| Damage | 13 | 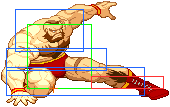
|
| Stun | 0 | |
| Chain Cancel | No | |
| Special Cancel | Yes | |
| Super Cancel | Yes | |
| Meter on whiff/hit | 1/0 | |
| Frame Count | 7/4/18 | |
| Block Stun | -3 | |
| Hit Stun/Counter Hit | -2/+2 |
| Damage | 17 | 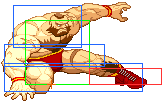
|
| Stun | 0 | |
| Chain Cancel | No | |
| Special Cancel | No | |
| Super Cancel | No | |
| Meter on whiff/hit | 1/0 | |
| Frame Count | 9/4/20 | |
| Block Stun | -1 | |
| Hit Stun/Counter Hit | - |
| Damage | 13 | 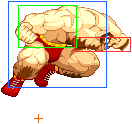
|
| Stun | 18 | |
| Meter on whiff/hit | 2/(A)3(XV)4 | |
| Frame Count | 4/6/* |
| Damage | 16 | 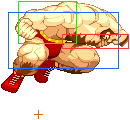
|
| Stun | 20 | |
| Meter on whiff/hit | 2/(A)6(XV)9 | |
| Frame Count | 6/4/* |
| Damage | 19 | 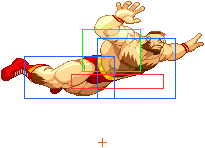
|
| Stun | 0 | |
| Meter on whiff/hit | 2/0 | |
| Frame Count | 7/28/* |
| Damage | 9 | 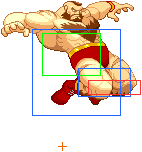
|
| Stun | 0 | |
| Meter on whiff/hit | 1/0 | |
| Frame Count | 7/32/* |
| Damage | 14 | 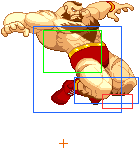
|
| Stun | 0 | |
| Meter on whiff/hit | 2/0 | |
| Frame Count | 7/32/* |
Throws
Back Drop:
| Damage | 20 | 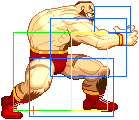
|
| Stun | 0 | |
| Range | 36 | |
| Meter Gain | (A)1(XV)3 | |
| Frame Count | 5/1/16 |
Kamitsuki:
| Damage | 8+2x (0~9)+4*1 } | 
|
| Stun | 0 | |
| Range | 36 | |
| Meter on whiff/hit | (A)1(XV)3/(A)1(XV)3 | |
| Frame Count | 5/1/16 |
Stomach Claw:
| Damage | 8+2x (2~11)*1 | 
|
| Stun | 0 | |
| Range | 36 | |
| Meter on whiff/hit | (A)1(XV)3/(A)1(XV)3 | |
| Frame Count | 5/1/18 |
Piledriver:
| Damage | 20 | 
|
| Stun | 0 | |
| Range | 36 | |
| Meter on whiff/hit | (A)1(XV)3/(A)1(XV)3 | |
| Frame Count | 5/1/16 |
Flying Piledriver:
| Damage | 20 | 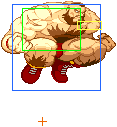
|
| Stun | 0 | |
| Range | 21 | |
| Meter on whiff/hit | 1/(A)1(XV)3 | |
| Frame Count | 1/1/1(before landing) |
Alpha Counter
During Blockstun ![]() +
+![]() +
+![]() of same strength
of same strength
- A-ISM
| Damage | 4 | 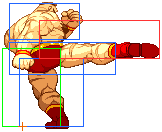
|
| Frame Count | 25/6/15 | |
| Invincibility | 0-25 |
- V-ISM
| Damage | 4 | 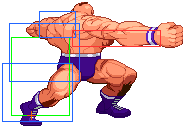
|
| Frame Count | 35/4/32 | |
| Invincibility | 0-35 |
Special Moves
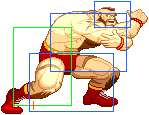
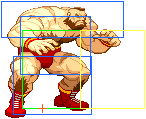
When executing this input, depending on how it's done the range varies, ending the 360 motion without canceling any prejump frames will give you more range while doing so gives you less.
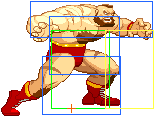
- Jab Version:
| PreJump | No PreJump | ||
| Damage | 20 | 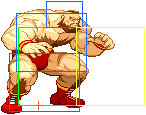 |
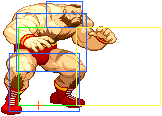
|
| Stun | 0 | ||
| Meter Gain | 15(A)22(XV) | ||
| Frame Count | 1 | ||
| Range | 68 | 84 | |
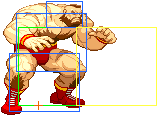
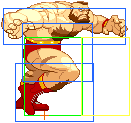
- Strong Version:
| PreJump | No PreJump | ||
| Damage | 24 | 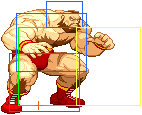 |
|
| Stun | 0 | ||
| Meter Gain | 15(A)22(XV) | ||
| Frame Count | 1 | ||
| Range | 64 | 80 | |
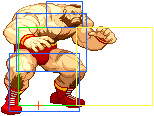
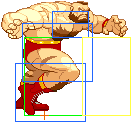
- Fierce Version:
| PreJump | No PreJump | ||
| Damage | 28 | 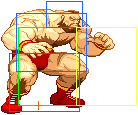 |
|
| Stun | 0 | ||
| Meter Gain | 15(A)22(XV) | ||
| Frame Count | 1 | ||
| Range | 60 | 76 | |
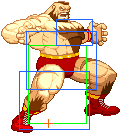
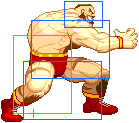
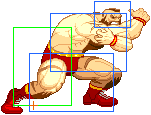
- Whiff:
| Meter Gain | 28 | 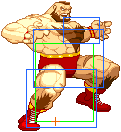 |
 |
 |
 |
 |

|
| Frame Count(Jab) | 48 | ||||||
| Frame Count(Strong) | 46 | ||||||
| Frame Count(Fierce) | 44 | ||||||
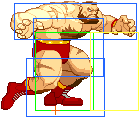
Same thing applies to this move as with the SPD.
| Short | Forward | Rh | PreJump | No PreJump | ||
| Damage | 10 + 16 | 13 + 16 | 16 x 2 | 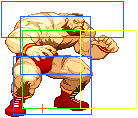 |
| |
| Stun | 0 | |||||
| Meter on whiff/hit | 3(A)4(XV)/15(A)22(XV) | |||||
| Frame Count | 1 | |||||
| Range | 56 | 64 | ||||
Flying Powerbomb a.k.a Running Bear Grab ![]()
![]()
![]() :
:
![]() +
+ ![]() (Far)
(Far)
- Startup+Active:
- Short Version:
| Damage | 19 |  |
 |
 |
 |
|
| Stun | 0 | |||||
| Range | 48 | |||||
| Meter Gain | (A)9(XV)13 | |||||
| Frame Count | 27 | 8 | ||||
- Forward Version:
| Damage | 20 |  |
 |
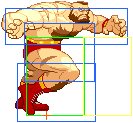 |
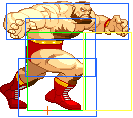 |
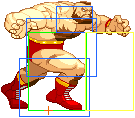
|
| Stun | 0 | |||||
| Range | 48 | |||||
| Meter Gain | (A)9(XV)13 | |||||
| Frame Count | 29 | 9 | ||||
- Roundhouse Version:
| Damage | 21 |  |
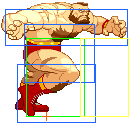 |
 |
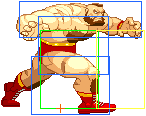 |
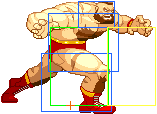
|
| Stun | 0 | |||||
| Range | 48 | |||||
| Meter Gain | (A)9(XV)13 | |||||
| Frame Count | 32 | 11 | ||||
- Whiff:
| Meter Gain | (A)3(XV)4 |  |
 |
 |
 |
 |

|
| Frame Count(Short) | 52 | ||||||
| Frame Count(Forward) | 54 | ||||||
| Frame Count(Roundhouse) | 56 | ||||||
- Startup:
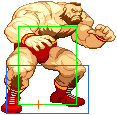 |
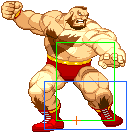
| ||
| Frame Count | 4 | ||
- Active:
| Initial | Follow up | 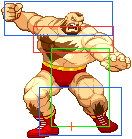 |
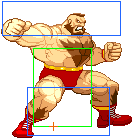 |
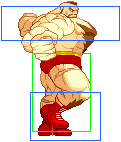 |
 |
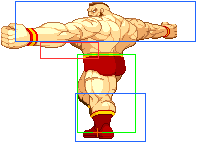
| |
| Damage | 14 | 12+10+8+6x6 | |||||
| Stun | 0 | ||||||
| Meter Gain | 4(A)6(XV)) | ||||||
| Frame Count | 2 | 4 | 4 | 3 | |||
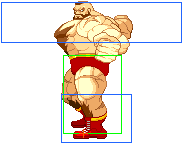 |
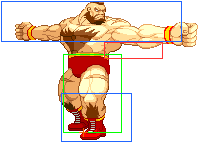 |
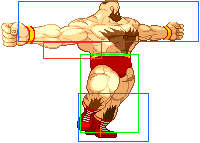 |
 |
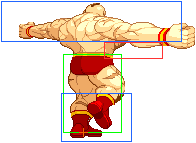 |

| |
| Frame Count | 3 | 3 | 4 | 4 | 4 | 4 |
 |
 |
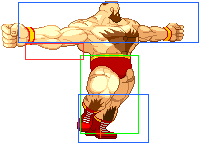 |
 |

| |
| Frame Count | 5 | 5 | 5 | 5 | 6 |
- Recovery:
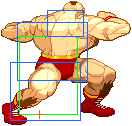 |
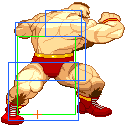 |
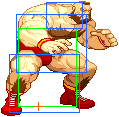
| |
| Frame Count | 12 | ||
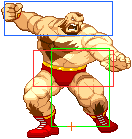
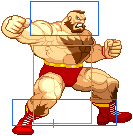
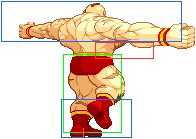
- Startup + Active:
| Initial | Follow up | 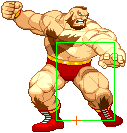 |
 |
 |
 |
 |
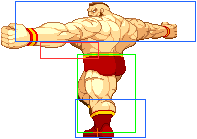
| |
| Damage | 12 | 10+8+6x3 | ||||||
| Stun | 0 | |||||||
| Meter Gain | 4(A)6(XV) | |||||||
| Frame Count | 4 | 2 | 4 | 4 | 3 | |||
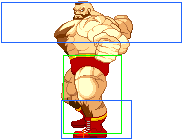 |
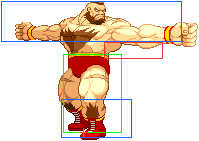 |
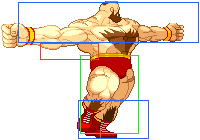 |
 |

| |
| Frame Count | 3 | 3 | 4 | 4 | 5 |
- Recovery:
 |
 |

| |
| Frame Count | 15 | ||
Banishing Flat ![]()
![]()
![]() :
:
![]() +
+ ![]() [A,V]
[A,V] +
![]() [X]
[X]
- Startup
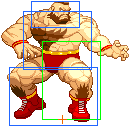 |
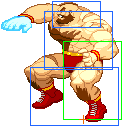 |
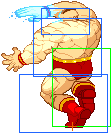
| |
| Frame Count (Jab) | 14 | ||
| Frame Count (Strong) | 15 | ||
| Frame Count (Fierce) | 16 | ||
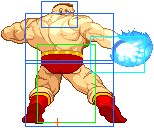
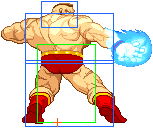
- Active:
| Jab | Strong | Fierce | Jab | Strong | Fierce | ||
| Damage | 16 | 17 | 18 |  |
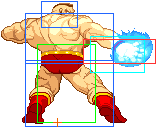 |
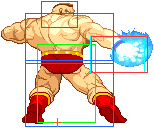
| |
| Stun | 0 | ||||||
| Meter Gain | 4(A)7(XV) | ||||||
| Block Stun | -5 | -6 | -9 | ||||
| Hit Stun/Counter Hit | -4 | -5 | -8 | ||||
| Frame Count | 8 | 10 | 12 | ||||
- Recovery:
 |
 |
 |
 |
| |
| Frame Count (Jab) | 20 | ||||
| Frame Count (Strong) | 19 | ||||
| Frame Count (Fierce) | 20 | ||||
Super Moves
- Startup+Active:
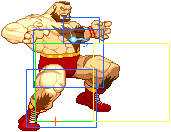
| Lvl 1 | Lvl 2 | Lvl 3 | 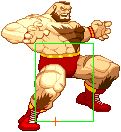 |
| |
| Damage | 12+24 | 12x2+30 | 13+12+13+31 | ||
| Stun | 0 | ||||
| Range | 76 | ||||
| Invincibility | 5 | ||||
| Frame Count | 5 | 1 | |||
- Whiff:
 |
 |
 |
 |
 |

| |
| Frame Count | 48 | |||||
| Lvl 1 | Lvl 2 | Lvl 3 |  |
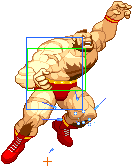 |
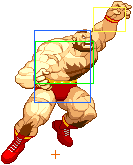 |
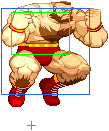 |
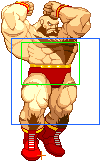 |

| ||
| Damage | 30 | 45 | 60 | |||||||
| Stun | 0 | |||||||||
| Range | 32 | |||||||||
| Invincibility | 10 | |||||||||
| Frame Count | 12 | 24 | 35 | |||||||
Miscellaneous
- Idle, Crouching, Airborne:
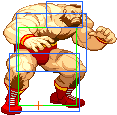 |
 |
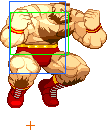
|
Zangief's airborne hurtbox is smaller than his sprite and is shifted more to the back and doesn't extend all the way down to his feet making an empty jumping gief very deceptive. He can bait anti airs vs less experienced players easily because of this.
The Basics
Which Ism?
V-ISM. Great customs solve a lot of his issues.
A-ISM:
Solid overall. Great supers. Lack of counter activate means you can no longer abuse your amazing jump-ins against V-ISM characters with strong anti-air customs.
V-ISM:
One of the strongest characters in the game. Customs shore up many of his weaknesses and give him a reliable way to punish projectiles from almost anywhere. Comboing into command grabs during activations makes closing rounds insanely easy.
X-ISM:
Against non-V-ISM characters, is maybe the most brain dead character in the game. Splash damage becomes obscene and many characters who have difficulty anti-airing him can be overwhelmed by constantly trading or being hit by his aerials. Gains a decent CPS1 chain and an altered green hand motion. Dies for free to V-ISM unfortunately and lack of air block makes his bad match-ups even worse.
Combos
- Basic Combos:
- V-ISM Combos:
Advanced Strategy
Match-ups
vs. V-Ryu
5-5
vs. V-Ken
4-6
vs. V-Chun-li
4-6
vs. V-Sagat
4-6
vs. V-Adon
4-6
vs. V-Birdie
8-2
vs A-Guy
4-6
vs. V-Sodom
2-8
vs. V-Charlie
4-6
vs. V-Rose
5.5-5
vs. A-Dictator
5-5
vs. V-Akuma
4-6
vs. V-Dan
7-3
vs. V-Dhalsim
3-7
vs. V-Zangief (Mirror Match)
5-5
vs. A-Gen
4-6
vs. V-Rolento
8-2
vs. V-Sakura
4-6
vs. A-Blanka
6-4
vs. V-E.Honda
7-3
vs. V-Claw
4-6
vs. V-Cammy
4-6
vs. V-Cody
4-6
vs. A-R.Mika
7-3
vs. V-Karin
2-8
vs. A-Boxer
9-1
vs. V-Juli
7-3
vs. Juni-V
6-4
Dhalsim, Sakura, Sodom, and Karin can be very tough match-ups
Cody's dodge can easily be exploited by forcing his dodge and cancelling into command grabs.
Notable Players
Japan
Cantona (V-Zangief)
Chappi (V-Zangief)
Destroyer (V-Zangief)
Hani (A-Zangief)
Ino (V-Zangief)
Inoshikacyou (X-Zangief)
Ishiyama Zangi (V-Zangief)
Kayaman (V-Zangief)
Kisaku (V/A-Zangief)
Kumagaya Zangief (V-Zangief)
Kuni (A-Zangief)
Kuzure (V-Zangief)
Makoto (A/V-Zangief)
Mukai (X-Zangief)
NEO3 (V-Zangief)
Odd Step (V-Zangief)
Ryusei (V-Zangief)
S (V/A-Zangief)
Savio (V-Zangief)
SIN (V-Zangief)
Takagi (V-Zangief)
Use (V-Zangief)
Zakki (V-Zangief)
ZM (V-Zangief)
North America
Kyokuji (V-Zangief)
OCxRiDaH (V-Zangief)
Vodka Gobalsky (A/V-Zangief)
Europe
Thompsoni (V-Zangief)
Latin America
GanFleim! (V-Zangief)
Shadowonlive (V-Zangief)
Scott (V-Zangief)
Comboman/Zangief X-ISM/MACRO_DETECTOR (V-Zangief)


