m (→Throws) |
|||
| (11 intermediate revisions by the same user not shown) | |||
| Line 418: | Line 418: | ||
[[image:left.gif|b]]/[[image:right.gif|f]]+[[image:2p.png|PP]] | [[image:left.gif|b]]/[[image:right.gif|f]]+[[image:2p.png|PP]] | ||
{{STDiagramHeader}} | {{STDiagramHeader}} | ||
{{STDiagramCell| Damage}} |{{STDiagramCell| 20}} |{{STDiagramImageCell| | {{STDiagramCell| Damage}} |{{STDiagramCell| 20}} |{{STDiagramImageCell| 5 | sfa3_Sagat_pk_throw.png }} | ||
|- | |- | ||
{{STDiagramCell| Stun}} |{{STDiagramCell| 0}} | {{STDiagramCell| Stun}} |{{STDiagramCell| 0}} | ||
|- | |||
{{STDiagramCell| Range}} |{{STDiagramCell| 32}} | |||
|- | |- | ||
{{STDiagramCell| Meter Gain}} |{{STDiagramCell| 1(A)3(XV)}} | {{STDiagramCell| Meter Gain}} |{{STDiagramCell| 1(A)3(XV)}} | ||
| Line 431: | Line 433: | ||
[[image:left.gif|b]]/[[image:right.gif|f]]+[[image:2k.png|PP]] | [[image:left.gif|b]]/[[image:right.gif|f]]+[[image:2k.png|PP]] | ||
{{STDiagramHeader}} | {{STDiagramHeader}} | ||
{{STDiagramCell| Damage}} |{{STDiagramCell| 8+4x(0~9)+4}} |{{STDiagramImageCell| | {{STDiagramCell| Damage}} |{{STDiagramCell| 8+4x(0~9)+4}} |{{STDiagramImageCell| 5 | sfa3_Sagat_pk_throw.png }} | ||
|- | |- | ||
{{STDiagramCell| Stun}} |{{STDiagramCell| 0}} | {{STDiagramCell| Stun}} |{{STDiagramCell| 0}} | ||
|- | |||
{{STDiagramCell| Range}} |{{STDiagramCell| 32}} | |||
|- | |- | ||
{{STDiagramCell| Meter Gain}} |{{STDiagramCell| 1(A)3(XV)}} | {{STDiagramCell| Meter Gain}} |{{STDiagramCell| 1(A)3(XV)}} | ||
| Line 445: | Line 449: | ||
*[[Glossary A-H#Air_Throw|Air Throw]] | *[[Glossary A-H#Air_Throw|Air Throw]] | ||
{{STDiagramHeader}} | {{STDiagramHeader}} | ||
{{STDiagramCell| Damage}} |{{STDiagramCell| 20}} |{{STDiagramImageCell| | {{STDiagramCell| Damage}} |{{STDiagramCell| 20}} |{{STDiagramImageCell| 5 | sfa3_Sagat_air_throw.png }} | ||
|- | |- | ||
{{STDiagramCell| Stun}} |{{STDiagramCell| 0}} | {{STDiagramCell| Stun}} |{{STDiagramCell| 0}} | ||
|- | |||
{{STDiagramCell| Range}} |{{STDiagramCell| 24}} | |||
|- | |- | ||
{{STDiagramCell| Meter Gain}} |{{STDiagramCell| 1(A)3(XV)}} | {{STDiagramCell| Meter Gain}} |{{STDiagramCell| 1(A)3(XV)}} | ||
| Line 476: | Line 482: | ||
====Special Moves==== | ====Special Moves==== | ||
'''Tiger Shot [ X | '''Tiger Shot [[File:X-ISM.png|f]][[File:A-ISM.png|f]][[File:V-ISM.png|f]]:''' | ||
[[File:Qcf.png]] + [[File:P.png]] | [[File:Qcf.png]] + [[File:P.png]] | ||
*<b>Startup</b> | *<b>Startup:</b> | ||
{{STDiagramHeader}} | {{STDiagramHeader}} | ||
{{STDiagramCell|}} |{{STDiagramImageCell| 1 | Sfa3_Sagat_TS_1.png }}|{{STDiagramImageCell| 1 | Sfa3_Sagat_TS_2.png }}|{{STDiagramImageCell| 1 | Sfa3_Sagat_TS_3.png }} | {{STDiagramCell|}} |{{STDiagramImageCell| 1 | Sfa3_Sagat_TS_1.png }}|{{STDiagramImageCell| 1 | Sfa3_Sagat_TS_2.png }}|{{STDiagramImageCell| 1 | Sfa3_Sagat_TS_3.png }} | ||
| Line 492: | Line 498: | ||
{{STDiagramCell| Stun}} |{{STDiagramCell| 4}} | {{STDiagramCell| Stun}} |{{STDiagramCell| 4}} | ||
|- | |- | ||
{{STDiagramCell| Meter on whiff | {{STDiagramCell| Meter on whiff}} |{{STDiagramCell| 1(A)3(XV)}} | ||
|- | |- | ||
{{STDiagramCell| Meter on hit}} |{{STDiagramCell| 3(A)4(XV)}} | {{STDiagramCell| Meter on hit}} |{{STDiagramCell| 3(A)4(XV)}} | ||
| Line 498: | Line 504: | ||
{{STDiagramCell| }} Block Stun|{{STDiagramCell| -12}} | {{STDiagramCell| }} Block Stun|{{STDiagramCell| -12}} | ||
|- | |- | ||
{{STDiagramCell| }} Hit Stun | {{STDiagramCell| }} Hit Stun|{{STDiagramCell| -11}} | ||
|- | |- | ||
{{STDiagramCellColSpan| 2 | Frame Count}} |{{STDiagramCellColSpan| 5 | 43}} | {{STDiagramCellColSpan| 2 | Frame Count}} |{{STDiagramCellColSpan| 5 | 43}} | ||
| Line 509: | Line 515: | ||
{{STDiagramCell| Stun}} |{{STDiagramCell| 4}} | {{STDiagramCell| Stun}} |{{STDiagramCell| 4}} | ||
|- | |- | ||
{{STDiagramCell| Meter on whiff | {{STDiagramCell| Meter on whiff}} |{{STDiagramCell| 1(A)3(XV)}} | ||
|- | |- | ||
{{STDiagramCell| Meter on hit}} |{{STDiagramCell| 3(A)4(XV)}} | {{STDiagramCell| Meter on hit}} |{{STDiagramCell| 3(A)4(XV)}} | ||
| Line 515: | Line 521: | ||
{{STDiagramCell| }} Block Stun|{{STDiagramCell| -13}} | {{STDiagramCell| }} Block Stun|{{STDiagramCell| -13}} | ||
|- | |- | ||
{{STDiagramCell| }} Hit Stun | {{STDiagramCell| }} Hit Stun|{{STDiagramCell| -12}} | ||
|- | |- | ||
{{STDiagramCellColSpan| 2 | Frame Count}} |{{STDiagramCellColSpan| 5 | 44}} | {{STDiagramCellColSpan| 2 | Frame Count}} |{{STDiagramCellColSpan| 5 | 44}} | ||
| Line 526: | Line 532: | ||
{{STDiagramCell| Stun}} |{{STDiagramCell| 4}} | {{STDiagramCell| Stun}} |{{STDiagramCell| 4}} | ||
|- | |- | ||
{{STDiagramCell| Meter on whiff | {{STDiagramCell| Meter on whiff}} |{{STDiagramCell| 1(A)3(XV)}} | ||
|- | |- | ||
{{STDiagramCell| Meter on hit}} |{{STDiagramCell| 3(A)4(XV)}} | {{STDiagramCell| Meter on hit}} |{{STDiagramCell| 3(A)4(XV)}} | ||
| Line 532: | Line 538: | ||
{{STDiagramCell| }} Block Stun|{{STDiagramCell| -14}} | {{STDiagramCell| }} Block Stun|{{STDiagramCell| -14}} | ||
|- | |- | ||
{{STDiagramCell| }} Hit Stun | {{STDiagramCell| }} Hit Stun|{{STDiagramCell| -13}} | ||
|- | |- | ||
{{STDiagramCellColSpan| 2 | Frame Count}} |{{STDiagramCellColSpan| 5 | 45}} | {{STDiagramCellColSpan| 2 | Frame Count}} |{{STDiagramCellColSpan| 5 | 45}} | ||
|} | |} | ||
'''Ground Tiger Shot [ X | '''Ground Tiger Shot [[File:X-ISM.png|f]][[File:A-ISM.png|f]][[File:V-ISM.png|f]]:''' | ||
[[File:Qcf.png]] + [[File:K.png]] | [[File:Qcf.png]] + [[File:K.png]] | ||
*<b>Startup</b> | *<b>Startup:</b> | ||
{{STDiagramHeader}} | {{STDiagramHeader}} | ||
{{STDiagramCell|}} |{{STDiagramImageCell| 1 | Sfa3_Sagat_GTS_1.png }}|{{STDiagramImageCell| 1 | Sfa3_Sagat_GTS_2.png }}|{{STDiagramImageCell| 1 | Sfa3_Sagat_GTS_3.png }} | {{STDiagramCell|}} |{{STDiagramImageCell| 1 | Sfa3_Sagat_GTS_1.png }}|{{STDiagramImageCell| 1 | Sfa3_Sagat_GTS_2.png }}|{{STDiagramImageCell| 1 | Sfa3_Sagat_GTS_3.png }} | ||
| Line 553: | Line 559: | ||
{{STDiagramCell| Stun}} |{{STDiagramCell| 4}} | {{STDiagramCell| Stun}} |{{STDiagramCell| 4}} | ||
|- | |- | ||
{{STDiagramCell| Meter on whiff | {{STDiagramCell| Meter on whiff}} |{{STDiagramCell| 1(A)3(XV)}} | ||
|- | |- | ||
{{STDiagramCell| Meter on hit}} |{{STDiagramCell| 3(A)4(XV)}} | {{STDiagramCell| Meter on hit}} |{{STDiagramCell| 3(A)4(XV)}} | ||
| Line 559: | Line 565: | ||
{{STDiagramCell| }} Block Stun|{{STDiagramCell| -13}} | {{STDiagramCell| }} Block Stun|{{STDiagramCell| -13}} | ||
|- | |- | ||
{{STDiagramCell| }} Hit Stun | {{STDiagramCell| }} Hit Stun|{{STDiagramCell| -12}} | ||
|- | |- | ||
{{STDiagramCellColSpan| 2 | Frame Count}} |{{STDiagramCellColSpan| 5 | 44}} | {{STDiagramCellColSpan| 2 | Frame Count}} |{{STDiagramCellColSpan| 5 | 44}} | ||
| Line 570: | Line 576: | ||
{{STDiagramCell| Stun}} |{{STDiagramCell| 4}} | {{STDiagramCell| Stun}} |{{STDiagramCell| 4}} | ||
|- | |- | ||
{{STDiagramCell| Meter on whiff | {{STDiagramCell| Meter on whiff}} |{{STDiagramCell| 1(A)3(XV)}} | ||
|- | |- | ||
{{STDiagramCell| Meter on hit}} |{{STDiagramCell| 3(A)4(XV)}} | {{STDiagramCell| Meter on hit}} |{{STDiagramCell| 3(A)4(XV)}} | ||
| Line 576: | Line 582: | ||
{{STDiagramCell| }} Block Stun|{{STDiagramCell| -14}} | {{STDiagramCell| }} Block Stun|{{STDiagramCell| -14}} | ||
|- | |- | ||
{{STDiagramCell| }} Hit Stun | {{STDiagramCell| }} Hit Stun|{{STDiagramCell| -13}} | ||
|- | |- | ||
{{STDiagramCellColSpan| 2 | Frame Count}} |{{STDiagramCellColSpan| 5 | 45}} | {{STDiagramCellColSpan| 2 | Frame Count}} |{{STDiagramCellColSpan| 5 | 45}} | ||
| Line 587: | Line 593: | ||
{{STDiagramCell| Stun}} |{{STDiagramCell| 4}} | {{STDiagramCell| Stun}} |{{STDiagramCell| 4}} | ||
|- | |- | ||
{{STDiagramCell| Meter on whiff | {{STDiagramCell| Meter on whiff}} |{{STDiagramCell| 1(A)3(XV)}} | ||
|- | |- | ||
{{STDiagramCell| Meter on hit}} |{{STDiagramCell| 3(A)4(XV)}} | {{STDiagramCell| Meter on hit}} |{{STDiagramCell| 3(A)4(XV)}} | ||
| Line 593: | Line 599: | ||
{{STDiagramCell| }} Block Stun|{{STDiagramCell| -15}} | {{STDiagramCell| }} Block Stun|{{STDiagramCell| -15}} | ||
|- | |- | ||
{{STDiagramCell| }} Hit Stun | {{STDiagramCell| }} Hit Stun|{{STDiagramCell| -14}} | ||
|- | |- | ||
{{STDiagramCellColSpan| 2 | Frame Count}} |{{STDiagramCellColSpan| 5 | 46}} | {{STDiagramCellColSpan| 2 | Frame Count}} |{{STDiagramCellColSpan| 5 | 46}} | ||
|} | |} | ||
'''Tiger Blow [ A | '''Tiger Blow [[File:A-ISM.png|f]][[File:V-ISM.png|f]]:''' | ||
[[File:Dp.png]] + [[File:P.png]] | [[File:Dp.png]] + [[File:P.png]] | ||
*<b>Jab Version:</b> | *<b>Jab Version:</b> | ||
| Line 648: | Line 654: | ||
|} | |} | ||
'''Tiger Uppercut [ X ]:''' | '''Tiger Uppercut [[File:X-ISM.png|f]]:''' | ||
[[File:Dp.png]] + [[File:P.png]] | [[File:Dp.png]] + [[File:P.png]] | ||
{{STDiagramHeader}} | {{STDiagramHeader}} | ||
| Line 680: | Line 686: | ||
|} | |} | ||
'''Tiger Crush [ X | '''Tiger Crush [[File:X-ISM.png|f]][[File:A-ISM.png|f]][[File:V-ISM.png|f]]:''' | ||
[[File:Dp.png]] + [[File:P.png]]'''(A,V)''' [[File:Qcf.png]] [[Image:Upright.gif]]+[[File:K.png]]'''(X)''' | [[File:Dp.png]] + [[File:P.png]]'''(A,V)''' [[File:Qcf.png]] [[Image:Upright.gif]]+[[File:K.png]]'''(X)''' | ||
{{STDiagramHeader}} | {{STDiagramHeader}} | ||
| Line 705: | Line 711: | ||
====Super Combos==== | ====Super Combos==== | ||
'''Tiger Genocide [ A ]:''' | '''Tiger Genocide [[File:A-ISM.png|f]]:''' | ||
[[File:Qcf.png]][[File:Qcf.png]] + [[File:K.png]] | [[File:Qcf.png]][[File:Qcf.png]] + [[File:K.png]] | ||
*<b>Level 1:</b> | *<b>Level 1:</b> | ||
| Line 764: | Line 770: | ||
|} | |} | ||
'''Tiger Genocide [ X ]:''' | '''Tiger Genocide [[File:X-ISM.png|f]]:''' | ||
[[File:Qcf.png]][[File:Qcf.png]] + [[File:K.png]] | [[File:Qcf.png]][[File:Qcf.png]] + [[File:K.png]] | ||
{{STDiagramHeader}} | {{STDiagramHeader}} | ||
{{STDiagramCell| Damage}} |{{STDiagramCell| 16+12x2+4+16+12+8+12+8+2x5}} |{{STDiagramImageCell| 3 | Sfa3_Sagat_TGXISM_1.png}} |{{STDiagramImageCell| 3 | Sfa3_Sagat_TGXISM_2.png}} |{{STDiagramImageCell| 3 | Sfa3_Sagat_TGXISM_3.png}} |{{STDiagramImageCell| 3 | Sfa3_Sagat_TGXISM_4.png}} |{{STDiagramImageCell| 3 | Sfa3_Sagat_TGXISM_5.png}} |{{STDiagramImageCell| 3 | Sfa3_Sagat_TGXISM_6.png}} |{{STDiagramImageCell| 3 | Sfa3_Sagat_TGXISM_7.png}} |{{STDiagramImageCell| 3 | Sfa3_Sagat_TGXISM_8.png}} |{{STDiagramImageCell| 3 | Sfa3_Sagat_TGXISM_9.png}} | {{STDiagramCell| Damage}} |{{STDiagramCell| 16+12x2+4+16+12+8+12+8+2x5}} |{{STDiagramImageCell| 3 | Sfa3_Sagat_TGXISM_1.png}} |{{STDiagramImageCell| 3 | Sfa3_Sagat_TGXISM_2.png}} |{{STDiagramImageCell| 3 | Sfa3_Sagat_TGXISM_3.png}} |{{STDiagramImageCell| 3 | Sfa3_Sagat_TGXISM_4.png}} |{{STDiagramImageCell| 3 | Sfa3_Sagat_TGXISM_5.png}} |{{STDiagramImageCell| 3 | Sfa3_Sagat_TGXISM_6.png}} |{{STDiagramImageCell| 3 | Sfa3_Sagat_TGXISM_7.png}} |{{STDiagramImageCell| 3 | Sfa3_Sagat_TGXISM_8.png}} |{{STDiagramImageCell| 3 | Sfa3_Sagat_TGXISM_9.png}} | ||
| Line 789: | Line 794: | ||
|} | |} | ||
'''Tiger Cannon [ A ]:''' | '''Tiger Cannon [[File:A-ISM.png|f]]:''' | ||
[[File:Qcf.png]][[File:Qcf.png]]+ [[File:P.png]] | [[File:Qcf.png]][[File:Qcf.png]]+ [[File:P.png]] | ||
*<b>Startup</b> | *<b>Startup</b> | ||
| Line 808: | Line 813: | ||
*<b>Active:</b> | *<b>Active:</b> | ||
*<b>Level 1</b> | *<b>Level 1:</b> | ||
{{STDiagramHeader}} | {{STDiagramHeader}} | ||
{{STDiagramCell| Damage}} |{{STDiagramCell| 8~1x4}} |{{STDiagramImageCell| 2 | Sfa3_Sagat_TCN_5.png}} |{{STDiagramImageCell| 2 | Sfa3_Sagat_TCN_6.png}} |{{STDiagramImageCell| 2 | Sfa3_Sagat_TCN_7.png}} |{{STDiagramImageCell| 2 | Sfa3_Sagat_TCN_8.png}} |{{STDiagramImageCellBorderRight| 2 | Sfa3_Sagat_TCN_9.png}} | {{STDiagramCell| Damage}} |{{STDiagramCell| 8~1x4}} |{{STDiagramImageCell| 2 | Sfa3_Sagat_TCN_5.png}} |{{STDiagramImageCell| 2 | Sfa3_Sagat_TCN_6.png}} |{{STDiagramImageCell| 2 | Sfa3_Sagat_TCN_7.png}} |{{STDiagramImageCell| 2 | Sfa3_Sagat_TCN_8.png}} |{{STDiagramImageCellBorderRight| 2 | Sfa3_Sagat_TCN_9.png}} | ||
| Line 817: | Line 822: | ||
|} | |} | ||
*<b>Level 2</b> | *<b>Level 2:</b> | ||
{{STDiagramHeader}} | {{STDiagramHeader}} | ||
{{STDiagramCell| Damage}} |{{STDiagramCell| 10~1x5}} |{{STDiagramImageCell| 2 | Sfa3_Sagat_TCN_5.png}} |{{STDiagramImageCell| 2 | Sfa3_Sagat_TCN_6.png}} |{{STDiagramImageCell| 2 | Sfa3_Sagat_TCN_7.png}} |{{STDiagramImageCell| 2 | Sfa3_Sagat_TCN_8.png}} |{{STDiagramImageCellBorderRight| 2 | Sfa3_Sagat_TCN_9.png}} | {{STDiagramCell| Damage}} |{{STDiagramCell| 10~1x5}} |{{STDiagramImageCell| 2 | Sfa3_Sagat_TCN_5.png}} |{{STDiagramImageCell| 2 | Sfa3_Sagat_TCN_6.png}} |{{STDiagramImageCell| 2 | Sfa3_Sagat_TCN_7.png}} |{{STDiagramImageCell| 2 | Sfa3_Sagat_TCN_8.png}} |{{STDiagramImageCellBorderRight| 2 | Sfa3_Sagat_TCN_9.png}} | ||
| Line 826: | Line 831: | ||
|} | |} | ||
*<b>Level 3</b> | *<b>Level 3:</b> | ||
{{STDiagramHeader}} | {{STDiagramHeader}} | ||
{{STDiagramCell| Damage}} |{{STDiagramCell| 12~1x6}} |{{STDiagramImageCell| 2 | Sfa3_Sagat_TCN_4.png}} |{{STDiagramImageCell| 2 | Sfa3_Sagat_TCN_6.png}} |{{STDiagramImageCell| 2 | Sfa3_Sagat_TCN_7.png}} |{{STDiagramImageCell| 2 | Sfa3_Sagat_TCN_8.png}} |{{STDiagramImageCellBorderRight| 2 | Sfa3_Sagat_TCN_9.png}} | {{STDiagramCell| Damage}} |{{STDiagramCell| 12~1x6}} |{{STDiagramImageCell| 2 | Sfa3_Sagat_TCN_4.png}} |{{STDiagramImageCell| 2 | Sfa3_Sagat_TCN_6.png}} |{{STDiagramImageCell| 2 | Sfa3_Sagat_TCN_7.png}} |{{STDiagramImageCell| 2 | Sfa3_Sagat_TCN_8.png}} |{{STDiagramImageCellBorderRight| 2 | Sfa3_Sagat_TCN_9.png}} | ||
| Line 835: | Line 840: | ||
|} | |} | ||
'''Tiger Raid:''' | '''Tiger Raid [[File:A-ISM.png|f]]:''' | ||
[[File:Qcb.png]][[File:Qcb.png]]+ [[File:K.png]] | [[File:Qcb.png]][[File:Qcb.png]]+ [[File:K.png]] | ||
*<b>Level 1:</b> | *<b>Level 1:</b> | ||
| Line 918: | Line 923: | ||
|} | |} | ||
'''Angry Charge [ A ]:''' | '''Angry Charge [[File:A-ISM.png|f]]:''' | ||
[[File:Qcf.png]] + [[File:S.png]] | [[File:Qcf.png]] + [[File:S.png]] | ||
{{STDiagramHeader}} | {{STDiagramHeader}} | ||
| Line 932: | Line 937: | ||
|} | |} | ||
= Miscellaneous = | =Miscellaneous= | ||
'''Buffed Jab Tiger Blow [[File:A-ISM.png|f]]:''' | |||
[[File:Dp.png]] + [[image:jab.gif|LP]] | |||
{{STDiagramHeader}} | {{STDiagramHeader}} | ||
{{STDiagramCell| Damage}} |{{STDiagramCell| 20,20,14}} |{{STDiagramImageCell| 5 | Sfa3_Sagat_TB_1.png}} |{{STDiagramImageCell| 5 | Sfa3_Sagat_TB_2.png}} |{{STDiagramImageCell| 5 | Sfa3_Sagat_TB_3.png}} |{{STDiagramImageCell| 5 | Sfa3_Sagat_TB_4.png}} |{{STDiagramImageCell| 5 | Sfa3_Sagat_TB_5.png}} |{{STDiagramImageCell| 5 | Sfa3_Sagat_TB_7.png}}|{{STDiagramImageCell| 5 | Sfa3_Sagat_TB_8.png}} | {{STDiagramCell| Damage}} |{{STDiagramCell| 20,20,14}} |{{STDiagramImageCell| 5 | Sfa3_Sagat_TB_1.png}} |{{STDiagramImageCell| 5 | Sfa3_Sagat_TB_2.png}} |{{STDiagramImageCell| 5 | Sfa3_Sagat_TB_3.png}} |{{STDiagramImageCell| 5 | Sfa3_Sagat_TB_4.png}} |{{STDiagramImageCell| 5 | Sfa3_Sagat_TB_5.png}} |{{STDiagramImageCell| 5 | Sfa3_Sagat_TB_7.png}}|{{STDiagramImageCell| 5 | Sfa3_Sagat_TB_8.png}} | ||
| Line 962: | Line 968: | ||
{{STDiagramImageCell| 1 | Sfa3_Sagat_TB_3.png}}|{{STDiagramImageCellBorderRight| 1 | Sfa3_Sagat_TB_4.png}}|{{STDiagramImageCell| 1 | Sfa3_Sagat_TB_5.png}}|{{STDiagramImageCell| 1 | Sfa3_Sagat_TB_6.png}} | {{STDiagramImageCell| 1 | Sfa3_Sagat_TB_3.png}}|{{STDiagramImageCellBorderRight| 1 | Sfa3_Sagat_TB_4.png}}|{{STDiagramImageCell| 1 | Sfa3_Sagat_TB_5.png}}|{{STDiagramImageCell| 1 | Sfa3_Sagat_TB_6.png}} | ||
|} | |} | ||
When using this move as an anti air, you should stay away from using the jab version because the grounded hitbox is only active for 1 frame(unless Angry Charge is active), so it can be easily airblocked(unless your timing is impeccable), the strong and fierce versions have more active frames on the grounded hitbox so getting a clean anti air that will not get air | When using this move as an anti air, you should stay away from using the jab version because the grounded hitbox is only active for 1 frame(unless Angry Charge is active), so it can be easily airblocked(unless your timing is impeccable), the strong and fierce versions have more active frames on the grounded hitbox so getting a clean anti air that will not get air blocked is less difficult even though the grounded active hitbox of the move is low to the ground you have more frames in which to hit the jump. | ||
*<b>Idle, Crouching, Airborne:</b> | *<b>Idle, Crouching, Airborne:</b> | ||
| Line 972: | Line 978: | ||
= The Basics = | = The Basics = | ||
=Which Ism?= | |||
*<b>A-ISM:</b> | |||
Unfortunately, one of the weakest characters in the game, despite him having his usual toolset. They gutted his tiger shots and tiger uppercut badly enough that he struggles in neutral against a lot of characters. | |||
Unfortunately, one of the weakest characters in the game, despite him having his usual toolset. They gutted his tiger shots and tiger uppercut badly enough that he struggles in neutral against a lot of characters. | |||
*<b>V-ISM:</b> | |||
Recommended. | Recommended. | ||
The character goes from low tier to high tier with access to his amazingly versatile customs. | The character goes from low tier to high tier with access to his amazingly versatile customs. | ||
*<b>X-ISM:</b> | |||
Probably one of the worst characters in the game. Gains a better tiger uppercut, but loses air block and alpha counter. Changes his tiger knee motion to the classic SF2 input. | Probably one of the worst characters in the game. Gains a better tiger uppercut, but loses air block and alpha counter. Changes his tiger knee motion to the classic SF2 input. | ||
= Combos = | = Combos = | ||
*<b>Basic Combos:</b> | |||
<youtube>u58cKHwbnr8</youtube> | <youtube>u58cKHwbnr8</youtube> | ||
*<b>V-ISM Combos:</b> | |||
<youtube>2BcPlgtSPrw</youtube> | <youtube>2BcPlgtSPrw</youtube> | ||
=Advanced Strategy= | |||
=Match-ups= | |||
Guy's Bushin chain hits on Sagat crouching. Be very careful. | Guy's Bushin chain hits on Sagat crouching. Be very careful. | ||
| Line 1,028: | Line 1,037: | ||
=Discussion= | |||
{{Navbox-SFA3}} | {{Navbox-SFA3}} | ||
Latest revision as of 16:05, 22 May 2025
Introduction
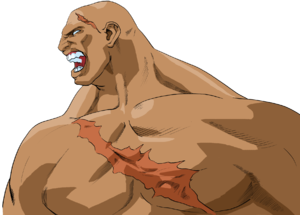
Feeling somewhat empty since his last match with Ryu, Sagat now realizes that Ryu has purposely thrown out the match so his grudge can be satisfied. Sagat also realized the source of his scar comes from the Satsui no Hado, a dark power that possessed Ryu when he was first defeated by him. Realizing that anger and hatred have corrupted his actions, Sagat now actively seeks out Ryu to not fight him cleanly again for revenge, but out of honor.
| Pros | Cons |
|
|
Color Options
| X-Ism | A-Ism | V-Ism | |||
 |
 |
 |
 |
 |

|
| Punch | Kick | Punch | Kick | Punch | Kick |
Moves List
Ground Normals
- Close/Far Standing Jab:
| Damage | 7 | 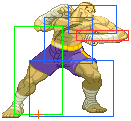
|
| Stun | 2 | |
| Chain Cancel | No | |
| Special Cancel | Yes | |
| Super Cancel | Yes | |
| Meter on whiff/hit | 0/1 | |
| Frame Count | 5/6/13 | |
| Block Stun | -5 | |
| Hit Stun/Counter Hit | -4/+1 |
- Close Standing Strong:
| Damage | 12 | 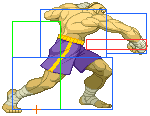
|
| Stun | 4 | |
| Chain Cancel | No | |
| Special Cancel | Yes | |
| Super Cancel | Yes | |
| Meter on whiff/hit | 1/A3/XV4 | |
| Frame Count | 6/3/25 | |
| Block Stun | -9 | |
| Hit Stun/Counter Hit | -8/-4 |
- Far Standing Strong:
| Damage | 11 | 
|
| Stun | 4 | |
| Chain Cancel | No | |
| Special Cancel | No | |
| Super Cancel | No | |
| Meter on whiff/hit | 1/A3/XV4 | |
| Frame Count | 8/4/17 | |
| Block Stun | -2 | |
| Hit Stun/Counter Hit | -1/+3 |
- Close Standing Fierce:
| Damage | 17/16 | 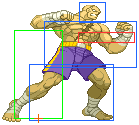 |
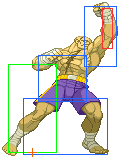
|
| Stun | 8 | ||
| Chain Cancel | No | ||
| Special Cancel | Yes | ||
| Super Cancel | Yes | ||
| Meter on whiff/hit | 1/A4/XV6 | ||
| Frame Count | 7/5/26 | ||
| Block Stun | -8 | ||
| Hit Stun/Counter Hit | -7/Launch |
Only the first active part can be special/super cancelled.
- Far Standing Fierce:
| Damage | 17 | 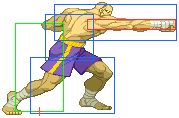
|
| Stun | 8 | |
| Chain Cancel | No | |
| Special Cancel | No | |
| Super Cancel | No | |
| Meter on whiff/hit | 1/A4/XV6 | |
| Frame Count | 10/6/28 | |
| Block Stun | -11 | |
| Hit Stun/Counter Hit | -10/Launch |
- Close/Far Standing Short:
| Damage | 3+2 | 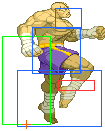 |
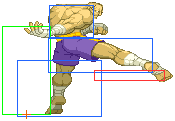
|
| Stun | 1x2 | ||
| Chain Cancel | No | ||
| Special Cancel | Yes | ||
| Super Cancel | Yes | ||
| Meter on whiff/hit | 0/1x2 | ||
| Frame Count | 5/4/3/20 | ||
| Block Stun | -9 | ||
| Hit Stun/Counter Hit | -8/-3 |
Only the first hit can be cancelled.
- Close/Far Standing Forward:
| Damage | 12 | 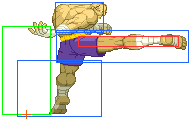
|
| Stun | 4 | |
| Chain Cancel | No | |
| Special Cancel | No | |
| Super Cancel | No | |
| Meter on whiff/hit | 1/A3/XV4 | |
| Frame Count | 10/3/26 | |
| Block Stun | -10 | |
| Hit Stun/Counter Hit | -9/-5 |
- Close/Far Standing Roundhouse:
| Damage | 9+8 | 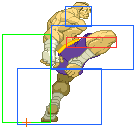 |
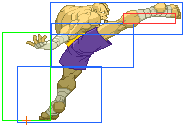
|
| Stun | 4x2 | ||
| Chain Cancel | No | ||
| Special Cancel | Yes | ||
| Super Cancel | Yes | ||
| Meter on whiff/hit | 1/A1x2/XV3x2 | ||
| Frame Count | 6/3/2/29 | ||
| Block Stun | -8 | ||
| Hit Stun/Counter Hit | -7/Launch |
Only the first hit is cancelleable.
- Crouching Jab:
| Damage | 6 | 
|
| Stun | 2 | |
| Chain Cancel | No | |
| Special Cancel | Yes | |
| Super Cancel | Yes | |
| Meter on whiff/hit | 0/1 | |
| Frame Count | 6/4/7 | |
| Block Stun | +3 | |
| Hit Stun/Counter Hit | +4/+9 |
- Crouching Strong:
| Damage | 11 | 
|
| Stun | 4 | |
| Chain Cancel | No | |
| Special Cancel | Yes | |
| Super Cancel | Yes | |
| Meter on whiff/hit | 1/A3/XV4 | |
| Frame Count | 5/4/13 | |
| Block Stun | +2 | |
| Hit Stun/Counter Hit | +3/+7 |
- Crouching Fierce:
| Damage | 16 | 
|
| Stun | 8 | |
| Chain Cancel | No | |
| Special Cancel | No | |
| Super Cancel | No | |
| Meter on whiff/hit | 1/A6/XV9 | |
| Frame Count | 8/5/15 | |
| Block Stun | +3 | |
| Hit Stun/Counter Hit | +4/Launch |
- Crouching Short:
| Damage | 5 | 
|
| Stun | 2 | |
| Chain Cancel | No | |
| Special Cancel | Yes | |
| Super Cancel | Yes | |
| Meter on whiff/hit | 0/1 | |
| Frame Count | 4/4/7 | |
| Block Stun | +3 | |
| Hit Stun/Counter Hit | +4/+9 |
- Crouching Forward:
| Damage | 11 | 
|
| Stun | 4 | |
| Chain Cancel | No | |
| Special Cancel | Yes(X,V only) | |
| Super Cancel | Yes(X only) | |
| Meter on whiff/hit | 1/A3/XV4 | |
| Frame Count | 7/4/21 | |
| Block Stun | -6 | |
| Hit Stun/Counter Hit | -5/-1 |
- Crouching Roundhouse:
| Damage | 16 | 
|
| Stun | 8 | |
| Chain Cancel | No | |
| Special Cancel | No | |
| Super Cancel | No | |
| Meter on whiff/hit | 1/A4/XV6 | |
| Frame Count | 9/5/26 | |
| Block Stun | -8 | |
| Hit Stun/Counter Hit | - |
Air Normals
- Neutral/Diagonal Jumping Jab:
| Damage | 7 | 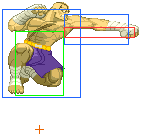
|
| Stun | 2 | |
| Meter on whiff/hit | 0/1 | |
| Frame Count | 4/10/* |
- Neutral/Diagonal Jumping Strong:
| Damage | 12 | 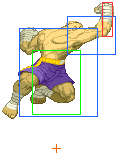
|
| Stun | 16 | |
| Meter on whiff/hit | 1/A3/XV4 | |
| Frame Count | 4/8/* |
- Neutral/Diagonal Jumping Fierce:
| Damage | 18 | 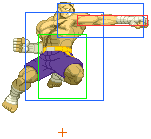
|
| Stun | 8 | |
| Meter on whiff/hit | 1/A4/XV6 | |
| Frame Count | 10/6/*} |
- Neutral Jumping Short:
| Damage | 6 | 
|
| Stun | 2 | |
| Meter on whiff/hit | 0/1 | |
| Frame Count | 6/10/* |
- Diagonal Jumping Short:
| Damage | 6 | 
|
| Stun | 2 | |
| Meter on whiff/hit | 0/1 | |
| Frame Count | 6/10/* |
- Neutral Jumping Forward:
| Damage | 11 | 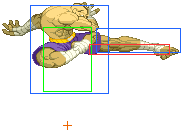
|
| Stun | 4 | |
| Meter on whiff/hit | 1/A3/XV4 | |
| Frame Count | 6/8/* |
- Diagonal Jumping Forward:
| Damage | 11 | 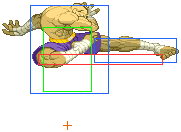
|
| Stun | 4 | |
| Meter on whiff/hit | 1/A3/XV4 | |
| Frame Count | 8/8/* |
- Neutral Jumping Roundhouse:
| Damage | 17 | 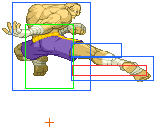
|
| Stun | 8 | |
| Meter on whiff/hit | 1/A4/XV6 | |
| Frame Count | 8/6/* |
- Diagonal Jumping Roundhouse:
| Damage | 17 | 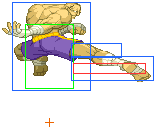
|
| Stun | 8 | |
| Meter on whiff/hit | 1/A4/XV6 | |
| Frame Count | 8/6/* |
Throws
Tiger Carry:
| Damage | 20 | 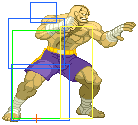
|
| Stun | 0 | |
| Range | 32 | |
| Meter Gain | 1(A)3(XV) | |
| Frame Count | 5/1/20 |
Tiger Rage:
| Damage | 8+4x(0~9)+4 | 
|
| Stun | 0 | |
| Range | 32 | |
| Meter Gain | 1(A)3(XV) | |
| Frame Count | 5/1/20 |
Kuuchuu Tiger Carry:
| Damage | 20 | 
|
| Stun | 0 | |
| Range | 24 | |
| Meter Gain | 1(A)3(XV) | |
| Frame Count | 1/1/1(before landing) |
Alpha Counter
During Blockstun ![]() +
+![]() +
+![]() of same strength
of same strength
- A-ISM:
| Damage | 4 | 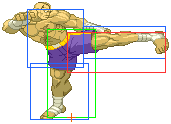
|
| Frame Count | 22/8/29 | |
| Invincibility | 0-22 |
- V-ISM:
| Damage | 4 |  |
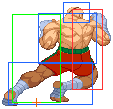 |

|
| Frame Count | 16/25/47 | |||
| Invincibility | 0-16 |
Special Moves
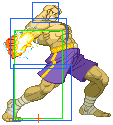
- Startup:
 |
 |

| ||
| Frame Count | 15 | |||
- Active:
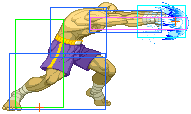
- Jab Version:
| Damage | 9~1 | 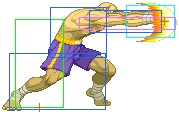 |
 |
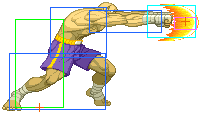 |
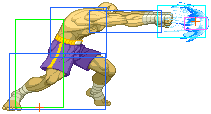 |
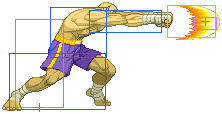
|
| Stun | 4 | |||||
| Meter on whiff | 1(A)3(XV) | |||||
| Meter on hit | 3(A)4(XV) | |||||
| Block Stun | -12 | |||||
| Hit Stun | -11 | |||||
| Frame Count | 43 | |||||
- Strong Version:
| Damage | 10~1 |  |
 |
 |
 |

|
| Stun | 4 | |||||
| Meter on whiff | 1(A)3(XV) | |||||
| Meter on hit | 3(A)4(XV) | |||||
| Block Stun | -13 | |||||
| Hit Stun | -12 | |||||
| Frame Count | 44 | |||||
- Fierce Version:
| Damage | 11~1 |  |
 |
 |
 |

|
| Stun | 4 | |||||
| Meter on whiff | 1(A)3(XV) | |||||
| Meter on hit | 3(A)4(XV) | |||||
| Block Stun | -14 | |||||
| Hit Stun | -13 | |||||
| Frame Count | 45 | |||||
- Startup:
 |
 |

| ||
| Frame Count | 15 | |||
- Active:
- Short Version:
| Damage | 9~1 |  |
 |
 |
 |

|
| Stun | 4 | |||||
| Meter on whiff | 1(A)3(XV) | |||||
| Meter on hit | 3(A)4(XV) | |||||
| Block Stun | -13 | |||||
| Hit Stun | -12 | |||||
| Frame Count | 44 | |||||
- Forward Version:
| Damage | 10~1 |  |
 |
 |
 |

|
| Stun | 4 | |||||
| Meter on whiff | 1(A)3(XV) | |||||
| Meter on hit | 3(A)4(XV) | |||||
| Block Stun | -14 | |||||
| Hit Stun | -13 | |||||
| Frame Count | 45 | |||||
- Roundhouse Version:
| Damage | 11~1 |  |
 |
 |
 |

|
| Stun | 4 | |||||
| Meter on whiff | 1(A)3(XV) | |||||
| Meter on hit | 3(A)4(XV) | |||||
| Block Stun | -15 | |||||
| Hit Stun | -14 | |||||
| Frame Count | 46 | |||||
- Jab Version:
| Damage | 18,15,12 |  |
 |
 |
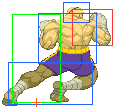 |
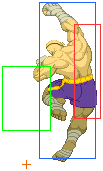 |
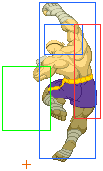
|
| Stun | 0 | ||||||
| Meter Gain | 4(A)7(V) | ||||||
| Block Stun | -23 | ||||||
| Invincibility | 0-8 | ||||||
| Frame Count | 7 | 1 | 4 | 8 | |||
 |
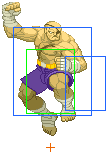 |
 |
 |
 |

| |
| Frame Count | 33 | |||||
- Strong / Fierce Version:
| Strong | Fierce |  |
 |
 |
 |
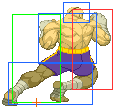 |
 |

| |
| Damage | 4x5 | 4x7 | |||||||
| Stun | 0 | ||||||||
| Meter Gain | 4(A)7(V) | ||||||||
| Block Stun | -32 | -45 | |||||||
| Invincibility | 0-5 | ||||||||
| Frame Count(Strong) | 4 | 1 | 3 | 4 | 4,2,2 | ||||
| Frame Count(Fierce) | 4 | 1 | 3 | 4 | 3,3,3,3,3 | ||||
 |
 |
 |
 |
 |

| |
| Frame Count(Strong) | 44 | |||||
| Frame Count(Fierce) | 47 | |||||
| Jab | Strong | Fierce |  |
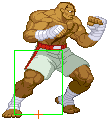 |
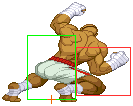 |
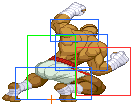 |

| |
| Damage | 10+9 | 11+9 | 12+9 | |||||
| Stun | 0 | |||||||
| Meter Gain | 7 | |||||||
| Block Stun | -27 | -38 | -48 | |||||
| Invincibility | 0-7 | |||||||
| Frame Count(Jab) | 6 | 1 | 3 | 11 | ||||
| Frame Count(Strong) | 6 | 1 | 3 | 16 | ||||
| Frame Count(Fierce) | 6 | 1 | 3 | 19 | ||||
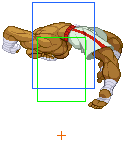 |
 |
 |
 |
 |
 |
 |

| |
| Frame Count(Jab) | 30 | |||||||
| Frame Count(Strong) | 36 | |||||||
| Frame Count(Fierce) | 43 | |||||||
| Damage | 11,7,3 |  |
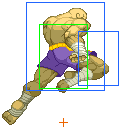 |
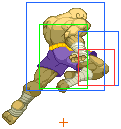 |
 |
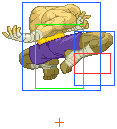
|
| Stun | 0 | |||||
| Meter Gain | 4(A)6(XV) | |||||
| Block Stun | -5 | |||||
| Frame Count(Short) | 10 | 1 | 2 | 2 | ||
| Frame Count(Forward) | 10 | 1 | 2 | 2 | ||
| Frame Count(Roundhouse) | 11 | 1 | 2 | 2 | ||
 |
 |
 |
 |
 |

| |||
| Frame Count | 23 | |||||||
Super Combos
- Level 1:
| Damage | 16+8+4+12+4+2x2 |  |
 |
 |
 |
 |
 |
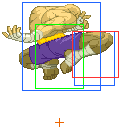 |
 |
 |

|
| Block Stun | -29 | ||||||||||
| Invincibility | 0-10 | ||||||||||
| Frame Count | 9 | 1 | 4 | 3 | 4 | 4 | 11 | 4 | |||
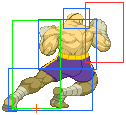 |
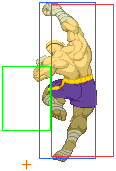 |
 |
 |
 |
 |
 |

| |
| Frame Count | 4 | 14 | 38 | |||||
- Level 2:
| Damage | 8x10 |  |
 |
 |
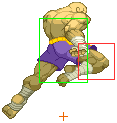 |
 |
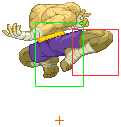 |
 |
 |

|
| Block Stun | -33 | |||||||||
| Invincibility | 0-25 | |||||||||
| Frame Count | 9 | 5 | 3 | 4 | 4 | 11 | 4 | |||
 |
 |
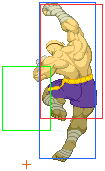 |
 |
 |
 |
 |
 |

| |
| Frame Count | 4 | 3 | 17 | 42 | |||||
- Level 3:
| Damage | 16+12x2+4+16+12+8+12+8+2x5 |  |
 |
 |
 |
 |
 |
 |
 |

|
| Block Stun | -33 | |||||||||
| Invincibility | 0-35 | |||||||||
| Frame Count | 9 | 5 | 3 | 4 | 4 | 9* | 1 | |||
 |
 |
 |
 |
 |
 |
 |
 |
 |

| |
| Frame Count | 1 | 3 | 10 | 19 | 3 | 3 | 3 | |||
 |
 |
 |
 |
 |
 |

| |
| Frame Count | 12 | 47 | |||||
| Damage | 16+12x2+4+16+12+8+12+8+2x5 |  |
 |
 |
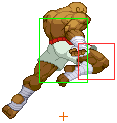 |
 |
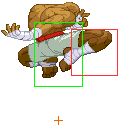 |
 |
 |
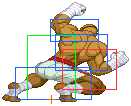
|
| Block Stun | -33 | |||||||||
| Invincibility | 0-34 | |||||||||
| Frame Count | 9 | 5 | 3 | 4 | 4 | 9* | 2 | |||
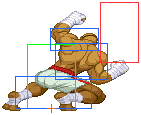 |
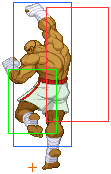 |
 |
 |
 |
 |
 |
 |
 |

| |
| Frame Count | 3 | 10 | 19 | 3 | 3 | |||||
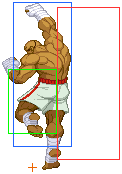 |
 |
 |
 |
 |
 |
 |
 |
 |

| |
| Frame Count | 3 | 12 | 47 | |||||||
- Startup
- Level 1
| Invincibility | 0-7 | 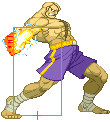 |
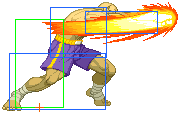
| ||
| Frame Count | 9 | ||||
- Level 2 & 3
| LVL.1 | LVL.2 |  |
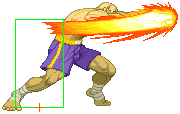
| |||
| Invincibility | 0-9 | 0-11 | ||||
| Frame Count | 9 | |||||
- Active:
- Level 1:
| Damage | 8~1x4 | 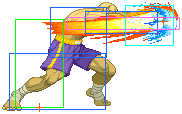 |
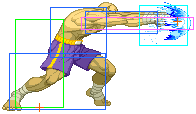 |
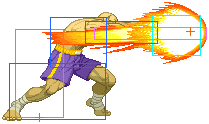 |
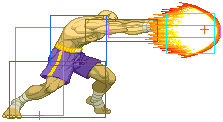 |
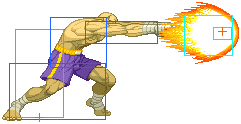
| |
| Block Stun | -15 | ||||||
| Frame Count | 49 | ||||||
- Level 2:
| Damage | 10~1x5 |  |
 |
 |
 |

| |
| Block Stun | -12 | ||||||
| Frame Count | 49 | ||||||
- Level 3:
| Damage | 12~1x6 | 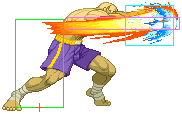 |
 |
 |
 |

| |
| Block Stun | -9 | ||||||
| Frame Count | 49 | ||||||
- Level 1:
| Damage | 16+12+8+2x3 |  |
 |
 |
 |
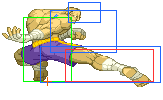 |
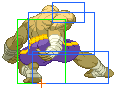 |
 |
 |
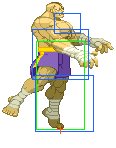 |

|
| Invincibility | 0~9 | ||||||||||
| Block Stun | -10 | ||||||||||
| Frame Count | 9 | 2 | 10 | ||||||||
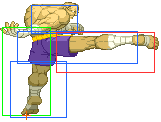 |
 |
 |
 |
 |
| |
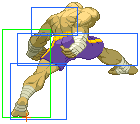
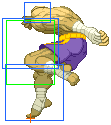
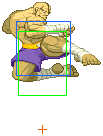
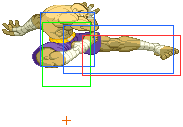
| Frame Count | 4 | 16 | 2,2,2,2 | |||
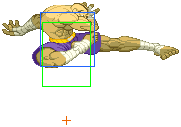 |
 |
 |
 |
 |
 |
 |

| |
| Frame Count | 31 | |||||||
- Level 2:
| Damage | 20+16+14+6x4 |  |
 |
 |
 |
 |
 |
 |
 |
 |

|
| Invincibility | 0~11 | ||||||||||
| Block Stun | -8 | ||||||||||
| Frame Count | 9 | 2 | 10 | ||||||||
 |
 |
 |
 |
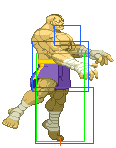 |
 |
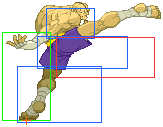
| |
| Frame Count | 4 | 10 | 4 | ||||
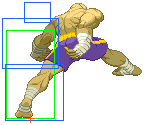 |
 |
 |
 |

| |
| Frame Count | 16 | 2,2,2,2 | |||
 |
 |
 |
 |
 |
 |
 |

| |
| Frame Count | 29 | |||||||
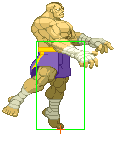
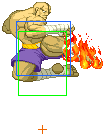
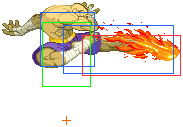
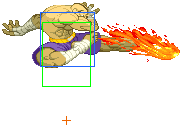
- Level 3:
| Damage | 15x4+16x3 |  |
 |
 |
 |
 |
 |
 |
 |
 |

|
| Invincibility | 0~21 | ||||||||||
| Block Stun | -7 | ||||||||||
| Frame Count | 9 | 2 | 10 | ||||||||
 |
 |
 |
 |
 |
 |

| |
| Frame Count | 4 | 10 | 4 | ||||
 |
 |
 |
 |
| |
| Frame Count | 16 | 2,2,2,2 | |||
 |
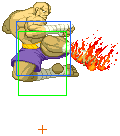 |
 |
 |
 |
 |
 |

| |
| Frame Count | 28 | |||||||
| Damage Buff |  |
 |
 |
 |
 |

| |
| Jab | 20,20,4 | ||||||
| Strong | 5x5 | ||||||
| Fierce | 5x7 | ||||||
| Frame Count | 5 | 17 | 24 | ||||
Miscellaneous
| Damage | 20,20,14 |  |
 |
 |
 |
 |
 |

|
| Stun | 0 | |||||||
| Meter Gain | 4(A)7(V) | |||||||
| Block Stun | -26 | |||||||
| Invincibility | 0-5 | |||||||
| Frame Count | 4 | 1 | 3 | 4 | 8 | |||
 |
 |
 |
 |
 |

| |
| Frame Count | 33 | |||||
When Angry Charge is active the jab version of Tiger Blow has different data.
- Tiger Blow anti air usage:
| Grounded | Airborne | ||
 |
 |
 |

|
When using this move as an anti air, you should stay away from using the jab version because the grounded hitbox is only active for 1 frame(unless Angry Charge is active), so it can be easily airblocked(unless your timing is impeccable), the strong and fierce versions have more active frames on the grounded hitbox so getting a clean anti air that will not get air blocked is less difficult even though the grounded active hitbox of the move is low to the ground you have more frames in which to hit the jump.
- Idle, Crouching, Airborne:
 |
 |

|
The Basics
Which Ism?
- A-ISM:
Unfortunately, one of the weakest characters in the game, despite him having his usual toolset. They gutted his tiger shots and tiger uppercut badly enough that he struggles in neutral against a lot of characters.
- V-ISM:
Recommended. The character goes from low tier to high tier with access to his amazingly versatile customs.
- X-ISM:
Probably one of the worst characters in the game. Gains a better tiger uppercut, but loses air block and alpha counter. Changes his tiger knee motion to the classic SF2 input.
Combos
- Basic Combos:
- V-ISM Combos:
Advanced Strategy
Match-ups
Guy's Bushin chain hits on Sagat crouching. Be very careful.
Sodom is a huge problem match in neutral due to b. FP not being duckable and slide generally giving Sagat issues without meter.
Notable Players
Japan
Chuugokujin (V-Sagat)
Fukui (V-Sagat)
Hidawa (A-Sagat)
Kayaman (V-Sagat)
Nekonohi (A/V-Sagat)
Noh (V-Sagat)
Nottsu (V-Sagat)
Totsuka (V-Sagat)
North America
GreenJoker (A-Sagat)
Kyokuji (V-Sagat)
