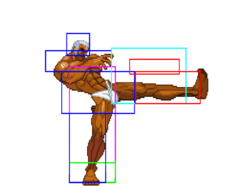
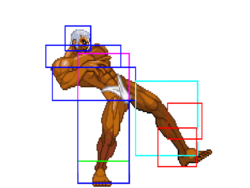
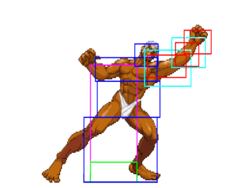
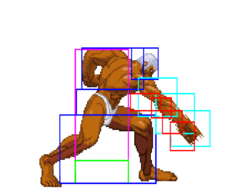
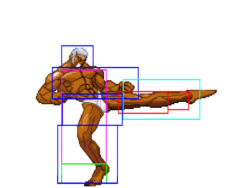
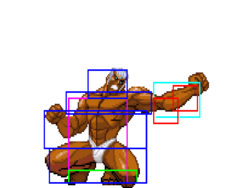
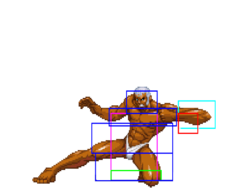
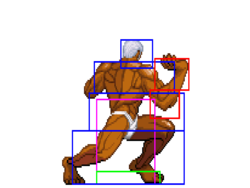
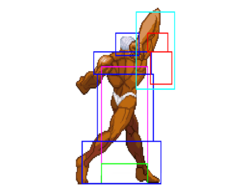
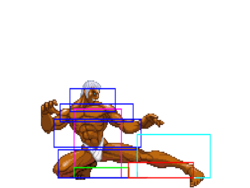
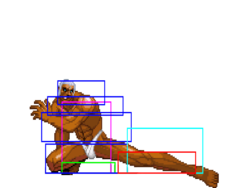
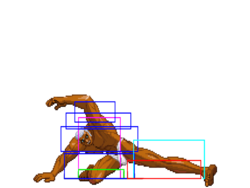
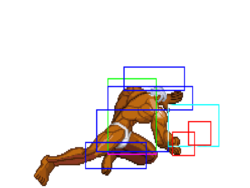
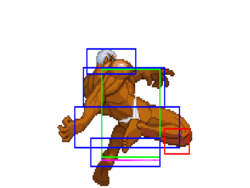
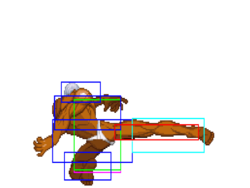
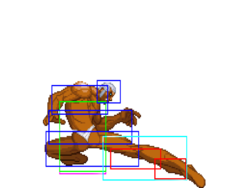
No edit summary |
|||
| (53 intermediate revisions by 6 users not shown) | |||
| Line 5: | Line 5: | ||
|hash=UR | |hash=UR | ||
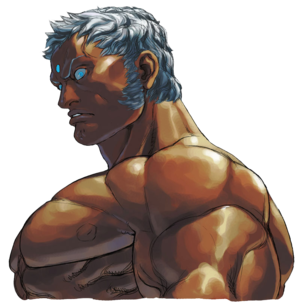
|image=3S_Urien_Art.png | |image=3S_Urien_Art.png | ||
|health= | |health=1285 | ||
|stun= | |stun=64 | ||
|SA1=2/104 | |SA1=2/104 | ||
|SA2=2/80 | |SA2=2/80 | ||
|SA3=2/88 | |SA3=2/88 | ||
|fDash= | |fDash=15 (17)<br>(121px) | ||
|bDash= | |bDash=19 (82px) | ||
|nJump=38(5+32+1) | |nJump=38(5+32+1) | ||
|bJump=38(5+32+1) | |bJump=38(5+32+1) | ||
| Line 30: | Line 30: | ||
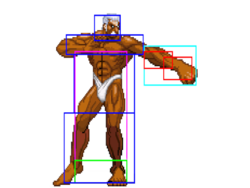
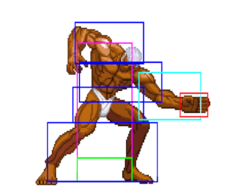
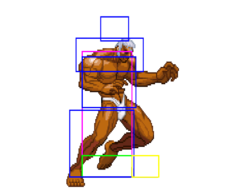
|name=Stand LP | |name=Stand LP | ||
|input={{lp}} | |input={{lp}} | ||
|image= | |image=3s_urien_st.lp.png | ||
|imageSize=250px | |||
|data= | |data= | ||
{{AttackData-3S | {{AttackData-3S | ||
| Line 36: | Line 37: | ||
|active=2 | |active=2 | ||
|recovery=6 | |recovery=6 | ||
|onHit=3 | |onHit=+3 | ||
|onHitCrouch=3 | |onHitCrouch=+3 | ||
|onBlock=3 | |onBlock=+3 | ||
|parry=A | |parry=A | ||
|damage=3 | |damage=3 | ||
|stun=3 | |stun=3 | ||
|attackLevel=Mid | |||
|description= | |description= | ||
* Cancel options: self ch sp su | * Cancel options: self ch sp su | ||
* Self meter gain: Whiff: 0, Hit: 2, Block: 1. | |||
* Opponent meter gain: Whiff: 0, Hit: 0, Block: 0. | |||
{{3S Button FAT|link=https://fullmeter.com/fatonline/#/framedata/movedetail/3S/Urien/normal/Stand%20LP}} | {{3S Button FAT|link=https://fullmeter.com/fatonline/#/framedata/movedetail/3S/Urien/normal/Stand%20LP}} | ||
}} | }} | ||
| Line 52: | Line 56: | ||
|name=Stand MP | |name=Stand MP | ||
|input={{mp}} | |input={{mp}} | ||
|image= | |image=3s_urien_st.mp.png | ||
|imageSize=250px | |||
|data= | |data= | ||
{{AttackData-3S | {{AttackData-3S | ||
| Line 58: | Line 63: | ||
|active=5 | |active=5 | ||
|recovery=10 | |recovery=10 | ||
|onHit=1 | |onHit=+1 | ||
|onHitCrouch=2 | |onHitCrouch=+2 | ||
|onBlock=0 | |||
|parry=H | |parry=H | ||
|damage=14 | |damage=14 | ||
|stun=9 | |stun=9 | ||
|attackLevel=Mid | |||
|description= | |description= | ||
* Cancel options: sp su | * Cancel options: sp su | ||
| Line 75: | Line 82: | ||
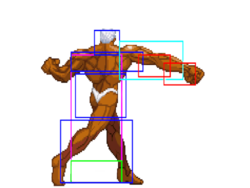
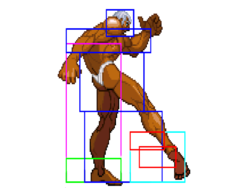
|name=Stand HP | |name=Stand HP | ||
|input={{hp}} | |input={{hp}} | ||
|image= | |image=3s_urien_st.hp_1.png | ||
|image2=3s_urien_st.hp_2.png | |||
|imageSize=250px | |||
|imageSize2=250px | |||
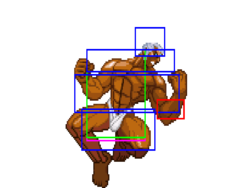
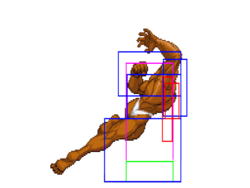
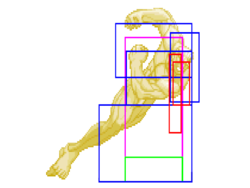
|caption=Frame 11 | |||
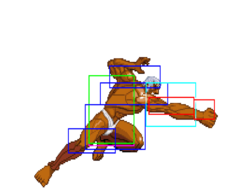
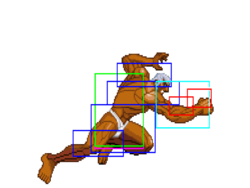
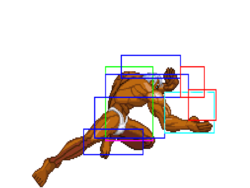
|caption2=Frames 12-14 | |||
|data= | |data= | ||
{{AttackData-3S | {{AttackData-3S | ||
| Line 82: | Line 94: | ||
|recovery=15 | |recovery=15 | ||
|onHit=-1 | |onHit=-1 | ||
|onHitCrouch=1 | |onHitCrouch=+1 | ||
|onBlock=-3 | |onBlock=-3 | ||
|parry=H | |parry=H | ||
|damage=23 | |damage=23 | ||
|stun=15 | |stun=15 | ||
|attackLevel=Mid | |||
|description= | |description= | ||
* -6 kara range | * -6 kara range | ||
| Line 99: | Line 112: | ||
|name=Stand LK | |name=Stand LK | ||
|input={{lk}} | |input={{lk}} | ||
|image= | |image=3s_urien_st.lk.png | ||
|imageSize=250px | |||
|data= | |data= | ||
{{AttackData-3S | {{AttackData-3S | ||
| Line 105: | Line 119: | ||
|active=2 | |active=2 | ||
|recovery=7 | |recovery=7 | ||
|onHit=2 | |onHit=+2 | ||
|onHitCrouch=2 | |onHitCrouch=+2 | ||
|onBlock=2 | |onBlock=+2 | ||
|attackLevel=Mid | |||
|parry=A | |parry=A | ||
|damage=5 | |damage=5 | ||
| Line 113: | Line 128: | ||
|description= | |description= | ||
* Cancel options: ch sp su | * Cancel options: ch sp su | ||
* Self meter gain: Whiff: 0, Hit: 2, Block: 1. | |||
* Opponent meter gain: Whiff: 0, Hit: 0, Block: 0. | |||
{{3S Button FAT|link=https://fullmeter.com/fatonline/#/framedata/movedetail/3S/Urien/normal/Stand%20LK}} | {{3S Button FAT|link=https://fullmeter.com/fatonline/#/framedata/movedetail/3S/Urien/normal/Stand%20LK}} | ||
}} | }} | ||
| Line 121: | Line 138: | ||
|name=Stand MK | |name=Stand MK | ||
|input={{mk}} | |input={{mk}} | ||
|image= | |image=3s_urien_st.mk.png | ||
|imageSize=250px | |||
|data= | |data= | ||
{{AttackData-3S | {{AttackData-3S | ||
| Line 133: | Line 151: | ||
|damage=14 | |damage=14 | ||
|stun=9 | |stun=9 | ||
|attackLevel=Mid | |||
|description= | |description= | ||
* Self meter gain: Whiff: 2, Hit: 11, Block: 6. | * Self meter gain: Whiff: 2, Hit: 11, Block: 6. | ||
| Line 144: | Line 163: | ||
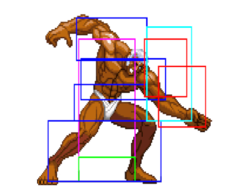
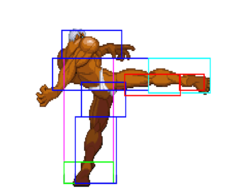
|name=Stand HK | |name=Stand HK | ||
|input={{hk}} | |input={{hk}} | ||
|image= | |image=3s_urien_st.hk_1.png | ||
|image2=3s_urien_st.hk_2.png | |||
|image3=3s_urien_st.hk_3.png | |||
|imageSize=250px | |||
|imageSize2=250px | |||
|imageSize3=250px | |||
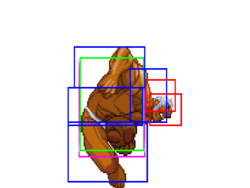
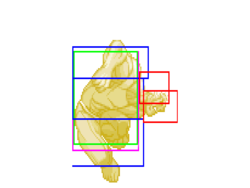
|caption=Frames 18-20 | |||
|caption2=Frames 21-22 | |||
|caption3=Frame 23 | |||
|data= | |data= | ||
{{AttackData-3S | {{AttackData-3S | ||
| Line 156: | Line 183: | ||
|damage=16 | |damage=16 | ||
|stun=9 | |stun=9 | ||
|attackLevel=Overhead | |||
|description= | |description= | ||
* -10 kara range | * -10 kara range | ||
| Line 171: | Line 199: | ||
|name=Quarrel Upper | |name=Quarrel Upper | ||
|input={{f}}+{{mp}} | |input={{f}}+{{mp}} | ||
|image= | |image=3s_urien_f+mp.png | ||
|imageSize=250px | |||
|data= | |data= | ||
{{AttackData-3S | {{AttackData-3S | ||
| Line 179: | Line 208: | ||
|onHit=-2 | |onHit=-2 | ||
|onBlock=-3 | |onBlock=-3 | ||
|onHitCrouch=0 | |||
|parry=H | |parry=H | ||
|damage=14 | |damage=14 | ||
|stun=9 | |stun=9 | ||
|attackLevel=Mid | |||
|description= | |description= | ||
* 4 kara range | * 4 kara range | ||
| Line 194: | Line 225: | ||
|name=Terrible Smash | |name=Terrible Smash | ||
|input={{f}}+{{hp}} | |input={{f}}+{{hp}} | ||
|image= | |image=3s_urien_f+hp.png | ||
|imageSize=250px | |||
|data= | |data= | ||
{{AttackData-3S | {{AttackData-3S | ||
| Line 205: | Line 237: | ||
|parry=H | |parry=H | ||
|damage=21 | |damage=21 | ||
|attackLevel=Overhead | |||
|stun=3 | |stun=3 | ||
|description= | |description= | ||
| Line 217: | Line 250: | ||
|name=Quarrel Kick | |name=Quarrel Kick | ||
|input={{f}}+{{mk}} | |input={{f}}+{{mk}} | ||
|image= | |image=3s_urien_f+mk.png | ||
|imageSize=250px | |||
|data= | |data= | ||
{{AttackData-3S | {{AttackData-3S | ||
| Line 225: | Line 259: | ||
|onHit=-1 | |onHit=-1 | ||
|onBlock=-2 | |onBlock=-2 | ||
|onHitCrouch=0 | |||
|parry=H | |parry=H | ||
|damage=16 | |damage=16 | ||
|stun=9 | |stun=9 | ||
|attackLevel=Mid | |||
|description= | |description= | ||
* Self meter gain: Whiff: 2, Hit: 11, Block: 6. | * Self meter gain: Whiff: 2, Hit: 11, Block: 6. | ||
| Line 237: | Line 273: | ||
<br> | <br> | ||
<br> | <br> | ||
==== Crouching Normals ==== | ==== Crouching Normals ==== | ||
=====<font style="visibility:hidden; float:right">2LP</font>===== | =====<font style="visibility:hidden; float:right">2LP</font>===== | ||
| Line 242: | Line 279: | ||
|name=Crouch LP | |name=Crouch LP | ||
|input={{d}}+{{lp}} | |input={{d}}+{{lp}} | ||
|image= | |image=3s_urien_cr.lp.png | ||
|imageSize=250px | |||
|data= | |data= | ||
{{AttackData-3S | {{AttackData-3S | ||
| Line 248: | Line 286: | ||
|active=2 | |active=2 | ||
|recovery=7 | |recovery=7 | ||
|onHit=1 | |onHit=+1 | ||
|onHitCrouch=1 | |onHitCrouch=+1 | ||
|onBlock=1 | |onBlock=+1 | ||
|parry=A | |parry=A | ||
|attackLevel=Mid | |||
|damage=3 | |damage=3 | ||
|stun=3 | |stun=3 | ||
|description= | |description= | ||
* Cancel options: self ch sp su | * Cancel options: self ch sp su | ||
* Self meter gain: Whiff: 0, Hit: 2, Block: 1. | |||
* Opponent meter gain: Whiff: 0, Hit: 0, Block: 0. | |||
{{3S Button FAT|link=https://fullmeter.com/fatonline/#/framedata/movedetail/3S/Urien/normal/Crouch%20LP}} | {{3S Button FAT|link=https://fullmeter.com/fatonline/#/framedata/movedetail/3S/Urien/normal/Crouch%20LP}} | ||
}} | }} | ||
| Line 264: | Line 305: | ||
|name=Crouch MP | |name=Crouch MP | ||
|input={{d}}+{{mp}} | |input={{d}}+{{mp}} | ||
|image= | |image=3s_urien_cr.mp.png | ||
|imageSize=250px | |||
|data= | |data= | ||
{{AttackData-3S | {{AttackData-3S | ||
| Line 272: | Line 314: | ||
|onHit=-1 | |onHit=-1 | ||
|onBlock=-2 | |onBlock=-2 | ||
|onHitCrouch=0 | |||
|parry=A | |parry=A | ||
|damage=10 | |damage=10 | ||
|stun=3 | |stun=3 | ||
|attackLevel=Mid | |||
|description= | |description= | ||
* Self meter gain: Whiff: 2, Hit: 11, Block: 6. | * Self meter gain: Whiff: 2, Hit: 11, Block: 6. | ||
| Line 286: | Line 330: | ||
|name=Crouch HP | |name=Crouch HP | ||
|input={{d}}+{{hp}} | |input={{d}}+{{hp}} | ||
|image= | |image=3s_urien_cr.hp_1.png | ||
|image2=3s_urien_cr.hp_2.png | |||
|imageSize=250px | |||
|imageSize2=250px | |||
|caption=Frame 10 | |||
|caption2=Frame 11 | |||
|data= | |data= | ||
{{AttackData-3S | {{AttackData-3S | ||
| Line 292: | Line 341: | ||
|active=2 | |active=2 | ||
|recovery=25 | |recovery=25 | ||
|onHit= | |onHit=Soft KD | ||
|onHitCrouch= | |onHitCrouch=Soft KD | ||
|onBlock=-10 | |onBlock=-10 | ||
|parry=A | |parry=A | ||
|damage=18 | |damage=18 | ||
|stun=9 | |stun=9 | ||
|attackLevel=Mid | |||
|description= | |description= | ||
* Cancel options: sp su | * Cancel options: sp su | ||
| Line 303: | Line 353: | ||
* Self meter gain: Whiff: 3, Hit: 18, Block: 8. | * Self meter gain: Whiff: 3, Hit: 18, Block: 8. | ||
* Opponent meter gain: Whiff: 0, Hit: 4, Block: 0. | * Opponent meter gain: Whiff: 0, Hit: 4, Block: 0. | ||
* Considered crouching throughout entire attack | |||
{{3S Button FAT|link=https://fullmeter.com/fatonline/#/framedata/movedetail/3S/Urien/normal/Crouch%20HP}} | {{3S Button FAT|link=https://fullmeter.com/fatonline/#/framedata/movedetail/3S/Urien/normal/Crouch%20HP}} | ||
}} | }} | ||
| Line 311: | Line 362: | ||
|name=Crouch LK | |name=Crouch LK | ||
|input={{d}}+{{lk}} | |input={{d}}+{{lk}} | ||
|image= | |image=3s_urien_cr.lk.png | ||
|imageSize=250px | |||
|data= | |data= | ||
{{AttackData-3S | {{AttackData-3S | ||
| Line 317: | Line 369: | ||
|active=1 | |active=1 | ||
|recovery=9 | |recovery=9 | ||
|onHit=1 | |onHit=+1 | ||
|onHitCrouch=1 | |onHitCrouch=+1 | ||
|onBlock=1 | |onBlock=+1 | ||
|parry=L | |parry=L | ||
|attackLevel=Low | |||
|damage=3 | |damage=3 | ||
|stun=3 | |stun=3 | ||
|description= | |description= | ||
* Cancel options: sp su | * Cancel options: sp su | ||
* Self meter gain: Whiff: 0, Hit: 2, Block: 1. | |||
* Opponent meter gain: Whiff: 0, Hit: 0, Block: 0. | |||
{{3S Button FAT|link=https://fullmeter.com/fatonline/#/framedata/movedetail/3S/Urien/normal/Crouch%20LK}} | {{3S Button FAT|link=https://fullmeter.com/fatonline/#/framedata/movedetail/3S/Urien/normal/Crouch%20LK}} | ||
}} | }} | ||
| Line 333: | Line 388: | ||
|name=Crouch MK | |name=Crouch MK | ||
|input={{d}}+{{mk}} | |input={{d}}+{{mk}} | ||
|image= | |image=3s_urien_cr.mk.png | ||
|imageSize=250px | |||
|data= | |data= | ||
{{AttackData-3S | {{AttackData-3S | ||
| Line 339: | Line 395: | ||
|active=3 | |active=3 | ||
|recovery=11 | |recovery=11 | ||
|onHit=1 | |onHit=+1 | ||
|onHitCrouch=2 | |onHitCrouch=+2 | ||
|onBlock=0 | |||
|parry=L | |parry=L | ||
|damage=12 | |damage=12 | ||
|stun=3 | |stun=3 | ||
|attackLevel=Low | |||
|description= | |description= | ||
* Self meter gain: Whiff: 2, Hit: 11, Block: 6. | * Self meter gain: Whiff: 2, Hit: 11, Block: 6. | ||
| Line 355: | Line 413: | ||
|name=Crouch HK | |name=Crouch HK | ||
|input={{d}}+{{hk}} | |input={{d}}+{{hk}} | ||
|image= | |image=3s_urien_cr.hk.png | ||
|imageSize=250px | |||
|data= | |data= | ||
{{AttackData-3S | {{AttackData-3S | ||
| Line 361: | Line 420: | ||
|active=3 | |active=3 | ||
|recovery=21 | |recovery=21 | ||
|onHit= | |onHit=Soft KD | ||
|onHitCrouch= | |onHitCrouch=Soft KD | ||
|onBlock=-13 | |onBlock=-13 | ||
|parry=L | |parry=L | ||
|damage=17 | |damage=17 | ||
|attackLevel=Low | |||
|stun=3 | |stun=3 | ||
|description= | |description= | ||
| Line 381: | Line 441: | ||
|name=Jump LP | |name=Jump LP | ||
|input={{u}}/{{uf}}+{{lp}} | |input={{u}}/{{uf}}+{{lp}} | ||
|image= | |image=3s_urien_j.lp.png | ||
|imageSize=250px | |||
|data= | |data= | ||
{{AttackData-3S | {{AttackData-3S | ||
|startup=4 | |startup=4 | ||
|active=Until Landing | |||
|parry=H | |parry=H | ||
|damage=8 | |damage=8 | ||
|stun=7 | |stun=7 | ||
|onHit=-5~+6 | |||
|onHitCrouch=+4~+7 | |||
|onBlock=-5~+7 | |||
|attackLevel=Overhead | |||
|description= | |description= | ||
* Self meter gain: Whiff: 0, Hit: 2, Block: 1. | |||
* Opponent meter gain: Whiff: 0, Hit: 0, Block: 0. | |||
{{3S Button FAT|link=https://fullmeter.com/fatonline/#/framedata/movedetail/3S/Urien/normal/Jump%20LP}} | {{3S Button FAT|link=https://fullmeter.com/fatonline/#/framedata/movedetail/3S/Urien/normal/Jump%20LP}} | ||
}} | }} | ||
| Line 397: | Line 465: | ||
|name=Jump MP | |name=Jump MP | ||
|input={{u}}/{{uf}}+{{mp}} | |input={{u}}/{{uf}}+{{mp}} | ||
|image= | |image=3s_urien_j.mp_1.png | ||
|image2=3s_urien_j.mp_2.png | |||
|imageSize=250px | |||
|imageSize2=250px | |||
|caption=Frame 7 | |||
|caption2=Frames 8-10 | |||
|data= | |data= | ||
{{AttackData-3S | {{AttackData-3S | ||
| Line 405: | Line 478: | ||
|damage=16 | |damage=16 | ||
|stun=9 | |stun=9 | ||
|onHit=+3~+10 | |||
|onHitCrouch=+9~+10 | |||
|onBlock=+3~+10 | |||
|attackLevel=Overhead | |||
|description= | |description= | ||
* Self meter gain: Whiff: 2, Hit: 11, Block: 6. | * Self meter gain: Whiff: 2, Hit: 11, Block: 6. | ||
| Line 416: | Line 493: | ||
|name=Jump HP | |name=Jump HP | ||
|input={{u}}/{{uf}}+{{hp}} | |input={{u}}/{{uf}}+{{hp}} | ||
|image= | |image=3s_urien_j.hp_1.png | ||
|image2=3s_urien_j.hp_2.png | |||
|imageSize=250px | |||
|imageSize2=250px | |||
|caption=Frame 8 | |||
|caption2=Frames 9-10 | |||
|data= | |data= | ||
{{AttackData-3S | {{AttackData-3S | ||
| Line 424: | Line 506: | ||
|damage=23 | |damage=23 | ||
|stun=11 | |stun=11 | ||
|onHit=+2~+12 | |||
|onHitCrouch=+11~+12 | |||
|onBlock=+5~+13 | |||
|attackLevel=Overhead | |||
|description= | |description= | ||
* Self meter gain: Whiff: 3, Hit: 19, Block: 10. | * Self meter gain: Whiff: 3, Hit: 19, Block: 10. | ||
| Line 435: | Line 521: | ||
|name=Jump LK | |name=Jump LK | ||
|input={{u}}/{{uf}}+{{lk}} | |input={{u}}/{{uf}}+{{lk}} | ||
|image= | |image=3s_urien_j.lk.png | ||
|imageSize=250px | |||
|data= | |data= | ||
{{AttackData-3S | {{AttackData-3S | ||
| Line 443: | Line 530: | ||
|damage=8 | |damage=8 | ||
|stun=7 | |stun=7 | ||
|onHit=+2~+12 | |||
|onHitCrouch=+11~+12 | |||
|onBlock=+5~+13 | |||
|attackLevel=Overhead | |||
|description= | |description= | ||
* Self meter gain: Whiff: 0, Hit: 2, Block: 1. | |||
* Opponent meter gain: Whiff: 0, Hit: 0, Block: 0. | |||
{{3S Button FAT|link=https://fullmeter.com/fatonline/#/framedata/movedetail/3S/Urien/normal/Jump%20LK}} | {{3S Button FAT|link=https://fullmeter.com/fatonline/#/framedata/movedetail/3S/Urien/normal/Jump%20LK}} | ||
}} | }} | ||
| Line 452: | Line 545: | ||
|name=Jump MK | |name=Jump MK | ||
|input={{u}}/{{uf}}+{{mk}} | |input={{u}}/{{uf}}+{{mk}} | ||
|image= | |image=3s_urien_j.mk.png | ||
|imageSize=250px | |||
|data= | |data= | ||
{{AttackData-3S | {{AttackData-3S | ||
| Line 460: | Line 554: | ||
|damage=16 | |damage=16 | ||
|stun=9 | |stun=9 | ||
|onHit=+3~+10 | |||
|onHitCrouch=+9~+10 | |||
|onBlock=+2~+10 | |||
|attackLevel=Overhead | |||
|description= | |description= | ||
* Self meter gain: Whiff: 2, Hit: 11, Block: 6. | * Self meter gain: Whiff: 2, Hit: 11, Block: 6. | ||
| Line 470: | Line 568: | ||
{{MoveData | {{MoveData | ||
|name=Jump HK | |name=Jump HK | ||
|input={{u}}/{{uf}}+{{ | |input={{u}}/{{uf}}+{{hk}} | ||
|image= | |image=3s_urien_j.hk.png | ||
|imageSize=250px | |||
|data= | |data= | ||
{{AttackData-3S | {{AttackData-3S | ||
| Line 479: | Line 578: | ||
|damage=23 | |damage=23 | ||
|stun=11 | |stun=11 | ||
|onHit=+1~+13 | |||
|onHitCrouch=+9~+13 | |||
|onBlock=-4~+12 | |||
|attackLevel=Overhead | |||
|description= | |description= | ||
* Self meter gain: Whiff: 3, Hit: 19, Block: 10. | * Self meter gain: Whiff: 3, Hit: 19, Block: 10. | ||
| Line 491: | Line 594: | ||
==== Target Combos ==== | ==== Target Combos ==== | ||
=====<font style="visibility:hidden; float:right">MPHP</font>===== | |||
{{MoveData | |||
|name=st.LP xx st.MP | |||
|input={{lp}}>{{mp}} | |||
|image=3s_urien_st.lp.png | |||
|imageSize=250px | |||
|image2=3s_urien_st.mp.png | |||
|imageSize2=250px | |||
|data= | |||
{{AttackData-3S | |||
|startup=4 | |||
|active= | |||
|recovery= | |||
|onHit=0 | |||
|onHitCrouch=+2 | |||
|onBlock=-2 | |||
|parry=H | |||
|damage=7 | |||
|stun=3 | |||
|attackLevel=Mid>Mid | |||
|description= | |||
}} | |||
}} | |||
<br> | <br> | ||
<br> | <br> | ||
| Line 500: | Line 626: | ||
|name=Destroy Claw | |name=Destroy Claw | ||
|input={{lp}}+{{lk}} | |input={{lp}}+{{lk}} | ||
|image=(uriennt).gif | |image=3s_urien_lp+lk.png | ||
|image2=(uriennt).gif | |||
|imageSize=250px | |||
|imageSize2=150px | |||
|data= | |data= | ||
{{AttackData-3S | {{AttackData-3S | ||
| Line 506: | Line 635: | ||
|active=1 | |active=1 | ||
|recovery=21 | |recovery=21 | ||
|onHit= | |onHit=Soft KD | ||
|onHitCrouch= | |onHitCrouch=Soft KD | ||
|damage=15 | |damage=15 | ||
|stun=22 | |stun=22 | ||
|attackLevel=Throw | |||
|description= | |description= | ||
* 26 throw range | * 26 throw range | ||
* Self meter gain: Whiff: 0, Hit: 8, Block: 0. | |||
* Opponent meter gain: Whiff: 0, Hit: 2, Block: 0. | |||
{{3S Button FAT|link=https://fullmeter.com/fatonline/#/framedata/movedetail/3S/Urien/normal/Destroy%20Claw}} | {{3S Button FAT|link=https://fullmeter.com/fatonline/#/framedata/movedetail/3S/Urien/normal/Destroy%20Claw}} | ||
}} | }} | ||
| Line 520: | Line 652: | ||
|name=Spartan Bomb | |name=Spartan Bomb | ||
|input={{b}}/{{f}}+{{lp}}+{{lk}} | |input={{b}}/{{f}}+{{lp}}+{{lk}} | ||
|image=(uriensbft).gif | |image=3s_urien_lp+lk.png | ||
|image2=(uriensbft).gif | |||
|imageSize=250px | |||
|imageSize2=150px | |||
|data= | |data= | ||
{{AttackData-3S | {{AttackData-3S | ||
| Line 526: | Line 661: | ||
|active=1 | |active=1 | ||
|recovery=21 | |recovery=21 | ||
|onHit= | |onHit=Soft KD | ||
|onHitCrouch= | |onHitCrouch=Soft KD | ||
|damage=24 | |damage=24 | ||
|attackLevel=Throw | |||
|stun=8 | |stun=8 | ||
|description= | |description= | ||
* 26 throw range | * 26 throw range | ||
* Self meter gain: Whiff: 0, Hit: 8, Block: 0. | |||
* Opponent meter gain: Whiff: 0, Hit: 2, Block: 0. | |||
{{3S Button FAT|link=https://fullmeter.com/fatonline/#/framedata/movedetail/3S/Urien/normal/Spartan%20Bomb}} | {{3S Button FAT|link=https://fullmeter.com/fatonline/#/framedata/movedetail/3S/Urien/normal/Spartan%20Bomb}} | ||
}} | }} | ||
| Line 538: | Line 676: | ||
<br> | <br> | ||
<br> | <br> | ||
==== Universal Overhead ==== | ==== Universal Overhead ==== | ||
=====<font style="visibility:hidden; float:right">MPMK</font>===== | =====<font style="visibility:hidden; float:right">MPMK</font>===== | ||
| Line 543: | Line 682: | ||
|name=Elbow Strike | |name=Elbow Strike | ||
|input={{mp}}+{{mk}} | |input={{mp}}+{{mk}} | ||
|image= | |image=3s_urien_mp+mk.png | ||
|imageSize=250px | |||
|data= | |data= | ||
{{AttackData-3S | {{AttackData-3S | ||
| Line 551: | Line 691: | ||
|parry=H | |parry=H | ||
|damage=7 | |damage=7 | ||
|onHit=0~+8 | |||
|onHitCrouch=+1~+9 | |||
|onBlock=-5~0 | |||
|stun=3 | |stun=3 | ||
|attackLevel=Mid | |||
|description= | |description= | ||
* Self meter gain: Whiff: 0, Hit: 2, Block: 1. | |||
* Opponent meter gain: Whiff: 0, Hit: 0, Block: 0. | |||
{{3S Button FAT|link=https://fullmeter.com/fatonline/#/framedata/movedetail/3S/Urien/normal/Elbow%20Strike}} | {{3S Button FAT|link=https://fullmeter.com/fatonline/#/framedata/movedetail/3S/Urien/normal/Elbow%20Strike}} | ||
}} | }} | ||
| Line 559: | Line 705: | ||
<br> | <br> | ||
<br> | <br> | ||
==== Taunts ==== | ==== Taunts ==== | ||
=====<font style="visibility:hidden; float:right">HPHK</font>===== | =====<font style="visibility:hidden; float:right">HPHK</font>===== | ||
| Line 564: | Line 711: | ||
|name=Ground Pound | |name=Ground Pound | ||
|input={{hp}}+{{hk}} | |input={{hp}}+{{hk}} | ||
|image= | |image=3s_urien_hp+hk.png | ||
|imageSize=250px | |||
|data= | |data= | ||
{{AttackData-3S | {{AttackData-3S | ||
| Line 571: | Line 719: | ||
|recovery=31 | |recovery=31 | ||
|parry=L | |parry=L | ||
|guard=L | |||
|damage=1 | |damage=1 | ||
|onHit=Soft KD | |||
|onHitCrouch=Soft KD | |||
|onBlock=-15 | |||
|attackLevel=Low | |||
|description= | |description= | ||
Increases Urien's damage for the next hit/combo by 31.3%. One taunt is the maximum. | |||
* 16 kara range | * 16 kara range | ||
* Self meter gain: Whiff: 4, Hit: 6, Block: 5. | * Self meter gain: Whiff: 4, Hit: 6, Block: 5. | ||
| Line 582: | Line 736: | ||
<br> | <br> | ||
<br> | <br> | ||
==== Special Moves ==== | ==== Special Moves ==== | ||
=====<font style="visibility:hidden; float:right">236P</font>===== | =====<font style="visibility:hidden; float:right">236P</font>===== | ||
| Line 587: | Line 742: | ||
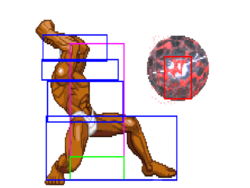
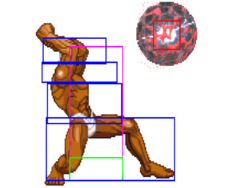
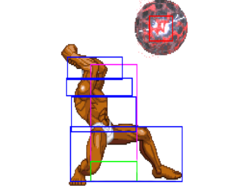
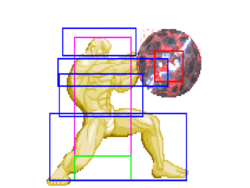
|name=Metallic Sphere | |name=Metallic Sphere | ||
|input={{qcf}}+{{p}} | |input={{qcf}}+{{p}} | ||
|image= | |image=3s_urien_qcf_lp.png | ||
|caption={{ | |caption={{lp}} | ||
|image2= | |image2=3s_urien_qcf_mp.png | ||
|caption2={{ | |caption2={{mp}} | ||
|image3= | |image3=3s_urien_qcf_hp.png | ||
|caption3={{ | |caption3={{hp}} | ||
|image4= | |image4=3s_urien_qcf_ex.png | ||
|caption4={{ | |caption4={{ex}} | ||
| | |imageSize=250px | ||
| | |imageSize2=250px | ||
|imageSize3=250px | |||
|imageSize4=250px | |||
|data= | |data= | ||
{{AttackData-3S | {{AttackData-3S | ||
|version=LP | |version=LP | ||
|attackLevel=Mid | |||
|startup=14 | |startup=14 | ||
|recovery=39 | |recovery=39 | ||
|onHit=-7 if point blank | |||
|onHitCrouch=-7 if point blank | |||
|onBlock=-8 | |onBlock=-8 | ||
|parry=H | |parry=H | ||
| Line 608: | Line 768: | ||
|description= | |description= | ||
* Cancel options: su | * Cancel options: su | ||
* Self meter gain: Whiff: 0, Hit: 2, Block: 1. | |||
* Opponent meter gain: Whiff: 0, Hit: 0, Block: 0. | |||
{{3S Button FAT|link=https://fullmeter.com/fatonline/#/framedata/movedetail/3S/Urien/normal/LP%20Metallic%20Sphere}} | {{3S Button FAT|link=https://fullmeter.com/fatonline/#/framedata/movedetail/3S/Urien/normal/LP%20Metallic%20Sphere}} | ||
}} | }} | ||
{{AttackData-3S | {{AttackData-3S | ||
|version=MP | |version=MP | ||
|attackLevel=Mid | |||
|startup=14 | |startup=14 | ||
|recovery=35 | |recovery=35 | ||
|onBlock=-4 | |onHit=-3 if point blank | ||
|onHitCrouch=-3 if point blank | |||
|onBlock=-4 if point blank | |||
|parry=H | |parry=H | ||
|damage=12 | |damage=12 | ||
| Line 620: | Line 785: | ||
|description= | |description= | ||
* Cancel options: su | * Cancel options: su | ||
* Self meter gain: Whiff: 0, Hit: 2, Block: 1. | |||
* Opponent meter gain: Whiff: 0, Hit: 0, Block: 0. | |||
{{3S Button FAT|link=https://fullmeter.com/fatonline/#/framedata/movedetail/3S/Urien/normal/MP%20Metallic%20Sphere}} | {{3S Button FAT|link=https://fullmeter.com/fatonline/#/framedata/movedetail/3S/Urien/normal/MP%20Metallic%20Sphere}} | ||
}} | }} | ||
{{AttackData-3S | {{AttackData-3S | ||
|version=HP | |version=HP | ||
|attackLevel=Mid | |||
|startup=14 | |startup=14 | ||
|recovery=28 | |recovery=28 | ||
|onBlock=3 | |onHit=-3 if point blank | ||
|onHitCrouch= | |||
|onBlock=+3 if point blank | |||
|parry=H | |parry=H | ||
|damage=12 | |damage=12 | ||
| Line 632: | Line 802: | ||
|description= | |description= | ||
* Cancel options: su | * Cancel options: su | ||
* Self meter gain: Whiff: 0, Hit: 2, Block: 1. | |||
* Opponent meter gain: Whiff: 0, Hit: 0, Block: 0. | |||
{{3S Button FAT|link=https://fullmeter.com/fatonline/#/framedata/movedetail/3S/Urien/normal/HP%20Metallic%20Sphere}} | {{3S Button FAT|link=https://fullmeter.com/fatonline/#/framedata/movedetail/3S/Urien/normal/HP%20Metallic%20Sphere}} | ||
}} | }} | ||
{{AttackData-3S | {{AttackData-3S | ||
|version=EX | |version=EX | ||
|attackLevel=Mid | |||
|startup=14 | |startup=14 | ||
|recovery=55 | |recovery=55 | ||
|onHit=-15 if point blank | |||
|onHitCrouch=-15 if point blank | |||
|onBlock=-16 | |onBlock=-16 | ||
|parry=H | |parry=H | ||
| Line 654: | Line 829: | ||
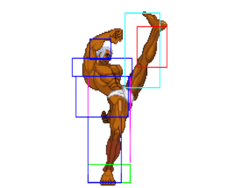
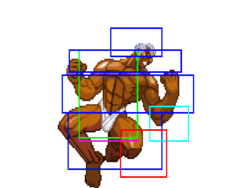
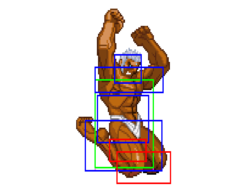
|name=Violence Knee Drop | |name=Violence Knee Drop | ||
|input=(hold){{d}}~{{u}}+{{k}} | |input=(hold){{d}}~{{u}}+{{k}} | ||
|image= | |image=3s_urien_du_K.png | ||
|caption={{lk}}/{{mk}}/{{hk}} | |caption={{lk}}/{{mk}}/{{hk}} | ||
|image2= | |image2=3s_urien_du_K.png | ||
|caption2={{ex}} | |caption2={{ex}} | ||
|imageSize=250px | |||
|imageSize2=250px | |||
|data= | |data= | ||
{{AttackData-3S | {{AttackData-3S | ||
| Line 664: | Line 841: | ||
|active=12 | |active=12 | ||
|recovery=7 | |recovery=7 | ||
|onHit=Soft KD | |||
|onHitCrouch=Soft KD | |||
|onBlock=-16 | |onBlock=-16 | ||
|parry=H | |parry=H | ||
|attackLevel=Overhead | |||
|damage=19 | |damage=19 | ||
|stun=11 | |stun=11 | ||
| Line 678: | Line 858: | ||
|active=5 | |active=5 | ||
|recovery=7 | |recovery=7 | ||
|onBlock=-14 | |onHit=-18~-14 | ||
|onHitCrouch=-15 | |||
|onBlock=-18~-14 | |||
|parry=H | |parry=H | ||
|attackLevel=Overhead | |||
|damage=23 | |damage=23 | ||
|stun=17 | |stun=17 | ||
| Line 693: | Line 876: | ||
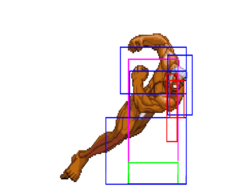
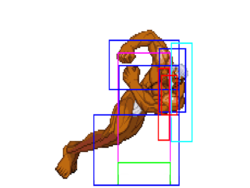
|name=Chariot Tackle | |name=Chariot Tackle | ||
|input=(hold){{b}}~{{f}}+{{k}} | |input=(hold){{b}}~{{f}}+{{k}} | ||
|image= | |image=3s_urien_bf_lk.png | ||
|caption={{lk}} | |caption={{lk}} | ||
|image2= | |image2=3s_urien_bf_mk.png | ||
|caption2={{ | |caption2={{mk}} | ||
| | |image3=3s_urien_bf_hk.png | ||
| | |caption3={{hk}} | ||
|image4=3s_urien_bf_ex.png | |||
|caption4={{ex}} | |||
|imageSize=250px | |||
|imageSize2=250px | |||
|imageSize3=250px | |||
|imageSize4=250px | |||
|data= | |data= | ||
{{AttackData-3S | {{AttackData-3S | ||
| Line 705: | Line 894: | ||
|active=10 | |active=10 | ||
|recovery=25 | |recovery=25 | ||
|onHit=0 | |||
|onHitCrouch=+2 | |||
|onBlock=-10 | |onBlock=-10 | ||
|parry=H | |parry=H | ||
|damage=21 | |damage=21 | ||
|stun=7 | |stun=7 | ||
|attackLevel=Mid | |||
|description= | |description= | ||
* Cancel options: su | * Cancel options: su | ||
| Line 721: | Line 913: | ||
|recovery=26 | |recovery=26 | ||
|onBlock=-11 | |onBlock=-11 | ||
|onHit=-1 | |||
|onHitCrouch=+1 | |||
|parry=H | |parry=H | ||
|damage=24 | |damage=24 | ||
|stun=9 | |stun=9 | ||
|attackLevel=Mid | |||
|description= | |description= | ||
* Cancel options: su | * Cancel options: su | ||
| Line 735: | Line 930: | ||
|active=15 | |active=15 | ||
|recovery=27 | |recovery=27 | ||
|onHit=-2 | |||
|onHitCrouch=0 | |||
|onBlock=-12 | |onBlock=-12 | ||
|parry=H | |parry=H | ||
|damage=26 | |damage=26 | ||
|stun=11 | |stun=11 | ||
|attackLevel=Mid | |||
|description= | |description= | ||
* Cancel options: su | * Cancel options: su | ||
| Line 750: | Line 948: | ||
|active=34 | |active=34 | ||
|recovery=39 | |recovery=39 | ||
|onHit=+2 | |||
|onHitCrouch=+4 | |||
|onBlock=-9 | |onBlock=-9 | ||
|parry=H | |parry=H | ||
|damage=29 | |damage=29 | ||
|stun=17 | |stun=17 | ||
|attackLevel=Mid | |||
|description= | |description= | ||
* Cancel options: su | * Cancel options: su | ||
| Line 761: | Line 962: | ||
}} | }} | ||
}} | }} | ||
=====<font style="visibility:hidden; float:right">28P</font>===== | =====<font style="visibility:hidden; float:right">28P</font>===== | ||
| Line 767: | Line 967: | ||
|name=Headbutt | |name=Headbutt | ||
|input=(hold){{d}}~{{u}}+{{p}} | |input=(hold){{d}}~{{u}}+{{p}} | ||
|image= | |image=3s_urien_du_P.png | ||
|caption={{lp}}/{{mp}}/{{hp}} | |caption={{lp}}/{{mp}}/{{hp}} | ||
|image2= | |image2=3s_urien_du_p_EX.png | ||
|caption2={{ex}} | |caption2={{ex}} | ||
|imageSize=250px | |||
|imageSize2=250px | |||
|data= | |data= | ||
{{AttackData-3S | {{AttackData-3S | ||
| Line 777: | Line 979: | ||
|active=2 | |active=2 | ||
|recovery=19 | |recovery=19 | ||
|attackLevel=Mid | |||
|onHit=Soft KD | |||
|onHitCrouch=Soft KD | |||
|onBlock=-5 | |onBlock=-5 | ||
|parry=H | |parry=H | ||
| Line 791: | Line 996: | ||
|active=4 | |active=4 | ||
|recovery=18 | |recovery=18 | ||
|onHit=Soft KD | |||
|onHitCrouch=Soft KD | |||
|onBlock=-6 | |onBlock=-6 | ||
|attackLevel=Mid | |||
|parry=H | |parry=H | ||
|damage=23 | |damage=23 | ||
| Line 805: | Line 1,013: | ||
|active=6 | |active=6 | ||
|recovery=19 | |recovery=19 | ||
|onHit=Soft KD | |||
|onHitCrouch=Soft KD | |||
|onBlock=-9 | |onBlock=-9 | ||
|attackLevel=Mid | |||
|parry=H | |parry=H | ||
|damage=24 | |damage=24 | ||
| Line 819: | Line 1,030: | ||
|active=4 | |active=4 | ||
|recovery=15 | |recovery=15 | ||
|onHit=Soft KD | |||
|onHitCrouch=Soft KD | |||
|onBlock=-1 | |onBlock=-1 | ||
|attackLevel=Mid | |||
|parry=H | |parry=H | ||
|damage=27 | |damage=27 | ||
| Line 836: | Line 1,050: | ||
=====<font style="visibility:hidden; float:right">236236P (SA1)</font>===== | =====<font style="visibility:hidden; float:right">236236P (SA1)</font>===== | ||
{{MoveData | {{MoveData | ||
|name=Tyrant | |name=Tyrant Slaughter | ||
|input={{qcf}}{{qcf}}+{{p}} (SA1) | |input={{qcf}}{{qcf}}+{{p}} (SA1) | ||
| | |subtitle=Tyrant Punish (JP) | ||
|image=3s_urien_sa1.png | |||
|imageSize=250px | |||
|data= | |data= | ||
{{AttackData-3S | {{AttackData-3S | ||
| Line 844: | Line 1,060: | ||
|active=55 | |active=55 | ||
|recovery=23 | |recovery=23 | ||
|onHit=Hard KD | |||
|onHitCrouch=Hard KD | |||
|attackLevel=Mid | |||
|onBlock=-18 | |onBlock=-18 | ||
|damage=69 | |damage=69 | ||
|description= | |description= | ||
A series of advancing tackles, ending in a clothesline knockdown. A fast and invulnerable Super Art that can be canceled into from some of Urien's relevant moves. Does solid damage and, if selected, is Urien's only reversal, but suffers from some of Urien's best neutral options not having super cancels. | |||
In general Urien's kit doesn't synergize well with a damage/confirm super. | |||
{{3S Button FAT|link=https://fullmeter.com/fatonline/#/framedata/movedetail/3S/Urien/normal/Tyrant%20Punish}} | {{3S Button FAT|link=https://fullmeter.com/fatonline/#/framedata/movedetail/3S/Urien/normal/Tyrant%20Punish}} | ||
}} | }} | ||
| Line 855: | Line 1,077: | ||
|name=Temporal Thunder | |name=Temporal Thunder | ||
|input={{qcf}}{{qcf}}+{{p}} (SA2) | |input={{qcf}}{{qcf}}+{{p}} (SA2) | ||
| | |subtitle=Jupiter Thunder (JP) | ||
|image=3s_urien_sa2.png | |||
|imageSize=250px | |||
|data= | |data= | ||
{{AttackData-3S | {{AttackData-3S | ||
| Line 861: | Line 1,085: | ||
|active=75 | |active=75 | ||
|recovery=91 | |recovery=91 | ||
|onBlock=-36 | |onHit=Hard KD | ||
|onHitCrouch=Hard KD | |||
|attackLevel=Mid | |||
|onBlock=-36 if point blank | |||
|damage=48 | |damage=48 | ||
|stun=33 | |stun=33 | ||
|description= | |description= | ||
An oddball projectile super art. Launches a blast of electrical energy that eventually weakens into a metallic sphere. Has pretty substantial stun output, but is terrible for anything else. Arguably decent in corner juggles, especially as a stun-oriented reset option against low stun characters like Remy and Akuma, but its utility is both narrow and weak. | |||
{{3S Button FAT|link=https://fullmeter.com/fatonline/#/framedata/movedetail/3S/Urien/normal/Temporal%20Thunder}} | {{3S Button FAT|link=https://fullmeter.com/fatonline/#/framedata/movedetail/3S/Urien/normal/Temporal%20Thunder}} | ||
}} | }} | ||
| Line 873: | Line 1,101: | ||
|name=Aegis Reflector | |name=Aegis Reflector | ||
|input={{qcf}}{{qcf}}+{{p}} (SA3) | |input={{qcf}}{{qcf}}+{{p}} (SA3) | ||
|image= | |image=3s_urien_sa3.png | ||
|image2=(uriensa3pzones).png | |||
|image2=( | |caption2={{lp}}/{{mp}}/{{hp}} | ||
|caption2={{ | |image3=(uriensa3pp).gif | ||
|image3=( | |caption3={{ex}} | ||
|caption3={{ | |imageSize=250px | ||
|imageSize2=150px | |||
|imageSize3=150px | |||
|data= | |data= | ||
{{AttackData-3S | {{AttackData-3S | ||
|version= | |version=LP/MP/HP | ||
|startup=12/24/32 | |||
|active=224/212/204 | |||
|recovery=12 | |recovery=12 | ||
|onBlock=65 | |onBlock=+65 | ||
|onHit=Applies Hard KD effect after you knockdown the opponent and resets the Juggle Meter | |||
|onHitCrouch=Applies Hard KD effect after you knockdown the opponent and resets the Juggle Meter | |||
|attackLevel=Mid | |||
|parry=A | |parry=A | ||
|damage=23 | |damage=23 | ||
|description= | |description= | ||
<big>''Aegis Reflector is a wildly nuanced tool, and will not be covered at length in this move description; this is a brief overview. Go to the [[Street_Fighter_3:_3rd_Strike/Urien/2021/Aegis|Aegis sub-page]] for a more detailed breakdown.''</big> | |||
Urien projects a mirror forwards, which will hit opponents and reflect projectiles. | |||
A legendary and character-defining super, arguably the strongest individual Super Art in the game. Put very briefly and bluntly, Aegis singlehandedly elevates Urien from middling to highly menacing, dishonest, and explosive. Aegis Reflector, deployed properly, enables a ludicrous degree of screen control, game theft, and damage output. | |||
Aegis reflector has several properties that are key to understanding how it works. They are as follows: | |||
* Generally must be blocked according to the direction it was deployed from (with some nuances and caveats; see the Aegis page) | |||
** This is what sets up unblockables | |||
* Button strength corresponds to the length of travel before the Aegis comes to rest | |||
* Will slowly drift towards the opponent once reaches its target distance | |||
* Six hits, which are consumed on hit | |||
** The mirror can be 'damaged' when struck by the opponent's moves, losing hits | |||
* Reflection is not fully consistent | |||
** Some moves are outright reflected, others are destroyed, and a small few will beat the reflector | |||
{{3S Button FAT|link=https://fullmeter.com/fatonline/#/framedata/movedetail/3S/Urien/normal/Aegis%20Reflector}} | {{3S Button FAT|link=https://fullmeter.com/fatonline/#/framedata/movedetail/3S/Urien/normal/Aegis%20Reflector}} | ||
}} | }} | ||
{{AttackData-3S | {{AttackData-3S | ||
|version=EX | |version=EX | ||
|startup=2 | |||
|recovery=12 | |recovery=12 | ||
|onBlock=46 | |active=238 | ||
|onHit=Applies Hard KD effect after you knockdown the opponent | |||
|onHitCrouch=Applies Hard KD effect after you knockdown the opponent | |||
|onBlock=+46 | |||
|parry=A | |parry=A | ||
|attackLevel=Mid | |||
|damage=23 | |damage=23 | ||
|description= | |description= | ||
Urien projects a mirror upwards and forwards. | |||
EX Aegis is distinguished by the fact that it is active immediately, allowing it to be used as a niche combo enabler. It can make tackles safe on block, be linked into from Universal Overhead and EX Tackle, and pick up opponents from close Headbutt hits. | |||
* Identical properties to regular Aegis Reflector; see the non-EX entry | |||
{{3S Button FAT|link=https://fullmeter.com/fatonline/#/framedata/movedetail/3S/Urien/normal/EX%20Aegis%20Reflector}} | {{3S Button FAT|link=https://fullmeter.com/fatonline/#/framedata/movedetail/3S/Urien/normal/EX%20Aegis%20Reflector}} | ||
}} | }} | ||
Latest revision as of 03:13, 14 March 2025
Introduction
Urien is the second strongest member of the mysterious Secret Society, only outranked by his own brother Gill. He resents his older brother's supremacy and longs to overthrow Gill by any means. Urien was first introduced in Street Fighter III: 2nd Impact
Urien is a character that relies mostly on setups, basic mixups and normal moves. His fundamental game plan is basic, and his normals are unexceptional, but the added threat of Aegis Reflector glues his entire kit together. If you can manage his meter economy, and are willing to learn character-specific setups and combo routes, you can make your opponent's life absolutely miserable. If a basic, solid game plan backed by a nuclear option sounds up your alley, Urien is your character.
- Dr. SteelHammer's guide is heavily recommended
Super Arts
SA1: Tyrant Punish
Not Recommended
tl;dr Urien is not a confirm-driven character, and doesn't have the moveset to support a super like this
A series of advancing tackles, ending in a clothesline knockdown. A basic invulnerable Super Art that can be canceled into from some of Urien's relevant moves. Does solid damage and, if selected, is Urien's only reversal, but suffers from some of Urien's best neutral options not having super cancels.
Its simplicity is not necessarily good for beginners either; engaging with Aegis at a basic level will be far more beneficial than getting comfortable with a reversal/raw damage super that is largely irrelevant at a higher level. If you have no interest in learning anything related to Aegis, maybe this is a worthwhile pick.
SA2: Temporal Thunder
Not Recommended
tl;dr fails to shore up any holes in Urien's game plan
Projectile super art. Launches a blast of electrical energy that eventually weakens into a metallic sphere. Respectable stun output, terrible for anything else. Decent in corner juggles, especially as a stun-oriented reset option, but its utility is both narrow and weak.
Due to its stun output, it is possible to use this effectively in the Akuma matchup (this also answers the question of Akuma's teleports) but overall you will still get more mileage out of SA3.
SA3: Aegis Reflector
Recommended; Character-Defining
tl;dr this is the reason you play Urien
Widely considered Urien's best Super Art, as well as one of the most unique Super Arts in the game. Depending on the input used, Urien projects a shield at close, medium, or far distance (or upward), which will slowly drift towards the opponent. The shield has six hits, and must be blocked according to the direction from which Aegis was deployed.
This blocking direction mechanic, paired with Urien's ease in switching sides, means Urien can create situations where the opponent is mechanically asked to block both directions at once by hitting the opponent from the opposite side of the Aegis. This is an unblockable¹ situation; the opponent generally must parry out or try to otherwise break the setup. These unblockables are possible anywhere on screen, generate large amounts of meter, and are highly damaging.
Aegis can also be used as a mixup engine, placed directly on or in front of opponents to create situations that range from the mundane (one-time high-low mixups) to the insane (repeated high/low/throw mixups with limited escape options). It sees some use as a combo extender as well, intentionally whiffing the Aegis itself to enable long and highly damaging tackle sequences by taking advantage of the ability to charge inputs during the cinematic freeze of a super activation.
Because of the Aegis's versatility and two super bars, it is considered Urien's best Super Art by far.
¹Technically just a hard-to-blockable
| Strengths | Weaknesses |
|---|---|
|
|
| Urien #3S_UR | |
|---|---|
| Vitals | |
| Life Points | 1285 |
| Stun Points | 64 |
| Super Art Stock/Size | |
| SA1 | 2/104 |
| SA2 | 2/80 |
| SA3 | 2/88 |
| Ground Movement | |
| Forward Dash duration/distance | 15 (17) (121px) |
| Back Dash duration/distance | 19 (82px) |
| Jumping | |
| Back Jump duration | 38(5+32+1) |
| Neutral Jump duration | 38(5+32+1) |
| Forward Jump duration | 38(5+32+1) |
| Back Super Jump duration | 51(7+43+1) |
| Neutral Super Jump duration | 51(7+43+1) |
| Forward Super Jump duration | 51(7+43+1) |
| Wake up | |
| Wake up duration | 76 |
| Quick rise duration | 56 |
| 3S Frame Data Glossary | |
|---|---|
| Active |
How many frames a move remains active (can hurt opponents) for. Consecutive sets of active frames on a multi-hit move are separated by an asterisk (ex: 3*5). If there is a gap between sets of active frames, the gap is denoted by a number in parentheses (ex: 2(4)2) |
| Attack |
Attack level is L for low attacks (must be blocked crouching), H is for High attacks (which can be blocked high or low) and M for overhead (must be blocked standing). T is for throw attacks (which cannot be blocked). |
| Cancel options |
Available cancel options.
|
| Damage |
Attack damage on hit in life points. Notation may denote multi-hit or "sweet spot" damage values on certain frames. |
| Hit/Block |
These are frame advantage values when the attack hits or is blocked. If the number is positive, then the move will end before the defender can act again. If the number is negative, the defender will be able to act before the attacker and maybe even punish. D refers to knockdown on hit. "Cr. Hit" is an additional frame advantage value denoting if the advantage on hit changes when the defender is being hit while crouching. |
| Kara Range |
Almost all normal attacks can be canceled into a special or a multi-button command within three frames of startup. During that time, some attacks will shift position forward or backward and affect the reach of the special or command accordingly. This is denoted in pixels of range. There are a handful of moves in the game that can be kara-canceled after this initial window and will be denoted as a late kara-cancel. |
| Link |
A combo that is performed by inputting the second move after the first move has completely recovered (as opposed to cancelling the first move's animation). In 3S, the final frame of a move's hitstun allows a character to block a normal or special move, as well as some projectile supers. Therefore, an attack's frame advantage must be 2 frames greater than the followup move's startup in order to link. Ex: a +6 normal can link into a 4f normal/special, or a 5f super. |
| Parry |
This field will show a value of A if the attack can be parried standing or crouching, H if it must be parried standing or L if it must be parried crouching. |
| Recovery |
How many frames it takes for a move to finish after it's been active. |
| Startup |
How many frames it takes before the move becomes 'active' or has a hitbox. 3S uses classic startup notation, which does not include the first active frame. A move with 3 startup becomes active on frame 4. |
| Stun |
Amount of stun added to the opponent's stun bar on hit. |
| Throw range |
Range in pixels from the center of the character to the center of the opponent which allows a grab to connect. |
Frame Data
Standing Normals
5LP
5MP
5HP
5LK
5MK
5HK
Command Normals
6MP
6HP
6MK
Crouching Normals
2LP
2MP
2HP
2LK
2MK
2HK
Jumping Normals
j.LP
j.MP
j.HP
j.LK
j.MK
j.HK
Target Combos
MPHP
| Startup | Active | Recovery | Block | Hit | Cr. Hit | Damage | Stun | Kara | Guard Level | Parry Level |
|---|---|---|---|---|---|---|---|---|---|---|
| 4 | - | - | -2 | 0 | +2 | 7 | 3 | - | - | H |
| Cancel Options | Self Meter Gain | Whiff | Hit | Block / Tech | Opponent Meter Gain | Hit | Block / Tech | |||
| - | - | - | - | - | - | |||||
Throws
LPLK
4/6LPK
Universal Overhead
MPMK
Taunts
HPHK
Special Moves
236P
28K
46K
28P
Super Arts
236236P (SA1)
236236P (SA2)
236236P (SA3)
| LP/MP/HP | Startup | Active | Recovery | Block | Hit | Cr. Hit | Damage | Stun | Kara | Guard Level | Parry Level |
|---|---|---|---|---|---|---|---|---|---|---|---|
| 12/24/32 | 224/212/204 | 12 | +65 | Applies Hard KD effect after you knockdown the opponent and resets the Juggle Meter | Applies Hard KD effect after you knockdown the opponent and resets the Juggle Meter | 23 | - | - | - | A | |
| Cancel Options | Self Meter Gain | Whiff | Hit | Block / Tech | Opponent Meter Gain | Hit | Block / Tech | ||||
| - | - | - | - | - | - | ||||||
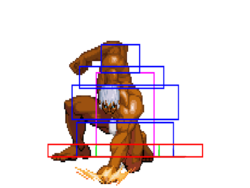
|
Aegis Reflector is a wildly nuanced tool, and will not be covered at length in this move description; this is a brief overview. Go to the Aegis sub-page for a more detailed breakdown. Urien projects a mirror forwards, which will hit opponents and reflect projectiles. A legendary and character-defining super, arguably the strongest individual Super Art in the game. Put very briefly and bluntly, Aegis singlehandedly elevates Urien from middling to highly menacing, dishonest, and explosive. Aegis Reflector, deployed properly, enables a ludicrous degree of screen control, game theft, and damage output. Aegis reflector has several properties that are key to understanding how it works. They are as follows:
| |||||||||||
| EX | Startup | Active | Recovery | Block | Hit | Cr. Hit | Damage | Stun | Kara | Guard Level | Parry Level |
| 2 | 238 | 12 | +46 | Applies Hard KD effect after you knockdown the opponent | Applies Hard KD effect after you knockdown the opponent | 23 | - | - | - | A | |
| Cancel Options | Self Meter Gain | Whiff | Hit | Block / Tech | Opponent Meter Gain | Hit | Block / Tech | ||||
| - | - | - | - | - | - | ||||||
|
Urien projects a mirror upwards and forwards. EX Aegis is distinguished by the fact that it is active immediately, allowing it to be used as a niche combo enabler. It can make tackles safe on block, be linked into from Universal Overhead and EX Tackle, and pick up opponents from close Headbutt hits.
| |||||||||||
