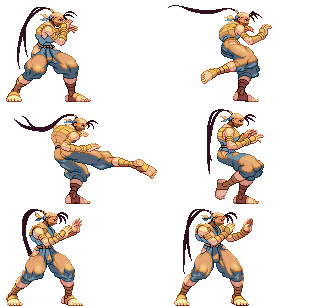
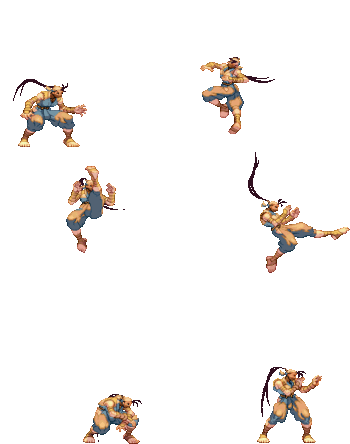
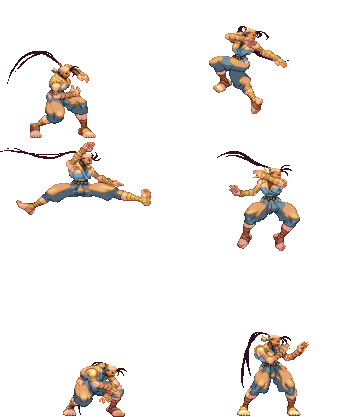
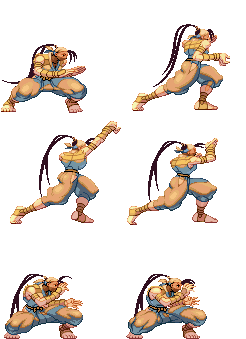
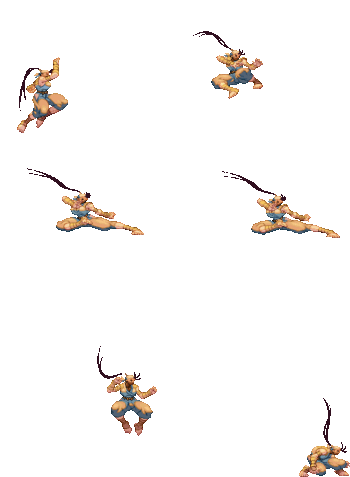
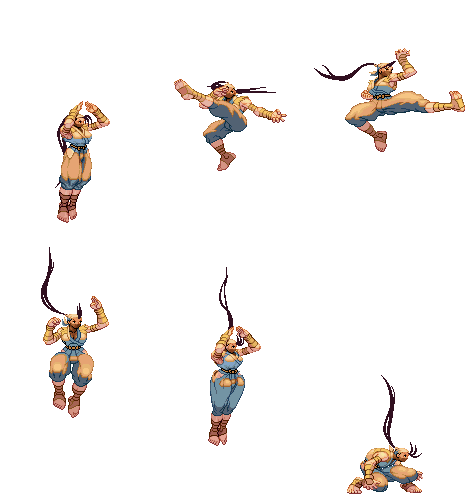
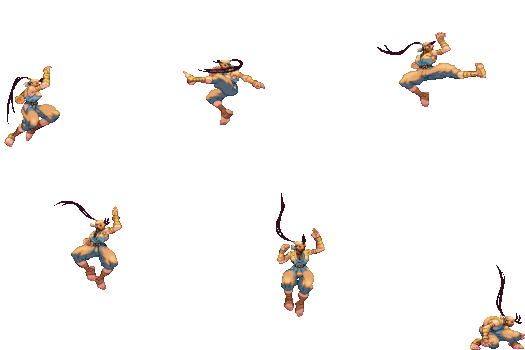
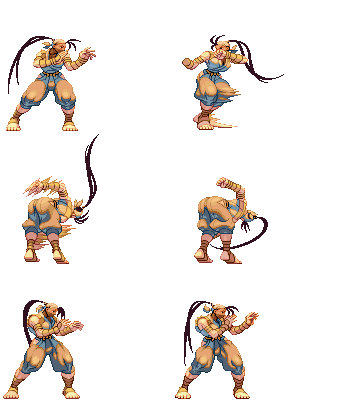
(→3MK: Expanded fireballs that can be slid under) |
|||
| (40 intermediate revisions by 6 users not shown) | |||
| Line 40: | Line 40: | ||
|onHitCrouch=5 | |onHitCrouch=5 | ||
|onBlock=5 | |onBlock=5 | ||
| | |guard=H | ||
|parry=A | |parry=A | ||
|damage=5 | |damage=5 | ||
| Line 47: | Line 47: | ||
* Cancel options: tc ch sp su | * Cancel options: tc ch sp su | ||
* 14 kara range | * 14 kara range | ||
* Whiffs on crouching Chun-Li, Elena, Ibuki, Oro | * Whiffs on crouching Chun-Li, Elena, Ibuki, and Oro. | ||
* Similar use to far LP as a pressure tool, though not used as often due to its range. | |||
{{3S Button FAT|link=https://fullmeter.com/fatonline/#/framedata/movedetail/3S/Ibuki/normal/Close%20LP}} | {{3S Button FAT|link=https://fullmeter.com/fatonline/#/framedata/movedetail/3S/Ibuki/normal/Close%20LP}} | ||
}} | }} | ||
| Line 65: | Line 66: | ||
|onHitCrouch=6 | |onHitCrouch=6 | ||
|onBlock=6 | |onBlock=6 | ||
| | |guard=H | ||
|parry=A | |parry=A | ||
|damage=4 | |damage=4 | ||
| Line 71: | Line 72: | ||
|description= | |description= | ||
* Cancel options: tc | * Cancel options: tc | ||
* Whiffs on crouching Chun-Li, Elena, Ibuki, Oro, Yang, Yun | * Whiffs on crouching Chun-Li, Elena, Ibuki, Oro, Yang, and Yun. | ||
* Incredible pressure button; walking forward with far LP allows for | * Incredible pressure button; walking forward with far LP allows for strong strike/throw and frametrap pressure. | ||
{{3S Button FAT|link=https://fullmeter.com/fatonline/#/framedata/movedetail/3S/Ibuki/normal/Far%20LP}} | {{3S Button FAT|link=https://fullmeter.com/fatonline/#/framedata/movedetail/3S/Ibuki/normal/Far%20LP}} | ||
}} | }} | ||
| Line 90: | Line 91: | ||
|onHitCrouch=8 | |onHitCrouch=8 | ||
|onBlock=6 | |onBlock=6 | ||
| | |guard=H | ||
|parry=H | |parry=H | ||
|damage=12 | |damage=12 | ||
| Line 96: | Line 97: | ||
|description= | |description= | ||
* Cancel options: tc | * Cancel options: tc | ||
* Whiffs on crouching Chun-Li, Elena, Ibuki, Oro, Yang, Yun | * Whiffs on crouching Chun-Li, Elena, Ibuki, Oro, Yang, and Yun. | ||
* Self meter gain: Whiff: 1, Hit: 9, Block: 3. | * Self meter gain: Whiff: 1, Hit: 9, Block: 3. | ||
* Opponent meter gain: Whiff: 0, Hit: 2, Block: 0. | * Opponent meter gain: Whiff: 0, Hit: 2, Block: 0. | ||
| Line 116: | Line 117: | ||
|onHitCrouch=1 | |onHitCrouch=1 | ||
|onBlock=-3 | |onBlock=-3 | ||
| | |guard=H*H | ||
|parry=H*H | |parry=H*H | ||
|damage= | |damage=10*10 | ||
|stun= | |stun=9*6 | ||
|description= | |description= | ||
* Cancel options: sp su (1st hit), tc (2nd hit) | * Cancel options: sp su (1st hit), tc (2nd hit) | ||
* The cancellable first hit only connects on crouching Hugo/Urien | * The cancellable first hit only connects consistently on crouching Hugo/Urien, while it connects inconsistently on crouching Dudley/Q. | ||
** Also hits twice against crouch blocking Twelve (but not on hit) | ** Also hits twice against crouch blocking Twelve (but not on hit). | ||
* Self meter gain: Whiff: 3, Hit: 20, Block: 11. | * Self meter gain: Whiff: 3, Hit: 20, Block: 11. | ||
* Opponent meter gain: Whiff: 0, Hit: 4, Block: 0. | * Opponent meter gain: Whiff: 0, Hit: 4, Block: 0. | ||
| Line 143: | Line 144: | ||
|onHitCrouch=3 | |onHitCrouch=3 | ||
|onBlock=-1 | |onBlock=-1 | ||
| | |guard=H | ||
|parry=H | |parry=H | ||
|damage= | |damage=12 | ||
|stun= | |stun=5 | ||
|description= | |description= | ||
* Cancel options: tc sp su | * Cancel options: tc sp su | ||
* Combos into EX Kubi Ori for a knockdown from max range, and MP Kubi Ori for a meterless knockdown from just shy of it. | |||
* Self meter gain: Whiff: 3, Hit: 13, Block: 5. | * Self meter gain: Whiff: 3, Hit: 13, Block: 5. | ||
* Opponent meter gain: Whiff: 0, Hit: 4, Block: 0. | * Opponent meter gain: Whiff: 0, Hit: 4, Block: 0. | ||
| Line 167: | Line 169: | ||
|onHitCrouch=3 | |onHitCrouch=3 | ||
|onBlock=-1 | |onBlock=-1 | ||
| | |guard=H | ||
|parry=H | |parry=H | ||
|damage=12 | |damage=12 | ||
|stun= | |stun=15 | ||
|description= | |description= | ||
* 7f window to input 2nd HP (must be input late in the Far HP animation, after hitstop). | |||
* Can be inputted if far HP whiffed. | |||
* Self meter gain: Whiff: 2, Hit: 10, Block: 4. | * Self meter gain: Whiff: 2, Hit: 10, Block: 4. | ||
* Opponent meter gain: Whiff: 0, Hit: 2, Block: 0. | * Opponent meter gain: Whiff: 0, Hit: 2, Block: 0. | ||
| Line 191: | Line 195: | ||
|onHitCrouch=1 | |onHitCrouch=1 | ||
|onBlock=1 | |onBlock=1 | ||
| | |guard=H | ||
|parry=A | |parry=A | ||
|damage=3 | |damage=3 | ||
| Line 214: | Line 218: | ||
|onHitCrouch=3 | |onHitCrouch=3 | ||
|onBlock=1 | |onBlock=1 | ||
| | |guard=H | ||
|parry=H | |parry=H | ||
|damage=17 | |damage=17 | ||
| Line 221: | Line 225: | ||
* Cancel options: tc sp su | * Cancel options: tc sp su | ||
* 4 kara range | * 4 kara range | ||
* Ibuki moves forward from her origin significantly, giving the move deceptive horizontal range. | |||
* Self meter gain: Whiff: 2, Hit: 11, Block: 6. | * Self meter gain: Whiff: 2, Hit: 11, Block: 6. | ||
* Opponent meter gain: Whiff: 0, Hit: 2, Block: 0. | * Opponent meter gain: Whiff: 0, Hit: 2, Block: 0. | ||
| Line 240: | Line 245: | ||
|onHitCrouch=D | |onHitCrouch=D | ||
|onBlock=-11 (-14) | |onBlock=-11 (-14) | ||
| | |guard=H*H | ||
|parry=H*H | |parry=H*H | ||
|damage= | |damage=8*10 | ||
|stun= | |stun=3*8 | ||
|description= | |description= | ||
* Cancel options: sj (2nd hit only, hit/block/parry) | * Cancel options: sj (2nd hit only, hit/block/parry) | ||
* vs. crouch block, 2nd hit only connects on Dudley, Hugo, Q, Urien<br>-Whiffing 2nd hit makes super jump impossible (-14 on block, less pushback) | * vs. crouch block, 2nd hit only connects on Dudley, Hugo, Q, Urien.<br>-Whiffing 2nd hit makes super jump impossible (-14 on block, less pushback). | ||
* Because the first hit only has 1 active frame, it can be difficult to time on the opponent's wakeup | * Because the first hit only has 1 active frame, it can be difficult to time on the opponent's wakeup. | ||
* Can work as an anti-air, but close jumps will usually make it whiff | * Very rewarding on hit because of its launch property and ability to be super jump cancelled. | ||
* Can work as an anti-air, but close jumps will usually make it whiff due to its poor backwards hitbox. | |||
* 4 kara range | * 4 kara range | ||
* Self meter gain: Whiff: 3, Hit: 18, Block: 8. | * Self meter gain: Whiff: 3, Hit: 18, Block: 8. | ||
| Line 269: | Line 275: | ||
|onHitCrouch=1 | |onHitCrouch=1 | ||
|onBlock=-2 | |onBlock=-2 | ||
| | |guard=H | ||
|parry=H | |parry=H | ||
|damage=19 | |damage=19 | ||
|stun=13 | |stun=13 | ||
|description= | |description= | ||
* Cancel options: sj (on hit only, making it a somewhat risky but rewarding AA)<br>- This also allows you to option select a super jump cancel into SA3, only coming out on hit | * Cancel options: sj (on hit only, making it a somewhat risky but rewarding AA)<br>- This also allows you to option select a super jump cancel into SA3, only coming out on hit. | ||
* Whiffs on crouching Chun, Elena, Ibuki, Oro | * Whiffs on crouching Chun, Elena, Ibuki, and Oro. Also whiffs on crouching Yang and Yun, unless you are at the closest possible distance. | ||
* Self meter gain: Whiff: 3, Hit: 19, Block: 10. | * Self meter gain: Whiff: 3, Hit: 19, Block: 10. | ||
* Opponent meter gain: Whiff: 0, Hit: 4, Block: 0. | * Opponent meter gain: Whiff: 0, Hit: 4, Block: 0. | ||
| Line 294: | Line 300: | ||
{{AttackData-3S | {{AttackData-3S | ||
|startup=6 | |startup=6 | ||
|active= | |active=1*6 | ||
|recovery=10 | |recovery=10 | ||
|onHit=-1 | |onHit=-1 | ||
|onHitCrouch=0 | |onHitCrouch=0 | ||
|onBlock=-2 | |onBlock=-2 | ||
| | |guard=H*H | ||
|parry=H*H | |parry=H*H | ||
|damage= | |damage=5*8 | ||
|stun= | |stun=5*8 | ||
|description= | |description= | ||
* Cancel options: tc sp su | * Cancel options: tc sp su | ||
| Line 327: | Line 333: | ||
|onHitCrouch=-1 | |onHitCrouch=-1 | ||
|onBlock=-1 | |onBlock=-1 | ||
| | |guard=H | ||
|parry=A | |parry=A | ||
|damage=3 | |damage=3 | ||
| Line 351: | Line 357: | ||
|onHitCrouch=0 | |onHitCrouch=0 | ||
|onBlock=-2 | |onBlock=-2 | ||
| | |guard=H | ||
|parry=H | |parry=H | ||
|damage=12 | |damage=12 | ||
| Line 378: | Line 384: | ||
|onHitCrouch=11 | |onHitCrouch=11 | ||
|onBlock=9 | |onBlock=9 | ||
| | |guard=M | ||
|parry=H | |parry=H | ||
|damage=14 | |damage=14 | ||
|stun=13 | |stun=13 | ||
|description= | |description= | ||
* Generally safe if parried, except to 3f specials/supers or 2f normals (throws can also punish if Ibuki is close enough) | * Generally safe if parried, except to 3f specials/supers or 2f normals (throws can also punish if Ibuki is close enough). | ||
* Can combo into EX Tsumuji or SA3 on reaction<br>-Against short crouching characters, cr.MK is a more consistent combo ender than EX Tsumuji | * Can combo into EX Tsumuji or SA3 on reaction.<br>-Against short crouching characters, cr.MK is a more consistent combo ender than EX Tsumuji. | ||
* Knocks down vs. airborne opponents | * Knocks down vs. airborne opponents. | ||
* Airborne 10f, Throw invulnerable 12f (until landing), can hop over many grounded attacks | * Airborne 10f, Throw invulnerable 12f (until landing), and can hop over many grounded attacks. | ||
* Self meter gain: Whiff: 2, Hit: 11, Block: 6. | * Self meter gain: Whiff: 2, Hit: 11, Block: 6. | ||
* Opponent meter gain: Whiff: 0, Hit: 2, Block: 0. | * Opponent meter gain: Whiff: 0, Hit: 2, Block: 0. | ||
| Line 406: | Line 412: | ||
|onHitCrouch=3 | |onHitCrouch=3 | ||
|onBlock=-1 | |onBlock=-1 | ||
| | |guard=H | ||
|parry=H | |parry=H | ||
|damage=23 | |damage=23 | ||
| Line 436: | Line 442: | ||
|onHitCrouch=-5 ~ 5 | |onHitCrouch=-5 ~ 5 | ||
|onBlock=-16 ~ -6 | |onBlock=-16 ~ -6 | ||
| | |guard=L | ||
|parry=L | |parry=L | ||
|damage=12 | |damage=12 | ||
|stun=3 | |stun=3 | ||
|description= | |description= | ||
* | * Can low profile most horizontal projectiles even at point blank, including: | ||
** Chun-Li's Kikoken | |||
** Oro's LP Sun Disk Palm | |||
** Remy's P Light of Virtue | |||
** All standard and EX Hadoukens (Ryu, Ken) | |||
** Akuma's standard and burning Gouhadouken (but not his Messatsu Gouhadouken) | |||
** Sean's Hadou Burst | |||
** Ryu's Shinkuu Hadouken and Denjin Hadouken (Can even parry 1st hit then slide through the rest) | |||
** Urien's Metallic Sphere and Orbital Thunder (Mid-range or farther) | |||
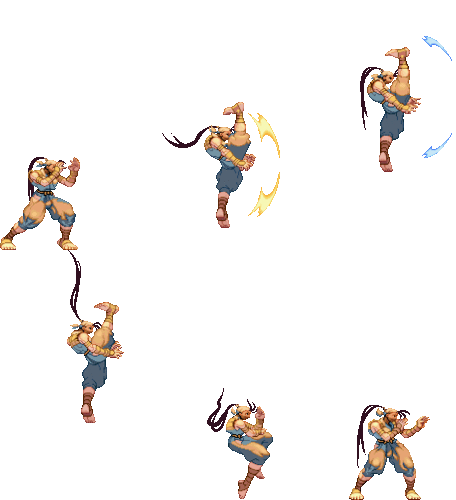
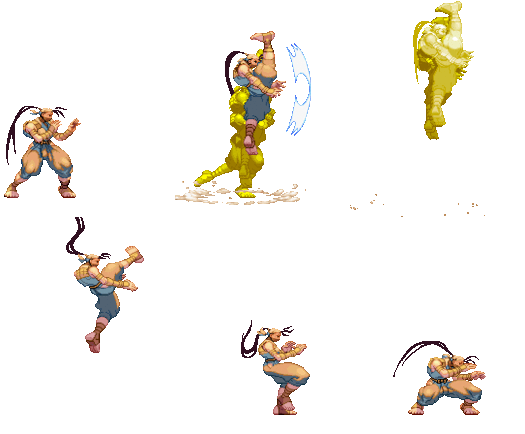
* Can also slide under moves which would normally whiff on crouchers, such as Urien's st.MK. | |||
* Self meter gain: Whiff: 3, Hit: 17, Block: 7. | * Self meter gain: Whiff: 3, Hit: 17, Block: 7. | ||
* Opponent meter gain: Whiff: 0, Hit: 4, Block: 0. | * Opponent meter gain: Whiff: 0, Hit: 4, Block: 0. | ||
| Line 465: | Line 480: | ||
|onHitCrouch=5 | |onHitCrouch=5 | ||
|onBlock=5 | |onBlock=5 | ||
| | |guard=H | ||
|parry=A | |parry=A | ||
|damage=3 | |damage=3 | ||
| Line 488: | Line 503: | ||
|onHitCrouch=4 | |onHitCrouch=4 | ||
|onBlock=2 | |onBlock=2 | ||
| | |guard=H | ||
|parry=A | |parry=A | ||
|damage=12 | |damage=12 | ||
| Line 513: | Line 528: | ||
|onHitCrouch=1 | |onHitCrouch=1 | ||
|onBlock=-3 | |onBlock=-3 | ||
| | |guard=H | ||
|parry=A | |parry=A | ||
|damage=19 | |damage=19 | ||
| Line 540: | Line 555: | ||
|onHitCrouch=3 | |onHitCrouch=3 | ||
|onBlock=3 | |onBlock=3 | ||
| | |guard=L | ||
|parry=L | |parry=L | ||
|damage=3 | |damage=3 | ||
| Line 564: | Line 579: | ||
|onHitCrouch=0 | |onHitCrouch=0 | ||
|onBlock=-2 | |onBlock=-2 | ||
| | |guard=L | ||
|parry=L | |parry=L | ||
|damage=12 | |damage=12 | ||
| Line 588: | Line 603: | ||
|onHitCrouch=D | |onHitCrouch=D | ||
|onBlock=-8 | |onBlock=-8 | ||
| | |guard=L | ||
|parry=L | |parry=L | ||
|damage=17 | |damage=17 | ||
| Line 613: | Line 628: | ||
|startup=3 | |startup=3 | ||
|active=until land | |active=until land | ||
| | |guard=M | ||
|parry=H | |parry=H | ||
|damage=8 | |damage=8 | ||
| Line 631: | Line 646: | ||
|startup=3 | |startup=3 | ||
|active=19 | |active=19 | ||
| | |guard=M | ||
|parry=H | |parry=H | ||
|damage=10 | |damage=10 | ||
| Line 650: | Line 665: | ||
|startup=5 | |startup=5 | ||
|active=7 | |active=7 | ||
| | |guard=M | ||
|parry=H | |parry=H | ||
|damage=12 | |damage=12 | ||
| Line 670: | Line 685: | ||
|startup=6 | |startup=6 | ||
|active=13 | |active=13 | ||
| | |guard=M | ||
|parry=H | |parry=H | ||
|damage=14 | |damage=14 | ||
| Line 690: | Line 705: | ||
|startup=11 | |startup=11 | ||
|active=5 | |active=5 | ||
| | |guard=M | ||
|parry=H | |parry=H | ||
|damage=21 | |damage=21 | ||
| Line 711: | Line 726: | ||
|startup=11 | |startup=11 | ||
|active=5 | |active=5 | ||
| | |guard=M | ||
|parry=H | |parry=H | ||
|damage=21 | |damage=21 | ||
| Line 732: | Line 747: | ||
|startup=4 | |startup=4 | ||
|active=until land | |active=until land | ||
| | |guard=M | ||
|parry=H | |parry=H | ||
|damage=8 | |damage=8 | ||
| Line 750: | Line 765: | ||
|startup=3 | |startup=3 | ||
|active=until land | |active=until land | ||
| | |guard=M | ||
|parry=H | |parry=H | ||
|damage=7 | |damage=7 | ||
| Line 770: | Line 785: | ||
|startup=5 | |startup=5 | ||
|active=7 | |active=7 | ||
| | |guard=M | ||
|parry=H | |parry=H | ||
|damage=12 | |damage=12 | ||
| Line 790: | Line 805: | ||
|startup=7 | |startup=7 | ||
|active=13 | |active=13 | ||
| | |guard=M | ||
|parry=H | |parry=H | ||
|damage=12 | |damage=12 | ||
| Line 811: | Line 826: | ||
|startup=10 | |startup=10 | ||
|active=3 | |active=3 | ||
| | |guard=M | ||
|parry=H | |parry=H | ||
|damage=19 | |damage=19 | ||
| Line 832: | Line 847: | ||
|startup=11 | |startup=11 | ||
|active=3 | |active=3 | ||
| | |guard=M | ||
|parry=H | |parry=H | ||
|damage=19 | |damage=19 | ||
| Line 848: | Line 863: | ||
==== Target Combos ==== | ==== Target Combos ==== | ||
<!-- Note: All the data for the entire TC sequence is listed in each segment. But for example, LP-MP-HP could be reformatted so that it only includes the data for the HP, since LP-MP is already listed before that. As long as it's made clear that the damage, stun, etc is only for that specific hit. Additionally, the Grouflon Dev version Lua script does not give accurate frame advantage for most target combos, so was manually tested for accuracy --> | |||
=====<font style="visibility:hidden; float:right">Close 5LP TC</font>===== | =====<font style="visibility:hidden; float:right">Close 5LP TC</font>===== | ||
{{MoveData | {{MoveData | ||
| Line 862: | Line 878: | ||
|onHitCrouch=0 | |onHitCrouch=0 | ||
|onBlock=-2 | |onBlock=-2 | ||
| | |guard=H*H*H | ||
|parry=A*H*H | |parry=A*H*H | ||
|damage= | |damage=5*5*8 | ||
|stun= | |stun=5*4*7 | ||
|description= | |description= | ||
* Cancel options: sp su tc (MP 1st hit); tc (MP 2nd hit) | * Cancel options: sp su tc (MP 1st hit); tc (MP 2nd hit) | ||
| Line 881: | Line 897: | ||
|onHitCrouch=7 (-3) | |onHitCrouch=7 (-3) | ||
|onBlock=3 (-5) | |onBlock=3 (-5) | ||
| | |guard=H*H*H | ||
|parry=A*H*H | |parry=A*H*H | ||
|damage= | |damage=5*5*11 | ||
|stun= | |stun=5*4*6 | ||
|description= | |description= | ||
* Cancel options: sp su | * Cancel options: sp su | ||
| Line 901: | Line 917: | ||
|onHitCrouch=D | |onHitCrouch=D | ||
|onBlock=-8 | |onBlock=-8 | ||
| | |guard=H*H*H*L | ||
|parry=A*H*H*L | |parry=A*H*H*L | ||
|damage= | |damage=5*5*8*6 | ||
|stun= | |stun=5*4*7*2 | ||
|description= | |description= | ||
* Cancel options: tc | * Cancel options: tc | ||
| Line 918: | Line 934: | ||
|onHitCrouch=D | |onHitCrouch=D | ||
|onBlock=-16 (-2) | |onBlock=-16 (-2) | ||
| | |guard=H*H*H*L*H | ||
|parry=A*H*H*L*H | |parry=A*H*H*L*H | ||
|damage= | |damage=5*5*8*6*11 | ||
|stun= | |stun=5*4*7*2*9 | ||
|description= | |description= | ||
* Cancel options: sj (hit only) | * Cancel options: sj (hit only) | ||
| Line 945: | Line 961: | ||
|onHitCrouch=8 | |onHitCrouch=8 | ||
|onBlock=6 | |onBlock=6 | ||
| | |guard=H*H | ||
|parry=A*H | |parry=A*H | ||
|damage= | |damage=4*11 | ||
|stun= | |stun=5*10 | ||
|description= | |description= | ||
* Cancel options: tc | * Cancel options: tc | ||
| Line 954: | Line 970: | ||
}} | }} | ||
{{AttackData-3S | {{AttackData-3S | ||
|version={{lp}} | |version={{lp}}>{{mp}}>{{f}}{{lk}} | ||
|startup=- | |startup=- | ||
|active=- | |active=- | ||
| Line 961: | Line 977: | ||
|onHitCrouch=4 | |onHitCrouch=4 | ||
|onBlock=2 | |onBlock=2 | ||
| | |guard=H*H*H | ||
|parry=A*H*A | |parry=A*H*A | ||
|damage= | |damage=4*11*6 | ||
|stun= | |stun=5*10*2 | ||
|description= | |||
* Generally not very strong, but occasionally it's Ibuki's only real punish option when outside close LP range | |||
}} | |||
{{AttackData-3S | |||
|version={{mp}}>{{f}}{{lk}} | |||
|startup=- | |||
|active=- | |||
|recovery=- | |||
|onHit=3 | |||
|onHitCrouch=4 | |||
|onBlock=2 | |||
|guard=H*H | |||
|parry=H*A | |||
|damage=12*8 | |||
|stun=11*2 | |||
|description= | |description= | ||
* The MP starter can be useful to stuff dashes against some characters, as MP is fairly safe to whiff | * The MP starter can be useful to stuff dashes against some characters, as MP is fairly safe to whiff | ||
}} | }} | ||
| Line 985: | Line 1,015: | ||
|onHitCrouch=7 (-3) | |onHitCrouch=7 (-3) | ||
|onBlock=3 (-5) | |onBlock=3 (-5) | ||
| | |guard=H*H | ||
|parry=H*H | |parry=H*H | ||
|damage= | |damage=5*11 | ||
|stun= | |stun=5*6 | ||
|description= | |description= | ||
* Cancel options: sp su | * Cancel options: sp su | ||
| Line 1,003: | Line 1,033: | ||
|onHitCrouch=D | |onHitCrouch=D | ||
|onBlock=-8 | |onBlock=-8 | ||
| | |guard=H*H*L | ||
|parry=H*H*L | |parry=H*H*L | ||
|damage= | |damage=5*8*6 | ||
|stun= | |stun=5*8*2 | ||
|description= | |description= | ||
* Cancel options: tc | * Cancel options: tc | ||
| Line 1,021: | Line 1,051: | ||
|onHitCrouch=D | |onHitCrouch=D | ||
|onBlock=-16 (-2) | |onBlock=-16 (-2) | ||
| | |guard=H*H*L*H | ||
|parry=H*H*L*H | |parry=H*H*L*H | ||
|damage= | |damage=5*8*6*11 | ||
|stun= | |stun=5*8*2*10 | ||
|description= | |description= | ||
* Cancel options: sj (hit only) | * Cancel options: sj (hit only) | ||
| Line 1,049: | Line 1,079: | ||
|onHitCrouch=D | |onHitCrouch=D | ||
|onBlock=-8 | |onBlock=-8 | ||
| | |guard=H*H*L | ||
|parry=H*H*L | |parry=H*H*L | ||
|damage= | |damage=10*10*5 | ||
|stun= | |stun=9*6*2 | ||
|description= | |description= | ||
* Cancel options: tc | * Cancel options: tc | ||
| Line 1,067: | Line 1,097: | ||
|onHitCrouch=D | |onHitCrouch=D | ||
|onBlock=-16 (-2) | |onBlock=-16 (-2) | ||
| | |guard=H*H*L*H | ||
|parry=H*H*L*H | |parry=H*H*L*H | ||
|damage= | |damage=10*10*5*8 | ||
|stun= | |stun=9*6*2*10 | ||
|description= | |description= | ||
* Cancel options: sj (hit only) | * Cancel options: sj (hit only) | ||
| Line 1,093: | Line 1,123: | ||
|onHit=D | |onHit=D | ||
|onHitCrouch=D | |onHitCrouch=D | ||
|onBlock= | |onBlock=-11 (-14) | ||
| | |guard=L*H*H | ||
|parry=L*H*H | |parry=L*H*H | ||
|damage= | |damage=17*7*9 | ||
|stun= | |stun=3*2*7 | ||
|description= | |description= | ||
* Cancel options: sj | * Cancel options: sj (2nd hit only, hit/block/parry) | ||
* Strong punish option | * vs. crouch block, 2nd hit only connects on Dudley, Hugo, Q, Urien | ||
** Whiffing 2nd hit makes super jump impossible (-14 on block, less pushback) | |||
* Strong punish option (especially after close range parry), leading to juggle mixups | |||
}} | }} | ||
{{AttackData-3S | {{AttackData-3S | ||
| Line 1,108: | Line 1,139: | ||
|active=- | |active=- | ||
|recovery=- | |recovery=- | ||
|onHit= | |onHit=D | ||
|onHitCrouch= | |onHitCrouch=D | ||
|onBlock= | |onBlock=-16 (-2) | ||
| | |guard=L*H | ||
|parry=L*H | |parry=L*H | ||
|damage= | |damage=17*17 | ||
|stun= | |stun=3*12 | ||
|description= | |description= | ||
*Cancel options: sj (hit only) | * Cancel options: sj (hit only) | ||
* | * On hit, final HK always whiffs on Yang; also whiffs on Twelve and Yun, unless perfectly spaced at the closest Far HK range | ||
* Final HK whiffs on crouch block, except vs. Hugo (-2 oB) | |||
** Can also connect vs. Q and Urien, if done from the closest possible range where Far 5HK comes out | |||
* If no super jump, Ibuki recovers 11f before opponent lands, allowing for corner meaties | |||
}} | }} | ||
}} | }} | ||
| Line 1,135: | Line 1,169: | ||
|onHitCrouch=6 | |onHitCrouch=6 | ||
|onBlock=4 | |onBlock=4 | ||
| | |guard=H*H | ||
|parry=A*H | |parry=A*H | ||
|damage= | |damage=3*8 | ||
|stun= | |stun=3*6 | ||
|description= | |description= | ||
* Cancel options: tc sp su | * Cancel options: tc sp su | ||
| Line 1,145: | Line 1,179: | ||
}} | }} | ||
{{AttackData-3S | {{AttackData-3S | ||
|version={{lk}} | |version={{lk}}>{{mk}}>{{hk}} | ||
|startup=- | |startup=- | ||
|active=- | |active=- | ||
| Line 1,152: | Line 1,186: | ||
|onHitCrouch=2 (-11) | |onHitCrouch=2 (-11) | ||
|onBlock=-2 (-13) | |onBlock=-2 (-13) | ||
| | |guard=H*H*H | ||
|parry=A*H*H | |parry=A*H*H | ||
|damage= | |damage=3*8*13 | ||
|stun= | |stun=3*6*6 | ||
|description= | |description= | ||
*Very rarely used (a special move after MK is always preferable) | *Very rarely used (a special move after MK is always preferable) | ||
| Line 1,162: | Line 1,196: | ||
*On hit, the HK whiffs on crouching Ibuki, Ken, Makoto, Ryu, Sean, Yang, and Yun (-11 oH) | *On hit, the HK whiffs on crouching Ibuki, Ken, Makoto, Ryu, Sean, Yang, and Yun (-11 oH) | ||
}} | }} | ||
}} | {{AttackData-3S | ||
|version={{mk}}>{{hk}} | |||
|startup=- | |||
|active=- | |||
|recovery=- | |||
|onHit=0 | |||
|onHitCrouch=2 (-11) | |||
|onBlock=-2 (-13) | |||
|guard=H*H | |||
|parry=H*H | |||
|damage=17*13 | |||
|stun=11*6 | |||
|description= | |||
*Very rarely used (a special move after MK is always preferable) | |||
*Can only chain into Far HK regardless of range, and this version cannot super jump cancel | |||
*The HK always whiffs on crouching Chun, Elena, and Oro (-11 oH/-13 oB) | |||
*On hit, the HK whiffs on crouching Ibuki, Ken, Makoto, Ryu, Sean, Yang, and Yun (-11 oH) | |||
}} | |||
}} | |||
=====<font style="visibility:hidden; float:right">4MK TC</font>===== | =====<font style="visibility:hidden; float:right">4MK TC</font>===== | ||
| Line 1,178: | Line 1,230: | ||
|onHitCrouch=11 | |onHitCrouch=11 | ||
|onBlock=9 | |onBlock=9 | ||
| | |guard=H*M | ||
|parry=H*H | |parry=H*H | ||
|damage= | |damage=12*12 | ||
|stun= | |stun=5*9 | ||
|description= | |description= | ||
* b.MK is Ibuki's longest ranged poke, and the overhead is her only potential followup | * b.MK is Ibuki's longest ranged poke, and the overhead is her only potential followup | ||
| Line 1,202: | Line 1,254: | ||
|onHitCrouch=- | |onHitCrouch=- | ||
|onBlock=- | |onBlock=- | ||
| | |guard=M*M | ||
|parry=H*H | |parry=H*H | ||
|damage= | |damage=10*17 | ||
|stun= | |stun=5*12 | ||
|description= | |description= | ||
* Strong option against AA parries because it works well high or close to the ground | * Strong option against AA parries because it works well high or close to the ground | ||
| Line 1,218: | Line 1,270: | ||
|onHitCrouch=- | |onHitCrouch=- | ||
|onBlock=- | |onBlock=- | ||
| | |guard=M*M | ||
|parry=H*H | |parry=H*H | ||
|damage= | |damage=21*8 | ||
|stun= | |stun=13*8 | ||
|description= | |description= | ||
* Can be done from angled or neutral jump | * Can be done from angled or neutral jump | ||
* Can be used to follow up after a jump cancelled cl. HK. | |||
}} | }} | ||
{{AttackData-3S | {{AttackData-3S | ||
| Line 1,233: | Line 1,286: | ||
|onHitCrouch=- | |onHitCrouch=- | ||
|onBlock=- | |onBlock=- | ||
| | |guard=M*M | ||
|parry=H*H | |parry=H*H | ||
|damage= | |damage=7*8 | ||
|stun= | |stun=5*8 | ||
|description= | |description= | ||
* In the corner, the j.LK can crossup (hold away from the corner while inputting j.MK) | * In the corner, the j.LK can crossup (hold away from the corner while inputting j.MK) | ||
| Line 1,261: | Line 1,314: | ||
|damage=21 | |damage=21 | ||
|stun=12 | |stun=12 | ||
| | |guard=T | ||
|description= | |description= | ||
* 16 throw range | * 16 throw range | ||
| Line 1,279: | Line 1,332: | ||
|active=1 | |active=1 | ||
|onHit=D | |onHit=D | ||
|damage= | |damage=26 | ||
|stun=16 | |stun=16 | ||
| | |guard=T | ||
|description= | |description= | ||
*Can be teched in the air | *Can be teched in the air | ||
| Line 1,307: | Line 1,360: | ||
|onHitCrouch=1 ~ 9 | |onHitCrouch=1 ~ 9 | ||
|onBlock=-5 ~ 7 | |onBlock=-5 ~ 7 | ||
| | |guard=M | ||
|parry=H | |parry=H | ||
|damage=7 | |damage=7 | ||
| Line 1,313: | Line 1,366: | ||
|description= | |description= | ||
* Airborne 5-25f | * Airborne 5-25f | ||
* If well-timed as a close range meaty, can link into LP Raida | |||
** Other followups are possible but LP Raida is good for safety and consistency | |||
{{3S Button FAT|link=https://fullmeter.com/fatonline/#/framedata/movedetail/3S/Ibuki/normal/Souken}} | {{3S Button FAT|link=https://fullmeter.com/fatonline/#/framedata/movedetail/3S/Ibuki/normal/Souken}} | ||
}} | }} | ||
| Line 1,334: | Line 1,389: | ||
|onHitCrouch=-22 ~ -23 | |onHitCrouch=-22 ~ -23 | ||
|onBlock=-28 ~ -32 (-4 ~ -7) | |onBlock=-28 ~ -32 (-4 ~ -7) | ||
| | |guard=H | ||
|parry=A | |parry=A | ||
|damage=1 | |damage=1 | ||
| Line 1,347: | Line 1,402: | ||
* If the first 4 active frames are blocked, Ibuki drops straight down (-4 ~ -7 oB) | * If the first 4 active frames are blocked, Ibuki drops straight down (-4 ~ -7 oB) | ||
* Any later active frames cause Ibuki to bounce off (-28 ~ -32)<br>-Crouch blocking will always cause the leapfrog to bounce off | * Any later active frames cause Ibuki to bounce off (-28 ~ -32)<br>-Crouch blocking will always cause the leapfrog to bounce off | ||
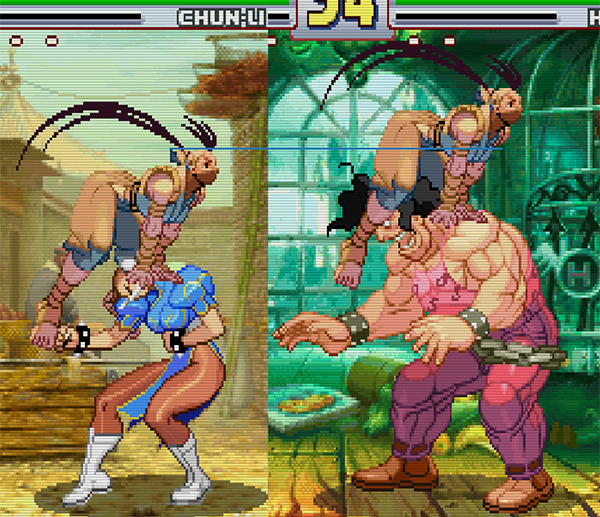
** <div class="mw-collapsible mw-collapsed" data-expandtext="Show Example Height Difference" data-collapsetext="Hide Example" style="width:50%;"><div style="width:200%; padding-top:2em;">[[File:3s_Ibuki_TauntCompare.png]]</div></div> | |||
* Self meter gain: Whiff: 4, Hit: 15, Block: 4. | * Self meter gain: Whiff: 4, Hit: 15, Block: 4. | ||
* Opponent meter gain: Whiff: 0, Hit: 2, Block: 0. | * Opponent meter gain: Whiff: 0, Hit: 2, Block: 0. | ||
| Line 1,378: | Line 1,434: | ||
|onHitCrouch=varies | |onHitCrouch=varies | ||
|onBlock=varies | |onBlock=varies | ||
| | |guard=H | ||
|parry=H | |parry=H | ||
|damage=8 | |damage=8 | ||
| Line 1,384: | Line 1,440: | ||
|description= | |description= | ||
* Cancel options: su | * Cancel options: su | ||
* If Ibuki holds down when landing, she will be in a crouching recovery state | |||
{{3S Button FAT|link=https://fullmeter.com/fatonline/#/framedata/movedetail/3S/Ibuki/normal/LP%20Kunai}} | {{3S Button FAT|link=https://fullmeter.com/fatonline/#/framedata/movedetail/3S/Ibuki/normal/LP%20Kunai}} | ||
}} | }} | ||
| Line 1,394: | Line 1,451: | ||
|onHitCrouch=varies | |onHitCrouch=varies | ||
|onBlock=varies | |onBlock=varies | ||
| | |guard=H | ||
|parry=H | |parry=H | ||
|damage=8 | |damage=8 | ||
| Line 1,400: | Line 1,457: | ||
|description= | |description= | ||
* Cancel options: su | * Cancel options: su | ||
* If Ibuki holds down when landing, she will be in a crouching recovery state | |||
{{3S Button FAT|link=https://fullmeter.com/fatonline/#/framedata/movedetail/3S/Ibuki/normal/MP%20Kunai}} | {{3S Button FAT|link=https://fullmeter.com/fatonline/#/framedata/movedetail/3S/Ibuki/normal/MP%20Kunai}} | ||
}} | }} | ||
| Line 1,410: | Line 1,468: | ||
|onHitCrouch=varies | |onHitCrouch=varies | ||
|onBlock=varies | |onBlock=varies | ||
| | |guard=H | ||
|parry=H | |parry=H | ||
|damage=8 | |damage=8 | ||
| Line 1,416: | Line 1,474: | ||
|description= | |description= | ||
* Cancel options: su | * Cancel options: su | ||
* If Ibuki holds down when landing, she will be in a crouching recovery state | |||
{{3S Button FAT|link=https://fullmeter.com/fatonline/#/framedata/movedetail/3S/Ibuki/normal/HP%20Kunai}} | {{3S Button FAT|link=https://fullmeter.com/fatonline/#/framedata/movedetail/3S/Ibuki/normal/HP%20Kunai}} | ||
}} | }} | ||
| Line 1,426: | Line 1,485: | ||
|onHitCrouch=varies | |onHitCrouch=varies | ||
|onBlock=varies | |onBlock=varies | ||
| | |guard=H*H | ||
|parry=H | |parry=H*H | ||
|damage= | |damage=9*9 | ||
|stun= | |stun=3*2 | ||
|description= | |description= | ||
* Cancel options: su | * Cancel options: su | ||
| Line 1,436: | Line 1,495: | ||
* Holding forward will make the EX Kunai travel farther | * Holding forward will make the EX Kunai travel farther | ||
* Depending on the angle and the initial parry timing, 1 or 2 parries may be required | * Depending on the angle and the initial parry timing, 1 or 2 parries may be required | ||
* If Ibuki holds down when landing, she will be in a crouching recovery state | |||
{{3S Button FAT|link=https://fullmeter.com/fatonline/#/framedata/movedetail/3S/Ibuki/normal/EX%20Kunai}} | {{3S Button FAT|link=https://fullmeter.com/fatonline/#/framedata/movedetail/3S/Ibuki/normal/EX%20Kunai}} | ||
}} | }} | ||
| Line 1,458: | Line 1,518: | ||
|damage=28 | |damage=28 | ||
|stun=8 | |stun=8 | ||
| | |guard=H | ||
|parry=N | |||
|description= | |description= | ||
* 44 throw range | * 44 throw range | ||
| Line 1,476: | Line 1,537: | ||
|damage=30 | |damage=30 | ||
|stun=10 | |stun=10 | ||
| | |guard=H | ||
|parry=N | |||
|description= | |description= | ||
* 46 throw range | * 46 throw range | ||
| Line 1,494: | Line 1,556: | ||
|damage=32 | |damage=32 | ||
|stun=12 | |stun=12 | ||
| | |guard=H | ||
|parry=N | |||
|description= | |description= | ||
* 48 throw range | * 48 throw range | ||
* Hit-grab (can't be parried); prevents quick rise | * Hit-grab (can't be parried); prevents quick rise | ||
* Block advantage is not increased when timed as a meaty | * Block advantage is not increased when timed as a meaty | ||
* Is risky to use as a meaty as it's unsafe. But when timed right beats many wakeup options, including reversal normals, parries, and even some supers. | |||
{{3S Button FAT|link=https://fullmeter.com/fatonline/#/framedata/movedetail/3S/Ibuki/normal/HP%20Raida}} | {{3S Button FAT|link=https://fullmeter.com/fatonline/#/framedata/movedetail/3S/Ibuki/normal/HP%20Raida}} | ||
}} | }} | ||
| Line 1,520: | Line 1,584: | ||
|onHit=D | |onHit=D | ||
|onHitCrouch=D | |onHitCrouch=D | ||
|onBlock=- | |onBlock=-17 | ||
| | |guard=H | ||
|parry=A | |parry=A | ||
|damage=19 | |damage=19 | ||
| Line 1,527: | Line 1,591: | ||
|description= | |description= | ||
* Cancel options: su | * Cancel options: su | ||
* If Ibuki holds down when landing, she will be in a crouching recovery state | |||
* Self meter gain: Whiff: 3, Hit: 23, Block: 17. | * Self meter gain: Whiff: 3, Hit: 23, Block: 17. | ||
* Opponent meter gain: Whiff: 0, Hit: 6, Block: 0. | * Opponent meter gain: Whiff: 0, Hit: 6, Block: 0. | ||
| Line 1,539: | Line 1,604: | ||
|onHit=D | |onHit=D | ||
|onHitCrouch=D | |onHitCrouch=D | ||
|onBlock=- | |onBlock=-16 | ||
| | |guard=H | ||
|parry=A | |parry=A | ||
|damage=23 | |damage=23 | ||
| Line 1,546: | Line 1,611: | ||
|description= | |description= | ||
* Cancel options: su | * Cancel options: su | ||
* If Ibuki holds down when landing, she will be in a crouching recovery state | |||
* Self meter gain: Whiff: 3, Hit: 23, Block: 17. | * Self meter gain: Whiff: 3, Hit: 23, Block: 17. | ||
* Opponent meter gain: Whiff: 0, Hit: 6, Block: 0. | * Opponent meter gain: Whiff: 0, Hit: 6, Block: 0. | ||
| Line 1,558: | Line 1,624: | ||
|onHit=D | |onHit=D | ||
|onHitCrouch=D | |onHitCrouch=D | ||
|onBlock=- | |onBlock=-17 | ||
| | |guard=H | ||
|parry=A | |parry=A | ||
|damage=30 | |damage=30 | ||
| Line 1,565: | Line 1,631: | ||
|description= | |description= | ||
* Cancel options: su | * Cancel options: su | ||
* If Ibuki holds down when landing, she will be in a crouching recovery state | |||
* Self meter gain: Whiff: 3, Hit: 24, Block: 18. | * Self meter gain: Whiff: 3, Hit: 24, Block: 18. | ||
* Opponent meter gain: Whiff: 0, Hit: 6, Block: 0. | * Opponent meter gain: Whiff: 0, Hit: 6, Block: 0. | ||
| Line 1,575: | Line 1,642: | ||
|active=11 | |active=11 | ||
|recovery=33 | |recovery=33 | ||
|onHit=- | |onHit=-15 | ||
|onHitCrouch=- | |onHitCrouch=-15 | ||
|onBlock=-21 | |onBlock=-21 | ||
| | |guard=H | ||
|parry=A | |parry=A | ||
|damage=28 | |damage=28 | ||
| Line 1,584: | Line 1,651: | ||
|description= | |description= | ||
* Cancel options: sp su | * Cancel options: sp su | ||
* On hit, can come down with kunai or diagonal jump | * SA1 cancels on hit, block, whiff, parry (must be done very quickly if not on hit) | ||
* | * On hit: forces stand, can come down with kunai or diagonal jump normals (but not parry) | ||
** Some characters can consistently beat or trade with any followup besides SA1, making it potentially risky even on hit | |||
* Holding down while landing affects Ibuki's landing recovery and causes her to recover in a crouching state | |||
** On hit, recovers 3f faster | |||
** On whiff/block/parry, recovers 6f faster | |||
* Self meter gain: Whiff: -40, Hit: -40, Block: -40. | * Self meter gain: Whiff: -40, Hit: -40, Block: -40. | ||
* Opponent meter gain: Whiff: 0, Hit: 0, Block: 0. | * Opponent meter gain: Whiff: 0, Hit: 0, Block: 0. | ||
| Line 1,603: | Line 1,674: | ||
{{AttackData-3S | {{AttackData-3S | ||
|version=LK | |version=LK (high) | ||
|startup=11 | |startup=11 | ||
|active= | |active=1(14)1 | ||
|recovery=19 | |recovery=19 | ||
|onHit=2 | |onHit=0 | ||
|onHitCrouch=2 | |||
|onBlock=-4 | |onBlock=-4 | ||
|parry=H | |guard=H*H | ||
|damage= | |parry=H*H | ||
|stun= | |damage=10*(8) | ||
|stun=3*(2) | |||
|description= | |description= | ||
* 2nd kick | * 2nd high kick comes out automatically if not holding {{d}} | ||
** Safe on block, except against particularly fast/far ranged punish supers | |||
* Self meter gain: Whiff: 3, Hit: 19, Block: 13. | * Self meter gain: Whiff: 3, Hit: 19, Block: 13. | ||
* Opponent meter gain: Whiff: 0, Hit: 4, Block: 0. | * Opponent meter gain: Whiff: 0, Hit: 4, Block: 0. | ||
{{3S Button FAT|link=https://fullmeter.com/fatonline/#/framedata/movedetail/3S/Ibuki/normal/LK%20Tsumuji}} | {{3S Button FAT|link=https://fullmeter.com/fatonline/#/framedata/movedetail/3S/Ibuki/normal/LK%20Tsumuji}} | ||
}} | |||
{{AttackData-3S | |||
|version=LK (low end) | |||
|startup=11 | |||
|active=1(19)2 | |||
|recovery=30 | |||
|onHit=D | |||
|onHitCrouch=D | |||
|onBlock=-12 | |||
|guard=H*L | |||
|parry=H*L | |||
|damage=10*(8) | |||
|stun=3*(3) | |||
|description= | |||
* Hold {{d}} for a low 2nd kick | |||
** Doesn't combo, but can mess up parry attempts in exchange for safety | |||
}} | }} | ||
| Line 1,622: | Line 1,713: | ||
|version=MK | |version=MK | ||
|startup=13 | |startup=13 | ||
|active= | |active=1(15)1 | ||
|recovery=21 | |recovery=21 | ||
|onHit=2 | |onHit=0 | ||
|onHitCrouch=2 | |||
|onBlock=-2 | |onBlock=-2 | ||
|parry=H | |guard=H*H | ||
|damage= | |parry=H*H | ||
|stun= | |damage=10*8 | ||
|stun=3*2 | |||
|description= | |description= | ||
* | * Safe on block against most characters; can follow up with 3rd kick after confirming a hit | ||
* Self meter gain: Whiff: 3, Hit: 19, Block: 13. | * Self meter gain: Whiff: 3, Hit: 19, Block: 13. | ||
* Opponent meter gain: Whiff: 0, Hit: 4, Block: 0. | * Opponent meter gain: Whiff: 0, Hit: 4, Block: 0. | ||
| Line 1,637: | Line 1,730: | ||
{{AttackData-3S | {{AttackData-3S | ||
|version= | |version=+ MK (3rd High) | ||
|startup= | |startup=- | ||
|active= | |active=1 | ||
|recovery= | |recovery=21 | ||
|onHit=3 | |onHit=1 | ||
|onBlock=- | |onHitCrouch=3 | ||
|onBlock=-7 | |||
|guard=H | |||
|parry=H | |parry=H | ||
|damage= | |damage=8 | ||
|stun= | |stun=5 | ||
|description= | |description= | ||
* | * Press {{k}} for a high third kick - 6f window, shortly after 2nd kick | ||
* Cancel options: su | * The timing of the 3rd hit doesn't change regardless of when it is input during this 6f window | ||
* Full active frame data: 1(15)1(15)1 | |||
}} | |||
{{AttackData-3S | |||
|version=+ MK (3rd Low) | |||
|startup=- | |||
|active=2 | |||
|recovery=30 | |||
|onHit=D | |||
|onHitCrouch=D | |||
|onBlock=-12 | |||
|guard=L | |||
|parry=L | |||
|damage=8 | |||
|stun=3 | |||
|description= | |||
* Press {{d}}+{{k}} for a low third kick - 6f window, shortly after 2nd kick | |||
* The timing of the 3rd hit doesn't change regardless of when it is input during this 6f window | |||
* Only combos against crouching opponents (easily confirmed after the first 2 hits connect) | |||
* Full active frame data: 1(15)1(21)2 | |||
}} | |||
{{AttackData-3S | |||
|version=HK (high) | |||
|startup=14 | |||
|active=1(13)1(15)1 | |||
|recovery=24 | |||
|onHit=0 | |||
|onHitCrouch=2 | |||
|onBlock=-8 | |||
|guard=H*H*H | |||
|parry=H*H*H | |||
|damage=10*8*(13) | |||
|stun=3*4*(4) | |||
|description= | |||
* Cancel options: su (2nd hit only, into SA2 fireball or SA3) | |||
* Third high kick comes out automatically if not holding {{d}} | |||
* Self meter gain: Whiff: 3, Hit: 20, Block: 14. | * Self meter gain: Whiff: 3, Hit: 20, Block: 14. | ||
* Opponent meter gain: Whiff: 0, Hit: 4, Block: 0. | * Opponent meter gain: Whiff: 0, Hit: 4, Block: 0. | ||
| Line 1,655: | Line 1,787: | ||
{{AttackData-3S | {{AttackData-3S | ||
|version=EX | |version=HK (low end) | ||
|startup=7 | |startup=- | ||
|active= | |active=2 | ||
|recovery=28 | |recovery=30 | ||
|onHit=D | |||
|onHitCrouch=D | |||
|onBlock=-12 | |||
|guard=L | |||
|parry=L | |||
|damage=12 | |||
|stun=3 | |||
|description= | |||
* Hold {{d}} after 2nd kick to use the low ender | |||
* Frame data is for the 3rd low kick only, not the entire sequence | |||
* Can't be comboed into, but can mess up parry attempts at the risk of being more unsafe on block | |||
* Full active frame data: 1(13)1(18)2 | |||
* Self meter gain: Whiff: 3, Hit: 20, Block: 14. | |||
* Opponent meter gain: Whiff: 0, Hit: 4, Block: 0. | |||
}} | |||
{{AttackData-3S | |||
|version=EX (high) | |||
|startup=7 | |||
|active=1(9)1(9)1(10)1 | |||
|recovery=28 | |||
|onHit=D | |||
|onHitCrouch=D | |||
|onBlock=-11 | |onBlock=-11 | ||
|parry=H | |guard=H*H*H*H | ||
|damage= | |parry=H*H*H*H | ||
|stun= | |damage=8*8*8*(11) | ||
|stun=3*4*4*(2) | |||
|description= | |description= | ||
* | * After the first kick, any followups can be low by holding {{d}} | ||
* | ** A high kick will only combo into a low followup on crouching opponents | ||
** A successful low followup can always combo into further high or low kicks | |||
* Whiffs against short crouching characters; later hits can whiff on more characters depending on range | |||
** -23 on hit if only the final kick whiffs | |||
* Self meter gain: Whiff: -40, Hit: -40, Block: -40. | * Self meter gain: Whiff: -40, Hit: -40, Block: -40. | ||
* Opponent meter gain: Whiff: 0, Hit: 0, Block: 0. | * Opponent meter gain: Whiff: 0, Hit: 0, Block: 0. | ||
{{3S Button FAT|link=https://fullmeter.com/fatonline/#/framedata/movedetail/3S/Ibuki/normal/EX%20Tsumuji}} | {{3S Button FAT|link=https://fullmeter.com/fatonline/#/framedata/movedetail/3S/Ibuki/normal/EX%20Tsumuji}} | ||
}} | |||
<!-- Removed the cancel option (su) because it can't actually be done without infinite meter training scripts, but this could be mentioned in a Misc. Notes section --> | |||
{{AttackData-3S | |||
|version=EX (low end) | |||
|startup=- | |||
|active=2 | |||
|recovery=30 | |||
|onHit=D | |||
|onHitCrouch=D | |||
|onBlock=-16 | |||
|guard=L | |||
|parry=L | |||
|damage=10 | |||
|stun=3 | |||
|description= | |||
* Frame data when the final kick is a low (any of the 2nd-4th hits can alternate between high and low) | |||
* Active frames for 3 high kicks + low ender: 1(9)1(9)1(14)2 | |||
}} | }} | ||
}} | }} | ||
=====<font style="visibility:hidden; float:right">421K</font>===== | =====<font style="visibility:hidden; float:right">421K</font>===== | ||
| Line 1,688: | Line 1,863: | ||
|startup=22 | |startup=22 | ||
|active=3 | |active=3 | ||
|recovery= | |recovery=22 | ||
|onBlock=- | |onHit=-31 ~ -30 | ||
| | |onBlock=-31 | ||
|guard=M*M | |||
|parry=H*H | |parry=H*H | ||
|damage= | |damage=7*12 | ||
|stun= | |stun=7*6 | ||
|description= | |description= | ||
* Cancel options: sp su | * Cancel options: sp su | ||
* 1f Airborne, 5f throw invuln | * 1f Airborne, 5f throw invuln | ||
* If Ibuki holds down when landing, she will be in a crouching recovery state | |||
* Self meter gain: Whiff: 3, Hit: 19, Block: 13. | * Self meter gain: Whiff: 3, Hit: 19, Block: 13. | ||
* Opponent meter gain: Whiff: 0, Hit: 4, Block: 0. | * Opponent meter gain: Whiff: 0, Hit: 4, Block: 0. | ||
| Line 1,706: | Line 1,883: | ||
|startup=25 | |startup=25 | ||
|active=3 | |active=3 | ||
|recovery= | |recovery=16 | ||
|onBlock=- | |onHit=-38 ~ -37 | ||
| | |onBlock=-38 | ||
|guard=M*M | |||
|parry=H*H | |parry=H*H | ||
|damage= | |damage=7*15 | ||
|stun= | |stun=7*6 | ||
|description= | |description= | ||
* Cancel options: sp su | * Cancel options: sp su | ||
* 1f Airborne, 5f throw invuln | * 1f Airborne, 5f throw invuln | ||
* If Ibuki holds down when landing, she will be in a crouching recovery state | |||
* Self meter gain: Whiff: 3, Hit: 19, Block: 13. | * Self meter gain: Whiff: 3, Hit: 19, Block: 13. | ||
* Opponent meter gain: Whiff: 0, Hit: 4, Block: 0. | * Opponent meter gain: Whiff: 0, Hit: 4, Block: 0. | ||
| Line 1,724: | Line 1,903: | ||
|startup=28 | |startup=28 | ||
|active=4 | |active=4 | ||
|recovery= | |recovery=15 | ||
|onBlock=- | |onHit=-35 ~ -34 | ||
| | |onBlock=-35 | ||
|guard=M*M | |||
|parry=H*H | |parry=H*H | ||
|damage= | |damage=7*18 | ||
|stun= | |stun=7*8 | ||
|description= | |description= | ||
* Cancel options: sp su | * Cancel options: sp su | ||
* 1f Airborne, 6f throw invuln | * 1f Airborne, 6f throw invuln | ||
* If Ibuki holds down when landing, she will be in a crouching recovery state | |||
* Self meter gain: Whiff: 3, Hit: 19, Block: 13. | * Self meter gain: Whiff: 3, Hit: 19, Block: 13. | ||
* Opponent meter gain: Whiff: 0, Hit: 4, Block: 0. | * Opponent meter gain: Whiff: 0, Hit: 4, Block: 0. | ||
| Line 1,742: | Line 1,923: | ||
|startup=26 | |startup=26 | ||
|active=4 | |active=4 | ||
|recovery= | |recovery=11 | ||
|onHit=-32 ~ -28 | |||
|onBlock=-32 | |onBlock=-32 | ||
| | |guard=M*M | ||
|parry=H*H | |parry=H*H | ||
|damage= | |damage=7*25 | ||
|stun= | |stun=7*8 | ||
|description= | |description= | ||
* Cancel options: sp su | * Cancel options: sp su | ||
* 1f Airborne, 4f throw invuln | * 1f Airborne, 4f throw invuln | ||
* Auto-tracks to opponent's location at the time the move is input | * Auto-tracks to opponent's location at the time the move is input | ||
* If Ibuki holds down when landing, she will be in a crouching recovery state | |||
* Self meter gain: Whiff: -40, Hit: -40, Block: -40. | * Self meter gain: Whiff: -40, Hit: -40, Block: -40. | ||
* Opponent meter gain: Whiff: 0, Hit: 0, Block: 0. | * Opponent meter gain: Whiff: 0, Hit: 0, Block: 0. | ||
| Line 1,776: | Line 1,959: | ||
|onHitCrouch=D | |onHitCrouch=D | ||
|onBlock=-10 | |onBlock=-10 | ||
| | |guard=L | ||
|parry=L | |parry=L | ||
|damage=26 | |damage=26 | ||
| Line 1,782: | Line 1,965: | ||
|description= | |description= | ||
* 40 throw range | * 40 throw range | ||
* If well-spaced, can be as safe as 0 on block (i.e. after cr.MP) | |||
* 11-25f low profiles projectiles from Akuma, Chun, Ken, Oro, Ryu, Sean (SA1), Urien | * 11-25f low profiles projectiles from Akuma, Chun, Ken, Oro, Ryu, Sean (SA1), Urien | ||
* 1-33f low profiles Remy LP/MP/HP projectile | * 1-33f low profiles Remy LP/MP/HP projectile | ||
| Line 1,797: | Line 1,981: | ||
|onHitCrouch=D | |onHitCrouch=D | ||
|onBlock=-16 | |onBlock=-16 | ||
| | |guard=L | ||
|parry=L | |parry=L | ||
|damage=26 | |damage=26 | ||
| Line 1,803: | Line 1,987: | ||
|description= | |description= | ||
* 40 throw range | * 40 throw range | ||
* At best, can be -5 on block with perfect spacing | |||
* 12-27f low profiles projectiles from Akuma, Chun, Ken, Oro, Ryu, Sean (SA1), Urien | * 12-27f low profiles projectiles from Akuma, Chun, Ken, Oro, Ryu, Sean (SA1), Urien | ||
* 1-36f low profiles Remy LP/MP/HP projectile | * 1-36f low profiles Remy LP/MP/HP projectile | ||
| Line 1,818: | Line 2,003: | ||
|onHitCrouch=D | |onHitCrouch=D | ||
|onBlock=-19 | |onBlock=-19 | ||
| | |guard=L | ||
|parry=L | |parry=L | ||
|damage=26 | |damage=26 | ||
| Line 1,824: | Line 2,009: | ||
|description= | |description= | ||
* 40 throw range | * 40 throw range | ||
* At best, can be -6 on block with perfect spacing | |||
* 14-31f low profiles projectiles from Akuma, Chun, Ken, Oro, Ryu, Sean (SA1), Urien | * 14-31f low profiles projectiles from Akuma, Chun, Ken, Oro, Ryu, Sean (SA1), Urien | ||
* 1-41f low profiles Remy LP/MP/HP projectile | * 1-41f low profiles Remy LP/MP/HP projectile | ||
| Line 1,838: | Line 2,024: | ||
|onHit=D | |onHit=D | ||
|onHitCrouch=D | |onHitCrouch=D | ||
|onBlock=- | |onBlock=-15 | ||
| | |guard=L | ||
|parry=L | |parry=L | ||
|damage=32 | |damage=32 | ||
| Line 1,845: | Line 2,031: | ||
|description= | |description= | ||
* 40 throw range | * 40 throw range | ||
* At best, can be -6 on block with perfect spacing | |||
* 12-25f low profiles projectiles from Akuma, Chun, Ken, Oro, Ryu, Sean (SA1), Urien | * 12-25f low profiles projectiles from Akuma, Chun, Ken, Oro, Ryu, Sean (SA1), Urien | ||
* 1-35f low profiles Remy LP/MP/HP projectile | * 1-35f low profiles Remy LP/MP/HP projectile | ||
| Line 1,865: | Line 2,052: | ||
* Ibuki takes 50% extra damage from opponent attacks if she is hit out of Kasumi Gake | * Ibuki takes 50% extra damage from opponent attacks if she is hit out of Kasumi Gake | ||
* Does not pass through opponents, unlike her normal dash | * Does not pass through opponents, unlike her normal dash | ||
* | * Frame Data for normals cancelled into QCF+LK (oH/oB vs standing; 2f worse for QCF+MK, 5f worse for QCF+HK) | ||
** st.MK, cr.MP, b.MP (1st hit), LK>MK, cl.LP>MP | ** -5/-6: st.MK, cr.MP, b.MP (1st hit), LK>MK, cl.LP>MP | ||
** -2/-4: LP>MP>HP, b.MP>HP | |||
** -3/-5: cl.HP, far.HP | |||
** -11/-11: cr.LK, cr.LP, cl.LP | |||
{{3S Button FAT|link=https://fullmeter.com/fatonline/#/framedata/movedetail/3S/Ibuki/normal/Kasumi%20Gake}} | {{3S Button FAT|link=https://fullmeter.com/fatonline/#/framedata/movedetail/3S/Ibuki/normal/Kasumi%20Gake}} | ||
| Line 1,883: | Line 2,070: | ||
{{AttackData-3S | {{AttackData-3S | ||
|startup=42/44/48 | |||
|recovery=2 land | |||
|description= | |description= | ||
* Cancel options: sp su | * Cancel options: sp su | ||
* | * Airborne frame 1 | ||
* Throw invuln frame 5/6/7 (LP/MP/HP) | |||
* Ibuki faces the opposite direction during her descent, and will throw kunai in this new direction | |||
** SA1 will autocorrect regardless of which side Ibuki is facing | |||
* Can be used sparingly to escape the corner at semi-low risk due to its airborne frames | |||
* If Ibuki holds down when landing, she will be in a crouching recovery state | |||
{{3S Button FAT|link=https://fullmeter.com/fatonline/#/framedata/movedetail/3S/Ibuki/normal/Tsuiji%20Goe}} | {{3S Button FAT|link=https://fullmeter.com/fatonline/#/framedata/movedetail/3S/Ibuki/normal/Tsuiji%20Goe}} | ||
}} | }} | ||
| Line 1,904: | Line 2,098: | ||
|active=87 | |active=87 | ||
|recovery=4/6/9 land (LP/MP/HP) | |recovery=4/6/9 land (LP/MP/HP) | ||
|onHit= | |onHit=-23 ~ 4 | ||
|onBlock= | |onBlock=-24 ~ 2 | ||
| | |guard=H | ||
|parry=H | |parry=H | ||
|damage=45 | |damage=45 | ||
| Line 1,912: | Line 2,106: | ||
*Button strength determines range - LP=close, MP=mid, HP=far<br>-LP: +4 to -12 oH, +1 to -13 oB, +3 to -9 if parried<br>-MP: -3 to -17 oH, -5 to -18 oB, -1 to -14 if parried<br>-HP: -9 to -23 oH, -11 to -24 oB, -7 to -20 if parried<br>-These values do not account for pushback possibly making later hits whiff | *Button strength determines range - LP=close, MP=mid, HP=far<br>-LP: +4 to -12 oH, +1 to -13 oB, +3 to -9 if parried<br>-MP: -3 to -17 oH, -5 to -18 oB, -1 to -14 if parried<br>-HP: -9 to -23 oH, -11 to -24 oB, -7 to -20 if parried<br>-These values do not account for pushback possibly making later hits whiff | ||
*Will always autocorrect to face the opponent | *Will always autocorrect to face the opponent | ||
*Cornered opponents won't get pushed back on hit/block, making it more unsafe<br>-Additionally, stand blocking tends to cause more pushback than crouch blocking | *Cornered opponents won't get pushed back on hit/block, making it more unsafe<br>-Additionally, stand blocking tends to cause more pushback than crouch blocking | ||
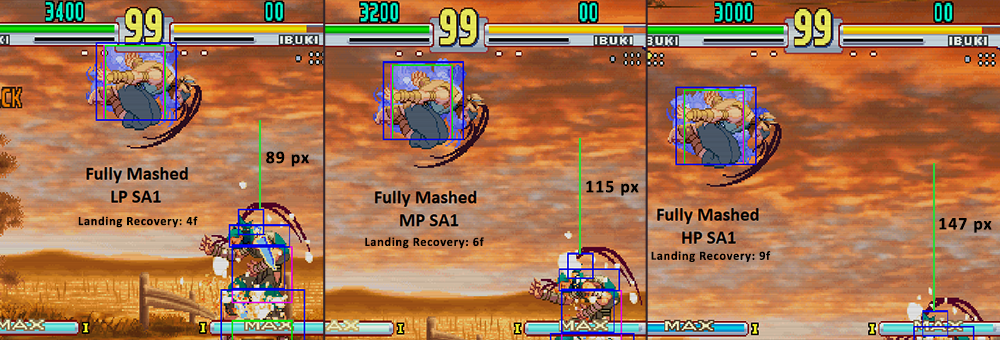
*Mash P for more hits (up to 20) - causes Ibuki to float higher, giving worse frame advantage<br>-Higher strength P = higher float when mashing extra hits<br> | |||
<div class="mw-collapsible mw-collapsed" data-expandtext="Show SA1 Height Comparison" data-collapsetext="Hide SA1 Comparison" style="width:50%;"><div style="width:200%; padding-top:2em;">[[File:3S_Ibuki_SA1_MashCompare.png]]</div></div> | |||
{{3S Button FAT|link=https://fullmeter.com/fatonline/#/framedata/movedetail/3S/Ibuki/normal/Kasumi%20Suzaku}} | {{3S Button FAT|link=https://fullmeter.com/fatonline/#/framedata/movedetail/3S/Ibuki/normal/Kasumi%20Suzaku}} | ||
}} | }} | ||
| Line 1,926: | Line 2,121: | ||
{{AttackData-3S | {{AttackData-3S | ||
|startup=1 | |startup=1 | ||
|active= | |active=1 | ||
|recovery=65 | |recovery=65 | ||
|onHit=D | |onHit=D | ||
|onHitCrouch=D | |onHitCrouch=D | ||
| | |guard=T | ||
|parry=N | |parry=N | ||
|damage=77 | |damage=77 | ||
| Line 1,936: | Line 2,131: | ||
|description= | |description= | ||
* 46 throw range | * 46 throw range | ||
* Can't be escaped after super freeze if the opponent is within throw range | |||
{{3S Button FAT|link=https://fullmeter.com/fatonline/#/framedata/movedetail/3S/Ibuki/normal/Yoroi%20Doushi}} | {{3S Button FAT|link=https://fullmeter.com/fatonline/#/framedata/movedetail/3S/Ibuki/normal/Yoroi%20Doushi}} | ||
}} | }} | ||
| Line 1,953: | Line 2,149: | ||
|onHitCrouch=D | |onHitCrouch=D | ||
|onBlock=-54 | |onBlock=-54 | ||
| | |guard=H | ||
|parry=A | |parry=A | ||
|damage=48 | |damage=48 | ||
| Line 1,976: | Line 2,172: | ||
|onHitCrouch=D | |onHitCrouch=D | ||
|onBlock=-10 ~ -6 | |onBlock=-10 ~ -6 | ||
| | |guard=L | ||
|parry=L | |parry=L | ||
|damage=55 | |damage=55 | ||
|stun=23 | |stun=23 | ||
|description= | |description= | ||
* | * If first hit (kunai throw) trades, followup does not come out | ||
* Ibuki becomes invincible once the dash animation starts | |||
** This allows the move to counter projectiles if done preemptively from farther ranges | |||
{{3S Button FAT|link=https://fullmeter.com/fatonline/#/framedata/movedetail/3S/Ibuki/normal/Yami%20Shigure}} | {{3S Button FAT|link=https://fullmeter.com/fatonline/#/framedata/movedetail/3S/Ibuki/normal/Yami%20Shigure}} | ||
}} | }} | ||
Latest revision as of 20:33, 25 February 2025
Introduction
Ibuki is a kunoichi who would rather live her life as a high school student. She first appears in Street Fighter III: New Generation.
Touting some incredible walkspeed and frame data, Ibuki is a mixup powerhouse that can be frustrating to contend with. Her ability to get frame advantage is startling, and she is often unpunishable by much of the cast. Once she gets started on offense, it can be lights out for the opponent if they can't catch onto her patterns. Another notable aspect is her far reaching and very fast jump, which can be altered by using her Kunai to avoid anti-air attempts and begin her offense.
Super Arts
SA1: Kasumi Suzaku
Kasumi Suzaku automatically turns Ibuki to face the opponent. Strength of button determines angle/distance of knives thrown. Rapidly pressing punch increases number of knives thrown and raises Ibuki higher into the air. Throws 12 knives by default, and up to a maximum of 20. Each knife does 35 attack for a maximum of 335 (scaled damage). The "recovery" listed for each strength refers to the amount of recovery frames Ibuki has once she reaches the ground, it does not include the time it takes for her to reach the ground from the air. It is difficult for some characters to punish, but fast long-ranged supers can punish Ibuki as she lands if it is not properly spaced (or if it is mashed too much).
It offers a large benefit in its 3 stock capacity, giving Ibuki more access to EX moves for confirms. Damage isn't particularly good and there's few options to actually confirm into the super, but it adds more threat to Ibuki's already strong air game and mixup potential.
SA2: Yoroi Doushi
Yoroi Doushi is an unblockable command grab super. Will not grab airborne opponents. Throw range: 46. While not as useful as the other supers, SA2's damage is still impressive. It can be comboed into with j.HP on some characters, as it will briefly backturn the opponent.
Yoroi Doushi also has an energy blast (fireball) version. This occurs when the grab version fails. It does 13 hits, each hit has 32 attack for a maximum of 280 (scaled damage). The fireball version can reset airborne juggled opponents.
SA3: Yami Shigure
Yami Shigure is a good damage super that is easy to combo into from a plethora of options. It has very fast startup, allowing Ibuki to punish things like blocked Shoto sweeps. Its small stock size keeps it from being used more often, as EX moves enable Ibuki's gameplan and strongest confirms. Still very useful in various matchups, so even players who generally favor SA1 may utilize it on occasion. Strength of button determines angle/distance of knives thrown. Block Advantage: -10 to -6.
| Strengths | Weaknesses |
|---|---|
|
|
| Ibuki #3S_IB | |
|---|---|
| Vitals | |
| Life Points | 1035 |
| Stun Points | 64 |
| Super Art Stock/Size | |
| SA1 | 3/88 |
| SA2 | 1/104 |
| SA3 | 1/80 |
| Ground Movement | |
| Forward Dash duration/distance | 19 (148px) |
| Back Dash duration/distance | 35 (164px) |
| Jumping | |
| Back Jump duration | 43(4+36+3) |
| Neutral Jump duration | 41(4+34+3) |
| Forward Jump duration | 40(4+33+3) |
| Back Super Jump duration | 58(5+50+3) |
| Neutral Super Jump duration | 52(5+44+3) |
| Forward Super Jump duration | 46(5+38+3) |
| Wake up | |
| Wake up duration | 68 |
| Quick rise duration | 53 |
| 3S Frame Data Glossary | |
|---|---|
| Active |
How many frames a move remains active (can hurt opponents) for. Consecutive sets of active frames on a multi-hit move are separated by an asterisk (ex: 3*5). If there is a gap between sets of active frames, the gap is denoted by a number in parentheses (ex: 2(4)2) |
| Attack |
Attack level is L for low attacks (must be blocked crouching), H is for High attacks (which can be blocked high or low) and M for overhead (must be blocked standing). T is for throw attacks (which cannot be blocked). |
| Cancel options |
Available cancel options.
|
| Damage |
Attack damage on hit in life points. Notation may denote multi-hit or "sweet spot" damage values on certain frames. |
| Hit/Block |
These are frame advantage values when the attack hits or is blocked. If the number is positive, then the move will end before the defender can act again. If the number is negative, the defender will be able to act before the attacker and maybe even punish. D refers to knockdown on hit. "Cr. Hit" is an additional frame advantage value denoting if the advantage on hit changes when the defender is being hit while crouching. |
| Kara Range |
Almost all normal attacks can be canceled into a special or a multi-button command within three frames of startup. During that time, some attacks will shift position forward or backward and affect the reach of the special or command accordingly. This is denoted in pixels of range. There are a handful of moves in the game that can be kara-canceled after this initial window and will be denoted as a late kara-cancel. |
| Link |
A combo that is performed by inputting the second move after the first move has completely recovered (as opposed to cancelling the first move's animation). In 3S, the final frame of a move's hitstun allows a character to block a normal or special move, as well as some projectile supers. Therefore, an attack's frame advantage must be 2 frames greater than the followup move's startup in order to link. Ex: a +6 normal can link into a 4f normal/special, or a 5f super. |
| Parry |
This field will show a value of A if the attack can be parried standing or crouching, H if it must be parried standing or L if it must be parried crouching. |
| Recovery |
How many frames it takes for a move to finish after it's been active. |
| Startup |
How many frames it takes before the move becomes 'active' or has a hitbox. 3S uses classic startup notation, which does not include the first active frame. A move with 3 startup becomes active on frame 4. |
| Stun |
Amount of stun added to the opponent's stun bar on hit. |
| Throw range |
Range in pixels from the center of the character to the center of the opponent which allows a grab to connect. |
Frame Data
All sprites are taken from the site https://www.justnopoint.com/zweifuss/
Standing Normals
5LP (cl)
5LP (far)
5MP
5HP
5HP (far)
| Startup | Active | Recovery | Block | Hit | Cr. Hit | Damage | Stun | Kara | Guard Level | Parry Level |
|---|---|---|---|---|---|---|---|---|---|---|
| 13 | 4 | 14 | -1 | 1 | 3 | 12 | 5 | - | H | H |
| Cancel Options | Self Meter Gain | Whiff | Hit | Block / Tech | Opponent Meter Gain | Hit | Block / Tech | |||
| - | - | - | - | - | - | |||||
| ||||||||||
5HP,HP (far)
5LK
5MK
5HK (cl)
5HK (far)
Command Normals
4MP
6LK
4MK
6MK
6HK
3MK
Crouching Normals
2LP
2MP
2HP
2LK
2MK
2HK
Jumping Normals
8LP
j.LP
8MP
j.MP
8HP
j.HP
8LK
j.LK
8MK
j.MK
8HK
j.HK
Target Combos
Close 5LP TC
| Startup | Active | Recovery | Block | Hit | Cr. Hit | Damage | Stun | Kara | Guard Level | Parry Level | |
|---|---|---|---|---|---|---|---|---|---|---|---|
| - | - | - | -2 | -1 | 0 | 5*5*8 | 5*4*7 | - | H*H*H | A*H*H | |
| Cancel Options | Self Meter Gain | Whiff | Hit | Block / Tech | Opponent Meter Gain | Hit | Block / Tech | ||||
| - | - | - | - | - | - | ||||||
| |||||||||||
| Startup | Active | Recovery | Block | Hit | Cr. Hit | Damage | Stun | Kara | Guard Level | Parry Level | |
| - | - | - | 3 (-5) | 5 | 7 (-3) | 5*5*11 | 5*4*6 | - | H*H*H | A*H*H | |
| Cancel Options | Self Meter Gain | Whiff | Hit | Block / Tech | Opponent Meter Gain | Hit | Block / Tech | ||||
| - | - | - | - | - | - | ||||||
| |||||||||||
| Startup | Active | Recovery | Block | Hit | Cr. Hit | Damage | Stun | Kara | Guard Level | Parry Level | |
| - | - | - | -8 | D | D | 5*5*8*6 | 5*4*7*2 | - | H*H*H*L | A*H*H*L | |
| Cancel Options | Self Meter Gain | Whiff | Hit | Block / Tech | Opponent Meter Gain | Hit | Block / Tech | ||||
| - | - | - | - | - | - | ||||||
| |||||||||||
| Startup | Active | Recovery | Block | Hit | Cr. Hit | Damage | Stun | Kara | Guard Level | Parry Level | |
| - | - | - | -16 (-2) | D | D | 5*5*8*6*11 | 5*4*7*2*9 | - | H*H*H*L*H | A*H*H*L*H | |
| Cancel Options | Self Meter Gain | Whiff | Hit | Block / Tech | Opponent Meter Gain | Hit | Block / Tech | ||||
| - | - | - | - | - | - | ||||||
| |||||||||||
Far 5LP TC
| Startup | Active | Recovery | Block | Hit | Cr. Hit | Damage | Stun | Kara | Guard Level | Parry Level | |
|---|---|---|---|---|---|---|---|---|---|---|---|
| - | - | - | 6 | 7 | 8 | 4*11 | 5*10 | - | H*H | A*H | |
| Cancel Options | Self Meter Gain | Whiff | Hit | Block / Tech | Opponent Meter Gain | Hit | Block / Tech | ||||
| - | - | - | - | - | - | ||||||
| |||||||||||
| Startup | Active | Recovery | Block | Hit | Cr. Hit | Damage | Stun | Kara | Guard Level | Parry Level | |
| - | - | - | 2 | 3 | 4 | 4*11*6 | 5*10*2 | - | H*H*H | A*H*A | |
| Cancel Options | Self Meter Gain | Whiff | Hit | Block / Tech | Opponent Meter Gain | Hit | Block / Tech | ||||
| - | - | - | - | - | - | ||||||
| |||||||||||
| Startup | Active | Recovery | Block | Hit | Cr. Hit | Damage | Stun | Kara | Guard Level | Parry Level | |
| - | - | - | 2 | 3 | 4 | 12*8 | 11*2 | - | H*H | H*A | |
| Cancel Options | Self Meter Gain | Whiff | Hit | Block / Tech | Opponent Meter Gain | Hit | Block / Tech | ||||
| - | - | - | - | - | - | ||||||
| |||||||||||
4MP TC
| Startup | Active | Recovery | Block | Hit | Cr. Hit | Damage | Stun | Kara | Guard Level | Parry Level | |
|---|---|---|---|---|---|---|---|---|---|---|---|
| - | - | - | 3 (-5) | 5 | 7 (-3) | 5*11 | 5*6 | - | H*H | H*H | |
| Cancel Options | Self Meter Gain | Whiff | Hit | Block / Tech | Opponent Meter Gain | Hit | Block / Tech | ||||
| - | - | - | - | - | - | ||||||
| |||||||||||
| Startup | Active | Recovery | Block | Hit | Cr. Hit | Damage | Stun | Kara | Guard Level | Parry Level | |
| - | - | - | -8 | D | D | 5*8*6 | 5*8*2 | - | H*H*L | H*H*L | |
| Cancel Options | Self Meter Gain | Whiff | Hit | Block / Tech | Opponent Meter Gain | Hit | Block / Tech | ||||
| - | - | - | - | - | - | ||||||
| |||||||||||
| Startup | Active | Recovery | Block | Hit | Cr. Hit | Damage | Stun | Kara | Guard Level | Parry Level | |
| - | - | - | -16 (-2) | D | D | 5*8*6*11 | 5*8*2*10 | - | H*H*L*H | H*H*L*H | |
| Cancel Options | Self Meter Gain | Whiff | Hit | Block / Tech | Opponent Meter Gain | Hit | Block / Tech | ||||
| - | - | - | - | - | - | ||||||
| |||||||||||
Close 5HP TC
| Startup | Active | Recovery | Block | Hit | Cr. Hit | Damage | Stun | Kara | Guard Level | Parry Level | |
|---|---|---|---|---|---|---|---|---|---|---|---|
| - | - | - | -8 | D | D | 10*10*5 | 9*6*2 | - | H*H*L | H*H*L | |
| Cancel Options | Self Meter Gain | Whiff | Hit | Block / Tech | Opponent Meter Gain | Hit | Block / Tech | ||||
| - | - | - | - | - | - | ||||||
| |||||||||||
| Startup | Active | Recovery | Block | Hit | Cr. Hit | Damage | Stun | Kara | Guard Level | Parry Level | |
| - | - | - | -16 (-2) | D | D | 10*10*5*8 | 9*6*2*10 | - | H*H*L*H | H*H*L*H | |
| Cancel Options | Self Meter Gain | Whiff | Hit | Block / Tech | Opponent Meter Gain | Hit | Block / Tech | ||||
| - | - | - | - | - | - | ||||||
| |||||||||||
2HK TC
(close) |
Startup | Active | Recovery | Block | Hit | Cr. Hit | Damage | Stun | Kara | Guard Level | Parry Level |
|---|---|---|---|---|---|---|---|---|---|---|---|
| - | - | - | -11 (-14) | D | D | 17*7*9 | 3*2*7 | - | L*H*H | L*H*H | |
| Cancel Options | Self Meter Gain | Whiff | Hit | Block / Tech | Opponent Meter Gain | Hit | Block / Tech | ||||
| - | - | - | - | - | - | ||||||
| |||||||||||
(far) |
Startup | Active | Recovery | Block | Hit | Cr. Hit | Damage | Stun | Kara | Guard Level | Parry Level |
| - | - | - | -16 (-2) | D | D | 17*17 | 3*12 | - | L*H | L*H | |
| Cancel Options | Self Meter Gain | Whiff | Hit | Block / Tech | Opponent Meter Gain | Hit | Block / Tech | ||||
| - | - | - | - | - | - | ||||||
| |||||||||||
5LK TC
| Startup | Active | Recovery | Block | Hit | Cr. Hit | Damage | Stun | Kara | Guard Level | Parry Level | |
|---|---|---|---|---|---|---|---|---|---|---|---|
| - | - | - | 4 | 5 | 6 | 3*8 | 3*6 | - | H*H | A*H | |
| Cancel Options | Self Meter Gain | Whiff | Hit | Block / Tech | Opponent Meter Gain | Hit | Block / Tech | ||||
| - | - | - | - | - | - | ||||||
| |||||||||||
| Startup | Active | Recovery | Block | Hit | Cr. Hit | Damage | Stun | Kara | Guard Level | Parry Level | |
| - | - | - | -2 (-13) | 0 | 2 (-11) | 3*8*13 | 3*6*6 | - | H*H*H | A*H*H | |
| Cancel Options | Self Meter Gain | Whiff | Hit | Block / Tech | Opponent Meter Gain | Hit | Block / Tech | ||||
| - | - | - | - | - | - | ||||||
| |||||||||||
| Startup | Active | Recovery | Block | Hit | Cr. Hit | Damage | Stun | Kara | Guard Level | Parry Level | |
| - | - | - | -2 (-13) | 0 | 2 (-11) | 17*13 | 11*6 | - | H*H | H*H | |
| Cancel Options | Self Meter Gain | Whiff | Hit | Block / Tech | Opponent Meter Gain | Hit | Block / Tech | ||||
| - | - | - | - | - | - | ||||||
| |||||||||||
4MK TC
| Startup | Active | Recovery | Block | Hit | Cr. Hit | Damage | Stun | Kara | Guard Level | Parry Level | |
|---|---|---|---|---|---|---|---|---|---|---|---|
| - | - | - | 9 | 10 | 11 | 12*12 | 5*9 | - | H*M | H*H | |
| Cancel Options | Self Meter Gain | Whiff | Hit | Block / Tech | Opponent Meter Gain | Hit | Block / Tech | ||||
| - | - | - | - | - | - | ||||||
| |||||||||||
Air TCs
| j. (diagonal jump) |
Startup | Active | Recovery | Block | Hit | Cr. Hit | Damage | Stun | Kara | Guard Level | Parry Level |
|---|---|---|---|---|---|---|---|---|---|---|---|
| - | - | - | - | - | - | 10*17 | 5*12 | - | M*M | H*H | |
| Cancel Options | Self Meter Gain | Whiff | Hit | Block / Tech | Opponent Meter Gain | Hit | Block / Tech | ||||
| - | - | - | - | - | - | ||||||
| |||||||||||
| j. |
Startup | Active | Recovery | Block | Hit | Cr. Hit | Damage | Stun | Kara | Guard Level | Parry Level |
| - | - | - | - | - | - | 21*8 | 13*8 | - | M*M | H*H | |
| Cancel Options | Self Meter Gain | Whiff | Hit | Block / Tech | Opponent Meter Gain | Hit | Block / Tech | ||||
| - | - | - | - | - | - | ||||||
| |||||||||||
| j. (diagonal jump) |
Startup | Active | Recovery | Block | Hit | Cr. Hit | Damage | Stun | Kara | Guard Level | Parry Level |
| - | - | - | - | - | - | 7*8 | 5*8 | - | M*M | H*H | |
| Cancel Options | Self Meter Gain | Whiff | Hit | Block / Tech | Opponent Meter Gain | Hit | Block / Tech | ||||
| - | - | - | - | - | - | ||||||
| |||||||||||
Throws
LPLK
LPLK (air)
Universal Overhead
MPMK
Taunt
HPHK
Special Moves
236P (air)
63214P
623K
214K
421K
236P
236+K
623+P
