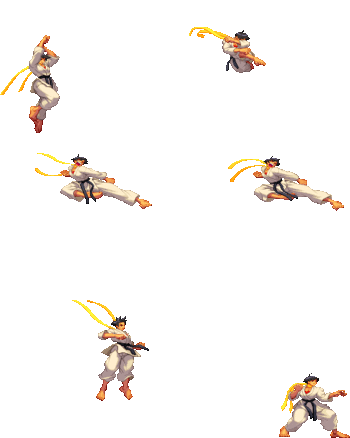
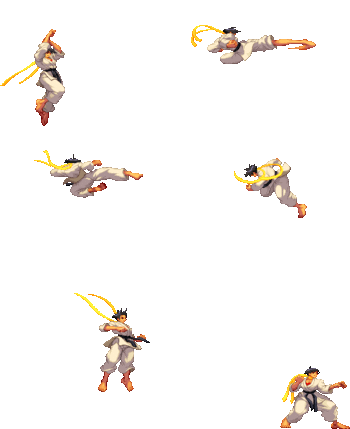
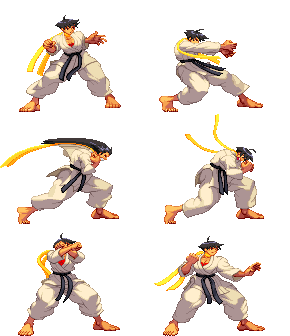
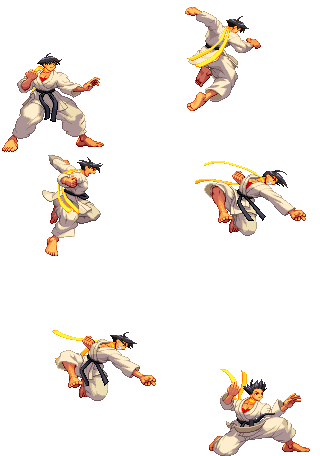
m (→MPMK) |
(Alterations to several under-utilized normal attacks with utility notes) |
||
| Line 128: | Line 128: | ||
|description= | |description= | ||
* Cancel options: tc sp su | * Cancel options: tc sp su | ||
* 7 kara range | * 7 kara range (startup-canceled); much longer range if late kara-canceled | ||
* Late kara-cancel possible from frames 8-11 | * Only normal in 3s that can be kara-canceled after active frames; Late kara-cancel possible from frames 8-11 | ||
Core tool of Makoto's offense and tied for her fastest normal attack (4f). Greatly increases the range of all special attacks when canceled from, including the infamous kara-Karakusa. Can also be used to corpse-push opponents out of their throw range (but still within your karakusa range). | |||
{{3S Button FAT|link=https://fullmeter.com/fatonline/#/framedata/movedetail/3S/Makoto/normal/Stand%20LK}} | {{3S Button FAT|link=https://fullmeter.com/fatonline/#/framedata/movedetail/3S/Makoto/normal/Stand%20LK}} | ||
}} | }} | ||
| Line 156: | Line 157: | ||
* Self meter gain: Whiff: 2, Hit: 11, Block: 6. | * Self meter gain: Whiff: 2, Hit: 11, Block: 6. | ||
* Opponent meter gain: Whiff: 0, Hit: 2, Block: 0. | * Opponent meter gain: Whiff: 0, Hit: 2, Block: 0. | ||
Can be used as a decent high poke (and catch jump-outs) but misses on most crouching characters. Will also lose to heavy attacks on trade due to priority system. | |||
This is also Makoto's best button for forward-moving kara-cancel (such as kara-cancel LP Hayate after EX Hayate in the corner). | |||
{{3S Button FAT|link=https://fullmeter.com/fatonline/#/framedata/movedetail/3S/Makoto/normal/Stand%20MK}} | {{3S Button FAT|link=https://fullmeter.com/fatonline/#/framedata/movedetail/3S/Makoto/normal/Stand%20MK}} | ||
}} | }} | ||
| Line 183: | Line 185: | ||
* Opponent meter gain: Whiff: 0, Hit: 4, Block: 0. | * Opponent meter gain: Whiff: 0, Hit: 4, Block: 0. | ||
* Can avoid both low attacks and throws with proper timing and distance (except in the corner) | * Can avoid both low attacks and throws with proper timing and distance (except in the corner) | ||
Useful defensive and neutral tool (stuffs low attacks, high priority). It's also used as a reverse-movement kara-cancel button (SA2 W-Fukiage, spacing for MP+MK Universal Overhead to SA1, etc). Great for avoiding tick-throws after blocking opponent's light attack in close range. Can be linked into SA1 on certain characters. | |||
{{3S Button FAT|link=https://fullmeter.com/fatonline/#/framedata/movedetail/3S/Makoto/normal/Stand%20HK}} | {{3S Button FAT|link=https://fullmeter.com/fatonline/#/framedata/movedetail/3S/Makoto/normal/Stand%20HK}} | ||
}} | }} | ||
| Line 210: | Line 212: | ||
* Cancel options: ch sp su | * Cancel options: ch sp su | ||
* More range than stand LP but can miss crouching characters | * More range than stand LP but can miss crouching characters | ||
* Can reliably chain into itself (unlike 5LP) but has less overall utility than 5LP. | |||
{{3S Button FAT|link=https://fullmeter.com/fatonline/#/framedata/movedetail/3S/Makoto/normal/Kazami}} | {{3S Button FAT|link=https://fullmeter.com/fatonline/#/framedata/movedetail/3S/Makoto/normal/Kazami}} | ||
}} | }} | ||
| Line 238: | Line 240: | ||
* Opponent meter gain: Whiff: 0, Hit: 2, Block: 0. | * Opponent meter gain: Whiff: 0, Hit: 2, Block: 0. | ||
* Has significant pushback | * Has significant pushback | ||
Its primary use is gaining distance via its pushback, though it can link into SA1. | Its primary use is gaining distance via its pushback, though it can link into SA1. Can be used to corpse-push opponents for spacing during their knockdown state. | ||
{{3S Button FAT|link=https://fullmeter.com/fatonline/#/framedata/movedetail/3S/Makoto/normal/Kaoruna}} | {{3S Button FAT|link=https://fullmeter.com/fatonline/#/framedata/movedetail/3S/Makoto/normal/Kaoruna}} | ||
}} | }} | ||
| Line 292: | Line 294: | ||
* Extremely good range for a light poke | * Extremely good range for a light poke | ||
* Avoids most crouching sweeps and kicks | * Avoids most crouching sweeps and kicks | ||
Can be used against every character to reset the opponent in the corner after an EX Hayate. Against certain characters, you can even dash under them. | Can be used against every character to reset the opponent in the corner after an EX Hayate. Against certain characters (e.g.: Dudley, Urien) you can even dash under them. | ||
{{3S Button FAT|link=https://fullmeter.com/fatonline/#/framedata/movedetail/3S/Makoto/normal/Shibuki}} | {{3S Button FAT|link=https://fullmeter.com/fatonline/#/framedata/movedetail/3S/Makoto/normal/Shibuki}} | ||
}} | }} | ||
| Line 321: | Line 323: | ||
* Opponent meter gain: Whiff: 0, Hit: 2, Block: 0. | * Opponent meter gain: Whiff: 0, Hit: 2, Block: 0. | ||
* May miss most crouching characters | * May miss most crouching characters | ||
Significant delay before the kick comes out but also has considerable forward movement (comparable to f+HK Kuroshio). Can be used to juggle full-screen Tsurugi launches or as an alternative okizeme tool after EX Hayate (best against Alex). | |||
{{3S Button FAT|link=https://fullmeter.com/fatonline/#/framedata/movedetail/3S/Makoto/normal/Naruto}} | {{3S Button FAT|link=https://fullmeter.com/fatonline/#/framedata/movedetail/3S/Makoto/normal/Naruto}} | ||
}} | }} | ||
| Line 350: | Line 352: | ||
* From 3rd frame, Makoto steps backwards and can avoid some grabs | * From 3rd frame, Makoto steps backwards and can avoid some grabs | ||
* Moves her forward far more quickly than walk | * Moves her forward far more quickly than walk | ||
Used as a mixup with the feint version (hold HK). Can be used to close out rounds as an okizeme option. | |||
{{3S Button FAT|link=https://fullmeter.com/fatonline/#/framedata/movedetail/3S/Makoto/normal/Kuroshio}} | {{3S Button FAT|link=https://fullmeter.com/fatonline/#/framedata/movedetail/3S/Makoto/normal/Kuroshio}} | ||
}} | }} | ||
| Line 397: | Line 399: | ||
|description= | |description= | ||
* Cancel options: self sp su | * Cancel options: self sp su | ||
Excellent setup tool. Better recovery than 5LP and +3 on all scenarios, however less active frames and 1f slower startup, so use it for applying mixups and dash cancelling. Also note that it has more pushback than 5LP, but can chain into itself reliably (for SA1 confirms). | |||
{{3S Button FAT|link=https://fullmeter.com/fatonline/#/framedata/movedetail/3S/Makoto/normal/Crouch%20LP}} | {{3S Button FAT|link=https://fullmeter.com/fatonline/#/framedata/movedetail/3S/Makoto/normal/Crouch%20LP}} | ||
}} | }} | ||
| Line 425: | Line 427: | ||
* Opponent meter gain: Whiff: 0, Hit: 2, Block: 0. | * Opponent meter gain: Whiff: 0, Hit: 2, Block: 0. | ||
* Long cancel window and significant active frames allow this to be used to cover a large area and hit confirm into hayate if it hits. | * Long cancel window and significant active frames allow this to be used to cover a large area and hit confirm into hayate if it hits. | ||
Possesses long range and persistent active frames/cancel window, which makes it an ideal poking tool. Its cancelability into specials and supers means it doesn't suffer (as much) from being vulnerable to parries. Also moves Makoto's upper body forward from 1st frame of startup, which can cause some aerial attacks to miss (crossups, Ibuki's Hien). | |||
{{3S Button FAT|link=https://fullmeter.com/fatonline/#/framedata/movedetail/3S/Makoto/normal/Crouch%20MP}} | {{3S Button FAT|link=https://fullmeter.com/fatonline/#/framedata/movedetail/3S/Makoto/normal/Crouch%20MP}} | ||
}} | }} | ||
| Line 452: | Line 454: | ||
* Opponent meter gain: Whiff: 0, Hit: 4, Block: 0. | * Opponent meter gain: Whiff: 0, Hit: 4, Block: 0. | ||
* Sweep, hits low | * Sweep, hits low | ||
Its excellent speed and range makes it good at stopping approaches, and largely unpunishable by other sweeps. However it can still suffer against certain SAs, so be sure not to abuse it. | Its excellent speed and range makes it good at stopping approaches, and largely unpunishable by other sweeps. However it can still suffer against certain SAs (Ken SA3, Chun SA2), so be sure not to abuse it in those matchups. | ||
{{3S Button FAT|link=https://fullmeter.com/fatonline/#/framedata/movedetail/3S/Makoto/normal/Crouch%20HP}} | {{3S Button FAT|link=https://fullmeter.com/fatonline/#/framedata/movedetail/3S/Makoto/normal/Crouch%20HP}} | ||
}} | }} | ||
| Line 479: | Line 481: | ||
* Makoto's fastest low poke. Usually reserved for mixups | * Makoto's fastest low poke. Usually reserved for mixups | ||
* Combos into LP hayate, unless it hits at max range. | * Combos into LP hayate, unless it hits at max range. | ||
A button used to punish those who block standing, especially during Hayate loops. Its best canceled into LP Hayate on hit to continue the mix, or into EX Oroshi to surprise any crouch blockers. Its immediate upper body hitbox retraction also allows one to avoid standing jabs entirely. | A button used to punish those who block standing, especially during Hayate loops. Its best canceled into LP Hayate on hit to continue the mix, or into EX Oroshi to surprise any crouch blockers. Its immediate upper body hitbox retraction also allows one to avoid standing jabs entirely. However it is punishable by some characters (namely Chun-Li) on hit or block, if not canceled. | ||
{{3S Button FAT|link=https://fullmeter.com/fatonline/#/framedata/movedetail/3S/Makoto/normal/Crouch%20LK}} | {{3S Button FAT|link=https://fullmeter.com/fatonline/#/framedata/movedetail/3S/Makoto/normal/Crouch%20LK}} | ||
}} | }} | ||
| Line 534: | Line 536: | ||
* Opponent meter gain: Whiff: 0, Hit: 4, Block: 0. | * Opponent meter gain: Whiff: 0, Hit: 4, Block: 0. | ||
* High-angle attack for anti-air, often recovers fast enough to be safe if parried | * High-angle attack for anti-air, often recovers fast enough to be safe if parried | ||
The high angle of the attack, in combination with its relatively quick recovery makes this the ideal option for dealing with jump-ins from Dudley and Elena. It can also beat long | The high angle of the attack, in combination with its relatively quick recovery makes this the ideal option for dealing with jump-ins from Dudley and Elena. It can also beat long-reaching Medium or Heavy normals through proper spacing. However, if parried/countered, leaves Makoto in crouching state (25% defense penalty). | ||
{{3S Button FAT|link=https://fullmeter.com/fatonline/#/framedata/movedetail/3S/Makoto/normal/Crouch%20HK}} | {{3S Button FAT|link=https://fullmeter.com/fatonline/#/framedata/movedetail/3S/Makoto/normal/Crouch%20HK}} | ||
}} | }} | ||
| Line 575: | Line 577: | ||
|stun=7 | |stun=7 | ||
|description= | |description= | ||
* Has extended active frames for the entire jump but hitbox is too high to hit grounded characters if done early | * Has extended active frames for the entire jump but hitbox is too high to hit grounded characters if done early (can mix up with jMP which looks identical) | ||
* Excellent reset setup attack after Fukiage for mixups | * Excellent reset setup attack after Fukiage for mixups | ||
{{3S Button FAT|link=https://fullmeter.com/fatonline/#/framedata/movedetail/3S/Makoto/normal/Jump%20LP}} | {{3S Button FAT|link=https://fullmeter.com/fatonline/#/framedata/movedetail/3S/Makoto/normal/Jump%20LP}} | ||
| Line 597: | Line 599: | ||
* Self meter gain: Whiff: 2, Hit: 11, Block: 6. | * Self meter gain: Whiff: 2, Hit: 11, Block: 6. | ||
* Opponent meter gain: Whiff: 0, Hit: 2, Block: 0. | * Opponent meter gain: Whiff: 0, Hit: 2, Block: 0. | ||
Can be used to deny jump-ins due to its significant range and active frames. | |||
{{3S Button FAT|link=https://fullmeter.com/fatonline/#/framedata/movedetail/3S/Makoto/normal/Jump%20MP%20(Neutral)}} | {{3S Button FAT|link=https://fullmeter.com/fatonline/#/framedata/movedetail/3S/Makoto/normal/Jump%20MP%20(Neutral)}} | ||
}} | }} | ||
| Line 619: | Line 621: | ||
* Opponent meter gain: Whiff: 0, Hit: 2, Block: 0. | * Opponent meter gain: Whiff: 0, Hit: 2, Block: 0. | ||
* Has extended active frames for the entire jump | * Has extended active frames for the entire jump | ||
Active for the entire jump and can stuff attempts to intercept Makoto in mid-air. Links reliably into SA1 (similar to Q's usage of jLP into SA2). Can be used in conjunction with jLP for setting up empty jumps/bait parry attempts. | |||
{{3S Button FAT|link=https://fullmeter.com/fatonline/#/framedata/movedetail/3S/Makoto/normal/Jump%20MP}} | {{3S Button FAT|link=https://fullmeter.com/fatonline/#/framedata/movedetail/3S/Makoto/normal/Jump%20MP}} | ||
}} | }} | ||
| Line 642: | Line 644: | ||
* Extremely slow startup | * Extremely slow startup | ||
* High hitbox, cannot hit most crouching characters | * High hitbox, cannot hit most crouching characters | ||
Difficult to use, especially for hitting grounded opponents. However, this can be exploited to trick opponents into expecting a jump-in and getting a karakusa opportunity upon landing (similar to Alex j.MP whiff into Power Bomb setup). Can also be used reliably against Akuma for SA2 100% Stun combo (after launching with Fukiage). | |||
{{3S Button FAT|link=https://fullmeter.com/fatonline/#/framedata/movedetail/3S/Makoto/normal/Jump%20HP%20(Neutral)}} | {{3S Button FAT|link=https://fullmeter.com/fatonline/#/framedata/movedetail/3S/Makoto/normal/Jump%20HP%20(Neutral)}} | ||
}} | }} | ||
| Line 665: | Line 667: | ||
* First frame does less damage than later frames | * First frame does less damage than later frames | ||
* Can hit slightly behind Makoto vs larger characters | * Can hit slightly behind Makoto vs larger characters | ||
A safe jumping move (from +1 to +13 on block). Can be | A safe jumping move (from +1 to +13 on block). Can be followed up with 5HP (though timing can make it difficult at first) and can crossup some characters. Can miss some stunned characters like Necro and Oro due to being unable to land too deeply. | ||
{{3S Button FAT|link=https://fullmeter.com/fatonline/#/framedata/movedetail/3S/Makoto/normal/Jump%20HP}} | {{3S Button FAT|link=https://fullmeter.com/fatonline/#/framedata/movedetail/3S/Makoto/normal/Jump%20HP}} | ||
}} | }} | ||
Revision as of 15:10, 18 November 2024
Introduction
Makoto, a tomboyish Japanese teenager, seeks to restore her father's dojo to its former glory. She is one of the new characters introduced in SF III: 3rd Strike, based around a more traditional concept of Japanese Karate compared to Ryu/Ken's more supernaturally-flavored Ansatsuken.
Makoto is the first female Street Fighter to be tough and hard-hitting with just as much stamina as the average males (like Ryu and Ken), instead of being a "glass cannon" archetype. Although her normal walk speed is incredibly sluggish, she has the fastest dash in the game, as well as quick feints and overheads. Perhaps her best tool is the Karakusa, a unique command grab which can be comboed from, making way for devastating damage and stun. Put all of this together and you have a character who can survive long sets until her highly explosive fighting style can win with a single opening.
Super Arts
SA I (Seichuusen Godanzuki)
Highly recommended for beginners and for sensible, orthodox players relying on solid play. It does excellent damage and has numerous hit-confirms. It is especially good if you can confirm it after Hayate and Oroshi. Weaknesses include lack of range and bad anti-air, but the first shouldn't be an issue if you combo into it, and the second isn't a big deal, as she has plenty of good anti-air normals. It also confers no positional advantage after hit, as your opponent is sent across the screen and often recovers before you will (some characters can even get a free punish if you hit them with it in the corner, most notably Dudley, Necro and Yang). Some top players use this super exclusively against all characters as it allows for fast punishes and is universally easy to connect with. It has zero bad matchups.
SA II: (Abare Tosanami)
High execution, high reward Super. A lot of its usefulness depends on your ability to land Karakusa (or the threat thereof), especially on your half of the screen, as it can be comboed into with HP after the Karakusa (or simply with HP to catch your opponent trying to jump away out of Karakusa reach. It is potentially the most powerful super in the game and can lead to 100% kill combos from full health using the Double Fukiage technique. For the most damage, you can use early MK Tsurugi, Fukiage, jump Fierce, but for the most reliable combo, use MK Tsurugi, Hayate, Hayate.
Makoto has 100% stun setups from Karakusa on almost everyone except the 5 characters with the longest stun bar (Alex, Q, Hugo, Oro, and Dudley) using the "Double Fukiage" (W-Fukiage in Japan) followup, but they involve an advanced kara-cancel technique on at least the first Fukiage (using neutral HK), and even more advanced methods against Oro, Ibuki, and Chun-Li (the Telesniper technique). Akuma and Remy, having the shortest stun bars, have the easiest 100% stun combo (the "Fukiage, HP" follow-up to the super), and can also be fully stunned with even a raw SAII using the Double Fukiage follow-up. Timing before the first Fukiage also varies greatly by character (Necro, Urien, Dudley, and Hugo very slowly, Shotos tend to fall moderately fast, and Yun, Yang, and Alex fall extremely quickly, for example). Also, it can 100% stun every character in the game if comboed into from jump HP, though this is highly situational.
The main downsides (aside from its usefulness being mostly tied to your ability to land Karakusa on your side of the screen) is that it has huge startup time and no upper body invulnerability on startup, unlike her other two supers. However, it can be used to counter fireballs and even throw techs from full screen, and meaty low attacks even on wakeup (if you are actually unhinged enough to do this).
SA III: (Tanden Renki)
Obviously the last super of choice, this is more a "fun" super than a practical one. If you can get your opponent on the back foot and guessing wrong once or twice, you can get insane damage by the time the meter runs out. However, if you're on the back foot against an experienced player (while it's already active), you're pretty much screwed. It does confer temporary invulnerability upon startup with zero recovery time (with additional invulnerability if you don't press anything), so it's possible to use this as a one-time Get Out of Jail Free card, but it's likely to take you out of the frying pan and directly into the fire.
| Strengths | Weaknesses |
|---|---|
|
|
| Makoto #3S_MA | |
|---|---|
| Vitals | |
| Life Points | 1200 |
| Stun Points | 64 |
| Super Art Stock/Size | |
| SA1 | 1/120 |
| SA2 | 2/88 |
| SA3 | 1/96 |
| Ground Movement | |
| Forward Dash duration/distance | 11 (30) (150px) |
| Back Dash duration/distance | 14 |
| Jumping | |
| Back Jump duration | 42(4+35+3) |
| Neutral Jump duration | 41(4+34+3) |
| Forward Jump duration | 41(4+34+3) |
| Back Super Jump duration | 46(6+37+3) |
| Neutral Super Jump duration | 45(6+36+3) |
| Forward Super Jump duration | 45(6+36+3) |
| Wake up | |
| Wake up duration | 71 |
| Quick rise duration | 43 |
| 3S Frame Data Glossary | |
|---|---|
| Active |
How many frames a move remains active (can hurt opponents) for. Consecutive sets of active frames on a multi-hit move are separated by an asterisk (ex: 3*5). If there is a gap between sets of active frames, the gap is denoted by a number in parentheses (ex: 2(4)2) |
| Attack |
Attack level is L for low attacks (must be blocked crouching), H is for High attacks (which can be blocked high or low) and M for overhead (must be blocked standing). T is for throw attacks (which cannot be blocked). |
| Cancel options |
Available cancel options.
|
| Damage |
Attack damage on hit in life points. Notation may denote multi-hit or "sweet spot" damage values on certain frames. |
| Hit/Block |
These are frame advantage values when the attack hits or is blocked. If the number is positive, then the move will end before the defender can act again. If the number is negative, the defender will be able to act before the attacker and maybe even punish. D refers to knockdown on hit. "Cr. Hit" is an additional frame advantage value denoting if the advantage on hit changes when the defender is being hit while crouching. |
| Kara Range |
Almost all normal attacks can be canceled into a special or a multi-button command within three frames of startup. During that time, some attacks will shift position forward or backward and affect the reach of the special or command accordingly. This is denoted in pixels of range. There are a handful of moves in the game that can be kara-canceled after this initial window and will be denoted as a late kara-cancel. |
| Link |
A combo that is performed by inputting the second move after the first move has completely recovered (as opposed to cancelling the first move's animation). In 3S, the final frame of a move's hitstun allows a character to block a normal or special move, as well as some projectile supers. Therefore, an attack's frame advantage must be 2 frames greater than the followup move's startup in order to link. Ex: a +6 normal can link into a 4f normal/special, or a 5f super. |
| Parry |
This field will show a value of A if the attack can be parried standing or crouching, H if it must be parried standing or L if it must be parried crouching. |
| Recovery |
How many frames it takes for a move to finish after it's been active. |
| Startup |
How many frames it takes before the move becomes 'active' or has a hitbox. 3S uses classic startup notation, which does not include the first active frame. A move with 3 startup becomes active on frame 4. |
| Stun |
Amount of stun added to the opponent's stun bar on hit. |
| Throw range |
Range in pixels from the center of the character to the center of the opponent which allows a grab to connect. |
Frame Data
Standing Normals
5LP
5MP
5HP
5LK
5MK
5HK
Command Normals
6LP
6MP
6HP
6LK
6MK
6HK
6HK (Hold)
Crouching Normals
2LP
2MP
2HP
2LK
2MK
2HK
Jumping Normals
8LP
j.LP
8MP
j.MP
8HP
j.HP
j.LK
j.MK
j.HK
Target Combos
5LK, MK
6MK,HK
6HP, HP, HP
Throws
LPLK
4/6LPK
Universal Overhead
MPMK
Taunts
HPHK
None
None
Special Moves
236P
236P (7F hold)
236P (27F hold)
236P (47F hold)
236P (67F hold)
236P,K
236P, HPK
623P
214P
214K (air)
63214K

