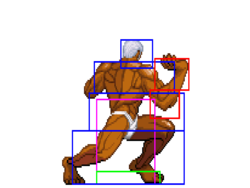
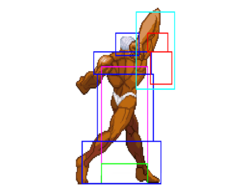
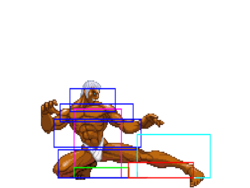
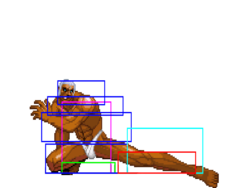
mNo edit summary |
|||
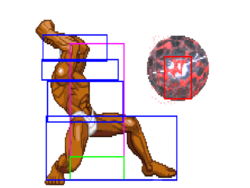
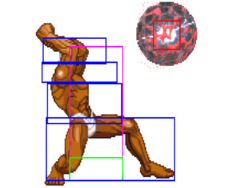
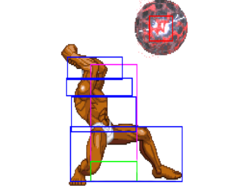
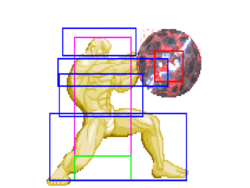
| Line 103: | Line 103: | ||
}} | }} | ||
}} | }} | ||
=====<font style="visibility:hidden; float:right">5LK</font>===== | |||
{{MoveData | |||
|name=Stand LK | |||
|input={{lk}} | |||
|image=3s_urien_st.lk.png | |||
|imageSize=250px | |||
|data= | |||
{{AttackData-3S | |||
|startup=5 | |||
|active=2 | |||
|recovery=7 | |||
|onHit=+2 | |||
|onHitCrouch=+2 | |||
|onBlock=+2 | |||
|attackLevel=Mid | |||
|parry=A | |||
|damage=5 | |||
|stun=3 | |||
|description= | |||
* Cancel options: ch sp su | |||
* Self meter gain: Whiff: 0, Hit: 2, Block: 1. | |||
* Opponent meter gain: Whiff: 0, Hit: 0, Block: 0. | |||
{{3S Button FAT|link=https://fullmeter.com/fatonline/#/framedata/movedetail/3S/Urien/normal/Stand%20LK}} | |||
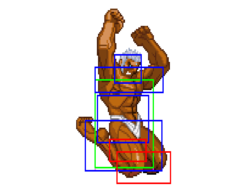
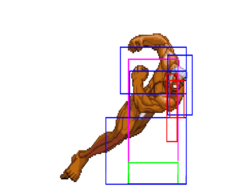
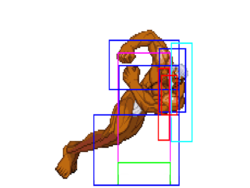
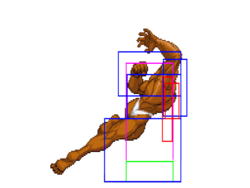
}} | |||
}} | |||
=====<font style="visibility:hidden; float:right">5MK</font>===== | |||
{{MoveData | |||
|name=Stand MK | |||
|input={{mk}} | |||
|image=3s_urien_st.mk.png | |||
|imageSize=250px | |||
|data= | |||
{{AttackData-3S | |||
|startup=8 | |||
|active=2 | |||
|recovery=15 | |||
|onHit=-3 | |||
|onHitCrouch=-2 | |||
|onBlock=-4 | |||
|parry=H | |||
|damage=14 | |||
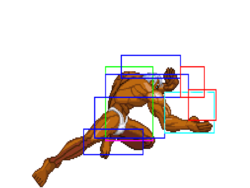
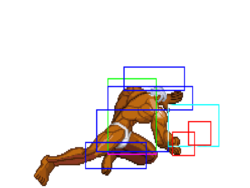
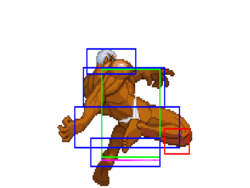
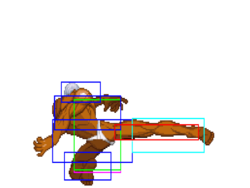
|stun=9 | |||
|attackLevel=Mid | |||
|description= | |||
* Self meter gain: Whiff: 2, Hit: 11, Block: 6. | |||
* Opponent meter gain: Whiff: 0, Hit: 2, Block: 0. | |||
{{3S Button FAT|link=https://fullmeter.com/fatonline/#/framedata/movedetail/3S/Urien/normal/Stand%20MK}} | |||
}} | |||
}} | |||
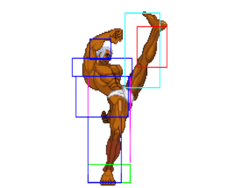
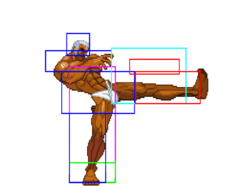
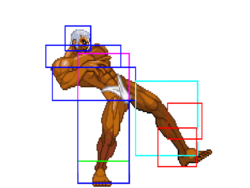
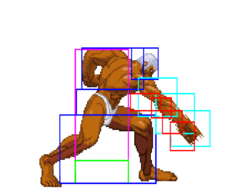
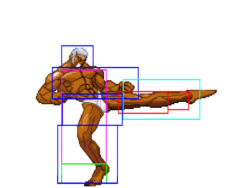
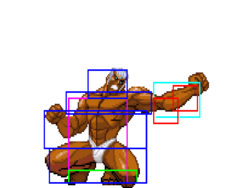
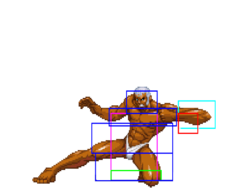
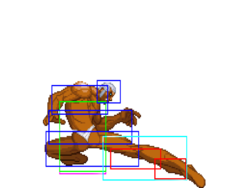
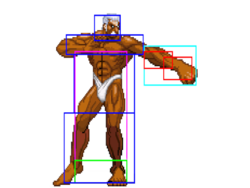
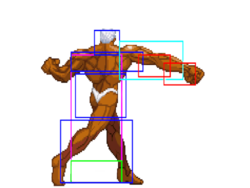
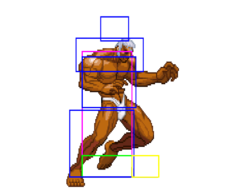
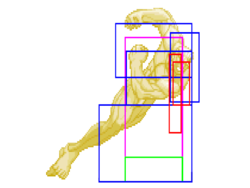
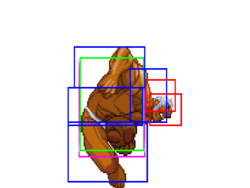
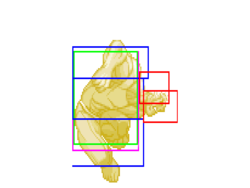
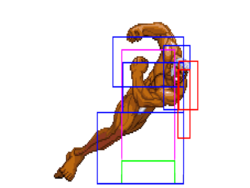
=====<font style="visibility:hidden; float:right">5HK</font>===== | |||
{{MoveData | |||
|name=Stand HK | |||
|input={{hk}} | |||
|image=3s_urien_st.hk_1.png | |||
|image2=3s_urien_st.hk_2.png | |||
|image3=3s_urien_st.hk_3.png | |||
|imageSize=250px | |||
|imageSize2=250px | |||
|imageSize3=250px | |||
|caption=Frames 18-20 | |||
|caption2=Frames 21-22 | |||
|caption3=Frame 23 | |||
|data= | |||
{{AttackData-3S | |||
|startup=17 | |||
|active=6 | |||
|recovery=20 | |||
|onHit=-5 | |||
|onHitCrouch=-3 | |||
|onBlock=-7 | |||
|parry=H | |||
|damage=16 | |||
|stun=9 | |||
|attackLevel=Overhead | |||
|description= | |||
* -10 kara range | |||
* Self meter gain: Whiff: 3, Hit: 17, Block: 7. | |||
* Opponent meter gain: Whiff: 0, Hit: 4, Block: 0. | |||
{{3S Button FAT|link=https://fullmeter.com/fatonline/#/framedata/movedetail/3S/Urien/normal/Stand%20HK}} | |||
}} | |||
}} | |||
<br> | |||
<br> | |||
<br> | |||
==== Command Normals ==== | |||
=====<font style="visibility:hidden; float:right">6MP</font>===== | |||
{{MoveData | |||
|name=Quarrel Upper | |||
|input={{f}}+{{mp}} | |||
|image=3s_urien_f+mp.png | |||
|imageSize=250px | |||
|data= | |||
{{AttackData-3S | |||
|startup=9 | |||
|active=2 | |||
|recovery=14 | |||
|onHit=-2 | |||
|onBlock=-3 | |||
|onHitCrouch=0 | |||
|parry=H | |||
|damage=14 | |||
|stun=9 | |||
|attackLevel=Mid | |||
|description= | |||
* 4 kara range | |||
* Self meter gain: Whiff: 2, Hit: 11, Block: 6. | |||
* Opponent meter gain: Whiff: 0, Hit: 2, Block: 0. | |||
{{3S Button FAT|link=https://fullmeter.com/fatonline/#/framedata/movedetail/3S/Urien/normal/Quarrel%20Upper}} | |||
}} | |||
}} | |||
=====<font style="visibility:hidden; float:right">6HP</font>===== | |||
{{MoveData | |||
|name=Terrible Smash | |||
|input={{f}}+{{hp}} | |||
|image=3s_urien_f+hp.png | |||
|imageSize=250px | |||
|data= | |||
{{AttackData-3S | |||
|startup=14 | |||
|active=1 | |||
|recovery=21 | |||
|onHit=-4 | |||
|onHitCrouch=-2 | |||
|onBlock=-6 | |||
|parry=H | |||
|damage=21 | |||
|attackLevel=Overhead | |||
|stun=3 | |||
|description= | |||
* Self meter gain: Whiff: 3, Hit: 19, Block: 10. | |||
* Opponent meter gain: Whiff: 0, Hit: 4, Block: 0. | |||
{{3S Button FAT|link=https://fullmeter.com/fatonline/#/framedata/movedetail/3S/Urien/normal/Terrible%20Smash}} | |||
}} | |||
}} | |||
=====<font style="visibility:hidden; float:right">6MK</font>===== | |||
{{MoveData | |||
|name=Quarrel Kick | |||
|input={{f}}+{{mk}} | |||
|image=3s_urien_f+mk.png | |||
|imageSize=250px | |||
|data= | |||
{{AttackData-3S | |||
|startup=16 | |||
|active=3 | |||
|recovery=12 | |||
|onHit=-1 | |||
|onBlock=-2 | |||
|onHitCrouch=0 | |||
|parry=H | |||
|damage=16 | |||
|stun=9 | |||
|attackLevel=Mid | |||
|description= | |||
* Self meter gain: Whiff: 2, Hit: 11, Block: 6. | |||
* Opponent meter gain: Whiff: 0, Hit: 2, Block: 0. | |||
{{3S Button FAT|link=https://fullmeter.com/fatonline/#/framedata/movedetail/3S/Urien/normal/Quarrel%20Kick}} | |||
}} | |||
}} | |||
<br> | |||
<br> | |||
<br> | |||
==== Crouching Normals ==== | |||
=====<font style="visibility:hidden; float:right">2LP</font>===== | |||
{{MoveData | |||
|name=Crouch LP | |||
|input={{d}}+{{lp}} | |||
|image=3s_urien_cr.lp.png | |||
|imageSize=250px | |||
|data= | |||
{{AttackData-3S | |||
|startup=4 | |||
|active=2 | |||
|recovery=7 | |||
|onHit=+1 | |||
|onHitCrouch=+1 | |||
|onBlock=+1 | |||
|parry=A | |||
|attackLevel=Mid | |||
|damage=3 | |||
|stun=3 | |||
|description= | |||
* Cancel options: self ch sp su | |||
* Self meter gain: Whiff: 0, Hit: 2, Block: 1. | |||
* Opponent meter gain: Whiff: 0, Hit: 0, Block: 0. | |||
{{3S Button FAT|link=https://fullmeter.com/fatonline/#/framedata/movedetail/3S/Urien/normal/Crouch%20LP}} | |||
}} | |||
}} | |||
=====<font style="visibility:hidden; float:right">2MP</font>===== | |||
{{MoveData | |||
|name=Crouch MP | |||
|input={{d}}+{{mp}} | |||
|image=3s_urien_cr.mp.png | |||
|imageSize=250px | |||
|data= | |||
{{AttackData-3S | |||
|startup=11 | |||
|active=4 | |||
|recovery=15 | |||
|onHit=-1 | |||
|onBlock=-2 | |||
|onHitCrouch=0 | |||
|parry=A | |||
|damage=10 | |||
|stun=3 | |||
|attackLevel=Mid | |||
|description= | |||
* Self meter gain: Whiff: 2, Hit: 11, Block: 6. | |||
* Opponent meter gain: Whiff: 0, Hit: 2, Block: 0. | |||
{{3S Button FAT|link=https://fullmeter.com/fatonline/#/framedata/movedetail/3S/Urien/normal/Crouch%20MP}} | |||
}} | |||
}} | |||
=====<font style="visibility:hidden; float:right">2HP</font>===== | |||
{{MoveData | |||
|name=Crouch HP | |||
|input={{d}}+{{hp}} | |||
|image=3s_urien_cr.hp_1.png | |||
|image2=3s_urien_cr.hp_2.png | |||
|imageSize=250px | |||
|imageSize2=250px | |||
|caption=Frame 10 | |||
|caption2=Frame 11 | |||
|data= | |||
{{AttackData-3S | |||
|startup=9 | |||
|active=2 | |||
|recovery=25 | |||
|onHit=Soft KD | |||
|onHitCrouch=Soft KD | |||
|onBlock=-10 | |||
|parry=A | |||
|damage=18 | |||
|stun=9 | |||
|attackLevel=Mid | |||
|description= | |||
* Cancel options: sp su | |||
* 2 kara range | |||
* Self meter gain: Whiff: 3, Hit: 18, Block: 8. | |||
* Opponent meter gain: Whiff: 0, Hit: 4, Block: 0. | |||
{{3S Button FAT|link=https://fullmeter.com/fatonline/#/framedata/movedetail/3S/Urien/normal/Crouch%20HP}} | |||
}} | |||
}} | |||
=====<font style="visibility:hidden; float:right">2LK</font>===== | |||
{{MoveData | |||
|name=Crouch LK | |||
|input={{d}}+{{lk}} | |||
|image=3s_urien_cr.lk.png | |||
|imageSize=250px | |||
|data= | |||
{{AttackData-3S | |||
|startup=5 | |||
|active=1 | |||
|recovery=9 | |||
|onHit=+1 | |||
|onHitCrouch=+1 | |||
|onBlock=+1 | |||
|parry=L | |||
|attackLevel=Low | |||
|damage=3 | |||
|stun=3 | |||
|description= | |||
* Cancel options: sp su | |||
* Self meter gain: Whiff: 0, Hit: 2, Block: 1. | |||
* Opponent meter gain: Whiff: 0, Hit: 0, Block: 0. | |||
{{3S Button FAT|link=https://fullmeter.com/fatonline/#/framedata/movedetail/3S/Urien/normal/Crouch%20LK}} | |||
}} | |||
}} | |||
=====<font style="visibility:hidden; float:right">2MK</font>===== | |||
{{MoveData | |||
|name=Crouch MK | |||
|input={{d}}+{{mk}} | |||
|image=3s_urien_cr.mk.png | |||
|imageSize=250px | |||
|data= | |||
{{AttackData-3S | |||
|startup=7 | |||
|active=3 | |||
|recovery=11 | |||
|onHit=+1 | |||
|onHitCrouch=+2 | |||
|onBlock=0 | |||
|parry=L | |||
|damage=12 | |||
|stun=3 | |||
|attackLevel=Low | |||
|description= | |||
* Self meter gain: Whiff: 2, Hit: 11, Block: 6. | |||
* Opponent meter gain: Whiff: 0, Hit: 2, Block: 0. | |||
{{3S Button FAT|link=https://fullmeter.com/fatonline/#/framedata/movedetail/3S/Urien/normal/Crouch%20MK}} | |||
}} | |||
}} | |||
=====<font style="visibility:hidden; float:right">2HK</font>===== | |||
{{MoveData | |||
|name=Crouch HK | |||
|input={{d}}+{{hk}} | |||
|image=3s_urien_cr.hk.png | |||
|imageSize=250px | |||
|data= | |||
{{AttackData-3S | |||
|startup=12 | |||
|active=3 | |||
|recovery=21 | |||
|onHit=Soft KD | |||
|onHitCrouch=Soft KD | |||
|onBlock=-13 | |||
|parry=L | |||
|damage=17 | |||
|attackLevel=Low | |||
|stun=3 | |||
|description= | |||
* Self meter gain: Whiff: 3, Hit: 19, Block: 10. | |||
* Opponent meter gain: Whiff: 0, Hit: 4, Block: 0. | |||
{{3S Button FAT|link=https://fullmeter.com/fatonline/#/framedata/movedetail/3S/Urien/normal/Crouch%20HK}} | |||
}} | |||
}} | |||
<br> | |||
<br> | |||
<br> | |||
==== Jumping Normals ==== | |||
=====<font style="visibility:hidden; float:right">j.LP</font>===== | |||
{{MoveData | |||
|name=Jump LP | |||
|input={{u}}/{{uf}}+{{lp}} | |||
|image=3s_urien_j.lp.png | |||
|imageSize=250px | |||
|data= | |||
{{AttackData-3S | |||
|startup=4 | |||
|active=Until Landing | |||
|parry=H | |||
|damage=8 | |||
|stun=7 | |||
|onHit=-5~+6 | |||
|onHitCrouch=+4~+7 | |||
|onBlock=-5~+7 | |||
|attackLevel=Overhead | |||
|description= | |||
* Self meter gain: Whiff: 0, Hit: 2, Block: 1. | |||
* Opponent meter gain: Whiff: 0, Hit: 0, Block: 0. | |||
{{3S Button FAT|link=https://fullmeter.com/fatonline/#/framedata/movedetail/3S/Urien/normal/Jump%20LP}} | |||
}} | |||
}} | |||
=====<font style="visibility:hidden; float:right">j.MP</font>===== | |||
{{MoveData | |||
|name=Jump MP | |||
|input={{u}}/{{uf}}+{{mp}} | |||
|image=3s_urien_j.mp_1.png | |||
|image2=3s_urien_j.mp_2.png | |||
|imageSize=250px | |||
|imageSize2=250px | |||
|caption=Frame 7 | |||
|caption2=Frames 8-10 | |||
|data= | |||
{{AttackData-3S | |||
|startup=6 | |||
|active=4 | |||
|parry=H | |||
|damage=16 | |||
|stun=9 | |||
|onHit=+3~+10 | |||
|onHitCrouch=+9~+10 | |||
|onBlock=+3~+10 | |||
|attackLevel=Overhead | |||
|description= | |||
* Self meter gain: Whiff: 2, Hit: 11, Block: 6. | |||
* Opponent meter gain: Whiff: 0, Hit: 2, Block: 0. | |||
{{3S Button FAT|link=https://fullmeter.com/fatonline/#/framedata/movedetail/3S/Urien/normal/Jump%20MP}} | |||
}} | |||
}} | |||
=====<font style="visibility:hidden; float:right">j.HP</font>===== | |||
{{MoveData | |||
|name=Jump HP | |||
|input={{u}}/{{uf}}+{{hp}} | |||
|image=3s_urien_j.hp_1.png | |||
|image2=3s_urien_j.hp_2.png | |||
|imageSize=250px | |||
|imageSize2=250px | |||
|caption=Frame 8 | |||
|caption2=Frames 9-10 | |||
|data= | |||
{{AttackData-3S | |||
|startup=7 | |||
|active=3 | |||
|parry=H | |||
|damage=23 | |||
|stun=11 | |||
|onHit=+2~+12 | |||
|onHitCrouch=+11~+12 | |||
|onBlock=+5~+13 | |||
|attackLevel=Overhead | |||
|description= | |||
* Self meter gain: Whiff: 3, Hit: 19, Block: 10. | |||
* Opponent meter gain: Whiff: 0, Hit: 4, Block: 0. | |||
{{3S Button FAT|link=https://fullmeter.com/fatonline/#/framedata/movedetail/3S/Urien/normal/Jump%20HP}} | |||
}} | |||
}} | |||
=====<font style="visibility:hidden; float:right">j.LK</font>===== | |||
{{MoveData | |||
|name=Jump LK | |||
|input={{u}}/{{uf}}+{{lk}} | |||
|image=3s_urien_j.lk.png | |||
|imageSize=250px | |||
|data= | |||
{{AttackData-3S | |||
|startup=4 | |||
|active=10 | |||
|parry=H | |||
|damage=8 | |||
|stun=7 | |||
|onHit=+2~+12 | |||
|onHitCrouch=+11~+12 | |||
|onBlock=+5~+13 | |||
|attackLevel=Overhead | |||
|description= | |||
* Self meter gain: Whiff: 0, Hit: 2, Block: 1. | |||
* Opponent meter gain: Whiff: 0, Hit: 0, Block: 0. | |||
{{3S Button FAT|link=https://fullmeter.com/fatonline/#/framedata/movedetail/3S/Urien/normal/Jump%20LK}} | |||
}} | |||
}} | |||
=====<font style="visibility:hidden; float:right">j.MK</font>===== | |||
{{MoveData | |||
|name=Jump MK | |||
|input={{u}}/{{uf}}+{{mk}} | |||
|image=3s_urien_j.mk.png | |||
|imageSize=250px | |||
|data= | |||
{{AttackData-3S | |||
|startup=6 | |||
|active=4 | |||
|parry=H | |||
|damage=16 | |||
|stun=9 | |||
|onHit=+3~+10 | |||
|onHitCrouch=+9~+10 | |||
|onBlock=+2~+10 | |||
|attackLevel=Overhead | |||
|description= | |||
* Self meter gain: Whiff: 2, Hit: 11, Block: 6. | |||
* Opponent meter gain: Whiff: 0, Hit: 2, Block: 0. | |||
{{3S Button FAT|link=https://fullmeter.com/fatonline/#/framedata/movedetail/3S/Urien/normal/Jump%20MK}} | |||
}} | |||
}} | |||
=====<font style="visibility:hidden; float:right">j.HK</font>===== | |||
{{MoveData | |||
|name=Jump HK | |||
|input={{u}}/{{uf}}+{{hk}} | |||
|image=3s_urien_j.hk.png | |||
|imageSize=250px | |||
|data= | |||
{{AttackData-3S | |||
|startup=10 | |||
|active=3 | |||
|parry=H | |||
|damage=23 | |||
|stun=11 | |||
|onHit=+1~+13 | |||
|onHitCrouch=+9~+13 | |||
|onBlock=-4~+12 | |||
|attackLevel=Overhead | |||
|description= | |||
* Self meter gain: Whiff: 3, Hit: 19, Block: 10. | |||
* Opponent meter gain: Whiff: 0, Hit: 4, Block: 0. | |||
{{3S Button FAT|link=https://fullmeter.com/fatonline/#/framedata/movedetail/3S/Urien/normal/Jump%20HK}} | |||
}} | |||
}} | |||
<br> | |||
<br> | |||
<br> | |||
==== Target Combos ==== | |||
=====<font style="visibility:hidden; float:right">MPHP</font>===== | |||
{{MoveData | |||
|name=st.LP xx st.MP | |||
|input={{lp}}>{{mp}} | |||
|image=3s_urien_st.lp.png | |||
|imageSize=250px | |||
|image2=3s_urien_st.mp.png | |||
|imageSize2=250px | |||
|data= | |||
{{AttackData-3S | |||
|startup=4 | |||
|active= | |||
|recovery= | |||
|onHit=0 | |||
|onHitCrouch=+2 | |||
|onBlock=-2 | |||
|parry=H | |||
|damage=7 | |||
|stun=3 | |||
|attackLevel=Mid>Mid | |||
|description= | |||
}} | |||
}} | |||
<br> | |||
<br> | |||
<br> | |||
==== Throws ==== | |||
=====<font style="visibility:hidden; float:right">LPLK</font>===== | |||
{{MoveData | |||
|name=Destroy Claw | |||
|input={{lp}}+{{lk}} | |||
|image=3s_urien_lp+lk.png | |||
|image2=(uriennt).gif | |||
|imageSize=250px | |||
|imageSize2=150px | |||
|data= | |||
{{AttackData-3S | |||
|startup=2 | |||
|active=1 | |||
|recovery=21 | |||
|onHit=Soft KD | |||
|onHitCrouch=Soft KD | |||
|damage=15 | |||
|stun=22 | |||
|attackLevel=Throw | |||
|description= | |||
* 26 throw range | |||
* Self meter gain: Whiff: 0, Hit: 8, Block: 0. | |||
* Opponent meter gain: Whiff: 0, Hit: 2, Block: 0. | |||
{{3S Button FAT|link=https://fullmeter.com/fatonline/#/framedata/movedetail/3S/Urien/normal/Destroy%20Claw}} | |||
}} | |||
}} | |||
=====<font style="visibility:hidden; float:right">4/6LPK</font>===== | |||
{{MoveData | |||
|name=Spartan Bomb | |||
|input={{b}}/{{f}}+{{lp}}+{{lk}} | |||
|image=3s_urien_lp+lk.png | |||
|image2=(uriensbft).gif | |||
|imageSize=250px | |||
|imageSize2=150px | |||
|data= | |||
{{AttackData-3S | |||
|startup=2 | |||
|active=1 | |||
|recovery=21 | |||
|onHit=Soft KD | |||
|onHitCrouch=Soft KD | |||
|damage=24 | |||
|attackLevel=Throw | |||
|stun=8 | |||
|description= | |||
* 26 throw range | |||
* Self meter gain: Whiff: 0, Hit: 8, Block: 0. | |||
* Opponent meter gain: Whiff: 0, Hit: 2, Block: 0. | |||
{{3S Button FAT|link=https://fullmeter.com/fatonline/#/framedata/movedetail/3S/Urien/normal/Spartan%20Bomb}} | |||
}} | |||
}} | |||
<br> | |||
<br> | |||
<br> | |||
==== Universal Overhead ==== | |||
=====<font style="visibility:hidden; float:right">MPMK</font>===== | |||
{{MoveData | |||
|name=Elbow Strike | |||
|input={{mp}}+{{mk}} | |||
|image=3s_urien_mp+mk.png | |||
|imageSize=250px | |||
|data= | |||
{{AttackData-3S | |||
|startup=15 | |||
|active=10 | |||
|recovery=5 | |||
|parry=H | |||
|damage=7 | |||
|onHit=0~+8 | |||
|onHitCrouch=+1~+9 | |||
|onBlock=-5~0 | |||
|stun=3 | |||
|attackLevel=Mid | |||
|description= | |||
* Self meter gain: Whiff: 0, Hit: 2, Block: 1. | |||
* Opponent meter gain: Whiff: 0, Hit: 0, Block: 0. | |||
{{3S Button FAT|link=https://fullmeter.com/fatonline/#/framedata/movedetail/3S/Urien/normal/Elbow%20Strike}} | |||
}} | |||
}} | |||
<br> | |||
<br> | |||
<br> | |||
==== Taunts ==== | |||
=====<font style="visibility:hidden; float:right">HPHK</font>===== | |||
{{MoveData | |||
|name=Ground Pound | |||
|input={{hp}}+{{hk}} | |||
|image=3s_urien_hp+hk.png | |||
|imageSize=250px | |||
|data= | |||
{{AttackData-3S | |||
|startup=21 | |||
|active=3 | |||
|recovery=31 | |||
|parry=L | |||
|damage=1 | |||
|onHit=Soft KD | |||
|onHitCrouch=Soft KD | |||
|onBlock=-15 | |||
|attackLevel=Low | |||
|description= | |||
Increases Urien's damage for the next hit/combo by 31.3%. One taunt is the maximum. | |||
* 16 kara range | |||
* Self meter gain: Whiff: 4, Hit: 6, Block: 5. | |||
* Opponent meter gain: Whiff: 0, Hit: 0, Block: 0. | |||
{{3S Button FAT|link=https://fullmeter.com/fatonline/#/framedata/movedetail/3S/Urien/normal/Ground%20Pound}} | |||
}} | |||
}} | |||
<br> | |||
<br> | |||
<br> | |||
==== Special Moves ==== | |||
=====<font style="visibility:hidden; float:right">236P</font>===== | |||
{{MoveData | |||
|name=Metallic Sphere | |||
|input={{qcf}}+{{p}} | |||
|image=3s_urien_qcf_lp.png | |||
|caption={{lp}} | |||
|image2=3s_urien_qcf_mp.png | |||
|caption2={{mp}} | |||
|image3=3s_urien_qcf_hp.png | |||
|caption3={{hp}} | |||
|image4=3s_urien_qcf_ex.png | |||
|caption4={{ex}} | |||
|imageSize=250px | |||
|imageSize2=250px | |||
|imageSize3=250px | |||
|imageSize4=250px | |||
|data= | |||
{{AttackData-3S | |||
|version=LP | |||
|attackLevel=Mid | |||
|startup=14 | |||
|recovery=39 | |||
|onHit=-7 if point blank | |||
|onHitCrouch=-7 if point blank | |||
|onBlock=-8 | |||
|parry=H | |||
|damage=12 | |||
|stun=3 | |||
|description= | |||
* Cancel options: su | |||
* Self meter gain: Whiff: 0, Hit: 2, Block: 1. | |||
* Opponent meter gain: Whiff: 0, Hit: 0, Block: 0. | |||
{{3S Button FAT|link=https://fullmeter.com/fatonline/#/framedata/movedetail/3S/Urien/normal/LP%20Metallic%20Sphere}} | |||
}} | |||
{{AttackData-3S | |||
|version=MP | |||
|attackLevel=Mid | |||
|startup=14 | |||
|recovery=35 | |||
|onHit=-3 if point blank | |||
|onHitCrouch=-3 if point blank | |||
|onBlock=-4 if point blank | |||
|parry=H | |||
|damage=12 | |||
|stun=3 | |||
|description= | |||
* Cancel options: su | |||
* Self meter gain: Whiff: 0, Hit: 2, Block: 1. | |||
* Opponent meter gain: Whiff: 0, Hit: 0, Block: 0. | |||
{{3S Button FAT|link=https://fullmeter.com/fatonline/#/framedata/movedetail/3S/Urien/normal/MP%20Metallic%20Sphere}} | |||
}} | |||
{{AttackData-3S | |||
|version=HP | |||
|attackLevel=Mid | |||
|startup=14 | |||
|recovery=28 | |||
|onHit=-3 if point blank | |||
|onHitCrouch= | |||
|onBlock=+3 if point blank | |||
|parry=H | |||
|damage=12 | |||
|stun=3 | |||
|description= | |||
* Cancel options: su | |||
* Self meter gain: Whiff: 0, Hit: 2, Block: 1. | |||
* Opponent meter gain: Whiff: 0, Hit: 0, Block: 0. | |||
{{3S Button FAT|link=https://fullmeter.com/fatonline/#/framedata/movedetail/3S/Urien/normal/HP%20Metallic%20Sphere}} | |||
}} | |||
{{AttackData-3S | |||
|version=EX | |||
|attackLevel=Mid | |||
|startup=14 | |||
|recovery=55 | |||
|onHit=-15 if point blank | |||
|onHitCrouch=-15 if point blank | |||
|onBlock=-16 | |||
|parry=H | |||
|damage=27 | |||
|stun=5 | |||
|description= | |||
* Cancel options: su | |||
* Self meter gain: Whiff: -40, Hit: -40, Block: -40. | |||
* Opponent meter gain: Whiff: 0, Hit: 0, Block: 0. | |||
{{3S Button FAT|link=https://fullmeter.com/fatonline/#/framedata/movedetail/3S/Urien/normal/EX%20Metallic%20Sphere}} | |||
}} | |||
}} | |||
=====<font style="visibility:hidden; float:right">28K</font>===== | |||
{{MoveData | |||
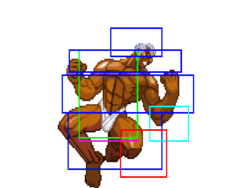
|name=Violence Knee Drop | |||
|input=(hold){{d}}~{{u}}+{{k}} | |||
|image=3s_urien_du_K.png | |||
|caption={{lk}}/{{mk}}/{{hk}} | |||
|image2=3s_urien_du_K.png | |||
|caption2={{ex}} | |||
|imageSize=250px | |||
|imageSize2=250px | |||
|data= | |||
{{AttackData-3S | |||
|version=Normal | |||
|startup=24 | |||
|active=12 | |||
|recovery=7 | |||
|onHit=Soft KD | |||
|onHitCrouch=Soft KD | |||
|onBlock=-16 | |||
|parry=H | |||
|attackLevel=Overhead | |||
|damage=19 | |||
|stun=11 | |||
|description= | |||
* Self meter gain: Whiff: 3, Hit: 18, Block: 12. | |||
* Opponent meter gain: Whiff: 0, Hit: 4, Block: 0. | |||
{{3S Button FAT|link=https://fullmeter.com/fatonline/#/framedata/movedetail/3S/Urien/normal/Violence%20Knee%20Drop}} | |||
}} | |||
{{AttackData-3S | |||
|version=EX | |||
|startup=26 | |||
|active=5 | |||
|recovery=7 | |||
|onHit=-18~-14 | |||
|onHitCrouch=-15 | |||
|onBlock=-18~-14 | |||
|parry=H | |||
|attackLevel=Overhead | |||
|damage=23 | |||
|stun=17 | |||
|description= | |||
* Self meter gain: Whiff: -40, Hit: -40, Block: -40. | |||
* Opponent meter gain: Whiff: 0, Hit: 0, Block: 0. | |||
{{3S Button FAT|link=https://fullmeter.com/fatonline/#/framedata/movedetail/3S/Urien/normal/EX%20Violence%20Knee%20Drop}} | |||
}} | |||
}} | |||
=====<font style="visibility:hidden; float:right">46K</font>===== | |||
{{MoveData | |||
|name=Chariot Tackle | |||
|input=(hold){{b}}~{{f}}+{{k}} | |||
|image=3s_urien_bf_lk.png | |||
|caption={{lk}} | |||
|image2=3s_urien_bf_mk.png | |||
|caption2={{mk}} | |||
|image3=3s_urien_bf_hk.png | |||
|caption3={{hk}} | |||
|image4=3s_urien_bf_ex.png | |||
|caption4={{ex}} | |||
|imageSize=250px | |||
|imageSize2=250px | |||
|imageSize3=250px | |||
|imageSize4=250px | |||
|data= | |||
{{AttackData-3S | |||
|version=LK | |||
|startup=7 | |||
|active=10 | |||
|recovery=25 | |||
|onHit=0 | |||
|onHitCrouch=+2 | |||
|onBlock=-10 | |||
|parry=H | |||
|damage=21 | |||
|stun=7 | |||
|attackLevel=Mid | |||
|description= | |||
* Cancel options: su | |||
* Self meter gain: Whiff: 3, Hit: 19, Block: 10. | |||
* Opponent meter gain: Whiff: 0, Hit: 4, Block: 0. | |||
{{3S Button FAT|link=https://fullmeter.com/fatonline/#/framedata/movedetail/3S/Urien/normal/LK%20Chariot%20Tackle}} | |||
}} | |||
{{AttackData-3S | |||
|version=MK | |||
|startup=10 | |||
|active=12 | |||
|recovery=26 | |||
|onBlock=-11 | |||
|onHit=-1 | |||
|onHitCrouch=+1 | |||
|parry=H | |||
|damage=24 | |||
|stun=9 | |||
|attackLevel=Mid | |||
|description= | |||
* Cancel options: su | |||
* Self meter gain: Whiff: 3, Hit: 19, Block: 10. | |||
* Opponent meter gain: Whiff: 0, Hit: 4, Block: 0. | |||
{{3S Button FAT|link=https://fullmeter.com/fatonline/#/framedata/movedetail/3S/Urien/normal/MK%20Chariot%20Tackle}} | |||
}} | |||
{{AttackData-3S | |||
|version=HK | |||
|startup=13 | |||
|active=15 | |||
|recovery=27 | |||
|onHit=-2 | |||
|onHitCrouch=0 | |||
|onBlock=-12 | |||
|parry=H | |||
|damage=26 | |||
|stun=11 | |||
|attackLevel=Mid | |||
|description= | |||
* Cancel options: su | |||
* Self meter gain: Whiff: 3, Hit: 19, Block: 10. | |||
* Opponent meter gain: Whiff: 0, Hit: 4, Block: 0. | |||
{{3S Button FAT|link=https://fullmeter.com/fatonline/#/framedata/movedetail/3S/Urien/normal/HK%20Chariot%20Tackle}} | |||
}} | |||
{{AttackData-3S | |||
|version=EX | |||
|startup=6 | |||
|active=34 | |||
|recovery=39 | |||
|onHit=+2 | |||
|onHitCrouch=+4 | |||
|onBlock=-9 | |||
|parry=H | |||
|damage=29 | |||
|stun=17 | |||
|attackLevel=Mid | |||
|description= | |||
* Cancel options: su | |||
* Self meter gain: Whiff: -40, Hit: -40, Block: -40. | |||
* Opponent meter gain: Whiff: 0, Hit: 0, Block: 0. | |||
{{3S Button FAT|link=https://fullmeter.com/fatonline/#/framedata/movedetail/3S/Urien/normal/EX%20Chariot%20Tackle}} | |||
}} | |||
}} | |||
=====<font style="visibility:hidden; float:right">28P</font>===== | |||
{{MoveData | |||
|name=Headbutt | |||
|input=(hold){{d}}~{{u}}+{{p}} | |||
|image=3s_urien_du_P.png | |||
|caption={{lp}}/{{mp}}/{{hp}} | |||
|image2=3s_urien_du_p_EX.png | |||
|caption2={{ex}} | |||
|imageSize=250px | |||
|imageSize2=250px | |||
|data= | |||
{{AttackData-3S | |||
|version=LP | |||
|startup=7 | |||
|active=2 | |||
|recovery=19 | |||
|attackLevel=Mid | |||
|onHit=Soft KD | |||
|onHitCrouch=Soft KD | |||
|onBlock=-5 | |||
|parry=H | |||
|damage=21 | |||
|stun=13 | |||
|description= | |||
* Self meter gain: Whiff: 3, Hit: 13, Block: 5. | |||
* Opponent meter gain: Whiff: 0, Hit: 3, Block: 0. | |||
{{3S Button FAT|link=https://fullmeter.com/fatonline/#/framedata/movedetail/3S/Urien/normal/LP%20Dangerous%20Headbutt}} | |||
}} | |||
{{AttackData-3S | |||
|version=MP | |||
|startup=9 | |||
|active=4 | |||
|recovery=18 | |||
|onHit=Soft KD | |||
|onHitCrouch=Soft KD | |||
|onBlock=-6 | |||
|attackLevel=Mid | |||
|parry=H | |||
|damage=23 | |||
|stun=15 | |||
|description= | |||
* Self meter gain: Whiff: 3, Hit: 13, Block: 5. | |||
* Opponent meter gain: Whiff: 0, Hit: 3, Block: 0. | |||
{{3S Button FAT|link=https://fullmeter.com/fatonline/#/framedata/movedetail/3S/Urien/normal/MP%20Headbutt}} | |||
}} | |||
{{AttackData-3S | |||
|version=HP | |||
|startup=12 | |||
|active=6 | |||
|recovery=19 | |||
|onHit=Soft KD | |||
|onHitCrouch=Soft KD | |||
|onBlock=-9 | |||
|attackLevel=Mid | |||
|parry=H | |||
|damage=24 | |||
|stun=17 | |||
|description= | |||
* Self meter gain: Whiff: 3, Hit: 13, Block: 5. | |||
* Opponent meter gain: Whiff: 0, Hit: 3, Block: 0. | |||
{{3S Button FAT|link=https://fullmeter.com/fatonline/#/framedata/movedetail/3S/Urien/normal/HP%20Headbutt}} | |||
}} | |||
{{AttackData-3S | |||
|version=EX | |||
|startup=9 | |||
|active=4 | |||
|recovery=15 | |||
|onHit=Soft KD | |||
|onHitCrouch=Soft KD | |||
|onBlock=-1 | |||
|attackLevel=Mid | |||
|parry=H | |||
|damage=27 | |||
|stun=21 | |||
|description= | |||
* Self meter gain: Whiff: -40, Hit: -40, Block: -40. | |||
* Opponent meter gain: Whiff: 0, Hit: 0, Block: 0. | |||
{{3S Button FAT|link=https://fullmeter.com/fatonline/#/framedata/movedetail/3S/Urien/normal/EX%20Headbutt}} | |||
}} | |||
}} | |||
<br> | |||
<br> | |||
<br> | |||
==== Super Arts ==== | |||
=====<font style="visibility:hidden; float:right">236236P (SA1)</font>===== | |||
{{MoveData | |||
|name=Tyrant Punish | |||
|input={{qcf}}{{qcf}}+{{p}} (SA1) | |||
|image=3s_urien_sa1.png | |||
|imageSize=250px | |||
|data= | |||
{{AttackData-3S | |||
|startup=1 | |||
|active=55 | |||
|recovery=23 | |||
|onHit=Hard KD | |||
|onHitCrouch=Hard KD | |||
|attackLevel=Mid | |||
|onBlock=-18 | |||
|damage=69 | |||
|description= | |||
A series of advancing tackles, ending in a clothesline knockdown. A fast and invulnerable Super Art that can be canceled into from some of Urien's relevant moves. Does solid damage and, if selected, is Urien's only reversal, but suffers from some of Urien's best neutral options not having super cancels. | |||
In general Urien's kit doesn't synergize well with a damage/confirm super. | |||
{{3S Button FAT|link=https://fullmeter.com/fatonline/#/framedata/movedetail/3S/Urien/normal/Tyrant%20Punish}} | |||
}} | |||
}} | |||
=====<font style="visibility:hidden; float:right">236236P (SA2)</font>===== | |||
{{MoveData | |||
|name=Temporal Thunder | |||
|input={{qcf}}{{qcf}}+{{p}} (SA2) | |||
|image=3s_urien_sa2.png | |||
|imageSize=250px | |||
|data= | |||
{{AttackData-3S | |||
|startup=1 | |||
|active=75 | |||
|recovery=91 | |||
|onHit=Hard KD | |||
|onHitCrouch=Hard KD | |||
|attackLevel=Mid | |||
|onBlock=-36 if point blank | |||
|damage=48 | |||
|stun=33 | |||
|description= | |||
An oddball projectile super art. Launches a blast of electrical energy that eventually weakens into a metallic sphere. Has pretty substantial stun output, but is terrible for anything else. Arguably decent in corner juggles, especially as a stun-oriented reset option against low stun characters like Remy and Akuma, but its utility is both narrow and weak. | |||
{{3S Button FAT|link=https://fullmeter.com/fatonline/#/framedata/movedetail/3S/Urien/normal/Temporal%20Thunder}} | |||
}} | |||
}} | |||
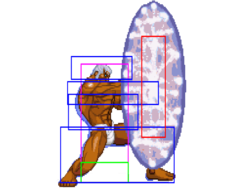
=====<font style="visibility:hidden; float:right">236236P (SA3)</font>===== | |||
{{MoveData | |||
|name=Aegis Reflector | |||
|input={{qcf}}{{qcf}}+{{p}} (SA3) | |||
|image=3s_urien_sa3.png | |||
|image2=(uriensa3pzones).png | |||
|caption2={{lp}}/{{mp}}/{{hp}} | |||
|image3=(uriensa3pp).gif | |||
|caption3={{ex}} | |||
|imageSize=250px | |||
|imageSize2=150px | |||
|imageSize3=150px | |||
|data= | |||
{{AttackData-3S | |||
|version=LP/MP/HP | |||
|startup=12/24/32 | |||
|active=224/212/204 | |||
|recovery=12 | |||
|onBlock=+65 | |||
|onHit=Applies Hard KD effect after you knockdown the opponent and resets the Juggle Meter | |||
|onHitCrouch=Applies Hard KD effect after you knockdown the opponent and resets the Juggle Meter | |||
|attackLevel=Mid | |||
|parry=A | |||
|damage=23 | |||
|description= | |||
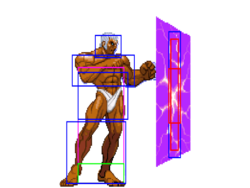
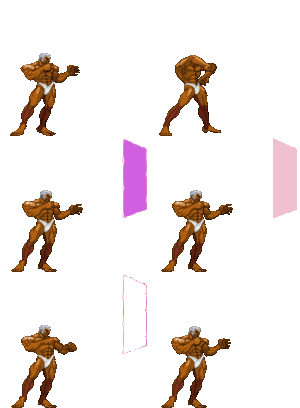
<big>''Aegis Reflector is a wildly nuanced tool, and will not be covered at length in this move description; this is a brief overview. Go to the [[Street_Fighter_3:_3rd_Strike/Urien/2021/Aegis|Aegis sub-page]] for a more detailed breakdown.''</big> | |||
Urien projects a mirror forwards, which will hit opponents and reflect projectiles. | |||
A legendary and character-defining super, arguably the strongest individual Super Art in the game. Put very briefly and bluntly, Aegis singlehandedly elevates Urien from middling to highly menacing, dishonest, and explosive. Aegis Reflector, deployed properly, enables a ludicrous degree of screen control, game theft, and damage output. | |||
Aegis reflector has several properties that are key to understanding how it works. They are as follows: | |||
* Generally must be blocked according to the direction it was deployed from (with some nuances and caveats; see the Aegis page) | |||
** This is what sets up unblockables | |||
* Button strength corresponds to the length of travel before the Aegis comes to rest | |||
* Will slowly drift towards the opponent once reaches its target distance | |||
* Six hits, which are consumed on hit | |||
** The mirror can be 'damaged' when struck by the opponent's moves, losing hits | |||
* Reflection is not fully consistent | |||
** Some moves are outright reflected, others are destroyed, and a small few will beat the reflector | |||
{{3S Button FAT|link=https://fullmeter.com/fatonline/#/framedata/movedetail/3S/Urien/normal/Aegis%20Reflector}} | |||
}} | |||
{{AttackData-3S | |||
|version=EX | |||
|startup=2 | |||
|recovery=12 | |||
|active=238 | |||
|onHit=Applies Hard KD effect after you knockdown the opponent | |||
|onHitCrouch=Applies Hard KD effect after you knockdown the opponent | |||
|onBlock=+46 | |||
|parry=A | |||
|attackLevel=Mid | |||
|damage=23 | |||
|description= | |||
Urien projects a mirror upwards and forwards. | |||
EX Aegis is distinguished by the fact that it is active immediately, allowing it to be used as a niche combo enabler. It can make tackles safe on block, be linked into from Universal Overhead and EX Tackle, and pick up opponents from close Headbutt hits. | |||
* Identical properties to regular Aegis Reflector; see the non-EX entry | |||
{{3S Button FAT|link=https://fullmeter.com/fatonline/#/framedata/movedetail/3S/Urien/normal/EX%20Aegis%20Reflector}} | |||
}} | |||
}} | |||
{{Navbox-3S}} | |||
[[Category:Street Fighter III: 3rd Strike]] | |||
Revision as of 02:15, 5 July 2024
Introduction
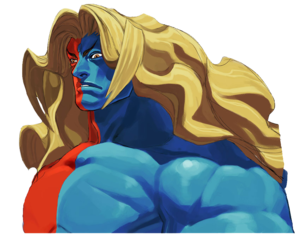
Gill (ギル Giru) is the leader of a mysterious cult-like organization called the Secret Society which has manipulated world events for over 2000 years, and is dedicated to the salvation of mankind, and creation of a new utopia. His desire is to control the world (or in the case of 3rd Strike, the console port tierlist), but he's neither a villain or hero. Gill was first introduced in Street Fighter III: New Generation.
Gill is a boss character that can be best described as a far better version of Urien (in terms of normals). They both have similar sprites, hitboxes, and hurtboxes, but Gill's moves come out far faster and / or do more damage and stun. He has a headbutt like Urien, but it isn't a charge move, and unlike Urien, he has a Lariat. He is also arguably the strongest character in the game both in the arcade version and in the console port where he is buffed slightly (Pyrokenesis / Cryokenesis becomes super cancellable in the console port). Gill is a damage machine, having almost no bad moves, and is capable of getting a TOD from any part of the screen on either side from a single crouching HP.
Super Arts
While Gill has access to all three of his supers at all times, it is still important to know which supers are good, and which supers are bad.
Meteor Strike
Recommended
Ideal combo ender for TODs involving beefier characters
Seraphic Wings
Not Recommended
Minus as hell, and only really practical in the console ports; which most people reading this wiki will not care for.
Resurrection
Not recommended, even if it is unavoidable
To be honest if you die as Gill, it is kind of on you if this super comes out.
| Strengths | Weaknesses |
|---|---|
|
|
| Gill #3S_GI | |
|---|---|
| Vitals | |
| Life Points | 1300 |
| Stun Points | 72 |
| Super Art Stock/Size | |
| SA1 | 1/120 |
| SA2 | 1/120 |
| SA3 | 1/120 |
| Ground Movement | |
| Forward Dash duration/distance | 15 (17) (143px) |
| Back Dash duration/distance | 19 (104px) |
| Jumping | |
| Back Jump duration | 38(5+32+1) |
| Neutral Jump duration | 38(5+32+1) |
| Forward Jump duration | 38(5+32+1) |
| Back Super Jump duration | 51(7+43+1) |
| Neutral Super Jump duration | 51(7+43+1) |
| Forward Super Jump duration | 51(7+43+1) |
| Wake up | |
| Wake up duration | 76 |
| Quick rise duration | 56 |
Frame Data
Standing Normals
5LP
5LP
5HP
5LK
5MK
5HK
Command Normals
6MP
6HP
6MK
Crouching Normals
2LP
2MP
2HP
2LK
2MK
2HK
Jumping Normals
j.LP
j.MP
j.HP
j.LK
j.MK
j.HK
Target Combos
MPHP
| Startup | Active | Recovery | Block | Hit | Cr. Hit | Damage | Stun | Kara | Guard Level | Parry Level |
|---|---|---|---|---|---|---|---|---|---|---|
| 4 | - | - | -2 | 0 | +2 | 7 | 3 | - | - | H |
| Cancel Options | Self Meter Gain | Whiff | Hit | Block / Tech | Opponent Meter Gain | Hit | Block / Tech | |||
| - | - | - | - | - | - | |||||
Throws
LPLK
4/6LPK
Universal Overhead
MPMK
Taunts
HPHK
Special Moves
236P
28K
46K
28P
Super Arts
236236P (SA1)
236236P (SA2)
236236P (SA3)
| LP/MP/HP | Startup | Active | Recovery | Block | Hit | Cr. Hit | Damage | Stun | Kara | Guard Level | Parry Level |
|---|---|---|---|---|---|---|---|---|---|---|---|
| 12/24/32 | 224/212/204 | 12 | +65 | Applies Hard KD effect after you knockdown the opponent and resets the Juggle Meter | Applies Hard KD effect after you knockdown the opponent and resets the Juggle Meter | 23 | - | - | - | A | |
| Cancel Options | Self Meter Gain | Whiff | Hit | Block / Tech | Opponent Meter Gain | Hit | Block / Tech | ||||
| - | - | - | - | - | - | ||||||
|
Aegis Reflector is a wildly nuanced tool, and will not be covered at length in this move description; this is a brief overview. Go to the Aegis sub-page for a more detailed breakdown. Urien projects a mirror forwards, which will hit opponents and reflect projectiles. A legendary and character-defining super, arguably the strongest individual Super Art in the game. Put very briefly and bluntly, Aegis singlehandedly elevates Urien from middling to highly menacing, dishonest, and explosive. Aegis Reflector, deployed properly, enables a ludicrous degree of screen control, game theft, and damage output. Aegis reflector has several properties that are key to understanding how it works. They are as follows:
| |||||||||||
| EX | Startup | Active | Recovery | Block | Hit | Cr. Hit | Damage | Stun | Kara | Guard Level | Parry Level |
| 2 | 238 | 12 | +46 | Applies Hard KD effect after you knockdown the opponent | Applies Hard KD effect after you knockdown the opponent | 23 | - | - | - | A | |
| Cancel Options | Self Meter Gain | Whiff | Hit | Block / Tech | Opponent Meter Gain | Hit | Block / Tech | ||||
| - | - | - | - | - | - | ||||||
|
Urien projects a mirror upwards and forwards. EX Aegis is distinguished by the fact that it is active immediately, allowing it to be used as a niche combo enabler. It can make tackles safe on block, be linked into from Universal Overhead and EX Tackle, and pick up opponents from close Headbutt hits.
| |||||||||||
