RaVen-ahzi (talk | contribs) (Created page with "= Strategies = ==Overview== Chun-Li is a top-tier character, sharing the top slots with Yun, Ken and (arguably) Makoto. Her greatest assets are her extremely damaging Super...") |
Callie Rose (talk | contribs) No edit summary |
||
| (One intermediate revision by one other user not shown) | |||
| Line 1: | Line 1: | ||
= | {{FP Box|header={{Big|'''The 101'''}}|content= | ||
<center>{{Big|'''Neutral'''}}</center> | |||
*'''2MK:''' The cornerstone of your neutral, a fast and rewarding low poke that can be cancelled into SAII. | |||
*'''4HP:''' A great button that tends to beat almost anything for a chunk of health. It's also great to whiff for meterbuild. | |||
*'''5HP:''' Your longest range button, good for swatting from long range. | |||
*'''2MP:''' A good button for reaching low beyond 2MK range. | |||
*'''5/6HK:''' Hopping kicks that let you dodge lows, good to beat people attempting to counterpoke her lows. | |||
*'''2LP:''' A great jab to whiff in order to catch hitbox extensions or jabs with almost no risk. | |||
<center>{{Big|'''Anti-Air'''}}</center> | |||
*'''5MK:''' A kick at a diagonal angle above Chun, good for standard anti-air usage but loses to air parry and angle altering moves. | |||
*'''cl.MK:''' High kick aimed above her head, good for catching people above you or trying to cross you up and can be held for the followup vs air parry, though it lacks horizontal range. | |||
*'''2HK:''' Sweep is great for swatting low jumps similar to 5MK, but secures a knockdown as well. | |||
*'''4HP:''' Beats or trades with most jump normals, and can cancel for air parry safety, but is a little slow to use on reaction. | |||
*'''5LP:''' Your fastest normal, good to check people falling down when you didn't react faster and is fairly safe vs air parry but will lose to most strong jump normals. | |||
*'''cl.HK:''' Fast and damaging, and can superjump cancel for safety vs air parry, but will lose to a majority of jump normals. | |||
<center>{{Big|'''Offense'''}}</center> | |||
*'''2LP:''' Where your offense starts, mix between frametraps and tick throws from this, or just walk up and do it again. | |||
*'''LP+LK:''' Chun's throw is her main tool to stop the opponent from blocking. Keep throwing them until they start doing something about it. | |||
*'''2MK:''' Your main low on offense, scary as it's fairly safe and confirms SAII. | |||
*'''5/6HK:''' Low and throw crush normal, links to SAII on crouchers making it scary to mash. | |||
*'''4HP:''' Beefy way to threaten from range if they try and mash. | |||
}} | |||
Chun-Li | == Strategy == | ||
Chun-Li is a largely neutral focused character, using fast and high priority buttons to control the pace of the match from a safe distance. This means learning Chun involves learning the ins and outs of 3rd Strike's neutral game, and being able to stay on top of your opponents bad habits at all times. Do they mash often? What buttons do they press at this range? Where and why are they jumping, and what can you do to make them stop? While every character has to learn these things in some way, Chun lives by them, since many of her anti-airs are situational and her health is quite low. | |||
=== Neutral/Checking Habits === | |||
The first thing you should do is try and get a feel for your opponent. Chun-Li does this very well using 2MK: this is a safe fast low, and by finding out how they respond to it, you can learn a lot about player habits. If they try and press buttons into it, you can use 4HP to beat them out. If they're trying to space away from it, you can walk forward fairly safely to take space, or even risk a fast dash into 2LP/kara-throw. | |||
<gallery widths="200px" heights="200px" mode="nolines"> | |||
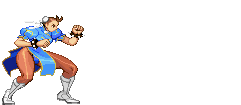
File:(chunlicmk).gif | Use 2MK to keep them at range and check their habits. | |||
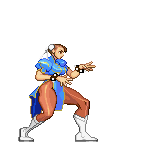
File:(chunlibhp).gif | Use 4HP to beat out buttons in neutral at range. | |||
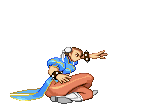
File:(chunlihp).gif | Use 5HP to swat them from far away. | |||
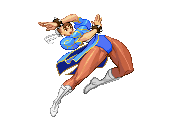
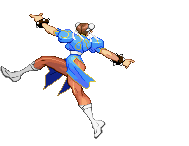
File:(chunlihk).gif | Use 5/6HK to hop over lows. | |||
</gallery> | |||
Of course, all of this becomes much scarier once you have a Houyoku-Sen stocked. SAII is fast, damaging, and combos from most of Chun's best normals at all ranges. Simply having a stock of it allows for mindgames, as opponents will avoid Chun in order to not get hit by SAII. This is a snowball effect as well, as while they're afraid to press in neutral, Chun can easily walk forward into her preferred range while whiffing buttons repeatedly for meter, quickly securing her more meter for another SAII. | |||
Anti-airs are where it gets tricky, as opponents will frequently jump around Chun-Li to avoid grounded pokes. Learning the variation of anti-air options you have is important, as each of them come with unique strengths and weaknesses, and this is on top of having to work around air parries. Your ideal anti-air is 5MK, as it hits at the best angle above you for both catching forward and neutral jumps. 2HK is good for similar reasons, but excels if they're falling right on top of you instead. A smart opponent will vary themselves upon getting anti-aired however, and start parrying these. Without any cancels, both of them are extremely weak to air parry, leading to huge damage from the opponent. Dealing with air parry will require some tricks, usually using unusual normals like 4HP and cl.HK which cancel and are safer on air parry. | |||
<gallery widths="200px" heights="200px" mode="nolines"> | |||
File:(chunlimk).gif | 5MK is great for standard anti-air angles, with opponents jumping at you from neutral. | |||
File:(chunliclosemk).gif | cl.MK can snipe opponents above you, which is useful for stopping crossups. | |||
File:(chunlibhp).gif | 4HP can beat out jumps based on pure priority and active frames, but can lose to early timed jump normals. | |||
File:(chunlichk).gif | 2HK is useful for beating opponents at similar angles as 5MK, but is crouching and knocks down, though it is smaller and whiffs a lot more. | |||
File:(chunliclosehk).gif | cl.HK isn't great against most air buttons, but is great vs air parry where it can be superjump cancelled for safety. | |||
</gallery> | |||
==== Houyoku-Sen ==== | |||
< | <gallery widths="300px" heights="300px" mode="nolines"> | ||
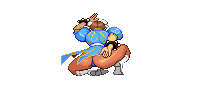
File:(chunlisa2).gif | Having SAII is your win condition, and ensuring you have it as often as possible and use it as intelligently as possible is your goal to take games with Chun-Li. | |||
</gallery> | |||
Chun's SAII Houyoku-Sen is your win condition: that means that having it as often as possible is your path to winning the game. This means that playing around your meter is essential, as wasting an SAII puts you in the position to lose. Luckily, Chun naturally builds lots of meter by whiffing, poking, and parrying things in neutral. You'll usually spend time when you lack stocks trying to aggressively control space by poking with faster, safer buttons. Once you build a stock, your opponent is going to be scared, allowing you to whiff heavies safely to build even more meter. | |||
The only thing to keep in mind is Chun's reversal, EX Spinning Bird Kick. While it isn't stellar, it is a reversal option that Chun can use to escape losing scenarios. This comes with the major downside of costing meter however, and will require some thought before using it. EX moves aren't expensive, but wasting meter on escaping mixups you might be able to hold safely can be the difference between having SAII and not having it. | |||
Chun-Li | '''Tips on 2MK Delay Cancel:'''</br> | ||
Learning to master the 2MK delay cancel makes Chun-Li far scarier, as you can safely combo into it. There are a few ways to go about it, with the best being simply tapping again to confirm the hit. This is done by always inputting 2MK with the motion for super, i.e. 2(MK)36236. If you learn to distinguish the sound effects of hit and block, you can train yourself to tap on reaction to the hit sound. | |||
=== Offense === | |||
On the surface level, Chun-Li has fairly below average mixup focused on strikes and throws. Thanks to her myriad of plus/safe normals however, the threat of frametraps into SAII will keep them scared of mashing, allowing you to sneak throws more often. This is scarier thanks to her amazing kara throw, which is only matched in range by Q's kara throw, and a handful of forward moving pressure resets that the opponent has to consider often. | |||
<gallery widths="300px" heights="300px" mode="nolines"> | |||
File:(chunliclp).gif | Use 2LP to start pressure with a plus normal into frametraps/throws. | |||
File:(chunlicmk).gif | Use 2MK as a scary low frametrap to catch jumps, mashing, and safely space yourself out. | |||
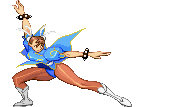
File:(chunlifhk).gif | Use 6HK to reset pressure and crush lows/throws. | |||
File:(chunlifmk).gif | Use 6MK to also reset pressure while spaced further away. | |||
</gallery> | |||
This is all tied together with her amazing kara-throw, which has the longest range in the game (tied with Q). You can kara-cancel the startup of her 5MK into a throw by inputting 5MK~LP+LK, which will give a huge boost in range. If mastered, you can threaten tick throws from absurdly far away, making Chun's offense incredibly hard to escape. | |||
== | <gallery widths="300px" heights="300px" mode="nolines"> | ||
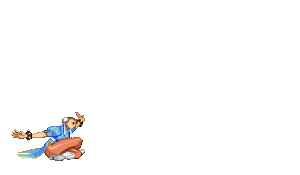
File:(chunlitr).gif | Throw is your can opener, looping throw on afraid opponents is key to racking up damage with Chun on offense. | |||
</gallery> | |||
== | ==== Post-SAII Mixups ==== | ||
Tick throws are mostly the main mixups Chun has. Using the speed and advantage of 2LP to frametrap, bait reversals, and tick throw is generally all you have, though it's strong enough that you won't need much else. This changes after an SAII, where Chun can air reset the opponent high above the screen where they can't see her setting up a mixup. | |||
The most simple SAII mixup is corner SAII > Air Target Combo and then either doing a meaty UOH as they fall, walking up and doing 2MK, or throwing. The high low of meaty UOH/2MK can confirm into super, as meaty UOH can usually go straight to super or even link into cl.HK for more damage, and delay cancel can safely confirm super. Throw allows you to reset into further strike/throw rather than the reward of an SAII. You can also throw out Lightning Legs for some safe chip damage, though this leads to little reward. | |||
Midscreen, you'll usually reset with j.MK after SAII and run a left/right mixup instead. Chun has some time to slightly walk under the opponent here, so she can choose to meaty same side or crossup. The high/low also works here, but getting UOH meaty is much harder. Meaty Lightning Legs is a bit stronger in comparison, as you can also left/right with it now, making it safe and rewarding. | |||
=== Defense === | |||
Defense can be scary with Chun, since her health is low and her defensive options are straightforward. Above all else, you should learn to block with Chun. React to overheads when you can, and watch for where they like to throw. Your first defensive option is 2LP, which is a much faster than average jab. This lets you beat common strings or strings that arent tight, and spamming it lets you easily build space to your preferred range. This is scarier once you learn how to crouch tech. When holding downback, you can input LP+LK, which gives you a 2LP. If your opponent throws you as you input this, you'll tech the throw like normal. This lets you check dashes and frametraps while staying safe to tight tickthrows. | |||
If you find yourself in a really tight situation, you can use Chun's reversal, [2]8KK EX Spinning Bird Kick. This has 8 frames of invuln, allowing it to blow through gaps and laggy meaties. This has a few drawbacks to consider however. The full startup is 12 frames, which is quite slow, allowing things like jabs to safely recover in time for opponents to block. It is unsafe on block as well, so being predictable with it can lead to a much worse punish than you would have been in if you just blocked. The likely biggest drawback however is that it costs precious meter, meaning that using it actively puts you farther away from having an SAII stocked. | |||
<gallery widths="300px" heights="300px" mode="nolines"> | |||
File:(chunlisbkex).gif | EX Spinning Bird Kick is your sole invincible move, use it wisely to escape gaps. | |||
File:(chunliclp).gif | 2LP is a great mash button, and gives Chun a useful defensive option with crouch tech. | |||
</gallery> | |||
=== Parry === | |||
3rd Strike is known for parry, the infamous system mechanic that defines the flow of the game. Using parry on both offense and defense takes Chun from a bit limited to incredibly freeform. Especially on defense, it can be a lifesaver compared to spending meter on EX SBK as a reversal, or as a last minute anti-air that beats any jump button for a punish. Due to the freeform nature, parry tends to be a more intermediate level addition to your strategy, so if you're a brand new player, don't worry too much about landing every parry or how often you miss it. Parry comes with time, noticing the patterns in characters and learning the timing to parry them is something slowly practiced through experience or in training mode. | |||
If you aren't planning on spending meter, Chun usually settles for a throw after parry. Other characters who have to use throw as a parry punish tend to suffer, since throws are very short range, but her kara-throw comes in clutch here too, allowing her to punish with throw much more often. With meter, you'll usually confirm a 2MK > SAII, making parry a terrifying option on defense and forcing your opponent to hold back a bit more. This is also basically any range, meaning even long range parry can lead to this, or at worst a raw SAII. | |||
=== TL;DR === | |||
Chun-Li is a defensive poking character. Learn how to properly space, learn to confirm your supers, and run proper strike/throw, and you'll be on a great path to learning the infamous top tier of 3rd Strike. | |||
<gallery widths="200px" heights="200px" mode="nolines"> | |||
File:(chunlit1).gif | |||
File:(chunlit2).gif | |||
File:(chunlit3).gif | |||
</gallery> | |||
==== Tips on Lightning Legs ==== | |||
Lightning Legs is strong to safely chip opponents out, and buffering it out of normals can be incredibly rewarding as it makes them much harder to punish. For example, if they keep parrying 4HP as an anti-air, you can go into Lightning Legs to make it a much more difficult parry. The input can be quite difficult to do, and is almost impossible in neutral without whiffing a button, so there are a few tricks one should learn to input properly. | |||
The easiest way to input it is the most obvious way: mashing the button you want. This is done easier by cancelling from normals, which can also be made easier by pressing the button you want to cancel and the kick you want at the same time. For example, if you want 4HP > HK Lightning Legs, you can do 4HP+HK and start tapping HK fast. If you do it fast enough, you'll cancel right into HK Lightning Legs and bait air parry. | |||
You can also use it on offense or during air resets by hiding it in a dash. Since you can't use any moves while dashing, you can safely mash and exit out of the dash with any version of Lightning Legs. This technique can also be used to partition the input. You can mash most of what you need during the dash, and it will store that for a while. Then, you can use a fast normal and lightly mash whatever version you want, and get a cancel into Lightning Legs. | |||
{{Navbox-3S}} | |||
[[Category:Street Fighter III: 3rd Strike]] | |||
Latest revision as of 16:10, 18 March 2023
- 2MK: The cornerstone of your neutral, a fast and rewarding low poke that can be cancelled into SAII.
- 4HP: A great button that tends to beat almost anything for a chunk of health. It's also great to whiff for meterbuild.
- 5HP: Your longest range button, good for swatting from long range.
- 2MP: A good button for reaching low beyond 2MK range.
- 5/6HK: Hopping kicks that let you dodge lows, good to beat people attempting to counterpoke her lows.
- 2LP: A great jab to whiff in order to catch hitbox extensions or jabs with almost no risk.
- 5MK: A kick at a diagonal angle above Chun, good for standard anti-air usage but loses to air parry and angle altering moves.
- cl.MK: High kick aimed above her head, good for catching people above you or trying to cross you up and can be held for the followup vs air parry, though it lacks horizontal range.
- 2HK: Sweep is great for swatting low jumps similar to 5MK, but secures a knockdown as well.
- 4HP: Beats or trades with most jump normals, and can cancel for air parry safety, but is a little slow to use on reaction.
- 5LP: Your fastest normal, good to check people falling down when you didn't react faster and is fairly safe vs air parry but will lose to most strong jump normals.
- cl.HK: Fast and damaging, and can superjump cancel for safety vs air parry, but will lose to a majority of jump normals.
- 2LP: Where your offense starts, mix between frametraps and tick throws from this, or just walk up and do it again.
- LP+LK: Chun's throw is her main tool to stop the opponent from blocking. Keep throwing them until they start doing something about it.
- 2MK: Your main low on offense, scary as it's fairly safe and confirms SAII.
- 5/6HK: Low and throw crush normal, links to SAII on crouchers making it scary to mash.
- 4HP: Beefy way to threaten from range if they try and mash.
Strategy
Chun-Li is a largely neutral focused character, using fast and high priority buttons to control the pace of the match from a safe distance. This means learning Chun involves learning the ins and outs of 3rd Strike's neutral game, and being able to stay on top of your opponents bad habits at all times. Do they mash often? What buttons do they press at this range? Where and why are they jumping, and what can you do to make them stop? While every character has to learn these things in some way, Chun lives by them, since many of her anti-airs are situational and her health is quite low.
Neutral/Checking Habits
The first thing you should do is try and get a feel for your opponent. Chun-Li does this very well using 2MK: this is a safe fast low, and by finding out how they respond to it, you can learn a lot about player habits. If they try and press buttons into it, you can use 4HP to beat them out. If they're trying to space away from it, you can walk forward fairly safely to take space, or even risk a fast dash into 2LP/kara-throw.
Use 2MK to keep them at range and check their habits.
Use 4HP to beat out buttons in neutral at range.
Use 5HP to swat them from far away.
Use 5/6HK to hop over lows.
.gif)
.gif)
.gif)
.gif)
Of course, all of this becomes much scarier once you have a Houyoku-Sen stocked. SAII is fast, damaging, and combos from most of Chun's best normals at all ranges. Simply having a stock of it allows for mindgames, as opponents will avoid Chun in order to not get hit by SAII. This is a snowball effect as well, as while they're afraid to press in neutral, Chun can easily walk forward into her preferred range while whiffing buttons repeatedly for meter, quickly securing her more meter for another SAII.
Anti-airs are where it gets tricky, as opponents will frequently jump around Chun-Li to avoid grounded pokes. Learning the variation of anti-air options you have is important, as each of them come with unique strengths and weaknesses, and this is on top of having to work around air parries. Your ideal anti-air is 5MK, as it hits at the best angle above you for both catching forward and neutral jumps. 2HK is good for similar reasons, but excels if they're falling right on top of you instead. A smart opponent will vary themselves upon getting anti-aired however, and start parrying these. Without any cancels, both of them are extremely weak to air parry, leading to huge damage from the opponent. Dealing with air parry will require some tricks, usually using unusual normals like 4HP and cl.HK which cancel and are safer on air parry.
5MK is great for standard anti-air angles, with opponents jumping at you from neutral.
cl.MK can snipe opponents above you, which is useful for stopping crossups.
4HP can beat out jumps based on pure priority and active frames, but can lose to early timed jump normals.
2HK is useful for beating opponents at similar angles as 5MK, but is crouching and knocks down, though it is smaller and whiffs a lot more.

cl.HK isn't great against most air buttons, but is great vs air parry where it can be superjump cancelled for safety.
.gif)
.gif)
.gif)
.gif)
Houyoku-Sen
Having SAII is your win condition, and ensuring you have it as often as possible and use it as intelligently as possible is your goal to take games with Chun-Li.
.gif)
Chun's SAII Houyoku-Sen is your win condition: that means that having it as often as possible is your path to winning the game. This means that playing around your meter is essential, as wasting an SAII puts you in the position to lose. Luckily, Chun naturally builds lots of meter by whiffing, poking, and parrying things in neutral. You'll usually spend time when you lack stocks trying to aggressively control space by poking with faster, safer buttons. Once you build a stock, your opponent is going to be scared, allowing you to whiff heavies safely to build even more meter.
The only thing to keep in mind is Chun's reversal, EX Spinning Bird Kick. While it isn't stellar, it is a reversal option that Chun can use to escape losing scenarios. This comes with the major downside of costing meter however, and will require some thought before using it. EX moves aren't expensive, but wasting meter on escaping mixups you might be able to hold safely can be the difference between having SAII and not having it.
Tips on 2MK Delay Cancel:
Learning to master the 2MK delay cancel makes Chun-Li far scarier, as you can safely combo into it. There are a few ways to go about it, with the best being simply tapping again to confirm the hit. This is done by always inputting 2MK with the motion for super, i.e. 2(MK)36236. If you learn to distinguish the sound effects of hit and block, you can train yourself to tap on reaction to the hit sound.
Offense
On the surface level, Chun-Li has fairly below average mixup focused on strikes and throws. Thanks to her myriad of plus/safe normals however, the threat of frametraps into SAII will keep them scared of mashing, allowing you to sneak throws more often. This is scarier thanks to her amazing kara throw, which is only matched in range by Q's kara throw, and a handful of forward moving pressure resets that the opponent has to consider often.

Use 2LP to start pressure with a plus normal into frametraps/throws.
Use 2MK as a scary low frametrap to catch jumps, mashing, and safely space yourself out.
Use 6HK to reset pressure and crush lows/throws.

Use 6MK to also reset pressure while spaced further away.
.gif)
.gif)
.gif)
This is all tied together with her amazing kara-throw, which has the longest range in the game (tied with Q). You can kara-cancel the startup of her 5MK into a throw by inputting 5MK~LP+LK, which will give a huge boost in range. If mastered, you can threaten tick throws from absurdly far away, making Chun's offense incredibly hard to escape.
Throw is your can opener, looping throw on afraid opponents is key to racking up damage with Chun on offense.
.gif)
Post-SAII Mixups
Tick throws are mostly the main mixups Chun has. Using the speed and advantage of 2LP to frametrap, bait reversals, and tick throw is generally all you have, though it's strong enough that you won't need much else. This changes after an SAII, where Chun can air reset the opponent high above the screen where they can't see her setting up a mixup.
The most simple SAII mixup is corner SAII > Air Target Combo and then either doing a meaty UOH as they fall, walking up and doing 2MK, or throwing. The high low of meaty UOH/2MK can confirm into super, as meaty UOH can usually go straight to super or even link into cl.HK for more damage, and delay cancel can safely confirm super. Throw allows you to reset into further strike/throw rather than the reward of an SAII. You can also throw out Lightning Legs for some safe chip damage, though this leads to little reward.
Midscreen, you'll usually reset with j.MK after SAII and run a left/right mixup instead. Chun has some time to slightly walk under the opponent here, so she can choose to meaty same side or crossup. The high/low also works here, but getting UOH meaty is much harder. Meaty Lightning Legs is a bit stronger in comparison, as you can also left/right with it now, making it safe and rewarding.
Defense
Defense can be scary with Chun, since her health is low and her defensive options are straightforward. Above all else, you should learn to block with Chun. React to overheads when you can, and watch for where they like to throw. Your first defensive option is 2LP, which is a much faster than average jab. This lets you beat common strings or strings that arent tight, and spamming it lets you easily build space to your preferred range. This is scarier once you learn how to crouch tech. When holding downback, you can input LP+LK, which gives you a 2LP. If your opponent throws you as you input this, you'll tech the throw like normal. This lets you check dashes and frametraps while staying safe to tight tickthrows.
If you find yourself in a really tight situation, you can use Chun's reversal, [2]8KK EX Spinning Bird Kick. This has 8 frames of invuln, allowing it to blow through gaps and laggy meaties. This has a few drawbacks to consider however. The full startup is 12 frames, which is quite slow, allowing things like jabs to safely recover in time for opponents to block. It is unsafe on block as well, so being predictable with it can lead to a much worse punish than you would have been in if you just blocked. The likely biggest drawback however is that it costs precious meter, meaning that using it actively puts you farther away from having an SAII stocked.
EX Spinning Bird Kick is your sole invincible move, use it wisely to escape gaps.
2LP is a great mash button, and gives Chun a useful defensive option with crouch tech.
.gif)
Parry
3rd Strike is known for parry, the infamous system mechanic that defines the flow of the game. Using parry on both offense and defense takes Chun from a bit limited to incredibly freeform. Especially on defense, it can be a lifesaver compared to spending meter on EX SBK as a reversal, or as a last minute anti-air that beats any jump button for a punish. Due to the freeform nature, parry tends to be a more intermediate level addition to your strategy, so if you're a brand new player, don't worry too much about landing every parry or how often you miss it. Parry comes with time, noticing the patterns in characters and learning the timing to parry them is something slowly practiced through experience or in training mode.
If you aren't planning on spending meter, Chun usually settles for a throw after parry. Other characters who have to use throw as a parry punish tend to suffer, since throws are very short range, but her kara-throw comes in clutch here too, allowing her to punish with throw much more often. With meter, you'll usually confirm a 2MK > SAII, making parry a terrifying option on defense and forcing your opponent to hold back a bit more. This is also basically any range, meaning even long range parry can lead to this, or at worst a raw SAII.
TL;DR
Chun-Li is a defensive poking character. Learn how to properly space, learn to confirm your supers, and run proper strike/throw, and you'll be on a great path to learning the infamous top tier of 3rd Strike.
.gif)
.gif)
.gif)
Tips on Lightning Legs
Lightning Legs is strong to safely chip opponents out, and buffering it out of normals can be incredibly rewarding as it makes them much harder to punish. For example, if they keep parrying 4HP as an anti-air, you can go into Lightning Legs to make it a much more difficult parry. The input can be quite difficult to do, and is almost impossible in neutral without whiffing a button, so there are a few tricks one should learn to input properly.
The easiest way to input it is the most obvious way: mashing the button you want. This is done easier by cancelling from normals, which can also be made easier by pressing the button you want to cancel and the kick you want at the same time. For example, if you want 4HP > HK Lightning Legs, you can do 4HP+HK and start tapping HK fast. If you do it fast enough, you'll cancel right into HK Lightning Legs and bait air parry.
You can also use it on offense or during air resets by hiding it in a dash. Since you can't use any moves while dashing, you can safely mash and exit out of the dash with any version of Lightning Legs. This technique can also be used to partition the input. You can mash most of what you need during the dash, and it will store that for a while. Then, you can use a fast normal and lightly mash whatever version you want, and get a cancel into Lightning Legs.


