m (Added some additional info to Leonardo's get up attack description.) |
CartoonFan18 (talk | contribs) m (added image) |
||
| (13 intermediate revisions by 8 users not shown) | |||
| Line 14: | Line 14: | ||
'''''It's my call, I decide who gets a beat down.''''' | '''''It's my call, I decide who gets a beat down.''''' | ||
The serious, mature, and skilled leader of the Teenage Mutant Ninja Turtles, Leonardo is a master with his | The serious, mature, and skilled leader of the Teenage Mutant Ninja Turtles, Leonardo is a master with his twin katanas, but he still takes every opportunity to better and improve himself, because that's what Master Splinter would do. Unlike his younger brother, Michelangelo, Leonardo is much more reserved and patient, and this is represented in his playstyle as well. Prepare to taste some Shell Shock! | ||
== Gameplay == | == Gameplay == | ||
Leonardo is a rushdown character with a very wide range but weaker overall attack strength; he's made for gradually chipping away at his opponent with his assault while also keeping anyone from getting too close to him due to his smorgasbord of disjoints. The key to being effective with the blue boy is to know your combos and know your spacing. His recovery differs from others as having hitboxes on both sides rather than up and below, making it very useful for anyone trying to stuff out your return to stage. Alongside this are his Unique Special moves, with '''Niten Ichi-Ryu''' being a rekka attack that can lead into 1 of 2 follows ups depending and the situation and '''Back Flip''' which is a quick evasive reversal option that can be cancelled into a drop kick attack to confound opponents. | Leonardo is a rushdown character with a very wide range but weaker overall attack strength; he's made for gradually chipping away at his opponent with his assault while also keeping anyone from getting too close to him due to his smorgasbord of disjoints. The key to being effective with the blue boy is to know your combos and know your spacing. His recovery differs from others as having hitboxes on both sides rather than up and below, making it very useful for anyone trying to stuff out your return to stage. Alongside this are his Unique Special moves, with '''Niten Ichi-Ryu''' being a rekka attack that can lead into 1 of 2 follows ups depending and the situation and '''Back Flip''' which is a quick evasive reversal option that can be cancelled into a drop kick attack to confound opponents. | ||
| Line 32: | Line 32: | ||
* '''Keep Away:''' Leo's twin swords cover a wide area with every swing and will keep anyone from getting too close; perfect for countering rushdown characters. | * '''Keep Away:''' Leo's twin swords cover a wide area with every swing and will keep anyone from getting too close; perfect for countering rushdown characters. | ||
* '''Grab Game:''' Leo can consistently perform 0-to-deaths at the ledge if he manages to grab the opponent, and put the opponent in a terrifying edge guard scenario at higher percents. | * '''Grab Game:''' Leo can consistently perform 0-to-deaths at the ledge if he manages to grab the opponent, and put the opponent in a terrifying edge guard scenario at higher percents. | ||
* '''Edgeguarding:''' Leo's huge arsenal of disjoints and amazing 2-frame options in 2L, 2S, and j.2L make it extremely hard for most of the cast to recover once they're off stage, leading to the opponent having to burn most, if not all, of their tools on one recovery attempt. Getting hit by j.2L off stage is 100% death as it combos into itself as much as Leo needs while still being able to recover. | * '''Edgeguarding:''' Leo's huge arsenal of disjoints and amazing 2-frame options in 2L, 2S, and j.2L make it extremely hard for most of the cast to recover once they're off stage, leading to the opponent having to burn most, if not all, of their tools on one recovery attempt. Getting hit by j.2L off stage is 100% death as it combos into itself as much as Leo needs while still being able to recover. | ||
|cons= | |cons= | ||
* '''Tis but a scratch:''' Leo's speed and combo game comes at the expense of overall weaker attacks. Taking the stock might take a touch longer than it would with others. | * '''Tis but a scratch:''' Leo's speed and combo game comes at the expense of overall weaker attacks. Taking the stock might take a touch longer than it would with others. | ||
* '''Slow Normals:''' Leo's normals are slower than average with the exception of 2L | ** As of the Rocko patch, his Strong Neutral Air knockback has been altered to be much weaker, which hinders him. | ||
* '''Slow Normals:''' Leo's normals are slower than average with the exception of 2L making dealing with shield pressure harder. Leo players should space your normals well, or be put in a bad situation. | |||
* '''Recovery:''' Leo's j.8P, while it can be difficult to edgeguard from the sides, is slow and doesn't have much vertical height. If Leo's sent too low offstage, Game Over. | |||
* '''High Percents:''' Leo can struggle to kill some characters at very high percents; especially those with exceptional recoveries. | * '''High Percents:''' Leo can struggle to kill some characters at very high percents; especially those with exceptional recoveries. | ||
* ''' | * '''Honesty is not the best policy:''' Leo has to often win neutral interactions to get rewarded, which can prove very difficult in Nick Brawl. Much like the character himself, he requires patience and effort to successfully get confirms, which is something a majority of the cast can do much easier. | ||
}} | }} | ||
| Line 46: | Line 47: | ||
{{MoveData | {{MoveData | ||
|image= NASB leo light mid.png | |image= NASB leo light mid.png | ||
|caption= | |caption= The neutral winner | ||
|name= Horizontal Slash | |name= Horizontal Slash | ||
|linkname= 5L | |linkname= 5L | ||
| Line 52: | Line 53: | ||
|data= | |data= | ||
{{AttackData-NASB | {{AttackData-NASB | ||
|Damage= 6% (9%) | |Damage=6% (9% tipper) | ||
|Startup= 8 | |Startup=8 | ||
|Active= | |Active=8 - 9 | ||
| | |Total Frames= 24 | ||
| | |Safety= -7 | ||
|description= | |description= | ||
A straightforward slash, covering the space in front of Leo. | |||
Somewhat slow as a jab, but the huge horizontal disjoint | *Somewhat slow as a jab, but the huge horizontal disjoint makes this worth using. | ||
* Great for closing out stocks for it's awkward horizontal launch angle at high %s. | |||
* Unlike other characters jabs, Leo's jab does not jab-reset the opponent. | |||
}} | }} | ||
}} | }} <br> | ||
{{MoveData | {{MoveData | ||
|image= NASB leo light up.png | |image= NASB leo light up.png | ||
|caption= | |caption= Trademark combo starter | ||
|name= Vertical Slash | |name= Vertical Slash | ||
|linkname= 8L | |linkname= 8L | ||
| Line 77: | Line 74: | ||
|data= | |data= | ||
{{AttackData-NASB | {{AttackData-NASB | ||
|Damage= 6% (9%) | |Damage=6% (9% tipper) | ||
|Startup= 7 | |Startup=7 | ||
|Active= 3 | |Active=3 | ||
| | |Total Frames=25 | ||
| | |Safety=-9 | ||
|description= | |description= | ||
A slash at the air in front and above you. Big range, upwards launching, fast combo starter. | |||
Big range, upwards launching, fast combo starter. | |||
}} | }} | ||
}} <br> | |||
{{MoveData | {{MoveData | ||
|image= NASB leo light down.png | |image= NASB leo light down.png | ||
|caption= | |caption= Nice recovery nerd | ||
|name= Leg Sweep | |name= Leg Sweep | ||
|linkname= 2L | |linkname= 2L | ||
| Line 102: | Line 92: | ||
|data= | |data= | ||
{{AttackData-NASB | {{AttackData-NASB | ||
|Damage= 8% | |Damage=8% | ||
|Startup= | |Startup=5 | ||
|Active= 5 | |Active=5 - 9 | ||
| | |Total Frames=22 | ||
| | |Safety=-8 | ||
|description= | |description= | ||
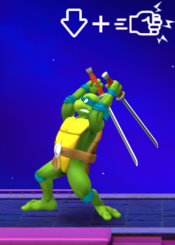
Leo's fastest ground normal. | A quick sweep kick. Pops grounded opponents upward while sending airborne opponents downward. | ||
* Leo's fastest ground normal. His go-to option out of shield for punishing opponents. | |||
* Because of it's long active frames and spike effect this is an amazing move for catching recovering opponents opponents. | |||
* On hit leads into up light combos at low %s. | |||
}} | }} | ||
}} <br> | |||
{{MoveData | {{MoveData | ||
|image= NASB leo dash light.png | |image= NASB leo dash light.png | ||
|caption= | |caption= "Enjoy your time in the blast zone!" | ||
|name= Shell Shock | |name= Shell Shock | ||
|linkname= 66L | |linkname= 66L | ||
| Line 126: | Line 113: | ||
|data= | |data= | ||
{{AttackData-NASB | {{AttackData-NASB | ||
|Damage= 8% | |Damage=8% | ||
|Startup= 6 | |Startup=6 | ||
|Active= | |Active=6 - 13 | ||
| | |Total Frames=26 | ||
| | |Safety=-25 | ||
|description= | |description= | ||
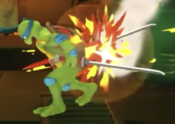
Very fast and | Leo rams into the opponent with his backside. Can be cancelled into other moves on hit. | ||
* Very fast and active dash light that can also easily hit opponents below the ledge. HUGE reward on hit near the ledge as run light into down light leads sets up for offstage spike opportunities. | |||
}} | }} | ||
}} <br> | |||
=== Jumping/Air Light Attacks === | === Jumping/Air Light Attacks === | ||
| Line 145: | Line 128: | ||
{{MoveData | {{MoveData | ||
|image= NASB leo aerial light mid.png | |image= NASB leo aerial light mid.png | ||
|caption= | |caption= "Oh? You're approaching me?" | ||
|name= Aerial Horizontal Slash | |name= Aerial Horizontal Slash | ||
|linkname= j5L | |linkname= j5L | ||
| Line 151: | Line 134: | ||
|data= | |data= | ||
{{AttackData-NASB | {{AttackData-NASB | ||
|Damage= 5% (9%) | |Damage=5% (9% tipper) | ||
|Startup= 8 | |Startup=8 | ||
|Active= | |Active=8 - 9 | ||
|Total Frames=26 | |||
|Safety=-6 | |||
| | |||
| | |||
|description= | |description= | ||
Leo swipes at the opponent mid-air. Your go-to neutral tool. | |||
Your go-to neutral tool. Amazing horizontal disjoint | * Amazing horizontal disjoint allows you to easily zone your opponent out. When approaching, it's good to mix up between retreating neutral lights and approaching to force your opponent to guess which of the two you will do and make them overextend. | ||
* Outstanding for safely covering high recovery options from your opponent. If you manage to hit them with the tipper hitbox they can die at absurdly low %s offstage. | |||
}} | }} | ||
}} <br> | |||
{{MoveData | {{MoveData | ||
|image= NASB leo aerial light up.png | |image= NASB leo aerial light up.png | ||
|caption= | |caption= If you got hit by this, prepare to not touch the ground for a while | ||
|name= Aerial Vertical Slash | |name= Aerial Vertical Slash | ||
|linkname= j8L | |linkname= j8L | ||
| Line 176: | Line 154: | ||
|data= | |data= | ||
{{AttackData-NASB | {{AttackData-NASB | ||
|Damage= 5% (9%) | |Damage=5% (9% tipper) | ||
|Startup= 8 | |Startup=8 | ||
|Active= | |Active=8 - 9 | ||
|Total Frames=28 | |||
|Safety=-6 | |||
| | |||
| | |||
|description= | |description= | ||
* | A midair slash covering the airspace above you. Great against opponents with no double jump and/or airdash. | ||
* Outstanding disjoint that excels at sharking opponents and racking up damage. | |||
}} | }} | ||
}} <br> | |||
{{MoveData | {{MoveData | ||
|image= NASB leo aerial light down.png | |image= NASB leo aerial light down.png | ||
|caption= | |caption= GGs shake my hand | ||
|name= Down Slash | |name= Down Slash | ||
|linkname= j2lL | |linkname= j2lL | ||
| Line 201: | Line 173: | ||
|data= | |data= | ||
{{AttackData-NASB | {{AttackData-NASB | ||
|Damage= 6% (10%) | |Damage=6% (10% tipper) | ||
|Startup= 8 | |Startup=8 | ||
|Active= | |Active=8 - 10 | ||
|Total Frames=39 | |||
|Safety=-6 | |||
| | |||
| | |||
|description= | |description= | ||
A downward slash below Leo. A great spike. | |||
* In the neutral any stray hit from this move will put your opponent in a tech chase position that's heavily in your favor. | |||
* Go-to spike ender for covering low recoveries. | |||
}} | }} | ||
}} <br> | |||
=== Strong Attacks === | === Strong Attacks === | ||
| Line 222: | Line 189: | ||
{{MoveData | {{MoveData | ||
|image= NASB leo strong mid.png | |image= NASB leo strong mid.png | ||
|caption= | |caption= Spin to win | ||
|name= Dual Horizontal Slash | |name= Dual Horizontal Slash | ||
|linkname= 5S | |linkname= 5S | ||
| Line 228: | Line 195: | ||
|data= | |data= | ||
{{AttackData-NASB | {{AttackData-NASB | ||
|Damage= 10% (16%) | |Damage=10% (16% tipper) | ||
|Startup= 21 | |Startup=21 | ||
|Active= | |Active=21 - 24 | ||
| | |Total Frames=40 | ||
| | |Safety=-2 | ||
|description= | |description= | ||
* | A powerful slash with a lot of wind-up, utilizing both of Leo's blades. | ||
Leo's slowest strong attack. Good for baiting and punishing your opponents approach options | * Leo's slowest strong attack. Good for baiting and punishing your opponents approach options. It's framedata on block and disjoint makes it very spammable, just don't overuse it or risk being whiff-punished or hit out of the startup. | ||
}} | }} | ||
}} <br> | |||
{{MoveData | {{MoveData | ||
|image= NASB leo strong up.png | |image= NASB leo strong up.png | ||
|caption= | |caption= WHY YOU MASHING BRO?? | ||
|name= Dual Vertical Slash | |name= Dual Vertical Slash | ||
|linkname= 8S | |linkname= 8S | ||
| Line 253: | Line 214: | ||
|data= | |data= | ||
{{AttackData-NASB | {{AttackData-NASB | ||
|Damage= 10% (16%) | |Damage=10% (16% tipper) | ||
|Startup= 20 | |Startup=20 | ||
|Active= | |Active=20 - 24 | ||
|Recovery= 16 | |Recovery= 16 | ||
| | |Total Frames=40 | ||
| | |Safety=-3 | ||
|description= | |description= | ||
Leo raises both of his blades upward, covering the space in front and above him. | |||
Very high-reaching disjoint | * Very high-reaching disjoint. Great for mixing up your approach after doing an up light or landing jump up light if your opponent is prone to mashing out of your air combos. | ||
}} | }} | ||
}} | }} <br> | ||
{{MoveData | {{MoveData | ||
|image= NASB leo strong down.png | |image= NASB leo strong down.png | ||
|caption= | |caption= You thought you were safe now? | ||
|name= Scissor Slash | |name= Scissor Slash | ||
|linkname= 2S | |linkname= 2S | ||
| Line 278: | Line 234: | ||
|data= | |data= | ||
{{AttackData-NASB | {{AttackData-NASB | ||
|Damage= 10% (16%) | |Damage=10% (16% tipper) | ||
|Startup= 19 | |Startup=19 | ||
|Active= | |Active=19 - 23 | ||
| | |Total Frames=40 | ||
| | |Safety=-4 | ||
|description= | |description= | ||
An X-slash crossing both blades, aimed downwards. Spikes those unfortunate enough to get caught in it. | |||
* Better than down light in matchups where the characters recovery has a disjoint that can beat you out, like vs Spongebob. Otherwise inferior to down light due to how much less spammable it is at ledge. | |||
}} | }} | ||
}} <br> | |||
{{MoveData | {{MoveData | ||
|image= NASB leo dash strong.png | |image= NASB leo dash strong.png | ||
|caption= | |caption= Devastating misinput | ||
|name= Running Hit | |name= Running Hit | ||
|linkname= 66S | |linkname= 66S | ||
| Line 303: | Line 253: | ||
|data= | |data= | ||
{{AttackData-NASB | {{AttackData-NASB | ||
|Damage= 10% (20%) | |Damage=10% (20% tipper) | ||
|Startup= 21 | |Startup=21 | ||
|Active= | |Active=21 - 25 | ||
| | |Total Frames=45 | ||
| | |Safety=-19 | ||
|description= | |description= | ||
* | Leo rams into his opponent, pointing both blades ahead of him, ready to stab through them. Like other dash attacks it can be cancelled on hit into further followups. | ||
Very slow, high damaging dash strong attack. Outside of the damage, this isn't really worth using over | * Very slow, high damaging dash strong attack. Outside of the damage, this isn't really worth using over run light ever. | ||
}} | }} | ||
}} <br> | |||
=== Jumping/Air Strong Attacks === | |||
{{MoveData | {{MoveData | ||
|image= NASB leo aerial strong mid.png | |image= NASB leo aerial strong mid.png | ||
|caption= | |caption= These attack names are becoming a mouthful... | ||
|name= Aerial Dual Horizontal Slash | |name= Aerial Dual Horizontal Slash | ||
|linkname= j5S | |linkname= j5S | ||
| Line 329: | Line 274: | ||
|data= | |data= | ||
{{AttackData-NASB | {{AttackData-NASB | ||
|Damage= 10% (16%) | |Damage=10% (16% tipper) | ||
|Startup= 23 | |Startup=23 | ||
|Active= | |Active=23 - 24 | ||
|Total Frames=40 | |||
|Safety=-7 | |||
| | |||
| | |||
|description= | |description= | ||
* | A big swing using both blades. | ||
Hard-hitting, disjointed aerial strong. Good for punishing the opponent when you know they're gonna try to throw out a move at you in the air. | * Hard-hitting, disjointed aerial strong. Good for punishing the opponent when you know they're gonna try to throw out a move at you in the air. | ||
}} | }} | ||
}} | }} <br> | ||
{{MoveData | {{MoveData | ||
|image= NASB leo aerial strong up.png | |image= NASB leo aerial strong up.png | ||
|caption= | |caption= Zim's air up strong, but better | ||
|name= Dual Hit | |name= Dual Hit | ||
|linkname= j8S | |linkname= j8S | ||
| Line 354: | Line 293: | ||
|data= | |data= | ||
{{AttackData-NASB | {{AttackData-NASB | ||
|Damage= 10% (16%) | |Damage=10% (16%) | ||
|Startup= 20 | |Startup=20 | ||
|Active | |Active=20 - 27 | ||
|Total Frames=40 | |||
| | |Safety=-8 | ||
| | |||
|description= | |description= | ||
* | A screw-like attack hitting above Leo utilizing both blades. | ||
* Despite what it looks like, the hitbox is rather large. The tipper hitbox has exceptionally high knockback, letting you kill off the top very early. | |||
}} | }} | ||
}} <br> | |||
{{MoveData | {{MoveData | ||
|image= NASB leo aerial strong down.png | |image= NASB leo aerial strong down.png | ||
|caption= ' | |caption= Don't run with scissors. Jumping with them is ok though | ||
|name= Aerial Scissor Slash Down | |name= Aerial Scissor Slash Down | ||
|linkname= j2S | |linkname= j2S | ||
| Line 379: | Line 312: | ||
|data= | |data= | ||
{{AttackData-NASB | {{AttackData-NASB | ||
|Damage= 10% (16%) | |Damage=10% (16% tipper) | ||
|Startup= 19 | |Startup=19 | ||
|Active= | |Active=19 - 23 | ||
|Total Frames=55 | |||
|Safety=-6 | |||
| | |||
| | |||
|description= | |description= | ||
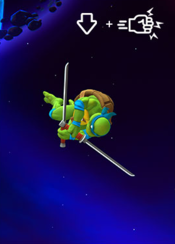
A scissor-like slash attack hitting below you in the air. Spikes opponents caught in it. | |||
}} | }} | ||
}} | }} <br> | ||
=== Special Attacks === | === Special Attacks === | ||
{{MoveData | {{MoveData | ||
|image= NASB leo special mid.png | |image= NASB leo special mid.png | ||
|caption= | |caption= For when you have the power of Splinter and anime on your side | ||
|image2= NASB leo special mid special mid.png | |||
|caption2= Forward | |||
|image3= NASB leo special mid special up.png | |||
|caption3= Up | |||
|image4= NASB leo special mid special down.png | |||
|caption4= Down | |||
|image5= NASB leo special back.png | |||
|caption5= Back | |||
|name= Niten-Ichi Ryu | |name= Niten-Ichi Ryu | ||
|linkname= 5P | |linkname= 5P | ||
| Line 405: | Line 339: | ||
|data= | |data= | ||
{{AttackData-NASB | {{AttackData-NASB | ||
|Damage= 8% (10%) | |Damage=8% (10% tipper) | ||
|Startup= 22 | |Startup=22 to 62 | ||
|Active | |Active=22 - 24* | ||
|Total Frames=46 | |||
|Safety=-15 | |||
| | |||
| | |||
|description= | |description= | ||
First hit of Leo's rekka-type special move. On hit or whiff press special alongside either forward, up, down or back to perform a follow-up attack. Each followup has unique properties and uses. Can be charged before releasing. | |||
* Has to charge for a minimum of 21 frame to a maximum of 61 frames before releasing the first hit. Charging does not affect damage. | |||
* Anytime after frame 5 of the attack being unleashed one of 4 follow up attacks can be inputted. All followups come out as fast as frame 3, but can be delayed to come out as late as frame 62. | |||
}} | }} | ||
{{AttackData-NASB | |||
|Damage=8% (10% tipper) | |||
|Startup=3 to 62 | |||
|Active=3 - 6* | |||
|Total Frames=31 | |||
|Safety=-19 | |||
|description= | |||
Forward variant of second hit. | |||
* The worst follow-up off. Doesn't lead to any knockdown even on tipper hit and it puts the opponent in an awkward position for Leo to capitalize off of. | |||
}} | }} | ||
{{AttackData-NASB | {{AttackData-NASB | ||
|Damage= 8% (10%) | |Damage=8% (10% tipper) | ||
|Startup= 3 | |Startup=3 to 62 | ||
|Active= | |Active=3 - 6* | ||
| | |Total Frames=30 | ||
| | |Safety=-18 | ||
|description= | |description= | ||
Up variant of second hit. | |||
* | * The best follow-up. Knocks the opponent straight upwards so you can shark them. Also has some forward momentum, making this hard to whiff. | ||
The | |||
}} | }} | ||
{{AttackData-NASB | {{AttackData-NASB | ||
|Damage= 8% (10%) | |Damage=8% (10% tipper) | ||
|Startup= 3 | |Startup=3 to 62 | ||
|Active= | |Active=3 - 6* | ||
| | |Total Frames=30 | ||
| | |Safety=-18 | ||
|description= | |description= | ||
Down variant of second hit. | |||
* | * Leo's 2nd best follow-up. At low percents it leads into a tech chase scenario. This follow-up also has a lot of forward momentum making it near-impossible to whiff. | ||
Leo's 2nd best follow-up | |||
}} | }} | ||
{{AttackData-NASB | {{AttackData-NASB | ||
|Damage= 8% (10%) | |Damage=8% (10% tipper) | ||
|Startup= 3 | |Startup=3 to 62 | ||
|Active= | |Active=3 - 5* | ||
| | |Total Frames=30 | ||
| | |Safety=-18 | ||
|description= | |description= | ||
Back variant of second hit. | |||
}} | }} | ||
}} <br> | |||
{{MoveData | {{MoveData | ||
|image= NASB leo special up.png | |image= NASB leo special up.png | ||
|caption= | |caption= We hope you enjoy your flight on Leonardo Airlines | ||
|name= Endless Screw | |name= Endless Screw | ||
|linkname= 8P | |linkname= 8P | ||
| Line 509: | Line 398: | ||
|data= | |data= | ||
{{AttackData-NASB | {{AttackData-NASB | ||
|Damage= 4% | |Damage=4% | ||
|Startup= 14 | |Startup=14 | ||
|Active= | |Active=14 - 45 | ||
|Total Frames=60 | |||
|Safety=-80 | |||
| | |||
| | |||
|description= | |description= | ||
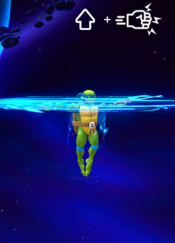
Leo rises into the air spinning, damaging those caught in it. | |||
}} | }} | ||
}} <br> | |||
{{MoveData | {{MoveData | ||
|image= NASB leo special down.png | |image= NASB leo special down.png | ||
|caption= | |caption= What's with characters named Leo and DPs? | ||
|image2= NASB leo aerial special down.png | |||
|caption2= '''''DIVEKICK!''''' | |||
|name= Backflip | |name= Backflip | ||
|linkname= 2P | |linkname= 2P | ||
| Line 534: | Line 418: | ||
|data= | |data= | ||
{{AttackData-NASB | {{AttackData-NASB | ||
|Damage= | |Damage=8% | ||
|Startup= | |Startup=10 | ||
|Active= | |Active=10 - 17 | ||
| | |Total Frames=26 flip, 37 kick | ||
| | |Safety=-13 | ||
|description= | |description= | ||
Does a retreating backflip when performed off the ground. Inputting the special button again (or starting the move in the air) follows it up with a divekick. Has lots of utility as a repositioning and recovery tool. | |||
* Invincible from frames 1-6 when started off the ground. | |||
* Your momentum in the air is also completely changed as soon as you input this move, allowing you to further mixup how you'll land on stage. | |||
}} | }} | ||
}} <br> | |||
=== Taunt === | === Taunt === | ||
| Line 771: | Line 434: | ||
{{MoveData | {{MoveData | ||
|image= NASB_leo_taunt.png | |image= NASB_leo_taunt.png | ||
|caption= | |caption= Like the swords? Come closer and take a look... | ||
|name= | |name= Taunt | ||
|linkname= | |linkname= Taunt | ||
|input= | |input= Taunt Button | ||
|data= | |data= | ||
swords | |||
}} | }} <br> | ||
== Colors == | == Colors == | ||
[[File:NASB leonardo character.png|200px]] | |||
[[File:NASB Leo alt costume.png|200px]] | |||
{{Navbox-NASB}} | {{Navbox-NASB}} | ||
[[Category:Nickelodeon All-Star Brawl]] | [[Category:Nickelodeon All-Star Brawl]] | ||
Latest revision as of 03:44, 20 February 2023
Story
It's my call, I decide who gets a beat down.
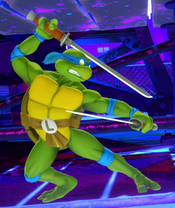
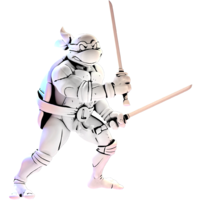
The serious, mature, and skilled leader of the Teenage Mutant Ninja Turtles, Leonardo is a master with his twin katanas, but he still takes every opportunity to better and improve himself, because that's what Master Splinter would do. Unlike his younger brother, Michelangelo, Leonardo is much more reserved and patient, and this is represented in his playstyle as well. Prepare to taste some Shell Shock!
Gameplay
Leonardo is a rushdown character with a very wide range but weaker overall attack strength; he's made for gradually chipping away at his opponent with his assault while also keeping anyone from getting too close to him due to his smorgasbord of disjoints. The key to being effective with the blue boy is to know your combos and know your spacing. His recovery differs from others as having hitboxes on both sides rather than up and below, making it very useful for anyone trying to stuff out your return to stage. Alongside this are his Unique Special moves, with Niten Ichi-Ryu being a rekka attack that can lead into 1 of 2 follows ups depending and the situation and Back Flip which is a quick evasive reversal option that can be cancelled into a drop kick attack to confound opponents.
Interestingly Leo also has a unique attribute being that his sword moves have higher knockback and damage if you hit them on the tip of his swords while hitting them at the hilt will do less damage and knockback.
If you're willing to sacrifice attack power for speed and like keeping your foes at arms length, then this turtle will certianly lead you to victory!
| Franchise |
Teenage Mutant Ninja Turtles |
|---|---|
| Weight Class |
Middle |
| Character Discord | |
| Home Stage |
Sewers Slam |
| Strengths | Weaknesses |
|---|---|
|
|
Moves List
Light Attacks
| Damage | Startup Frames | Active Frames | Total Frames | Safety | |
|---|---|---|---|---|---|
| 6% (9% tipper) | 8 | 8 - 9 | 24 | -7 | |
|
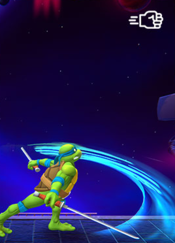
A straightforward slash, covering the space in front of Leo.
| |||||
| Damage | Startup Frames | Active Frames | Total Frames | Safety | |
|---|---|---|---|---|---|
| 6% (9% tipper) | 7 | 3 | 25 | -9 | |
|
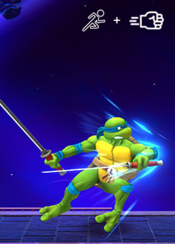
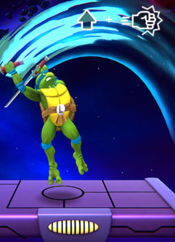
A slash at the air in front and above you. Big range, upwards launching, fast combo starter. | |||||
| Damage | Startup Frames | Active Frames | Total Frames | Safety | |
|---|---|---|---|---|---|
| 8% | 5 | 5 - 9 | 22 | -8 | |
|
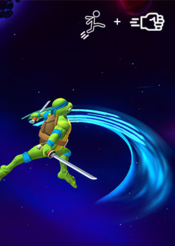
A quick sweep kick. Pops grounded opponents upward while sending airborne opponents downward.
| |||||
| Damage | Startup Frames | Active Frames | Total Frames | Safety | |
|---|---|---|---|---|---|
| 8% | 6 | 6 - 13 | 26 | -25 | |
|
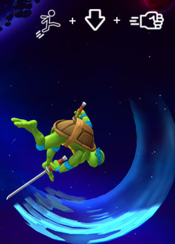
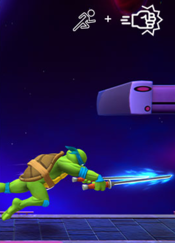
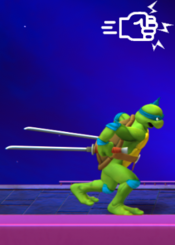
Leo rams into the opponent with his backside. Can be cancelled into other moves on hit.
| |||||
Jumping/Air Light Attacks
| Damage | Startup Frames | Active Frames | Total Frames | Safety | |
|---|---|---|---|---|---|
| 5% (9% tipper) | 8 | 8 - 9 | 26 | -6 | |
|
Leo swipes at the opponent mid-air. Your go-to neutral tool.
| |||||
| Damage | Startup Frames | Active Frames | Total Frames | Safety | |
|---|---|---|---|---|---|
| 5% (9% tipper) | 8 | 8 - 9 | 28 | -6 | |
|
A midair slash covering the airspace above you. Great against opponents with no double jump and/or airdash.
| |||||
| Damage | Startup Frames | Active Frames | Total Frames | Safety | |
|---|---|---|---|---|---|
| 6% (10% tipper) | 8 | 8 - 10 | 39 | -6 | |
|
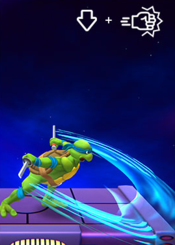
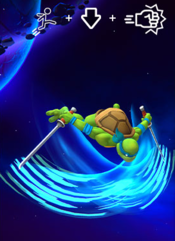
A downward slash below Leo. A great spike.
| |||||
Strong Attacks
| Damage | Startup Frames | Active Frames | Total Frames | Safety | |
|---|---|---|---|---|---|
| 10% (16% tipper) | 21 | 21 - 24 | 40 | -2 | |
|
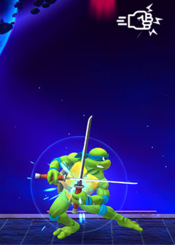
A powerful slash with a lot of wind-up, utilizing both of Leo's blades.
| |||||
| Damage | Startup Frames | Active Frames | Total Frames | Safety | |
|---|---|---|---|---|---|
| 10% (16% tipper) | 20 | 20 - 24 | 40 | -3 | |
|
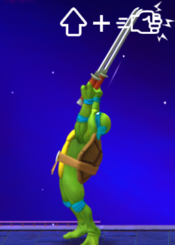
Leo raises both of his blades upward, covering the space in front and above him.
| |||||
| Damage | Startup Frames | Active Frames | Total Frames | Safety | |
|---|---|---|---|---|---|
| 10% (16% tipper) | 19 | 19 - 23 | 40 | -4 | |
|
An X-slash crossing both blades, aimed downwards. Spikes those unfortunate enough to get caught in it.
| |||||
| Damage | Startup Frames | Active Frames | Total Frames | Safety | |
|---|---|---|---|---|---|
| 10% (20% tipper) | 21 | 21 - 25 | 45 | -19 | |
|
Leo rams into his opponent, pointing both blades ahead of him, ready to stab through them. Like other dash attacks it can be cancelled on hit into further followups.
| |||||
Jumping/Air Strong Attacks
| Damage | Startup Frames | Active Frames | Total Frames | Safety | |
|---|---|---|---|---|---|
| 10% (16% tipper) | 23 | 23 - 24 | 40 | -7 | |
|
A big swing using both blades.
| |||||
| Damage | Startup Frames | Active Frames | Total Frames | Safety | |
|---|---|---|---|---|---|
| 10% (16%) | 20 | 20 - 27 | 40 | -8 | |
|
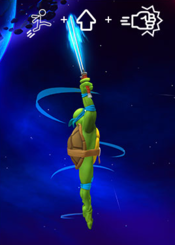
A screw-like attack hitting above Leo utilizing both blades.
| |||||
| Damage | Startup Frames | Active Frames | Total Frames | Safety | |
|---|---|---|---|---|---|
| 10% (16% tipper) | 19 | 19 - 23 | 55 | -6 | |
|
A scissor-like slash attack hitting below you in the air. Spikes opponents caught in it. | |||||
Special Attacks
| Damage | Startup Frames | Active Frames | Total Frames | Safety | |
|---|---|---|---|---|---|
| 8% (10% tipper) | 22 to 62 | 22 - 24* | 46 | -15 | |
|
First hit of Leo's rekka-type special move. On hit or whiff press special alongside either forward, up, down or back to perform a follow-up attack. Each followup has unique properties and uses. Can be charged before releasing.
| |||||
| Damage | Startup Frames | Active Frames | Total Frames | Safety | |
| 8% (10% tipper) | 3 to 62 | 3 - 6* | 31 | -19 | |
|
Forward variant of second hit.
| |||||
| Damage | Startup Frames | Active Frames | Total Frames | Safety | |
| 8% (10% tipper) | 3 to 62 | 3 - 6* | 30 | -18 | |
|
Up variant of second hit.
| |||||
| Damage | Startup Frames | Active Frames | Total Frames | Safety | |
| 8% (10% tipper) | 3 to 62 | 3 - 6* | 30 | -18 | |
|
Down variant of second hit.
| |||||
| Damage | Startup Frames | Active Frames | Total Frames | Safety | |
| 8% (10% tipper) | 3 to 62 | 3 - 5* | 30 | -18 | |
|
Back variant of second hit. | |||||
| Damage | Startup Frames | Active Frames | Total Frames | Safety | |
|---|---|---|---|---|---|
| 4% | 14 | 14 - 45 | 60 | -80 | |
|
Leo rises into the air spinning, damaging those caught in it. | |||||
| Damage | Startup Frames | Active Frames | Total Frames | Safety | |
|---|---|---|---|---|---|
| 8% | 10 | 10 - 17 | 26 flip, 37 kick | -13 | |
|
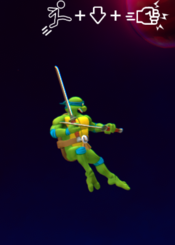
Does a retreating backflip when performed off the ground. Inputting the special button again (or starting the move in the air) follows it up with a divekick. Has lots of utility as a repositioning and recovery tool.
| |||||
Taunt

