Street Fighter 3: 3rd Strike/Q: Difference between revisions

From SuperCombo Wiki
m (→‎46P (hold): fixed a formatting issue)
Line 640: Line 640:
|caption=Standard
|caption=Standard
|image2=(qdhao).gif
|image2=(qdhao).gif
|caption3=Held {{p}}
|caption2=Held {{p}}
|image3=(qdhaex).gif
|image3=(qdhaex).gif
|caption3={{ex}}
|caption3={{ex}}

Revision as of 01:45, 24 August 2021

Introduction

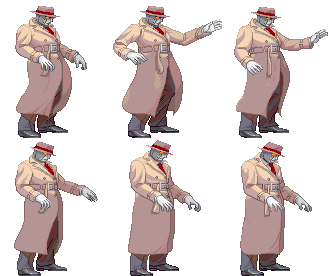
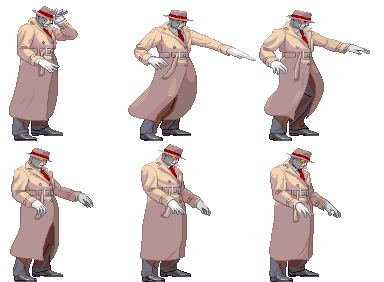
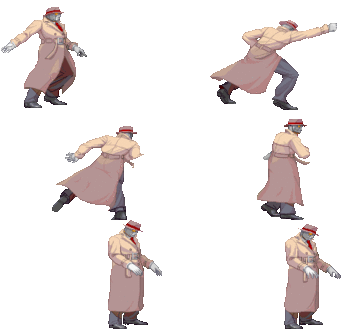
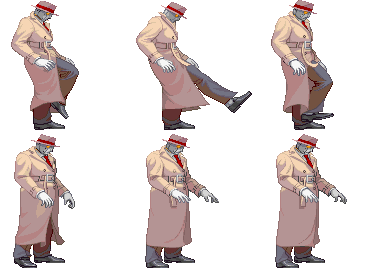
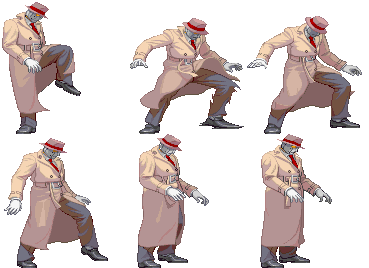
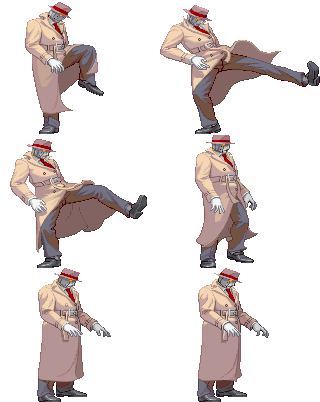
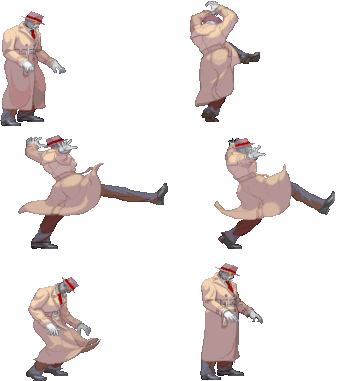
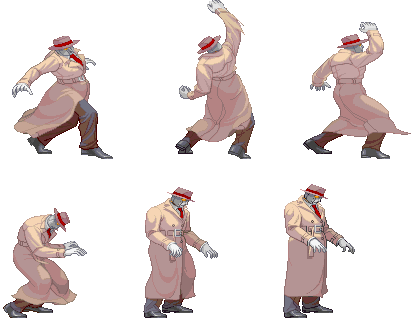
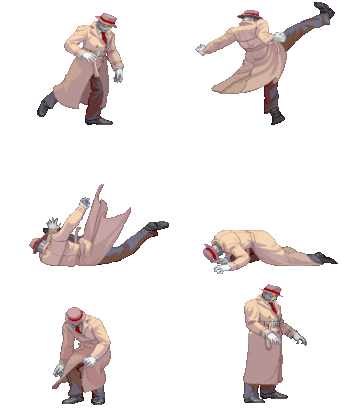
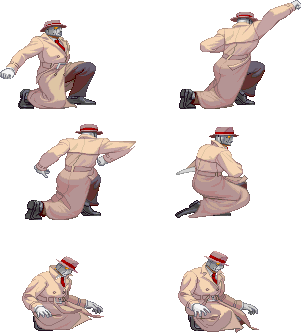
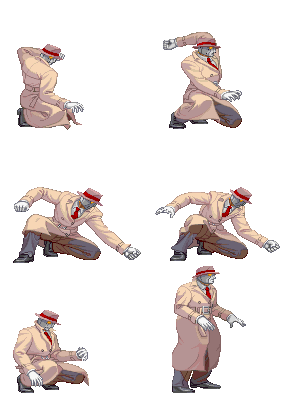
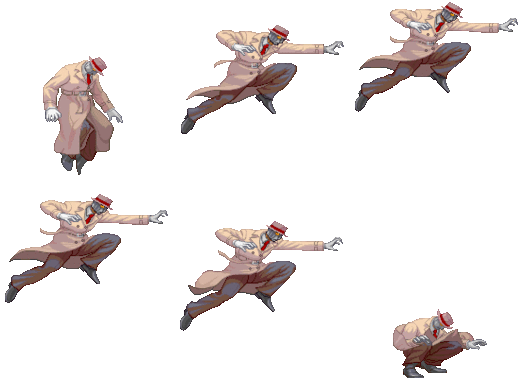
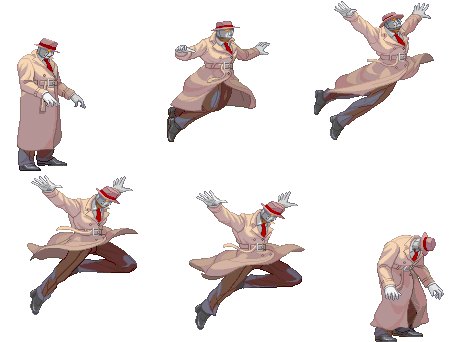
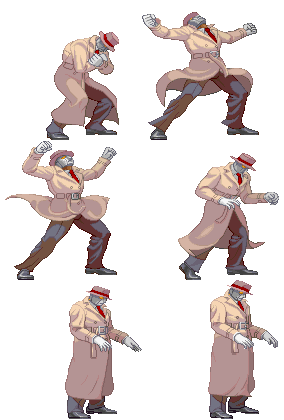
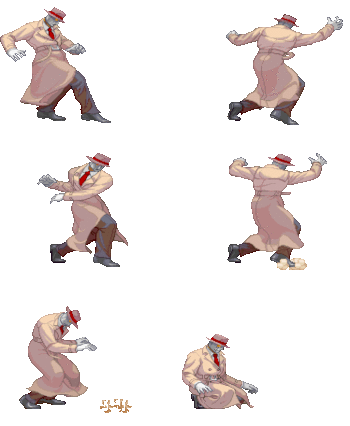
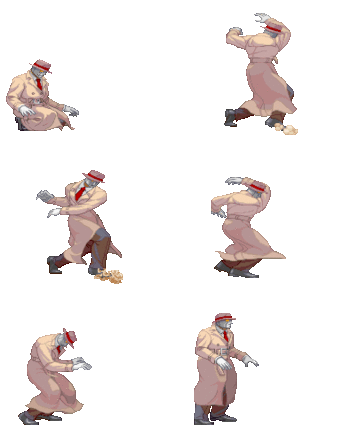
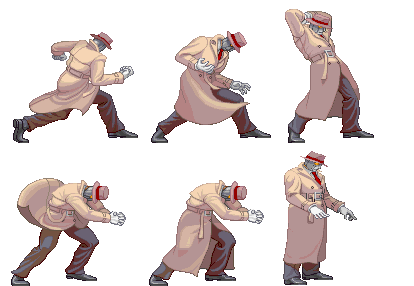
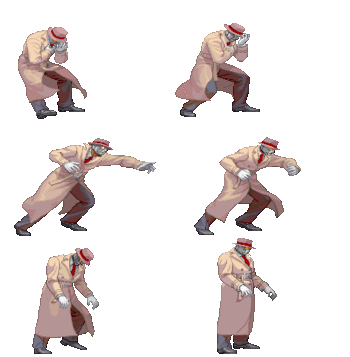
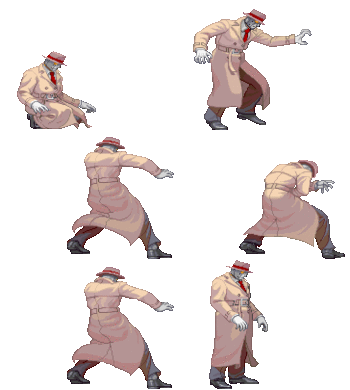
Not much is known about the mysterious being known as "Q". He's been reported to be in completely different places at the same times based on various eyewitness accounts. He has been spotted in every country around the world. Some believe that he may be linked to various disasters. Newcomer to the SF Roster in 3rd Strike.

Perhaps the most popular of the low tiers, Q is a fairly simplistic brute-force brawler with good power, range and many useful normals, but he is also fairly slow, meaning every move must be deliberate. Additionally, he has the highest potential stamina in the game if the player finds safe times to taunt, making him very difficult to kill at that point.

Super Arts

SAI (Critical Combo Attack)

SA1 is usually the best choice. As the only option of Q's SAs with 2 bars he has more meter to stock and spend. Critical Combo Attack has good range and invulnerability as well as being easy to combo into. Punishes blocked shoto sweeps and fantastic at catching projectile attempts. Rounds out Q's kit very well.

SAII: (Deadly Double Combination)

SA2 is also easy to combo into and great damage, and allowing followups afterwards for even more damage. The fastest startup of Q's SAs, with the capability of linking off of Q's Overhead Dash Punch. Has the disadvantage of only being 1 bar compared to the 2 bars of SA1.

SAIII: (Total Destruction)

SA3 is a rather gimmicky super as it has very high startup for being a grab. Not much use aside from flexing on your opponent.

Strengths Weaknesses
  • Can setup the best Defense in the game, with 3 of his quick, somewhat safe taunts.
  • Punch rushes allow him to control footsies decently, and can mixup unready opponent with high-low options.
  • Very high damage output with meter, great Super Arts.
  • Medium range pokes with good recovery and damage.
  • Great command grab allowing him to gain a solidly good offensive presence.
  • Can avoid all throws shortly after crouching and not pressing anything after, essentially invalidating many of the casts' pressure when blocks low.
  • Nearly all his normals don't cancel into specials or supers, his heavy attacks are very unsafe.
  • Slow mobility and limited offensive mixups.
  • Struggles in a lot of matchup, especially ones against defensive or pressure-heavy characters.
  • Tall, thin hurtbox making him an easy crossup and large juggle combos target.

Character Colors

(qcolor).gif
Q
#3S_Q
Q3sport.gif
Vitals
Life Points 1200, 1400 with 1 taunt, 1705 with 2 taunts, 2050 with 3 taunts.
Stun Points 72
Super Art Stock/Size
SA1 2/96
SA2 1/120
SA3 1/106
Ground Movement
Forward Dash duration/distance 30
Back Dash duration/distance 30
Jumping
Back Jump duration 42(6+34+2)
Neutral Jump duration 42(6+34+2)
Forward Jump duration 42(6+34+2)
Back Super Jump duration 48(7+39+2)
Neutral Super Jump duration 48(7+39+2)
Forward Super Jump duration 49(7+40+2)
Wake up
Wake up duration 72 (36 + 36)
Quick rise duration 46 (16 + 30)
3S Frame Data Glossary
Active

How many frames a move remains active (can hurt opponents) for. Consecutive sets of active frames on a multi-hit move are separated by an asterisk (ex: 3*5). If there is a gap between sets of active frames, the gap is denoted by a number in parentheses (ex: 2(4)2)

Attack

Attack level is L for low attacks (must be blocked crouching), H is for High attacks (which can be blocked high or low) and M for overhead (must be blocked standing). T is for throw attacks (which cannot be blocked).

Cancel options

Available cancel options.

  • "ch": Chain cancel (into itself or another light attack), refer to description for options.
  • "self": Self-only chain cancel. Much more restrictive than a standard chain cancel.
  • "tc": Target combo, refer to description for options. Successive attacks in a target combo may warrant their own move entry.
  • "dash": Grounded dashes.
  • "sj": Super jump.
  • "sp": Special move.
  • "su": Super Art.
Damage

Attack damage on hit in life points. Notation may denote multi-hit or "sweet spot" damage values on certain frames.

Hit/Block

These are frame advantage values when the attack hits or is blocked. If the number is positive, then the move will end before the defender can act again. If the number is negative, the defender will be able to act before the attacker and maybe even punish. D refers to knockdown on hit.

"Cr. Hit" is an additional frame advantage value denoting if the advantage on hit changes when the defender is being hit while crouching.

Kara Range

Almost all normal attacks can be canceled into a special or a multi-button command within three frames of startup. During that time, some attacks will shift position forward or backward and affect the reach of the special or command accordingly. This is denoted in pixels of range. There are a handful of moves in the game that can be kara-canceled after this initial window and will be denoted as a late kara-cancel.

Link

A combo that is performed by inputting the second move after the first move has completely recovered (as opposed to cancelling the first move's animation). In 3S, the final frame of a move's hitstun allows a character to block a normal or special move, as well as some projectile supers. Therefore, an attack's frame advantage must be 2 frames greater than the followup move's startup in order to link. Ex: a +6 normal can link into a 4f normal/special, or a 5f super.

Parry

This field will show a value of A if the attack can be parried standing or crouching, H if it must be parried standing or L if it must be parried crouching.

Recovery

How many frames it takes for a move to finish after it's been active.

Startup

How many frames it takes before the move becomes 'active' or has a hitbox. 3S uses classic startup notation, which does not include the first active frame. A move with 3 startup becomes active on frame 4.

Stun

Amount of stun added to the opponent's stun bar on hit.

Throw range

Range in pixels from the center of the character to the center of the opponent which allows a grab to connect.

Frame Data

5LP (cl)
Close LP
Lp.png (cl)
(qcloselp).gif
Startup Active Recovery Block Hit Cr. Hit Damage Stun Kara Guard Level Parry Level
4 4 6 2 2 2 6 3 - - A
Cancel Options Self Meter Gain Whiff Hit Block / Tech Opponent Meter Gain Hit Block / Tech
- - - - - -
  • Cancel options: self sp su
FATonline.png
5LP (far)
Far LP
Lp.png (far)
(qlp).gif
Startup Active Recovery Block Hit Cr. Hit Damage Stun Kara Guard Level Parry Level
6 4 4 4 4 4 5 3 - - A
Cancel Options Self Meter Gain Whiff Hit Block / Tech Opponent Meter Gain Hit Block / Tech
- - - - - -
  • Cancel options: self
  • 1 kara range
FATonline.png
5MP
Stand MP
Mp.png
(qmp).gif
Startup Active Recovery Block Hit Cr. Hit Damage Stun Kara Guard Level Parry Level
12 5 19 -2 - 2 16 9 - - H
Cancel Options Self Meter Gain Whiff Hit Block / Tech Opponent Meter Gain Hit Block / Tech
- - - - - -
  • 25 kara range
  • Self meter gain: Whiff: 2, Hit: 10, Block: 5.
  • Opponent meter gain: Whiff: 0, Hit: 2, Block: 0.
FATonline.png
5HP
Stand HP
Hp.png
(qhp).gif
Startup Active Recovery Block Hit Cr. Hit Damage Stun Kara Guard Level Parry Level
18 16 23 -23 D D 23 15 - - H
Cancel Options Self Meter Gain Whiff Hit Block / Tech Opponent Meter Gain Hit Block / Tech
- - - - - -
  • Self meter gain: Whiff: 3, Hit: 18, Block: 9.
  • Opponent meter gain: Whiff: 0, Hit: 4, Block: 0.
FATonline.png
5LK
Stand LK
Lk.png
(qlk).gif
Startup Active Recovery Block Hit Cr. Hit Damage Stun Kara Guard Level Parry Level
4 4 8 2 2 2 7 3 - - A
Cancel Options Self Meter Gain Whiff Hit Block / Tech Opponent Meter Gain Hit Block / Tech
- - - - - -
  • Cancel options: self
FATonline.png
5MK (cl)
Close MK
Mk.png close
(qclosemk).gif
Startup Active Recovery Block Hit Cr. Hit Damage Stun Kara Guard Level Parry Level
7 2 18 -2 - 2 17 3 - - H
Cancel Options Self Meter Gain Whiff Hit Block / Tech Opponent Meter Gain Hit Block / Tech
- - - - - -
  • Cancel options: sp su
  • Self meter gain: Whiff: 2, Hit: 10, Block: 5.
  • Opponent meter gain: Whiff: 0, Hit: 2, Block: 0.
FATonline.png
5MK (far)
Far MK
Mk.png (far)
(qmk).gif
Startup Active Recovery Block Hit Cr. Hit Damage Stun Kara Guard Level Parry Level
8 5 14 -1 1 3 19 7 - - H
Cancel Options Self Meter Gain Whiff Hit Block / Tech Opponent Meter Gain Hit Block / Tech
- - - - - -
  • Self meter gain: Whiff: 2, Hit: 10, Block: 5.
  • Opponent meter gain: Whiff: 0, Hit: 2, Block: 0.
FATonline.png
5HK
Stand HK
Hk.png
(qhk).gif
Startup Active Recovery Block Hit Cr. Hit Damage Stun Kara Guard Level Parry Level
20 5 28 -12 -10 -8 26 9 - - H
Cancel Options Self Meter Gain Whiff Hit Block / Tech Opponent Meter Gain Hit Block / Tech
- - - - - -
  • Self meter gain: Whiff: 3, Hit: 18, Block: 9.
  • Opponent meter gain: Whiff: 0, Hit: 4, Block: 0.
FATonline.png


Command Normals

4MP
Upwards Head Strike
B.png+Mp.png
(qbmp).gif
Startup Active Recovery Block Hit Cr. Hit Damage Stun Kara Guard Level Parry Level
8 4 18 -2 - - 17 13 - - H
Cancel Options Self Meter Gain Whiff Hit Block / Tech Opponent Meter Gain Hit Block / Tech
- - - - - -
  • 36 kara range
  • Self meter gain: Whiff: 2, Hit: 10, Block: 5.
  • Opponent meter gain: Whiff: 0, Hit: 2, Block: 0.
FATonline.png
4HP
Double-Armed Advance
B.png+Hp.png
(qhp).gif
Startup Active Recovery Block Hit Cr. Hit Damage Stun Kara Guard Level Parry Level
13 11 15 -1 1 3 21 15 - - H
Cancel Options Self Meter Gain Whiff Hit Block / Tech Opponent Meter Gain Hit Block / Tech
- - - - - -
  • Self meter gain: Whiff: 3, Hit: 18, Block: 9.
  • Opponent meter gain: Whiff: 0, Hit: 4, Block: 0.
FATonline.png
4HK
Inversion Head Kick
B.png+Hk.png
(qbhk).gif
Startup Active Recovery Block Hit Cr. Hit Damage Stun Kara Guard Level Parry Level
11 7 35 -26 D D 24 3 - - A
Cancel Options Self Meter Gain Whiff Hit Block / Tech Opponent Meter Gain Hit Block / Tech
- - - - - -
  • Cancel options: sp su
  • Self meter gain: Whiff: 3, Hit: 18, Block: 9.
  • Opponent meter gain: Whiff: 0, Hit: 4, Block: 0.
FATonline.png


Crouching Normals

2LP
Crouch LP
D.png+Lp.png
(qclp).gif
Startup Active Recovery Block Hit Cr. Hit Damage Stun Kara Guard Level Parry Level
5 4 4 4 4 4 3 3 - - A
Cancel Options Self Meter Gain Whiff Hit Block / Tech Opponent Meter Gain Hit Block / Tech
- - - - - -
FATonline.png
2MP
Crouch MP
D.png+Mp.png
(qcmp).gif
Startup Active Recovery Block Hit Cr. Hit Damage Stun Kara Guard Level Parry Level
8 5 13 -2 -1 - 16 9 - - A
Cancel Options Self Meter Gain Whiff Hit Block / Tech Opponent Meter Gain Hit Block / Tech
- - - - - -
  • 14 kara range
  • Self meter gain: Whiff: 2, Hit: 10, Block: 5.
  • Opponent meter gain: Whiff: 0, Hit: 2, Block: 0.
FATonline.png
2HP
Crouch HP
D.png+Hp.png
(qchp).gif
Startup Active Recovery Block Hit Cr. Hit Damage Stun Kara Guard Level Parry Level
14 1 20 -3 -1 1 21 5 - - L
Cancel Options Self Meter Gain Whiff Hit Block / Tech Opponent Meter Gain Hit Block / Tech
- - - - - -
  • Self meter gain: Whiff: 3, Hit: 18, Block: 9.
  • Opponent meter gain: Whiff: 0, Hit: 4, Block: 0.
FATonline.png
2LK
Crouch LK
D.png+Lk.png
(qclk).gif
Startup Active Recovery Block Hit Cr. Hit Damage Stun Kara Guard Level Parry Level
6 5 8 -2 -2 -2 3 3 - - L
Cancel Options Self Meter Gain Whiff Hit Block / Tech Opponent Meter Gain Hit Block / Tech
- - - - - -
  • Cancel options: self
FATonline.png
2MK
Crouch MK
D.png+Mk.png
(qcmk).gif
Startup Active Recovery Block Hit Cr. Hit Damage Stun Kara Guard Level Parry Level
7 3 14 -3 -2 -1 14 3 - - L
Cancel Options Self Meter Gain Whiff Hit Block / Tech Opponent Meter Gain Hit Block / Tech
- - - - - -
  • Self meter gain: Whiff: 2, Hit: 10, Block: 5.
  • Opponent meter gain: Whiff: 0, Hit: 2, Block: 0.
FATonline.png
2HK
Crouch HK
D.png+Hk.png
(qchk).gif
Startup Active Recovery Block Hit Cr. Hit Damage Stun Kara Guard Level Parry Level
12 8 33 -25 D D 23 3 - - L
Cancel Options Self Meter Gain Whiff Hit Block / Tech Opponent Meter Gain Hit Block / Tech
- - - - - -
  • Self meter gain: Whiff: 3, Hit: 18, Block: 9.
  • Opponent meter gain: Whiff: 0, Hit: 4, Block: 0.
FATonline.png


Jumping Normals

8LP
Jump LP (Neutral)
U.png+Lp.png
(qnjlp).gif
Startup Active Recovery Block Hit Cr. Hit Damage Stun Kara Guard Level Parry Level
3 - - - - - 7 7 - - H
Cancel Options Self Meter Gain Whiff Hit Block / Tech Opponent Meter Gain Hit Block / Tech
- - - - - -
FATonline.png
j.LP
Jump LP
Uf.png+Lp.png
(qjlp).gif
Startup Active Recovery Block Hit Cr. Hit Damage Stun Kara Guard Level Parry Level
2 - - - - - 7 7 - - H
Cancel Options Self Meter Gain Whiff Hit Block / Tech Opponent Meter Gain Hit Block / Tech
- - - - - -
FATonline.png
j.MP
Jump MP
Uf.png+Mp.png
(qjmp).gif
Startup Active Recovery Block Hit Cr. Hit Damage Stun Kara Guard Level Parry Level
7 6 - - - - 17 11 - - H
Cancel Options Self Meter Gain Whiff Hit Block / Tech Opponent Meter Gain Hit Block / Tech
- - - - - -
  • Self meter gain: Whiff: 2, Hit: 10, Block: 5.
  • Opponent meter gain: Whiff: 0, Hit: 2, Block: 0.
FATonline.png
j.HP
Jump HP
Uf.png+Hp.png
(qjhp).gif
Startup Active Recovery Block Hit Cr. Hit Damage Stun Kara Guard Level Parry Level
10 8 - - - - 23 15 - - H
Cancel Options Self Meter Gain Whiff Hit Block / Tech Opponent Meter Gain Hit Block / Tech
- - - - - -
  • Self meter gain: Whiff: 3, Hit: 18, Block: 9.
  • Opponent meter gain: Whiff: 0, Hit: 4, Block: 0.
FATonline.png
j.LK
Jump LK
Uf.png+Lk.png
(qjlk).gif
Startup Active Recovery Block Hit Cr. Hit Damage Stun Kara Guard Level Parry Level
4 - - - - - 7 7 - - H
Cancel Options Self Meter Gain Whiff Hit Block / Tech Opponent Meter Gain Hit Block / Tech
- - - - - -
FATonline.png
j.MK
Jump MK
Uf.png+Mk.png
(qjmk).gif
Startup Active Recovery Block Hit Cr. Hit Damage Stun Kara Guard Level Parry Level
9 8 - - - - 16 9 - - H
Cancel Options Self Meter Gain Whiff Hit Block / Tech Opponent Meter Gain Hit Block / Tech
- - - - - -
  • Self meter gain: Whiff: 2, Hit: 10, Block: 5.
  • Opponent meter gain: Whiff: 0, Hit: 2, Block: 0.
FATonline.png
j.HK
Jump HK
Uf.png+Hk.png
(qjhk).gif
Startup Active Recovery Block Hit Cr. Hit Damage Stun Kara Guard Level Parry Level
17 3 - - - - 25 13 - - H
Cancel Options Self Meter Gain Whiff Hit Block / Tech Opponent Meter Gain Hit Block / Tech
- - - - - -
  • Self meter gain: Whiff: 3, Hit: 18, Block: 9.
  • Opponent meter gain: Whiff: 0, Hit: 4, Block: 0.
FATonline.png


Throws

LPLK
Grab and Knee Smash
Lp.png+Lk.png
(qtn).gif
Startup Active Recovery Block Hit Cr. Hit Damage Stun Kara Guard Level Parry Level
2 1 21 - D D 19 16 - - -
Cancel Options Self Meter Gain Whiff Hit Block / Tech Opponent Meter Gain Hit Block / Tech
- - - - - -
  • 24 throw range
FATonline.png
4/6LPK
Depraved Impact
B.png/F.png+Lp.png+Lk.png
(qtf).gif
Startup Active Recovery Block Hit Cr. Hit Damage Stun Kara Guard Level Parry Level
2 1 21 - D D 24 12 - - -
Cancel Options Self Meter Gain Whiff Hit Block / Tech Opponent Meter Gain Hit Block / Tech
- - - - - -
  • 24 throw range
FATonline.png


Universal Overhead

MPMK
Leap Attack
Mp.png+Mk.png
(quoh).gif
Startup Active Recovery Block Hit Cr. Hit Damage Stun Kara Guard Level Parry Level
15 10 5 - - - 7 3 - - H
Cancel Options Self Meter Gain Whiff Hit Block / Tech Opponent Meter Gain Hit Block / Tech
- - - - - -
FATonline.png


Taunt

HPHK
Intimidation (Assumed)
Hp.png+Hk.png
(qt).gif
Startup Active Recovery Block Hit Cr. Hit Damage Stun Kara Guard Level Parry Level
21 1 62 - - - - - - - -
Cancel Options Self Meter Gain Whiff Hit Block / Tech Opponent Meter Gain Hit Block / Tech
- - - - - -
  • Stacks up to 3 times (lasts per round)
  • Health(1200 initially) increases to 1400 with 1 taunt, 1705 with 2 taunts, 2050 with 3 taunts.
  • First taunt each round gives Q 10% faster stun recovery, following taunts don't give extra stun recovery though
  • 3 taunts gives him about 40% damage decrease
  • Max taunts makes Q the best defense in the game (normally he takes the second-least damage)
FATonline.png


SPECIALS

46P (hold)
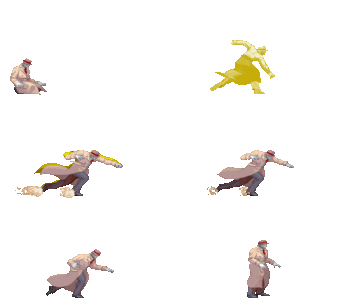
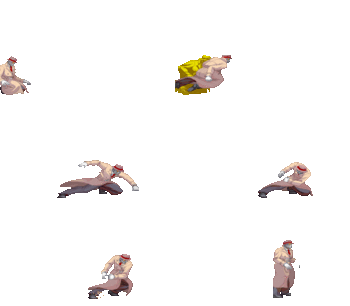
Dashing Head Attack
hold B.png,F.png+P.png
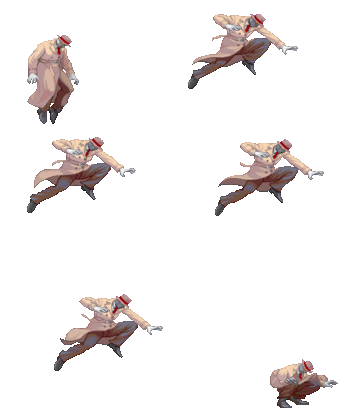
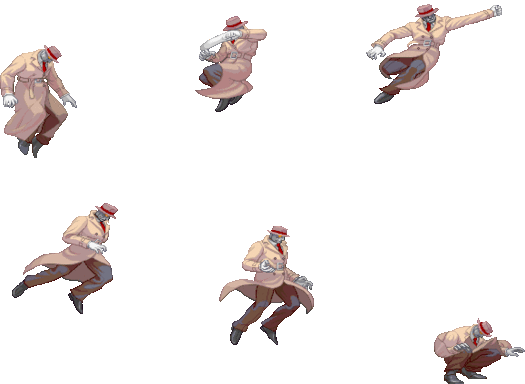
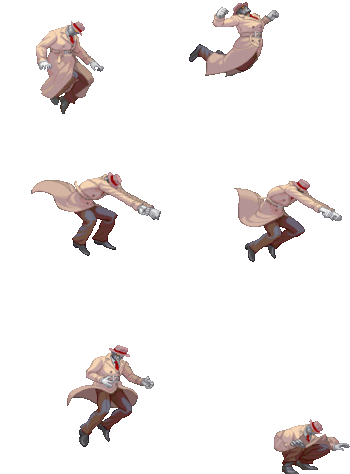
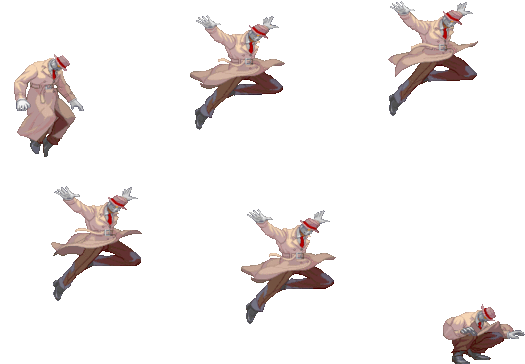
(qdha).gif
Standard
(qdhao).gif
Held P.png
(qdhaex).gif
Ex.png
LP Startup Active Recovery Block Hit Cr. Hit Damage Stun Kara Guard Level Parry Level
13/24(hold 3 -/23 -2/-10 - - 21/17 11/9 - - H
Cancel Options Self Meter Gain Whiff Hit Block / Tech Opponent Meter Gain Hit Block / Tech
- - - - - -
FATonline.png


MP Startup Active Recovery Block Hit Cr. Hit Damage Stun Kara Guard Level Parry Level
15/28 (hold) 3 16/24 -2/-11 - - 24/20 13/9 - - H
Cancel Options Self Meter Gain Whiff Hit Block / Tech Opponent Meter Gain Hit Block / Tech
- - - - - -
FATonline.png


HP Startup Active Recovery Block Hit Cr. Hit Damage Stun Kara Guard Level Parry Level
19/32(hold) 4/3 16/25 -3/-12 - - 27/23 15/9 - - H
Cancel Options Self Meter Gain Whiff Hit Block / Tech Opponent Meter Gain Hit Block / Tech
- - - - - -
FATonline.png


EX Startup Active Recovery Block Hit Cr. Hit Damage Stun Kara Guard Level Parry Level
14 3 36 -21 - - 28 9 - - H
Cancel Options Self Meter Gain Whiff Hit Block / Tech Opponent Meter Gain Hit Block / Tech
- - - - - -
  • Cancel options: su
  • Self meter gain: Whiff: -40, Hit: -40, Block: -40.
  • Opponent meter gain: Whiff: 0, Hit: 0, Block: 0.
FATonline.png
  • 2nd value of each dataset is for held P.png
46K
Dashing Leg Attack
hold B.png,F.png+K.png
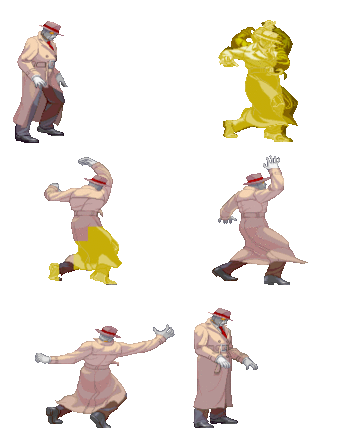
LK Startup Active Recovery Block Hit Cr. Hit Damage Stun Kara Guard Level Parry Level
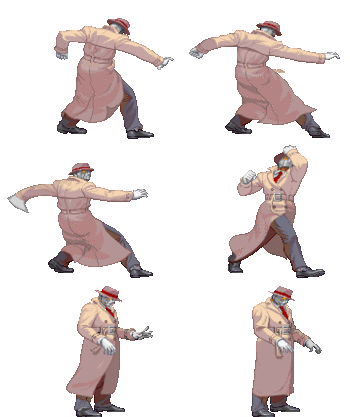
25 2 29 -13 - - 19 3 - - L
Cancel Options Self Meter Gain Whiff Hit Block / Tech Opponent Meter Gain Hit Block / Tech
- - - - - -
  • Self meter gain: Whiff: 3, Hit: 17, Block: 11.
  • Opponent meter gain: Whiff: 0, Hit: 4, Block: 0.
FATonline.png


MK Startup Active Recovery Block Hit Cr. Hit Damage Stun Kara Guard Level Parry Level
28 2 30 -14 - - 22 3 - - L
Cancel Options Self Meter Gain Whiff Hit Block / Tech Opponent Meter Gain Hit Block / Tech
- - - - - -
  • Self meter gain: Whiff: 3, Hit: 17, Block: 11.
  • Opponent meter gain: Whiff: 0, Hit: 4, Block: 0.
FATonline.png


HK Startup Active Recovery Block Hit Cr. Hit Damage Stun Kara Guard Level Parry Level
31 2 31 -15 - - 24 3 - - L
Cancel Options Self Meter Gain Whiff Hit Block / Tech Opponent Meter Gain Hit Block / Tech
- - - - - -
  • Self meter gain: Whiff: 3, Hit: 17, Block: 11.
  • Opponent meter gain: Whiff: 0, Hit: 4, Block: 0.
FATonline.png


EX Startup Active Recovery Block Hit Cr. Hit Damage Stun Kara Guard Level Parry Level
26 4 34 -18 - - 29 7 - - L
Cancel Options Self Meter Gain Whiff Hit Block / Tech Opponent Meter Gain Hit Block / Tech
- - - - - -
  • Cancel options: su
  • Self meter gain: Whiff: -40, Hit: -40, Block: -40.
  • Opponent meter gain: Whiff: 0, Hit: 0, Block: 0.
FATonline.png
214P
High Speed Barrage
Qcb.png+P.png
LP Startup Active Recovery Block Hit Cr. Hit Damage Stun Kara Guard Level Parry Level
9 3 26 -6 - - 24 7 - - H
Cancel Options Self Meter Gain Whiff Hit Block / Tech Opponent Meter Gain Hit Block / Tech
- - - - - -
  • Self meter gain: Whiff: 3, Hit: 20, Block: 14.
  • Opponent meter gain: Whiff: 0, Hit: 4, Block: 0.
FATonline.png


MP Startup Active Recovery Block Hit Cr. Hit Damage Stun Kara Guard Level Parry Level
8 4 28 -9 - - 24 11 - - H
Cancel Options Self Meter Gain Whiff Hit Block / Tech Opponent Meter Gain Hit Block / Tech
- - - - - -
  • Self meter gain: Whiff: 3, Hit: 20, Block: 14.
  • Opponent meter gain: Whiff: 0, Hit: 4, Block: 0.
FATonline.png


HP Startup Active Recovery Block Hit Cr. Hit Damage Stun Kara Guard Level Parry Level
9 3 28 -8 - - 24 11 - - H
Cancel Options Self Meter Gain Whiff Hit Block / Tech Opponent Meter Gain Hit Block / Tech
- - - - - -
  • Self meter gain: Whiff: 3, Hit: 20, Block: 14.
  • Opponent meter gain: Whiff: 0, Hit: 4, Block: 0.
FATonline.png


EX Startup Active Recovery Block Hit Cr. Hit Damage Stun Kara Guard Level Parry Level
6 11 36 -23 - - 40 24 - - H
Cancel Options Self Meter Gain Whiff Hit Block / Tech Opponent Meter Gain Hit Block / Tech
- - - - - -
  • Self meter gain: Whiff: -40, Hit: -40, Block: -40.
  • Opponent meter gain: Whiff: 0, Hit: 0, Block: 0.
FATonline.png
63214K
Capture and Deadly Blow
Hcb.png+K.png
(qcadb).gif
Lk.png,Mp.png,Hp.png
LK Startup Active Recovery Block Hit Cr. Hit Damage Stun Kara Guard Level Parry Level
12 2 42 - - - 19 10 - - -
Cancel Options Self Meter Gain Whiff Hit Block / Tech Opponent Meter Gain Hit Block / Tech
- - - - - -
  • 44 throw range
  • Self meter gain: Whiff: 2, Hit: 20, Block: ---.
  • Opponent meter gain: Whiff: 0, Hit: 4, Block: ---.
FATonline.png


MK Startup Active Recovery Block Hit Cr. Hit Damage Stun Kara Guard Level Parry Level
13 2 44 - - - 21 10 - - -
Cancel Options Self Meter Gain Whiff Hit Block / Tech Opponent Meter Gain Hit Block / Tech
- - - - - -
  • 46 throw range
  • Self meter gain: Whiff: 2, Hit: 21, Block: ---.
  • Opponent meter gain: Whiff: 0, Hit: 4, Block: ---.
FATonline.png


HK Startup Active Recovery Block Hit Cr. Hit Damage Stun Kara Guard Level Parry Level
14 2 46 - - - 23 10 - - -
Cancel Options Self Meter Gain Whiff Hit Block / Tech Opponent Meter Gain Hit Block / Tech
- - - - - -
  • 48 throw range
  • Self meter gain: Whiff: 2, Hit: 23, Block: ---.
  • Opponent meter gain: Whiff: 0, Hit: 6, Block: ---.
FATonline.png
236236P (SA1)
Critical Combo Attack
Qcf.pngQcf.png+P.png (SA1)
(qsa1).gif
Startup Active Recovery Block Hit Cr. Hit Damage Stun Kara Guard Level Parry Level
5 16 31 -19 - - 62 14 - - H
Cancel Options Self Meter Gain Whiff Hit Block / Tech Opponent Meter Gain Hit Block / Tech
- - - - - -
FATonline.png
236236P (SA2)
Deadly Double Combination
Qcf.pngQcf.png+P.png (SA2)
(qsa2).gif
Startup Active Recovery Block Hit Cr. Hit Damage Stun Kara Guard Level Parry Level
1 1 65 -25 - - 80 20 - - A
Cancel Options Self Meter Gain Whiff Hit Block / Tech Opponent Meter Gain Hit Block / Tech
- - - - - -
FATonline.png
236236P (SA3)
Total Destruction
Qcf.pngQcf.png+P.png (SA3)
(qsa1).gif
Startup Active Recovery Block Hit Cr. Hit Damage Stun Kara Guard Level Parry Level
18 - - - - - - - - - -
Cancel Options Self Meter Gain Whiff Hit Block / Tech Opponent Meter Gain Hit Block / Tech
- - - - - -
FATonline.png
SA3 > 236P
Total Destruction: Blow
SA3 > Qcf.png+P.png
(qsa3qcfp).gif
Startup Active Recovery Block Hit Cr. Hit Damage Stun Kara Guard Level Parry Level
12 1 39 -17 - - 62 24 - - A
Cancel Options Self Meter Gain Whiff Hit Block / Tech Opponent Meter Gain Hit Block / Tech
- - - - - -
FATonline.png
SA3 > 236K
Total Destruction: Capture
SA3 > Qcf.png+K.png
(qsa3qcfk).gif
Startup Active Recovery Block Hit Cr. Hit Damage Stun Kara Guard Level Parry Level
6 3 59 - - - 83 20 - - -
Cancel Options Self Meter Gain Whiff Hit Block / Tech Opponent Meter Gain Hit Block / Tech
- - - - - -
  • 56 throw range
FATonline.png

3S Navigation

General
Controls
Notation
HUD
Glossary
System
FAQ
Characters
Akuma
Alex
Chun-Li
Dudley
Elena
Hugo
Ibuki
Ken
Makoto
Q
Necro
Oro
Remy
Ryu
Sean
Twelve
Urien
Yang
Yun
Gill