Introduction
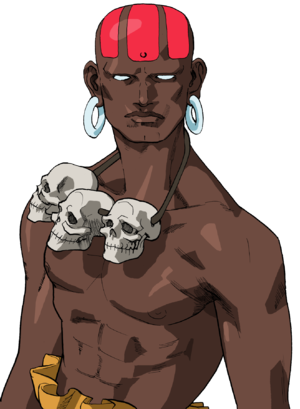
Once again, Dhalsim fights to protect his family and the poor. After sensing a disturbance caused by the evil energy of the Psycho Drive, Dhalsim leaves his village to investigate further, but fears that by doing so, he will further the chances of him becoming corrupted with darkness.
| Pros | Cons |
|
|
Color Options
| X-Ism | A-Ism | V-Ism | |||
 |
 |
 |
 |
 |

|
| Punch | Kick | Punch | Kick | Punch | Kick |
Moves List
Note : Dhalsims "close" normals are activated in A/V by holding back, or downback when crouching, while in X, they function like regular proximity normals.
Ground Normals
- Close Standing Jab:
| Damage | 6 |  |

|
| Stun | 2 | ||
| Chain Cancel | No | ||
| Special Cancel | Yes | ||
| Super Cancel | Yes | ||
| Meter on whiff/hit | 0/1 | ||
| Frame Count | 3/9/10 | ||
| Block Stun | -4 | ||
| Hit Stun/Counter Hit | -3/+2 |
Close lp is an exception, as it's just neutral or back + lp in A/V. Has an insane amount of priority as an anti-air.
- Far Standing Jab:
| Damage | 6(AV)3(X) | 
|
| Stun | 2 | |
| Chain Cancel | No | |
| Special Cancel | Yes | |
| Super Cancel | Yes | |
| Meter on whiff/hit | 0/1 | |
| Frame Count (A/V) | 3/9/10 | |
| Frame Count (X) | 4/4/10 | |
| Block Stun | +0 | |
| Hit Stun/Counter Hit | +1/+6 |
Far lp is an exception, as it's forward + lp in A/V.
- Close Standing Strong:
| Damage | 13 |  |

|
| Stun | 4 | ||
| Chain Cancel | No | ||
| Special Cancel | Yes | ||
| Super Cancel | Yes | ||
| Meter on whiff/hit | 1/3(A)4(XV) | ||
| Frame Count | 4/5/24 | ||
| Block Stun | -10 | ||
| Hit Stun/Counter Hit | -9/-5 |
In V, the second active part can also be canceled.
- Far Standing Strong:
| Damage | 10 | 
|
| Stun | 4 | |
| Chain Cancel | No | |
| Special Cancel | No | |
| Super Cancel | No | |
| Meter on whiff/hit | 1/3(A)4(XV) | |
| Frame Count | 10/4/15 | |
| Block Stun | +0 | |
| Hit Stun/Counter Hit | +1/+5 |
- Close Standing Fierce:
| Damage | 9+8 |  |

|
| Stun | 4+3 | ||
| Chain Cancel | No | ||
| Special Cancel | Yes | ||
| Super Cancel | Yes | ||
| Meter on whiff/hit | 1/3+1(A)4+1(XV) | ||
| Frame Count | 5/6/7/27 | ||
| Block Stun | -11 | ||
| Hit Stun/Counter Hit | -10/Launch |
- Far Standing Fierce:
| Damage | 13 | 
|
| Stun | 8 | |
| Chain Cancel | No | |
| Special Cancel | No | |
| Super Cancel | No | |
| Meter on whiff/hit | 1/4(A)6(XV) | |
| Frame Count | 13/2/23 | |
| Block Stun | -2 | |
| Hit Stun/Counter Hit | -1/Launch |
- Close Standing Short:
| Damage | 6 | 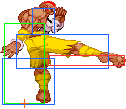
|
| Stun | 2 | |
| Chain Cancel | No | |
| Special Cancel | Yes | |
| Super Cancel | Yes | |
| Meter on whiff/hit | 0/1 | |
| Frame Count | 4/5/13 | |
| Block Stun | -4 | |
| Hit Stun/Counter Hit | -3/+2 |
- Far Standing Short:
| Damage | 3 | 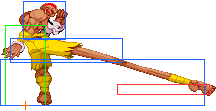
|
| Stun | 2 | |
| Chain Cancel | No | |
| Special Cancel | No | |
| Super Cancel | No | |
| Meter on whiff/hit | 0/1 | |
| Frame Count | 8/4/12 | |
| Block Stun | -2 | |
| Hit Stun/Counter Hit | -1/+4 |
- Close Standing Forward:
| Damage | 11 | 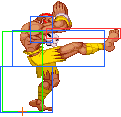
|
| Stun | 4 | |
| Chain Cancel | No | |
| Special Cancel | Yes | |
| Super Cancel | Yes | |
| Meter on whiff/hit | 1/3(A)4(XV) | |
| Frame Count | 5/3/17 | |
| Block Stun | -1 | |
| Hit Stun/Counter Hit | +0/+4 |
Used as anti-air in mid-ranges
- Far Standing Forward:
| Damage | 9 | 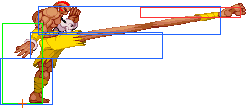
|
| Stun | 4 | |
| Chain Cancel | No | |
| Special Cancel | No | |
| Super Cancel | No | |
| Meter on whiff/hit | 1/3(A)4(XV) | |
| Frame Count | 10/3/21 | |
| Block Stun | -5 | |
| Hit Stun/Counter Hit | -4/+0 |
- Close Standing Roundhouse:
| Damage | 16 | 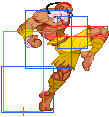
|
| Stun | 6 | |
| Chain Cancel | No | |
| Special Cancel | Yes | |
| Super Cancel | Yes | |
| Meter on whiff/hit | 1/4(A)6(XV) | |
| Frame Count | 6/4/27 | |
| Block Stun | -8 | |
| Hit Stun/Counter Hit | -7/Launch |
- Far Standing Roundhouse:
| Damage | 14 | 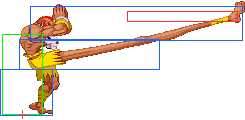
|
| Stun | 6 | |
| Chain Cancel | No | |
| Special Cancel | No | |
| Super Cancel | No | |
| Meter on whiff/hit | 1/4(A)6(XV) | |
| Frame Count | 12/3/22 | |
| Block Stun | -2 | |
| Hit Stun/Counter Hit | -1/Launch |
- Close Crouching Jab:
| Damage | 5 | 
|
| Stun | 2 | |
| Chain Cancel | No | |
| Special Cancel | Yes | |
| Super Cancel | Yes | |
| Meter on whiff/hit | 0/1 | |
| Frame Count | 3/3/9 | |
| Block Stun | +2 | |
| Hit Stun/Counter Hit | +3/+8 |
- Far Crouching Jab:
| Damage | 2 | 
|
| Stun | 2 | |
| Chain Cancel | No | |
| Special Cancel | No | |
| Super Cancel | No | |
| Meter on whiff/hit | 0/1 | |
| Frame Count | 10/2/21 | |
| Block Stun | -9 | |
| Hit Stun/Counter Hit | -8/-3 |
- Close Crouching Strong:
| Damage | 11 | 
|
| Stun | 4 | |
| Chain Cancel | No | |
| Special Cancel | Yes | |
| Super Cancel | Yes | |
| Meter on whiff/hit | 1/3(A)4(XV) | |
| Frame Count | 4/4/11 | |
| Block Stun | +4 | |
| Hit Stun/Counter Hit | +5/+9 |
- Far Crouching Strong:
| Damage | 9 | 
|
| Stun | 4 | |
| Chain Cancel | No | |
| Special Cancel | No | |
| Super Cancel | No | |
| Meter on whiff/hit | 1/3(A)4(XV) | |
| Frame Count | 12/4/24 | |
| Block Stun | -9 | |
| Hit Stun/Counter Hit | -8/-4 |
- Close Crouching Fierce:
| Damage | 14 | 
|
| Stun | 6 | |
| Chain Cancel | No | |
| Special Cancel | Yes | |
| Super Cancel | Yes | |
| Meter on whiff/hit | 1/4(A)6(XV) | |
| Frame Count | 5/4/13 | |
| Block Stun | +6 | |
| Hit Stun/Counter Hit | +7/Launch |
- Far Crouching Fierce:
| Damage | 12 | 
|
| Stun | 6 | |
| Chain Cancel | No | |
| Special Cancel | No | |
| Super Cancel | No | |
| Meter on whiff/hit | 1/4(A)6(XV) | |
| Frame Count | 14/6/27 | |
| Block Stun | -10 | |
| Hit Stun/Counter Hit | -9/Launch |
- Close Crouching Short:
| Damage | 5 | 
|
| Stun | 2 | |
| Chain Cancel | No | |
| Special Cancel | Yes | |
| Super Cancel | Yes | |
| Meter on whiff/hit | 0/1 | |
| Frame Count | 4/4/11 | |
| Block Stun | -1 | |
| Hit Stun/Counter Hit | +0/+5 |
- Far Crouching Short:
| Damage | 5 | |
| Stun | 2 | |
| Chain Cancel | No | |
| Special Cancel | Yes | |
| Super Cancel | Yes | |
| Meter on whiff/hit | 0/1 | |
| Frame Count | 3/9/9 | |
| Block Stun | -4 | |
| Hit Stun/Counter Hit | -3/+2 |
- Close Crouching Forward:
| Damage | 10 | 
|
| Stun | 4 | |
| Chain Cancel | No | |
| Special Cancel | Yes | |
| Super Cancel | Yes | |
| Meter on whiff/hit | 1/3(A)4(XV) | |
| Frame Count | 5/4/14 | |
| Block Stun | +1 | |
| Hit Stun/Counter Hit | +2/+6 |
- Far Crouching Forward:
| Damage | 9 | |
| Stun | 4 | |
| Chain Cancel | No | |
| Special Cancel | Yes | |
| Super Cancel | Yes | |
| Meter on whiff/hit | 1/3(A)4(XV) | |
| Frame Count | 7/11/13 | |
| Block Stun | -5 | |
| Hit Stun/Counter Hit | -4/+0 |
- Close Crouching Roundhouse:
| Damage | 14 | 
|
| Stun | 6 | |
| Chain Cancel | No | |
| Special Cancel | No | |
| Super Cancel | No | |
| Meter on whiff/hit | 1/4(A)6(XV) | |
| Frame Count | 6/4/25 | |
| Block Stun | -6 | |
| Hit Stun/Counter Hit | Knockdown/Launch |
- Far Crouching Roundhouse:
| Damage | 14 | |
| Stun | 6 | |
| Chain Cancel | No | |
| Special Cancel | Yes | |
| Super Cancel | Yes | |
| Meter on whiff/hit | 1/4(A)6(XV) | |
| Frame Count | 8/13/25 | |
| Block Stun | -15 | |
| Hit Stun/Counter Hit | - |
Air Normals
Note: Dhalsims "close" air normals are done by holding back in A/V, in X they function like proximity normals.
- Close Neutral Jump Jab:
| Damage | 7 | 
|
| Stun | 2 | |
| Meter on whiff/hit | 0/1 | |
| Frame Count | 3/10/11 |
- Close Diagonal Jump Jab:
| Damage | 6 | 
|
| Stun | 2 | |
| Meter on whiff/hit | 0/1 | |
| Frame Count | 3/10/11 |
- Far Neutral Jump Jab:
| Damage | 4 | 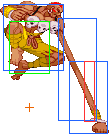
|
| Stun | 2 | |
| Meter on whiff/hit | 0/1 | |
| Frame Count | 7/2/20 |
- Far Diagonal Jump Jab:
| Damage | 4 | 
|
| Stun | 2 | |
| Meter on whiff/hit | 0/1 | |
| Frame Count | 7/4/20 |
- Close Neutral Jump Strong:
| Damage | 12 | 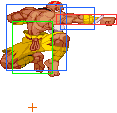
|
| Stun | 4 | |
| Meter on whiff/hit | 2/3(A)4(XV) | |
| Frame Count | 4/8/13 |
- Close Diagonal Jump Strong:
| Damage | 11 | 
|
| Stun | 4 | |
| Meter on whiff/hit | 2/3(A)4(XV) | |
| Frame Count | 4/8/13 |
- Far Jump Strong:
| Damage | 8 | 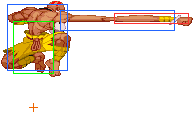
|
| Stun | 4 | |
| Meter on whiff/hit | 2/3(A)4(XV) | |
| Frame Count | 8/2/22 |
- Close Jump Fierce:
| Damage | 16 | 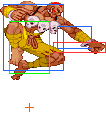
|
| Stun | 6 | |
| Meter on whiff/hit | 2/4(A)6(XV) | |
| Frame Count | 4/6/10 |
- Far Jump Fierce:
| Damage | 12 | 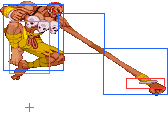
|
| Stun | 6 | |
| Meter on whiff/hit | 2/4(XA)6(XV) | |
| Frame Count | 8/4/19 |
- Close Jump Short:
| Damage | 6 | 
|
| Stun | 2 | |
| Meter on whiff/hit | 0/1 | |
| Frame Count | 4/10/12 |
- Far Jump Short:
| Damage | 3 | 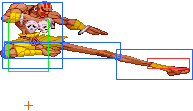
|
| Stun | 2 | |
| Meter on whiff/hit | 0/1 | |
| Frame Count | 8/4/21 |
- Close Neutral Jump Forward:
| Damage | 10 | 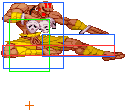
|
| Stun | 4 | |
| Meter on whiff/hit | 2/3(A)4(XV) | |
| Frame Count | 7/6/12 |
- Close Diagonal Jump Forward:
| Damage | 10 | 
|
| Stun | 4 | |
| Meter on whiff/hit | 2/3(A)4(XV) | |
| Frame Count | 5/8/12 |
- Far Jump Forward:
| Damage | 8 | 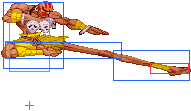
|
| Stun | 4 | |
| Meter on whiff/hit | 2/3(A)4(XV) | |
| Frame Count | 11/3/21 |
- Close Jump Roundhouse:
| Damage | 15 | 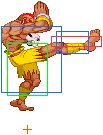
|
| Stun | 6 | |
| Meter on whiff/hit | 2/4(A)6(XV) | |
| Frame Count | 8/6/14 |
- Far Jump Roundhouse:
| Damage | 13 | 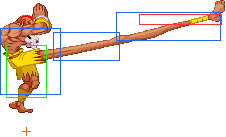
|
| Stun | 6 | |
| Meter on whiff/hit | 2/4(A)6(XV) | |
| Frame Count | 12/4/26 |
Command Normals
| Damage | 12 | 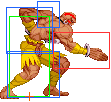
|
| Stun | 6 | |
| Chain Cancel | No | |
| Special Cancel | No | |
| Super Cancel | No | |
| Meter on whiff/hit | 0/3 | |
| Frame Count | 45/5/20 | |
| Block Stun | -2 | |
| Hit Stun/Counter Hit | -1/? |
This LP Takes about half a second to charge but hits harder and becomes an overhead.
| Damage | 10 | 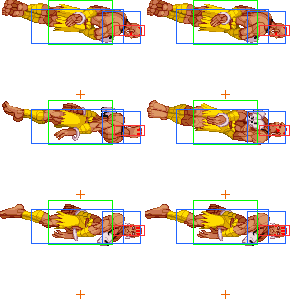
|
| Stun | 6 | |
| Meter on whiff/hit | 2/3(A)4(XV) | |
| Frame Count | 7/∞/9 |
Dhalsim spins across the screen head-first. Unlike the Drill Kick, there is no way to choose the angle of the attack.
| Damage | 10 | 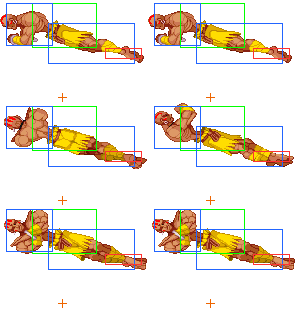
|
| Stun | 6 | |
| Meter on whiff/hit (Neutral Jump) | 2/3(A)4(XV) | |
| Meter on whiff/hit (Diagonal Jump) | 1/3(A)4(XV) | |
| Frame Count | 7/∞/9 |
- Forward Version:
| Damage | 10 | 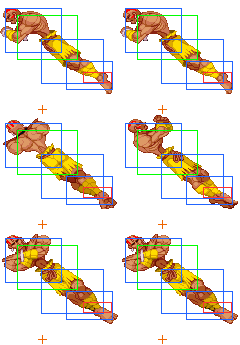
|
| Stun | 6 | |
| Meter on whiff/hit (Neutral Jump) | 2/3(A)4(XV) | |
| Meter on whiff/hit (Diagonal Jump) | 1/A3(A)4(XV) | |
| Frame Count | 7/∞/9 |
- Roundhouse Version:
| Damage | 10 | 
|
| Stun | 6 | |
| Meter on whiff/hit (Neutral Jump) | 2/3(A)4(XV) | |
| Meter on whiff/hit (Diagonal Jump) | 1/3(A)4(XV) | |
| Frame Count | 7/∞/9 |
Dhalsim spins to the ground feet-first. Using LK will dive almost straight across the screen, MK will dive at a slight angle, and HK will dive almost straight down.
Throws
| Damage | 8+2x(0~13)+2*² | 
|
| Stun | 0 | |
| Range | 34 | |
| Meter on whiff/hit | 1/1(A)3(XV) | |
| Frame Count | 5/1/16 |
| Damage | 20 | 
|
| Stun | 0 | |
| Range | 34 | |
| Meter on whiff/hit | 1/1(A)3(XV) | |
| Frame Count | 5/1/16 |
Yoga Trip:
Any direction but ![]() /
/![]() +
+![]()
| Damage | 20 | 
|
| Stun | 0 | |
| Range | 34 | |
| Meter on whiff/hit | 1(A)3(XV)/0 | |
| Frame Count | 1/1/1(before landing) |
Alpha Counter
During Blockstun ![]() +
+![]() +
+![]() of same strength
of same strength
- A-ISM:
| Damage | 4 |  |

|
| Frame Count | 24/10/12 | ||
| Invincibility | 0-24 |
- V-ISM:
| Damage | 4 | |
| Frame Count | 29/12/25 | |
| Invincibility | 0-29 |
Yoga Escape: (when knocked down) ![]()
![]()
![]() +
+![]() [A/V Only]
[A/V Only]
-Dhalsim will teleport before hitting the ground and re-appear standing on
 the ground.
Special Moves
Yoga Fire: QCF+Punch [X Z V]
-Dhalsim exhales a tiny fireball across the screen. In Z-Ism and V-Ism, the
 fireball will dissipiate as it travels, and the stronger the Punch button
 used, the faster the fireball will go but the sooner it will dissipiate. In
 X-Ism, the fireball will not dissipiate.
Yoga Flame: HCB+Punch [Z V]
-Dhalsim exhales a large fire in front of him. The stronger the Punch button
 used, the longer Dhalsim keeps the fire in front of him. Note that the Z-Ism
 and V-Ism Yoga Flame has a different control motion than in X-Ism.
Yoga Flame: HCF+Punch [X]
-Dhalsim exhales a large fire in front of him. The stronger the Punch button
 used, the longer Dhalsim keeps the fire in front of him. Note that the X-Ism
 Yoga Flame has a different control motion than in Z-Ism and V-Ism
Yoga Blast: HCB+Kick [Z V]
-Dhalsim exhales a large fire at an upward angle. The stronger the Kick button
 used, the longer Dhalsim keeps the fire in the air. Note that the Z-Ism and
 V-Ism Yoga Blast has a different control motion than in X-Ism.
Yoga Blast: HCF+Kick [X]
-Dhalsim exhales a large fire at an upward angle. The stronger the Kick button
 used, the longer Dhalsim keeps the fire in the air. Note that the X-Ism
 Yoga Blast has a different control motion than in Z-Ism and V-Ism.
Yoga Teleport: F,D,DF or B,D,DB + (PPP or KKK) (air) [X Z V]
-Dhalsim will teleport either forward or backward, depending if (F,D,DF) or
 (B,D,DB) is used. Using (KKK) will teleport Dhalsim a bit further away.
 Dhalsim cannot be attacked while he is teleporting.
 In Z-Ism and V-Ism, Dhalsim can Teleport while in the air, but not in X-Ism.
 If Teleport is performed in the air, Dhalsim reappears in the air and is able to perform
 any of his neutral jump moves, except another Yoga Teleport.
Super Combos
Yoga Tempest: HCF,HCF+Punch [X]
-A more powerful version of the Yoga Flame, Dhalsim exhales a large
 multi-hitting fire in front of him
    X-Ism: 5 Hits
Yoga Inferno: QCF,QCF+Punch [Z]
-A more powerful version of the Yoga Flame, Dhalsim exhales a twisting spray
 of fire in front of him
    Level 1: 3 Hits      Level 2: 8 Hits       Level 3: 13 Hits
Yoga Strike: QCF,D,DF+Kick [Z]
-Dhalsim leaps up and flips in the air. If he touches his opponent while in
 the air, he will grab them and slam them into he ground with his legs. This
 will only attack opponents in the air and will do nothing to them on the
 ground.
    Level 1: 1 Hit       Level 2: 2 Hits       Level 3: 3 Hits
Yoga Stream: QCB,QCB+Punch [Z]
-Dhalsim exhales a spray of fire along the ground. This attack must be
 blocked low
    Level 1: 3 Hits      Level 2: 4 Hits       Level 3: 5 Hits
The Basics
Which Ism?
Anyone
A-Ism
Still top tier due to yoga escape nullifying a lot of V-ISM threats and his anti-air super making it super risky to get counter-hit by any of his anti-airs.
V-Ism
Easily his best ISM, as it gives him access to scary customs that make it risky to use sustained pressure against him. Hadou rave is easy damage against characters who lack meter to counter-activate and can be used to force alpha counters.
X-Ism
One of the best supers in the game, but loses access to air block and controllable normals.
Combos
A-ISM combos
V-ISM combos
Advanced Strategy
Misc
If you taunt while airborne, Dhalsim will slowly float towards the ground while in his teleport stance. This is usually very unsafe and useless, in some rare cases however you can use it to avoid attacks when coming down from a jump/air tech.
Match-ups
vs. V-Ryu
6-4
vs. V-Ken
7-3
vs. V-Chun-li
6-4
vs. V-Sagat
7-3
vs. V-Adon
7-3
vs. V-Birdie
8-2
vs A-Guy
7-3
vs. V-Sodom
5-5
vs. V-Charlie
8-2
vs. V-Rose
6-4
vs. V-Dictator
6-4
vs. V-Akuma
4-6
vs. V-Dan
7-3
vs. V-Dhalsim (Mirror match)
5-5
vs. V-Zangief
7-3
vs. A-Gen
6-4
vs. V-Rolento
5-5
vs. V-Sakura
6-4
vs. A-Blanka
6-4
vs. V-E.Honda
7-3
vs. V-Claw
7-3
vs. V-Cammy
7-3
vs. V-Cody
6-4
vs. A-R.Mika
7-3
vs. V-Karin
6-4
vs. A-Boxer
6-4
vs. V-Juli
7-3
vs. Juni-V
7-3
Notable Players
Japan
AL (X-Dhalsim)
Darumo (A-Dhalsim)
Doronbo (A-Dhalsim)
En (X-Dhalsim)
Enmachi (V-Dhalsim)
Gorin (A-Dhalsim)
Hiro (X-Dhalsim)
Masumi (A-Dhalsim)
MC (A-Dhalsim)
Mukai (A/V-Dhalsim)
Muse (V-Dhalsim)
Nike (V-Dhalsim)
Nishikawaguchi Dhalsim (A-Dhalsim)
Nitto (V-Dhalsim)
P40 (V-Dhalsim)
RF (A-Dhalsim)
Ryuji (V-Dhalsim)
S (V-Dhalsim)
Shindy (V-Dhalsim)
Shiba (A-Dhalsim)
Shiva Dhalsim (A-Dhalsim)
Supu Shin (A-Dhalsim)
Tadakichi (A-Dhalsim)
Takamari Maximum (V-Dhalsim)
Takedaru (A/V/X-Dhalsim)
Taro (V-Dhalsim)
Teruchika (A-Dhalsim)
Tokido (A-Dhalsim)
Tosa (V-Dhalsim)
VER (V-Dhalsim)
Versus (V-Dhalsim)
WC Dhalsim (A-Dhalsim)
YMD Tosa (V-Dhalsim)
Zabon (A-Dhalsim)
North America
Arturo Sanchez / Sabin (A-Dhalsim)
a-v-karin (A/V-Dhalsim)
Carvd / tomass (V-Dhalsim)
Jason Cole / Afrocole (A-Dhalsim)
Kyokuji (V-Dhalsim)
OCxRiDaH (V-Dhalsim)
Ryu1999 (A-Dhalsim)
SabreAZ (V-Dhalsim)
Europe
IMX (A-Dhalsim)
Thompsoni (V-Dhalsim)
Latin America
Fox and Capcom (V-Dhalsim)
GanFleim! (V-Dhalsim)
Comboman/MACRO_DETECTOR (A/V-Dhalsim
