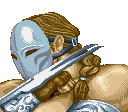

Vega
A Spanish cage fighter who uses a unique style of ninjutsu.
Known as Vega outside of Japan, Balrog in Japan, or Claw as an unambiguous pseudonym.
In a nutshell
Vega is one of the fastest characters in the Street Fighter series, and also one of the most fragile. His strength is in long-range attacks, with the reach advantage provided by his claw (now his attacks can be nerfed in range and damage without it compared to Champion Edition), his speed and jumps. His weakness is his defense.
Character Specific Information
Color Options
| Default | Start |
 |

|
Moves List
Note: All frame data gathered by using the method described at http://code.google.com/p/macrolua/wiki/FrameDataExamples. Some differs from TAkiba's, and is noted by a *.
Damage values after a + indicate bonus damage when Vega has his claw.
Normal Moves
- Standing Normal Moves (st.)
- Crouching Normal Moves (cr.)
- Jumping Normal Moves (nj.)
- Diagonal Jumping Normal Moves (j.)
Unique Moves
Throws
Special Moves
The Basics
The goal with Vega is to use his unparalleled speed and range to keep your opponent away. His lack of any 'get off me' move means that once an opponent has you cornered or knocked down, you are at immense disadvantage. Vega also has no reliable way of dealing with tick throws.
His jump is fast (especially in an already fast game like Hyper Fighting), which is an advantage, but must not be overused.
Pros
- Fast Pokes
- Jumping Game and Projectile Evasion
Cons
- Rolling Crystal Flash hit block flip coin safe
- Limited Anti Air Tools
Advanced Strategy
From Apoc:
I guess one thing I could say is learn to use your rolls properly. This is never used the way it should be generally. People need to think of their rolls as attacks in time. People generally roll at random from far away or when they know it will combo or be blocked. But those are really attacks flying at someone and the final stab is HUGE on damage and has good priority.
The opponent can't tell which roll you are doing everytime. Learn those ranges. Like a fun thing I like to do with the Jab roll is to space myself a bit a way so that when I roll I will still be out of their sweep range AND they can't jump anywhere at that point because the jab ends fast. When you roll like this, a smart player will notice he can't sweep you(and at this range it trades with DPs and such since they meet at the top, and it stuffs just about every special when the tip is landing) and he can't walk into you unless he has a greatly timed DP so most will opt for jumping and crossing Vega up while he rolls...at worst, they figure, they'll end up following and tripping the final stab from behind. They second they leave the ground they get hit with the jab stab for huge damage and stun and Vega's on top of them to boot.
I'll jab roll at Bison or Blanka if I have it ranged that by the time they notice to react my stab will be fully extended, knocking it clean. The roll can be its' own bait as well. It's perfect for nailing those who like to jump straight up(properly timed...but am I supposed to explain everything?). Also learn when to throw it out. You can't JUST roll at anyone. There are delays in Vega's roll that are counter-bait. When someone gets up and you do a deep forward x'2,(this should be strong or jab)this next move is going to be a 2in1 of some sort to maintain pressure. However, if you do it like a normal 2in1 everytime, the opponent will counter the final stab clean, making you roll shy. There are all sorts of ways to offset the timing of a roll. I used to just hit jab and THEN roll. THe stab would hit under the DP. And ppl with Vega experience will do that. You can walk forward into roll and make them want to counter you "throw" attempt as it becomes a roll. But never do the same roll patterns or use the same 2in1 timing. Changing that makes the move much more scary.
Just really understand the roll. I think it's rarely used how it should be and it should be "vega basics", ya know? Um...and have a real gameplan for character vs.character That's always good:P
General keep-away:
Crouching Jab and standing Fierce (when you have the claw) are your two main tools for keeping the opponent out. Jab RCF is useful at the right range to stop opponents from jumping.
Anti-airs:
Your main go-to anti air attacks are Strong (if you have claw), neutral jumping Roundhouse, or a anticipatory airthrow. Even a Jab RCF can be a good anti air if spaced well.
Combos
Bread And Butter
- j.HK, cr.MK, cr.MP
- RCF, cr.HP (Jab version is safe but Strong and Fierce are good for cheap damage)
- cr.MK, cr.MK, cr.LP
Meaty Combos
- meaty cr.MK, cr.MK, cr.MP
Crossup Only
- crossup j.HK, cr.MK, cr.MK, cr.LP
Match-ups
Vs. Balrog (boxer)
Crouching Kicks can defeat him easily, its a great matchup if you consider if you want to be a jumper instead of a crouch or standing poking or rushing, use Barcelona as a surprise attack.
Backdash when you're far to him only for escape, try to poke him with jabs in corner and use Barcelona or Izuna for mixups after a Slide too.
Vs. Blanka
Very tough match. Blanka's jumps, amazing air attacks, scary post-throw mixups and generally strong offence is very difficult for Vega to stop.
There's a solution for Vega to handle Blanka's HK vertical ball trap, there are two cases:
- Vertical ball falls a little bit in front of Vega: well timed mp can hit the ball.
- Vertical ball falls directly over Vega and standing mp cannot hit the ball: Vega should slide immediately when the ball begins to rise (Vega must react very very fast, this does not work if Vega player press down+hk too late), Vega will escape the ball attack and recover faster than Blanka (due to the early input, Blanka should still in air when vega recover), Vega can then hit back Blanka ....
Vs. Chun-Li
She is a bit faster than you and also have new far distance combat strategies with her Kikoken use Crouching Roundhouse or Barcelona against it, air throw battle if she use air Spinning Bird Kick...ground Spinning Bird Kick its easily punishable with crouching attack buy it can hit you if you use Barcelona.
Rolling Crystal Flash its great far combat options, Backdash her Kikoken its a risk, you need to play the jumper one in this matchup, try to start with a Rolling Crystal Flash for trade hits or gain corner distance.
Vs. Dhalsim
An air poke vs ground poke matchup, your objective will be make Dhalsim to throw Yoga Fire or Teleport for crouching Roundhouse punish, you have air throw advantages if he Drills of Mummy you.
Far combat options are decent, you can approach with Rolling Attack or Barcelona if Dhalsim its spamming Fire or standing Roundhouse or Strong.
Barcelona are usefuls not only for evade Fire and Flame,it will be your corner escape or also a good Teleport Punish or approach it and Throw him.
Vs. E. Honda
One of the best matches due to his short pokes and easy punish against Torpedo,but in short range can be defeated with Honda's throw mixups, A Sumo Splash can be evaded with a Slide, use a standing Fierce if he use his Hunred Slaps for trade hits.
Claw best will be jumping and mix up with Barcelona Attack or Izuna Drops, Strong or Fierce Crystal Rolling Flash isn't a good option because Honda can hit your non attack frames, use Jab one for trick him.
Vs. Guile
Crouching Roundhouse pass Sonic Boom , isn't changed much about CE, but try to Rolling Crystal Flash him after a failed Flash Kick now that you can vary your number of rolls depending on the button.
Guile's objective isn't changed a lot but you have some advantages now with RCF variations, and his Flash Kick Nerf, Barcelona Attack its a riskful one because air throw.
Vs. Ken
A fair matchup because you have good pokes, he had better Shoryuken so jumping attacks are a risk, instead use your crouching Roundhouse or Barcelona to punish his weak Hadoken or his Hurricane Kick with crouching attacks.
Use a crouching Roundhouse to start the match, Ken commonly starts with a Shoryuken, then stay more focused in zoning the rest of the round, you will not try to Barcelona until you see he is spamming Hadoken,if you are in your home escape instead of try to hit or throw him.
Vega will be reduced to poke with standing Jabs or crouching Fierce commonly, but a Rolling Attack to approach is a good tool.
Vs. M. Bison (dictator)
Poking battle,Crouching Kicks its your main weapon, try to use Barcelona Attack to escape in corner or counter Stomps with an Izuna Drop, its still an interesting matchup because now Dictador its nerfed in Specials but buffed in throw, Double Knee Press its an opportunity for an Izuna Drop.
Vs. Ryu
A matchup of air play vs balanced ground one, try to start with a slide against an Hadoken, same as Ken strategies but with better Hadoken,wall jump him,and Hurricane Kick is better than Ken but with less Dragon Punch Range.
Rolling Crystal Flash attacks variations its a good pressure after a knockdown , he can respond with a Shoryuken but its dangerous as Ken so use it.
Barcelona Attack and Izuna Drop its a risk and use it as an escape only, your jumping Roundhouse have good range against an Hadoken.
Vs. Sagat
Claw had a bit advantage against him only fo one thing: nerfed Tiger Shots startup
That means that you can be safe to punish High Tiger Shots with Crouching Fierce but beware with Tigger Uppercut,it can defeat Wall Jump and Barcelona.
Start with a Slide and if he responds with a Tiger Shot you can win easily with mixups varied in Wall Jump or Barcelona for own sake.
Vs. Vega (claw) (self)
If you are a better jumper you be the best, remember your Barcelona for surprise attack, punish your crouching Roundhouse with Throws.
Vs. Zangief
Keeping him out with standing HP, neutral jumping HP and standing MP is incredibly vital. Once he gets in or knocks you down, it's all over, since Vega has no way to deal with his tick grabs. Play as lame-keep-away as you possibly can. Zangief's jumping splash-type move can beat your max-distance s.HP anti air- if they are using this tactic, switch to nj.HP to beat him.
Slide can be useful to deal with his slow lariats, but beware the fast ones which are low invincible.
Hitboxes
Standing Normals
- Standing Jab/Short:
| Damage+vega | 4+0 |  |
 |
  |
 |

|
| Stun | 1~7 | |||||
| Stun Timer | 40 | |||||
| Chain Cancel | No | |||||
| Special Cancel | Yes | |||||
| On Hit | +5 | |||||
| Frame Count | 2 | 2 | 4 | 4 | 1 | |
| Simplified | 4 | 4 | 5 | |||
Standing Jab and Standing Short are identical in frame data and hitboxes. Reach with the vega on is no further, but hitbox extends slightly higher/lower/back past Vega's head.
- Standing Strong/Forward:
| Damage+vega | 10+2 |  |
  |

|
| Stun | 5~11 | |||
| Stun Timer | 60 | |||
| Chain Cancel | No | |||
| Special Cancel | No | |||
| On Hit | +8 | |||
| Frame Count | 5 | 4 | 7 | |
Standing Strong and Standing Forward are identical in frame data and hitboxes. without claw, this move has considerably less range than s.LP, and is in fact vulnerable at the tip.
- Standing Fierce/Roundhouse:
| Damage+vega | 14+4 |  |
  |

|
| Stun | 11~17 | |||
| Stun Timer | 80 | |||
| Chain Cancel | No | |||
| Special Cancel | No | |||
| On Hit | -2 | |||
| Frame Count | 7 | 6 | 19 | |
Standing Fierce and Standing Roundhouse are identical in frame data and hitboxes. without claw, less vulnerable to jumpins, but considerably less range.
- Crouching Jab:
| Damage+vega | 4+0 |  |
 |
 |
  |

|
| Stun | 1~7 | |||||
| Stun Timer | 40 | |||||
| Chain Cancel | No | |||||
| Special Cancel | Yes | |||||
| On Hit | +6 | |||||
| Frame Count | 1 | 1 | 2 | 4 | 4 | |
| Simplified | 4 | 4 | 4 | |||
Having vega only extends hitbox behind Vega's shoulders.
- Crouching Strong:
| Damage+vega | 10+2 |  |
  |

|
| Stun | 5~11 | |||
| Stun Timer | 60 | |||
| Chain Cancel | No | |||
| Special Cancel | No | |||
| On Hit | +8 | |||
| Frame Count | 5 | 4 | 7* | |
Considerably smaller hitbox without claw.
- Crouching Fierce:
| Damage+vega | 14+4 |  |
  |

|
| Stun | 11~17 | |||
| Stun Timer | 80 | |||
| Chain Cancel | No | |||
| Special Cancel | No | |||
| On Hit | -2 | |||
| Frame Count | 7 | 6 | 19* | |
Enormous range with vega. Over half screen.
- Crouching Short:
| Damage | 7 |  |
 |
 |
 |
 |

|
| Stun | 1~7 | ||||||
| Stun Timer | 40 | ||||||
| Chain Cancel | No | ||||||
| Special Cancel | No | ||||||
| On Hit | +5 | ||||||
| Frame Count | 2 | 1 | 1 | 1 | 4 | 5 | |
| Simplified | 5 | 4 | 5 | ||||
Crouching short hitboxes and frame data are identical with or without claw.
- Crouching Forward:
| Damage | 10 |  |
 |
 |
 |
 |

|
| Stun | 5~11 | ||||||
| Stun Timer | 60 | ||||||
| Chain Cancel | No | ||||||
| Special Cancel | No | ||||||
| On Hit | +8 | ||||||
| Frame Count | 2 | 1 | 1 | 1 | 4 | 7 | |
| Simplified | 5 | 4 | 7 | ||||
Crouching forward hitboxes and frame data are identical with or without claw.
- Crouching Roundhouse:
| Damage | 14 |  |
 |
 |
 |

|
| Stun | 5~11 | |||||
| Stun Timer | 130 | |||||
| Chain Cancel | No | |||||
| Special Cancel | No | |||||
| On Hit | KD | |||||
| On Block | -11 | |||||
| Frame Count | 3 | 2 | 2 | 21 | 14 | |
| Simplified | 7 | 21 | 14 | |||
A long slide across the ground which knocks down. Crouching roundhouse hitboxes and frame data are identical with or without claw. Amusingly, unlike all other crouching attacks, no vega is shown during the active frames of the c.RH animation even when the player still has the vega.
Aerial Moves
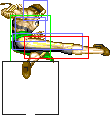
- Neutral Jumping Jab/Short:
| Damage | 8 |  |
 |
 |
 |
 |

|
| Stun | 1~7 | ||||||
| Stun Timer | ? | ||||||
| Special Cancel | No | ||||||
| Frame Count | 1 | 1 | 20 | 2 | 2 | ∞ | |
| Simplified | 2 | 20 | ∞ | ||||
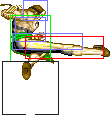
- Neutral Jumping Strong/Forward:
| Damage | 12 |  |
 |
 |
 |
 |

|
| Stun | 5~11 | ||||||
| Stun Timer | ? | ||||||
| Special Cancel | No | ||||||
| Frame Count | 1 | 1 | 10 | 2 | 2 | ∞ | |
| Simplified | 2 | 10 | ∞ | ||||
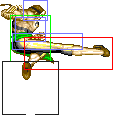
- Neutral Jumping Fierce/Roundhouse:
| Damage | 16 |  |
 |
 |
 |
 |

|
| Stun | 11~17 | ||||||
| Stun Timer | ? | ||||||
| Special Cancel | No | ||||||
| Frame Count | 2 | 2 | 5 | 2 | 2 | ∞ | |
| Simplified | 4 | 5 | ∞ | ||||
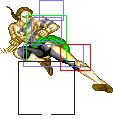
- Diagonal Jumping Jab/Short:
| Damage | 7 |  |
 |
 |
 |
 |

|
| Stun | 1~7 | ||||||
| Stun Timer | ? | ||||||
| Special Cancel | No | ||||||
| Frame Count | 1 | 1 | 20 | 2 | 2 | ∞ | |
| Simplified | 2 | 20 | ∞ | ||||
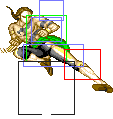
- Diagonal Jumping Strong/Forward:
| Damage | 10 |  |
 |
 |
 |
 |

|
| Stun | 5~11 | ||||||
| Stun Timer | ? | ||||||
| Special Cancel | No | ||||||
| Frame Count | 1 | 2 | 10 | 2 | 2 | ∞ | |
| Simplified | 3 | 10 | ∞ | ||||
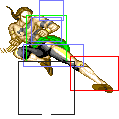
- Diagonal Jumping Fierce/Roundhouse:
| Damage | 14 |  |
 |
 |
 |
 |

|
| Stun | 11~17 | ||||||
| Stun Timer | ? | ||||||
| Special Cancel | No | ||||||
| Frame Count | 2 | 2 | 5 | 2 | 2 | ∞ | |
| Simplified | 4 | 5 | ∞ | ||||
Unique Moves
- Wall Jump: Jump towards wall, then press away from wall

| |
| Frame Count | 6 |
Throws
Vega can throw with Strong and Fierce, and has an Airthrow with Strong or Fierce.
- Rainbow Suplex: (←/→ + Strong/Fierce)
| Damage | 28 | 
| |
| Stun | 7~13 | ||
| Stun Timer | 99 | ||
| Range (from axis) | 48 | ||
| Range advantage | 19 | ||
Both punch throws are the same.
- Stardust Drop (a.k.a. air throw): (←/→ + Strong/Fierce) while airbourne
| Damage | 28 | 
| |
| Stun | 7~13 | ||
| Stun Timer | 100 | ||
| Range (from axis) | 58 | ||
| Range advantage | 29 | ||
Both punch throws are the same.
Special Moves
- Rolling Crystal Flash: (Charge ←, →, P)
Startup:
 |

| |
| Frame Count | 5 | 5 |
| Simplified | 10 | |
Active part 1:
- Jab Version: This does not occur.
- Strong Version: This happens only once.
- Fierce Version: This happens 2 times.
| Damage (Jab) | - |  |
 |
 |
 |

|
| Damage (Strong) | 4,4 | |||||
| Damage (Fierce) | 4,4,4,4 | |||||
| Stun | 0~6,0~6 | |||||
| Stun Timer | 30,30 | |||||
| - | - | |||||
| Frame Count | 4 | 3 | 3 | 1 | 2 | |
| Simplified | 4 | 6 | 1 | 2 | ||
Active part 2:
| Damage (Jab)+claw | 4,4 |  |
 |
 |
 |
 |

|
| Damage (Strong)+claw | 4,4 | ||||||
| Damage (Fierce)+claw | 4,4 | ||||||
| Stun | 0~6,0~6 | ||||||
| Stun Timer | 30,30 | ||||||
| Frame Count | 4 | 3 | 3 | 3 | 2 | 2 | |
| Simplified | 4 | 6 | 3 | 4 | |||
| Damage (Jab)+claw | 16+10 |  
|
| Damage (Strong)+claw | 16+10 | |
| Damage (Fierce)+claw | 18+10 | |
| Stun | 13~19 | |
| Stun Timer | 130 | |
| Frame Advantage | +9 | |
| Frame Count | 8 | |
Recovery:
 |

| ||
| Frame Count | 4 | 1 | |
| Simplified | 5 | ||
A point blank fierce roll is usually blockable after the second hit. Depending on positioning, the second hit of both active part 1 and 2 are capable of hitting low (i.e. Fierce RCF contains 3 possible low hits). However, after hitting low in this fashion, the opponent being in hitstun long enough for the rest of the roll to connect is even more position dependent.
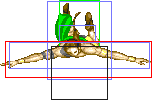
- Flying Barcelona Attack: (Charge ↓, ↑, K), P for vega attack, or any direction + P for Izuna drop
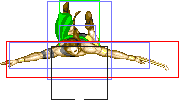
- Claw attack (vs ground):
| Damage (Short)+claw | 16+6 |  |
|
| Damage (Fwd)+claw | 18+6 | ||
| Damage (RH)+claw | 20+6 | ||
| Stun | 13~19 | ||
| Stun Timer | 120 | ||
| Frame Adv | -12 | ||
| Frame Count | 3 | 10 | |
- Claw attack (air-to-air):
As above, except
| Stun | 11~17 |
| Stun Timer | 80 |
| Frame Adv | KD |
- Izuna drop:
| Damage | 28 | 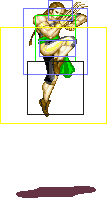
|
| Stun | 7~13 | |
| Stun Timer | 99 | |
| Frame Count | 2 | |
Recovery:
 |
 |
 |
 |

| |
| Frame Count | 1 | 2 | 2 | 9 | 2 |
| Simplified | 17 | ||||
Vega jumps to the wall, clings briefly as in his walljump, then jumps towards the opponent. After touching the wall, Vega's arc is controllable with ← and →.
For the Claw attack, the initial kick button pressed (NOT the punch button) determines the damage dealt. Hitting a grounded opponent near the head with the Claw attack leaves you at considerable disadvantage, less so when hitting deeper (best case is -1f). Hitting an airbourne opponent with the Claw attack results in a knockdown.
The Izuna drop leaves plenty of time to set up a safe jump or meaty attack.
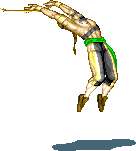
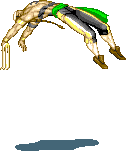
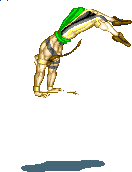
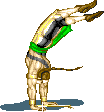
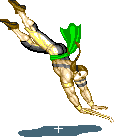
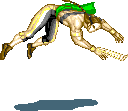
- Backslash (a.k.a backflip): (Jab + Strong + Fierce)
Invincible:
 |
 |
 |
 |
 |
 |
| |
| Frame Count | 1 | 7 | 8 | 19 | 3 | 8 | 8 |
| Simplified | 54 | ||||||
Recovery:

| |
| Frame Count | 9 |
Vega's sole move with invincibility. Unfortunately it's slow enough that most opponents can simply chase Vega down and punish the considerable recovery, or at the very least keep the pressure on. Generally an unfavourable option.
Misc Animations
| Walk back | Neutral | Walk Fwd | Crouch |
 |
 |
 |

|
- Standing reel:
 |
 |

|
- Standing gut reel:
 |
 |
 |

|
- Crouching reel:
 |

|
- Dizzy:
 |
 |

|
- Knockdown bouncing pushbox:
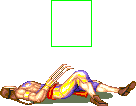
| |
| Frame Count | 9 |
For some reason, Vega has a series of knockdown frames with an elevated pushbox. This allows his opponent (character dependent?) to walk "through" a knocked down Vega, which can be very annoying
Miscellaneous
Technical info about Claw's claw
