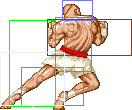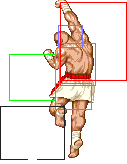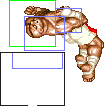

Sagat
Sagat was kicking Ryu's ass in Street Fighter 1 until he knocked Ryu down and attempted a meaty taunt, whereupon Ryu reversal Dragon Punched him a huge gash in his chest. Adon laughed at him so mercilessly that Sagat had to join a gang to feel the unity of a group once again. Shadaloo's ideals don't interest him, but it provides the vehicle he needs to gain a rematch against Ryu, and to get his revenge.
He lost his eye in a minor scuffle with Dan Hibiki's dad's nose.
In a nutshell
Sagat has a very strong projectile game, with very fast Tiger Shots which can be fired ![]() or low. This, along with a decent uppercut and very useful Tiger Knee allow him to pretty much cover all the bases for a strong character in Hyper Fighting. His limbs tend to be pretty punishable though.
or low. This, along with a decent uppercut and very useful Tiger Knee allow him to pretty much cover all the bases for a strong character in Hyper Fighting. His limbs tend to be pretty punishable though.
Character Specific Information
Color Options
| Default | Start |
 |

|
Moves List
All frame data taken from T.Akiba's data. Will independently verify soon.
Normal Moves
- Standing Normal Moves (st.)
- Crouching Normal Moves (cr.)
- Jumping Normal Moves (nj.)
- Diagonal Jumping Normal Moves (j.)
Unique Moves
Throws
Special Moves
The Basics
A lot of Sagat's basic game revolves around his tiger shot projectiles. He has control over very fast, very slow, and high or low projectiles, which is incredibly useful in limiting the opponent's options. Become as familiar as possible with them.
If the opponent can't neutralise the tiger shots, they will often resort to jumping in, in which case hit them out of the air!
Anti-airs:
- Tiger Uppercut - will often trade unless done deep/late, to make use of the invincibility frames.
- Standing HK - Works well if jump is predicted early enough
- Standing HP - for jump-ins from far away.
- Tiger Knee - will often do massive damage, but the jumps it works against is limited (very character/positioning dependent).
Pros
- Good Projectile mindgames
- Long normals
Cons
- Tiger Shot recovery nerfed
- Some new specials are new counter for projectiles
Advanced Strategy
Tiger uppercut's full effectiveness as an anti-air can only be gained if you are a master of 'crouching uppercuts'. If you can uppercut from a crouching position without your character standing up, you can avoid many jumping attacks, and also use the early invincibility frames of the tiger uppercut to cleanly beat the jump-in. If you can't reliably perform the motion fast enough from crouching, a bootleg version is to whiff a cr.LK and buffer the DP motion in during that.
In Hyper Fighting, Sagat's tiger knee is capable of passing over most projectiles (notably not Sagat's high tiger shot). When timed and positioned correctly, this puts Sagat right in the opponent's face, with a fairly intimidating mixup of 'throw or tiger uppercut'. If used incorrectly, Sagat can be punished, however. Definitely a good trick to have in the bag though.
Combos
- j.HK, cr.LK xx HP Tiger Uppercut
- j.HK, cr.LK xx Tiger Knee
- cr.MP, cr.LK xx Low Tiger Shot
Match-ups
Vs. Balrog (boxer)
Boxer can turn-around punch through your fireballs, so be aware of your (and his!) ranges.
Vs. Blanka
Be careful with anti-airs, Blanka's j.HK is capable of beating Tiger Uppercut clean.
Also don't spam Low Tiger Shot due to the advantage of Vertical Rolling downward motion cross ups, try to spam High Tiger Shot and Tiger Knee instead.
Vs. Chun-Li
One of the best matchups for him,he can jump Kikoken easily and poke her with medium attacks and Tiger Uppercut,but Chun's poke attacks are faster than him.
Sagat's gameplan will be Tiger Shot spamming and keep at midscreen, if she used Spinning Bird Kick that will be the best moment to Tiger Knee or Uppercut her, if she escapes with a Air Spinning Bird Kick, throw a Tiger to catch her at far distance or Uppercut her.
Vs. Dhalsim
Dhalsim can punish high tiger shots with crouching limbs, and mummy drill over low tiger shots, making a zoning game difficult for Sagat.
Vs. E. Honda
One of the few bad Sagat matchups,because E.Honda is usually at an incredible disadvantage against projectile users such as Sagat,but however in this case his Headbutt can travel over low tiger shots and Sumo Splash can approach and punish you. High tiger shots will hit it though. Regardless, pepper him with tiger shots and anti-air when he tries to jump in.
Sagat objective its about more Uppercut,less Shots.
Vs. Guile
Its one of the most current matchups not only in CE, in SF in general, Sagat had a few advantages due to the special arsenals, but now that their Tiger Shots are nerfed in recovery as Guile's Sonic Booms its a bit equally.
Your Tiger Shots must be used in long range,also watch out with his now hit twice Roundhouse Flash Kick,you need to poke him and punish a missed one, fortunately he is a bit nerfed in Sonic Boom frame recovery.
Sagat will play to keep the medium distance in Guile, also it depends if is an offensive sweep and jumping one or a turtling, if is the last one you can short some distance, if he changes the plan Uppercut him for a coin flip trade hit.
In a few words,still a projectile mind game match up. .
Vs. Ken
Roughly even matchup. Ken's dragon punch has more invincibility than Tiger Uppercut, so Sagat will always lose dueling uppercuts. In general, Ken's probably trying to get in and land his 'touch of death' combo, so you want to maintain distance and zone with fireballs, while using anti airs like early standing HK to keep him at bay. Anything to avoid him getting a deep jump-in!
Vs. M. Bison (dictator)
Thanks for the M.Bison nerfs Sagat still had advantages, first you can punish a Stomp with a Tiger Uppercut or then Low Tiger Shot him, Tiger Knee its a good approach tool, try to defeat Psycho Crusher with an uppercut and then back corner him
Vs. Ryu
As with Ken, Ryu's dragon punch will beat Tiger Uppercut every time. Ryu's hurricane kick has invincibility at the start and end, and also knocks down. It's a powerful move you will need to learn how to deal with.
From Crayfish: At mid range fireball game against Ryu, don't forget Sagat's standing HP. Its possible to snuff/trade with more damage against Ryu's fireball, from safely outside his sweep range. If he hurricane kicks, you will trade for surprisingly even damage and both get knocked down, only a perfect SRK counters. Once you land this a couple of times, it can make Ryu hesitate and gives you the opportunity to take the initiative in the FB game...
From coldsnap: You can tiger uppercut from crouch underneath a hurricane kick. Problem is that it will often trade unpredictably.
However, you can hit cleanly with s.HK when the hurricane goes past. s.HP works as well, but the timing is strict. Haven't tested tiger knee because I usually just use s.HK.
Vs. Sagat (self)
Tiger,Tiger,Tiger!
Vs. Vega (claw)
Barcelona Attack can be punished with Tiger Uppercut, there is not much change outside of the first CE American revision to Japanese punch strenght Rolling Attack variations from 1 to Jab to 3 for Fierce,anyway you can hit or miss with Tiger Uppercut for it, try to start with Tiger Knee or Tiger Uppercut and use it in close combat for trade hits or counter his Jabs, mid screen its the best zone for him.
Beign a spammer of Tiger Shots will be your own enemy, but a High One randomly can be a good zoning one because Claw its more focused in jumping attacks
Vs. Zangief
Mixing up your high/low tiger shots is extremely valuable for dealing with Zangief's lariats, which are his usual method of avoiding fireballs. He is then pretty much stuck with jumping, answer with anti-airs such as an early s.HK.
Hitboxes
Standing Normals
- Standing Jab:
| Damage | 6 | 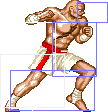 |
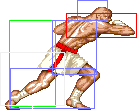 |

|
| Stun | 1~7 | |||
| Stun Timer | 40 | |||
| Chain Cancel | No | |||
| Special Cancel | Yes | |||
| Frame Advantage | +7 | |||
| Frame Count | 4 | 4 | 4 | |
- Standing Strong:
| Damage | 10 |  |
 |
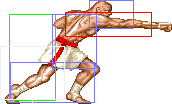 |
 |

|
| Stun | 5~11 | |||||
| Stun Timer | 60 | |||||
| Chain Cancel | No | |||||
| Special Cancel | No | |||||
| Frame Advantage | +8 | |||||
| Frame Count | 3 | 2 | 4 | 4 | 2 | |
| Simplified | 5 | 4 | 6 | |||
- Standing Fierce:
| Damage | 22 |  |
 |
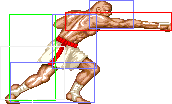 |
 |

|
| Stun | 11~17 | |||||
| Stun Timer | 80 | |||||
| Chain Cancel | No | |||||
| Special Cancel | No | |||||
| Frame Advantage | +7 | |||||
| Frame Count | 4 | 3 | 6 | 10 | 12 | |
| Simplified | 7 | 6 | 22 | |||
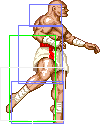
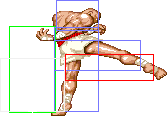
- Standing Short:
| Damage | 8 | 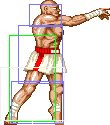 |
 |
 |
 |
 |
 |

|
| Stun | 1~7 | |||||||
| Stun Timer | 40 | |||||||
| Chain Cancel | No | |||||||
| Special Cancel | Yes (1st hit) | |||||||
| Frame Advantage | +5 | |||||||
| Frame Count | 2 | 2 | 2 | 2 | 2 | 2 | 3 | |
| Simplified | 4 | 4 | 7 | |||||
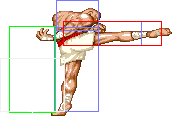
- Standing Forward:
| Damage | 10 |  |
 |
 |
 |
 |
 |

|
| Stun | 5~11 | |||||||
| Stun Timer | 60 | |||||||
| Chain Cancel | No | |||||||
| Special Cancel | No | |||||||
| Frame Advantage | +8 | |||||||
| Frame Count | 3 | 2 | 2 | 2 | 2 | 3 | 5 | |
| Simplified | 5 | 4 | 10 | |||||
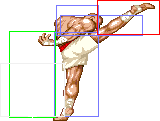
- Standing Roundhouse:
| Damage | 18 |  |
 |
 |
 |
 |
 |

|
| Stun | 11~17 | |||||||
| Stun Timer | 80 | |||||||
| Chain Cancel | No | |||||||
| Special Cancel | No | |||||||
| Frame Advantage | -3 | |||||||
| Frame Count | 4 | 3 | 3 | 3 | 5 | 6 | 10 | |
| Simplified | 7 | 6 | 21 | |||||
Crouching Normals
- Crouching Jab:
| Damage | 8 |  |
 |

|
| Stun | 1~7 | |||
| Stun Timer | 40 | |||
| Chain Cancel | No | |||
| Special Cancel | Yes | |||
| Frame Advantage | +6 | |||
| Frame Count | 4 | 4 | 4 | |
- Crouching Strong:
| Damage | 16 |  |
 |

|
| Stun | 5~11 | |||
| Stun Timer | 60 | |||
| Chain Cancel | No | |||
| Special Cancel | No | |||
| Frame Advantage | +9 | |||
| Frame Count | 1+5 | 4 | 6 | |
- Crouching Fierce:
| Damage | 22 |  |
 |

|
| Stun | 11~17 | |||
| Stun Timer | 80 | |||
| Chain Cancel | No | |||
| Special Cancel | No | |||
| Frame Advantage | -3 | |||
| Frame Count | 1+7 | 6 | 20 | |
- Crouching Short:
| Damage | 8 |  |
 |
 |
 |

|
| Stun | 1~7 | |||||
| Stun Timer | 40 | |||||
| Chain Cancel | No | |||||
| Special Cancel | Yes | |||||
| Frame Advantage | +6 | |||||
| Frame Count | 2 | 2 | 4 | 2 | 3 | |
| Simplified | 1+4 | 4 | 5 | |||
- Crouching Forward:
| Damage | 16 |  |
 |
 |
 |

|
| Stun | 5~11 | |||||
| Stun Timer | 60 | |||||
| Chain Cancel | No | |||||
| Special Cancel | No | |||||
| Frame Advantage | +10 | |||||
| Frame Count | 2 | 2 | 4 | 3 | 4 | |
| Simplified | 1+4 | 4 | 7 | |||
- Crouching Roundhouse:
| Damage | 22 |  |
 |
 |
 |

|
| Stun | 11~17 | |||||
| Stun Timer | 80 | |||||
| Chain Cancel | No | |||||
| Special Cancel | No | |||||
| Frame Advantage | KD/-11 | |||||
| Frame Count | 4 | 2 | 6 | 8 | 9 | |
| Simplified | 1+6 | 6 | 17 | |||
Aerial Normals
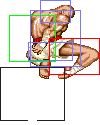
- Neutral Jumping Jab/Short:
| Damage | 10 |  |
|
| Stun | 1~7 | ||
| Stun Timer | 40 | ||
| Frame Count | 2 | ∞ | |
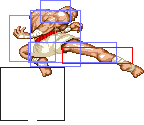
- Neutral Jumping Strong/Forward:
| Damage | 16 |  |
 |
 |
 |

| ||
| Stun | 5~11 | |||||||
| Stun Timer | 50 | |||||||
| Frame Count | 1 | 2 | 20 | 3 | ∞ | |||
| Simplified | 3 | 20 | ∞ | |||||
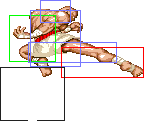
- Neutral Jumping Fierce/Roundhouse:
| Damage | 22 |  |
 |
 |
 |

|
| Stun | 11~17 | |||||
| Stun Timer | 60 | |||||
| Frame Count | 2 | 3 | 8 | 5 | ∞ | |
| Simplified | 5 | 8 | ∞ | |||
- Diagonal Jumping Jab/Short:
| Damage | 8 |  |

|
| Stun | 1~7 | ||
| Stun Timer | 40 | ||
| Frame Count | 2 | ∞ | |
- Diagonal Jumping Strong/Forward:
| Damage | 16 |  |
 |
 |
 |

| ||
| Stun | 5~11 | |||||||
| Stun Timer | 50 | |||||||
| Frame Count | 1 | 2 | 20 | 3 | ∞ | |||
| Simplified | 3 | 20 | ∞ | |||||
- Diagonal Jumping Fierce/Roundhouse:
| Damage | 22 |  |
 |
 |
 |

|
| Stun | 11~17 | |||||
| Stun Timer | 60 | |||||
| Frame Count | 2 | 3 | 8 | 5 | ∞ | |
| Simplified | 5 | 8 | ∞ | |||
Throws
- Tiger Carry (←/→ + MP/HP)
| Damage | 32 | 
| |
| Duration | 130 | ||
| Stun | 7~13 | ||
| Stun Timer | 100 | ||
| Range (from axis) | 48 | ||
| Range advantage | 16 | ||
Special Moves
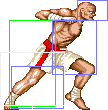
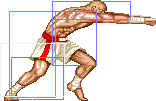
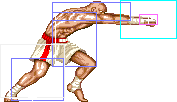
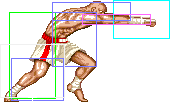
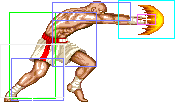
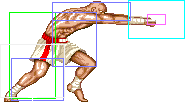
- High Tiger Shot: ↓↘→ + Punch
Startup:
 |
 |
| |
| Frame Count | 6 | 3 | 1 |
| Simplified | 1+10 | ||
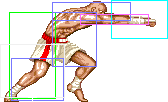
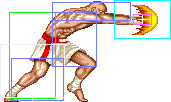
LP version:
| Damage | 12 | 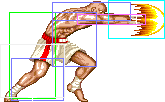 |
 |
 |
|
| Stun | 13~19 | ||||
| Stun Timer | 120 | ||||
| Frame Advantage | - | ||||
| Frame Count | 1 | 1 | 2 | 1 | |
| Simplified | 37 | ||||
MP version:
| Damage | 14 |  |
 |
 |
|
| Stun | 13~19 | ||||
| Stun Timer | 120 | ||||
| Frame Advantage | - | ||||
| Frame Count | 1 | 1 | 2 | 1 | |
| Simplified | 37 | ||||
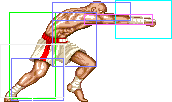
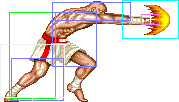
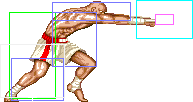
HP version:
| Damage | 16 |  |
 |
 |
|
| Stun | 13~19 | ||||
| Stun Timer | 120 | ||||
| Frame Advantage | - | ||||
| Frame Count | 1 | 1 | 2 | 1 | |
| Simplified | 37 | ||||
Main special for Sagat's gameplan, its nerfed in recovery with Champion Editiot but try to use it against aereal opponents or tall characters.
- Low Tiger Shot: ↓↘→ + Kick
Start up:
 |
 |

| |
| Frame Count | 6 | 3 | 1 |
| Simplified | 1+10 | ||
LK version:
| Damage | 12 |  |
 |
 |

|
| Stun | 13~19 | ||||
| Stun Timer | 120 | ||||
| Frame Advantage | - | ||||
| Frame Count | 1 | 1 | 2 | 1 | |
| Simplified | 42 | ||||
MK version:
| Damage | 14 |  |
 |
 |

|
| Stun | 13~19 | ||||
| Stun Timer | 120 | ||||
| Frame Advantage | - | ||||
| Frame Count | 1 | 1 | 2 | 1 | |
| Simplified | 42 | ||||
HK version:
| Damage | 16 |  |
 |
 |

|
| Stun | 13~19 | ||||
| Stun Timer | 120 | ||||
| Frame Advantage | - | ||||
| Frame Count | 1 | 1 | 2 | 1 | |
| Simplified | 42 | ||||
Small character like E.Honda or Blanka can whiff High with a crouch, try to mix Low Short and High Fierce or Low Roundhouse and High Jab ones.
- Tiger Uppercut: →↓↘ + Punch
General:
Has a chance of being unblockable if performed as a reversal (on wakeup or coming out of block/hitstun). This bug is unique to CPS1 CE & HF Sagat and can be replicated by their Hyper Street Fighter II variants.
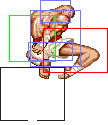
- Tiger Knee: ↓↘→↗ + Kick
Startup & Active
| Damage | 22/24/26 |  |
 |
 |
 |
 |
 |
 |
 |
 |

|
| Stun | 13~19 | ||||||||||
| Stun Timer | 120 | ||||||||||
| Frame Advantage | +3/+3/-4 | ||||||||||
| Short | 1 | 1 | 1 | 1 | 1 | 5 | 6 | 6 | 1 | 8 | |
| Foward | 1 | 1 | 1 | 1 | 1 | 6 | 6 | 6 | 2 | 8 | |
| Roundhouse | 1 | 1 | 1 | 1 | 1 | 7 | 6 | 6 | 3 | 8 | |
Don't change much with Champion Edition,but still useful against close standing opponents
Misc Animations
| Walk back/Fwd | Neutral | Crouch |
 |
 |

|
- Standing reel:
 |
 |

|
- Crouching reel:

|
- Dizzy:
 |

|


