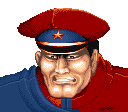

M.Bison
A megalomaniacal dictator whose least memorable day is Tuesday.
Leader of crime syndicate Shadaloo, M.Bison wields the evil energy "Psycho Power" against any that oppose him. He is the final boss of SF2:HF.
In a nutshell
The most nerfed character from CE to HF and now the bottom tier in the game, he loss the cheap block damage with the Psycho Crusher, but now in HF he can combo his stomp follow up with Crouching Roundhouse, and Psycho Crusher crossups and Double Knee Press can be useful for Throw Mixups instead of the Corner Trap Block of Champion Edition,poking and turtling is your base game
Character Specific Information
Color Options
| Default | Start |
 |

|
Moves List
Normal Moves
- Standing Normal Moves (st.)
- Crouching Normal Moves (cr.)
- Jumping Normal Moves (nj.)
- Diagonal Jumping Normal Moves (j.)
Throws
Special Moves
The Basics
Use Standing Kicks and the standing Fierce to poke and turtle,Psycho Crusher must be used for pressure to throw traps but use the Headstomp wisely agaisnt projectile characters.
Pros
- Good Throw Damage
- Great Pokes and Headstomp easy link
Cons
- Nerfed Psycho Crusher and Scissors Kicks
- Lack of Anti Air Tools
Combos
-cr./st.LP , Psycho Crusher
-Skull Diver,cr.HK
-(cross up j.HK),cr.LP,s.LP,DKP (Scissor Kicks)
Advanced Strategy
First of all, you lost your link crouching Strong after Double Knee Press, instead, your Psycho Crusher its now a safe throw range special.
Dictador's Meta Game its now reduced to a Hit and Run, but one of your main buff its the Throw that had a better range and damage than CE, if you want to see your objective in the game try to start with a crouching Roundhouse or a Head Stomp for projectile characters.
Poke,charge,jump, special , repeat...even you're not the top tier anymore but the best black horse in the game.
Anti Air:
Crouching Fierce - a bit buffed hitbox from Champion Edition
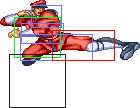
Neutral Jumping Short - only option against jumping specials
Match-ups
Vs. Balrog (boxer)
Balrog fears M.Bison's Psycho Crusher, but only if you use it from about half a screen away, and only as long as you have a lot of room after making contact to land afterwards. On the other hand, M.Bison fears Balrog's normals and his headbutt. To win in this fight. Bison needs to stay the hell away from 'Rog and keep moving.
The goal for this fight is simple. M.Bison needs to be at least half a screen away from Balrog and charged at all times. M.Bison can hit Balrog's rushing attacks with s.HK (standing Hard Kick/Roundhouse), but to do consistently is impossible unless you're the CPU, so I wouldn't even try. The reverse isn't quite as difficult, unfortunately: Balrog can reaction c.HK (crouching Hard Kick/Roundhouse)) you out of both your Psycho Crusher and your Double Knee Press from up close, and he can use s.HP (standing Hard Punch/Fierce) from far. So you need to be at least beyond his s.HP range before you even think about flying into him.
Once you're in the right range, you have to know what to fly at him with. If you're not in the middle of the playing field or close to your corner, you can try a Light Punch/Medium Punch Psycho Crusher or a Light Kick/Medium Kick Double Knee Press for pressure/block damage if he's not moving forward. The Light Punch Psycho Crusher should be safe. The Medium Punch Psycho Crusher isn't safe, but it sets up a guessing game that could lead you to a throw. If he blocks the Double Knee Press, you can try a blocked string like crouching Medium Kick, standing Medium Kick, and then perform another Double Knee Press. He can crouching Hard Punch you out of this, but it's tough to do. Don't stay there too long, though, since he is in a much better position of close than you.
If you're near your corner, and Balrog is advancing upon you, use a Hard Punch Psycho Crusher. Balrog will either block it or get hit. He can jump over it, but Balrog's low slow jump makes it difficult to do consistently. Once you fly to the other side and land, re-establish your optimum range and repeat. Scrubby as it sounds, you can get by by repeatedly Psycho Crushing back and forth across the playing field, as long as you do it only when near to your corner, and only as long as Balrog is within half a screen of you (or if he foolishly decides to use one of his charging attacks on you from far away - your Psycho Crusher will go through them all for free).
Vs. Blanka
Your strategy against Blanka is very much similar as the your strategy against Balrog, but Blanka is much more dangerous: He has a higher jump, very good high priority normals, has a much longer throw range, and an extremely dangerous Vertical Ball that can lock you down in the corner if you're not careful.
The main premise is the same: Stay about half a screen away and be charged at all times. Only use Psycho Crusher's against Blanka, never Double Knee Presses, because when Blanka ducks, he's so low to the ground that the first hit of the Double Knee Press will whiff, causing the move to recover funny (you end up landing closer to the opponent) and make you even more vulnerable to counterattack. Once Blanka is about half a screen away, and you're winthin half a screen of your own corner, use a Hard Punch Psych Crusher. He'll either block it (most likely) for 3 or 4 hits or get hit.
However, Blanka's sprite is curiously wide, such that sometimes he gets hit by the 4th hit even if he blocked the first 3! Also, depending on your timing, it's possible to make Blanka get hit as he's getting up from a knock down by M.Bison's legs during the latter's Hard Punch Psycho Crusher, knocking him down again. You can actually repeat this several times in a row if your timing is right. You can do this against other characters as well, but it happens most easily against Blanka.
Blanka can hit you out of your Psycho Crusher with his standing light attacks, but in my experience, only the CPU can do it consistently.
If Blanka ever does his Horizontal Ball on you and you block it, you can Hard Punch Psycho Crusher him for free. Thus, you will seldom see a Horizontal Ball in this fight.
Your Psycho Crusher can go through his Thundershock, but only if done from at least a few steps away. Your crouching Hard Kick (the slide) will also hit it, but only if done from far away.
Blanka's jumping attacks are extremely dangerous, especially his jumping Medium Kick and his jumping Hard Kick, both of which will take you out of all your special moves and jumping attacks with ease. Don't get into an air war with Blanka, you will lose. Try to avoid being in range of his jumping attacks. If you're in the corner and he's jumping at you repeatedly, try an early jump back Light Punch to get him off you, and then Psyco Crusher when you land to get away.
If you're knocked down in the corner and Blanka is right on top of you, you're in trouble. Among other things, Blanka then has free reign to do Vertical Ball over and over again over your head, and it's hard to get out. The only two ways to get out I know of are: 1) A well timed Hard Punch Psycho Crusher at the last possible moment to hit him on the way down, and using his crouching Hard Kick (the slide) to avoid it entirely. I'm not even sure about the former, though the latter works. It doesn't put you in any advantageous position, but at least it gets you out of the trap.
This is, of course, assuming Blanka doesn't simply jump kick you and then bite you repeatedly when he lands. M.BIson dies to all sorts of stupid stuff when he's trapped in the corner.
Vs. Chun-Li
Chun-li is not a great character in HF, but she's a lot better than M.Bison, and has a number of tools that can make his life hell. Her first main tool is jumping Medium Kick. This attack will beat pretty much all of Bison's jumping attacks and all his special attacks. The second is her Lightning Leg, which is an impenetrable wall from up close. Since Bison has no instantaneous high priority anti-air, Chun-li has fairly free reign to jump at Bison all day with Medium Kick, land and do Lighting Leg for free chip damage at worst, or score free hits (since up close anything Bison tries to stick out will get hit) and a possible knock down. Chun-li also has the option, once she knocks Bison down, to run up and do her flipping neck breaker (close F + Hard Kick) over and over, and it's difficult for Bison to hit her. Chun-li's head stomp (D + Medium Kick) is also really annoying for Bison to deal with, and it also hits him out of his Psycho Crusher almost for free.
Chun-li's Kikkoken projectile is a minor annoyance, at best. But combined with her other tools, it can make beating her very annoying. Her Spinning Bird Kick is only somewhat annoying if she uses it after a head stomp and you're not charged to run her ass down, but it's pretty useless otherwise in this match.
The main way to beat Chun-li is to control the match, and never let her take initiative. If she throws a Kikkoken from roughly two-thirds to three-fourths of the screen away and you're not charged, jump at her with Hard Kick. You likely nail her, but if not, don't worry. Otherwise Head Press her. If she's in the corner, fly away to safety. If she's at least a few steps away from the corner, steer behind her and use the Somersault Skull Diver. Do it early if she tries to jump after you. If you time it right, she'll never punish your Skull Diver attempts.
If she jumps towards you from three-fourths of the screen away with Medium Kick, you can try and trade with a jump up Hard Kick if you're desperate, but you best bet might be to just block. Block the follow up Lightning Leg too. If she has Lightning Leg still running in front of you after you get pushed out of range, you might have to jump away, because you might still be too close to hit her, and while the move is active you won't be able to walk backwards.
If she jumps from closer from three-fourths of the screen and your charged, you can try and Psycho Crusher underneath her so that Bison's legs hit her from behind, though it can be tough since her jumping Medium Kick can hit from behind as well. It's unreliable, but it may be your best bet if you're too far to try and walk underneath her and throw her.
If she ever uses a Spinning Bird Kick, smile and say thank you, then smack her ass with crouching Hard Punch. It's one of the few things Bison can counter on Chun-li for free.
Knocked down in the corner? You're going to need patience to get out. This is the best time for her to do repeat flipping neck breakers on you, but if her timing is off, you can jump back with Light Punch to hit her, then Psycho Crusher when you land to get out of the corner. She can do jumping Medium Kick -> Lighting Leg for free against you, which you're just going to have to take like a man and block. After she gets pushed away, that is the key point: She has the option to jump again, stand and throw Kikkokens, or walk up and pressure. You have a different answer depending on what she does, and you have only a short window to choose, which is why you don't want to be in this position. If she jumps again, you can try and Psycho Crusher out. This is also good if she tries to Lightning Leg in your face, but is far enough away that your Psycho Crusher can hit her. It's risky though, since if your spacing is off, you'll get knocked back down again. If she throws Kikkokens, use a Hard Punch Psycho Crusher to trade. You'll both get knocked down, but she'll take a lot more damage and you'll get a bit of breathing room. If she hesitates before throwing a Kikkoken, walk up and book kick her to get her off your back. If she walks up, try to sneak in either a Light Kick while holding back or a crouching Medium Kick, then Psycho Crusher out. Regardless, she has the advantage here, and it'll take a while to get out, assuming she doesn't kill you first.
If you can get you Double Knee Press pressure going, that would be a great help. Keeping her on the ground in the middle of the stage while you're charged and fairly close is your best way to inflict damage. Her Kikkoken and Lightning Leg are slow to start up, and she has no good reversal (see above about Spinning Bird Kick), so Scissor Kick away. She can be dangerous in close with her standing Medium Punch, crouching Medium Kick, and crouching Hard Kick. Her crouching Hard Kick (sweep) is deceptive, since it looks like it hits mid, but it doesn't, so be careful. Use Double Knee Press pressure, mix in some occasional Head Presses followed by Skull Divers that go behind her. Try to keep her in the middle of the stage if you can and knocking her down - putting her in the corner does little for you, since it takes away one of your primary weapons in this fight (go behind Somersault Skull Divers). Never try to met her in the air, and don't let her throw Kikkokens without some sort of answer, otherwise she'll establish position and it could take 40 seconds to get it back, in which time you could lose a ton of life.
Vs. Dhalsim
Its still a fair match but there is some differences. you must wait if he Teleports for a cross up Psycho Crusher or Scicross Kick,also use Headstomp against Fire and Flame and its effective against his main pokes
Try to start with standing Kicks or a Slide to see which kind of Dhalsim player you will fight, if he responds with Fire and Flames play Stomp Kick mixups.
Vs. E. Honda
A hard match against you, you must poke wisely and use your Psycho Crusher to corner him and throw him and your crouching Roundhouse its a useful tool against his wake up.
Try to start with a Headstomp or crouching Roundhouse and then wait if he use a Sumo Splash to approach to you or counter you(use crouch Roundhouse to evade it), if you are in midscreen, try to spam standing Jabs and Shorts if he is near to you and then Psycho Crusher in midscreen or Double Knee Press in corner to throw him after a blocked one.
You have better air game than him so try to attack with jumping Roundhouse if Honda try to Headbutt you, a Headstomp can be a useful reversal after a knockdown.
Vs. Guile
Now he is a bit superior to you,anyway you can still use your Stomp against his Sonic Booms and also punish his Sommersault Kick with Psycho Crusher in midscreen, try to start the match with a Headstomp if you think its a Sonic Boom or crouching Roundhouse against a starting Sommersault Kick.
You don't have corner trap anymore but you have a better throw now as a Sommersault Kick punish if you are cornered.
Vs. Ken
God. This is a winnable fight for M.Bison, but it'll take a tremendous amount of practice, patience, and good old fashioned skill to win. Ken is a MUCH better character than M.Bison, and one mistake equals death, but BIson can hold his own against Ken.
The start of the round is crucial. Bison wants to establish his optimal range while charged as soon as possible, that range being just beyond the range of Ken's crouching Hard Kick (sweep), and the start of the round is one of the few times Bison gets an opporunity to do so without having to worry about a lot of things. -Ideally-, what you want to do at the start of the round is make contact with Ken with a medium Double Knee Press. You want to follow this up with a crouching Medium Kick, something else, then another medium Double Knee Press, and repeat. That is, you want to start up your standard Double Knee Press pressure and keep it up as long as possible.
There are numerous points to watch out for. First is the very start of the round. There are a number of things Ken can do based on what he thinks you're going to do (Shoryuken, jump back and Hard Kick, jump back and air Tatsumaki Senpuukyaku, etc.), and there are a number of things you can do based on what you think Ken thinks you're going to do (pause, the Double Knee Press; Double Knee Press to get closer, use a Hard Punch Psycho Crusher, etc.). But the safest thing for Ken to do is walk backwards, regrdless of what Ken thinks you're going to do. Ken, of course, can Light Punch (LP) Shoryuken your Double Knee Press at nearly any time, even on reaction if the player has fast enough reflexes. Ken can also LP Shoryuken in between the hits of your Double Knee Press pressure string, which is why you're going to have to use more hesitation and fakes in the string to keep Ken off-balance. If you think he's going to Shoryuken you after the Double Knee Press, hesitate a split second, then do crouching Medium Kick, hesitate, do crouching Light Punch, hesitate, then another medium Double Knee Press. Every point of hesitation gives Ken an opportunity to Shoryuken and hit nothing, after which you get to Double Knee Press him for free. It's still dangerous though, since if you're even slightly off, you'll get Shoryukened and knocked down.
If Ken jumps at your from far, your best bet is to block. If you anticipate the jump, jump up and meet him with Hard Kick. If he jumps in from closer, Hard Punch Psycho Crusher under him - you'll either avoid him or nail him with your legs.
Ken's main weapon in this fight is his Hadouken. Aside from establishing close range while charged, Bison's other goal is to take this weapon away from Ken or, failing that, to minimize its usefulness. If Ken throws them from half to full screen away, and if you're charged, use Head Press. If you'r not charged, just jump straight up over them. Learn to tell which speed Hadouken is coming your way quickly so you can time your jump accordingly (something which I admit to have yet to fully master, despite playing BIson for nearly 16 years now). If Ken is about a quarter screen away from the corner, fly far behind him, then fly in close and Somersault Skull Diver him. If he's in the corner, don't bother: his standing Hard Punch will nail you every time. He can also jump up and Hard Kick you, but this is tougher. Otherwise, yuor best bet is to fly away to safety. Eventually he'll stop throwing Hadoukens and come after you.
If Ken is walking towards you and your charged, fake a few moves and look to land a medium Double Knee Press. If you're not charged, keep him at bay with standing kicks and look to get charged ASAP. Watch out for reaction Shoryukens. Also watch out for Ken throwing out random sweeps - Ken's sweep is STUPIDLY fast (comes out in 4 frames!), and he can mash it out at really annoying times, like in between your pressure strings. If the player is fast enough, he can cancel every blocked sweep into Hadouken, which will push you out of yor optimal range and give Ken the initiative.
Ken's aerial Tatsumaki Senpuukyaku is an -extremely- dangerous weapon agains Bison. He can cancel any of his jumping attacks into it even if the attacks whiff, which makes it tricky to nail Ken's jump attacks. Bison's lack of an instantaneous anti-air reversal move also makes Bison exceedingly vulnerable if Ken does an air Tatsumaki Senpuukyaku in such a way that he lands behind you: Nine times out of ten, you're going to get thrown. Reverse-throwing Ken in that situation is VERY hard, and not at all reliable. And since Ken lands behind, there's nothing you can hit him with - he'll always get to attack first. Your best bet is to avoid it entirely - either Psycho Crusher before Ken lands, or use crouching Hard Kick (slide) to escape. The former is preferable since you have the chance to inflict damage while you're escaping, but if you're not charged, you'll have no choice but to slide out of the way.
The ground Tatsumaki Senpuu Kyaku isn't as dangerous as the air version, but it's nothing to sneeze at either. If Ken knocks you down and performs the attack as you're getting up, he has a chance to cross you up and inflict multiple hits and score a possible dizzy. Beware.
As with most other matches, getting knocked down in the corner is extremely costly. Patience and a bit of luck is the only way you'll get out. After getting knocked down, you'll be forced to eat at least one Hadouken, and possibly two. No more than that though. Additonal Hadoukens you have the chance to jump over, but it's still not in your favour. Ken can fake and Shoryuken you. If you jump too late, he might recover and Shoryuken you anyway. He can also tick throw you to death with stupid patterns like jump kick -> throw, air Tatsumaki Senpukyaku -> land behind and throw, or force you to guess between crouching Light Kick -> Throw and crouching Light Lick -> Shoryuken, etc. Jumping backwards into the corner over a Hadouken is your best bet, since it gives you the opportunity to charge, and maybe Double Knee Press or Psycho Crusher out.
In a nutshell, your goal is to establish your optimal range while charged as soon as possible to star up Double Knee Press pressure, use Head Press to counter Hadoukens from afar, avoid his aerial Tatsumaki Senpuukyaku entirely, and avoid getting knocked down, especially in the corner. As I said, it's a winnable fight - I think this match is 5-5, or maybe 5.5-4.5 in Ken's favour - but Bison needs to be nearly flawless against Ken.
Vs. M. Bison (dictator-self)
This is the stupidest fight in the game. M.Bison fears his own Psycho Crusher, and if it is used at the correct time, he has no answer for it. When fighting M.Bison vs. M.Bison, there is an algorithm that one can use, and whoever deviates from the pattern first loses.
The pattern is simple: Jump back into the corner repeatedly while pressing Hard Kick (Roundhouse). Once the other M.Bison moves to winthin half to one-third of a screen's distance from you on the ground, use a Hard Punch (Fierce) Psycho Crusher. Since the other M.Bison is walking forward, he will be unable to use any special moves on you. And unless you're fighting the CPU, he will be unable to reaction boot kick you (Hard Kick/Roundhouse) you out of your Psycho Crusher. He will either be forced to block it, get hit by it and subsequently knocked down, or jump over it, taking no damage. You get the advantage on all 3 scenarios. Once you recover from the Psycho Crusher, continue to jump backwards into the other corner and repeat.
The weakest part of this pattern is as soon as the round starts. At this distance, both M.Bisons need to guess what the other is going to do. Both want to establish the pattern, but neither wants the other to start it either. Whoever guesses correctly at the start and damages their opponent first will win.
For example, 1P M.Bison thinks that 2P M.Bison is going to jump backwards at the start, which is what he wants to do, so 1P does a HP Psycho Crusher immediately to hit 2P M.Bison on his way back. 2P M.Bison anticipates this and performs a MK Double Knee Press instead which, at that distance, will beat the Psyco Crusher cleanly. 1P M.Bison is now knocked down and is behind on life. 2P M.Bison is now free to jump backwards and establish the pattern.
There also needs to be care not to perform the Psyco Crusher against another M.Bison unless your backed up in the corner and when he's within one-third to half a screen away from you. If you perform the Psyco Crusher too far out in the open, you'll recover too close to the other M.Bison when you land, and you can be more easily hit/thrown. If performed when your back is in the corner, you'll travel nearly the entire playing field, and will be too far away for the other M.Bison to damage you in any real fashion.
After the initial jockeying for the pattern is established, whoever has the lead on life when the pattern is started will win. It is *tremendously* difficult for M.Bison to come from behind against this pattern. At that point, it's pretty much a matter of skill and experience rather than any set strategy.
Vs. Ryu
A match up now in Ryu's favor because of your nerfs only, mainly Ryu will be make a pattern of Hadoken and Shoryuken you randomly, but you can punish it Hadokens with your Headstomp, remember that he can use a Hurrican Kick mixup if he knocks down you but use a Psycho Crusher crossup against it or a crouching punch, Air Tatsumaki its a good Psycho Crusher or Double Knee Press hit too if he wants to escape in the corner.
Vs. Sagat
This is a very bad match for M.Bison, though he has a chance of victory. If Sagat gets M.Bison into the corner, he will lose. If M.Bison can stay a full screen away from Sagat, he has a chance. Unfortunately, all Sagat has to do is jump at Bison two or three times with blocked strings and he's in the corner, which is death. At close range, Sagat can randomly hit standing Light Kick (using the single hit version only, not the two-hit close version) which will beat every attack M.Bison has on the ground, including the Psycho Crusher and the Double Knee Press. With his back against the wall, M.Bison has no way to escape a Light Kick attack assault. If M.Bison tries to jump out, he will eat Tiger Uppercut, plus Sagat is free to cancel any connected Lick Kicks into Tiger Uppercut, or walk up and throw randomly. If he gets pushed back too far, he can Tiger Knee back in, which will also beat all of M.Bison's attacks if done up close. So M.Bison must avoid the corner at all costs. It is not in his favour though.
Out in the open, M.Bison has a few more options, especially if Sagat is throwing Tiger Shots at him all day (only if the Sagat doesn't know what he's doing). M.Bison can Psycho Crusher over low Tigers Shots from any range, or he can Double Knee Press over them from the right range. M.Bison can use crouching Hard Kick (the slide) against high Tiger Shots, though it's risky, and very punishable if his slide is blocked. If Sagat is in the corner, M.Bison can use the Head Press on him to try and cross him up - it has a good chance of stuffing or avoiding his Tiger Uppercut, and M.Bison can ambiguously land in front or behind and throw/go for more pressure.
But as noted, these tactics aren't likely to come into play if the Sagat knows what he's doing. All Sagat needs to do is jump with Hard Kick a few times in a row against M.Bison to force him back into the corner - the long range and havy priority of Sagat's jumping Hard Kick will beat all of M.Bison's ground attacks, and has a good chance of hitting him if he tries to jump as well (Sagat can always press the button early if he sees M.Bison try to jump after him). Once in the corner, it's all standing Light Kick abuse that M.Bison has no answer for.
Vs. Vega (claw)
While M.Bison is the undisputed worst character in the game, Vega is either the second or third worst character. That said, this match is one of the few that Bison can win, though both characters have a stupid weakness: If any character is knocked down in the corner, that character will die to jumping Light Kick -> throw patterns. As long as Bison doesn't get knocked down in the corner, though, he can win this fairly easily.
Vega has tremendous speed and long range, but he cannot sustain any kind of pressure, whereas Bison can keep Vega pinned down for long periods of time. Vega has no good reversals to stop your Scissors Kick pressure. He can do crouching Light Punch to try and fend you off, but unless he's psychic, there's no way he can stuff your Double Knee Press attempts every time. Bison can also jump at Vega with little fear, at least from far away. Vega can try to meet Bison in the air, which he has a good chance of doing with his speed, but the damage doesn't make it worth not doing. Jump at Vega repeatedly with Hard Kick, and try to get Double Knee Press pressure going. If he's in the middle of the stage, feel free to Hard Punch Psycho Crusher him. He can jump kick you, but again, the damage is not enough to make you stop doing it. It's far more likely he'll jump and get hit for a big chunk of damage and get knocked down. Don't do it if you'll land close to the corner, though, or else you'll be in trouble of he blocks it.
After knocking Vega down, you can also feel free to Head Press him. Vega blocks this attack weird - a lot of the time, Bison stomps Vega on his -knees-, which makes Bison recover faster than normal. You can fly away to safety sooner, or fly behind and Skull Diver faster - he has little chance of hitting you, even if he's in the corner.
If Vega ever decides to go to the wall, jump up and meet him with Hard Punch, or Light Punch if you're timing is off. You should never ever get hit by either his claw dive or his Suplex. In fact, if you're playing right, Vega should never get an opportunity to fly to either wall.
The main weapon Vega has that you need to watch out for his his throw. It is dangerous when coupled with his tremendously fast walk speed but, as long as you're not knocked down in the corner, you shouldn't have to worry. Obviously, don't do stupid things like Double Knee Press from too close, or Psycho Crusher such that you're left in the corner. Otherwise, you should be fine. Vega can't withstand Bison's pressure to any extent, and Vega can't mount pressure that does any damage long enough to kill you.
Vs. Zangief
There is little M.Bison can do in this fight except die. It is by far his worst match, and one of the worst mismatches in the game. With only a few moves, Gief can completely shut Bison down. His PPP/KKK Lariet will stop his Psyco Crusher and Double Knee Press clean on reaction, his PPP lariet nullfies his long range standing kicks, and his splash (down + Hard Punch in the air) will stuff every attack in Bison's arsenal.
Gief's algorithm in this match is very, very simple: All he needs to do is walk forward and PPP lariet anything that moves. Once he gets to within about half a screen, he can then jump and do splashes repeatedly. A blocked splash will lead to a ticked SPD. Repeat until death. There is nothing M.Bison can do about this. He lacks an instant high priority/invincible reversal, so Gief is free to splash him and tick into SPD all day long without fear of reprisal. His SPD range makes it virtually impossible to reverse throw Gief after any blocked sequence unless Gief screws up. Bison can't mount any offense from either close (splash or Lariet will beat everything) or from far (headstomp can be blocked all the time without fear since it does no block damage, or Gief can do his aerial headbutt [Up + Medium/Hard Punch in the air] to counter). All he can do is roll over and die.
There are some things you can do: If he does his PPP Lariet, you can do Double Knee Pres from far away so that only the second hit connects, or you can crouching Hard Kick (slide) him from far. If he does his KKK Lariet, you can walk up and standing Hard Kick him. You can also try and cross him up if you managed to knock him down. But none of these tactics are reliable. Your only chance of winning against Gief is if Gief screws up repeatedly.
Hitboxes
Note: All frame data gathered by using the method described at http://code.google.com/p/macrolua/wiki/FrameDataExamples. Some differs from TAkiba's, and is noted by a *.
Standing Moves
- Standing Jab:
| Damage | 4 |  |
 |

|
| Rnd Dmg Table | 0x020 | |||
| Stun | 1~7 | |||
| Stun Timer | 40 | |||
| Chain Cancel | Yes | |||
| Special Cancel | Yes | |||
| On Hit | +5 | |||
| Frame Count | 4 | 4 | 5 | |
- Standing Strong:
| Damage | 18 |  |
 |
 |

|
| Rnd Dmg Table | 0x020 | ||||
| Stun | 5~11 | ||||
| Stun Timer | 60 | ||||
| Chain Cancel | No | ||||
| Special Cancel | No | ||||
| On Hit | +6 | ||||
| Frame Count | 3 | 4 | 4 | 9 | |
| Simplified | 7 | 4 | 9* | ||
- Standing Fierce:
| Damage | 26 |  |
 |
 |

|
| Rnd Dmg Table | 0x020 | ||||
| Stun | 11~17 | ||||
| Stun Timer | 80 | ||||
| Chain Cancel | No | ||||
| Special Cancel | No | ||||
| On Hit | -3 | ||||
| Frame Count | 5 | 4 | 6 | 20 | |
| Simplified | 9 | 6 | 20 | ||
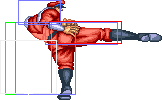
- Standing Short:
| Damage | 8 |  |
 |
 |
 |

|
| Rnd Dmg Table | 0x020 | |||||
| Stun | 1~7 | |||||
| Stun Timer | 40 | |||||
| Chain Cancel | No | |||||
| Special Cancel | No | |||||
| On Hit | +5 | |||||
| Frame Count | 3 | 2 | 4 | 4 | 1 | |
| Simplified | 5 | 4 | 5 | |||
- Standing Forward:
| Damage | 16 |  |
 |
 |
 |

|
| Rnd Dmg Table | 0x020 | |||||
| Stun | 5~11 | |||||
| Stun Timer | 60 | |||||
| Chain Cancel | No | |||||
| Special Cancel | No | |||||
| On Hit | +5 | |||||
| Frame Count | 4 | 3 | 5 | 8 | 1 | |
| Simplified | 7 | 5 | 9 | |||
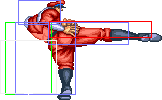
- Standing Roundhouse:
| Damage | 24 |  |
 |
 |
 |

|
| Rnd Dmg Table | 0x020 | |||||
| Stun | 11~17 | |||||
| Stun Timer | 80 | |||||
| Chain Cancel | No | |||||
| Special Cancel | No | |||||
| On Hit | -1 | |||||
| Frame Count | 4 | 5 | 6 | 17 | 1 | |
| Simplified | 9 | 6 | 18 | |||
Crouching Moves
- Crouching Jab:
| Damage | 4 |  |
 |
 |

| |
| Rnd Dmg Table | 0x020 | |||||
| Stun | 1~7 | |||||
| Stun Timer | 40 | |||||
| Chain Cancel | Yes | |||||
| Special Cancel | Yes | |||||
| On Hit | +6 | |||||
| Frame Count | 2 | 2 | 4 | 4 | ||
| Simplified | 4 | 4 | 4 | |||
- Crouching Strong:
| Damage | 18 |  |
 |
 |

| |
| Rnd Dmg Table | 0x020 | |||||
| Stun | 5~11 | |||||
| Stun Timer | 60 | |||||
| Chain Cancel | No | |||||
| Special Cancel | No | |||||
| On Hit | +6 | |||||
| Frame Count | 3 | 2 | 4 | 9 | ||
| Simplified | 5 | 4 | 9* | |||
- Crouching Fierce:
| Damage | 26 |  |
 |
 |

| |
| Rnd Dmg Table | 0x020 | |||||
| Stun | 11~17 | |||||
| Stun Timer | 80 | |||||
| Chain Cancel | No | |||||
| Special Cancel | No | |||||
| On Hit | -3 | |||||
| Frame Count | 5 | 4 | 6 | 20 | ||
| Simplified | 9 | 6 | 20 | |||
- Crouching Short:
| Damage | 8 |  |
 |

|
| Rnd Dmg Table | 0x020 | |||
| Stun | 1~7 | |||
| Stun Timer | 40 | |||
| Chain Cancel | No | |||
| Special Cancel | No | |||
| On Hit | +5 | |||
| Frame Count | 5 | 4 | 5 | |
Hits low.
- Crouching Forward:
| Damage | 16 |  |
 |

|
| Rnd Dmg Table | 0x020 | |||
| Stun | 5~11 | |||
| Stun Timer | 60 | |||
| Chain Cancel | No | |||
| Special Cancel | No | |||
| On Hit | +6 | |||
| Frame Count | 5 | 8 | 5 | |
Hits low.
- Crouching Roundhouse:
| Damage | 24 |  |
 |

|
| Rnd Dmg Table | 0x020 | |||
| Stun | 5~11 | |||
| Stun Timer | 130 | |||
| Chain Cancel | No | |||
| Special Cancel | No | |||
| On Hit | KD | |||
| On Block | -22 | |||
| Frame Count | 7 | 29 | 17 | |
Hits low. Slides roughly 3/4 the screen, knocking down on hit. Extremely unsafe unless connecting very late in the active frames.
Aerial Moves
- Neutral/Diagonal Jumping Jab:
| Damage | 8/7 |  |
 |
 |

| ||
| Rnd Dmg Table | 0x020 | ||||||
| Stun | 1~7 | ||||||
| Stun Timer | 40 | ||||||
| Special Cancel | No | ||||||
| Frame Count | 2 | 40 | 6 | ∞ | |||
| Simplified | 2 | 40 | ∞ | ||||
- Neutral/Diagonal Jumping Strong:
| Damage | 16/14 |  |
 |
 |

| ||
| Rnd Dmg Table | 0x020 | ||||||
| Stun | 5~11 | ||||||
| Stun Timer | 60 | ||||||
| Special Cancel | No | ||||||
| Frame Count | 3 | 20 | 6 | ∞ | |||
| Simplified | 3 | 20 | ∞ | ||||
- Neutral Jumping Fierce:
| Damage | 24 |  |
 |
 |

| ||
| Rnd Dmg Table | 0x020 | ||||||
| Stun | 11~17 | ||||||
| Stun Timer | 80 | ||||||
| Special Cancel | No | ||||||
| Frame Count | 5 | 8 | 6 | ∞ | |||
| Simplified | 5 | 8 | ∞ | ||||
- Diagonal Jumping Fierce:
| Damage | 22 |  |
 |
 |

| ||
| Rnd Dmg Table | 0x020 | ||||||
| Stun | 11~17 | ||||||
| Stun Timer | 80 | ||||||
| Special Cancel | No | ||||||
| Frame Count | 5 | 8 | 6 | ∞ | |||
| Simplified | 5 | 8 | ∞ | ||||
- Neutral Jumping Short:
| Damage | 10 |  |
 |

|
| Rnd Dmg Table | 0x020 | |||
| Stun | 1~7 | |||
| Stun Timer | 40 | |||
| Special Cancel | No | |||
| Frame Count | 2 | 40 | ∞ | |
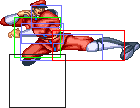
- Neutral Jumping Forward:
| Damage | 18 |  |
 |
 |

| |
| Rnd Dmg Table | 0x020 | |||||
| Stun | 5~11 | |||||
| Stun Timer | 60 | |||||
| Special Cancel | No | |||||
| Frame Count | 1 | 2 | 20 | ∞ | ||
| Simplified | 3 | 20 | ∞ | |||
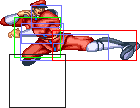
- Neutral Jumping Roundhouse:
| Damage | 26 |  |
 |
 |

| |
| Rnd Dmg Table | 0x020 | |||||
| Stun | 11~17 | |||||
| Stun Timer | 80 | |||||
| Special Cancel | No | |||||
| Frame Count | 3 | 2 | 8 | ∞ | ||
| Simplified | 5 | 8 | ∞ | |||
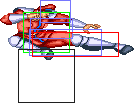
- Diagonal Jumping Short:
| Damage | 8 |  |
 |
 |

| ||
| Rnd Dmg Table | 0x020 | ||||||
| Stun | 1~7 | ||||||
| Stun Timer | 40 | ||||||
| Special Cancel | No | ||||||
| Frame Count | 2 | 40 | 5 | ∞ | |||
| Simplified | 2 | 40 | ∞ | ||||
- Diagonal Jumping Forward:
| Damage | 16 |  |
 |
 |

| ||
| Rnd Dmg Table | 0x020 | ||||||
| Stun | 5~11 | ||||||
| Stun Timer | 60 | ||||||
| Special Cancel | No | ||||||
| Frame Count | 3 | 20 | 5 | ∞ | |||
| Simplified | 3 | 20 | ∞ | ||||
- Diagonal Jumping Roundhouse:
| Damage | 24 |  |
 |
 |

| ||
| Rnd Dmg Table | 0x020 | ||||||
| Stun | 11~17 | ||||||
| Stun Timer | 80 | ||||||
| Special Cancel | No | ||||||
| Frame Count | 5 | 8 | 5 | ∞ | |||
| Simplified | 5 | 8 | ∞ | ||||
Throws
M.Bison can only throw with Strong and Fierce. He has no kick throws.
- Deadly Throw: (←/→ + Strong/Fierce)
| Damage | 32 | 
| |
| Stun | 7~13 | ||
| Stun Timer | 99 | ||
| Range (from axis) | 52 | ||
| Range advantage | 24 | ||
Both punch throws are the same.
Special Moves
Psycho Crusher: (Charge ←, →, P) [charge time: 59f]
- Startup:
 |
 |
 |

| |
| Frame Count | 2 | 2 | 2 | 5 |
| Simplified | 11 | |||
- Active part 1:
- Jab Version: This happens 2 times.
- Strong Version: This happens 3 times.
- Fierce Version: This happens 5 times.
| Damage (Jab) | 24 |  |
 |
 |

|
| Damage (Strong) | 26 | ||||
| Damage (Fierce) | 28 | ||||
| Random dmg table | 0x040 | ||||
| Stun | 13~19 | ||||
| Stun Timer | 120 | ||||
| Frame Advantage | KD | ||||
| Frame Count | 3 | 3 | 3 | 3 | |
| Simplified | 12 | ||||
- Active part 2:
- Jab Version:
 |
 |

| ||
| Frame Count | 3 | 3 | 2 | |
| Simplified | 8 | |||
- Strong Version: No extra animation.
- Fierce Version:

| |
| Frame Count | 2 |
- Recovery:
 |
 |

| |
| Frame Count | 4 | 5 | 7 |
| Simplified | 16 | ||
While severely toned down from Champion Edition, this is still a really good move if used correctly. LP Psycho Crusher is good chipping tool and fairly safe to use. MP Psycho Crusher can set up tick throws and crossing up folks who are getting up. HP Psycho Crusher is good at chasing people down, trading with projectiles up close, getting far away from the corner. It's also really good at hitting people from behind, either as they're getting up or coming down from a jump, since his legs can hit. HP Psycho Crusher is only somewhat safe if you do it when your opponent is far away from the corner though, and even then, some characters can still turn around and smack you before you land. Some characters can even hit you -in-between- the blocked hits of the Psycho Crusher, though in my 13 or so years of playing this game, I've only seen this occur -once-.
Bison's only special move with invincibility, though only 2 frames.
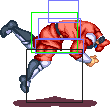
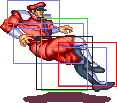
Double Knee Press: (Charge ←, →, K) [charge time: 107f]
- Startup:
 |
 |

| |
| Frame Count | 2/3/4 | 3 | 3 |
| Simplified | 8/9/10 | ||
- Active:
| Damage (Jab) | 24,16 | 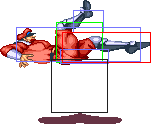 |
 |

|
| Damage (Strong) | 26,16 | |||
| Damage (Fierce) | 28,16 | |||
| Random dmg table | 0x020 | |||
| Stun | 13~19,1~7 | |||
| Stun Timer | 120,50 | |||
| Frame Advantage | +4/+3/+2 | |||
| Frame Count | 8 | 8 | 1 | |
| Simplified | 17 | |||
- Recovery:

| |
| Frame Count | 10/11/12 |
Notes: Another move that has been severely toned down from Champion Edition, even more so than the Psycho Crusher, this is still Bison's main attack move. He no longer gets frame advantage after it and can no longer combo after it, but it's still his best method of keeping pressure on the opponent. A MK Double Knee Press, followed by c.MK, s.MK, MK Double Knee Press is still decently good pressure. You ca draw out retaliation attacks after the c.MK, either by doing c.LP or doing nothing. All versions of the Double Knee Press are relatively safe if you do them from far away, which is the only place you should be doing them. c.LP x 2, s.LP, MK Double Knee Press is M.Bison's most damaging and most reliable combo to perform when an opponent is dizzy. Don't use this attack against a crouch-blocking Blanka, since his sprite is so low to the ground that only one hit connects really fast and it will throw off your timing.
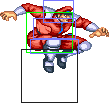
Head Stomp: (Charge ↓, ↑, K) [charge time: 59f]
- Startup:
 |
 |
 |
| |
| Frame Count | 2 | 12 | 8 | 8 |
| Simplified | 30 | |||
- Active:
- Short Version:
| Damage | 14 | 
|
| Random dmg table | 0x020 | |
| Stun | 11~17 | |
| Stun Timer | 60 | |
| Frame Count | ∞ | |
- Forward/Roundhouse Version:
| Damage (Frwrd) | 16 | 
|
| Damage (Rh) | 18 | |
| Random dmg table | 0x020 | |
| Stun | 11~17 | |
| Stun Timer | 60 | |
| Frame Count | ∞ | |
- Bounce/Recovery:
 |
 |
 |
 |
 |
 |
 |

| |
| Frame Count | 7 (IF) | 7 (IF) + 1 | 6 | 6 | 6 | 6 | ∞ | 6 |
Your main anti-projectile move. Use it to safely counter the projectiles of Ken, Dhalsim, or Chun-li on reaction from a full-screen away, which is where you'll be using this most of the time. You can counter Ryu or Sagat's with it, but only if you anticipate and launch the moment you see them throw their projectile. Guile's projectile cannot be reliably countered with this attack if you're at full screen - he may not be able to counter you back, but he should be able to block. The Head Press has some use as a low move counter in close, but only rarely, and not against anyone who has an instantaneous anti-air.
Somersault Skull Diver: (P, during the Bounce/Recovery animation of Head Stomp)
- Jab Version:
| Damage | 22 |  |
 |

|
| Random dmg table | 0x060 | |||
| Stun | 11~17 | |||
| Stun Timer | 60 | |||
| Frame Count | 3 | ∞ | 6 | |
- Strong Version:
| Damage | 24 |  |
 |
 |
 |

|
| Random dmg table | 0x060 | |||||
| Stun | 11~17 | |||||
| Stun Timer | 60 | |||||
| Frame Count | 4 | 20 | 6 | ∞ | 6 | |
- Fierce Version:
| Damage | 26 |  |
 |
 |
 |

|
| Random dmg table | 0x060 | |||||
| Stun | 11~17 | |||||
| Stun Timer | 60 | |||||
| Frame Count | 6 | 8 | 6 | ∞ | 6 | |
The follow up to the Head Press is a very useful move. You can combo off of it if you land it deep enough. It's also great for goading certain people, especially characters with air throws - after a blocked Head Press, you should NEVER EVER be air thrown out of this, since you can -always- smack them before they reach you. It's great against characters who don't have instantaneous anti-air, or characters' whose anti-air doesn't hit behind.
Misc Animations
| Walk back | Neutral | Walk Fwd | Crouch |
 |
 |
 |

|
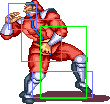
- Standing reel:
 |
 |
|
- Standing gut reel:
 |

|
- Crouching reel:
 |

|
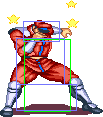
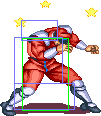
- Dizzy:
 |
 |
|
