

Chun-Li
The strongest woman in the world, thunder thighs, Chunners McGunners etc, Chun-Li is on a quest to revenge her father, who died at the hands of the Irish dictator M.Bison on a Tuesday. Her career as an undercover Interpol agent (often posing as a News Reporter or member of the X-Men) trained her well for this quest.
In a nutshell
Hot. She gain Kikoken (a slow but effective projectile commonly used for footsie traps in this revision) and also Spinning Bird Kick as an aerial move.
Character Specific Information
Color Options
| Default | Start |
 |

|
Moves List
Normal Moves
- Standing Normal Moves (st.)
- Close Normal Moves (st.)
- Crouching Normal Moves (cr.)
- Jumping Normal Moves (nj.)
- Diagonal Jumping Normal Moves (j.)
Unique Moves
Throws
Special Moves
Requires 5 button presses }}
Requires 5 button presses }}
Requires 5 button presses }}
The Basics
If you're playing as Chun-Li you obviously are a fan of both speed and a fighting style that prefer to pick away at your opponents health bar, as opposed to a straight full-on onslaught of attacks and cornering techniques. Her low attack strength is made up with her speed and ability to escape from opponents if you can successfully bounce around the screen's edges without being knocked ouf of the air via an anti-air move (i.e. Shoryuken). Also, due to her height, her reach is not the great and she needs to be fairly close to successfully land her ground attacks.
Chun-Li is great for beginners, as once they button-mash kick enough, they will uncover her Lightning Kick and add a little flair to their repertoire. However, this not to say that Chun-Li is only for beginners. She can turtle and pick away at a health bar just as well as anyone else. She is decidely a high middle-tier character, with both great advantages when it comes to her basic moveset, but extreme disadvantages when it comes to her special moves and the input motions required of them, charge motions in particular.
Pros
- Kikoken mind tricks and air special
- Good Poking normals
Cons
- Air Spinning Bird Kick most unsafe than ground
- lack of anti air options
Advanced Strategy
As stated above, Chun-Li is no powerhouse and must be used by balancing both offense and defense. Learning the timing for her special moves is critical as every of her special moves leaves her completely vulnerable to attacks if they miss connecting with an opponent or their block. Also, although she is quite speedy when it coming to jumping and attack speed, her reaction and recovery time is just average, not great.
Her trademark move, The Lightning Kick, is only really useful as a somewhat effective cornering tactic when the enemy has very little life left and all you need is to pick away at their blocking stance until their energy is drained away. A cheap tactic, but effective. It can also be useful as an anti-air move as an enemy jumps towards you and lands into her flailing leg.
Chun-Li's fireball, is the a dark blue fireball that resembles a big blue version of Dhalsim's Yoga Fire projectile. The motion required for the move is a forward-half-circle motion with a punch button. Many found this to be somewhat unfair considering the other fireball users in the game all received a forward-quarter-circle motion with punch for their fireballs, allowing for a faster fireball shootout.
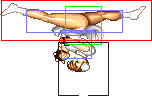
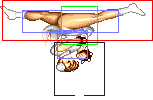
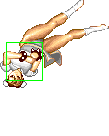
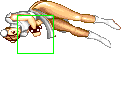
Another of Chun-Li's staple special moves is her gravity defying Spinning Bird Kick. By flipping herself upside down and using her powerful legs to propel herself forward like a helicopter, she creates a very powerful special move that is unforunately for some believed to be both her best special move, while at the same time her most underused and underappreciated special move. The Spinning Bird Kick does a nice amount of damage when you can successfully land either her initial flipping animation which does good damage and also knocks her opponent down. If the initial flipping animation does not connect but the first leg rotation does, followed by the subsequent hits, a nice amount of damage will be dealt, along with the possibility of dizzying your opponent. However, the Spinning Bird Kick is also very easily avoided by simply crouching where Chun-Li's torso is helpess and completely open to any attack. Also, it should be noted that the Spinning Bird Kick can also not only knock opponents out of the air but there is also the possibility of a chain combo of either a two or three hit juggle.
Combos
Chun Li had nice jumping combos, try to piano input H.Kyaku in a jumping attacks
- cr.LK, H. Kyaku (this can be a good low option)
- j.MK,MK H.Kyaku
- j.MP,s.MP,s.HP/cr.HK
- j.HP,HP,H.Kyaku
Match-ups
Vs. Balrog (boxer)
Use Crouch Foward to punish him easily,Kikoken is risky now with invincible quick TAP, the rest of the strategies are like Champion Edition, its still a good matchup for her, avoid use Spinning Bird Kick until you knock him down.
Vs. Blanka
Its of the most changed CE match ups because the buffs of their special movesets,but its an interesting one.
Anti Roll tactic is Crouch Roundhouse or Standing Jab,Kikoken can be a nice Sweep footsie trap for him, but beware with the Vertical Roll. Lightning Legs its a good tool for close combat but Blanka's objective will be Electricity trap or Vertical Roll you, Spinning Bird Kick knockdown setups are ok but don't waste if if you are at far distance, try to Kikoken him and make him Verticall Roll and air throw him
Blanka will want to mix up but Kikoken ones are useful, some CE stuff can be still useful, but don't jump too much because the Vertical Roll, instead wait if he does it and air throw him.
Vs. Chun-Li (self)
The best Chun Lin must use his air attacks and Kikoken wisely.
Vs. Dhalsim
Use your Kikoken to made him teleport and punish him,Drill and Mummy are throw punishables too, your close combat strategy is to poke him low with crouching Forward as in CE, Yoga Teleport its a good ground punish with crouching Roundhouse...Kikoken can be useful for keepaway in far distance.
Vs. E. Honda
Now you have Kikoken, butt there is a problem, he can ruin your gameplan with Sumo splash, instead of it, try to poke him with weak attacks like Champion Edition, but beware in close combat with throw mixups
Jump him its a bad idea because Torpedo anti air properties at start.
Spinning Bird Kick aereal versions can be a decent crossup trap or corner escape for E.Honda Hundred Splash plans
Vs. Guile
Kikoken and Crouching Roundhouse trap is effective on him.
It still an unfair matchup because Flash Kick its still useful agaisnt her air combat, but Sonic Boom can be evaded easily with Triangle Jump or crouchin Forward at medium distance, Try to spam your Lightning Legs in corner and close combat it still effective against his main pokes, Spinning Bird Kick on ground or air its deadly , try to crossup at knockdown to counter or Trade Hits with Flash Kick.
Vs. Ken
Compared to Ryu, your main objective will be air throw and poke punish more defensive, first try to star with crouch Roundhouse or Forward and then after SRK miss poke him or use Air throw, CE tactics like Hurricane Kick crouch attack punish, or Hadoken with crouch Forward or Triangle Jump are useful(first its better agaisnt him).
Lightning Legs use for close combat in corner its the best keepaway or zoning, Spinning Bird Kick use only after a knockdown for mixup and Air one for corner escape or missed Stomp.
Vs. M. Bison (dictator)
Its a great match for her you still have faster pokes and speed than him but remember to start with a jumping attack or punish his Stomp with Air Throw, Kikoken him and crouch Roundhouse randomly at midscreen,if you corner him its a good safe jump for air punish too, his specials like Psycho Crushers and Scicross Kicks are more punishable with your Jabs, but his throw is more powerful now, corner can be a weakness, use Triangle Jump instead to escape.
Spinning Bird Kick only after a knock down or as a blocked Stomp escape if you cornered...
Vs. Ryu
An interesting matchup now that its more balanced with your Kikoken, use it as a round start for see what kind of Ryu player is.
Hurricane Kick can be countered with Crouch Punches, use the same Ken tactics, but Hadoken its more powerful, Kikoken its a good answer for a far Hadoken too, but jumping its still the best answer, Lightning Legs its your main close combat options but in corner against him is useful for an air throw trap, try to use a lot of crouch Forward to punish close Hadokens, but the Shoryuken its a problem for air combat, if you use Triangle Jump...better as a corner escape if he is trying to spam you Hadoken, Spinning Bird Kick its a good idea for cross up mixup because he don't have a good Shoryuken as Ken's one.
Vs. Sagat
As a projectile spam character that he is, now you can answer him with Kikoken.
You can hit and run with her Punt Kick, or use crouching Forward or Roundhouse, jumping attacks are bad ideas because Tiger Uppercut its a good anti air.
Sagat's High Tiger Shots must be evaded with a crouch with a Roundhouse at medium distance, Low ones can be jumped but try to jump straight instead forward because Tiger Uppercut it's still a great anti air.
Spinning Bird Kick its a great tool only for escape at corner but its makes you too vulnerable to a Tiger Knee, main problem of Chun will be an ant air answer, but a back jump punt kick or Roundhouse will be instead.
Vs. Vega (claw)
She gains new strategies with her Kikoken, spam it if he is Backdashing a lot, also use your Lightning Leg Kicks to trade hits with pokes...
Punish his slide with Crouching Roundhouse and also counter his Barcelona with Air Throw, she must be defensive in corner because midscreen can read Claw's Izuna Drop easily.
The use of Spinning Bird Kick its only for air strategy against a far Barcelona prediction, air one its riskful anyway.
Vs. Zangief
A matchup that they will use their new special moves for a more fair matchup for Chun...because she can use her Kikoken for keepaway Zangief at far distance as Lightning Hunred Legs at close one, but the main disadvantage is that if he had good Quick Lariat timing can evade Kikoken but she can punish him with her main tool for long poke that is her crouching Roundhouse.
Spinning Bird Kick its still a bad idea because Zangief crouch punches can defeat her...use her air version to stay away after a blocked Head Stomp.
Hitboxes
Standing Normals
- Standing LP:
| Damage | 4 |  |
 |
 |
 |

|
| Stun | 1~7 | |||||
| Stun Timer | 40 | |||||
| Chain Cancel | No | |||||
| Special Cancel | Yes | |||||
| Frame Advantage | +7 | |||||
| Frame Count | 2 | 2 | 4 | 3 | 1 | |
| Simplified | 1+4 | 4 | 4 | |||
- Standing MP:
| Damage | 12 |  |
 |
 |
 |

|
| Stun | 5~11 | |||||
| Stun Timer | 60 | |||||
| Chain Cancel | No | |||||
| Special Cancel | No | |||||
| Frame Advantage | +11 | |||||
| Frame Count | 2 | 2 | 4 | 3 | 1 | |
| Simplified | 1+4 | 4 | 4 | |||
- Standing HP:
| Damage | 16 |  |
 |
 |
 |
 |

|
| Stun | 11~17 | ||||||
| Stun Timer | 80 | ||||||
| Chain Cancel | No | ||||||
| Special Cancel | No | ||||||
| Frame Advantage | -1 | ||||||
| Frame Count | 2 | 3 | 6 | 10 | 7 | 1 | |
| Simplified | 1+5 | 6 | 18 | ||||
- Standing LK:
| Damage | 8 |  |
 |
 |
 |

|
| Stun | 1~7 | |||||
| Stun Timer | 40 | |||||
| Chain Cancel | No | |||||
| Special Cancel | Yes | |||||
| Frame Advantage | +5 | |||||
| Frame Count | 3 | 3 | 5 | 4 | 1 | |
| Simplified | 1+6 | 5 | 5 | |||
- Standing MK:
| Damage | 12 |  |
 |
 |
 |

|
| Stun | 5~11 | |||||
| Stun Timer | 60 | |||||
| Chain Cancel | No | |||||
| Special Cancel | No | |||||
| Frame Advantage | +7 | |||||
| Frame Count | 3 | 3 | 5 | 4 | 4 | |
| Simplified | 1+6 | 5 | 8 | |||
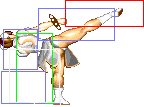
- Standing HK:
| Damage | 16 |  |
 |
 |
 |
 |

|
| Stun | 11~17 | ||||||
| Stun Timer | 80 | ||||||
| Chain Cancel | No | ||||||
| Special Cancel | No | ||||||
| Frame Advantage | +3 | ||||||
| Frame Count | 3 | 3 | 4 | 8 | 7 | 7 | |
| Simplified | 1+10 | 8 | 14 | ||||
Close Standing Normals
- Close Standing LP:
| Damage | 8 |  |
 |
 |
 |

|
| Stun | 1~7 | |||||
| Stun Timer | 40 | |||||
| Chain Cancel | Yes | |||||
| Special Cancel | Yes | |||||
| Frame Advantage | +7 | |||||
| Frame Count | 3 | 2 | 3 | 4 | 3 | |
| Simplified | 1+2 | 3 | 7 | |||
- Close Standing MP:
| Damage | 12 |  |
 |
 |
 |

|
| Stun | 5~11 | |||||
| Stun Timer | 60 | |||||
| Chain Cancel | No | |||||
| Special Cancel | No | |||||
| Frame Advantage | +13 | |||||
| Frame Count | 2 | 2 | 4 | 3 | 1 | |
| Simplified | 1+4 | 4 | 4 | |||
- Close Standing HP:
| Damage | 16 |  |
 |

|
| Stun | 11~17 | |||
| Stun Timer | 80 | |||
| Chain Cancel | No | |||
| Special Cancel | Yes | |||
| Frame Advantage | -8 | |||
| Frame Count | 3 | 20 | 11 | |
- Close Standing LK:
| Damage | 8 |  |
 |
 |
 |

|
| Stun | 1~7 | |||||
| Stun Timer | 40 | |||||
| Chain Cancel | No | |||||
| Special Cancel | No | |||||
| Frame Advantage | +5 | |||||
| Frame Count | 3 | 3 | 5 | 4 | 1 | |
| Simplified | 1+6 | 4 | 5 | |||
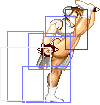
- Close Standing MK:
| Damage | 12 |  |
 |
 |
 |
 |
 |

|
| Stun | 5~11 | |||||||
| Stun Timer | 60 | |||||||
| Chain Cancel | No | |||||||
| Special Cancel | No | |||||||
| Frame Advantage | +6 | |||||||
| Frame Count | 3 | 3 | 3 | 6 | 3 | 4 | 1 | |
| Simplified | 1+6 | 9 | 8 | |||||
- Close Standing HK:
| Damage | 16 |  |
 |
 |
 |

|
| Stun | 11~17 | |||||
| Stun Timer | 80 | |||||
| Chain Cancel | No | |||||
| Special Cancel | No | |||||
| Frame Advantage | -2 | |||||
| Frame Count | 3 | 3 | 6 | 8 | 11 | |
| Simplified | 1+6 | 6 | 19 | |||
Crouching Normals
- Crouching LP:
| Damage | 6 |  |
 |
 |
 |

|
| Stun | 1~7 | |||||
| Stun Timer | 40 | |||||
| Chain Cancel | No | |||||
| Special Cancel | No | |||||
| Frame Advantage | +6 | |||||
| Frame Count | 2 | 2 | 4 | 4 | 1 | |
| Simplified | 1+4 | 4 | 5 | |||
- Crouching MP:
| Damage | 10 |  |
 |
 |
 |

|
| Stun | 5~11 | |||||
| Stun Timer | 60 | |||||
| Chain Cancel | No | |||||
| Special Cancel | No | |||||
| Frame Advantage | +11 | |||||
| Frame Count | 2 | 2 | 4 | 4 | 1 | |
| Simplified | 1+4 | 4 | 5 | |||
- Crouching HP:
| Damage | 16 |  |
 |
 |
 |

|
| Stun | 11~17 | |||||
| Stun Timer | 80 | |||||
| Chain Cancel | No | |||||
| Special Cancel | No | |||||
| Frame Advantage | -2/-1 | |||||
| Frame Count | 3 | 3 | 6 | 8 | 11 | |
| Simplified | 1+6 | 6 | 19 | |||
- Crouching LK:
| Damage | 8 |  |
 |
 |
 |

|
| Stun | 1~7 | |||||
| Stun Timer | 40 | |||||
| Chain Cancel | No | |||||
| Special Cancel | No | |||||
| Frame Advantage | +7 | |||||
| Frame Count | 3 | 3 | 4 | 4 | 1 | |
| Simplified | 6 | 4 | 5 | |||
- Crouching MK:
| Damage | 10 |  |
 |

|
| Stun | 5~11 | |||
| Stun Timer | 60 | |||
| Chain Cancel | No | |||
| Special Cancel | Yes | |||
| Frame Advantage | +12 | |||
| Frame Count | 1+4 | 5 | 4 | |
- Crouching HK:
| Damage | 14 |  |
 |
 |
 |

|
| Stun | 5~11 | |||||
| Stun Timer | 130 | |||||
| Chain Cancel | No | |||||
| Special Cancel | No | |||||
| Frame Advantage | -2 | |||||
| Frame Count | 3 | 3 | 6 | 8 | 11 | |
| Simplified | 1+6 | 6 | 19 | |||
Aerial Normals
- Neutral Jumping LP:
| Damage | 10 |  |
 |
 |

|
| Stun | 1~7 | ||||
| Stun Timer | 40 | ||||
| Frame Count | 3 | 3 | 2 | ∞ | |
| Simplified | 8 | ∞ | |||
- Diagonal Jumping LP:
| Damage | 10 |  |
 |

|
| Stun | 1~7 | |||
| Stun Timer | 40 | |||
| Frame Count | 3 | 3 | ∞ | |
| Simplified | 6 | ∞ | ||
- Neutral Jumping MP:
| Damage | 14 |  |
 |
 |
 |
 |
 |
 |

|
| Stun | 5~11 | ||||||||
| Stun Timer | 50 | ||||||||
| Frame Count | 3 | 3 | 2 | 16 | 2 | 3 | 4 | ∞ | |
| Simplified | 8 | 16 | ∞ | ||||||
- Diagonal Jumping MP:
| Damage | 14 |  |
 |
 |
 |
 |

|
| Stun | 5~11 | ||||||
| Stun Timer | 50 | ||||||
| Frame Count | 3 | 3 | 8 | 3 | 4 | ∞ | |
| Simplified | 6 | 8 | ∞ | ||||
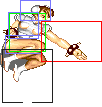
- Neutral Jumping HP:
| Damage | 16 |  |
 |
 |
 |
 |
 |
 |

|
| Stun | 11~17 | ||||||||
| Stun Timer | 60 | ||||||||
| Frame Count | 3 | 3 | 2 | 8 | 2 | 3 | 4 | ∞ | |
| Simplified | 8 | 8 | ∞ | ||||||
- Diagonal Jumping HP:
| Damage | 16 |  |
 |
 |
 |
 |

|
| Stun | 11~17 | ||||||
| Stun Timer | 60 | ||||||
| Frame Count | 3 | 3 | 8 | 3 | 4 | ∞ | |
| Simplified | 6 | 8 | ∞ | ||||
- Neutral Jumping LK:
| Damage | 10 |  |
 |

|
| Stun | 1~7 | |||
| Stun Timer | 40 | |||
| Frame Count | 3 | 3 | ∞ | |
| 5 | 6 | ∞ | ||
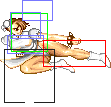
- Diagonal Jumping LK:
| Damage | 10 |  |
 |
|
| Stun | 1~7 | |||
| Stun Timer | 40 | |||
| Frame Count | 3 | 3 | ∞ | |
| 5 | 6 | ∞ | ||
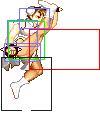
- Neutral Jumping MK:
| Damage | 12 |  |
 |
 |
 |

|
| Stun | 5~11 | |||||
| Stun Timer | 50 | |||||
| Frame Count | 3 | 3 | 16 | 3 | ∞ | |
| Simplified | 6 | 16 | ∞ | |||
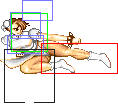
- Diagonal Jumping MK:
| Damage | 12 |  |
 |
 |
 |

|
| Stun | 5~11 | |||||
| Stun Timer | 50 | |||||
| Frame Count | 3 | 3 | 16 | 3 | ∞ | |
| Simplified | 6 | 16 | ∞ | |||
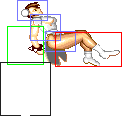
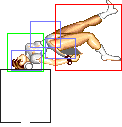
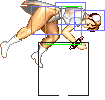
- Neutral Jumping HK:
| Damage | 16 |  |
 |
 |
 |
 |
 |
 |

|
| Stun | 11~17 | ||||||||
| Stun Timer | 60 | ||||||||
| Frame Count | 1 | 2 | 5 | 4 | 4 | 4 | 6 | ∞ | |
| Simplified | 3 | 13 | ∞ | ||||||
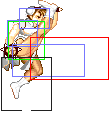
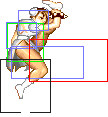
- Diagonal Jumping HK:
| Damage | 16 |  |
 |
 |
 |
 |
 |

|
| Stun | 11~17 | |||||||
| Stun Timer | 60 | |||||||
| Frame Count | 3 | 3 | 6 | 4 | 6 | 6 | ∞ | |
| Simplified | 6 | 6 | 4 | 6 | ∞ | |||
Unique Moves
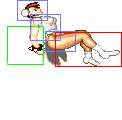
- Flip Kick: (On ground and close, ←/→ + MK)
| Damage | 14 |  |
 |
 |
 |
 |
 |
 |

|
| Stun | 5~11 | ||||||||
| Stun Timer | 40 | ||||||||
| Chain Cancel | No | ||||||||
| Special Cancel | No | ||||||||
| Frame Advantage | ? | ||||||||
| Frame Count | 2 | 2 | 5 | 4 | 4 | 4 | 6 | 29 | |
| Simplified | 1+4 | 13 | 39 | ||||||
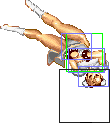
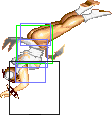
- Neck Breaker: (Close, ←/→ + HK)
| Damage | 14 |  |
 |
 |
 |
 |
 |
 |

|
| Stun | 5~11 | ||||||||
| Stun Timer | 40 | ||||||||
| Chain Cancel | No | ||||||||
| Special Cancel | No | ||||||||
| Frame Advantage | ? | ||||||||
| Frame Count | 4 | 4 | 5 | 6 | 7 | 8 | 2 | 14 | |
| Simplified | 1+36 | 14 | |||||||
- Head Stomp: (On air, ↙/↓/↘ + Mk)
| Damage | ? |  |
 |
 |
 |
 |
 |

|
| Stun | 5~11 | |||||||
| Stun Timer | 40 | |||||||
| Chain Cancel | No | |||||||
| Special Cancel | ? | |||||||
| Frame Advantage | ? | |||||||
| Frame Count | 1 | 2 | 16 | 8 | 4 | 5 | ∞ | |
| Simplified | 3 | 16 | ∞ | |||||
Throws
- Koshuu Tou: (←/→ + MP or HP)
| Damage | 20+(4*n) | 
| |
| Duration | 130 | ||
| Stun | 5~11 | ||
| Stun Timer | 100 | ||
| Range (from axis) | 48 | ||
| Range advantage | 23 | ||
- Ryuusei Raku: (On Air ←/→ + MP or HP)
| Damage | 20+(4*n) | 
| |
| Duration | 130 | ||
| Stun | 7~13 | ||
| Stun Timer | 100 | ||
| Range (from axis) | 58 | ||
| Range advantage | 33 | ||
Special Moves
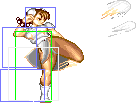
- Hyakurretsu Kyaku: press any single Kick repeatedly
Startup:
 |

| |
| Short | 1 | 3 |
| Foward | 3 | 4 |
| Roundhouse | 4 | 6 |
Cycle:
| Damage | 22/24/26 | 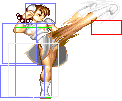 |
 |
 |
 |
 |
 |
 |

|
| Stun | 13~19 | ||||||||
| Stun Timer | 120 | ||||||||
| Frame Advantage | -7/-5/-6 | ||||||||
| Short | 4 | 4 | 4 | 4 | 4 | 4 | 4 | 4 | |
| Foward | 2 | 2 | 2 | 2 | 2 | 2 | 2 | 2 | |
| Roundhouse | 1 | 1 | 1 | 1 | 1 | 1 | 1 | 1 | |
Recovery:
 |

| |
| Short | 2 | 2 |
| Foward | 4 | 4 |
| Roundhouse | 6 | 6 |
+9 on block if is blocked 3 times (point blank). +4 for 2 blocks.
Its isn't changed a lot of the Champion Edition but its your main close combat option.
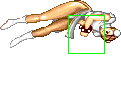
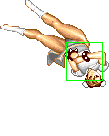
- Spinning Bird Kick: charge ↓, ↑ + Kick (charge 60f)
Startup:
| Damage | 24 |  |
 |
 |
 |
 |
 |

| |
| Stun | 13~19 | ||||||||
| Stun Timer | 120 | ||||||||
| Frame Advantage | -6/-9/-11 | ||||||||
| Frame Count | 1 | 4 | 3 | 2 | 3 | 4 | 4 | 2 | |
Active:
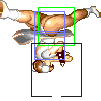
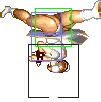
LK version :
 |
 |
 |
 |
 |
 |
 |
|
| 4 | 3 | 2 | 1 | 1 | 1 | 1 | 1 |
 |
 |
 |
 |
 |
 |
 |

|
| 2 | 1 | 2 | 2 | 3 | 4 | 4 | 2 |
MK version :
 |
 |
 |
 |
 |
 |
 |

|
| 4 | 4 | 3 | 3 | 2 | 2 | 1 | 1 |
 |
 |
 |
 |
 |
 |
 |

|
| 1 | 1 | 1 | 1 | 1 | 1 | 1 | 1 |
 |
 |
 |
 |
 |
 |
 |

|
| 2 | 1 | 1 | 2 | 2 | 3 | 3 | 4 |

|
| 2 |
HK version :
 |
 |
 |
 |
 |
 |
 |

|
| 5 | 4 | 4 | 3 | 3 | 2 | 2 | 2 |
 |
 |
 |
 |
 |
 |
 |

|
| 1 | 1 | 1 | 1 | 1 | 1 | 1 | 1 |
 |
 |
 |
 |
 |
 |
 |

|
| 1 | 1 | 1 | 1 | 1 | 1 | 1 | 1 |
 |
 |
 |
 |
 |
 |
 |

|
| 1 | 1 | 1 | 1 | 1 | 2 | 1 | 1 |
 |
 |
 |
 |
 |

|
| 2 | 2 | 3 | 3 | 3 | 3 |
Recovery:
Short:
 |
 |
 |
 |
 |
 |
|
| 2 | 3 | 2 | 2 | 3 | 3 | 1 |
Foward:
 |
 |
 |
 |
 |
 |
|
| 2 | 3 | 2 | 2 | 3 | 3 | 1 |
Roundhouse:
 |
 |
 |
 |
 |
 |
|
| 2 | 3 | 2 | 2 | 3 | 3 | 1 |
- Air Spinning Bird Kick: charge ↓, ↑ + Kick (charge 60f)
Startup:
 |
 |

| |
| 1 | 4 | 3 | 2 |
Active:
See Below
Recovery:
After Cycle:
 |
 |
 |
 |
 |
 |
 |

|
| 4 | 4 | 4 | 4 | 4 | 4 | 4 | 4 |
Landing:
 |
 |
 |
 |
 |
 |
|
| 2 | 3 | 2 | 2 | 3 | 3 | 6 |
Your main buff with Air version its about corner escape or cross up your opponent, use if after a blocked Air Stomp, ground version still decent for knockdown mixups and corner trap.
- Kikokken: hcf + Punch
LP version:
 |
 |
 |
 |
 |
 |

| |
| Frame Count | 2 | 7 | 1 | 2 | 1 | 1 | 1 |
| Simplified | 10 | 39 | |||||
MP version:
 |
 |
 |
 |
 |
 |

| |
| Frame Count | 2 | 7 | 1 | 2 | 1 | 1 | 1 |
| Simplified | 10 | 39 | |||||
HP version:
 |
 |
 |
 |
 |
 |

| |
| Frame Count | 2 | 7 | 1 | 2 | 1 | 1 | 1 |
| Simplified | 10 | 39 | |||||
Her new special, its a slow projectile with poor damage but its useful for sweep traps and air throw mixups, Its suitable against non projectile character.
Misc Animations
| Walk back | Neutral | Walk Fwd | Crouch |
 |
 |
 |

|
- Standing reel:
 |
 |
 |

|
- Standing gut reel:
 |
 |
 |

|
- Crouching reel:
 |
 |
 |

|
- Dizzy:
 |
 |
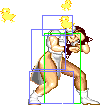 |

|
