

Guile
Go home and be a family man...
In a nutshell
Guile suffered some nerfs, in relation to his CE counterpart. Some of his moves have more recovery frames, to match the game increased speed. Even so, Guile is still in the top 3 tier list due to his great answer to opponents new special moves. HF is the last game where Guile's Roundhouse Flash Kick hits twice. (not counting Hyper Street Fighter II, of course)
Character Specific Information
Color Options
| Default | Start |
 |

|
Moves List
Normal Moves
- Standing Normal Moves (st.)
- Close Normal Moves (st.)
- Crouching Normal Moves (cr.)
- Jumping Normal Moves (nj.)
- Diagonal Jumping Normal Moves (j.)
Unique Moves
Throw Moves
Special Moves
The Basics
Guile is a charge character with a good anti air and also the fastest projectile in the game,use Crouching Back and poke with Far Standing Light Kick and Crouching Light Kick for lows.
Unfortunately compared to Champion Edition is nerfed, anyway your main gameplan about turtling its still effective, jump wisely and use High Punch for offensive, and High Kick for aerial pokes.
Knee Bazooka its still similar to last revision but makes a bit more damage,Air throw is you main aerial game weapon, and its too effective against aerial characters like Blanka,Claw and Dictador.
Flash Kick is buffed in this revision, also Roundhouse version can hit twice a close opponent, and that was an exclusive tactic in this game.
Pros
- Roundhouse Flash Kick hits twice
- Good Projectile
Cons
- unsafe Sweep recovery
- predictable gameplan
Advanced Strategy
Jumping forward against Guile is pretty stupid with most characters. Guile has so many options to kill you, it's just not good play. Jumping HP, air throw, jump HK, straight up HK, cr.MK, cr.HK, push nothing toss them when he lands, throw another sonic boom, etc. You can't get forward momentum and you're dead. --Jeff Schaefer
http://www.youtube.com/watch?v=enQ9P9VkKYs
Outside of that, his buffed Roundhouse Flash Kick can defeat the new special moves like Quick Lariat,Blanka Vertical Roll, E.Honda Sumo Splash,etc. that's make him still part of the general top 3.
Combos
Bread and Butter
- j.HP, cr.MP xx Flash Kick
- j.MP , cl.HP/cr.MP xx HP Sonic Boom (cl.HP is safe in corner)
CPS1 Chain
- cr.LK xxx cl.HP (CPS1 Chain) xx LK Flash Kick
- cr.LK xxx cl.MP (CPS1 Chain) xx Sonic Boom
Redizzy
- cr.LP xx Sonic Boom, cr.MP xx Sonic Boom, s.FP (corner only) [unverified]
Match-ups
Vs. Balrog (boxer)
Try to stay a certain distance (at the minimum, away from his standing fierce) a way from Balrog and throw repeated sonic booms, if he turn punches through the sonic boom, smack him with a backfist, this will usually dizzy Balrog. If Balrog jumps straight up, keep him away with footsies until you can get your charge back (mix up sonic boom speed to throw of Balrog's jump timing). You can also throw out a sonic boom and follow it, so if Balrog jumps straight up over it (which is actually very difficult for him), you can backfist him out of the air.
Vs. Blanka
Another matchup that changes drastically due to new Special Moves,Standing Short can defeat Electricity and Sonic Boom him,Flash Kicks are still effective against rolls, don't change so much about CE, but don't spam Sonic Boom because Blanka now can evade it with Vertical Rolling.
Vs. Chun-Li
Air throw combat,but you have better pokes,she can use a projectile now,but she will use to trap you and not to spam you,so you need to jump kick her, Guile's Objective wil be wait for a Kikoken and jumping Forward or Roundhouse at middle distance or wake up with a Flash Kick if she is mixup with Spinning Bird Kick before she crossups you with it.
Vs. Dhalsim
Still a far distance matchup, but Knee Bazooka is effect against Dhalsim Pokes,and also can defeat his Teleport recovery,but a Flash Kick its ok too, Yoga Flame its a good chance for crossup him or punish with crouch Roundhouse.
Dhalsim will try to play to keep you away with normals, but if you are in a stay at ground trade hit plan he can change his plan to a Yoga Fire spam and that will be the best moment to defeat him with a jumping combo to Flash Kick.
Vs. E. Honda
A changed matchup from CE but still a good one for the family man,standing Short defeat Hundred Slaps,but you must be careful with his Sumo Splash that can destroy your spam projectile tactic, rather Flash Kick him if he blocked Sonic Boom it, main gameplan it's about keep him distanced of you with poking Backfist or Knee Bazooka and Air Throws, try to jump him with a Forward to trade hits with a cross up Hundred Slaps.
Best situation will be if he jumps, Flash Kick and Air Throw will be like a death thread for him because you can charge a Sonic Boom and zoning him, don't get at close distance because his Hold mixup can be the dead end.
Vs. Guile (self)
Spam Sonic Boom and turtle randomly.
Vs. Ken
You still have a good anti air, but remember that your Flash Kick or air throw can be effective against a whiff Dragon Punch, and Guile can evade Hurricane Kick with crouching punch, you can spam Sonic Boom wisely due that your recovery frames are shorter than him, also your best starting move will be crouching Roundhouse or Sonic Boom, Ken commonly play the anti air zoning shoto.
Vs. M. Bison (dictator)
CE Classic Matchup but now turn ins Guile's favor, try to start with Flash Kick or Sonic Boom and if he wants to Stomp you, air throw him and punish Crouching Roundhouse Slide with Flash Kick, Guile can win easily now with Dictador nerfed stuff, Sonic Boom him its still a great far distance option.
Vs. Ryu
Not changed so much but remember to jump his Hadoken (better than Ken) or punish him with Knee Bazooka, also Air Tatsumaki Senpu Kyaku can be Flash Kicked easily, start the match with a Flash Kick to predict the Ryu's plan if he will play Hadoken spam or a medium distance sweeping or anti air zoning.
Vs. Sagat
After cancelling a low tiger shot with a Sonic Boom, try using b+mk (bazooka knee) to hit Sagat's outstretched arm. Spinning backfist will whiff due to Sagat's low hurtboxes.
It still a 4-6 matchup but you and Sagat had similar nerfs about projectile plans, try to get advantage with your buffed Roundhouse Flash Kick if he gets close with a Tiger Knee, an offensive sweep Guile its better against Sagat.
Vs. Vega (claw)
He is buffed if you consider Japanese CE revision with Rolling Attack,but Flash Kick his Barcelona its a nerfed option ,but use Sonic Boom carefully because he can Slide you, Air Throw is still useful.
Of course a back corner will be the worst situation for him unless you use a Flash Kick to keep him away and get the midscreen again.
Vs. Zangief
Compared to Champion Edition, you had more problems, try to poke him with Crouching Foward or Knee Bazooka,Sonic Boom can be evaded with Double Lariat, Quick Lariat can be Flash Kicked, its a riskyful play but more effective than low poking, playing a medium or long distance zoning its the best idea to defeat him
Hitboxes
Standing Normals
- Standing LP:
| Damage | 6 |  |
 |
 |

|
| Stun | 1~7 | ||||
| Stun Timer | 40 | ||||
| Chain Cancel | Yes | ||||
| Special Cancel | Yes | ||||
| Frame Advantage | +6 | ||||
| Frame Count | 3 | 4 | 2 | 3 | |
| Simplified | 3 | 4 | 2 | 3 | |
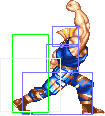
- Standing MP:
| Damage | 16 |  |
 |
 |
 |
 |

|
| Stun | 5~11 | ||||||
| Stun Timer | 60 | ||||||
| Chain Cancel | No | ||||||
| Special Cancel | Yes | ||||||
| Frame Advantage | +6 | ||||||
| Frame Count | 2 | 2 | 4 | 3 | 3 | 3 | |
| Simplified | 1+2 | 2 | 13 | ||||
- Standing HP:
| Damage | 22 |  |
 |
 |
 |
 |

|
| Stun | 11~17 | ||||||
| Stun Timer | 80 | ||||||
| Chain Cancel | No | ||||||
| Special Cancel | No | ||||||
| Frame Advantage | +1 | ||||||
| Frame Count | 2 | 3 | 4 | 5 | 10 | 8 | |
| Simplified | 1+9 | 5 | 18 | ||||
- Standing LK:
| Damage | 6 |  |
 |
 |
 |

|
| Stun | 1~7 | |||||
| Stun Timer | 40 | |||||
| Chain Cancel | Yes | |||||
| Special Cancel | Yes | |||||
| Frame Advantage | +5 | |||||
| Frame Count | 2 | 2 | 4 | 3 | 3 | |
| Simplified | 1+4 | 4 | 6 | |||
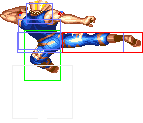
- Standing MK:
| Damage | 16 |  |
 |
 |
 |
 |
 |
 |
 |
 |

| ||||||||
| Stun | 5~11 | ||||||||||||||||||
| Stun Timer | 60 | ||||||||||||||||||
| Chain Cancel | No | ||||||||||||||||||
| Special Cancel | No | ||||||||||||||||||
| Frame Advantage | +2 | ||||||||||||||||||
| Frame Count | 2 | 2 | 2 | 3 | 5 | 4 | 3 | 2 | 2 | 2 | |||||||||
| Simplified | 1+9 | 5 | 13 | ||||||||||||||||
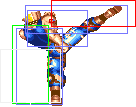
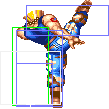
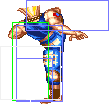
- Standing HK:
| Damage | 22 |  |
 |
 |
 |
 |
 |

|
| Stun | 11~17 | |||||||
| Stun Timer | 80 | |||||||
| Chain Cancel | No | |||||||
| Special Cancel | No | |||||||
| Frame Advantage | -5 | |||||||
| Frame Count | 4 | 4 | 5 | 6 | 8 | 9 | 1 | |
| Simplified | 1+8 | 5 | 24 | |||||
Close Standing Normals
- Close Standing MP:
| Damage | 16 |  |
 |
 |
 |
 |

|
| Stun | 5~11 | ||||||
| Stun Timer | 60 | ||||||
| Chain Cancel | No | ||||||
| Special Cancel | Yes | ||||||
| Frame Advantage | +5 | ||||||
| Frame Count | 3 | 3 | 3 | 3 | 3 | 3 | |
| Simplified | 1+3 | 3 | 12 | ||||
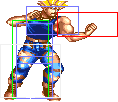
- Close Standing HP:
| Damage | 22 |  |
 |
 |
 |
 |

|
| Stun | 11~17 | ||||||
| Stun Timer | 80 | ||||||
| Chain Cancel | No | ||||||
| Special Cancel | Yes | ||||||
| Frame Advantage | -8 | ||||||
| Frame Count | 3 | 3 | 8 | 10 | 6 | 5 | |
| Simplified | 1+3 | 3 | 29 | ||||
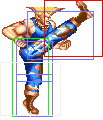
- Close Standing MK:
| Damage | 16 |  |
 |
 |
 |

|
| Stun | 5~11 | |||||
| Stun Timer | 60 | |||||
| Chain Cancel | No | |||||
| Special Cancel | No | |||||
| Frame Advantage | +10 | |||||
| Frame Count | 3 | 3 | 4 | 3 | 3 | |
| Simplified | 1+3 | 4 | 6 | |||
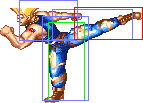
- Close Standing HK:
| Damage | 22 |  |
 |
 |

|
| Stun | 11~17 | ||||
| Stun Timer | 80 | ||||
| Chain Cancel | No | ||||
| Special Cancel | No | ||||
| Frame Advantage | +11 | ||||
| Frame Count | 3 | 4 | 4 | 9 | |
| Simplified | 1+7 | 4 | 9 | ||
Crouching Normals
- Crouching LP:
| Damage | 6 |  |
 |

|
| Stun | 1~7 | |||
| Stun Timer | 40 | |||
| Chain Cancel | Yes | |||
| Special Cancel | Yes | |||
| Frame Advantage | +6 | |||
| Frame Count | 1+3 | 4 | 5 | |
- Crouching MP:
| Damage | 16 |  |
 |
 |

|
| Stun | 5~11 | ||||
| Stun Timer | 60 | ||||
| Chain Cancel | No | ||||
| Special Cancel | Yes | ||||
| Frame Advantage | +8 | ||||
| Frame Count | 3 | 4 | 4 | 4 | |
| Simplified | 1+3 | 4 | 8 | ||
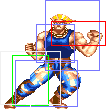
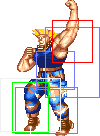
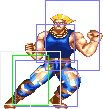
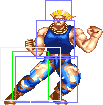
- Crouching HP:
| Damage | 22 |  |
 |
 |
 |
 |
|
| Stun | 11~17 | ||||||
| Stun Timer | 80 | ||||||
| Chain Cancel | No | ||||||
| Special Cancel | No | ||||||
| Frame Advantage | -2 | ||||||
| Frame Count | 2 | 3 | 4 | 12 | 9 | 1 | |
| Simplified | 1+5 | 16 | 10 | ||||
- Crouching LK:
| Damage | 6 |  |
 |
 |
 |

|
| Stun | 1~7 | |||||
| Stun Timer | 40 | |||||
| Chain Cancel | Yes | |||||
| Special Cancel | No | |||||
| Frame Advantage | +5 | |||||
| Frame Count | 3 | 3 | 4 | 3 | 3 | |
| Simplified | 1+7 | 4 | 6 | |||
- Crouching MK:
| Damage | 16 |  |
 |
 |
 |

|
| Stun | 5~11 | |||||
| Stun Timer | 60 | |||||
| Chain Cancel | No | |||||
| Special Cancel | No | |||||
| Frame Advantage | +8 | |||||
| Frame Count | 3 | 4 | 5 | 4 | 4 | |
| Simplified | 1+7 | 4 | 8 | |||
- Crouching HK:
| Damage | 22 |  |
 |
 |
 |
 |
 |
 |
 |
 |
 |

|
| Stun | 11~17 | |||||||||||
| Stun Timer | 80 | |||||||||||
| Chain Cancel | No | |||||||||||
| Special Cancel | No | |||||||||||
| Frame Advantage | KD/+7,-24 | |||||||||||
| Frame Count | 3 | 4 | 5 | 4 | 6 | 8 | 6 | 4 | 5 | 4 | 6 | |
| Simplified | 1+7 | 5 | 28 | 5 | 10 | |||||||
Aerial Normals
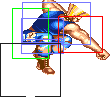
- Neutral Jumping LP:
| Damage | 10 |  |
 |
|
| Stun | 1~7 | |||
| Stun Timer | 40 | |||
| Frame Count | 3 | 4 | ∞ | |
| Simplified | 7 | ∞ | ||
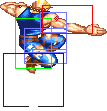
- Diagonal Jumping LP:
| Damage | 16 |  |
 |
|
| Stun | 5~11 | |||
| Stun Timer | 50 | |||
| Frame Count | 3 | 4 | ∞ | |
| Simplified | 7 | ∞ | ||
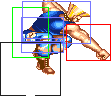
- Neutral Jumping MP:
| Damage | 16 |  |
 |
 |
 |

|
| Stun | 5~11 | |||||
| Stun Timer | 50 | |||||
| Frame Count | 3 | 4 | 20 | 4 | ∞ | |
| Simplified | 7 | 20 | ∞ | |||
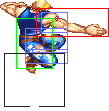
- Diagonal Jumping MP:
| Damage | 16 |  |
 |
 |
 |

|
| Stun | 5~11 | |||||
| Stun Timer | 50 | |||||
| Frame Count | 3 | 4 | 20 | 4 | ∞ | |
| Simplified | 7 | 20 | ∞ | |||
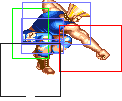
- Neutral Jumping HP:
| Damage | 22 |  |
 |
 |
 |

|
| Stun | 11~17 | |||||
| Stun Timer | 60 | |||||
| Frame Count | 3 | 4 | 8 | 4 | ∞ | |
| Simplified | 7 | 8 | ∞ | |||
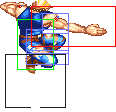
- Diagonal Jumping HP:
| Damage | 22 |  |
 |
 |
 |

|
| Stun | 11~17 | |||||
| Stun Timer | 60 | |||||
| Frame Count | 3 | 4 | 8 | 4 | ∞ | |
| Simplified | 7 | 8 | ∞ | |||
- Neutral Jumping LK:
| Damage | 10 |  |
 |

|
| Stun | 1~7 | |||
| Stun Timer | 40 | |||
| Frame Count | 3 | 4 | ∞ | |
| Simplified | 7 | ∞ | ||
- Diagonal Jumping LK:
| Damage | 10 |  |
 |

|
| Stun | 1~7 | |||
| Stun Timer | 40 | |||
| Frame Count | 3 | 4 | ∞ | |
| Simplified | 7 | ∞ | ||
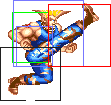
- Neutral Jumping MK:
| Damage | 16 |  |
 |
|
| Stun | 5~11 | |||
| Stun Timer | 50 | |||
| Frame Count | 3 | 4 | ∞ | |
| Simplified | 7 | ∞ | ||
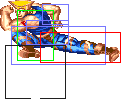
- Diagonal Jumping MK:
| Damage | 16 |  |
 |
 |
 |

|
| Stun | 5~11 | |||||
| Stun Timer | 50 | |||||
| Frame Count | 3 | 4 | 20 | 4 | ∞ | |
| Simplified | 7 | 20 | ∞ | |||
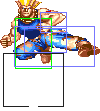
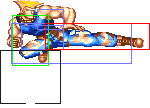
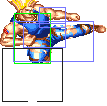
- Neutral/Diagonal Jumping HK:
| Damage | 22 |  |
 |
 |
 |
 |

|
| Stun | 11~17 | ||||||
| Stun Timer | 60 | ||||||
| Frame Count | 2 | 4 | 5 | 4 | 4 | ∞ | |
| Simplified | 6 | 5 | ∞ | ||||
Unique Moves
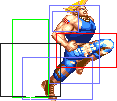
- Knee Bazooka: (On ground, ←/→ + MK)
| Damage | 16 |  |
 |
 |
 |
 |

|
| Stun | 5~11 | ||||||
| Stun Timer | 60 | ||||||
| Chain Cancel | No | ||||||
| Special Cancel | No | ||||||
| Frame Advantage | ? | ||||||
| Frame Count | 1 | 2 | 2 | 5 | 14 | 7 | |
| Simplified | 1+5 | 5 | 21 | ||||
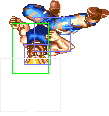
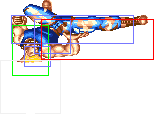
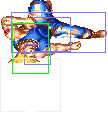
- Reverse Spin Kick: (On ground and close, ←/→ + HK)
| Damage | 22 |  |
 |
 |
 |
 |
 |
 |
 |
 |
 |

|
| Stun | 11~17 | |||||||||||
| Stun Timer | 80 | |||||||||||
| Chain Cancel | No | |||||||||||
| Special Cancel | No | |||||||||||
| Frame Advantage | ? | |||||||||||
| Frame Count | 3 | 3 | 2 | 3 | 4 | 6 | 4 | 3 | 3 | 3 | 3 | |
| Simplified | 1+15 | 4 | 16 | |||||||||
Throws
- Judo Throw: (←/→ + Strong) and Dragon Suplex: (←/→ + Fierce)
| Damage | 32 | 
| |
| Duration | 130 | ||
| Stun | 7~13 | ||
| Stun Timer | 100 | ||
| Range (from axis) | 48 | ||
| Range advantage | 18 | ||
- Flying Mare: (Guile and opponent in air, ↖/↙/←/→/↘/↗ + Strong/Fierce)
| Damage | 40 | 
| |
| Duration | 130 | ||
| Stun | 7~13 | ||
| Stun Timer | 100 | ||
| Range (from axis) | 54 | ||
| Range advantage | 24 | ||
- Flying Buster Drop:(Guile and opponent in air, ↖/↙/←/→/↘/↗ + Forward/Roundhouse)
| Damage | 40 | 
| |
| Duration | 130 | ||
| Stun | 7~13 | ||
| Stun Timer | 100 | ||
| Range (from axis) | 54 | ||
| Range advantage | 24 | ||
Special Moves
- Sonic Boom: charge ←, → + Punch (charge 60f)
Startup
 |
 |
 |

| |
| Frame Count | 2 | 2 | 2 | 2 |
| Simplified | 8 | |||
LP version:
| Damage | 12 |  |
 |
 |
 |

|
| Stun | 13~19 | |||||
| Stun Timer | 120 | |||||
| Frame Advantage | - | |||||
| Frame Count | 1 | 1 | 1 | 1 | 1 | |
| Simplified | 25 | |||||
MP version:
| Damage | 12 |  |
 |
 |
 |

|
| Stun | 13~19 | |||||
| Stun Timer | 120 | |||||
| Frame Advantage | - | |||||
| Frame Count | 1 | 1 | 1 | 1 | 1 | |
| Simplified | 25 | |||||
HP version:
| Damage | 12 |  |
 |
 |
 |

|
| Stun | 13~19 | |||||
| Stun Timer | 120 | |||||
| Frame Advantage | - | |||||
| Frame Count | 1 | 1 | 1 | 1 | 1 | |
| Simplified | 25 | |||||
It was nerfed from Champion Edition, but still a good projectile for medium and long distance combat, you can follow it with a Backfist in a corner.
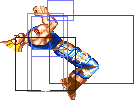
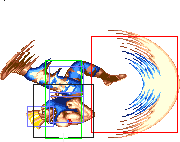
- Sommersault Kick: charge ↓, ↑ + Kick (charge 60f)
Startup:
| Damage | 24/26/16,14 |  |
 |

|
| Stun | 13~19 | |||
| Stun Timer | 120 | |||
| Frame Advantage | -24/-24/-33 | |||
| Short | 1 | 2 | 2 | |
| Foward | 1 | 2 | 1 | |
| Roundhouse | 3 | 1 | 2 | |
Active:
 |
 |
 |
| |
| Short | 4 | 2 | 2 | 4 |
| Foward | 3 | 2 | 2 | 5 |
| Roundhouse | 2 | 2 | 2 | 6 |
Recovery:
 |
 |
 |

| |
| Short | 2 | 2 | 22 | 10 |
| Foward | 4 | 4 | 25 | 11 |
| Roundhouse | 2 | 5 | 28 | 12 |
Buff from Champion Edition ,it can hit twice a close opponent and its the best anti air in the game.
Misc Animations
| Walk back | Neutral | Walk Fwd | Crouch |
 |
 |
 |

|
- Standing reel:
 |
 |
 |

|
- Standing gut reel:
 |
 |
 |

|
- Crouching reel:
 |

|
- Dizzy:
 |
 |
 |
 |
|
