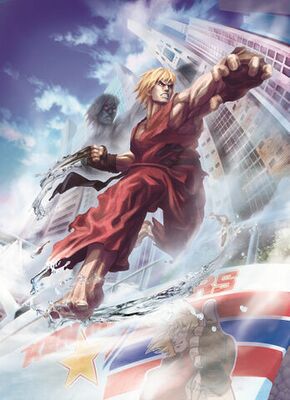
Street Fighter X Tekken/Ken

From SuperCombo Wiki

Introduction

Ideal Team Position: Point

While lacking the consistent damage of Ryu and the lockdown ability of Akuma, Ken’s superior buttons and generous frame advantages make him a force to be reckoned with...so long as you have a partner that can cover up his weaknesses. Although he has a Hadoken of his own, he recovers slower from its execution than Ryu and Akuma, which makes it difficult to use at mid-range where the opponent could react to it with enough time to punish Ken before he can recover. Instead, his mid-range is focused on using his excellent movement options to close in on the opponent where he can pressure them with his buttons or close in for a throw. To make up for his negligible solo damage, Ken has numerous ways he can safely tag in his partner who could deal the damage in his stead, which along with his footsie options, movement, and reset capabilities with his partner tagging in from a tag canceled HK or EX Tatsu make him an ideal point character.

Strengths Weaknesses
  • Several of his normal attacks either reach far, are safe on block, or both, allowing him to excel at playing footsies
  • MP, HP, and EX Shoryukens can be easily tag canceled on block to allow the partner to come in and apply pressure with minimal risk
  • Able to hitconfirm into HP Shoryuken allowing for “juggle reset” combos
  • Tatsumaki Senpukyaku has long hitstun for easy standing tag combos and reset opportunities
  • far HK, one of his farthest-reaching normals, causes crumple stun on counter hit, giving him the opportunity for a full juggle
  • f+mk, his step kick, is only -2 on block which allows him to easily get in range to play footsies at his optimal range
  • Kara Throw (cl.MK) allows him to throw opponents at ranges that would otherwise be inaccessible to him
  • His most dangerous throw requires him to be in neutral, preventing him from utilizing it while walking forward
  • Both overheads are unsafe on block, necessitating him to space them.
  • Has difficulty opening the opponent up without a counter hit stored and lacks setups for charging counter hit
  • Has trouble fighting out of life deficits due to low damage output and lack of tools to pressure opponents into making mistakes
  • Fireball recovers slower than other fireball characters
Ken
SFxT Ken Art.jpg
Health 1000
Ground Movement
Forward walk speed 40
Back walk speed 30
Forward dash duration 18
Back dash duration 8,10,9
Jumping
Prejump duration 4
Neutral jump duration 35
Diagonal jump duration 35
Neutral super jump duration 35
Diagonal super jump duration 35
Misc.
Charge Cancel Delay (Normal/EX) 6

Move Analysis

Normal Moves

Moves

Normal Attacks

Name
Command
Notes
Standing Light Punch
Lp.png
Rpdfire.png
Speccancel.png
Standing Medium Punch
Mp.png
Standing Hard Punch
Hp.png
Standing Light Kick
Lk.png
Standing Medium Kick
Mk.png
Standing Hard Kick
Hk.png
Chcrumple.png
Close Light Punch
(near opponent) Lp.png
Speccancel.png
rpdfire
Close Medium Punch
(near opponent) Mp.png
Speccancel.png
Close Hard Punch
(near opponent) Hp.png
Speccancel.png
Close Light Kick
(near opponent) Lk.png
Speccancel.png
Close Medium Kick
(near opponent) Mk.png
Speccancel.png
Close Hard Kick
(near opponent) Hk.png
Speccancel.png
Crouching Light Punch
D.png + Lp.png
Rpdfire.png
Speccancel.png
Crouching Medium Punch
D.png + Mp.png
Speccancel.png
Crouching Hard Punch
D.png + Hp.png
Speccancel.png
Knockdown.png
Crouching Light Kick
D.png + Lk.png
Rpdfire.png
Low.png
Speccancel.png
Crouching Medium Kick
D.png + Mk.png
Low.png
Speccancel.png
Crouching Hard Kick
D.png + Hk.png
Low.png
Hardknockdown.png
Neutral Jump Light Punch
U.png + Lp.png
High.png
Neutral Jump Medium Punch
U.png + Mp.png
High.png
Neutral Jump Hard Punch
U.png + Hp.png
High.png
Neutral Jump Light Kick
U.png + Lk.png
High.png
Neutral Jump Medium Kick
U.png + Mk.png
High.png
Neutral Jump Hard Kick
U.png + Hk.png
High.png
Angled Jump Light Punch
Ub.png / Uf.png + Lp.png
High.png
Angled Jump Medium Punch
Ub.png / Uf.png + Mp.png
High.png
Angled Jump Hard Punch
Ub.png / Uf.png + Hp.png
High.png
crossup
Angled Jump Light Kick
Ub.png / Uf.png + Lk.png
High.png
crossup
Angled Jump Medium Kick
Ub.png / Uf.png + Mk.png
High.png
crossup
Angled Jump Hard Kick
Ub.png / Uf.png + Hk.png
High.png


Unique Attacks

Name
Command
Notes
Inazuma Kick
B.png + Mk.png
High.png
Groundbounce.png vs airborne
Forward Step Kick
F.png + Mk.png
Knockdown.png vs airborne
Thunder Kick
F.png + Hk.png
Hold Hk.png to feint
Groundbounce.png vs crouching on Counterhit.png
Groundbounce.png vs airborne
Target Combo
(close) Mp.png ---.png Hp.png
Speccancel.png

Throws

Name
Command
Notes
Shoulder Throw
F.png + Lp.png + Lk.png
Throw.png
Knee Bash
N.png + Lp.png + Lk.png
Throw.png
Hell Wheel
B.png + Lp.png + Lk.png
Throw.png

Special Moves

Name
Command
Notes
Hadoken
Qcf.png + P.png
Ex.png
Knockdown.png vs airborne
Shoryuken
Dp.png + P.png
Ex.png
Knockdown.png
Hardknockdown.png on Ex.png
Airborne Tatsumaki Senpukyaku
air Qcb.png + K.png
Ex.png
Knockdown.png vs airborne
Tatsumaki Senpukyaku
Qcb.png + K.png
Ex.png Chrg.png
Knockdown.png vs airborne

Super Combo

Name
Command
Notes
Shippu Jinraikyaku
Qcb.png + 3k.png


Move Analysis

Normal Moves

N/A


Unique Attacks

N/A


Normal Throws

N/A


Special Moves

N/A


Super Combos

N/A


The Basics

N/A


Advanced Strategy

N/A


Combos

Bread and Butters

  • N/A

Hit Confirm Combos

  • N/A

Advanced Combos

  • N/A

Combos Into Supers

  • N/A

Game Navigation

General
Controls
Notation
HUD
Glossary
System
FAQ
Street Fighter Characters
Abel
Akuma
Balrog
Blanka
Cammy
Chun Li
Cody
Dhalsim
Dudley
Elena
Guile
Guy
Hugo
Ibuki
Juri
Ken
M Bison
Poison
Rolento
Rufus
Ryu
Sagat
Sakura
Vega
Zangief
Tekken Characters
Alisa
Asuka
Bob
Bryan
Christie
Heihachi
Hwoarang
Jack X
Jin
Julia
Kazuya
King
Kuma
Lars
Law
Lei
Lili
Marduk
Nina
Ogre
Paul
Raven
Steve
Xiaoyu
Yoshimitsu
Guest Characters
Cole
Kuro
Mega Man
Pac Man
Toro