SeenConnroy (talk | contribs) (Reformatted and added frame numbers for non-command normals.) |
SeenConnroy (talk | contribs) |
||
| Line 16: | Line 16: | ||
|description= A quick uppercut, a solid enough jab and chains into most of her other normals. | |description= A quick uppercut, a solid enough jab and chains into most of her other normals. | ||
'''Chains to:''' | '''Chains to:''' | ||
{{Icon-Capcom|LK}} > {{Icon-Capcom|HP}} > {{Icon-Capcom|HK}} | {{Icon-Capcom|LK}} > {{Icon-Capcom|HP}} > {{Icon-Capcom|HK}} | ||
''LK may be omitted, HP and HK may be swapped'' | ''LK may be omitted, HP and HK may be swapped'' | ||
}} | }} | ||
| Line 218: | Line 218: | ||
|damage=32 | |damage=32 | ||
|guard= Low | |guard= Low | ||
|startup= 10 | |startup=10 | ||
|active= | |active=3 | ||
|recovery= | |recovery=14 | ||
|frameAdv= -2 | |frameAdv= -2 | ||
|description= A low scooping punch, causes knockdown by itself but is more useful as Tamao's OTG pickup button. | |description= A low scooping punch, has a bit more range than crHK and causes knockdown by itself but is more useful as Tamao's OTG pickup button. | ||
}} | }} | ||
}} | }} | ||
| Line 234: | Line 234: | ||
|damage=32 | |damage=32 | ||
|guard= Mid | |guard= Mid | ||
|startup= 15 | |startup=15 | ||
|active= | |active=6 | ||
|recovery= | |recovery=20 | ||
|frameAdv= -9 | |frameAdv= -9 | ||
|description= A hopping hip attack, it makes a funny noise when you hit your opponent but you'll never hear it because the range on it is offensively bad, it has the lower range than ever her smallest of pokes. It's possible to whiff this to set up a command grab, I suppose. | |description= A hopping hip attack, knocks down, it makes a funny noise when you hit your opponent but you'll never hear it because the range on it is offensively bad, it has the lower range than ever her smallest of pokes. It's possible to whiff this to set up a command grab, I suppose. | ||
}} | }} | ||
}} | }} | ||
| Line 250: | Line 250: | ||
|damage=37 | |damage=37 | ||
|guard= Mid | |guard= Mid | ||
|startup= 6 | |startup=6 | ||
|active= | |active=21(10, 11), (4), 12 | ||
|recovery= | |recovery=18 | ||
|frameAdv= -39~0 | |frameAdv= -39~0 | ||
|description= Tamao does her best Sasquatch impression by leaping through the air head first to conk the opponent with her noggin. This attack actually has a secondary hitbox if she misses, as she will slide forward on her face (still a mid) after she lands, which is still part of the attack. This face slide is special cancelable so if your opponent isn't ready for it you can immediately cash out into a EX or Lightning Crash. Bless her heart, she's trying her best. | |description= Tamao does her best Sasquatch impression by leaping through the air head first to conk the opponent with her noggin. This attack actually has a secondary hitbox if she misses, as she will slide forward on her face (still a mid) after she lands, which is still part of the attack. This face slide is special cancelable so if your opponent isn't ready for it you can immediately cash out into a EX or Lightning Crash. Bless her heart, she's trying her best. | ||
| Line 266: | Line 266: | ||
|damage=28 | |damage=28 | ||
|guard= Mid | |guard= Mid | ||
|startup= 14 | |startup=14 | ||
|active= | |active=4 | ||
|recovery= | |recovery=14 | ||
|frameAdv= -3 | |frameAdv= -3 | ||
|description= A backfist strike, causes knockdown on hit. | |description= A backfist strike with slightly more range than stLP, causes knockdown on hit, not special canellable. | ||
}} | }} | ||
}} | }} | ||
| Line 276: | Line 276: | ||
=== Throws === | === Throws === | ||
{{MoveData | {{MoveData | ||
|image= | |image=AVG2_Tamao_PThrow.jpg | ||
|caption=cl. {{Motion|4}}/{{Motion|6}} + {{Icon-Capcom|P}} | |caption=cl. {{Motion|4}}/{{Motion|6}} + {{Icon-Capcom|P}} | ||
|name= | |name=Seoi Nage | ||
|data= | |data= | ||
{{AttackData-AVG2 | {{AttackData-AVG2 | ||
| Line 287: | Line 287: | ||
|recovery= | |recovery= | ||
|frameAdv= | |frameAdv= | ||
|description= | |description= Tamao performs a shoulder throw and then slightly loses balance. Very important to note that, while still being an instant throw, it is a techable knockdown that doesn't leave Tamao in much of an advantageous situation other than the damage (and apparently some characters can start their turn according to JP wiki, will need testing). The situation on throw soften isn't much better either as Tamao is still in the animation. | ||
Allows for OTG followups on no-techs in the corner. | |||
}} | }} | ||
}} | }} | ||
Revision as of 04:10, 6 September 2024
Move List
Standing Normals
| Damage | Guard | Startup | Active | Recovery | FrameAdv |
|---|---|---|---|---|---|
| 13 | Mid | 5 | 2 | 8 | +2 |
|
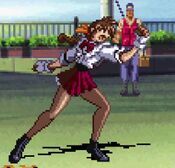
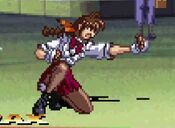
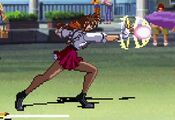
A low shin kick that hits mid despite looks. Same range as crLP, although a pinch slower, so you can use either to harass the opponent with minimal pushback. | |||||
| Damage | Guard | Startup | Active | Recovery | FrameAdv |
|---|---|---|---|---|---|
| 32 | Mid | 10 | 2 | 20 | -7 |
|
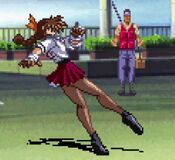
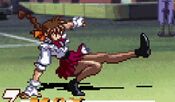
A beefy step-in high kick, great range and decent enough frame data. You will get more use from stHP but stHK goes further and hits all crouchers. | |||||
Crouching Normals
| Damage | Guard | Startup | Active | Recovery | FrameAdv |
|---|---|---|---|---|---|
| 9 | Mid | 3 | 2 | 8 | +2 |
|
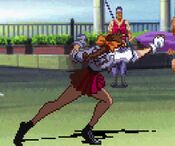
A snappy crouching jab. Can link into itself and stLP for a combo confirm. | |||||
| Damage | Guard | Startup | Active | Recovery | FrameAdv |
|---|---|---|---|---|---|
| 14 | Low | 4 | 2 | 10 | 0 |
|
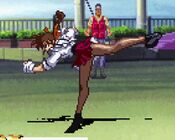
A nearly MK11 Terminator-looking crouch kick. Can link into itself or cr.LP for a chain combo. | |||||
| Damage | Guard | Startup | Active | Recovery | FrameAdv |
|---|---|---|---|---|---|
| 32 | Low | 5 | 4 | 17 | -6 |
|
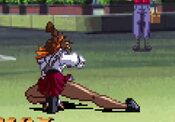
A quick shoto sweep, the frame data isn't bad on it but the range is atrocious. Causes knockdown. | |||||
Jumping Normals
| Damage | Guard | Startup | Active | Recovery | FrameAdv |
|---|---|---|---|---|---|
| 28 | High | 10 | 6 (3, 3) | 17 | - |
|
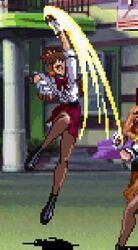
A two-handed club also similar to Kyo Kusanagi's but this does not operate the same as his. While you cannot cross up with this, it does have a great hitbox for aerial defensive plays and as a chain ender. | |||||
| Damage | Guard | Startup | Active | Recovery | FrameAdv |
|---|---|---|---|---|---|
| 32 | High | 6 | 11 | 5 | - |
|
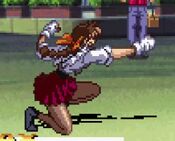
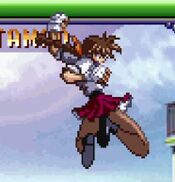
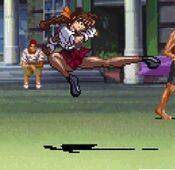
A massive dropkick, Tamao's preferred jump in normal for damage and range. Can also be used defensively with either 8jHK or 7jHK. | |||||
Command Normals
| Damage | Guard | Startup | Active | Recovery | FrameAdv |
|---|---|---|---|---|---|
| 32 | Low | 10 | 3 | 14 | -2 |
|
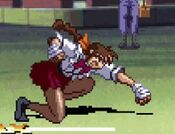
A low scooping punch, has a bit more range than crHK and causes knockdown by itself but is more useful as Tamao's OTG pickup button. | |||||
| Damage | Guard | Startup | Active | Recovery | FrameAdv |
|---|---|---|---|---|---|
| 32 | Mid | 15 | 6 | 20 | -9 |
|
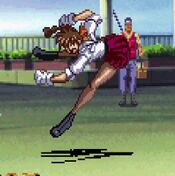
A hopping hip attack, knocks down, it makes a funny noise when you hit your opponent but you'll never hear it because the range on it is offensively bad, it has the lower range than ever her smallest of pokes. It's possible to whiff this to set up a command grab, I suppose. | |||||
| Damage | Guard | Startup | Active | Recovery | FrameAdv |
|---|---|---|---|---|---|
| 37 | Mid | 6 | 21(10, 11), (4), 12 | 18 | -39~0 |
|
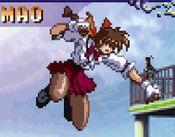
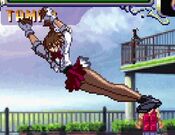
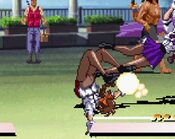
Tamao does her best Sasquatch impression by leaping through the air head first to conk the opponent with her noggin. This attack actually has a secondary hitbox if she misses, as she will slide forward on her face (still a mid) after she lands, which is still part of the attack. This face slide is special cancelable so if your opponent isn't ready for it you can immediately cash out into a EX or Lightning Crash. Bless her heart, she's trying her best. | |||||
| Damage | Guard | Startup | Active | Recovery | FrameAdv |
|---|---|---|---|---|---|
| 28 | Mid | 14 | 4 | 14 | -3 |
|
A backfist strike with slightly more range than stLP, causes knockdown on hit, not special canellable. | |||||
Throws
| Damage | Guard | Startup | Active | Recovery | FrameAdv |
|---|---|---|---|---|---|
|
Tamao performs a shoulder throw and then slightly loses balance. Very important to note that, while still being an instant throw, it is a techable knockdown that doesn't leave Tamao in much of an advantageous situation other than the damage (and apparently some characters can start their turn according to JP wiki, will need testing). The situation on throw soften isn't much better either as Tamao is still in the animation. Allows for OTG followups on no-techs in the corner. | |||||
Guard Cancels
Special Moves
| Damage | Guard | Startup | Active | Recovery | FrameAdv |
|---|---|---|---|---|---|
| - | N/A | - | - | - | |
|
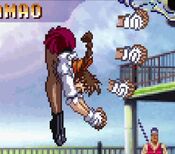
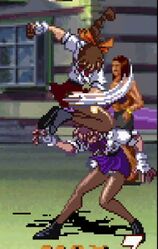
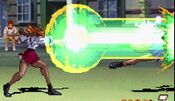
Tamao's command grab, she mounts the opponent's shoulders and starts raining down fists on their head. A very helpful addition to her kit, especially since her command grab has no whiff animation and she has no overlapping special that will come out if it misses. By holding either Punch or Kick immediately after the throw she gets access to a different ender that does slightly less damage, but offers a 3HP OTG pickup in the corner. Punch ender does the lowest damage but gives you the easiest pickup whereas Kick ender is the highest damage but leaves a smaller window to get the OTG. | |||||
Super Moves
| Damage | Guard | Startup | Active | Recovery | FrameAdv |
|---|---|---|---|---|---|
| 18 (20x) | Mid | - | - | -+4 | |
|
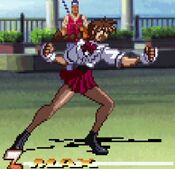
A 2 bar super that does stupid damage, usually 45% percent. Tamao's best use of meter, as she gets great damage, can combo into it, hits fullscreen, is plus if blocked, and does crazy amounts of chip damage. Chipping out a low life opponent with this is a super relevant strategy. Can also be performed with SP1+SP2. | |||||
