| Line 269: | Line 269: | ||
|damage= | |damage= | ||
|guard= Mid | |guard= Mid | ||
|startup= | |startup= 8 | ||
|active= | |active= | ||
|recovery=- | |recovery=- | ||
|frameAdv=- | |frameAdv=- | ||
| Line 319: | Line 319: | ||
|damage= | |damage= | ||
|guard= N/A | |guard= N/A | ||
|startup= | |startup= 4 | ||
|active=- | |active=- | ||
|recovery=- | |recovery=- | ||
| Line 330: | Line 330: | ||
|damage= | |damage= | ||
|guard= N/A | |guard= N/A | ||
|startup= | |startup= 4 | ||
|active=- | |active=- | ||
|recovery=- | |recovery=- | ||
|frameAdv=- | |frameAdv=- | ||
|description= HP version catches grounded mids. | |description= HP version catches grounded mids/highs. | ||
}} | }} | ||
{{AttackData-AVG2 | {{AttackData-AVG2 | ||
| Line 341: | Line 341: | ||
|damage= | |damage= | ||
|guard= N/A | |guard= N/A | ||
|startup= | |startup= 4 | ||
|active=- | |active=- | ||
|recovery=- | |recovery=- | ||
|frameAdv=- | |frameAdv=- | ||
|description=LP+HP version also catches grounded mids. Shakunage cannot catch lows or projectiles, but the LP+HP version side swaps. | |description=LP+HP version also catches grounded mids/highs. Shakunage cannot catch lows or projectiles, but the LP+HP version side swaps. | ||
}} | }} | ||
}} | }} | ||
Revision as of 19:49, 23 April 2022
Introduction
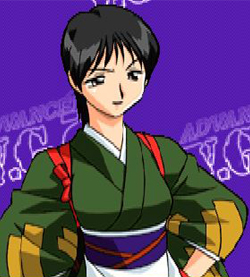
Kyoko doesn't even want to be here.
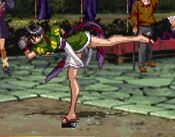
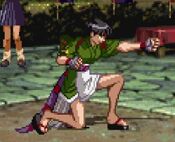
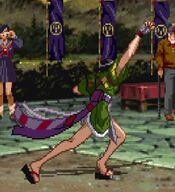
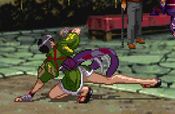
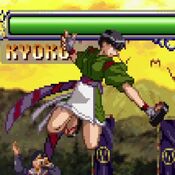
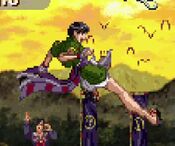
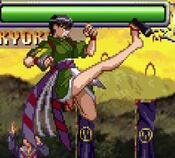
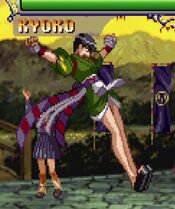
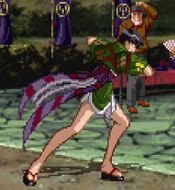
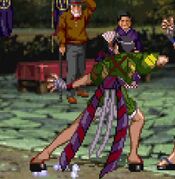
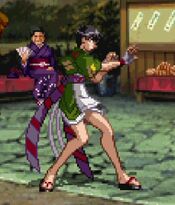
At a glance, you might think that Kyoko is a grappler character. However, while she does sport a command grab and a unique anti-air grab special, Kyoko is, surprisingly, far more well-suited to a close-range pressure game backed up by some dirty setplay. Sporting strong combos, one of the few four-hit aerial chains in the game, and powerful okizeme with EX Sazanka, Kyoko excels at overwhelming the opponent and not giving them a chance to breathe. However, this strength comes at the cost of a somewhat linear neutral game -- with her aerial normals being her primary way to start offense, she suffers against characters with good space control options. She also very heavily relies on meter to get going, so properly managing your resources is paramount to making Kyoko work.
| Pros | Cons |
|
|
Movelist
| Damage | Guard | Startup | Active | Recovery | FrameAdv |
|---|---|---|---|---|---|
| Mid | - | - | - |
| Damage | Guard | Startup | Active | Recovery | FrameAdv |
|---|---|---|---|---|---|
| Mid | - | - | - |
| Damage | Guard | Startup | Active | Recovery | FrameAdv |
|---|---|---|---|---|---|
| Mid | - | - | - |
| Damage | Guard | Startup | Active | Recovery | FrameAdv |
|---|---|---|---|---|---|
| Mid | - | - | - |
| Damage | Guard | Startup | Active | Recovery | FrameAdv |
|---|---|---|---|---|---|
| Low | - | - | - |
| Damage | Guard | Startup | Active | Recovery | FrameAdv |
|---|---|---|---|---|---|
| Low | - | - | - |
| Damage | Guard | Startup | Active | Recovery | FrameAdv |
|---|---|---|---|---|---|
| Mid | - | - | - |
| Damage | Guard | Startup | Active | Recovery | FrameAdv |
|---|---|---|---|---|---|
| Low | - | - | - |
| Damage | Guard | Startup | Active | Recovery | FrameAdv |
|---|---|---|---|---|---|
| High | - | - | - |
| Damage | Guard | Startup | Active | Recovery | FrameAdv |
|---|---|---|---|---|---|
| High | - | - | - |
| Damage | Guard | Startup | Active | Recovery | FrameAdv |
|---|---|---|---|---|---|
| High | - | - | - |
| Damage | Guard | Startup | Active | Recovery | FrameAdv |
|---|---|---|---|---|---|
| High | - | - | - |
| Damage | Guard | Startup | Active | Recovery | FrameAdv |
|---|---|---|---|---|---|
| High | - | - | - |
Command Moves
| Damage | Guard | Startup | Active | Recovery | FrameAdv |
|---|---|---|---|---|---|
| Mid | - | - | - | ||
|
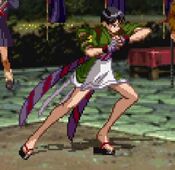
A short-range command elbow. Special cancels, but doesn't really do a whole lot for you. | |||||
Target Combos
st.HP > st.HK/cr.HK
(j.LP > j.LK) or (j.LK > j.LP) > (j.HP > j.HK) or (j.HK > j.HP)
(j.HP > j.HK) or (j.HK > j.HP)
Guard Cancels
LP: st.HP
LK: st.HK
HP: LP Ominaeshi (qcf+LP)
HK: LK Sazanka (dp+K)
Kyoko will usually get the most mileage out of her LP and LK guard cancels. LP works best for airborne opponents, LK is best for grounded opponents due to its horizontal range. In either case, your goal is to convert into Ominaeshi to score a combo.
Special Moves
Super Moves
| Damage | Guard | Startup | Active | Recovery | FrameAdv |
|---|---|---|---|---|---|
| N/A | 1 | - | - | - | |
|
1F command grab super that's unjumpable after the flash. Because of the way the final group of hits work, the best damage will often come from landing this in the center of the screen (not the center of the stage). However, you can combo after this in the corner by following up with Ominaeshi (it will whiff, but Otokoeshi will hit), which you can then extend with a super cancel if you feel like dumping meter. | |||||
Strategy
Because Kyoko lacks good long-range options for neutral, your best bet is to try and build meter by whiffing your air chains if your opponent decides to back off. If you can successfully goad them into coming to you, you can intercept their approach by jumping toward them with your fantastic aerial buttons and try to establish offense. If you find yourself on the defensive, you have some solid guard cancel options and EX Ominaeshi, so don't forget to use those if you need some breathing room. Remember that Kyoko is very highly dependent on meter to really make the best of her tools, so make sure you stay on top of your resource management.
Kyoko's okizeme starts with landing EX Sazanka. From here, you want to dash jump into j.HK. This effectively sets up an ambiguous left-right mixup, with the side you end up on depending on the timing of your button press. Since the resulting combo you land from this generates a fair amount of meter, you can loop this okizeme setup for a pretty decent amount of time, cashing out a ton of damage in the process.
Combos
For all combos ending with Ominaeshi, Otokoeshi is assumed unless you're super cancelling. If you are, you can cash out some meter by cancelling Ominaeshi into EX Sazanka, or cancelling Otokoeshi into EX Ominaeshi xx EX Sazanka.
Basic Combos
st.LP, cr.HP, sj.HK > j.HP, st.HP > st.HK xx Ominaeshi
(corner) st.LP, cr.HP, cr.HP x2, st.HP > st.HK xx Ominaeshi
Anti-Air Combos
EX Ominaeshi xx EX Sazanka
st.LP x1-2, sj.LK > j.HK > j.HP xx LP Ominaeshi
Throw Combos
Jinchouge, OTG cr.HK
(corner) Jinchouge, walk OTG cr.HK xx LP Ominaeshi, cr.HP, cr.HP xx LK Sazanka
(corner) Jinchouge, walk OTG cr.HK xx LP Ominaeshi, cr.HP, HP Ominaeshi > Ender
Counter Combo
LP Shakunage, sj.LK > j.HK, st.HP > st.HK xx Ominaeshi
HP Shakunage, HP Ominaeshi
LP+HP Shakunage, OTG cr.HK xx HP Ominaeshi
