| Line 177: | Line 177: | ||
|recovery=- | |recovery=- | ||
|frameAdv=- | |frameAdv=- | ||
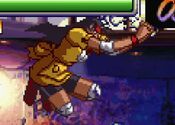
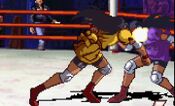
|description= Arguably Jun's best air normal, she can hit this rising on a standing opponent and then chain into j2HP to hit cross up. | |description= Arguably Jun's best air normal, she can hit this rising on a standing opponent and then chain into j2HP to hit cross up. It's also active for a full lunar cycle, so super jumping with this as an approach is a tasty proposition. | ||
}} | }} | ||
}} | }} | ||
| Line 242: | Line 242: | ||
|recovery=- | |recovery=- | ||
|frameAdv=- | |frameAdv=- | ||
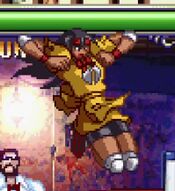
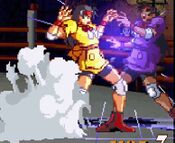
|description= Legally mandated grappler body splash cross-up tool, You know what this is good for. | |description= Legally mandated grappler body splash cross-up tool, You know what this is good for. It's Jun's go-to air-chain ender with how good it's hitbox is. | ||
}} | }} | ||
}} | }} | ||
Revision as of 23:11, 18 April 2022
Introduction
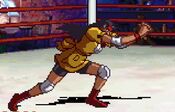
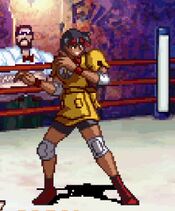
Aside from being an accomplished wrestler, Jun is also an astrophysicist. Her perfect synthesis of the two disciplines allows her to dunk people from outer space.
Jun very quickly and easily makes herself known as AVG2's grappler. And while she does quite dutifully fulfill this role, players who pick up Jun will find a surprisingly versatile character with strong mobility and no shortage of great pokes to be using in neutral. While her combos are short and fairly stable, she suffers from a lack of ways to confirm them compared to other characters, which causes her to rely on conditioning the opponent more. In short, expect to play a grappler, but one that is more than capable of holding her own in footsies.
| Pros | Cons |
|
|
Movelist
| Damage | Guard | Startup | Active | Recovery | FrameAdv |
|---|---|---|---|---|---|
| - | Mid | - | - | - |
| Damage | Guard | Startup | Active | Recovery | FrameAdv |
|---|---|---|---|---|---|
| - | Mid | - | - | - |
| Damage | Guard | Startup | Active | Recovery | FrameAdv |
|---|---|---|---|---|---|
| - | Mid | - | - | - |
| Damage | Guard | Startup | Active | Recovery | FrameAdv |
|---|---|---|---|---|---|
| - | Mid | - | - | - |
| Damage | Guard | Startup | Active | Recovery | FrameAdv |
|---|---|---|---|---|---|
| - | Low | - | - | - |
| Damage | Guard | Startup | Active | Recovery | FrameAdv |
|---|---|---|---|---|---|
| - | Low | - | - | - |
| Damage | Guard | Startup | Active | Recovery | FrameAdv |
|---|---|---|---|---|---|
| - | Mid | - | - | - |
| Damage | Guard | Startup | Active | Recovery | FrameAdv |
|---|---|---|---|---|---|
| - | Low | - | - | - |
| Damage | Guard | Startup | Active | Recovery | FrameAdv |
|---|---|---|---|---|---|
| - | High | - | - | - |
| Damage | Guard | Startup | Active | Recovery | FrameAdv |
|---|---|---|---|---|---|
| - | High | - | - | - | |
|
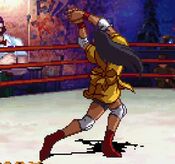
Arguably Jun's best air normal, she can hit this rising on a standing opponent and then chain into j2HP to hit cross up. It's also active for a full lunar cycle, so super jumping with this as an approach is a tasty proposition. | |||||
| Damage | Guard | Startup | Active | Recovery | FrameAdv |
|---|---|---|---|---|---|
| - | High | - | - | - |
| Damage | Guard | Startup | Active | Recovery | FrameAdv |
|---|---|---|---|---|---|
| - | High | - | - | - |
Command Moves
| Damage | Guard | Startup | Active | Recovery | FrameAdv |
|---|---|---|---|---|---|
| - | High | - | - | - | |
|
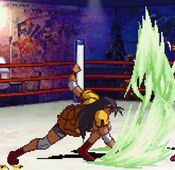
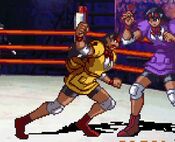
Command launcher. A bit on the slow side, but leads to good damage. Needs to be used preemptively due to it's slow startup, but works as a solid anti-air thanks to it's large hitbox. | |||||
| Damage | Guard | Startup | Active | Recovery | FrameAdv |
|---|---|---|---|---|---|
| - | High | - | - | - | |
|
Legally mandated grappler body splash cross-up tool, You know what this is good for. It's Jun's go-to air-chain ender with how good it's hitbox is. | |||||
Target Combos
st.LP > (cr.LP) > cl.HK
st.LP > (cr.LP) > st.LK > (cr.LK) > st.HK
st.LP > (cr.LP) > st.HP > st.HK
cr.LP > cr.HK
j.LP/LK > j.HP/HK/j.d+HP
Guard Cancels
LP: st.LP
LK: st.LK
HP: LP Earth Shaker (qcb+LP)
HK: HK Kubota Sway (rdp+HK)
Jun's LP and LK guard cancels are some of the most devastating in the game for one strange reason: the damage of these GCs is dependent on the move being guard cancelled. This also applies to subsequent uses of the normal when chaining into itself. As an example, by guard cancelling Chiho's Super, it's possible to kill her in one combo just by repeatedly chaining st.LP into itself because of the damage boost. Because of this factor along, HP and HK guard cancels don't see a lot of use.
Special Moves
Super Moves
| Damage | Guard | Startup | Active | Recovery | FrameAdv |
|---|---|---|---|---|---|
| Low | - | - | - | ||
|
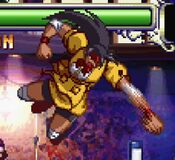
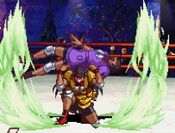
A powered up Kubota Lariat that does dino damage when it hits. For reasons our best scientists have yet to adequately explain, this move hits low. Using this to end combos is a huge part of Jun's high damage, since one of the move's most terrifying attributes is that the damage from the falling portion of the move will never be affected by damage scaling. | |||||
| Damage | Guard | Startup | Active | Recovery | FrameAdv |
|---|---|---|---|---|---|
| N/A | 1 | - | - | - | |
|
Mostly useful for the fact that it's 1F startup. While the damage is high, you often get better damage from HP Kubota Buster into EX Earth Shaker, so you mostly want to use this when you need speed more than damage. | |||||
Strategy
Jun generally wants to approach the neutral game carefully. You have a few usable mid-range options in footsies, primarily f+HP, st.HP, st.HK and Lariat. You'll have a hard time against fireballs, but if you have meter then you can very easily discourage people from throwing them with EX Earth Shaker. Outside of that, you largely want to be using aerial approaches, primarily with j.LP, as it's a very reliable air-to-air button that is freely chainable into any of Jun's heavy jump normals -- j.HK is best for long range, while j.d+HP is best up close.
Once you've found your way in, the crux of your pressure starts with cr.LP. From here, you have a very strong tick into Kubota Buster. If the opponent tries to jump out, a chain into cr.HK will catch them, allowing you to score a combo with Lariat into an OTG follow-up. If you have two bars to spare, you can extend any of those punishes into Kubota Shuttle for monstrous damage.
On defense, you'll largely be relying on attempts to call people out for gaps in pressure, since you don't have any particularly good abare options. However, you'll be able to get some mileage out of defensive command grab supers, and you'll definitely want to be using Kubota Sway against opponents who try to catch you with instant supers.
Combos
Basic Combos
cr.LK > cr.HK xx Kubota Lariat, OTG~
(corner) cr.LK > cr.HK xx HP Earth Shaker, cl.HK xx Kubota Lariat, OTG~
f+HP, sj.LK > j.HK, cl.HK xx HP Earth Shaker/Lariat
Primary OTG Follow-ups
~cr.LK xx HP Earth Shaker (xx Kubota Shuttle)
~cr.LK > cr.HK xx Lariat
~cr.LK > cl.HK xx Kubota Shuttle
Throw Combos
HP Kubota Buster, EX Earth Shaker
HP Kubota Buster, dash cr.LK xx HP Earth Shaker (xx Kubota Shuttle)
HP Throw, walk forward cr.LK xx HP Earth Shaker (xx Kubota Shuttle)

