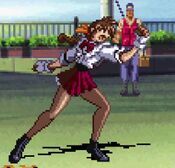
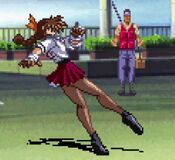
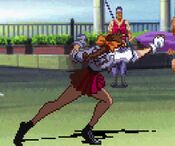
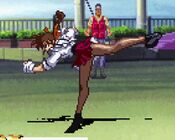
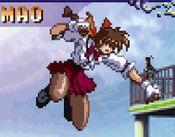
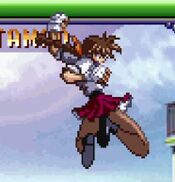
No edit summary |
No edit summary |
||
| Line 20: | Line 20: | ||
= Movelist = | = Movelist = | ||
{{MoveData | {{MoveData | ||
|image= | |image=AVG2_Tamao_stLP.jpg | ||
|caption= | |caption= | ||
|name=st.{{Icon-Capcom|LP}} | |name=st.{{Icon-Capcom|LP}} | ||
| Line 36: | Line 36: | ||
---- | ---- | ||
{{MoveData | {{MoveData | ||
|image= | |image=AVG2_Tamao_stLK.jpg | ||
|caption= | |caption= | ||
|name=st.{{Icon-Capcom|LK}} | |name=st.{{Icon-Capcom|LK}} | ||
| Line 52: | Line 52: | ||
---- | ---- | ||
{{MoveData | {{MoveData | ||
|image= | |image=AVG2_Tamao_stHP.jpg | ||
|caption= | |caption= | ||
|name=st.{{Icon-Capcom|HP}} | |name=st.{{Icon-Capcom|HP}} | ||
| Line 68: | Line 68: | ||
---- | ---- | ||
{{MoveData | {{MoveData | ||
|image= | |image=AVG2_Tamao_stHK.jpg | ||
|caption= | |caption= | ||
|name=st.{{Icon-Capcom|HK}} | |name=st.{{Icon-Capcom|HK}} | ||
| Line 84: | Line 84: | ||
---- | ---- | ||
{{MoveData | {{MoveData | ||
|image= | |image=AVG2_Tamao_crLP.jpg | ||
|caption= | |caption= | ||
|name=cr.{{Icon-Capcom|LP}} | |name=cr.{{Icon-Capcom|LP}} | ||
| Line 100: | Line 100: | ||
---- | ---- | ||
{{MoveData | {{MoveData | ||
|image= | |image=AVG2_Tamao_crLK.jpg | ||
|caption= | |caption= | ||
|name=cr.{{Icon-Capcom|LK}} | |name=cr.{{Icon-Capcom|LK}} | ||
| Line 116: | Line 116: | ||
---- | ---- | ||
{{MoveData | {{MoveData | ||
|image= | |image=AVG2_Tamao_crHP.jpg | ||
|caption= | |caption= | ||
|name=cr.{{Icon-Capcom|HP}} | |name=cr.{{Icon-Capcom|HP}} | ||
| Line 132: | Line 132: | ||
---- | ---- | ||
{{MoveData | {{MoveData | ||
|image= | |image=AVG2_Tamao_crHK.jpg | ||
|caption= | |caption= | ||
|name=cr.{{Icon-Capcom|HK}} | |name=cr.{{Icon-Capcom|HK}} | ||
| Line 148: | Line 148: | ||
---- | ---- | ||
{{MoveData | {{MoveData | ||
|image= | |image=AVG2_Tamao_jLP.jpg | ||
|caption= | |caption= | ||
|name=j.{{Icon-Capcom|LP}} | |name=j.{{Icon-Capcom|LP}} | ||
| Line 164: | Line 164: | ||
---- | ---- | ||
{{MoveData | {{MoveData | ||
|image= | |image=AVG2_Tamao_jLK.jpg | ||
|caption= | |caption= | ||
|name=j.{{Icon-Capcom|LK}} | |name=j.{{Icon-Capcom|LK}} | ||
| Line 180: | Line 180: | ||
---- | ---- | ||
{{MoveData | {{MoveData | ||
|image= | |image=AVG2_Tamao_jHP.jpg | ||
|caption= | |caption= | ||
|name=j.{{Icon-Capcom|HP}} | |name=j.{{Icon-Capcom|HP}} | ||
| Line 196: | Line 196: | ||
---- | ---- | ||
{{MoveData | {{MoveData | ||
|image= | |image=AVG2_Tamao_njHP.jpg | ||
|caption= | |caption= | ||
|name=nj.{{Icon-Capcom|HP}} | |name=nj.{{Icon-Capcom|HP}} | ||
| Line 212: | Line 212: | ||
---- | ---- | ||
{{MoveData | {{MoveData | ||
|image= | |image=AVG2_Tamao_jHK.jpg | ||
|caption= | |caption= | ||
|name=j.{{Icon-Capcom|HK}} | |name=j.{{Icon-Capcom|HK}} | ||
| Line 229: | Line 229: | ||
'''Command Moves'''<br> | '''Command Moves'''<br> | ||
{{MoveData | {{MoveData | ||
|image= | |image=AVG2_Tamao_3HP.jpg | ||
|caption= | |caption= | ||
|name={{Motion|3}}+{{Icon-Capcom|HP}} | |name={{Motion|3}}+{{Icon-Capcom|HP}} | ||
| Line 245: | Line 245: | ||
---- | ---- | ||
{{MoveData | {{MoveData | ||
|image= | |image=AVG2_Tamao_6HK.jpg | ||
|caption= | |caption= | ||
|name={{Motion|6}}+{{Icon-Capcom|HK}} | |name={{Motion|6}}+{{Icon-Capcom|HK}} | ||
| Line 261: | Line 261: | ||
---- | ---- | ||
{{MoveData | {{MoveData | ||
|image= | |image=AVG2_Tamao_66HP.jpg | ||
|caption= | |caption= | ||
|name=Running{{Icon-Capcom|HP}} | |name=Running{{Icon-Capcom|HP}} | ||
| Line 272: | Line 272: | ||
|recovery=- | |recovery=- | ||
|frameAdv=--39~0 | |frameAdv=--39~0 | ||
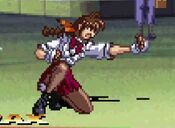
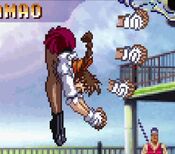
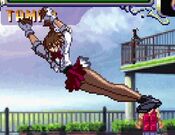
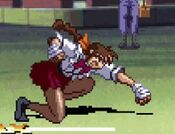
|description= | |description= Tamao does her best Sasquatch impression by leaping through the air head first to conk the opponent with her noggin. This attack actually has a secondary hitbox if she misses, as she will slide forward on her face after she land, which is still part of the attack. Bless her heart, she's trying her best. | ||
}} | }} | ||
}} | }} | ||
---- | ---- | ||
{{MoveData | {{MoveData | ||
|image= | |image=AVG2_Tamao_4HP.jpg | ||
|caption= | |caption= | ||
|name={{Motion|4}}+{{Icon-Capcom|HP}} | |name={{Motion|4}}+{{Icon-Capcom|HP}} | ||
| Line 319: | Line 319: | ||
|recovery=- | |recovery=- | ||
|frameAdv=--6 | |frameAdv=--6 | ||
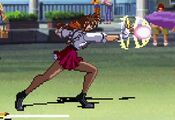
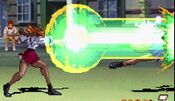
|description= | |description= Tamao's attempt at Yuka's fireball, tragically she cannot make it powerful enough to travel the entire distance of the screen. Thankfully this is not a Dan Hibiki-level fireball, so it does go far enough to actually be useful, it just wont zone from full screen. | ||
}} | }} | ||
{{AttackData-AVG2 | {{AttackData-AVG2 | ||
| Line 330: | Line 330: | ||
|recovery=- | |recovery=- | ||
|frameAdv=--6 | |frameAdv=--6 | ||
|description= | |description= With the power of a extra couple frames of concetration, Tamao is able to make her fireball travel a bit further. | ||
}} | }} | ||
{{AttackData-AVG2 | {{AttackData-AVG2 | ||
| Line 408: | Line 408: | ||
|recovery=- | |recovery=- | ||
|frameAdv=--4 | |frameAdv=--4 | ||
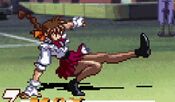
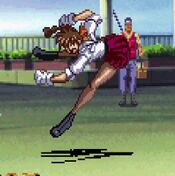
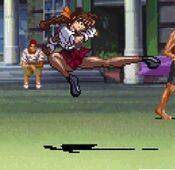
|description= | |description= Almost exactly like Dan Hibiki's replacement tatsu, the LK version of Kusenkyaku is a snappy leaping kick that is mostly safe on block (a 0f super will catch it) and knocks down on hit. One of Tamao's better tools in terms of both effectiveness and safety. | ||
}} | }} | ||
{{AttackData-AVG2 | {{AttackData-AVG2 | ||
| Line 419: | Line 419: | ||
|recovery=- | |recovery=- | ||
|frameAdv=--16 | |frameAdv=--16 | ||
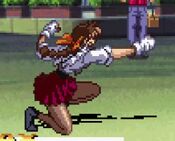
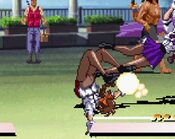
|description= | |description= While no longer anywhere near as safe as the LK version, HK Kusenkyaku is a three hit series of kicks that works best as a combo confirm tool. | ||
}} | }} | ||
{{AttackData-AVG2 | {{AttackData-AVG2 | ||
| Line 457: | Line 457: | ||
|recovery=- | |recovery=- | ||
|frameAdv=- | |frameAdv=- | ||
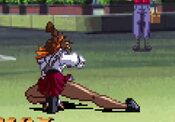
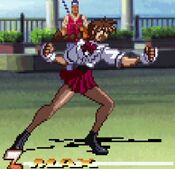
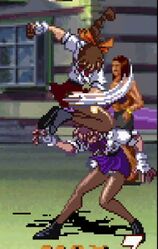
|description= | |description= Tamao's command grab, she mounts the opponent's shoulders and starts raining down fists on their head. A very helpful addition to her kit. | ||
}} | }} | ||
}} | }} | ||
Revision as of 10:10, 18 April 2022
Introduction
Tamao learned to fight by trying to copy Yuka really hard until it somehow started working. She's not sure how that works either, but you don't see her complaining.
Yuka but with all the good things shaved off.
| Pros | Cons |
|
|
Movelist
| Damage | Guard | Startup | Active | Recovery | FrameAdv |
|---|---|---|---|---|---|
| 9 | Mid | 5 | - | - | -+2 |
| Damage | Guard | Startup | Active | Recovery | FrameAdv |
|---|---|---|---|---|---|
| 13 | Mid | 5 | - | - | -+2 |
| Damage | Guard | Startup | Active | Recovery | FrameAdv |
|---|---|---|---|---|---|
| 28 | Mid | 3 | - | - | --3 |
| Damage | Guard | Startup | Active | Recovery | FrameAdv |
|---|---|---|---|---|---|
| 32 | Mid | 10 | - | - | --7 |
| Damage | Guard | Startup | Active | Recovery | FrameAdv |
|---|---|---|---|---|---|
| 9 | Low | 3 | - | - | -+2 |
| Damage | Guard | Startup | Active | Recovery | FrameAdv |
|---|---|---|---|---|---|
| 14 | Low | 4 | - | - | -0 |
| Damage | Guard | Startup | Active | Recovery | FrameAdv |
|---|---|---|---|---|---|
| 28 | Mid | 6 | - | - | --1 |
| Damage | Guard | Startup | Active | Recovery | FrameAdv |
|---|---|---|---|---|---|
| 32 | Low | 5 | - | - | --6 |
| Damage | Guard | Startup | Active | Recovery | FrameAdv |
|---|---|---|---|---|---|
| 9 | High | 5 | - | - | - |
| Damage | Guard | Startup | Active | Recovery | FrameAdv |
|---|---|---|---|---|---|
| 13 | High | 5 | - | - | - |
| Damage | Guard | Startup | Active | Recovery | FrameAdv |
|---|---|---|---|---|---|
| 28 | High | 10 | - | - | - |
| Damage | Guard | Startup | Active | Recovery | FrameAdv |
|---|---|---|---|---|---|
| 28 | High | 12 | - | - | - |
| Damage | Guard | Startup | Active | Recovery | FrameAdv |
|---|---|---|---|---|---|
| 32 | High | 6 | - | - | - |
Command Moves
| Damage | Guard | Startup | Active | Recovery | FrameAdv |
|---|---|---|---|---|---|
| 32 | Low | 10 | - | - | --2 |
| Damage | Guard | Startup | Active | Recovery | FrameAdv |
|---|---|---|---|---|---|
| 32 | Mid | 15 | - | - | --9 |
| Damage | Guard | Startup | Active | Recovery | FrameAdv |
|---|---|---|---|---|---|
| 37 | Mid | 6 | - | - | --39~0 |
|
Tamao does her best Sasquatch impression by leaping through the air head first to conk the opponent with her noggin. This attack actually has a secondary hitbox if she misses, as she will slide forward on her face after she land, which is still part of the attack. Bless her heart, she's trying her best. | |||||
| Damage | Guard | Startup | Active | Recovery | FrameAdv |
|---|---|---|---|---|---|
| 28 | Mid | 14 | - | - | --3 |
Target Combos
st.LP > (st.LK) > (st.HP > st.HK)/(st.HK > st.HP)
st.HP > st.HK
cr.HP > cr.HK
j.LP/j.LK > j.HP/j.HK
Guard Cancels
LP:
LK:
HP:
HK:
Special Moves
| Damage | Guard | Startup | Active | Recovery | FrameAdv |
|---|---|---|---|---|---|
| - | N/A | - | - | - | |
|
Tamao's command grab, she mounts the opponent's shoulders and starts raining down fists on their head. A very helpful addition to her kit. | |||||
Super Moves
| Damage | Guard | Startup | Active | Recovery | FrameAdv |
|---|---|---|---|---|---|
| 18 (20x) | Mid | - | - | -+4 |
Combos
Basic Combos
Misc. Combo

