No edit summary |
|||
| Line 385: | Line 385: | ||
=== Super Moves === | === Super Moves === | ||
{{MoveData | {{MoveData | ||
|image=AVG2_Satomi_Hissatsu_Kyokushinken .jpg | |image=AVG2_Satomi_Hissatsu_Kyokushinken.jpg | ||
|caption= {{Motion|6}}{{Motion|41236}} + {{Icon-Capcom|K}} | |caption= {{Motion|6}}{{Motion|41236}} + {{Icon-Capcom|K}} | ||
|name=Hissatsu Kyokushinken | |name=Hissatsu Kyokushinken | ||
| Line 400: | Line 400: | ||
}} | }} | ||
---- | ---- | ||
== Combos == | == Combos == | ||
'''Basic Combos'''<br> | '''Basic Combos'''<br> | ||
Revision as of 22:54, 16 April 2022
Introduction
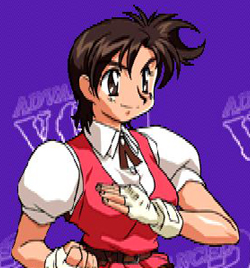
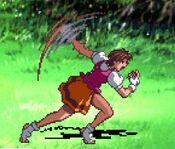
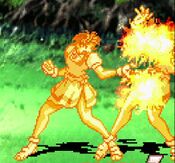
Satomi is gonna swing her arms around like this, and if you get hit, it's your own fault.
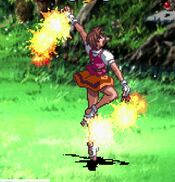
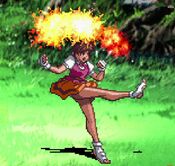
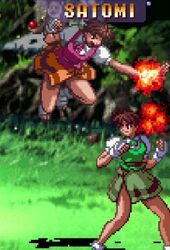
Satomi is one of the strongest characters in the game thanks to her straightforward, but overwhelmingly effective gameplan. She has some of the most fearsome normals in the game that allow her to bully her opponent in neutral, both sticking hitboxes out for the opponent to run into and being able to tag them for errent pokes with her whiff punish abilities. When the opponent has had enough and finally decides to jump, Satomi can unleash EX Kaenzan, the greatest anti-air in the game for beefy damage. Not only this, but when she gets into the enemy's face she can start a simple mixup with her cr.LK and Gokuensho overhead. While not as flashy as other characters in the game, her simplicity is a benefit because she doesn't require as much meter and thusly will usually have EX Kaenzan on deck.
| Pros | Cons |
|
|
Movelist
| Damage | Guard | Startup | Active | Recovery | FrameAdv |
|---|---|---|---|---|---|
| - | Mid | - | - | - |
| Damage | Guard | Startup | Active | Recovery | FrameAdv |
|---|---|---|---|---|---|
| - | Mid | - | - | - |
| Damage | Guard | Startup | Active | Recovery | FrameAdv |
|---|---|---|---|---|---|
| - | Mid | 5 | - | - | - |
|
The button of all time. | |||||
| Damage | Guard | Startup | Active | Recovery | FrameAdv |
|---|---|---|---|---|---|
| - | Mid | - | - | - |
| Damage | Guard | Startup | Active | Recovery | FrameAdv |
|---|---|---|---|---|---|
| - | Low | - | - | - |
| Damage | Guard | Startup | Active | Recovery | FrameAdv |
|---|---|---|---|---|---|
| - | Low | - | - | - |
| Damage | Guard | Startup | Active | Recovery | FrameAdv |
|---|---|---|---|---|---|
| - | Mid | - | - | - |
| Damage | Guard | Startup | Active | Recovery | FrameAdv |
|---|---|---|---|---|---|
| - | Low | - | - | - |
| Damage | Guard | Startup | Active | Recovery | FrameAdv |
|---|---|---|---|---|---|
| - | High | - | - | - |
| Damage | Guard | Startup | Active | Recovery | FrameAdv |
|---|---|---|---|---|---|
| - | High | - | - | - |
| Damage | Guard | Startup | Active | Recovery | FrameAdv |
|---|---|---|---|---|---|
| - | High | - | - | - |
| Damage | Guard | Startup | Active | Recovery | FrameAdv |
|---|---|---|---|---|---|
| - | High | - | - | - |
Target Combos
st.LP > (st.HP > st.HK)/(st.HK > st.HP)
st.LP > (cr.LP) > st.LK > (cr.LK) > (st.HP > st.HK)/(st.HK > st.HP)
st.HP > st.HK
cr.LP > cr.HP
cr.LP > (st.LP) > cr.LK > cr.HK
st.LK > cr.LK
j.LP/LK > j.HP/j.HK
Guard Cancels
LP: st.LP
LK: st.LK
HP: LK Gokuensho
HK: LP Kaenzan
LP has the best reward on hit, but LK is more reliable in more situations, and HP is a good catch-all guard cancel for knockdowns. HK has the best hitbox, but its speed as a guard cancel is strangely slow, making it somewhat unreliable.
Special Moves
Super Moves
| Damage | Guard | Startup | Active | Recovery | FrameAdv |
|---|---|---|---|---|---|
| - | - | - | - |
Combos
Basic Combos
Anti-Air Combos
Guard Break String
Misc. Combo
