No edit summary |
|||
| Line 20: | Line 20: | ||
= Movelist = | = Movelist = | ||
{{MoveData | {{MoveData | ||
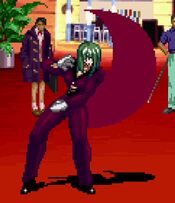
|image= | |image=AVG2_Saki_stLP.jpg | ||
|caption= | |caption= | ||
|name=st.{{Icon-Capcom|LP}} | |name=st.{{Icon-Capcom|LP}} | ||
| Line 35: | Line 35: | ||
}} | }} | ||
{{MoveData | {{MoveData | ||
|image= | |image=AVG2_Saki_stLK.jpg | ||
|caption= | |caption= | ||
|name=st.{{Icon-Capcom|LK}} | |name=st.{{Icon-Capcom|LK}} | ||
| Line 50: | Line 50: | ||
}} | }} | ||
{{MoveData | {{MoveData | ||
|image= | |image=AVG2_Saki_stHP.jpg | ||
|caption= | |caption= | ||
|name=st.{{Icon-Capcom|HP}} | |name=st.{{Icon-Capcom|HP}} | ||
| Line 65: | Line 65: | ||
}} | }} | ||
{{MoveData | {{MoveData | ||
|image= | |image=AVG2_Saki_stHK.jpg | ||
|caption= | |caption= | ||
|name=st.{{Icon-Capcom|HK}} | |name=st.{{Icon-Capcom|HK}} | ||
| Line 80: | Line 80: | ||
}} | }} | ||
{{MoveData | {{MoveData | ||
|image= | |image=AVG2_Saki_crLP.jpg | ||
|caption= | |caption= | ||
|name=cr.{{Icon-Capcom|LP}} | |name=cr.{{Icon-Capcom|LP}} | ||
| Line 95: | Line 95: | ||
}} | }} | ||
{{MoveData | {{MoveData | ||
|image= | |image=AVG2_Saki_crLK.jpg | ||
|caption= | |caption= | ||
|name=cr.{{Icon-Capcom|LK}} | |name=cr.{{Icon-Capcom|LK}} | ||
| Line 110: | Line 110: | ||
}} | }} | ||
{{MoveData | {{MoveData | ||
|image= | |image=AVG2_Saki_crHP.jpg | ||
|caption= | |caption= | ||
|name=cr.{{Icon-Capcom|HP}} | |name=cr.{{Icon-Capcom|HP}} | ||
| Line 125: | Line 125: | ||
}} | }} | ||
{{MoveData | {{MoveData | ||
|image= | |image=AVG2_Saki_crHK.jpg | ||
|caption= | |caption= | ||
|name=cr.{{Icon-Capcom|HK}} | |name=cr.{{Icon-Capcom|HK}} | ||
| Line 140: | Line 140: | ||
}} | }} | ||
{{MoveData | {{MoveData | ||
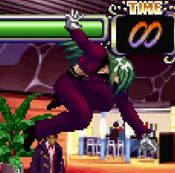
|image= | |image=AVG2_Saki_jLP.jpg | ||
|caption= | |caption= | ||
|name=j.{{Icon-Capcom|LP}} | |name=j.{{Icon-Capcom|LP}} | ||
| Line 155: | Line 155: | ||
}} | }} | ||
{{MoveData | {{MoveData | ||
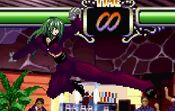
|image= | |image=AVG2_Saki_jLK.jpg | ||
|caption= | |caption= | ||
|name=j.{{Icon-Capcom|LK}} | |name=j.{{Icon-Capcom|LK}} | ||
| Line 170: | Line 170: | ||
}} | }} | ||
{{MoveData | {{MoveData | ||
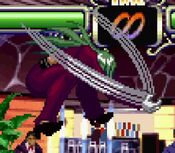
|image= | |image=AVG2_Saki_jHP.jpg | ||
|caption= | |caption= | ||
|name=j.{{Icon-Capcom|HP}} | |name=j.{{Icon-Capcom|HP}} | ||
| Line 185: | Line 185: | ||
}} | }} | ||
{{MoveData | {{MoveData | ||
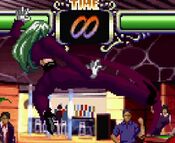
|image= | |image=AVG2_Saki_jHK.jpg | ||
|caption= | |caption= | ||
|name=j.{{Icon-Capcom|HK}} | |name=j.{{Icon-Capcom|HK}} | ||
| Line 201: | Line 201: | ||
'''Command Moves'''<br> | '''Command Moves'''<br> | ||
{{MoveData | {{MoveData | ||
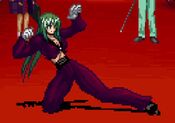
|image= | |image=AVG2_Saki_6LP.jpg | ||
|caption= | |caption= | ||
|name={{Motion|6}}+{{Icon-Capcom|LP}} | |name={{Motion|6}}+{{Icon-Capcom|LP}} | ||
| Line 216: | Line 216: | ||
}} | }} | ||
{{MoveData | {{MoveData | ||
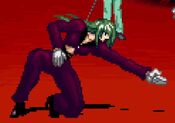
|image= | |image=AVG2_Saki_6HP.jpg | ||
|caption= | |caption= | ||
|name={{Motion|6}}+{{Icon-Capcom|HP}} | |name={{Motion|6}}+{{Icon-Capcom|HP}} | ||
| Line 231: | Line 231: | ||
}} | }} | ||
{{MoveData | {{MoveData | ||
|image= | |image=AVG2_Saki_6HK.jpg | ||
|caption= | |caption= | ||
|name={{Motion|6}}+{{Icon-Capcom|HK}} | |name={{Motion|6}}+{{Icon-Capcom|HK}} | ||
Revision as of 16:09, 13 April 2022
Introduction
Saki will cut you.
Saki is a simple character with a simple gameplan: make you explode. Sporting solid aerial normals and a HK button that almost plays footsies for you, Saki is able to turn a good number of errant pokes she'll land during neutral into incredible damage with her supers, leading to combos that often deal upwards of 50% damage in one shot. This simplicity is both a blessing and a curse, however -- her lack of solid pokes not attached to the HK button leaves her ground game feeling fairly linear, and her reliance on two-bar combo conversions for her damage makes resource management a very important question for her.
| Pros | Cons |
|
|
Movelist
| Damage | Guard | Startup | Active | Recovery | FrameAdv |
|---|---|---|---|---|---|
| - | Mid | - | - | - |
| Damage | Guard | Startup | Active | Recovery | FrameAdv |
|---|---|---|---|---|---|
| - | Mid | - | - | - |
| Damage | Guard | Startup | Active | Recovery | FrameAdv |
|---|---|---|---|---|---|
| - | Mid | - | - | - |
| Damage | Guard | Startup | Active | Recovery | FrameAdv |
|---|---|---|---|---|---|
| - | Mid | - | - | - |
| Damage | Guard | Startup | Active | Recovery | FrameAdv |
|---|---|---|---|---|---|
| - | Low | - | - | - |
| Damage | Guard | Startup | Active | Recovery | FrameAdv |
|---|---|---|---|---|---|
| - | Low | - | - | - |
| Damage | Guard | Startup | Active | Recovery | FrameAdv |
|---|---|---|---|---|---|
| - | Mid | - | - | - |
| Damage | Guard | Startup | Active | Recovery | FrameAdv |
|---|---|---|---|---|---|
| - | Low | - | - | - |
| Damage | Guard | Startup | Active | Recovery | FrameAdv |
|---|---|---|---|---|---|
| - | High | - | - | - |
| Damage | Guard | Startup | Active | Recovery | FrameAdv |
|---|---|---|---|---|---|
| - | High | - | - | - |
| Damage | Guard | Startup | Active | Recovery | FrameAdv |
|---|---|---|---|---|---|
| - | High | - | - | - |
| Damage | Guard | Startup | Active | Recovery | FrameAdv |
|---|---|---|---|---|---|
| - | High | - | - | - |
Command Moves
| Damage | Guard | Startup | Active | Recovery | FrameAdv |
|---|---|---|---|---|---|
| - | Mid | - | - | - | |
|
A quick chop that (thankfully) doesn't hit overhead | |||||
| Damage | Guard | Startup | Active | Recovery | FrameAdv |
|---|---|---|---|---|---|
| - | High | - | - | - | |
|
A midrange elbow strike | |||||
| Damage | Guard | Startup | Active | Recovery | FrameAdv |
|---|---|---|---|---|---|
| - | High | - | - | - | |
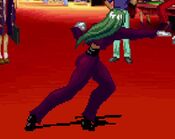
|
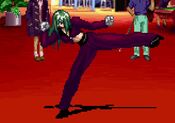
A forward step kick. Very strong poke. | |||||
Target Combos
st.LP > st.LK
f+LP > st.LK > st.LP > (st.HP > st.HK) or (st.HK > st.HP)
f+HK > st.HP/st.HK
st.HK > f+HP > st.HK
cr.LP > (st.LP) > cr.LK
cr.LK > cr.HK
j.LP/LK > j.HP/HK
Guard Cancels
LP: f+A
LK: cl.HK
HP: LP Ren (hcb,f+LP)
HK: LP Sen (dp+LP)
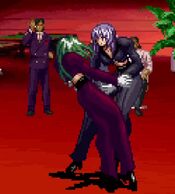
Saki's best guard cancel is her HP guard cancel, since it's her command grab. When activated outside of grab range, Saki will simply maintain her blocking animation while becoming briefly invincible. This can lead to larger punishes that can potentially make up for the meter spent on the guard cancel.
Special Moves
Super Moves
| Damage | Guard | Startup | Active | Recovery | FrameAdv |
|---|---|---|---|---|---|
| Mid | - | - | - | ||
|
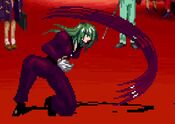
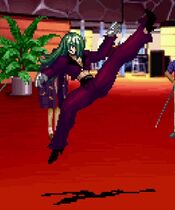
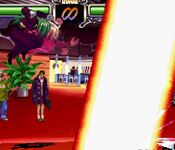
Saki jumps into the air before throwing out a massive pillar of fire a few steps in front of her. This super can also be performed in the air, where it becomes significantly faster on startup. The pillar is air-unblockable and deals a ton of damage, so while this super isn't used as often as Mizuchi, it's still useful in certain juggle combos as well as the occasional anti-air. | |||||
| Damage | Guard | Startup | Active | Recovery | FrameAdv |
|---|---|---|---|---|---|
| Mid | - | - | - | ||
|
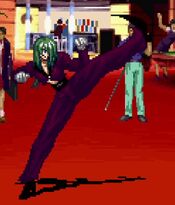
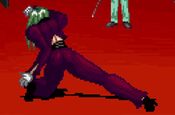
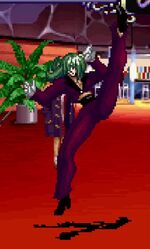
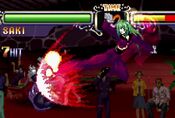
A flipkick that leads into a devastating follow up hit. The final hit of this super deals fixed damage, and is the primary reason why Saki's damage is as high as it is. Only used in combos, but is incredible for that purpose. | |||||
Strategy
Saki can get a lot of mileage out of just using her buttons to control neutral. On the ground, she can use far HK, cr.HK and f+HK to control the ground, while j.LK, j.HK and (again) far HK can swat people out of the air. With meter on deck, Saki can very easily blow people up for trying to stuff her aerial approaches -- conditioning them with aerial chains from jump-ins with j.LK can lead to you baiting and punishing potential anti-air attempts with Homura. This is much the same for people who try to approach by air blocking as well, since both far HK and Homura can beat those options. Once you've established yourself up close, you can run a pretty basic (but very scary) mixup between cr.LK > cr.HK hit confirms and your normal throw -- in either case, cashing your mixup out into HP Tetsu xx Mizuchi will deal around 50% damage to the opponent. However, it's important to be mindful of your meter, since Saki's primary defensive option is EX Shoku -- useful, to be sure, owing to its 0F startup after flash, but it does mean that you'll have to frequently be making decisions about how to use your meter, so try to be judicious when the necessity arises.
Combos
Basic Combos
Depending on the character and screen position, sometimes Tetsu will only hit once, which can make the super cancel more awkward to perform. In many cases you'll accidentally get EX Ryou instead of Mizuchi, which is still pretty decent damage.
cr.LK > cr.HK xx HP Tetsu (xx Mizuchi)
far HK, cr.HK xx HP Tetsu (xx Mizuchi)
cr.LP(x1~2), cr.HK xx HP Tetsu (xx Mizuchi)
Yes, those are links.
Anti-Air Combos
st.HK xx HP Tetsu (xx Mizuchi)
j.LK > j.HK, land j.LK > j.HK, EX Ryou/xx Homura
j.LK > j.HK, land f+HK > cl.HK xx Homura
Throw Combo
Throw > cr.HP xx HP Tetsu (xx Mizuchi)

