SeenConnroy (talk | contribs) |
SeenConnroy (talk | contribs) (→Move List: Added more frame data and such) |
||
| Line 185: | Line 185: | ||
|guard= High | |guard= High | ||
|startup=10 | |startup=10 | ||
|active=6 | |active={{Tooltip | text=6| hovertext= 1 hit. 3, 3}} | ||
|recovery=17 | |recovery=17 | ||
|frameAdv=- | |frameAdv=- | ||
| Line 251: | Line 251: | ||
|guard= Mid | |guard= Mid | ||
|startup=6 | |startup=6 | ||
|active=21(10, 11 | |active={{Tooltip | text=21, (4), 12| hovertext= 1 hit. 10, 11, (4), 12}} | ||
|recovery=18 | |recovery=18 | ||
|frameAdv= -39~0 | |frameAdv= -39~0 | ||
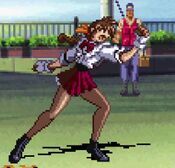
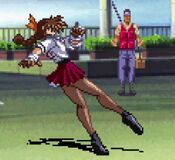
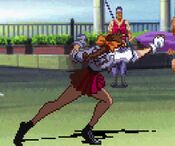
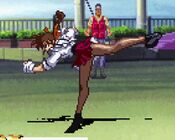
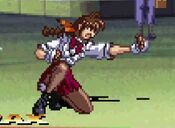
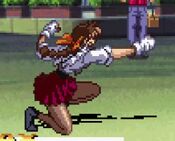
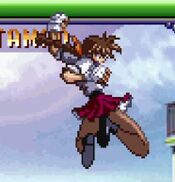
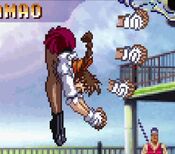
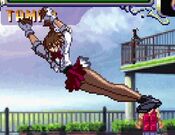
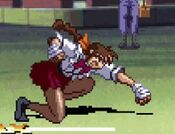
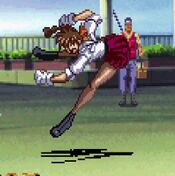
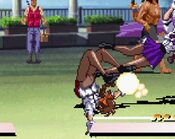
|description= Tamao does her best Sasquatch impression by leaping through the air head first to conk the opponent with her noggin. This attack actually has a secondary hitbox if she misses, as she will slide forward on her face (still a mid) after she lands, which is still part of the attack. This face slide is special cancelable so if your opponent isn't ready for it you can immediately cash out into a EX or Lightning Crash. Bless her heart, she's trying her best. | |description= Tamao does her best Sasquatch impression by leaping through the air head first to conk the opponent with her noggin. Can be inputted as 669HP to have Tamao launch herself with a more vertical trajectory, other than some more active frames, is otherwise the same move. | ||
This attack actually has a secondary hitbox if she misses, as she will slide forward on her face (still a mid) after she lands, which is still part of the attack. This face slide is special cancelable so if your opponent isn't ready for it you can immediately cash out into a EX or Lightning Crash. Bless her heart, she's trying her best. | |||
}} | }} | ||
}} | }} | ||
| Line 270: | Line 272: | ||
|recovery=14 | |recovery=14 | ||
|frameAdv= -3 | |frameAdv= -3 | ||
|description= A backfist strike with slightly more range than stLP, causes knockdown on hit, not special | |description= A backfist strike with slightly more range than stLP, causes knockdown on hit, not special cancellable. | ||
}} | }} | ||
}} | }} | ||
| Line 287: | Line 289: | ||
|recovery= | |recovery= | ||
|frameAdv= | |frameAdv= | ||
|description= Tamao performs a shoulder throw and then slightly loses balance. Very important to note that, while still being an instant throw, it is a techable knockdown that doesn't leave Tamao in much of an advantageous situation other than the damage (and apparently some characters can start their turn according to JP wiki, will need testing). The situation on throw soften isn't much better either as Tamao is still in the animation. | |description= Tamao performs a shoulder throw and then slightly loses balance. Very important to note that, while still being an instant throw, it is a techable knockdown that doesn't leave Tamao in much of an advantageous situation other than the damage (and apparently some characters can start their turn according to JP wiki, will need testing). The situation on throw soften isn't much better either as Tamao is still in the animation while the opponent can steal their turn. | ||
Allows for OTG followups on no-techs in the corner. | Allows for OTG followups on no-techs in the corner. | ||
| Line 370: | Line 372: | ||
|damage=26 | |damage=26 | ||
|guard= Mid | |guard= Mid | ||
|startup= | |startup=14 | ||
|active= | |active=1, 17 | ||
|recovery= | |recovery=21 | ||
|frameAdv=--6 | |frameAdv=--6 | ||
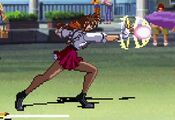
|description= Tamao's attempt at Yuka's fireball, tragically she cannot make it powerful enough to travel the entire distance of the screen. Thankfully this is not a Dan Hibiki-level fireball, so it does go far enough to actually be useful, it just wont zone from full screen. Can also be performed with '''SP1'''. | |description= Tamao's attempt at Yuka's fireball, tragically she cannot make it powerful enough to travel the entire distance of the screen. Thankfully this is not a Dan Hibiki-level fireball, so it does go far enough to actually be useful, it just wont zone from full screen. Can see use to clash with other fireballs, rather than jumping over them. | ||
Can also be performed with '''SP1'''. | |||
}} | }} | ||
{{AttackData-AVG2 | {{AttackData-AVG2 | ||
| Line 381: | Line 385: | ||
|damage=28 | |damage=28 | ||
|guard= Mid | |guard= Mid | ||
|startup= | |startup=16 | ||
|active= | |active=1, 27 | ||
|recovery= | |recovery=21 | ||
|frameAdv=--6 | |frameAdv=--6 | ||
|description= With the power of | |description= With the power of two more frames of concentration, Tamao is able to make her fireball travel further but still not full screen. | ||
Tamao recovers just before the fireball goes inactive, allowing her to react to the opponent as needed (if they haven't read the fireball anyways). | |||
}} | }} | ||
{{AttackData-AVG2 | {{AttackData-AVG2 | ||
| Line 392: | Line 397: | ||
|damage=28 (3x) | |damage=28 (3x) | ||
|guard= Mid | |guard= Mid | ||
|startup= | |startup=16 + 6 | ||
|active= | |active=1, 33 | ||
|recovery= | |recovery=25 | ||
|frameAdv=--4 | |frameAdv=--4 | ||
|description= Tamao spends her meter to deliver a single fireball that | |description= Tamao spends her meter to deliver a single fireball that travels a bit further than the HP version. It deals decent enough damage on its own and is useful to set up juggles and/or OTG followups in the corner for respectable damage. Can clash with other EX fireballs and beat out regular fireballs. | ||
}} | }} | ||
}} | }} | ||
| Line 409: | Line 414: | ||
|damage=24 | |damage=24 | ||
|guard= Mid | |guard= Mid | ||
|startup= 5 | |startup=5 | ||
|active= | |active={{Tooltip | text=20 | hovertext= 1 hit. 4, 4, 12}} | ||
|recovery= | |recovery=30 | ||
|frameAdv=--42 | |frameAdv=--42 | ||
|description= A standard Shoryuken anti-air, but Tamao tragically did not learn from Yuka that these things need to have invincibility frames. The best she gets is that she crouches low before rising with a strike, allowing her to sometimes shrink enough to not get hit before being active. Can also be performed with '''SP2'''. | |description= A standard Shoryuken anti-air, but Tamao tragically did not learn from Yuka that these things need to have invincibility frames. The best she gets is that she crouches low before rising with a strike, allowing her to sometimes shrink enough to not get hit before being active. Can also be performed with '''SP2'''. | ||
| Line 420: | Line 425: | ||
|damage=22, 18 (3x) | |damage=22, 18 (3x) | ||
|guard= Mid | |guard= Mid | ||
|startup= 5 | |startup=5 | ||
|active= | |active={{Tooltip | text=13| hovertext= 4 hits. 4, 3, 5}} | ||
|recovery= | |recovery=49 | ||
|frameAdv=--43 | |frameAdv=--43 | ||
|description= Tamao's better DP, it has legitimately stupid amounts of horizontal range (more range than her LK Kusenkyaku), meaning that this is a great combo ender from ranges you would never expect a DP to hit from. The airborne animation has her | |description= Tamao's better DP, it has legitimately stupid amounts of horizontal range (more range than her LK Kusenkyaku), meaning that this is a great combo ender from ranges you would never expect a DP to hit from. The airborne animation has her pumping out multiple punches, but this is purely visual, if using this as an anti-air it will still only hit airborne opponents once. Thanks to the first three hits being still grounded, Tamao has a sizeable window to EX or Super cancel, which makes HP Shoryugeki one of her staple combo extensions. She also uses it as an ender after EX Soryugeki loops. | ||
}} | }} | ||
{{AttackData-AVG2 | {{AttackData-AVG2 | ||
| Line 431: | Line 436: | ||
|damage=34, 18 (4x) | |damage=34, 18 (4x) | ||
|guard= Mid | |guard= Mid | ||
|startup= | |startup=3 + 2 | ||
|active= | |active={{Tooltip | text=8, (4), 4, (4), 4| hovertext= 5 hits. 2, 2, 4, (4), 4, (4), 4}} | ||
| | |recovery4 | ||
|frameAdv=--53 | |frameAdv=--53 | ||
|description= It may not have any invincibility still, but | |description= It may not have any invincibility still or be a [[Advanced_V.G._2/Advanced_Mechanics#Sprite_Layering_Order_and_LDP_Unblockables|LDP unblockable]], but it is still a 0f reversal so it can still see use defensively. On the flip side, it is the cornerstone of Tamao's damage as you can link mulitple EX Soryugeki's together in the corner to cash out big damage. | ||
}} | }} | ||
{{AttackData-AVG2 | {{AttackData-AVG2 | ||
| Line 442: | Line 447: | ||
|damage= | |damage= | ||
|guard= Mid | |guard= Mid | ||
|startup= | |startup=3 + 2 | ||
|active=- | |active=- | ||
|recovery=- | |recovery=- | ||
Revision as of 19:38, 6 September 2024
Move List
Standing Normals
| Damage | Guard | Startup | Active | Recovery | FrameAdv |
|---|---|---|---|---|---|
| 13 | Mid | 5 | 2 | 8 | +2 |
|
A low shin kick that hits mid despite looks. Same range as crLP, although a pinch slower, so you can use either to harass the opponent with minimal pushback. | |||||
| Damage | Guard | Startup | Active | Recovery | FrameAdv |
|---|---|---|---|---|---|
| 32 | Mid | 10 | 2 | 20 | -7 |
|
A beefy step-in high kick, great range and decent enough frame data. You will get more use from stHP but stHK goes further and hits all crouchers. | |||||
Crouching Normals
| Damage | Guard | Startup | Active | Recovery | FrameAdv |
|---|---|---|---|---|---|
| 9 | Mid | 3 | 2 | 8 | +2 |
|
A snappy crouching jab. Can link into itself and stLP for a combo confirm. | |||||
| Damage | Guard | Startup | Active | Recovery | FrameAdv |
|---|---|---|---|---|---|
| 14 | Low | 4 | 2 | 10 | 0 |
|
A nearly MK11 Terminator-looking crouch kick. Can link into itself or cr.LP for a chain combo. | |||||
| Damage | Guard | Startup | Active | Recovery | FrameAdv |
|---|---|---|---|---|---|
| 32 | Low | 5 | 4 | 17 | -6 |
|
A quick shoto sweep, the frame data isn't bad on it but the range is atrocious. Causes knockdown. | |||||
Jumping Normals
| Damage | Guard | Startup | Active | Recovery | FrameAdv |
|---|---|---|---|---|---|
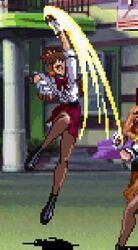
| 28 | High | 10 | 6 | 17 | - |
|
A two-handed club also similar to Kyo Kusanagi's but this does not operate the same as his. While you cannot cross up with this, it does have a great hitbox for aerial defensive plays and as a chain ender. | |||||
| Damage | Guard | Startup | Active | Recovery | FrameAdv |
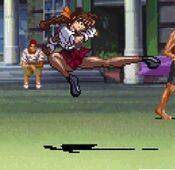
|---|---|---|---|---|---|
| 32 | High | 6 | 11 | 5 | - |
|
A massive dropkick, Tamao's preferred jump in normal for damage and range. Can also be used defensively with either 8jHK or 7jHK. | |||||
Command Normals
| Damage | Guard | Startup | Active | Recovery | FrameAdv |
|---|---|---|---|---|---|
| 32 | Low | 10 | 3 | 14 | -2 |
|
A low scooping punch, has a bit more range than crHK and causes knockdown by itself but is more useful as Tamao's OTG pickup button. | |||||
| Damage | Guard | Startup | Active | Recovery | FrameAdv |
|---|---|---|---|---|---|
| 32 | Mid | 15 | 6 | 20 | -9 |
|
A hopping hip attack, knocks down, it makes a funny noise when you hit your opponent but you'll never hear it because the range on it is offensively bad, it has the lower range than ever her smallest of pokes. It's possible to whiff this to set up a command grab, I suppose. | |||||
| Damage | Guard | Startup | Active | Recovery | FrameAdv |
|---|---|---|---|---|---|
| 37 | Mid | 6 | 21, (4), 12 | 18 | -39~0 |
|
Tamao does her best Sasquatch impression by leaping through the air head first to conk the opponent with her noggin. Can be inputted as 669HP to have Tamao launch herself with a more vertical trajectory, other than some more active frames, is otherwise the same move. This attack actually has a secondary hitbox if she misses, as she will slide forward on her face (still a mid) after she lands, which is still part of the attack. This face slide is special cancelable so if your opponent isn't ready for it you can immediately cash out into a EX or Lightning Crash. Bless her heart, she's trying her best. | |||||
| Damage | Guard | Startup | Active | Recovery | FrameAdv |
|---|---|---|---|---|---|
| 28 | Mid | 14 | 4 | 14 | -3 |
|
A backfist strike with slightly more range than stLP, causes knockdown on hit, not special cancellable. | |||||
Throws
| Damage | Guard | Startup | Active | Recovery | FrameAdv |
|---|---|---|---|---|---|
|
Tamao performs a shoulder throw and then slightly loses balance. Very important to note that, while still being an instant throw, it is a techable knockdown that doesn't leave Tamao in much of an advantageous situation other than the damage (and apparently some characters can start their turn according to JP wiki, will need testing). The situation on throw soften isn't much better either as Tamao is still in the animation while the opponent can steal their turn. Allows for OTG followups on no-techs in the corner. | |||||
Guard Cancels
Special Moves
| Version | Damage | Guard | Startup | Active | Recovery | FrameAdv |
|---|---|---|---|---|---|---|
| 24 | Mid | 5 | 20 | 30 | --42 | |
|
A standard Shoryuken anti-air, but Tamao tragically did not learn from Yuka that these things need to have invincibility frames. The best she gets is that she crouches low before rising with a strike, allowing her to sometimes shrink enough to not get hit before being active. Can also be performed with SP2. | ||||||
| 22, 18 (3x) | Mid | 5 | 13 | 49 | --43 | |
|
Tamao's better DP, it has legitimately stupid amounts of horizontal range (more range than her LK Kusenkyaku), meaning that this is a great combo ender from ranges you would never expect a DP to hit from. The airborne animation has her pumping out multiple punches, but this is purely visual, if using this as an anti-air it will still only hit airborne opponents once. Thanks to the first three hits being still grounded, Tamao has a sizeable window to EX or Super cancel, which makes HP Shoryugeki one of her staple combo extensions. She also uses it as an ender after EX Soryugeki loops. | ||||||
| 34, 18 (4x) | Mid | 3 + 2 | 8, (4), 4, (4), 4 | - | --53 | |
|
It may not have any invincibility still or be a LDP unblockable, but it is still a 0f reversal so it can still see use defensively. On the flip side, it is the cornerstone of Tamao's damage as you can link mulitple EX Soryugeki's together in the corner to cash out big damage. | ||||||
| Mid | 3 + 2 | - | - | - | ||
|
SECRET (Super Flash): Takes the startup of EX Soryugeki and applies it to the juggle height of HP Soryugeki. We currently assume this has true 0f Unblockable startup, so it lets Tamao have access to a 0f even with no meter. Due note, Secret Soryugeki will take 1 meter if available. This input will also overlap with Pokopoko and prioritizes the grab if available. | ||||||
| Damage | Guard | Startup | Active | Recovery | FrameAdv |
|---|---|---|---|---|---|
| - | N/A | - | - | - | |
|
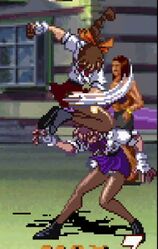
Tamao's command grab, she mounts the opponent's shoulders and starts raining down fists on their head. A very helpful addition to her kit, especially since her command grab has no whiff animation and she has no overlapping special that will come out if it misses. By holding either Punch or Kick immediately after the throw she gets access to a different ender that does slightly less damage, but offers a 3HP OTG pickup in the corner. Punch ender does the lowest damage but gives you the easiest pickup whereas Kick ender is the highest damage but leaves a smaller window to get the OTG. | |||||
Super Moves
| Damage | Guard | Startup | Active | Recovery | FrameAdv |
|---|---|---|---|---|---|
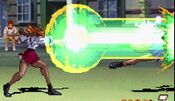
| 18 (20x) | Mid | - | - | -+4 | |
|
A 2 bar super that does stupid damage, usually 45% percent. Tamao's best use of meter, as she gets great damage, can combo into it, hits fullscreen, is plus if blocked, and does crazy amounts of chip damage. Chipping out a low life opponent with this is a super relevant strategy. Can also be performed with SP1+SP2. | |||||
