mNo edit summary |
No edit summary |
||
| Line 84: | Line 84: | ||
|Adv. Guard= | |Adv. Guard= | ||
|Adv. Pushblock= | |Adv. Pushblock= | ||
|description= Variable Assist move. Variable Counter is HP Photon Shot. Variable Combination super is Photon Array. | |description= Variable Assist move. Variable Counter is HP Photon Shot. Variable Combination super is Photon Array. Doom's Variety type is fine, it's good to stop jumping and flying characters, but other than that it's not really anything special. | ||
}} | }} | ||
}}<br> | }}<br> | ||
{{MoveData | {{MoveData | ||
|image= MVC2 DrDoom | |image= MVC2 DrDoom HCB K 01.png | ||
|caption= Type β | |caption= Type β | ||
|name= Anti-Air Type | |name= Anti-Air Type | ||
| Line 106: | Line 106: | ||
|Adv. Guard= | |Adv. Guard= | ||
|Adv. Pushblock= | |Adv. Pushblock= | ||
|description= Variable Assist move. Variable Counter is HK Molecular Shield. Variable Combination super is Sphere Flame. | |description= Variable Assist move. Variable Counter is HK Molecular Shield. Variable Combination super is Sphere Flame. This is THE assist. One of the best assists in the ENTIRE game, Doom's anti-air assist does not function like a regular anti-air assist might. Instead, this assist is EXCELLENT for lockdown, chip damage, pressure, zoning, keepaway, rushdown... anything you need to do, and rocks will help you get it done. Seriously. Almost always pick this assist, it will never steer you wrong. | ||
}} | }} | ||
}}<br> | }}<br> | ||
| Line 128: | Line 128: | ||
|Adv. Guard= | |Adv. Guard= | ||
|Adv. Pushblock= | |Adv. Pushblock= | ||
|description= Variable Assist move. Variable Counter is HP Plasma Beam. Variable Combination super is Electric Cage. | |description= Variable Assist move. Variable Counter is HP Plasma Beam. Variable Combination super is Electric Cage. This assist is mediocre at best. The other ones are just better for other reasons. If you need a ground covering beam in an air based game, just pick Iron Man instead. | ||
}} | }} | ||
}}<br> | }}<br> | ||
| Line 265: | Line 265: | ||
|Adv. Guard= | |Adv. Guard= | ||
|Adv. Pushblock= | |Adv. Pushblock= | ||
|description= Doom does a big | |description= Doom does a big stomp. This move hits twice, and the first hit has enough hitstun to cancel to some of his specials. Not a normal used that often. | ||
}} | }} | ||
}}<br> | }}<br> | ||
| Line 403: | Line 403: | ||
==== Air Normals ==== | ==== Air Normals ==== | ||
{{MoveData | {{MoveData | ||
|image= | |image= MVC2 DrDoom jLP 01.png | ||
|caption= | |caption= This has like 20 active frames | ||
|name= Air Light Punch | |name= Air Light Punch | ||
|linkname= j.LP | |linkname= j.LP | ||
| Line 420: | Line 420: | ||
|Adv. Guard= | |Adv. Guard= | ||
|Adv. Pushblock= | |Adv. Pushblock= | ||
|description= | |description= Doom does a little punch in the air. Mostly just used after a launcher to do an air combo, could be used for air-to-airs. | ||
}} | }} | ||
}}<br> | }}<br> | ||
{{MoveData | {{MoveData | ||
|image= | |image= MVC2 DrDoom jMP 01.png | ||
|caption= | |caption= Bet you're glad this isn't Marvel 3 huh | ||
|name= Air Medium Punch | |name= Air Medium Punch | ||
|linkname= j.MP | |linkname= j.MP | ||
| Line 442: | Line 442: | ||
|Adv. Guard= | |Adv. Guard= | ||
|Adv. Pushblock= | |Adv. Pushblock= | ||
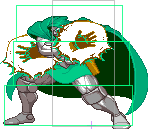
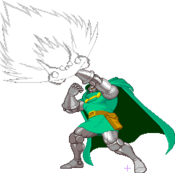
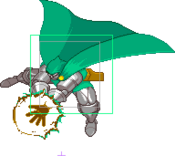
|description= | |description= Doom points his hands downward with electric energy to hit the opponent. Combo filler, which is a shame considering how huge the hitbox is. | ||
}} | }} | ||
}}<br> | }}<br> | ||
{{MoveData | {{MoveData | ||
|image= | |image= MVC2 DrDoom jHP 01.png | ||
|caption= | |caption= Budda gun (budda gun) gun wit da budda in it | ||
|name= Air Heavy Punch | |name= Air Heavy Punch | ||
|linkname= j.HP | |linkname= j.HP | ||
| Line 464: | Line 464: | ||
|Adv. Guard= | |Adv. Guard= | ||
|Adv. Pushblock= | |Adv. Pushblock= | ||
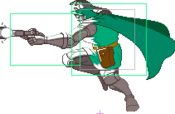
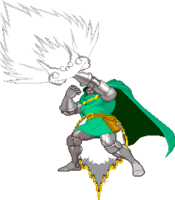
|description= | |description= The infamous butter gun. Doom takes out a small blaster and shoots a beam across the screen. Very solid air normal, as it has infinite range and can be cancelled at any time. The beam travels a little slowly, so to get the max range you have to be superjumping or rising with a normal jump. Not a bad tool for trying to snipe superjumping characters. | ||
}} | }} | ||
}}<br> | }}<br> | ||
{{MoveData | {{MoveData | ||
|image= | |image= MVC2 DrDoom jLK 01.png | ||
|caption= | |caption= Crouching light kick, in the air! | ||
|name= Air Light Kick | |name= Air Light Kick | ||
|linkname= j.LK | |linkname= j.LK | ||
| Line 486: | Line 486: | ||
|Adv. Guard= | |Adv. Guard= | ||
|Adv. Pushblock= | |Adv. Pushblock= | ||
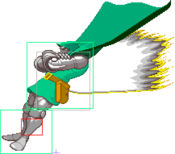
|description= | |description= Doom does a downward kick. Your best normal for doing tridash pressure with, though Doom's tridash pressure isn't that great. Still nice to have regardless, as a fast overhead that hits like this is always valuable. | ||
}} | }} | ||
}}<br> | }}<br> | ||
{{MoveData | {{MoveData | ||
|image= | |image= MVC2 DrDoom jMK 01.png | ||
|caption= | |caption= ...Hard Kick again? | ||
|name= Air Medium Kick | |name= Air Medium Kick | ||
|linkname= j.MK | |linkname= j.MK | ||
| Line 508: | Line 508: | ||
|Adv. Guard= | |Adv. Guard= | ||
|Adv. Pushblock= | |Adv. Pushblock= | ||
|description= | |description= Doom kicks upward in the air. Mostly just combo filler, like j.MP. | ||
}} | }} | ||
}}<br> | }}<br> | ||
{{MoveData | {{MoveData | ||
|image= | |image= MVC2 DrDoom jHK 01.png | ||
|caption= | |caption= It's familiar... y'know? | ||
|name= Air Heavy Kick | |name= Air Heavy Kick | ||
|linkname= j.HK | |linkname= j.HK | ||
| Line 530: | Line 530: | ||
|Adv. Guard= | |Adv. Guard= | ||
|Adv. Pushblock= | |Adv. Pushblock= | ||
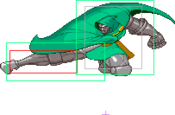
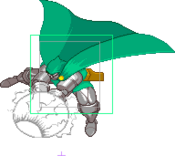
|description= | |description= Doom rockets toward his opponent with his legs extended in front of him at about a 45 degree angle. One of two footdives Doom has for maneuvering. Can be cancelled with specials, supers, and air dashes before it hits the opponent. After it lands, this puts Doom into a normal jump state, meaning you can call assists even if you superjumped. Not a bad move, but it's slow startup and lack of conversions leave a lot to be desired. | ||
}} | }} | ||
}}<br> | }}<br> | ||
| Line 536: | Line 536: | ||
==== Command Normals ==== | ==== Command Normals ==== | ||
{{MoveData | {{MoveData | ||
|image= | |image= MVC2 DrDoom j2HK 01.png | ||
|caption= | |caption= I REALLY bet you're glad this isn't Marvel 3, huh? | ||
|name= | |name= Jumping Down Heavy Kick | ||
|linkname= | |linkname= j.2HK | ||
|input= | |input= j. {{d}}+{{hk}} | ||
|data= | |data= | ||
{{AttackData-MVSC2 | {{AttackData-MVSC2 | ||
| Line 553: | Line 553: | ||
|Adv. Guard= | |Adv. Guard= | ||
|Adv. Pushblock= | |Adv. Pushblock= | ||
|description= | |description= Doom rockets down with his legs extended at about a 75 degree angle. If you've played Marvel 3, you will know how powerful this move is. Unfortunately, this isn't Marvel 3, and in this game it's only ok. Has all the same cancel and frame data properties as j.HK. Mostly used for movement. | ||
}} | }} | ||
}}<br> | }}<br> | ||
| Line 561: | Line 561: | ||
{{MoveData | {{MoveData | ||
|image= | |image= MVC2 Dr. Doom 2HP 01.png | ||
|caption= | |caption= | ||
|name= Universal Launcher (Punch) | |name= Universal Launcher (Punch) | ||
| Line 578: | Line 578: | ||
|Adv. Guard= | |Adv. Guard= | ||
|Adv. Pushblock= | |Adv. Pushblock= | ||
|description= | |description= Doom does his 2HP. Little to no differences with this one, still a great move. | ||
}} | }} | ||
}}<br> | }}<br> | ||
{{MoveData | {{MoveData | ||
|image= | |image= MVC2 DrDoom 5MK 01.png | ||
|caption= | |caption= | ||
|name= Universal Launcher (Kick) | |name= Universal Launcher (Kick) | ||
| Line 600: | Line 600: | ||
|Adv. Guard= | |Adv. Guard= | ||
|Adv. Pushblock= | |Adv. Pushblock= | ||
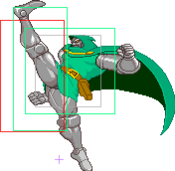
|description= | |description= Doom does his Hard Kick. Considering how high the hitbox goes, this could be used as a surprise anti-air sometimes. | ||
}} | }} | ||
}}<br> | }}<br> | ||
{{MoveData | {{MoveData | ||
|image= | |image= MVC2 DrDoom P Throw 01.png | ||
|caption= | |caption= He really lasers you in the chest | ||
|name= Throw (Punch) | |name= Throw (Punch) | ||
|linkname= Throw (Punch) | |linkname= Throw (Punch) | ||
| Line 622: | Line 622: | ||
|Adv. Guard= | |Adv. Guard= | ||
|Adv. Pushblock= | |Adv. Pushblock= | ||
|description= | |description= Doom picks the opponent up and fires a laser through them, sending them up and away. If the opponent doesn't tech roll, it's possible to combo off this throw with OTG, so it's not a bad tool to have. | ||
}} | }} | ||
}}<br> | }}<br> | ||
{{MoveData | {{MoveData | ||
|image= | |image= MVC2 DrDoom K Throw 01.png | ||
|caption= | |caption= Gives you the dunk | ||
|name= Throw (Kick) | |name= Throw (Kick) | ||
|linkname= Throw (Kick) | |linkname= Throw (Kick) | ||
| Line 644: | Line 644: | ||
|Adv. Guard= | |Adv. Guard= | ||
|Adv. Pushblock= | |Adv. Pushblock= | ||
|description= | |description= Doom picks the opponent up and slams them into the ground, sending them upward. Not as useful as his punch throw, but still nice. | ||
}} | }} | ||
}}<br> | }}<br> | ||
{{MoveData | {{MoveData | ||
|image= | |image= MVC2 DrDoom Air P Throw 01.png | ||
|caption= | |caption= Lasered in the air | ||
|name= Air Throw (Punch) | |name= Air Throw (Punch) | ||
|linkname= Air Throw (Punch) | |linkname= Air Throw (Punch) | ||
| Line 666: | Line 666: | ||
|Adv. Guard= | |Adv. Guard= | ||
|Adv. Pushblock= | |Adv. Pushblock= | ||
|description= | |description= Basically the same thing as his punch throw, but in the air. Notably though, with good timing and use of airdash it's possible to convert off this throw for a combo in the corner with no OTG needed. Needless to say this makes landing this incredibly rewarding near the corner for Doom. | ||
}} | }} | ||
}}<br> | }}<br> | ||
{{MoveData | {{MoveData | ||
|image= | |image= MVC2 DrDoom Air K Throw 01.png | ||
|caption= | |caption= To the ground you go | ||
|name= Air Throw (Kick) | |name= Air Throw (Kick) | ||
|linkname= Air Throw (Kick) | |linkname= Air Throw (Kick) | ||
| Line 688: | Line 688: | ||
|Adv. Guard= | |Adv. Guard= | ||
|Adv. Pushblock= | |Adv. Pushblock= | ||
|description= | |description= Doom throws the opponent to the ground. Sends straight down, could potentially try some weird left-right mixups, but punch throw is just so much better. | ||
}} | }} | ||
}}<br> | }}<br> | ||
{{MoveData | {{MoveData | ||
|image= | |image= MVC2 DrDoom jLK 01.png | ||
|caption= | |caption= | ||
|name= Variable Attack (raw tag) | |name= Variable Attack (raw tag) | ||
| Line 710: | Line 710: | ||
|Adv. Guard= | |Adv. Guard= | ||
|Adv. Pushblock= | |Adv. Pushblock= | ||
|description= | |description= A pretty standard tag attack. | ||
}} | }} | ||
}}<br> | }}<br> | ||
{{MoveData | {{MoveData | ||
|image= | |image= MVC2 DrDoom 5MP 01.png | ||
|caption= | |caption= Weird choice but ok | ||
|name= Snapback | |name= Snapback | ||
|linkname= QCF+A1/A2 | |linkname= QCF+A1/A2 | ||
| Line 732: | Line 732: | ||
|Adv. Guard= | |Adv. Guard= | ||
|Adv. Pushblock= | |Adv. Pushblock= | ||
|description= . | |description= Doom's snapback is painfully average. It's not particularly fast, not particularly big, and not particularly good at anything specific. | ||
}} | }} | ||
}} | }} | ||
| Line 738: | Line 738: | ||
=== Special Moves === | === Special Moves === | ||
{{MoveData | {{MoveData | ||
|image= | |image= MVC2 DrDoom QCF P 01.png | ||
| | |image2= MVC2 DrDoom Air QCF P 01.png | ||
|name= Special | |caption2= IMMA FIRIN MAH LAZER | ||
|linkname= Special | |name= Plasma Beam | ||
|input= | |linkname= Plasma Beam | ||
|input= {{qcf}} + {{lp}} or {{hp}} (Air OK) | |||
|data= | |||
{{AttackData-MVSC2 | |||
|Damage= | |||
|Startup= | |||
|Active= | |||
|Recovery= | |||
|Guard= | |||
|Special Property= | |||
|Cancel= | |||
|Adv. Hit= - | |||
|Adv. Guard= - | |||
|Adv. Pushblock= - | |||
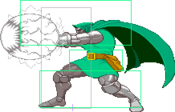
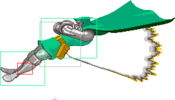
|description= Doom fires a yellow laser in front of him horizontally, or downward in the air. Doom's Plasma Beam in this game is not anything special. Unlike Marvel 3 where it's an incredibly good long range option for chip and ground control, in this game it's slow, one hit, and doesn't do a whole lot of damage for something so committal. Occasionally finds use as an air combo ender. Avoid using this, for the most part anyway. | |||
}} | |||
}} | |||
{{MoveData | |||
|image= MVC2 DrDoom HCB P 01.png | |||
|image2= MVC2 DrDoom Air HCB P 01.png | |||
|caption2= Pew | |||
|name= Photon Shot | |||
|linkname= Photon Shot | |||
|input= {{hcb}} + {{lp}} or {{hp}} (Air OK) | |||
|data= | |||
{{AttackData-MVSC2 | |||
|Damage= | |||
|Startup= | |||
|Active= | |||
|Recovery= | |||
|Guard= | |||
|Special Property= | |||
|Cancel= | |||
|Adv. Hit= - | |||
|Adv. Guard= - | |||
|Adv. Pushblock= - | |||
|description= Doom fires a row of laser all around him, or down and away from him in the air. Doom's Photon Shot is a core aspect to his gameplay, specifically the air version. The ground version is good, but VERY slow to come out and has a blindspot above him. The air version is much faster, sends five projectiles at a great angle, and recovers pretty quick. You are going to see a LOT of these if you play Doom, so get used to doing this input. | |||
}} | |||
}} | |||
{{MoveData | |||
|image= MVC2 DrDoom HCB K 01.png | |||
|caption= Why are you doing this on point | |||
|name= Molecular Shield | |||
|linkname= Molecular Shield | |||
|input= {{hcb}} + {{lk}} or {{hk}} | |||
|data= | |data= | ||
{{AttackData-MVSC2 | {{AttackData-MVSC2 | ||
| Line 755: | Line 803: | ||
|Adv. Guard= - | |Adv. Guard= - | ||
|Adv. Pushblock= - | |Adv. Pushblock= - | ||
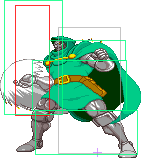
|description= | |description= Doom summons a bunch of rocks around him, then fires them out away from him horizontally. Doom's Molecular Shield, as a point character, is a move you should almost never be doing. It's incredibly slow, committal, doesn't do a lot of damage, and isn't particularly big. Seriously, just save it for the assist. | ||
}} | }} | ||
}} | }} | ||
{{MoveData | |||
|image= MVC2 DrDoom QCB KK 01.png | |||
|caption= To the skies! | |||
|name= Flight | |||
|linkname= Flight | |||
|input= {{hcb}} + {{lk}} + {{hk}} | |||
|data= | |||
{{AttackData-MVSC2 | |||
|Damage= | |||
|Startup= | |||
|Active= | |||
|Recovery= | |||
|Guard= | |||
|Special Property= | |||
|Cancel= | |||
|Adv. Hit= - | |||
|Adv. Guard= - | |||
|Adv. Pushblock= - | |||
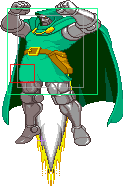
|description= Doom's Flight is fine, but not really anything special. It lasts about 6.5 seconds, puts you in normal jump mode, gives you free movement and infinite air dashes, all the stuff that normally happens with flight. The problem is that it's very slow both in terms of startup and movement speed, so it really isn't used all that much. Perform the motion again to cancel flight early. | |||
}} | |||
}} | |||
=== Hyper Combos === | === Hyper Combos === | ||
{{MoveData | {{MoveData | ||
|image= | |image= MVC2 DrDoom QCF PP 01.png | ||
|caption= | |caption= The only super he lost in Marvel 3 | ||
|name= | |name= Electric Cage | ||
|linkname= | |linkname= Electric Cage | ||
|input= | |input= {{qcf}} + {{lp}} + {{hp}} | ||
|data= | |data= | ||
{{AttackData-MVSC2 | {{AttackData-MVSC2 | ||
| Line 779: | Line 849: | ||
|Adv. Guard= | |Adv. Guard= | ||
|Adv. Pushblock= | |Adv. Pushblock= | ||
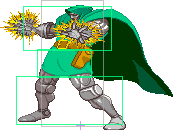
|description= | |description= Doom sends a ball of electricity out, and if it makes contact with the opponent, puts them into a field of energy that hits repeatedly before sending them away. Good for grounded DHC's after, but generally pretty average as far as supers go. | ||
}} | }} | ||
}}<br> | }}<br> | ||
{{MoveData | |||
|image= MVC2 DrDoom HCB P 01.png | |||
|image2= MVC2 DrDoom Air HCB P 01.png | |||
== | |caption2= The REALLY GOOD one | ||
|name= Photon Array | |||
|linkname= Photon Array | |||
|input= {{hcb}} + {{lp}} + {{hp}} (Air OK) | |||
|data= | |||
{{AttackData-MVSC2 | |||
|Damage= | |||
|Startup= | |||
|Active= | |||
|Recovery= | |||
|Guard= | |||
|Special Property= | |||
|Cancel= | |||
|Adv. Hit= | |||
|Adv. Guard= | |||
|Adv. Pushblock= | |||
|description= Doom sends out a volley of lasers in all directions on the ground, or down and away from him in the air, in a set of five shots each. On the ground this super is pretty good for chip and coverage, though it's kinda slow. The air version, though, is easily Doom's best super. If all the hits connect, this can do an INCREDIBLE amount of damage for one bar. It's also very good for meterdumping, stalling or going for chip. In addition, the air version of this move specifically has one other dirty thing going for it. It's frame 4, but if the opponent is not blocking already by the freeze, it is ''post flash unblockable.'' What was already a good super becomes very annoying with this in mind. If you have meter to waste with Doom (and you will from all the j.HP and Photon Shots you'll be throwing), use it on this super. | |||
}} | |||
}}<br> | |||
{{MoveData | {{MoveData | ||
|image= | |image= MVC2 DrDoom QCF KK 01.png | ||
| | |image2= MVC2 DrDoom QCF KK Projectile 01.png | ||
|name= | |caption2= This one's really bad | ||
|linkname= | |name= Sphere Flame | ||
|input= | |linkname= Sphere Flame | ||
|input= {{qcf}} + {{lk}} + {{hk}} | |||
|data= | |data= | ||
{{AttackData-MVSC2 | {{AttackData-MVSC2 | ||
|Damage= | |Damage= | ||
|Startup= | |Startup= | ||
|Active= | |Active= | ||
|Recovery= | |Recovery= | ||
|Guard= | |Guard= | ||
|Special Property= | |Special Property= | ||
|Cancel= | |Cancel= | ||
|Adv. Hit= | |Adv. Hit= | ||
|Adv. Guard= | |Adv. Guard= | ||
|Adv. Pushblock= | |Adv. Pushblock= | ||
|description= | |description= Doom fires a ball of flame into the air, which travels up a set distance before it disappears. An incredibly underwhelming super, as it doesn't do a lot of damage, is hard to land, it's pretty slow, and has no DHC options afterward for almost all characters. You can basically forget he has this and nothing will change. | ||
}} | }} | ||
}}<br> | }}<br> | ||
== Other == | |||
=== Taunt === | === Taunt === | ||
[[Image: MvC2 DrDoom Taunt.png]] | |||
"*evil laugh*" | |||
=== Colors === | === Colors === | ||
Revision as of 03:01, 8 July 2024
Introduction
Story
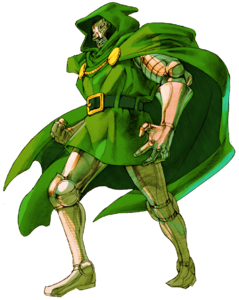
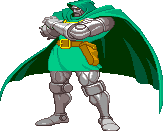
Victor von Doom, better known as Doctor Doom, is a character from the Fantastic Four series by Marvel. The archenemy of the Fantastic Four, Doom wears an iron mask and armor to hide his face after an accident scarred him for life. With genius level intellect and unparalleled skills in magic and sorcery, Doctor Doom is unrivaled in ability, ego, and will power.
Gameplay
Doctor Doom is a keepaway and zoning character designed to frustrate and torment your opponent into making rash decisions that will get them killed. His j.HP and his Photon Shot are annoying projectiles to deal with, and his combo damage is extremely good if he has a bar. His normals are excellent and reach very far, while his movement is above average, possessing an 8-way air dash, a fast ground dash, a flight mode, and a few normals and special moves to halt or alter his air momentum. Doom isn't just good on point though. His Anti-Air assist, Molecular Shield, while not functioning as a traditional anti-air assist, is one of the best assists in the game. A massive wall of rocks that go everywhere in front of him, this assist allows nearly any character to have a much easier time making their way in and locking an opponent down with lots of chip damage to boot. His DHCs are also solid and highly damaging, with grounded Photon Array being hard to punish. Overall, Doom is a very very solid character in many regards. If you like to slowly chip your opponents patience away until they're grovelling at your feet, then rule with the iron hand of Doctor Doom.
Gameplay
Doctor Doom is a keepaway and zoning character who can use his variety of projectiles and movement to slowly chip the opponent down from afar. His main strengths are his great movement options and chip damage output, but characters that are able to maneuver around his projectiles are quite annoying to deal with.
| Strengths | Weaknesses |
|---|---|
|
|
Character Summary
- Plasma Beam (Air OK)
 +
+ or
or 
- Photon Shot (Air OK)
 +
+
- Molecular Shield
 +
+
- Flight
 +
+ 

- Electric Cage
 +
+ +
+
- Photon Array (Air OK)
 +
+ +
+
- Sphere Flame
 +
+ +
+
- Type α - Variety Type
- Assist:
 Photon Shot
 - Counter:
 Photon Shot
 - Combination: Photon Array
- Type β - Anti-Air Type
- Assist:
 Molecular Shield
 - Counter:
 Molecular Shield
 - Combination: Sphere Flame
- Type γ - Projectile Type
- Assist:
 Plasma Beam
 - Counter:
 Plasma Beam
 - Combination: Electric Cage
Moves List
Variable Assists
| Damage | Startup | Active | Recovery | Guard | |
|---|---|---|---|---|---|
| - | - | - | - | - | |
| Special Property | Cancel | Adv. Hit | Adv. Guard | Adv. Pushblock | |
| - | - | - | - | - | |
|
Variable Assist move. Variable Counter is HP Photon Shot. Variable Combination super is Photon Array. Doom's Variety type is fine, it's good to stop jumping and flying characters, but other than that it's not really anything special. | |||||
| Damage | Startup | Active | Recovery | Guard | |
|---|---|---|---|---|---|
| - | - | - | - | - | |
| Special Property | Cancel | Adv. Hit | Adv. Guard | Adv. Pushblock | |
| - | - | - | - | - | |
|
Variable Assist move. Variable Counter is HK Molecular Shield. Variable Combination super is Sphere Flame. This is THE assist. One of the best assists in the ENTIRE game, Doom's anti-air assist does not function like a regular anti-air assist might. Instead, this assist is EXCELLENT for lockdown, chip damage, pressure, zoning, keepaway, rushdown... anything you need to do, and rocks will help you get it done. Seriously. Almost always pick this assist, it will never steer you wrong. | |||||
| Damage | Startup | Active | Recovery | Guard | |
|---|---|---|---|---|---|
| - | - | - | - | - | |
| Special Property | Cancel | Adv. Hit | Adv. Guard | Adv. Pushblock | |
| - | - | - | - | - | |
|
Variable Assist move. Variable Counter is HP Plasma Beam. Variable Combination super is Electric Cage. This assist is mediocre at best. The other ones are just better for other reasons. If you need a ground covering beam in an air based game, just pick Iron Man instead. | |||||
Normal Moves
Ground Normals
| Damage | Startup | Active | Recovery | Guard | |
|---|---|---|---|---|---|
| - | - | - | - | - | |
| Special Property | Cancel | Adv. Hit | Adv. Guard | Adv. Pushblock | |
| - | - | - | - | - | |
|
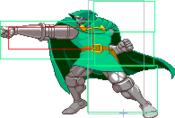
Doctor Doom leans forward for a punch. Has some nice range for a light normal. | |||||
| Damage | Startup | Active | Recovery | Guard | |
|---|---|---|---|---|---|
| - | - | - | - | - | |
| Special Property | Cancel | Adv. Hit | Adv. Guard | Adv. Pushblock | |
| - | - | - | - | - | |
|
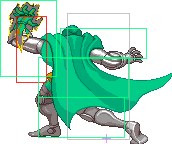
Doom does an uppercut with glowing energy around his hand. Mostly just combo filler. | |||||
| Damage | Startup | Active | Recovery | Guard | |
|---|---|---|---|---|---|
| - | - | - | - | - | |
| Special Property | Cancel | Adv. Hit | Adv. Guard | Adv. Pushblock | |
| - | - | - | - | - | |
|
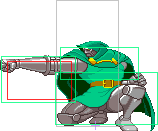
Doom puts his hands together, wrapped in electric energy, and puts them in front of him. Causes the opponent to get sent flying away, but not knocked down. Ok as a chain ender, but you can do better, generally speaking. | |||||
| Damage | Startup | Active | Recovery | Guard | |
|---|---|---|---|---|---|
| - | - | - | - | - | |
| Special Property | Cancel | Adv. Hit | Adv. Guard | Adv. Pushblock | |
| - | - | - | - | - | |
|
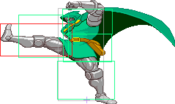
Doom stomps just in front of him. Generally just a very useless normal, as his other lights either have more range, are faster, recover sooner, or have better combo options available. | |||||
| Damage | Startup | Active | Recovery | Guard | |
|---|---|---|---|---|---|
| - | - | - | - | - | |
| Special Property | Cancel | Adv. Hit | Adv. Guard | Adv. Pushblock | |
| - | - | - | - | - | |
|
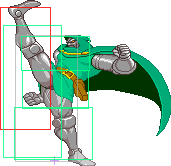
Doom kicks straight upward. This is a launcher, but not one used very often as you have a better one. (which is a bit further down the page) | |||||
| Damage | Startup | Active | Recovery | Guard | |
|---|---|---|---|---|---|
| - | - | - | - | - | |
| Special Property | Cancel | Adv. Hit | Adv. Guard | Adv. Pushblock | |
| - | - | - | - | - | |
|
Doom does a big stomp. This move hits twice, and the first hit has enough hitstun to cancel to some of his specials. Not a normal used that often. | |||||
| Damage | Startup | Active | Recovery | Guard | |
|---|---|---|---|---|---|
| - | - | - | - | - | |
| Special Property | Cancel | Adv. Hit | Adv. Guard | Adv. Pushblock | |
| - | - | - | - | - | |
|
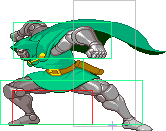
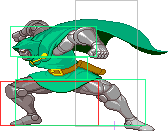
Doom does his 5LP, but crouching. Has much less range, but a smaller hurtbox for the same speed. Could be used for defensive scrambles. | |||||
| Damage | Startup | Active | Recovery | Guard | |
|---|---|---|---|---|---|
| - | - | - | - | - | |
| Special Property | Cancel | Adv. Hit | Adv. Guard | Adv. Pushblock | |
| - | - | - | - | - | |
|
Doom does another punch like 5LP. The exact same animation, except it's a tiny bit slower and does more damage. Once again more combo filler. | |||||
| Damage | Startup | Active | Recovery | Guard | |
|---|---|---|---|---|---|
| - | - | - | - | - | |
| Special Property | Cancel | Adv. Hit | Adv. Guard | Adv. Pushblock | |
| - | - | - | - | - | |
|
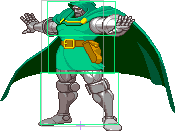
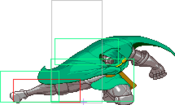
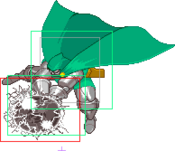
Doom slams his hand into the ground, sending up a massive shockwave around him. Very important for his combo game, as it launches for a combo and combos of a two hit confirm. Absolutely COLOSSAL hitbox, covering the entirety of his body and plenty more space in front of, above, and behind him. It's a bit slow though, only being able to combo off mediums, but it has incredible coverage. Can be cancelled with flight to somewhat shorten the massive recovery. While it only has 4 active frames, if it had more this would easily be the most broken anti-air normal in the game. | |||||
| Damage | Startup | Active | Recovery | Guard | |
|---|---|---|---|---|---|
| - | - | - | - | - | |
| Special Property | Cancel | Adv. Hit | Adv. Guard | Adv. Pushblock | |
| - | - | - | - | - | |
|
Doom does a low kick. Very important because it's a low, otherwise it's not really anything special. | |||||
| Damage | Startup | Active | Recovery | Guard | |
|---|---|---|---|---|---|
| - | - | - | - | - | |
| Special Property | Cancel | Adv. Hit | Adv. Guard | Adv. Pushblock | |
| - | - | - | - | - | |
|
Doom does another low kick. Combo filler, but important combo filler as it combos to his 2HP and is a second low. | |||||
| Damage | Startup | Active | Recovery | Guard | |
|---|---|---|---|---|---|
| - | - | - | - | - | |
| Special Property | Cancel | Adv. Hit | Adv. Guard | Adv. Pushblock | |
| - | - | - | - | - | |
|
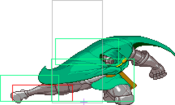
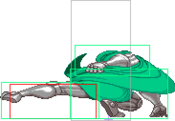
Doom sweeps the opponent, knocking them down. Overall a very uninteresting sweep... until you know that you can superjump cancel during the STARTUP of this move. This can allow for sneaky double low into tridash overhead sequences to open up opponents or reset pressure. Blockstringing into a superjump is unheard of in this game, and for Doom, superjumping is pretty useful. Not a bad tool to have. | |||||
Air Normals
| Damage | Startup | Active | Recovery | Guard | |
|---|---|---|---|---|---|
| - | - | - | - | - | |
| Special Property | Cancel | Adv. Hit | Adv. Guard | Adv. Pushblock | |
| - | - | - | - | - | |
|
Doom does a little punch in the air. Mostly just used after a launcher to do an air combo, could be used for air-to-airs. | |||||
| Damage | Startup | Active | Recovery | Guard | |
|---|---|---|---|---|---|
| - | - | - | - | - | |
| Special Property | Cancel | Adv. Hit | Adv. Guard | Adv. Pushblock | |
| - | - | - | - | - | |
|
Doom points his hands downward with electric energy to hit the opponent. Combo filler, which is a shame considering how huge the hitbox is. | |||||
| Damage | Startup | Active | Recovery | Guard | |
|---|---|---|---|---|---|
| - | - | - | - | - | |
| Special Property | Cancel | Adv. Hit | Adv. Guard | Adv. Pushblock | |
| - | - | - | - | - | |
|
The infamous butter gun. Doom takes out a small blaster and shoots a beam across the screen. Very solid air normal, as it has infinite range and can be cancelled at any time. The beam travels a little slowly, so to get the max range you have to be superjumping or rising with a normal jump. Not a bad tool for trying to snipe superjumping characters. | |||||
| Damage | Startup | Active | Recovery | Guard | |
|---|---|---|---|---|---|
| - | - | - | - | - | |
| Special Property | Cancel | Adv. Hit | Adv. Guard | Adv. Pushblock | |
| - | - | - | - | - | |
|
Doom does a downward kick. Your best normal for doing tridash pressure with, though Doom's tridash pressure isn't that great. Still nice to have regardless, as a fast overhead that hits like this is always valuable. | |||||
| Damage | Startup | Active | Recovery | Guard | |
|---|---|---|---|---|---|
| - | - | - | - | - | |
| Special Property | Cancel | Adv. Hit | Adv. Guard | Adv. Pushblock | |
| - | - | - | - | - | |
|
Doom kicks upward in the air. Mostly just combo filler, like j.MP. | |||||
| Damage | Startup | Active | Recovery | Guard | |
|---|---|---|---|---|---|
| - | - | - | - | - | |
| Special Property | Cancel | Adv. Hit | Adv. Guard | Adv. Pushblock | |
| - | - | - | - | - | |
|
Doom rockets toward his opponent with his legs extended in front of him at about a 45 degree angle. One of two footdives Doom has for maneuvering. Can be cancelled with specials, supers, and air dashes before it hits the opponent. After it lands, this puts Doom into a normal jump state, meaning you can call assists even if you superjumped. Not a bad move, but it's slow startup and lack of conversions leave a lot to be desired. | |||||
Command Normals
| Damage | Startup | Active | Recovery | Guard | |
|---|---|---|---|---|---|
| - | - | - | - | - | |
| Special Property | Cancel | Adv. Hit | Adv. Guard | Adv. Pushblock | |
| - | None | - | - | - | |
|
Doom rockets down with his legs extended at about a 75 degree angle. If you've played Marvel 3, you will know how powerful this move is. Unfortunately, this isn't Marvel 3, and in this game it's only ok. Has all the same cancel and frame data properties as j.HK. Mostly used for movement. | |||||
Universal Mechanics
| Damage | Startup | Active | Recovery | Guard | |
|---|---|---|---|---|---|
| - | - | - | - | - | |
| Special Property | Cancel | Adv. Hit | Adv. Guard | Adv. Pushblock | |
| Launcher (high) | - | - | - | - | |
|
Doom does his 2HP. Little to no differences with this one, still a great move. | |||||
| Damage | Startup | Active | Recovery | Guard | |
|---|---|---|---|---|---|
| - | - | - | - | - | |
| Special Property | Cancel | Adv. Hit | Adv. Guard | Adv. Pushblock | |
| Launcher (away) | - | - | - | - | |
|
Doom does his Hard Kick. Considering how high the hitbox goes, this could be used as a surprise anti-air sometimes. | |||||
| Damage | Startup | Active | Recovery | Guard | |
|---|---|---|---|---|---|
| - | - | - | - | - | |
| Special Property | Cancel | Adv. Hit | Adv. Guard | Adv. Pushblock | |
| - | - | - | - | - | |
|
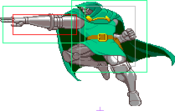
Doom picks the opponent up and fires a laser through them, sending them up and away. If the opponent doesn't tech roll, it's possible to combo off this throw with OTG, so it's not a bad tool to have. | |||||
| Damage | Startup | Active | Recovery | Guard | |
|---|---|---|---|---|---|
| - | - | - | - | - | |
| Special Property | Cancel | Adv. Hit | Adv. Guard | Adv. Pushblock | |
| - | - | - | - | - | |
|
Doom picks the opponent up and slams them into the ground, sending them upward. Not as useful as his punch throw, but still nice. | |||||
| Damage | Startup | Active | Recovery | Guard | |
|---|---|---|---|---|---|
| - | - | - | - | - | |
| Special Property | Cancel | Adv. Hit | Adv. Guard | Adv. Pushblock | |
| - | - | - | - | - | |
|
Basically the same thing as his punch throw, but in the air. Notably though, with good timing and use of airdash it's possible to convert off this throw for a combo in the corner with no OTG needed. Needless to say this makes landing this incredibly rewarding near the corner for Doom. | |||||
| Damage | Startup | Active | Recovery | Guard | |
|---|---|---|---|---|---|
| - | - | - | - | - | |
| Special Property | Cancel | Adv. Hit | Adv. Guard | Adv. Pushblock | |
| - | - | - | - | - | |
|
Doom throws the opponent to the ground. Sends straight down, could potentially try some weird left-right mixups, but punch throw is just so much better. | |||||
| Damage | Startup | Active | Recovery | Guard | |
|---|---|---|---|---|---|
| - | - | - | - | - | |
| Special Property | Cancel | Adv. Hit | Adv. Guard | Adv. Pushblock | |
| - | - | - | - | - | |
|
A pretty standard tag attack. | |||||
| Damage | Startup | Active | Recovery | Guard | |
|---|---|---|---|---|---|
| - | - | - | - | - | |
| Special Property | Cancel | Adv. Hit | Adv. Guard | Adv. Pushblock | |
| - | - | - | - | - | |
|
Doom's snapback is painfully average. It's not particularly fast, not particularly big, and not particularly good at anything specific. | |||||
Special Moves
| Damage | Startup | Active | Recovery | Guard | |
|---|---|---|---|---|---|
| - | - | - | - | - | |
| Special Property | Cancel | Adv. Hit | Adv. Guard | Adv. Pushblock | |
| - | - | - | - | - | |
|
Doom fires a yellow laser in front of him horizontally, or downward in the air. Doom's Plasma Beam in this game is not anything special. Unlike Marvel 3 where it's an incredibly good long range option for chip and ground control, in this game it's slow, one hit, and doesn't do a whole lot of damage for something so committal. Occasionally finds use as an air combo ender. Avoid using this, for the most part anyway. | |||||
| Damage | Startup | Active | Recovery | Guard | |
|---|---|---|---|---|---|
| - | - | - | - | - | |
| Special Property | Cancel | Adv. Hit | Adv. Guard | Adv. Pushblock | |
| - | - | - | - | - | |
|
Doom fires a row of laser all around him, or down and away from him in the air. Doom's Photon Shot is a core aspect to his gameplay, specifically the air version. The ground version is good, but VERY slow to come out and has a blindspot above him. The air version is much faster, sends five projectiles at a great angle, and recovers pretty quick. You are going to see a LOT of these if you play Doom, so get used to doing this input. | |||||
| Damage | Startup | Active | Recovery | Guard | |
|---|---|---|---|---|---|
| - | - | - | - | - | |
| Special Property | Cancel | Adv. Hit | Adv. Guard | Adv. Pushblock | |
| - | - | - | - | - | |
|
Doom summons a bunch of rocks around him, then fires them out away from him horizontally. Doom's Molecular Shield, as a point character, is a move you should almost never be doing. It's incredibly slow, committal, doesn't do a lot of damage, and isn't particularly big. Seriously, just save it for the assist. | |||||
| Damage | Startup | Active | Recovery | Guard | |
|---|---|---|---|---|---|
| - | - | - | - | - | |
| Special Property | Cancel | Adv. Hit | Adv. Guard | Adv. Pushblock | |
| - | - | - | - | - | |
|
Doom's Flight is fine, but not really anything special. It lasts about 6.5 seconds, puts you in normal jump mode, gives you free movement and infinite air dashes, all the stuff that normally happens with flight. The problem is that it's very slow both in terms of startup and movement speed, so it really isn't used all that much. Perform the motion again to cancel flight early. | |||||
Hyper Combos
| Damage | Startup | Active | Recovery | Guard | |
|---|---|---|---|---|---|
| - | - | - | - | - | |
| Special Property | Cancel | Adv. Hit | Adv. Guard | Adv. Pushblock | |
| - | - | - | - | - | |
|
Doom sends a ball of electricity out, and if it makes contact with the opponent, puts them into a field of energy that hits repeatedly before sending them away. Good for grounded DHC's after, but generally pretty average as far as supers go. | |||||
| Damage | Startup | Active | Recovery | Guard | |
|---|---|---|---|---|---|
| - | - | - | - | - | |
| Special Property | Cancel | Adv. Hit | Adv. Guard | Adv. Pushblock | |
| - | - | - | - | - | |
|
Doom sends out a volley of lasers in all directions on the ground, or down and away from him in the air, in a set of five shots each. On the ground this super is pretty good for chip and coverage, though it's kinda slow. The air version, though, is easily Doom's best super. If all the hits connect, this can do an INCREDIBLE amount of damage for one bar. It's also very good for meterdumping, stalling or going for chip. In addition, the air version of this move specifically has one other dirty thing going for it. It's frame 4, but if the opponent is not blocking already by the freeze, it is post flash unblockable. What was already a good super becomes very annoying with this in mind. If you have meter to waste with Doom (and you will from all the j.HP and Photon Shots you'll be throwing), use it on this super. | |||||
| Damage | Startup | Active | Recovery | Guard | |
|---|---|---|---|---|---|
| - | - | - | - | - | |
| Special Property | Cancel | Adv. Hit | Adv. Guard | Adv. Pushblock | |
| - | - | - | - | - | |
|
Doom fires a ball of flame into the air, which travels up a set distance before it disappears. An incredibly underwhelming super, as it doesn't do a lot of damage, is hard to land, it's pretty slow, and has no DHC options afterward for almost all characters. You can basically forget he has this and nothing will change. | |||||
Other
Taunt
Colors
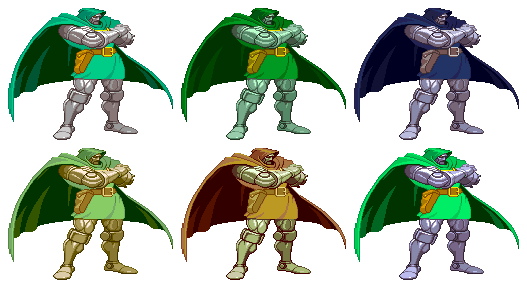
First row: ![]() ,
, ![]() , A1. Second row:
, A1. Second row: ![]() ,
, ![]() , A2.
, A2.
