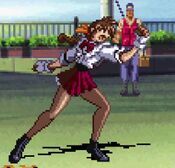
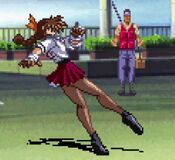
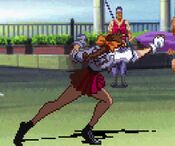
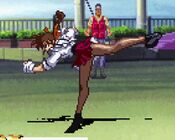
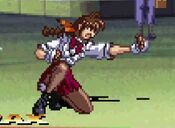
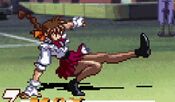
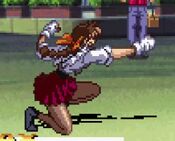
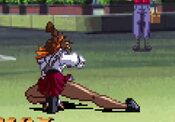
SeenConnroy (talk | contribs) (Reformatted and added frame numbers for non-command normals.) |
|||
| Line 1: | Line 1: | ||
{{AVG2 Character Subnav|char=tamao|short=tam|sub=1}} | {{AVG2 Character Subnav|char=tamao|short=tam|sub=1}} | ||
== Move List == | == Move List == | ||
=== Standing Normals === | |||
{{MoveData | {{MoveData | ||
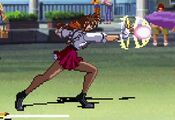
|image=AVG2_Tamao_stLP.jpg | |image=AVG2_Tamao_stLP.jpg | ||
| Line 9: | Line 10: | ||
|damage=9 | |damage=9 | ||
|guard= Mid | |guard= Mid | ||
|startup= 5 | |startup=5 | ||
|active= | |active=2 | ||
|recovery= | |recovery=8 | ||
|frameAdv= + | |frameAdv= +7/+1 | ||
|description= A quick uppercut, a solid enough jab and chains into most of her other normals. | |description= A quick uppercut, a solid enough jab and chains into most of her other normals. | ||
'''Chains to:''' | '''Chains to:''' | ||
{{Icon-Capcom|LK}} > {{Icon-Capcom|HP}} > {{Icon-Capcom|HK}}<br> | {{Icon-Capcom|LK}} > {{Icon-Capcom|HP}} > {{Icon-Capcom|HK}}<br> | ||
''LK may be omitted, HP and HK may be swapped'' | ''LK may be omitted, HP and HK may be swapped'' | ||
| Line 28: | Line 29: | ||
|damage=13 | |damage=13 | ||
|guard= Mid | |guard= Mid | ||
|startup= 5 | |startup=5 | ||
|active= | |active=2 | ||
|recovery= | |recovery=8 | ||
|frameAdv= +2 | |frameAdv= +2 | ||
|description= A low shin kick | |description= A low shin kick that hits mid despite looks. Same range as crLP, although a pinch slower, so you can use either to harass the opponent with minimal pushback. | ||
}} | }} | ||
}} | }} | ||
| Line 45: | Line 46: | ||
|guard= Mid | |guard= Mid | ||
|startup=3 | |startup=3 | ||
|active= | |active=3 | ||
|recovery= | |recovery=15 | ||
|frameAdv= -3 | |frameAdv= -3 | ||
|description= A particularly good lunging punch, with 3f startup and being only -3 on block you will get a lot of mileage out of this poke. It can chain into both stHK and crHK but will not combo, being more of a frame trap. Be aware, however, that this will whiff on Tamao, Satomi, and Saki if they are crouching. This does have a special cancel window on it, but it's | |description= A particularly good lunging punch, with 3f startup and being only -3 on block you will get a lot of mileage out of this poke. It can chain into both stHK and crHK but will not combo, being more of a frame trap. Be aware, however, that this will whiff on Tamao, Satomi, and Saki if they are crouching. This does have a special cancel window on it, but due to it's 3f startup, it would be wise to attempt Negative Edging out a special if you are looking to cancel from st.HP, other than doing the special input as fast as possible. | ||
'''Chains to:''' | '''Chains to:''' | ||
{{Icon-Capcom|HK}} | {{Icon-Capcom|HK}} | ||
}} | }} | ||
| Line 62: | Line 63: | ||
|damage=32 | |damage=32 | ||
|guard= Mid | |guard= Mid | ||
|startup= 10 | |startup=10 | ||
|active= | |active=2 | ||
|recovery= | |recovery=20 | ||
|frameAdv= -7 | |frameAdv= -7 | ||
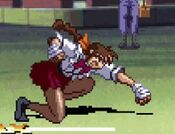
|description= A beefy step-in high kick, great range and decent enough frame data. You will get more use from stHP but stHK | |description= A beefy step-in high kick, great range and decent enough frame data. You will get more use from stHP but stHK goes further and hits all crouchers. | ||
}} | }} | ||
}} | }} | ||
---- | ---- | ||
=== Crouching Normals === | |||
{{MoveData | {{MoveData | ||
|image=AVG2_Tamao_crLP.jpg | |image=AVG2_Tamao_crLP.jpg | ||
| Line 78: | Line 81: | ||
|damage=9 | |damage=9 | ||
|guard= Mid | |guard= Mid | ||
|startup= 3 | |startup=3 | ||
|active= | |active=2 | ||
|recovery= | |recovery=8 | ||
|frameAdv= +2 | |frameAdv= +2 | ||
|description= A snappy crouching jab. Can link into itself and stLP for a combo confirm. | |description= A snappy crouching jab. Can link into itself and stLP for a combo confirm. | ||
| Line 94: | Line 97: | ||
|damage=14 | |damage=14 | ||
|guard= Low | |guard= Low | ||
|startup= 4 | |startup=4 | ||
|active= | |active=2 | ||
|recovery= | |recovery=10 | ||
|frameAdv= 0 | |frameAdv= 0 | ||
|description= A nearly MK11 Terminator-looking crouch kick. Can link into itself | |description= A nearly MK11 Terminator-looking crouch kick. Can link into itself or cr.LP for a chain combo. | ||
}} | }} | ||
}} | }} | ||
| Line 110: | Line 113: | ||
|damage=28 | |damage=28 | ||
|guard= Mid | |guard= Mid | ||
|startup= 6 | |startup=6 | ||
|active= | |active=2 | ||
|recovery= | |recovery=14 | ||
|frameAdv= -1 | |frameAdv= -1 | ||
|description= A stubbier poke than her standing | |description= A stubbier poke than her standing heavies, crHP is important because it can be linked into and have a more acceptable special cancel window than st.HP. This becomes a important poking tool as not only can you crHP into specials for a combo, but a max range crHP into LK Kusenkyaku will whiff and set you up for a throw while cancelling into L Kikoudan will keep them still. | ||
'''Chains to:''' | '''Chains to:''' | ||
{{Motion|2}}{{Icon-Capcom|HK}} | {{Motion|2}}{{Icon-Capcom|HK}} | ||
}} | }} | ||
| Line 128: | Line 131: | ||
|damage=32 | |damage=32 | ||
|guard= Low | |guard= Low | ||
|startup= 5 | |startup=5 | ||
|active= | |active=4 | ||
|recovery= | |recovery=17 | ||
|frameAdv= -6 | |frameAdv= -6 | ||
|description= A quick shoto sweep, the frame data isn't bad on it but the range is atrocious. Causes knockdown. | |description= A quick shoto sweep, the frame data isn't bad on it but the range is atrocious. Causes knockdown. | ||
| Line 136: | Line 139: | ||
}} | }} | ||
---- | ---- | ||
=== Jumping Normals === | |||
{{MoveData | {{MoveData | ||
|image=AVG2_Tamao_jLP.jpg | |image=AVG2_Tamao_jLP.jpg | ||
| Line 144: | Line 148: | ||
|damage=9 | |damage=9 | ||
|guard=High | |guard=High | ||
|startup= 5 | |startup=5 | ||
|active= | |active=8 | ||
|recovery= | |recovery=4 | ||
|frameAdv=- | |frameAdv=- | ||
|description= Standard jumping jab, angled downward. | |description= Standard jumping jab, angled downward. | ||
'''Chains to:''' | '''Chains to:''' | ||
j.{{Icon-Capcom|HP}} / j.{{Icon-Capcom|HK}} | j.{{Icon-Capcom|HP}} / j.{{Icon-Capcom|HK}} | ||
}} | }} | ||
| Line 163: | Line 167: | ||
|guard= High | |guard= High | ||
|startup= 5 | |startup= 5 | ||
|active= | |active=18 | ||
|recovery= | |recovery=0 | ||
|frameAdv=- | |frameAdv=- | ||
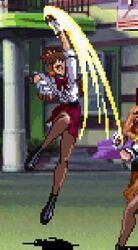
|description= A flying knee similar to Kyo Kusanagi's, and much like his you can cross up with this. What is perhaps more important is that this will very easily look like it's going to cross up but stay on the same side. It is also able to hit standing opponents while rising. | |description= A flying knee similar to Kyo Kusanagi's, and much like his you can cross up with this. What is perhaps more important is that this will very easily look like it's going to cross up but stay on the same side, forcing the opponent to either guess correctly, or find a way out of the situation (anti-air/moving). It is also able to hit standing opponents while rising. | ||
'''Chains to:''' | '''Chains to:''' | ||
j.{{Icon-Capcom|HP}} / j.{{Icon-Capcom|HK}} | j.{{Icon-Capcom|HP}} / j.{{Icon-Capcom|HK}} | ||
}} | }} | ||
| Line 180: | Line 184: | ||
|damage=28 | |damage=28 | ||
|guard= High | |guard= High | ||
|startup= 10 | |startup=10 | ||
|active= | |active=6 (3, 3) | ||
|recovery= | |recovery=17 | ||
|frameAdv=- | |frameAdv=- | ||
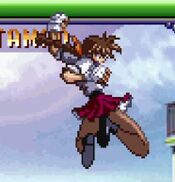
|description= A two-handed club also similar to Kyo Kusanagi's but this does not operate the same as his. While you cannot cross up with this, it does have a great hitbox for aerial defensive plays and as a chain ender. | |description= A two-handed club also similar to Kyo Kusanagi's but this does not operate the same as his. While you cannot cross up with this, it does have a great hitbox for aerial defensive plays and as a chain ender. | ||
| Line 196: | Line 200: | ||
|damage=32 | |damage=32 | ||
|guard= High | |guard= High | ||
|startup= 6 | |startup=6 | ||
|active= | |active=11 | ||
|recovery= | |recovery=5 | ||
|frameAdv=- | |frameAdv=- | ||
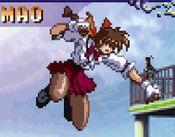
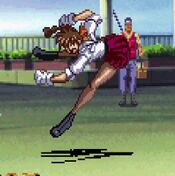
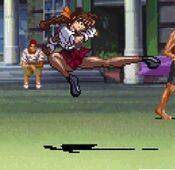
|description= A massive dropkick, Tamao's preferred jump in normal for damage and range. | |description= A massive dropkick, Tamao's preferred jump in normal for damage and range. Can also be used defensively with either 8jHK or 7jHK. | ||
}} | }} | ||
}} | }} | ||
| Line 267: | Line 271: | ||
|frameAdv= -3 | |frameAdv= -3 | ||
|description= A backfist strike, causes knockdown on hit. | |description= A backfist strike, causes knockdown on hit. | ||
}} | |||
}} | |||
---- | |||
=== Throws === | |||
{{MoveData | |||
|image=AVG2__PThrow.jpg | |||
|caption=cl. {{Motion|4}}/{{Motion|6}} + {{Icon-Capcom|P}} | |||
|name= | |||
|data= | |||
{{AttackData-AVG2 | |||
|damage= | |||
|guard= | |||
|startup= | |||
|active= | |||
|recovery= | |||
|frameAdv= | |||
|description= | |||
}} | |||
}} | |||
---- | |||
=== Guard Cancels === | |||
{{MoveData | |||
|image=AVG2_Tamao_stHP.jpg | |||
|caption= | |||
|name={{Icon-Capcom|LP}} Guard Cancel | |||
|data= | |||
{{AttackData-AVG2 | |||
|damage= | |||
|guard= | |||
|startup= | |||
|active= | |||
|recovery= | |||
|frameAdv= | |||
|description=Uses Tamao's {{Icon-Capcom|HP}}. Generally speaking, this is Tamao's best guard cancel option thanks to its 3F startup. However, it has a propensity for being low profiled, so you may want to use {{Icon-Capcom|LK}} guard cancel for opponents pressuring with crouching normals. | |||
}} | |||
}} | |||
---- | |||
{{MoveData | |||
|image=AVG2_Tamao_stHK.jpg | |||
|caption= | |||
|name={{Icon-Capcom|LK}} Guard Cancel | |||
|data= | |||
{{AttackData-AVG2 | |||
|damage= | |||
|guard= | |||
|startup= | |||
|active= | |||
|recovery= | |||
|frameAdv= | |||
|description=Uses Tamao's {{Icon-Capcom|HK}}. Slower than her {{Icon-Capcom|LP}} guard cancel, but useful as a backup against crouching opponents. | |||
}} | |||
}} | |||
---- | |||
{{MoveData | |||
|image=AVG2_Tamao_Kikoudan.jpg | |||
|caption= | |||
|name={{Icon-Capcom|HP}} Guard Cancel | |||
|data= | |||
{{AttackData-AVG2 | |||
|damage= | |||
|guard= | |||
|startup= | |||
|active= | |||
|recovery= | |||
|frameAdv= | |||
|description=Uses Tamao's {{Icon-Capcom|LP}} Kikoudan. There aren't really any good reasons to use this guard cancel. | |||
}} | |||
}} | |||
---- | |||
{{MoveData | |||
|image=AVG2_Tamao_Soryugeki.jpg | |||
|caption= | |||
|name={{Icon-Capcom|HK}} Guard Cancel | |||
|data= | |||
{{AttackData-AVG2 | |||
|damage= | |||
|guard= | |||
|startup= | |||
|active= | |||
|recovery= | |||
|frameAdv= | |||
|description=Uses Tamao's {{Icon-Capcom|LP}} Soryugeki. What would otherwise be a fantastic guard cancel is held back by the move's lack of any invulnerability. | |||
}} | }} | ||
}} | }} | ||
---- | ---- | ||
== Special Moves == | === Special Moves === | ||
{{MoveData | {{MoveData | ||
|image=AVG2_Tamao_Kikoudan.jpg | |image=AVG2_Tamao_Kikoudan.jpg | ||
| Line 428: | Line 515: | ||
---- | ---- | ||
== Super Moves == | === Super Moves === | ||
{{MoveData | {{MoveData | ||
|image=AVG2_Tamao_Lightning_Crash.jpg | |image=AVG2_Tamao_Lightning_Crash.jpg | ||
Revision as of 22:42, 5 September 2024
Move List
Standing Normals
| Damage | Guard | Startup | Active | Recovery | FrameAdv |
|---|---|---|---|---|---|
| 13 | Mid | 5 | 2 | 8 | +2 |
|
A low shin kick that hits mid despite looks. Same range as crLP, although a pinch slower, so you can use either to harass the opponent with minimal pushback. | |||||
| Damage | Guard | Startup | Active | Recovery | FrameAdv |
|---|---|---|---|---|---|
| 32 | Mid | 10 | 2 | 20 | -7 |
|
A beefy step-in high kick, great range and decent enough frame data. You will get more use from stHP but stHK goes further and hits all crouchers. | |||||
Crouching Normals
| Damage | Guard | Startup | Active | Recovery | FrameAdv |
|---|---|---|---|---|---|
| 9 | Mid | 3 | 2 | 8 | +2 |
|
A snappy crouching jab. Can link into itself and stLP for a combo confirm. | |||||
| Damage | Guard | Startup | Active | Recovery | FrameAdv |
|---|---|---|---|---|---|
| 14 | Low | 4 | 2 | 10 | 0 |
|
A nearly MK11 Terminator-looking crouch kick. Can link into itself or cr.LP for a chain combo. | |||||
| Damage | Guard | Startup | Active | Recovery | FrameAdv |
|---|---|---|---|---|---|
| 32 | Low | 5 | 4 | 17 | -6 |
|
A quick shoto sweep, the frame data isn't bad on it but the range is atrocious. Causes knockdown. | |||||
Jumping Normals
| Damage | Guard | Startup | Active | Recovery | FrameAdv |
|---|---|---|---|---|---|
| 28 | High | 10 | 6 (3, 3) | 17 | - |
|
A two-handed club also similar to Kyo Kusanagi's but this does not operate the same as his. While you cannot cross up with this, it does have a great hitbox for aerial defensive plays and as a chain ender. | |||||
| Damage | Guard | Startup | Active | Recovery | FrameAdv |
|---|---|---|---|---|---|
| 32 | High | 6 | 11 | 5 | - |
|
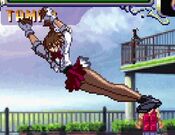
A massive dropkick, Tamao's preferred jump in normal for damage and range. Can also be used defensively with either 8jHK or 7jHK. | |||||
Command Normals
| Damage | Guard | Startup | Active | Recovery | FrameAdv |
|---|---|---|---|---|---|
| 32 | Low | 10 | - | - | -2 |
|
A low scooping punch, causes knockdown by itself but is more useful as Tamao's OTG pickup button. | |||||
| Damage | Guard | Startup | Active | Recovery | FrameAdv |
|---|---|---|---|---|---|
| 32 | Mid | 15 | - | - | -9 |
|
A hopping hip attack, it makes a funny noise when you hit your opponent but you'll never hear it because the range on it is offensively bad, it has the lower range than ever her smallest of pokes. It's possible to whiff this to set up a command grab, I suppose. | |||||
| Damage | Guard | Startup | Active | Recovery | FrameAdv |
|---|---|---|---|---|---|
| 37 | Mid | 6 | - | - | -39~0 |
|
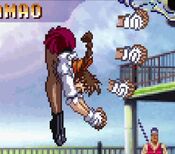
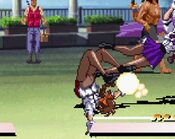
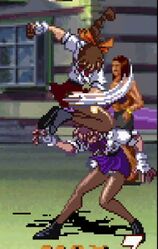
Tamao does her best Sasquatch impression by leaping through the air head first to conk the opponent with her noggin. This attack actually has a secondary hitbox if she misses, as she will slide forward on her face (still a mid) after she lands, which is still part of the attack. This face slide is special cancelable so if your opponent isn't ready for it you can immediately cash out into a EX or Lightning Crash. Bless her heart, she's trying her best. | |||||
| Damage | Guard | Startup | Active | Recovery | FrameAdv |
|---|---|---|---|---|---|
| 28 | Mid | 14 | - | - | -3 |
|
A backfist strike, causes knockdown on hit. | |||||
Throws
| Damage | Guard | Startup | Active | Recovery | FrameAdv |
|---|---|---|---|---|---|
Guard Cancels
Special Moves
| Damage | Guard | Startup | Active | Recovery | FrameAdv |
|---|---|---|---|---|---|
| - | N/A | - | - | - | |
|
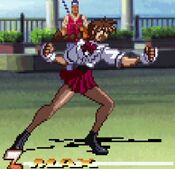
Tamao's command grab, she mounts the opponent's shoulders and starts raining down fists on their head. A very helpful addition to her kit, especially since her command grab has no whiff animation and she has no overlapping special that will come out if it misses. By holding either Punch or Kick immediately after the throw she gets access to a different ender that does slightly less damage, but offers a 3HP OTG pickup in the corner. Punch ender does the lowest damage but gives you the easiest pickup whereas Kick ender is the highest damage but leaves a smaller window to get the OTG. | |||||
Super Moves
| Damage | Guard | Startup | Active | Recovery | FrameAdv |
|---|---|---|---|---|---|
| 18 (20x) | Mid | - | - | -+4 | |
|
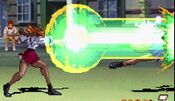
A 2 bar super that does stupid damage, usually 45% percent. Tamao's best use of meter, as she gets great damage, can combo into it, hits fullscreen, is plus if blocked, and does crazy amounts of chip damage. Chipping out a low life opponent with this is a super relevant strategy. Can also be performed with SP1+SP2. | |||||
