| Line 12: | Line 12: | ||
|active=- | |active=- | ||
|recovery=- | |recovery=- | ||
|frameAdv= | |frameAdv= +2 | ||
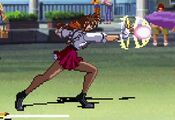
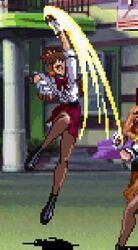
|description= A quick uppercut, a solid enough jab and chains into most of her other normals.<br> | |description= A quick uppercut, a solid enough jab and chains into most of her other normals.<br> | ||
'''Chains to:'''<br> | '''Chains to:'''<br> | ||
| Line 31: | Line 31: | ||
|active=- | |active=- | ||
|recovery=- | |recovery=- | ||
|frameAdv= | |frameAdv= +2 | ||
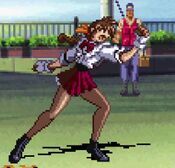
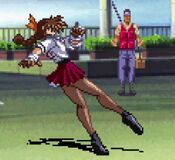
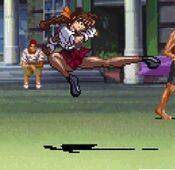
|description= A low shin kick, looks like a standing low but is still mid. With primarily the same frame data and range as stLP, stLK may seem like a better option but it has no chain routes. | |description= A low shin kick, looks like a standing low but is still mid. With primarily the same frame data and range as stLP, stLK may seem like a better option but it has no chain routes. | ||
}} | }} | ||
| Line 47: | Line 47: | ||
|active=- | |active=- | ||
|recovery=- | |recovery=- | ||
|frameAdv= | |frameAdv= -3 | ||
|description= A particularly good lunging punch, with 3f startup and being only -3 on block you will get a lot of mileage out of this poke. It can chain into both stHK and crHK but will not combo, being more of a frame trap. Be aware, however, that this will whiff on Tamao, Satomi, and Saki if they are crouching. <br> | |description= A particularly good lunging punch, with 3f startup and being only -3 on block you will get a lot of mileage out of this poke. It can chain into both stHK and crHK but will not combo, being more of a frame trap. Be aware, however, that this will whiff on Tamao, Satomi, and Saki if they are crouching. <br> | ||
'''Chains to:'''<br> | '''Chains to:'''<br> | ||
| Line 65: | Line 65: | ||
|active=- | |active=- | ||
|recovery=- | |recovery=- | ||
|frameAdv= | |frameAdv= -7 | ||
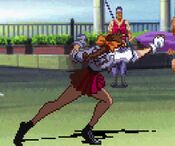
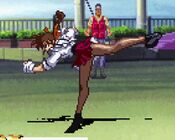
|description= A beefy step-in high kick, great range and decent enough frame data. You will get more use from stHP but stHK does go a little further. | |description= A beefy step-in high kick, great range and decent enough frame data. You will get more use from stHP but stHK does go a little further. | ||
}} | }} | ||
| Line 81: | Line 81: | ||
|active=- | |active=- | ||
|recovery=- | |recovery=- | ||
|frameAdv= | |frameAdv= +2 | ||
|description= A snappy crouching jab. Can link into itself and stLP for a combo confirm. | |description= A snappy crouching jab. Can link into itself and stLP for a combo confirm. | ||
}} | }} | ||
| Line 97: | Line 97: | ||
|active=- | |active=- | ||
|recovery=- | |recovery=- | ||
|frameAdv= | |frameAdv= 0 | ||
|description= A nearly MK11 Terminator-looking crouch kick. Can link into itself for. | |description= A nearly MK11 Terminator-looking crouch kick. Can link into itself for nothing (no special cancels) or into cr.LP for a chain combo. | ||
}} | }} | ||
}} | }} | ||
| Line 113: | Line 113: | ||
|active=- | |active=- | ||
|recovery=- | |recovery=- | ||
|frameAdv= | |frameAdv= -1 | ||
|description= A stubbier poke than her standing ones, crHP is important because it can natively special cancel (unlike stHP which is only special cancelable out of chains). This becomes a important poking tool as not only can you crHP into specials for a combo, but a max range crHP into LK Kusenkyaku will whiff and set you up for a throw.<br> | |description= A stubbier poke than her standing ones, crHP is important because it can natively special cancel (unlike stHP which is only special cancelable out of chains). This becomes a important poking tool as not only can you crHP into specials for a combo, but a max range crHP into LK Kusenkyaku will whiff and set you up for a throw.<br> | ||
'''Chains to:'''<br> | '''Chains to:'''<br> | ||
| Line 131: | Line 131: | ||
|active=- | |active=- | ||
|recovery=- | |recovery=- | ||
|frameAdv= | |frameAdv= -6 | ||
|description= A quick shoto sweep, the frame data isn't bad on it but the range is atrocious. Causes knockdown. | |description= A quick shoto sweep, the frame data isn't bad on it but the range is atrocious. Causes knockdown. | ||
}} | }} | ||
| Line 216: | Line 216: | ||
|active=- | |active=- | ||
|recovery=- | |recovery=- | ||
|frameAdv= | |frameAdv= -2 | ||
|description= A low scooping punch, causes knockdown by itself but is more useful as Tamao's OTG pickup button. | |description= A low scooping punch, causes knockdown by itself but is more useful as Tamao's OTG pickup button. | ||
}} | }} | ||
| Line 232: | Line 232: | ||
|active=- | |active=- | ||
|recovery=- | |recovery=- | ||
|frameAdv= | |frameAdv= -9 | ||
|description= A hopping hip attack, it makes a funny noise when you hit your opponent but you'll never hear it because the range on it is offensively bad, it has the lower range than ever her smallest of pokes. | |description= A hopping hip attack, it makes a funny noise when you hit your opponent but you'll never hear it because the range on it is offensively bad, it has the lower range than ever her smallest of pokes. | ||
}} | }} | ||
| Line 248: | Line 248: | ||
|active=- | |active=- | ||
|recovery=- | |recovery=- | ||
|frameAdv= | |frameAdv= -39~0 | ||
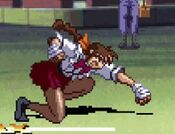
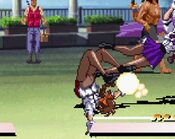
|description= Tamao does her best Sasquatch impression by leaping through the air head first to conk the opponent with her noggin. This attack actually has a secondary hitbox if she misses, as she will slide forward on her face (still a mid) after she lands, which is still part of the attack. This face slide is special cancelable so if your opponent isn't ready for it you can immediately cash out into a EX or Lightning Crash. Bless her heart, she's trying her best. | |description= Tamao does her best Sasquatch impression by leaping through the air head first to conk the opponent with her noggin. This attack actually has a secondary hitbox if she misses, as she will slide forward on her face (still a mid) after she lands, which is still part of the attack. This face slide is special cancelable so if your opponent isn't ready for it you can immediately cash out into a EX or Lightning Crash. Bless her heart, she's trying her best. | ||
}} | }} | ||
| Line 264: | Line 264: | ||
|active=- | |active=- | ||
|recovery=- | |recovery=- | ||
|frameAdv= | |frameAdv= -3 | ||
|description= A backfist strike, causes knockdown on hit. | |description= A backfist strike, causes knockdown on hit. | ||
}} | }} | ||
Revision as of 19:15, 15 March 2023
Move List
| Damage | Guard | Startup | Active | Recovery | FrameAdv |
|---|---|---|---|---|---|
| 13 | Mid | 5 | - | - | +2 |
|
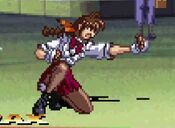
A low shin kick, looks like a standing low but is still mid. With primarily the same frame data and range as stLP, stLK may seem like a better option but it has no chain routes. | |||||
| Damage | Guard | Startup | Active | Recovery | FrameAdv |
|---|---|---|---|---|---|
| 32 | Mid | 10 | - | - | -7 |
|
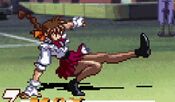
A beefy step-in high kick, great range and decent enough frame data. You will get more use from stHP but stHK does go a little further. | |||||
| Damage | Guard | Startup | Active | Recovery | FrameAdv |
|---|---|---|---|---|---|
| 9 | Mid | 3 | - | - | +2 |
|
A snappy crouching jab. Can link into itself and stLP for a combo confirm. | |||||
| Damage | Guard | Startup | Active | Recovery | FrameAdv |
|---|---|---|---|---|---|
| 14 | Low | 4 | - | - | 0 |
|
A nearly MK11 Terminator-looking crouch kick. Can link into itself for nothing (no special cancels) or into cr.LP for a chain combo. | |||||
| Damage | Guard | Startup | Active | Recovery | FrameAdv |
|---|---|---|---|---|---|
| 32 | Low | 5 | - | - | -6 |
|
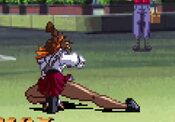
A quick shoto sweep, the frame data isn't bad on it but the range is atrocious. Causes knockdown. | |||||
| Damage | Guard | Startup | Active | Recovery | FrameAdv |
|---|---|---|---|---|---|
| 13 | High | 5 | - | - | - |
| Damage | Guard | Startup | Active | Recovery | FrameAdv |
|---|---|---|---|---|---|
| 28 | High | 10 | - | - | - |
|
A two-handed club also similar to Kyo Kusanagi's but this does not operate the same as his. While you cannot cross up with this, it does have a great hitbox for aerial defensive plays and as a chain ender. | |||||
| Damage | Guard | Startup | Active | Recovery | FrameAdv |
|---|---|---|---|---|---|
| 32 | High | 6 | - | - | - |
|
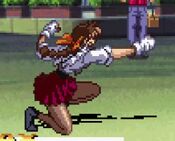
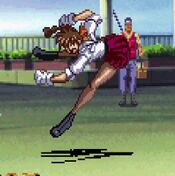
A massive dropkick, Tamao's preferred jump in normal for damage and range. | |||||
Command Moves
| Damage | Guard | Startup | Active | Recovery | FrameAdv |
|---|---|---|---|---|---|
| 32 | Low | 10 | - | - | -2 |
|
A low scooping punch, causes knockdown by itself but is more useful as Tamao's OTG pickup button. | |||||
| Damage | Guard | Startup | Active | Recovery | FrameAdv |
|---|---|---|---|---|---|
| 32 | Mid | 15 | - | - | -9 |
|
A hopping hip attack, it makes a funny noise when you hit your opponent but you'll never hear it because the range on it is offensively bad, it has the lower range than ever her smallest of pokes. | |||||
| Damage | Guard | Startup | Active | Recovery | FrameAdv |
|---|---|---|---|---|---|
| 37 | Mid | 6 | - | - | -39~0 |
|
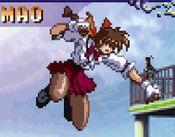
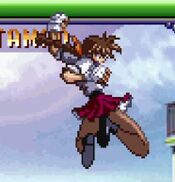
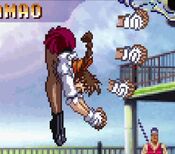
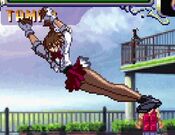
Tamao does her best Sasquatch impression by leaping through the air head first to conk the opponent with her noggin. This attack actually has a secondary hitbox if she misses, as she will slide forward on her face (still a mid) after she lands, which is still part of the attack. This face slide is special cancelable so if your opponent isn't ready for it you can immediately cash out into a EX or Lightning Crash. Bless her heart, she's trying her best. | |||||
| Damage | Guard | Startup | Active | Recovery | FrameAdv |
|---|---|---|---|---|---|
| 28 | Mid | 14 | - | - | -3 |
|
A backfist strike, causes knockdown on hit. | |||||
Special Moves
| Damage | Guard | Startup | Active | Recovery | FrameAdv |
|---|---|---|---|---|---|
| - | N/A | - | - | - | |
|
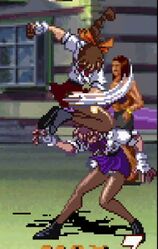
Tamao's command grab, she mounts the opponent's shoulders and starts raining down fists on their head. A very helpful addition to her kit, especially since her command grab has no whiff animation and she has no overlapping special that will come out if it misses. | |||||
Guard Cancels
Super Moves
| Damage | Guard | Startup | Active | Recovery | FrameAdv |
|---|---|---|---|---|---|
| 18 (20x) | Mid | - | - | -+4 | |
|
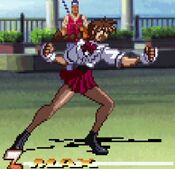
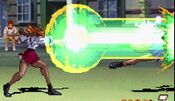
A 2 bar super that does stupid damage, usually 45% percent. Tamao's best use of meter, as she gets great damage, can combo into it, hits fullscreen, is plus if blocked, and does crazy amounts of chip damage. Chipping out a low life opponent with this is a super relevant strategy. | |||||
