No edit summary |
No edit summary |
||
| Line 26: | Line 26: | ||
|data= | |data= | ||
{{AttackData-AVG2 | {{AttackData-AVG2 | ||
|damage= | |damage=8 | ||
|guard= Mid | |guard= Mid | ||
|startup=3 | |startup=3 | ||
| Line 41: | Line 41: | ||
|data= | |data= | ||
{{AttackData-AVG2 | {{AttackData-AVG2 | ||
|damage= | |damage=13 | ||
|guard= Mid | |guard= Mid | ||
|startup=5 | |startup=5 | ||
| Line 56: | Line 56: | ||
|data= | |data= | ||
{{AttackData-AVG2 | {{AttackData-AVG2 | ||
|damage= | |damage=28 | ||
|guard= Mid | |guard= Mid | ||
|startup=7 | |startup=7 | ||
| Line 71: | Line 71: | ||
|data= | |data= | ||
{{AttackData-AVG2 | {{AttackData-AVG2 | ||
|damage= | |damage=28, 28 | ||
|guard= Mid | |guard= Mid | ||
|startup=5, 23 | |startup=5, 23 | ||
| Line 86: | Line 86: | ||
|data= | |data= | ||
{{AttackData-AVG2 | {{AttackData-AVG2 | ||
|damage= | |damage=32 | ||
|guard= Mid | |guard= Mid | ||
|startup= 8 | |startup= 8 | ||
| Line 101: | Line 101: | ||
|data= | |data= | ||
{{AttackData-AVG2 | {{AttackData-AVG2 | ||
|damage= | |damage=8 | ||
|guard= Low | |guard= Low | ||
|startup= 4 | |startup= 4 | ||
| Line 116: | Line 116: | ||
|data= | |data= | ||
{{AttackData-AVG2 | {{AttackData-AVG2 | ||
|damage= | |damage=13 | ||
|guard= Low | |guard= Low | ||
|startup= 3 | |startup= 3 | ||
| Line 131: | Line 131: | ||
|data= | |data= | ||
{{AttackData-AVG2 | {{AttackData-AVG2 | ||
|damage= | |damage=28 | ||
|guard= Mid | |guard= Mid | ||
|startup= 5(->8) | |startup= 5(->8) | ||
| Line 146: | Line 146: | ||
|data= | |data= | ||
{{AttackData-AVG2 | {{AttackData-AVG2 | ||
|damage= | |damage=32 | ||
|guard= Low | |guard= Low | ||
|startup= 9 | |startup= 9 | ||
| Line 161: | Line 161: | ||
|data= | |data= | ||
{{AttackData-AVG2 | {{AttackData-AVG2 | ||
|damage= | |damage=8 | ||
|guard=High | |guard=High | ||
|startup= 4 | |startup= 4 | ||
| Line 176: | Line 176: | ||
|data= | |data= | ||
{{AttackData-AVG2 | {{AttackData-AVG2 | ||
|damage= | |damage=13 | ||
|guard= High | |guard= High | ||
|startup= 4 | |startup= 4 | ||
| Line 191: | Line 191: | ||
|data= | |data= | ||
{{AttackData-AVG2 | {{AttackData-AVG2 | ||
|damage= | |damage=28 | ||
|guard= High | |guard= High | ||
|startup= 5 | |startup= 5 | ||
| Line 206: | Line 206: | ||
|data= | |data= | ||
{{AttackData-AVG2 | {{AttackData-AVG2 | ||
|damage= | |damage=28 | ||
|guard= High | |guard= High | ||
|startup= 8 (->12) | |startup= 8 (->12) | ||
| Line 221: | Line 221: | ||
|data= | |data= | ||
{{AttackData-AVG2 | {{AttackData-AVG2 | ||
|damage= | |damage=28 | ||
|guard= High | |guard= High | ||
|startup= 9 | |startup= 9 | ||
| Line 267: | Line 267: | ||
|data= | |data= | ||
{{AttackData-AVG2 | {{AttackData-AVG2 | ||
|damage= | |damage=26 | ||
|guard= | |guard= | ||
|startup= 15 | |startup= 15 | ||
| Line 282: | Line 282: | ||
|data= | |data= | ||
{{AttackData-AVG2 | {{AttackData-AVG2 | ||
|damage= | |damage=32 | ||
|guard= | |guard= | ||
|startup= 6 | |startup= 6 | ||
| Line 297: | Line 297: | ||
|data= | |data= | ||
{{AttackData-AVG2 | {{AttackData-AVG2 | ||
|damage= | |damage=34 | ||
|guard= High | |guard= High | ||
|startup= 9 | |startup= 9 | ||
| Line 312: | Line 312: | ||
|data= | |data= | ||
{{AttackData-AVG2 | {{AttackData-AVG2 | ||
|damage= | |damage=28 | ||
|guard= High | |guard= High | ||
|startup= 18 | |startup= 18 | ||
Revision as of 11:38, 13 April 2022
Introduction
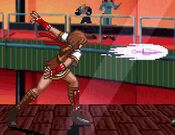
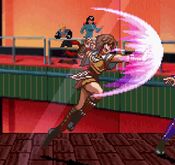
Chiho is a ninja, trained from birth in the ways of having bullshit custom combo supers.
An archetypical ninja character, Chiho is very speedy, sporting a set of fast normals, great mixup options and some of the best mobility in the game, which can be backed up by her excellent fireball. However, with speed comes fragility -- Chiho has a very low defense value, which means she takes punishment harder than most other characters. Her general damage output is also quite low, meaning you'll largely be trying to play carefully, scouting out openings and finding approaches with your fireball. This low damage output can be offset by her extremely threatening Zanei Jin combos, but the difficulty of these combos means that playing Chiho has a fairly high execution demand.
| Pros | Cons |
|
|
Movelist
| Damage | Guard | Startup | Active | Recovery | FrameAdv |
|---|---|---|---|---|---|
| 8 | Mid | 3 | - | - | -+3 |
| Damage | Guard | Startup | Active | Recovery | FrameAdv |
|---|---|---|---|---|---|
| 13 | Mid | 5 | - | - | -+2 |
| Damage | Guard | Startup | Active | Recovery | FrameAdv |
|---|---|---|---|---|---|
| 28 | Mid | 7 | - | - | --5 |
| Damage | Guard | Startup | Active | Recovery | FrameAdv |
|---|---|---|---|---|---|
| 28, 28 | Mid | 5, 23 | - | - | --2 |
| Damage | Guard | Startup | Active | Recovery | FrameAdv |
|---|---|---|---|---|---|
| 32 | Mid | 8 | - | - | --11 |
| Damage | Guard | Startup | Active | Recovery | FrameAdv |
|---|---|---|---|---|---|
| 8 | Low | 4 | - | - | -+4 |
| Damage | Guard | Startup | Active | Recovery | FrameAdv |
|---|---|---|---|---|---|
| 13 | Low | 3 | - | - | -+4 |
| Damage | Guard | Startup | Active | Recovery | FrameAdv |
|---|---|---|---|---|---|
| 28 | Mid | 5(->8) | - | - | --9 |
| Damage | Guard | Startup | Active | Recovery | FrameAdv |
|---|---|---|---|---|---|
| 32 | Low | 9 | - | - | --9 |
| Damage | Guard | Startup | Active | Recovery | FrameAdv |
|---|---|---|---|---|---|
| 8 | High | 4 | - | - | - |
| Damage | Guard | Startup | Active | Recovery | FrameAdv |
|---|---|---|---|---|---|
| 13 | High | 4 | - | - | - |
| Damage | Guard | Startup | Active | Recovery | FrameAdv |
|---|---|---|---|---|---|
| 28 | High | 5 | - | - | - |
| Damage | Guard | Startup | Active | Recovery | FrameAdv |
|---|---|---|---|---|---|
| 28 | High | 8 (->12) | - | - | - |
| Damage | Guard | Startup | Active | Recovery | FrameAdv |
|---|---|---|---|---|---|
| 28 | High | 9 | - | - | - |
Command Moves
| Damage | Guard | Startup | Active | Recovery | FrameAdv |
|---|---|---|---|---|---|
| - | - | - | - | - | - |
|
Wall Jump | |||||
| Damage | Guard | Startup | Active | Recovery | FrameAdv |
|---|---|---|---|---|---|
| - | - | - | - | ||
|
air throw | |||||
| Damage | Guard | Startup | Active | Recovery | FrameAdv |
|---|---|---|---|---|---|
| 26 | 15 | - | - | --13 | |
|
Command launcher | |||||
| Damage | Guard | Startup | Active | Recovery | FrameAdv |
|---|---|---|---|---|---|
| 32 | 6 | - | - | --10~+4 | |
|
Command launcher | |||||
| Damage | Guard | Startup | Active | Recovery | FrameAdv |
|---|---|---|---|---|---|
| 34 | High | 9 | - | - | --14 |
|
Advancing knee that launches for a small juggle follow-up. More useful than df+LK | |||||
| Damage | Guard | Startup | Active | Recovery | FrameAdv |
|---|---|---|---|---|---|
| 28 | High | 18 | - | - | --11 |
|
Hopping overhead, kind of like a 3rd Strike UOH | |||||
Target Combos
st.LP > st.LK > st.HP > st.HK/f+HK
st.LP > st.HP > st.HK/f+HK
st.LP > st.HK > st.HP
st.LP > st.HK/f+HK
st.LP > st.LK > st.HK > st.HP
st.HP > st.HK/f+HK
st.HK > st.LK > f+LK
j.LP/LK > j.HP/HK
Guard Cancels
LP: st.HP
LK: st.HK. Holding f during the freeze will make f+HK come out instead.
HP: Shisen Ken (qcb+P)
HK: Hien Geki (charge b,f+P)
f+LK guard cancel is generally the most rewarding one to use, since it leads to strong combo follow-ups. However, depending on the move being gc'd it can be risky to go for, in which case the LP guard cancel will cancel into anything else you want.
Special Moves
| Damage | Guard | Startup | Active | Recovery | FrameAdv |
|---|---|---|---|---|---|
| 15,30 | Mid | 1 | - | - | -0 |
|
Chiho's command grab. A good option to have, especially since it leads to combos. Has two follow-ups. | |||||
| Damage | Guard | Startup | Active | Recovery | FrameAdv |
|---|---|---|---|---|---|
| 40 | Mid | - | - | - | - |
|
It's an izuna drop. Adds on extra damage and leaves the opponent close to you if you choose not to use the final follow-up | |||||
| Damage | Guard | Startup | Active | Recovery | FrameAdv |
|---|---|---|---|---|---|
| 16 | Mid | - | - | - | - |
|
A final kick that tacks on some extra damage and knocks the opponent far away from you. Leaves them at a distance where you can reliably come in with a sj.LK, so whether or not you use it is up to you. | |||||
Super Moves
| Damage | Guard | Startup | Active | Recovery | FrameAdv |
|---|---|---|---|---|---|
| N/A | N/A | 0 | - | - | - |
|
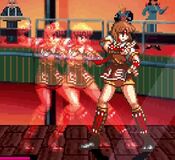
Shadow super. Chiho gets stupid combos with this. She loses access to her normal throw and her command throw for its duration, but it's not a big deal since you get unblockables instead. Also of note is that Chiho's attacks still build meter while Zanei Jin is active. | |||||
| Damage | Guard | Startup | Active | Recovery | FrameAdv |
|---|---|---|---|---|---|
| N/A | N/A | 0 | - | - | - |
|
Makes Chiho's movement and attacks faster for its duration. Not as useful as the classic 3rd Strike Genei Jin and also not as useful as Chiho's other install super. | |||||
| Damage | Guard | Startup | Active | Recovery | FrameAdv |
|---|---|---|---|---|---|
| 144 | 4 | - | - | -+8 | |
|
Fast super that tracks to the opponent's position, coming down on the opponent with a single attack. These two factors make it an exceptionally good tool for stuffing approaches and even anti-airing, but the trade-off is that the damage is the lowest of any Super in the game. Use carefully, because unless it will kill, your opponent may be okay with taking the damage if it means you're down two bars of meter. | |||||
Strategy
Chiho is best suited to rushing the opponent down, using a mixture of fireballs, df+HK slides, dashing HP and j.LK to aggressively approach the opponent and establish pressure. This is important for two reasons: the first is that the generally low damage output of her normals means that Chiho will generally fare worse in a careful footsie game compared to most other characters. The second is that the reward Chiho gets from her pressure is high, since Hien Geki gives her combos exceptional corner carry. The corner is where the real fun begins -- not only do you have access to all of your other mixup options, but you also gain access to a very annoying pressure sequence of dashing HP xx LP fireball, which you're free to change the timing of in order to bait reversals or guard cancels, as well as your terrifying (and exceptionally meter-efficient) Zanei Jin combos. If you find yourself on the defensive, look for opportunities to wall jump away from the opponent, or try to land EX Hien Geki if you're comfortable spending the meter.
Zanei Jin Unblockables
Due to the nature of the shadows attached to Zanei Jin, Chiho is able to set up unblockables in the corner by activating Zanei Jin after scoring a knockdown, timing LP+HP so that the shadows hit meaty, and then following up with cr.LK. You can use this to make waking up an incredibly scary proposition for your opponent, but you'll need to properly adjust for the opponent choosing to quick getup or not.
Combos
Basic Combos
cr.LK, cr.LP, st.LP > f+HK, cl.HP xx HP Hien Geki
(corner) cr.LK, cr.LP, st.LP > st.HK xx LP Hien Geki, cl.HP xx HP Hien Geki
Enraku Satsu, sj.LK > j.HK, land HP Hien Geki
Anti-Air Combos
j.LK > j.HK, HP Hien Geki
cl.HP/cr.HP xx LP Shisen Ken, EX Hien Geki
Zanei Jin Combo
cr.LK, cr.LP, st.LP > st.HP xx Zanei Jin {dash HP, st.LK, cr.LP, st.LP x2, cr.LP, st.LP}, st.LP x3, st.LP > st.HK xx LP Hien Geki, cl.HP xx Hien Geki
Corner combo. Hold forward during Zanei Jin to auto-walk forward and keep yourself close enough. Do this for the st.LP links after the super ends as well. Instead of going into the st.HK combo, you can chain st.LP > st.HP and start the Zanei Jin combo again -- this leads into an almost touch-of-death on basically every character in the corner.

