JtheSaltyy (talk | contribs) No edit summary |
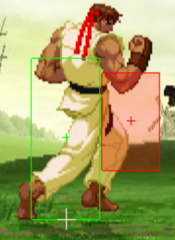
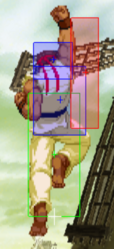
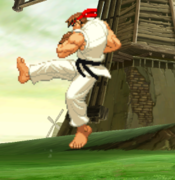
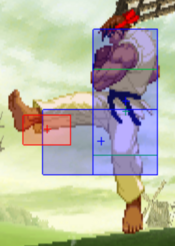
|||
| (50 intermediate revisions by 7 users not shown) | |||
| Line 1: | Line 1: | ||
== Introduction == | == Introduction == | ||
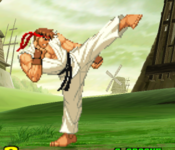
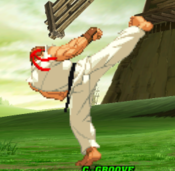
{{CvS2 Character Subnav|char=Ryu|short=Ryu}} | |||
<div> | |||
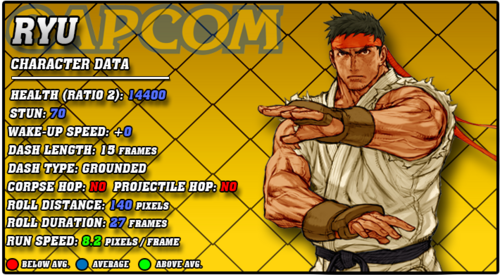
[[File:CVS2 Ryu Data.png|right|500px]] | |||
== Story == | |||
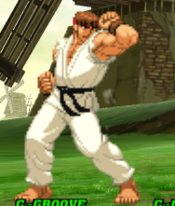
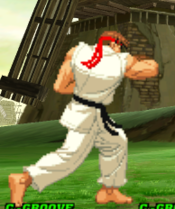
Ryu is | Ryu is the main character of the Street Fighter series, as well as THE fighting game character. He is a traveling martial artist who strives to test himself against strong opponents. Ryu is a practitioner of the Ansatsuken fighting style, alongside his best friend and rival Ken Masters. Strong and silent, Ryu's greatest pleasure in life is combat. He takes his training very seriously, even the basics. Occasionally, an evil power known as the Satsui no Hado threatens to overcome him, manipulating his desire for improvement into a desire for victory at any cost. Regardless, Ryu continues to train himself and travel the world, so that he may become the greatest version of himself that he can be. | ||
== | == Gameplay == | ||
Often you'll hear certain types of characters referred to as "shotos". These tend to be the simple, fundamental, and easy characters that can excel at any level. Ryu is the original shoto, and likely the purest one you can ever play. His control of neutral is stellar, with multiple great pokes, two fireballs, and a powerful anti-air. His main super, Shinkuu Hadouken, is a powerful utility super that allows him to punish fireballs or end combos with great damage. He can alter his air momentum with his Air Tatsu specials to keep his approach a bit ambiguous. His defense with his invincible Shoryuken is powerful, since he can deny pressure that isn't gapless. Even his rushdown is solid, though it is likely his weakest point. He has an overhead, a crossup, good hop normals, a solid low confirm, and of course two grabs. | |||
While Ryu doesn't truly have many weaknesses, his main weakness is that his strengths aren't excelling in their categories. He does everything well, but nothing perfectly, and requires you to make intelligent decisions and make solid gameplans. Ryu rewards consistency, and without it his strengths will falter. He does still have weaknesses, mainly that his preferred ender for knockdowns and damage requires a standing opponent meaning his knockdowns are a bit harder to find. Otherwise, Ryu is a simple and solid character that rewards you for being a good player. | |||
=== | === Groove Selection === | ||
{| | '''Best - C/N:''' While Ryu can be played in any Groove to some extent, he definitely has some he prefers over others. Likely his best is C-Groove, predictably. C-Groove is often seen as a fundamental Groove with simple Street Fighter style gameplay, and Ryu fits that perfectly. Simple level 2 combos, access to lots of meter for his supers, and a decent amount of defensive options make C-Ryu a standard and useful character. N-Ryu is a different take on the same Ryu formula. N-Groove is a versatile and simple Groove, and Ryu fits into it fairly well. While he does play a lot more mobile, he still ends a lot of combos in supers and has a nice mix of offensive and defensive options. | ||
'''Useful - K/A:''' K-Ryu gets access to the useful mechanics of JD and Rage. While he struggles a bit without Rage, JD helps him build it very fast, and his level 3 Shinkuu is no joke. Having access to Shin Shoryuken more often is also a benefit, as his close range punishes become very high damage. A-Ryu isn't bad, as while he doesn't have the greatest Custom Combo ever CC is still a powerful mechanic regardless. A-Ryu is more useful on point, where his great meter build and sustainable gameplan lets him ensure that the second character already has a CC ready when they come out. | |||
'''Worst - S/P:''' S-Ryu is a bit more of a gimmick. While Ryu can charge meter without sacrificing much to his patient gameplan, he still would rather use his great meterbuild tools or a few combos and cancels. Infinite level 1 supers is useful though, as Ryu can end every combo in Shinkuu, making all of his punishes and pokes much higher damage. P-Ryu is inconsistent at best. Parries are a useful tool, but Ryu can't always benefit from them unless he has a super, and P-Ryu won't have supers very often. However, when he does have a super, a parry from P-Ryu will do great damage with either a cancel into level 3 Shinkuu or a close parry into Shin Shoryuken. | |||
{{StrengthsAndWeaknesses | |||
|intro= | |||
--------------------------- | |||
'''Ryu''' is the original shoto, and a great all-rounder who struggles to excel in any specific area. Ryu's best Grooves are '''C-Groove''' and '''N-Groove'''. | |||
'''Difficulty''': Easy<br>'''Tier''': A- | |||
|pros= | |||
* '''Shoto:''' Very versatile toolkit allows him to easily work in most situations | |||
* '''Neutral Focused:''' Simple "footsies" based gameplan makes him easy and rewarding to learn | |||
* '''Easy:''' Generally very easy, with very few truly difficult things to learn | |||
* '''Versatile Super:''' A useful and reliable super with Shinkuu Hadouken | |||
* '''Groove Friendly:''' Useful to some extent in every Groove | |||
* '''Baseline Tools:''' Solid damage output, simple zoning and neutral, and solid defense, Ryu has everything you would want on a basic level | |||
|cons= | |||
* '''Jack-of-all-Trades:''' While he does do well in most categories, he isn't Sagat. He doesn't entirely excel in any category besides neutral | |||
* '''Mixup:''' His mixup potential is lackluster, he does have access to a simple mixup with his standing overhead and his normal throw but they lead to very little reward | |||
* '''Situational Enders:''' His preferred meterless combo ender whiffs on crouchers and his croucher specific routes are extremely spacing specific, so he tends to want to end in a super which he doesn't always have | |||
}} | |||
=== Players to Watch === | |||
{| class="wikitable" | |||
|- | |- | ||
! Name !! Country !! Groove !! Accounts !! Notes | |||
|- | |- | ||
|<br / | | GAO || Japan || C-Groove || N/A || A beast of a player. Uses C-Ryu to absolute perfection. <br> [https://youtu.be/yqYmRUZRnys Sample Match] | ||
|- | |- | ||
| Towel || Japan || C-Groove || Twitter: @TowelManX || One of the OG Japanese players, and has a very scary Ryu. Still plays after almost two decades. <br> [https://youtu.be/obM2I8MAL74 Sample Match] | |||
|- | |- | ||
| | | Dan || Japan || C-Groove || N/A || Though his name was largely lost to history, he was an incredible player for many years but seems to be inactive as of now. <br> [https://youtu.be/MZh3bHmHtbM Sample Match] | ||
|- | |- | ||
|} | |} | ||
=== | <br><br> | ||
== Normal Moves == | |||
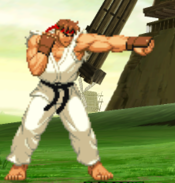
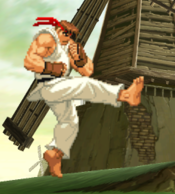
=== <span class="invisible-header">5LP</span> === | |||
{{MoveData | |||
| name = Far Jab | |||
| input = 5LP / Far LP | |||
| subtitle = Far Light Punch | |||
| image = CVS2_Ryu_5LP.PNG | |||
| caption = | |||
| linkname = 5LP | |||
| data = | |||
{{AttackData-CvS2 | |||
| version = Far {{Icon-Capcom|LP}} | |||
| subtitle = | |||
| damage = 300 | |||
| stun = 3 | |||
| cancel = RF/SP/SU | |||
| guard = Mid | |||
| parry = High | |||
| startup = 2 | |||
| active = 4 | |||
| recovery = 6 | |||
| total = 12 | |||
| advHit = +7 | |||
| advBlock = +7 | |||
| invul = None | |||
| description = Above average jab. 2 frame startup makes it great in walk jab pressure a la Sakura, but if they can duck under it then this jab is mostly used for last minute anti airs. | |||
}} | |||
}} | |||
=== <span class="invisible-header">5MP</span> === | |||
{{MoveData | |||
| name = Far Strong | |||
| input = 5MP / Far MP | |||
| subtitle = Far Medium Punch | |||
| image = CVS2_Ryu_5MP.PNG | |||
| caption = | |||
| linkname = 5MP | |||
| data = | |||
{{AttackData-CvS2 | |||
| version = Far {{Icon-Capcom|MP}} | |||
| subtitle = | |||
| damage = 1000 | |||
| stun = 10 | |||
| cancel = SU | |||
| guard = Mid | |||
| parry = High | |||
| startup = 5 | |||
| active = 6 | |||
| recovery = 17 | |||
| total = 28 | |||
| advHit = -1 | |||
| advBlock = -1 | |||
| invul = None | |||
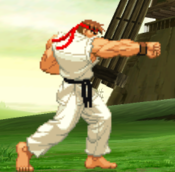
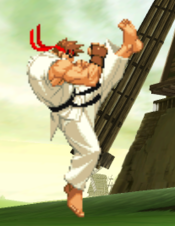
| description = Redundant button. A faster 5HP that really does not offer anything on its own. There are better buttons available but if you were to use this button it would be as a midrange poke. | |||
}} | |||
}} | |||
=== <span class="invisible-header">5HP</span> === | |||
{{MoveData | |||
| name = Far Fierce | |||
| input = 5HP / Far HP | |||
| subtitle = Far Heavy Punch | |||
| image = CVS2_Ryu_5HP.png | |||
| caption = | |||
| linkname = 5HP | |||
| data = | |||
{{AttackData-CvS2 | |||
| version = Far {{Icon-Capcom|HP}} | |||
| subtitle = | |||
| damage = 1400 | |||
| stun = 14 | |||
| cancel = SU | |||
| guard = Mid | |||
| parry = High | |||
| startup = 7 | |||
| active = 10 | |||
| recovery = 20 | |||
| total = 37 | |||
| advHit = 0 | |||
| advBlock = 0 | |||
| invul = None | |||
| description = Great long range counterpoke and blockstring ender. The super cancel is not used much but because it is 0 on block, this move is great to use in scenarios where you are hunting for stray hits or you want to end a blockstring. It is actually better to end your blockstrings with this move than cr.MK xx Hadouken in some cases (mainly when an opponent has an advancing lvl.3) | |||
}} | |||
}} | |||
=== <span class="invisible-header">5LK</span> === | |||
{{MoveData | |||
| name = Far Short | |||
| input = 5LK / Far LK | |||
| subtitle = Far Light Kick | |||
| image = CVS2_Ryu_5LK.PNG | |||
| caption = | |||
| linkname = 5LK | |||
| data = | |||
{{AttackData-CvS2 | |||
| version = Far {{Icon-Capcom|LK}} | |||
| subtitle = | |||
| damage = 500 | |||
| stun = 5 | |||
| cancel = SP/SU | |||
| guard = Mid | |||
| parry = High | |||
| startup = 4 | |||
| active = 8 | |||
| recovery = 5 | |||
| total = 17 | |||
| advHit = +3 | |||
| advBlock = +3 | |||
| invul = None | |||
| description = A quick anti air, but not used much. | |||
}} | |||
}} | |||
=== <span class="invisible-header">5MK</span> === | |||
{{MoveData | |||
| name = Far Forward | |||
| input = 5MK / Far MK | |||
| subtitle = Far Medium Kick | |||
| image = CVS2_Ryu_5LK.PNG | |||
| caption = | |||
| linkname = 5MK | |||
| data = | |||
{{AttackData-CvS2 | |||
| version = Far {{Icon-Capcom|MK}} | |||
| subtitle = | |||
| damage = 900 | |||
| stun = 9 | |||
| cancel = None | |||
| guard = Mid | |||
| parry = High | |||
| startup = 8 | |||
| active = 8 | |||
| recovery = 12 | |||
| total = 28 | |||
| advHit = +2 | |||
| advBlock = +2 | |||
| invul = None | |||
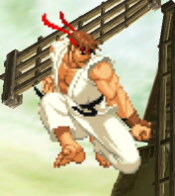
| description = Same as st.LK but slower. Same hitbox too. Also not used much. | |||
}} | |||
}} | |||
{| | === <span class="invisible-header">5HK</span> === | ||
{{MoveData | |||
| name = Far Roundhouse | |||
| input = 5HK / Far HK | |||
| subtitle = Far Heavy Kick | |||
| image = CVS2_Ryu_5HK.PNG | |||
| caption = | |||
| linkname = 5HK | |||
| data = | |||
{{AttackData-CvS2 | |||
| version = Far {{Icon-Capcom|HK}} | |||
| subtitle = | |||
| damage = 1200,1300 | |||
| stun = 12,13 | |||
| cancel = SP/SU | |||
| guard = Mid | |||
| parry = High | |||
| startup = 4 | |||
| active = 12 | |||
| recovery = 18 | |||
| total = 34 | |||
| advHit = -6 | |||
| advBlock = -6 | |||
| invul = None | |||
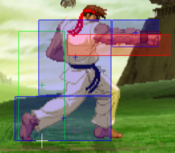
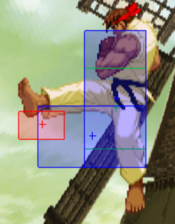
| description = Your main single button anti air from farther out, at around a 45 degree angle jump. You get extra damage if you connect on the 2nd hit which is the one that typically connects as an anti-air but there are cases where the 1st connects and you lose 100 dmg (not really a big deal but worth noting). | |||
It is also very active for an anti air, which is another reason why it is quite powerful, as you don't need to have as strict of a timing compared to other anti airs. | |||
}} | |||
}} | |||
== Close Normals == | |||
=== <span class="invisible-header">clLP</span> === | |||
|- | {{MoveData | ||
| | | name = Close Jab | ||
|- | | input = cl.LP / cl5LP | ||
|< | | subtitle = Close Light Punch | ||
|- | | image = CVS2_Ryu_clLP.PNG | ||
| caption = | |||
| linkname = cl.LP | |||
|- | | data = | ||
| | {{AttackData-CvS2 | ||
|- | | version = Close {{Icon-Capcom|LP}} | ||
|< | | subtitle = | ||
|- | | damage = 400 | ||
| stun = 4 | |||
| cancel = RF/SP/SU | |||
| | | guard = Mid | ||
| | | parry = High | ||
|- | | startup = 2 | ||
| active = 4 | |||
|- | | recovery = 6 | ||
|} | | total = 12 | ||
| advHit = +7 | |||
| advBlock = +7 | |||
| invul = None | |||
| description = Same as far jab, usually used in optimal stun combos or if you are staggering with jab and are close. | |||
}} | |||
}} | |||
=== <span class="invisible-header">clMP</span> === | |||
{{MoveData | |||
| name = Close Strong | |||
| input = cl.MP / cl5MP | |||
| subtitle = Close Medium Punch | |||
| image = CVS2_Ryu_clMP.PNG | |||
| caption = | |||
| linkname = cl.MP | |||
| data = | |||
{{AttackData-CvS2 | |||
| version = Close {{Icon-Capcom|MP}} | |||
| subtitle = | |||
| damage = 800 | |||
| stun = 8 | |||
| cancel = SP/SU | |||
| guard = Mid | |||
| parry = High | |||
| startup = 3 | |||
| active = 3 | |||
| recovery = 20 | |||
| total = 26 | |||
| advHit = -3 | |||
| advBlock = -3 | |||
| invul = None | |||
| description = Very fast for a medium, but is redundant compared to cl.MK. Even in the use case where it can combo into Shoryuken, cl.MK is better. | |||
}} | |||
}} | |||
=== <span class="invisible-header">clHP</span> === | |||
{{MoveData | |||
| name = Close Fierce | |||
| input = cl.HP / cl5HP | |||
| subtitle = Close Heavy Punch | |||
| image = CVS2_Ryu_clHP.PNG | |||
| caption = | |||
| linkname = cl.HP | |||
| data = | |||
{{AttackData-CvS2 | |||
| version = Close {{Icon-Capcom|HP}} | |||
| subtitle = | |||
| damage = 1200/1000 | |||
| stun = 12/10 | |||
| cancel = SP/SU | |||
| guard = Mid | |||
| parry = High | |||
| startup = 3 | |||
| active = 8 | |||
| recovery = 24 | |||
| total = 35 | |||
| advHit = -8 | |||
| advBlock = -8 | |||
| invul = None | |||
| description = A typical "uppercut" type normal. Like others, it has 2 uses. It is a high damage cancel into a special or super, and it is an anti-crossup, meaning it clips jumps above Ryu. | |||
The cancel into a move is mainly used after a jump-in, and the move you cancel into depends on spacing. Close range, heavy Shoryuken. Far range, heavy Tatsu. If you want to spend meter you use Shinkuu Hadoken. cr.HP is actually near identical to cl.HP in this aspect, as the damage and startup are basically identical. All of this is to say that you should use cr.HP for max damage combos instead if you aren't sure if you're close enough. | |||
As an anti-crossup, it is very consistent, and as a side-effect of it being the button that comes out on a whiffed punch throw it can catch jump-backs quite well, so you can use it for this. | |||
}} | |||
}} | |||
=== <span class="invisible-header">clLK</span> === | |||
{{MoveData | |||
| name = Close Short | |||
| input = cl.LK / cl5LK | |||
| subtitle = Close Light Kick | |||
| image = CVS2_Ryu_clLK.PNG | |||
| caption = | |||
| linkname = cl.LK | |||
| data = | |||
{{AttackData-CvS2 | |||
| version = Close {{Icon-Capcom|LK}} | |||
| subtitle = | |||
| damage = 300 | |||
| stun = 3 | |||
| cancel = SP/SU | |||
| guard = Mid | |||
| parry = Mid | |||
| startup = 4 | |||
| active = 8 | |||
| recovery = 7 | |||
| total = 19 | |||
| advHit = +2 | |||
| advBlock = +2 | |||
| invul = None | |||
| description = A quick low kick. Great as a meaty as it has 8 active frames and is +2 normally, meaning you can get some really neat links on a connect. | |||
}} | |||
}} | |||
=== <span class="invisible-header">clMK</span> === | |||
{{MoveData | |||
| name = Close Forward | |||
| input = cl.MK / cl5MK | |||
| subtitle = Close Medium Kick | |||
| image = CVS2_Ryu_clMK.PNG | |||
| caption = | |||
| linkname = cl.MK | |||
| data = | |||
{{AttackData-CvS2 | |||
| version = Close {{Icon-Capcom|MK}} | |||
| subtitle = | |||
| damage = 900 | |||
| stun = 9 | |||
| cancel = SP/SU | |||
| guard = Mid | |||
| parry = High | |||
| startup = 3 | |||
| active = 8 | |||
| recovery = 16 | |||
| total = 27 | |||
| advHit = +1 | |||
| advBlock = +1 | |||
| invul = None | |||
| description = Also good for meaties like cl.LK, with 1 less + frame but more damage. It is also your typical go-to normal cancel into Shoryuken. | |||
}} | |||
}} | |||
=== <span class="invisible-header">clHK</span> === | |||
{{MoveData | |||
| name = Close Roundhouse | |||
| input = cl.HK / cl5HK | |||
| subtitle = Close Heavy Kick | |||
| image = CVS2_Ryu_clHK.PNG | |||
| caption = | |||
| linkname = cl.HK | |||
| data = | |||
{{AttackData-CvS2 | |||
| version = Close {{Icon-Capcom|HK}} | |||
| subtitle = | |||
| damage = 500+900 | |||
| stun = 5+9 | |||
| cancel = SU | |||
| guard = Mid | |||
| parry = High | |||
| startup = 7 | |||
| active = 9,4 | |||
| recovery = 18 | |||
| total = 38 | |||
| advHit = +2 | |||
| advBlock = +2 | |||
| invul = None | |||
| description = Another decent anti-crossup normal, but it can be a bit on the slower side. Usually cl.HP is preferred but this can work as well. It is also not bad when it comes out on a whiffed kick throw, it may not catch all jumpbacks but it can still connect. | |||
}} | |||
}} | |||
== Crouching Normals == | |||
=== <span class="invisible-header">2LP</span> === | |||
{{MoveData | |||
| name = Crouch Jab | |||
| input = 2LP / cr.LP | |||
| subtitle = Crouching Light Punch | |||
| image = CVS2_Ryu_2LP.PNG | |||
| caption = | |||
| linkname = 2LP | |||
| data = | |||
{{AttackData-CvS2 | |||
| version = {{Motion|d}}+{{Icon-Capcom|LP}} | |||
| subtitle = | |||
| damage = 300 | |||
| stun = 3 | |||
| cancel = RF/SP/SU | |||
| guard = Mid | |||
| parry = Mid | |||
| startup = 3 | |||
| active = 4 | |||
| recovery = 6 | |||
| total = 13 | |||
| advHit = +7 | |||
| advBlock = +7 | |||
| invul = None | |||
| description = Your usual pressure option if 5LP is unavailable vs. crouchers. Links into just about everything you need and is also one of the better "run-stop" moves in the game if you have run at your disposal. It is also nice on defense, even if it lacks a 2 frame startup. | |||
}} | |||
}} | |||
=== <span class="invisible-header">2MP</span> === | |||
{{MoveData | |||
| name = Crouch Strong | |||
| input = 2MP / cr.MP | |||
| subtitle = Crouching Medium Punch | |||
| image = CVS2_Ryu_2MP.PNG | |||
| caption = | |||
| linkname = 2MP | |||
| data = | |||
{{AttackData-CvS2 | |||
| version = {{Motion|d}}+{{Icon-Capcom|MP}} | |||
| subtitle = | |||
| damage = 900 | |||
| stun = 9 | |||
| cancel = SP/SU | |||
| guard = Mid | |||
| parry = Mid | |||
| startup = 4 | |||
| active = 7 | |||
| recovery = 9 | |||
| total = 20 | |||
| advHit = +6 | |||
| advBlock = +6 | |||
| invul = None | |||
| description = Very nice meaty and counterpoke. Stuffs out a decent chunk of buttons when used at the tip and up close can generate some nice blockstrings due to it being +6. Even when it connects you have various damaging combo routes. | |||
}} | |||
}} | |||
=== <span class="invisible-header">2HP</span> === | |||
{{MoveData | |||
| name = Crouch Fierce | |||
| input = 2HP / cr.HP | |||
| subtitle = Crouching Heavy Punch | |||
| image = CVS2_Ryu_2HP.PNG | |||
| caption = | |||
| linkname = 2HP | |||
| data = | |||
{{AttackData-CvS2 | |||
| version = {{Motion|d}}+{{Icon-Capcom|HP}} | |||
| subtitle = | |||
| damage = 1200/800 | |||
| stun = 12/8 | |||
| cancel = SP/SU | |||
| guard = Mid | |||
| parry = High | |||
| startup = 3 | |||
| active = 11 | |||
| recovery = 26 | |||
| total = 40 | |||
| advHit = -13 | |||
| advBlock = -13 | |||
| invul = None | |||
| description = Similar to cl.HP. While you typically use this move to cancel into stuff, cl.HP is the stronger anti-crossup, however this attack is still more reliable due to it not being a proximity normal. You have to pick and choose when to use. | |||
}} | |||
}} | |||
=== <span class="invisible-header">2LK</span> === | |||
{{MoveData | |||
| name = Crouch Short | |||
| input = 2LK / cr.LK | |||
| subtitle = Crouching Light Kick | |||
| image = CVS2_Ryu_2LK.PNG | |||
| caption = | |||
| linkname = 2LK | |||
| data = | |||
{{AttackData-CvS2 | |||
| version = {{Motion|d}}+{{Icon-Capcom|LK}} | |||
| subtitle = | |||
| damage = 200 | |||
| stun = 2 | |||
| cancel = RF/SP/SU | |||
| guard = Low | |||
| parry = Low | |||
| startup = 3 | |||
| active = 4 | |||
| recovery = 8 | |||
| total = 15 | |||
| advHit = +5 | |||
| advBlock = +5 | |||
| invul = None | |||
| description = Your go-to starter on pressure since it hits low and confirms into all your favorite combos. | |||
}} | |||
}} | |||
=== <span class="invisible-header">2MK</span> === | |||
{{MoveData | |||
| name = Crouch Forward | |||
| input = 2MK / cr.MK | |||
| subtitle = Crouching Medium Kick | |||
| image = CVS2_Ryu_2MK.PNG | |||
| caption = | |||
| linkname = 2MK | |||
| data = | |||
{{AttackData-CvS2 | |||
| version = {{Motion|d}}+{{Icon-Capcom|MK}} | |||
| subtitle = | |||
| damage = 800 | |||
| stun = 8 | |||
| cancel = SP/SU | |||
| guard = Low | |||
| parry = Low | |||
| startup = 4 | |||
| active = 6 | |||
| recovery = 17 | |||
| total = 27 | |||
| advHit = -1 | |||
| advBlock = -1 | |||
| invul = None | |||
| description = The poke. You want to operate at a range where this attack hits at the very tip, as it has a nice disjoint at the end. If you want, you can cancel into fireball on closer connects to generate + frames, although it can be exploited so don't do that too much especially if you're cancelling from larger distances. It is also the go-to linking option from 2 lights (cr.HP is the go-to from 1 up close). | |||
}} | |||
}} | |||
=== <span class="invisible-header">2HK</span> === | |||
{{MoveData | |||
| name = Crouch Roundhouse | |||
| input = 2HK / cr.HK | |||
| subtitle = Crouching Roundhouse | |||
| image = CVS2_Ryu_2HK.PNG | |||
| caption = | |||
| linkname = 2HK | |||
| data = | |||
{{AttackData-CvS2 | |||
| version = {{Motion|d}}+{{Icon-Capcom|HK}} | |||
| subtitle = | |||
| damage = 1300 | |||
| stun = 13 | |||
| cancel = SP/SU | |||
| guard = Low | |||
| parry = Low | |||
| startup = 6 | |||
| active = 6 | |||
| recovery = 35 | |||
| total = 47 | |||
| advHit = -DWN | |||
| advBlock = -15 | |||
| invul = None | |||
| description = A typical sweep as they come, although this one is particularly fast. Like SF2, you want to be careful when you choose when to use 2MK and when to sweep. A cancel into fireball usually makes sweep safe, but you do have to be careful to not leave a gap otherwise you can risk losing your turn or worse getting punished by an RC or lvl.3. You can also link into this from cr.LP, theoretically making it your go-to combo in most cases but it is 1-frame and just inconsistent to go for. | |||
}} | |||
}} | |||
== Jumping Normals == | |||
=== <span class="invisible-header">jLP</span> === | |||
{{MoveData | |||
| name = Jump Jab | |||
| input = j.LP / 8LP | |||
| subtitle = Jumping Light Punch | |||
| image = CVS2_Ryu_jLP.PNG | |||
| caption = | |||
| linkname = j.LP | |||
| data = | |||
{{AttackData-CvS2 | |||
| version = {{Motion|ub}},{{Motion|u}},{{Motion|uf}}+{{Icon-Capcom|LP}} | |||
| subtitle = | |||
| damage = 600 | |||
| stun = 6 | |||
| cancel = SP | |||
| guard = High | |||
| parry = High | |||
| startup = 3 | |||
| active = 22 | |||
| recovery = 0 | |||
| total = 25 | |||
| advHit = Varies | |||
| advBlock = Varies | |||
| invul = None | |||
| description = A decent air-to-air. Not much else. | |||
}} | |||
}} | |||
=== <span class="invisible-header">jMP</span> === | |||
{{MoveData | |||
| name = Jump Strong | |||
| input = j.MP / 8MP | |||
| subtitle = Jumping Medium Punch | |||
| image = CVS2_Ryu_jMP.PNG | |||
| caption = Neutral Jump | |||
| image2 = CVS2_Ryu_njMP.png | |||
| caption2 = Diagonal Jump | |||
| linkname = j.MP | |||
| data = | |||
{{AttackData-CvS2 | |||
| version = {{Motion|u}}+{{Icon-Capcom|MP}} | |||
| subtitle = | |||
| damage = 1000 | |||
| stun = 10 | |||
| cancel = SP | |||
| guard = High | |||
| parry = High | |||
| startup = 4 | |||
| active = 10 | |||
| recovery = 0 | |||
| total = 14 | |||
| advHit = Varies | |||
| advBlock = Varies | |||
| invul = None | |||
}} | |||
{{AttackData-CvS2 | |||
| version = {{Motion|ub}}/{{Motion|uf}}+{{Icon-Capcom|MP}} | |||
| subtitle = | |||
| damage = 600+300 | |||
| stun = 6+3 | |||
| cancel = None | |||
| guard = High | |||
| parry = High | |||
| startup = 5 | |||
| active = 3,8 | |||
| recovery = 0 | |||
| total = 16 | |||
| advHit = Varies | |||
| advBlock = Varies | |||
| invul = None | |||
| description = The neutral jump version of j.MP is unremarkable and unused. Diagonal j.MP however is not. | |||
It hits twice. This can be used in 2 ways, either against tall characters to work as a weird double overhead (worse version of Rolento j.MP) or as a niche air-to-air with a cross-under mixup as your reward. As a jump-in it is lackluster and not used much. As an air-to-air, you might be incentivsed to go for it at least once, as the ensuing ambiguous cross-under you get can potentially create a nice opening. If it gets blocked, well you can just pressure instead. It is unique. | |||
}} | |||
}} | |||
=== <span class="invisible-header">jHP</span> === | |||
{{MoveData | |||
| name = Jump Fierce | |||
| input = j.HP / 8HP | |||
| subtitle = Jumping Heavy Punch | |||
| image = CVS2_Ryu_jHP.PNG | |||
| caption = | |||
| linkname = j.HP | |||
| data = | |||
{{AttackData-CvS2 | |||
| version = {{Motion|ub}},{{Motion|u}},{{Motion|uf}}+{{Icon-Capcom|HP}} | |||
| subtitle = | |||
| damage = 1300 (Neutral) /1200 (Diagonal) | |||
| stun = 13/12 | |||
| cancel = None | |||
| guard = High | |||
| parry = High | |||
| startup = 5 | |||
| active = 8 | |||
| recovery = 0 | |||
| total = 13 | |||
| advHit = Varies | |||
| advBlock = Varies | |||
| invul = None | |||
| description = Beefy jump-in. There is more disjoint on this than j.HK so it can work at the tip, but it is outranged, so pick and choose. You get more damage on the neutral jump version but there is no reason to use it for that outside of stun combos. | |||
}} | |||
}} | |||
=== <span class="invisible-header">jLK</span> === | |||
{{MoveData | |||
| name = Jump Short | |||
| input = j.LK / 8LK | |||
| subtitle = Jumping Light Kick | |||
| image = CVS2_Ryu_njLK.PNG | |||
| caption = Neutral Jump | |||
| image2 = CVS2_Ryu_jLK.PNG | |||
| caption2 = Diagonal Jump | |||
| linkname = j.LK | |||
| data = | |||
{{AttackData-CvS2 | |||
| version = {{Motion|u}}+{{Icon-Capcom|LK}} | |||
| subtitle = | |||
| damage = 500 | |||
| stun = 5 | |||
| cancel = SP | |||
| guard = High | |||
| parry = High | |||
| startup = 4 | |||
| active = 22 | |||
| recovery = 0 | |||
| total = 26 | |||
| advHit = Varies | |||
| advBlock = Varies | |||
| invul = None | |||
}} | |||
{{AttackData-CvS2 | |||
| version = {{Motion|ub}}/{{Motion|uf}}+{{Icon-Capcom|LK}} | |||
| subtitle = | |||
| damage = 500 | |||
| stun = 5 | |||
| cancel = SP | |||
| guard = High | |||
| parry = High | |||
| startup = 3 | |||
| active = 22 | |||
| recovery = 0 | |||
| total = 25 | |||
| advHit = Varies | |||
| advBlock = Varies | |||
| invul = None | |||
| description = Both versions are situational at best. nj.LK is an okay anti-air (against non C-groove characters) and j.LK can be used as a gimmicky cancel to Air Tatsu on jump-in or as a tick throw. It is outclassed by j.LP. | |||
}} | |||
}} | |||
=== <span class="invisible-header">jMK</span> === | |||
{{MoveData | |||
| name = Jump Forward | |||
| input = j.MK / 8MK | |||
| subtitle = Jumping Medium Kick | |||
| image = CVS2_Ryu_njMK.png | |||
| caption = Neutral Jump | |||
| image2 = CVS2_Ryu_jMK.png | |||
| caption2 = Diagonal Jump | |||
| linkname = j.MK | |||
| data = | |||
{{AttackData-CvS2 | |||
| version = {{Motion|u}}+{{Icon-Capcom|MK}} | |||
| subtitle = | |||
| damage = 900 | |||
| stun = 9 | |||
| cancel = None | |||
| guard = High | |||
| parry = High | |||
| startup = 5 | |||
| active = 10 | |||
| recovery = 0 | |||
| total = 15 | |||
| advHit = Varies | |||
| advBlock = Varies | |||
| invul = None | |||
}} | |||
{{AttackData-CvS2 | |||
| version = {{Motion|ub}}/{{Motion|uf}}+{{Icon-Capcom|MK}} | |||
| subtitle = | |||
| damage = 800 | |||
| stun = 8 | |||
| cancel = None | |||
| guard = High | |||
| parry = High | |||
| startup = 5 | |||
| active = 12 | |||
| recovery = 0 | |||
| total = 17 | |||
| advHit = Varies | |||
| advBlock = Varies | |||
| invul = None | |||
| description = Neutral jump version is the same as j.LK but with more damage and a slightly thinner hurtbox. | |||
j.MK is your go-to cross-up button. Aside from that it does not do much else. Getting cross-ups with j.MK against standing characters can be tricky, as it will only really cross-up on very early connects which makes it unsafe, so its potency is affected a bit depending on character thickness. Still a good button overall. | |||
}} | |||
}} | |||
=== <span class="invisible-header">jHK</span> === | |||
{{MoveData | |||
| name = Jump Roundhouse | |||
| input = j.HK / 8HK | |||
| subtitle = Jumping Heavy Kick | |||
| image = CVS2_Ryu_njHK.PNG | |||
| caption = Neutral Jump | |||
| image2 = CVS2_Ryu_jHK.PNG | |||
| caption2 = Diagonal Jump | |||
| linkname = j.HK | |||
| data = | |||
{{AttackData-CvS2 | |||
| version = {{Motion|u}}+{{Icon-Capcom|HK}} | |||
| subtitle = | |||
| damage = 1300,1200 | |||
| stun = 13,12 | |||
| cancel = SP | |||
| guard = High | |||
| parry = High | |||
| startup = 3 | |||
| active = 8 | |||
| recovery = 0 | |||
| total = 11 | |||
| advHit = Varies | |||
| advBlock = Varies | |||
| invul = None | |||
}} | |||
{{AttackData-CvS2 | |||
| version = {{Motion|ub}}/{{Motion|uf}}+{{Icon-Capcom|HK}} | |||
| subtitle = | |||
| damage = 1200 | |||
| stun = 12 | |||
| cancel = None | |||
| guard = High | |||
| parry = High | |||
| startup = 6 | |||
| active = 7 | |||
| recovery = 0 | |||
| total = 13 | |||
| advHit = Varies | |||
| advBlock = Varies | |||
| invul = None | |||
| description = Your main jump normal for reach and damage. Goes very far and has high hitstun, allowing you to easily link into a grounded normal and a cancel. Very reliable jump normal. Neutral jump is a good air-to-air, but is limited against C-Groove. | |||
}} | |||
}} | |||
== Command Normals == | |||
=== <span class="invisible-header">Sakatsu Wari</span> === | |||
{{MoveData | |||
| name = Sakatsu Wari | |||
| input = 6MP | |||
| subtitle = Overhead | |||
| image = CVS2_Ryu_6MP.PNG | |||
| caption = | |||
| linkname = 6MP | |||
| data = | |||
{{AttackData-CvS2 | |||
| version = {{Motion|f}}+{{Icon-Capcom|MP}} | |||
| subtitle = | |||
| damage = 300+600 | |||
| stun = 3+6 | |||
| cancel = None | |||
| guard = -3 | |||
| parry = -3 | |||
| startup = 26 | |||
| active = 5 | |||
| recovery = 20 | |||
| total = 51 | |||
| advHit = -3 | |||
| advBlock = -3 | |||
| invul = None | |||
| description = While this is not a good button you should use it at least once because the threat of that overhead will bleed into a scenario where it could be the end of the round. Condition with 2LKs first before fishing for it. If you have shorthop, use shorthop HK/HP over this. | |||
}} | |||
}} | |||
=== <span class="invisible-header">Kyuubu Kudaki</span> === | |||
{{MoveData | |||
| name = Kyuubu Kudaki | |||
| input = 6HP | |||
| subtitle = Rush Punch, Lunge Punch | |||
| image = CVS2_Ryu_6HP.PNG | |||
| caption = | |||
| linkname = 6HP | |||
| data = | |||
{{AttackData-CvS2 | |||
| version = {{Motion|f}}+{{Icon-Capcom|HP}} | |||
| subtitle = | |||
| damage = 500+900 | |||
| stun = 5+9 | |||
| cancel = None | |||
| guard = Mid | |||
| parry = High | |||
| startup = 15 | |||
| active = 4,12 | |||
| recovery = 16 | |||
| total = 47 | |||
| advHit = -4 | |||
| advBlock = -4 | |||
| invul = None | |||
| description = Outside of A-Groove this button is fairly useless unlike other games featuring this normal. | |||
In A-Groove this button can be used as an easy CC, but that's not what gives it at least some use, it's really the forward momentum that allows for DP loops to work. You can cancel a DP into this button, then juggle into another DP with relatively identical spacing. Even then you can do other moves to attain this spacing but because it uses HP it can make your input sequences easier. | |||
}} | |||
}} | |||
=== <span class="invisible-header">Senpu Kyaku</span> === | |||
{{MoveData | |||
| name = Senpu Kyaku | |||
| input = 6MK | |||
| subtitle = Hop Kick | |||
| image = CVS2_Ryu_6MK.PNG | |||
| caption = | |||
| linkname = 6MK | |||
| data = | |||
{{AttackData-CvS2 | |||
| version = {{Motion|f}}+{{Icon-Capcom|MK}} | |||
| subtitle = | |||
| damage = 700 | |||
| stun = 7 | |||
| cancel = None | |||
| guard = Mid | |||
| parry = High | |||
| startup = 19 | |||
| active = 4 | |||
| recovery = 15 | |||
| total = 28 | |||
| advHit = -4 | |||
| advBlock = +1 | |||
| invul = Lower Body/Throw (Airborne) | |||
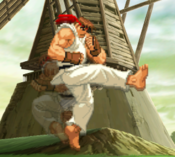
| description = Very useful button. Unfortunately because this button uses air normal data on hit it is -4, whereas on block it is +1, so it is rather poor on hit if not spaced, but still excellent on block. You can do various sequences and slip this in your pressure to reset, but keep in mind it is slow so a savvy opponent may RC through it or use some other move that counters. It can avoid lows due to it being airbourne so you can clip someone trying to low poke out as well. | |||
Like 6HP you can use this in CCs for DP loops as well. | |||
}} | |||
}} | |||
== Throws == | |||
=== <span class="invisible-header">Seoi Nage</span> === | |||
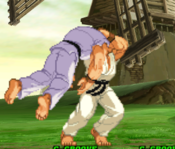
{{MoveData | |||
| name = Seoi Nage | |||
| input = Near Opponent, 4/6HP | |||
| subtitle = Punch Throw | |||
| image = CVS2_Ryu_PThrow.PNG | |||
| caption = | |||
| linkname = Seoi Nage | |||
| data = | |||
{{AttackData-CvS2 | |||
| version = Close {{Motion|b}}/{{Motion|f}}+{{Icon-Capcom|HP}} | |||
| subtitle = | |||
| damage = 1800 | |||
| stun = 0 | |||
| cancel = None | |||
| guard = Grab | |||
| parry = Grab | |||
| startup = 3 | |||
| active = 1 | |||
| recovery = 13 | |||
| total = 17 | |||
| advHit = -DWN | |||
| advBlock = Grab | |||
| invul = None | |||
| description = Ryu has a fairly standard punch throw, predictably. For most CvS2 characters, punch throws are the faster and lower damage of your two throws. This makes them mostly used for punishes and tick throws. | |||
}} | |||
}} | |||
== | === <span class="invisible-header">Tomoe Nage</span> === | ||
{{MoveData | |||
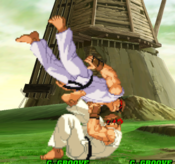
| name = Tomoe Nage | |||
| input = Near Opponent, 4/6HK | |||
| subtitle = Kick Throw | |||
| image = CVS2_Ryu_KThrow.PNG | |||
| caption = | |||
| linkname = Tomoe Nage | |||
| data = | |||
{{AttackData-CvS2 | |||
| version = Close {{Motion|b}}/{{Motion|f}}+{{Icon-Capcom|HK}} | |||
| subtitle = | |||
| damage = 2100 | |||
| stun = 0 | |||
| cancel = None | |||
| guard = Grab | |||
| parry = Grab | |||
| startup = 5 | |||
| active = 1 | |||
| recovery = 13 | |||
| total = 19 | |||
| advHit = -DWN | |||
| advBlock = Grab | |||
| invul = None | |||
| description = The higher damage and harder to tech throw at the expense of 2 frames of startup. More useful for throw mixups, and it actually does 100 damage more than the average kick throw. Not as useful for punishes, and leaves a wider gap in tick throws. | |||
}} | |||
}} | |||
| | |||
| | |||
| | |||
| | |||
| | |||
| | |||
== | == Special Moves == | ||
=== <span class="invisible-header">Hadouken</span> === | |||
{{MoveData | |||
| name = Hadouken | |||
| input = 236P | |||
| subtitle = Fireball | |||
| image = CVS2_Ryu_236P.PNG | |||
| caption = | |||
| linkname = Hadouken | |||
| data = | |||
{{AttackData-CvS2 | |||
| version = {{Motion|236}}+{{Icon-Capcom|LP}} | |||
| subtitle = | |||
| damage = 800 | |||
| stun = 8 | |||
| cancel = None | |||
| guard = Mid | |||
| parry = High | |||
| startup = 12 | |||
| active = Traveling | |||
| recovery = 42 | |||
| total = 54 | |||
| advHit = -9 | |||
| advBlock = -9 | |||
| invul = None | |||
}} | |||
{{AttackData-CvS2 | |||
| header = no | |||
| version = {{Motion|236}}+{{Icon-Capcom|MP}} | |||
| subtitle = | |||
| damage = 900 | |||
| stun = 9 | |||
| cancel = None | |||
| guard = Mid | |||
| parry = High | |||
| startup = 12 | |||
| active = Traveling | |||
| recovery = 43 | |||
| total = 55 | |||
| advHit = -10 | |||
| advBlock = -10 | |||
| invul = None | |||
}} | |||
{{AttackData-CvS2 | |||
| header = no | |||
| version = {{Motion|236}}+{{Icon-Capcom|HP}} | |||
| subtitle = | |||
| damage = 1000 | |||
| stun = 10 | |||
| cancel = None | |||
| guard = Mid | |||
| parry = High | |||
| startup = 12 | |||
| active = Traveling | |||
| recovery = 44 | |||
| total = 56 | |||
| advHit = -11 | |||
| advBlock = -11 | |||
| invul = None | |||
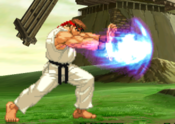
| description = Though the classic Hadoken's use seems obvious, in CvS2 it is a bit more complex. | |||
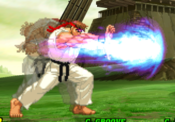
As a zoning tool, you need to be careful. While it can work to keep an opponent at bay, there are many, many anti-fireball tools in CvS2. RCs, CCs, rolls, dedicated specials/supers, etc. You need to do it in moderation with your anti-airs and pokes, but when used correctly, you can almost play an SF2 type gameplan by just using your fireballs and anti airs. Usually you want to minimize the potential risks of what can hurt you, so zoning from fullscreen or 3/4 screen is preferred, although keep in mind the closer you are the more risky using your fireball will be. | |||
As a poke, it is pretty decent when RC'd. The only risk is the recovery, since as a poke you're using this at a range where the fireball won't travel far. Like zoning, you need to use this in moderation, and you need to have prepared counters to things like jumping or rolling. By mixing in your fast pokes with RC fireball, you can create a dynamic neutral game. | |||
Then there is using this move as a combo ender. Unfortunately since Tatsu can't hit crouchers this is your next option if Shoryuken is unavailable (which most times will be the case). Even so, most times Shakunetsu is better and works in the same scenarios, but due to its more demanding input this is more reliable. Basically, if they're crouching you end your combo in Hadouken/Shakunetsu, if they're standing you end in Tatsu for meterless combos. | |||
}} | |||
}} | |||
=== <span class="invisible-header">Shakunetsu Hadouken</span> === | |||
{{MoveData | |||
| name = Shakunetsu Hadouken | |||
| input = 41236P | |||
| subtitle = Red Fireball | |||
| image = CVS2_Ryu_41236P.PNG | |||
| caption = | |||
| linkname = 41236P | |||
| data = | |||
{{AttackData-CvS2 | |||
| version = {{Motion|41236}}+{{Icon-Capcom|LP}} | |||
| subtitle = | |||
| damage = 900/1000 | |||
| stun = 9/10 | |||
| cancel = None | |||
| guard = Mid | |||
| parry = High | |||
| startup = 14 | |||
| active = Traveling | |||
| recovery = 47 | |||
| total = 61 | |||
| advHit = -DWN | |||
| advBlock = -14 | |||
| invul = None | |||
}} | |||
{{AttackData-CvS2 | |||
| header = no | |||
| version = {{Motion|41236}}+{{Icon-Capcom|MP}} | |||
| subtitle = | |||
| damage = 1000 | |||
| stun = 10 | |||
| cancel = None | |||
| guard = Mid | |||
| parry = High | |||
| startup = 14 | |||
| active = Traveling | |||
| recovery = 48 | |||
| total = 62 | |||
| advHit = -DWN | |||
| advBlock = -15 | |||
| invul = None | |||
}} | |||
{{AttackData-CvS2 | |||
| header = no | |||
| version = {{Motion|41236}}+{{Icon-Capcom|HP}} | |||
| subtitle = | |||
| damage = 1100/1000 | |||
| stun = 11/10 | |||
| cancel = None | |||
| guard = Mid | |||
| parry = High | |||
| startup = 14 | |||
| active = Traveling | |||
| recovery = 49 | |||
| total = 63 | |||
| advHit = -DWN | |||
| advBlock = -16 | |||
| invul = None | |||
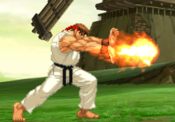
| description = Also known as "Red Fireball." It is slower across the board compared to Hadouken, making it a poorer zoning tool (most of the time, it is better on hit). As a combo ender it is quite good against crouching opponents, but due to it needing time to travel it will only work on certain up-close routes. | |||
}} | |||
}} | |||
=== <span class="invisible-header">Shoryuken</span> === | |||
{{MoveData | |||
| name = Shoryuken | |||
| input = 623P | |||
| subtitle = DP, Uppercut, Shoryu | |||
| image = CVS2_Ryu_623P.PNG | |||
| caption = 1st Hitbox (LP) | |||
| image2 = CVS2_Ryu_623P2.png | |||
| caption2 = 1st Hitbox (MP/HP) | |||
| image3 = CVS2_Ryu_623P3.png | |||
| caption3 = Rising Hitbox | |||
| linkname = Shoryuken | |||
| data = | |||
{{AttackData-CvS2 | |||
| version = {{Motion|623}}+{{Icon-Capcom|LP}} | |||
| subtitle = | |||
| damage = 1600/800 | |||
| stun = 16/8 | |||
| cancel = None | |||
| guard = Mid | |||
| parry = High | |||
| startup = 4 | |||
| active = 14 | |||
| recovery = 29 | |||
| total = 47 | |||
| advHit = -DWN | |||
| advBlock = -19 | |||
| invul = 4 (Full), 14 (Lower) | |||
}} | |||
{{AttackData-CvS2 | |||
| header = no | |||
| version = {{Motion|623}}+{{Icon-Capcom|MP}} | |||
| subtitle = | |||
| damage = 1700/800 | |||
| stun = 17/8 | |||
| cancel = None | |||
| guard = Mid | |||
| parry = High | |||
| startup = 4 | |||
| active = 16 | |||
| recovery = 39 | |||
| total = 59 | |||
| advHit = -DWN | |||
| advBlock = -30 | |||
| invul = 8 (Full), 12 (Lower) | |||
}} | |||
{{AttackData-CvS2 | |||
| header = no | |||
| version = {{Motion|623}}+{{Icon-Capcom|HP}} | |||
| subtitle = | |||
| damage = 1900/800 | |||
| stun = 19/8 | |||
| cancel = None | |||
| guard = Mid | |||
| parry = High | |||
| startup = 4 | |||
| active = 19 | |||
| recovery = 47 | |||
| total = 70 | |||
| advHit = -DWN | |||
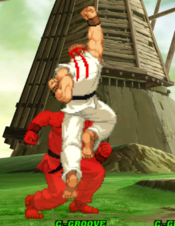
| advBlock = -41 | |||
| invul = 8 (Full), 14 (Lower) | |||
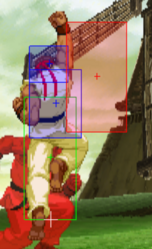
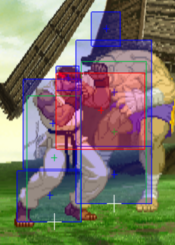
| description = The iconic Shoryuken. Unlike Hadoken which has more uses than what meets the eye, this move works about how you expect. | |||
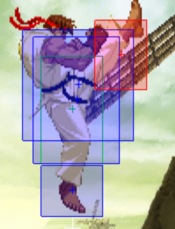
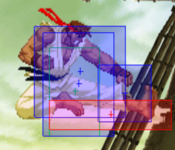
LP is the only one of the bunch that has a hurtbox on the 1st hitbox, but because it has the least risk it is used commonly in anti-airs, despite having the least amount of damage. You also get the most variable okizeme afterwards as well. | |||
MP can be used as both an anti air and a reversal since it no longer has the hurtbox on the 1st hitbox. Not really used too often. | |||
HP is the big risky version, and is your best meterless combo ender from a damage standpoint. Because it does the most damage of the 3, it is ideally the one you always want to use in both anti airs and reversals, but it is also by far the riskiest, so having it get airblocked or worse whiffed/blocked means you will lose a ton of life. Use with caution. | |||
}} | |||
}} | |||
- | === <span class="invisible-header">Tatsumaki Senpukyaku</span> === | ||
{{MoveData | |||
| name = Tatsumaki Senpukyaku | |||
| input = 214K | |||
| subtitle = Tatsu | |||
| image = CVS2_Ryu_214K.PNG | |||
| caption = | |||
| image2 = CVS2_Ryu_214K2.png | |||
| caption2 = | |||
| linkname = Tatsumaki Senpukyaku | |||
| data = | |||
{{AttackData-CvS2 | |||
| version = {{Motion|214}}+{{Icon-Capcom|LK}} | |||
| subtitle = | |||
| damage = 1200 | |||
| stun = 12 | |||
| cancel = None | |||
| guard = Mid | |||
| parry = High | |||
| startup = 13 | |||
| active = 2(4)2 | |||
| recovery = 17 | |||
| total = 38 | |||
| advHit = -DWN | |||
| advBlock = Varies | |||
| invul = None | |||
}} | |||
{{AttackData-CvS2 | |||
| header = no | |||
| version = {{Motion|214}}+{{Icon-Capcom|MK}} | |||
| subtitle = | |||
| damage = 1300 | |||
| stun = 13 | |||
| cancel = None | |||
| guard = Mid | |||
| parry = High | |||
| startup = 13 | |||
| active = 2(4)2(4)2(4)2(4)2(4)2 | |||
| recovery = 17 | |||
| total = 42 | |||
| advHit = -DWN | |||
| advBlock = Varies | |||
| invul = None | |||
}} | |||
{{AttackData-CvS2 | |||
| header = no | |||
| version = {{Motion|214}}+{{Icon-Capcom|HK}} | |||
| subtitle = | |||
| damage = 1400 | |||
| stun = 14 | |||
| cancel = None | |||
| guard = Mid | |||
| parry = High | |||
| startup = 13 | |||
| active = 2(4)2(4)2(4)2(4)2(4)2(4)2(4)2 | |||
| recovery = 17 | |||
| total = 44 | |||
| advHit = -DWN | |||
| advBlock = Varies | |||
| invul = None | |||
| description = Your main combo ender on standing opponents, among other things. When used as a combo ender you have to be careful against quickrise. Against C/P/S you can just default to the HK version, but against A/N/K they can quickrise, and though it is not punishable on hit, you can lose your turn, so use MK instead. | |||
- | Outside of combos, Tatsu sees other uses. For one, it is a nice meterbuild tool (LK version), so from fullscreen you can throw it out to get a pinch of meter. This also applies on knockdowns, you can just use the light version and get some extra meter. Additionally, on an up-close knockdown, you can do an LK Tatsu to set up an ambiguous left-right mixup. | ||
- | RC Tatsu can be quite strong on LK and sometimes MK. You can blow through many pokes and it is hard to punish. From midrange and from point blank they can be strong, just don't get too comfortable using it because it is still punishable, just use it every now and then. If you tatsu up close and they are down-backing you can also just throw them. | ||
}} | |||
}} | |||
- | === <span class="invisible-header">Air Tatsumaki Senpukyaku</span> === | ||
{{MoveData | |||
| name = Air Tatsumaki Senpukyaku | |||
| input = j.214K | |||
| subtitle = Air Tatsu | |||
| image = CVS2_Ryu_j214K.PNG | |||
| caption = | |||
| image2 = CVS2_Ryu_j214K2.png | |||
| caption2 = | |||
| linkname = j.214K | |||
| data = | |||
{{AttackData-CvS2 | |||
| version = In Air, {{Motion|214}}+{{Icon-Capcom|K}} | |||
| subtitle = | |||
| damage = 800 | |||
| stun = 8 | |||
| cancel = None | |||
| guard = Mid | |||
| parry = High | |||
| startup = 5 | |||
| active = 2(4)2(4)2(4)2 | |||
| recovery = Till Landing +6 | |||
| total = 31+ | |||
| advHit = -DWN | |||
| advBlock = +18 | |||
| invul = None | |||
| description = Though it is very + on block, that is not the primary usage of this attack. | |||
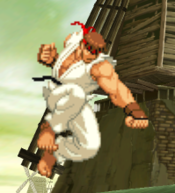
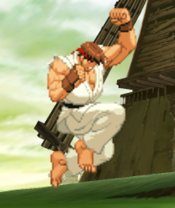
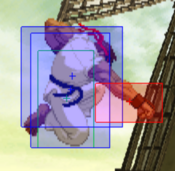
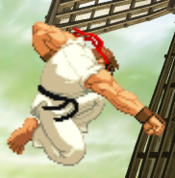
You almost always use this move as a way to position yourself on screen, altering your air momentum as you see fit. Depending on how early you do the Air Tatsu, you can travel fullscreen with ease, so if you are playing a runaway gameplan you need to get really good at using Air Tatsu, whether it be TK'd or pseudo TK'd. | |||
Not only that but using this move gives you decent meterbuild so running away while using this can build you a lot of meter quickly and it is one of the main ways Ryu gets meter. | |||
}} | |||
}} | |||
- | == Super Moves == | ||
=== <span class="invisible-header">Shinku Hadouken</span> === | |||
{{MoveData | |||
| name = Shinku Hadouken | |||
| input = 236236P | |||
| subtitle = Fireball Super | |||
| image = CVS2_Ryu_236236P.PNG | |||
| caption = | |||
| linkname = Shinku Hadouken | |||
| data = | |||
{{AttackData-CvS2 | |||
| version = {{Motion|236}}{{Motion|236}}+{{Icon-Capcom|LP}} | |||
| subtitle = | |||
| damage = 2000 | |||
| stun = 0 | |||
| cancel = None | |||
| guard = Mid | |||
| parry = High | |||
| startup = 4:5 | |||
| active = Traveling | |||
| recovery = 45 | |||
| total = 54 | |||
| advHit = -DWN | |||
| advBlock = -6 | |||
| invul = 7 (Full) | |||
}} | |||
{{AttackData-CvS2 | |||
| header = no | |||
| version = {{Motion|236}}{{Motion|236}}+{{Icon-Capcom|MP}} | |||
| subtitle = | |||
| damage = 3000 | |||
| stun = 0 | |||
| cancel = SP/SU | |||
| guard = Mid | |||
| parry = High | |||
| startup = 4:5 | |||
| active = Traveling | |||
| recovery = 45 | |||
| total = 54 | |||
| advHit = -DWN | |||
| advBlock = -3 | |||
| invul = 12 (Full) | |||
}} | |||
{{AttackData-CvS2 | |||
| header = no | |||
| version = {{Motion|236}}{{Motion|236}}+{{Icon-Capcom|HP}} | |||
| subtitle = | |||
| damage = 4500 | |||
| stun = 0 | |||
| cancel = None | |||
| guard = Mid | |||
| parry = High | |||
| startup = 4:5 | |||
| active = Traveling | |||
| recovery = 45 | |||
| total = 54 | |||
| advHit = -DWN | |||
| advBlock = 0 | |||
| invul = 19 (Full) | |||
| description = Your main metered combo ender and sometimes a way to punish gaps in blockstrings (fireballs and/or other gaps). Most of the time you save up your meter to use this in combos. | |||
This is also a super convenient S-Groove desperation supers, you can just end all of your combos in a hard knockdown and a decent chunk of damage. | |||
}} | |||
}} | |||
- | === <span class="invisible-header">Shinku Tatsumaki Senpukyaku</span> === | ||
{{MoveData | |||
| name = Shinku Tatsumaki Senpukyaku | |||
| input = 214214K | |||
| subtitle = Tatsu Super | |||
| image = CVS2_Ryu_214214K.PNG | |||
| caption = Not this Shinku, the other one | |||
| linkname = Shinku Tatsumaki Senpukyaku | |||
| data = | |||
{{AttackData-CvS2 | |||
| version = {{Motion|214}}{{Motion|214}}+{{Icon-Capcom|LK}} | |||
| subtitle = | |||
| damage = 2600 | |||
| stun = 0 | |||
| cancel = None | |||
| guard = Mid | |||
| parry = High | |||
| startup = 5:4 | |||
| active = 2(4)2(4)2(4)2(4)2(3)2 | |||
| recovery = 24 | |||
| total = 64 | |||
| advHit = -DWN | |||
| advBlock = -2 | |||
| invul = 9 (Full) | |||
}} | |||
{{AttackData-CvS2 | |||
| header = no | |||
| version = {{Motion|214}}{{Motion|214}}+{{Icon-Capcom|MK}} | |||
| subtitle = | |||
| damage = 3800 | |||
| stun = 0 | |||
| cancel = SP/SU | |||
| guard = Mid | |||
| parry = High | |||
| startup = 5:4 | |||
| active = 2(4)2(4)2(4)2(4)2(4)2(4)2(4)2(4)2(3)2 | |||
| recovery = 25 | |||
| total = 89 | |||
| advHit = -DWN | |||
| advBlock = -3 | |||
| invul = 15 (Full) | |||
}} | |||
{{AttackData-CvS2 | |||
| header = no | |||
| version = {{Motion|214}}{{Motion|214}}+{{Icon-Capcom|HK}} | |||
| subtitle = | |||
| damage = 5500 | |||
| stun = 0 | |||
| cancel = None | |||
| guard = Mid | |||
| parry = High | |||
| startup = 5:4 | |||
| active = 2(4)2(4)2(4)2(4)2(4)2(4)2(4)2(4)2(4)2(4)2(4)2(4)2(3)2 | |||
| recovery = 26 | |||
| total = 114 | |||
| advHit = -DWN | |||
| advBlock = -4 | |||
| invul = 23 (Full) | |||
| description = Although it isn't your "combo super" it is still useful. Mainly you use this either as a reversal (it is safe) or to blow up someone mashing (expensive but viable). In some scenarios you can juggle into it but it is niche at best and not really useful. | |||
Also is very strong as an S-Groove desperation super, as it can be used multiple times in succession before you really get punished, and it also a great chip-out move. | |||
}} | |||
}} | |||
== | === <span class="invisible-header">Shin Shoryuken</span> === | ||
{{MoveData | |||
| name = Shin Shoryuken | |||
| input = 23623K | |||
| subtitle = Shoryuken Super | |||
| image = CVS2_Ryu_23623K.PNG | |||
| caption = The hitbox you want | |||
| image2 = CVS2_Ryu_236236K2.png | |||
| caption2 = The hitbox you don't want | |||
| image3 = CVS2_Ryu_236236K3.png | |||
| caption3 = Death | |||
| linkname = Shin Shoryuken | |||
| data = | |||
{{AttackData-CvS2 | |||
| version = {{Motion|236}}{{Motion|d}}{{Motion|df}}+{{Icon-Capcom|K}} | |||
| subtitle = | |||
| damage = 6400 | |||
| stun = 0 | |||
| cancel = None | |||
| guard = Mid | |||
| parry = High | |||
| startup = 4:0 | |||
| active = 4,4~14 | |||
| recovery = 51 | |||
| total = 73 | |||
| advHit = -DWN | |||
| advBlock = -41 | |||
| invul = 22 (Full) | |||
| description = Insanely high damage super that can shred a health bar with ease. However, it is not the easiest super to land. The best way you can connect this super fully is as an anti-air, since it is super unreliable as a combo ender (Most reliable route is jump-in > Shinsho). Unfortunately, since Ryu's meter is better spent on the other 2 supers, this super is mostly used for style, or sometimes an extremely punishing anti-air. | |||
}} | |||
}} | |||
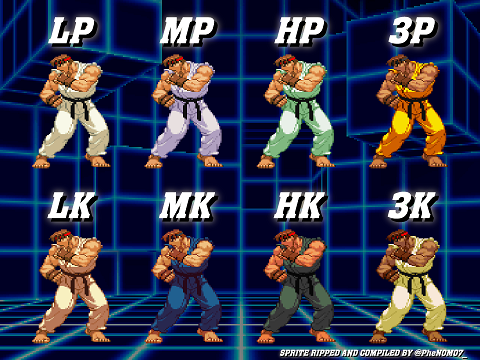
== Colors == | |||
[[File:Ryu_CvS2_colors.png]] | |||
{{Navbox-CvS2}} | |||
[[Category:Capcom vs SNK 2]] | [[Category:Capcom vs SNK 2]] | ||
[[Category:Ryu]] | |||
Latest revision as of 04:30, 7 May 2025
Introduction
Story
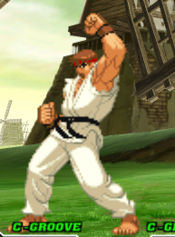
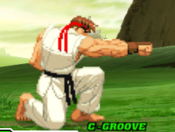
Ryu is the main character of the Street Fighter series, as well as THE fighting game character. He is a traveling martial artist who strives to test himself against strong opponents. Ryu is a practitioner of the Ansatsuken fighting style, alongside his best friend and rival Ken Masters. Strong and silent, Ryu's greatest pleasure in life is combat. He takes his training very seriously, even the basics. Occasionally, an evil power known as the Satsui no Hado threatens to overcome him, manipulating his desire for improvement into a desire for victory at any cost. Regardless, Ryu continues to train himself and travel the world, so that he may become the greatest version of himself that he can be.
Gameplay
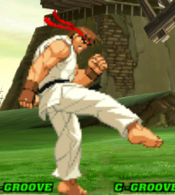
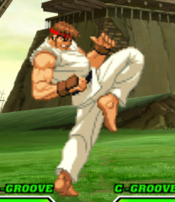
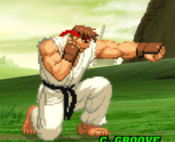
Often you'll hear certain types of characters referred to as "shotos". These tend to be the simple, fundamental, and easy characters that can excel at any level. Ryu is the original shoto, and likely the purest one you can ever play. His control of neutral is stellar, with multiple great pokes, two fireballs, and a powerful anti-air. His main super, Shinkuu Hadouken, is a powerful utility super that allows him to punish fireballs or end combos with great damage. He can alter his air momentum with his Air Tatsu specials to keep his approach a bit ambiguous. His defense with his invincible Shoryuken is powerful, since he can deny pressure that isn't gapless. Even his rushdown is solid, though it is likely his weakest point. He has an overhead, a crossup, good hop normals, a solid low confirm, and of course two grabs.
While Ryu doesn't truly have many weaknesses, his main weakness is that his strengths aren't excelling in their categories. He does everything well, but nothing perfectly, and requires you to make intelligent decisions and make solid gameplans. Ryu rewards consistency, and without it his strengths will falter. He does still have weaknesses, mainly that his preferred ender for knockdowns and damage requires a standing opponent meaning his knockdowns are a bit harder to find. Otherwise, Ryu is a simple and solid character that rewards you for being a good player.
Groove Selection
Best - C/N: While Ryu can be played in any Groove to some extent, he definitely has some he prefers over others. Likely his best is C-Groove, predictably. C-Groove is often seen as a fundamental Groove with simple Street Fighter style gameplay, and Ryu fits that perfectly. Simple level 2 combos, access to lots of meter for his supers, and a decent amount of defensive options make C-Ryu a standard and useful character. N-Ryu is a different take on the same Ryu formula. N-Groove is a versatile and simple Groove, and Ryu fits into it fairly well. While he does play a lot more mobile, he still ends a lot of combos in supers and has a nice mix of offensive and defensive options.
Useful - K/A: K-Ryu gets access to the useful mechanics of JD and Rage. While he struggles a bit without Rage, JD helps him build it very fast, and his level 3 Shinkuu is no joke. Having access to Shin Shoryuken more often is also a benefit, as his close range punishes become very high damage. A-Ryu isn't bad, as while he doesn't have the greatest Custom Combo ever CC is still a powerful mechanic regardless. A-Ryu is more useful on point, where his great meter build and sustainable gameplan lets him ensure that the second character already has a CC ready when they come out.
Worst - S/P: S-Ryu is a bit more of a gimmick. While Ryu can charge meter without sacrificing much to his patient gameplan, he still would rather use his great meterbuild tools or a few combos and cancels. Infinite level 1 supers is useful though, as Ryu can end every combo in Shinkuu, making all of his punishes and pokes much higher damage. P-Ryu is inconsistent at best. Parries are a useful tool, but Ryu can't always benefit from them unless he has a super, and P-Ryu won't have supers very often. However, when he does have a super, a parry from P-Ryu will do great damage with either a cancel into level 3 Shinkuu or a close parry into Shin Shoryuken.
|
Ryu is the original shoto, and a great all-rounder who struggles to excel in any specific area. Ryu's best Grooves are C-Groove and N-Groove. Difficulty: EasyTier: A- |
|
| Pros | Cons |
|
|
Players to Watch
| Name | Country | Groove | Accounts | Notes |
|---|---|---|---|---|
| GAO | Japan | C-Groove | N/A | A beast of a player. Uses C-Ryu to absolute perfection. Sample Match |
| Towel | Japan | C-Groove | Twitter: @TowelManX | One of the OG Japanese players, and has a very scary Ryu. Still plays after almost two decades. Sample Match |
| Dan | Japan | C-Groove | N/A | Though his name was largely lost to history, he was an incredible player for many years but seems to be inactive as of now. Sample Match |
