Introduction
Story
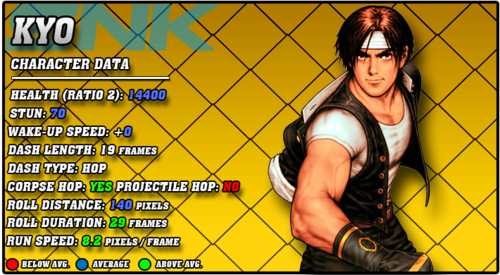
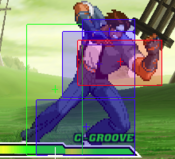
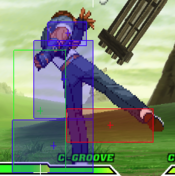
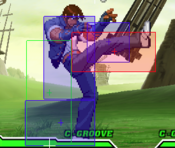
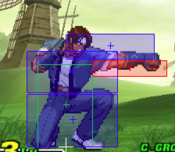
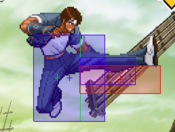
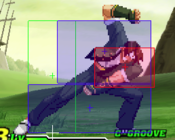
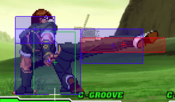
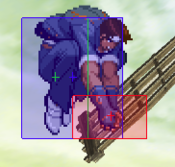
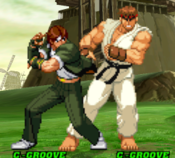
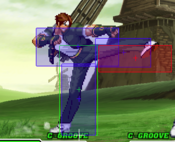
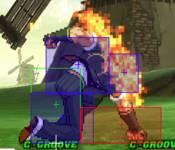
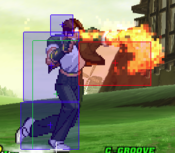
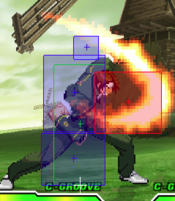
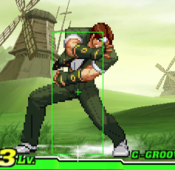
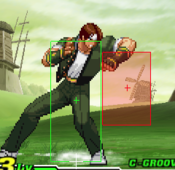
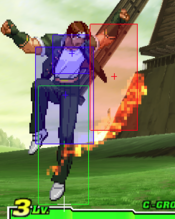
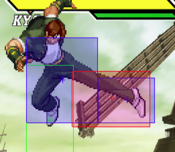
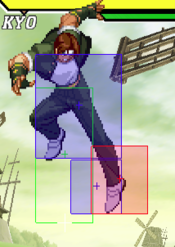
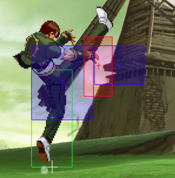
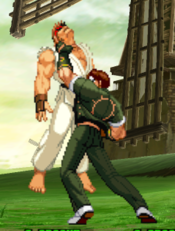
Kyo Kusanagi, the face of the famous King of Fighters series and the main protagonist of it's first saga, the Orochi Saga. Kyo is the heir to the Kusanagi clan, one of 3 legendary clans in possession of the three Sacred Treasures. The Kusanagi clan weilds powerful fire, and Kyo uses it very well. Kyo is a master of the Kusanagi flame, taught by his father Saisyu. Outside of his martial art skill and legendary family name, Kyo is a highschool dropout who enters the King of Fighters tournaments mostly to stop the evil guys behind them or for the fun of fighting when there are no evil guys. He has a girlfriend he loves named Yuki. In the first saga of KOF, he teamed up with his best friends Benimaru and Daimon to form Team Japan. In KOF 97', Kyo and the other Sacred Treasures Chizuru and Iori are forced to confront Team Orochi, who eventually resummon Orochi. Kyo and Iori seal Orochi back into the Earth, hopefully destroying it forever.
Gameplay
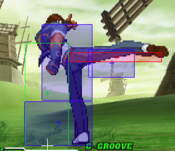
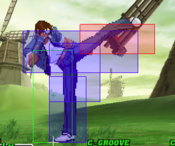
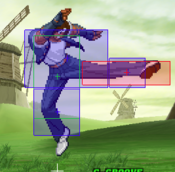
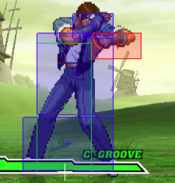
Kyo is the epitome of a rushdown character. His ability to mix and punish the opponent is almost unmatched, with massive damage output off any starter. He has a solid low confirm, a few great overheads, one of the best normal throws, and two very ambiguous crossups. Mix that with his signature rekka special Aragami, which can be followed up in multiple ways or done to leave Kyo safe at the end of a blockstring, and Kyo gets a vortex of guesses that can close out a round quick. He also has stellar defense, with great normals for mashing and a very scary DP, and plenty of good anti-airs.
This isn't without sacrifice though. Kyo struggles very hard in neutral, lacking any kind of projectile or even a consistent rewarding poke. Kyo has to take a risk to get in, whether by jumping or running or rolling, as he gets beaten in neutral by almost everyone. While he does have decent reach with normals like 5HK and 3HK, these have various weaknesses such as being crouchable or having a lot of endlag. Kyo can very rarely convert a poke into knockdown either, forcing him to rely on his up-close game to secure rounds.
If you like a character who can get in the opponents face and spin the wheel of mix until they die, you'll love Kyo. Especially if you're willing to put up with his underwhelming neutral.
Groove Selection
Best - K: Kyo can be run well with almost any groove, but shines mostly in K groove. While rolls do help him, JD and rage turn the already high damage Kyo into a punish machine, dishing out damage from almost any starter. Rage also makes his already scary oki mixup even scarier, as it only takes a few good hits for Kyo to win, and he can easily combo into level 3 Orochinagi in the corner for massive damage.
Just Defense helps Kyo punish certain pokes that are normally safe and score a knockdown when used too close due to JD eliminating pushback and making pokes unsafe in some cases (example, Blanka c.fp done too close) and allowing Kyo to score a rekka knockdown uses standing or crouching medium punch.
Useful - C/N/A/P: The other grooves are all varying in usefulness but generally are good. C-Kyo gets access to damaging and flashy level 2 combos and can more easily end combos in his autocombo super, alongside airblock and Alpha Counters that aid his defense. N-Kyo is sort of a lesser K-Kyo, with roll giving him a good defensive tool and RC specials for neutral use. You lose out on a lot of meter potential however, as Kyo's level 1 supers are very weak. A big plus is popping stock for 20% damage on already painful combos for big punishes. A-Kyo gets access to the powerful Custom Combo mechanic, and in classic Kyo style his CC is highly damaging and puts your opponent in the corner where you want them, as well as having access to repeated DP chip/guard CC for amazing damage. P-Kyo is shockingly good, as his meterless punishes are devastating and his level 3 punishes even more so. One good parry from P-Kyo puts your opponent deep in the corner.
Worst - S: Despite his usefulness in other grooves, S-Kyo has very little going for him. Kyo has decent but underwhelming and combo-oriented supers, so having infinite level 1s means nothing to him. S-Kyo also has to actively give up space to build meter, which harms his heavily aggro gameplan.
|
Kyo is a close range brawler with stellar mixup and some of the highest damage in the game. His pressure and ability to open up opponents make him terrifying up close, and his combo potential is much higher than the average character. He has play neutral to get there, though, and that's a lot easier said than done. Kyo is best in K-Groove. Difficulty: HardTier: B+ |
|
| Pros | Cons |
|
|
Players to Watch
| Name | Country | Groove | Accounts | Notes |
|---|---|---|---|---|
| Daidouraku | Japan | A/N-Groove | Twitter: @DAIDOURAKU | Has two very different playstyles depending on the groove. His A-Kyo is slower with more read based fundamentals while his N-Kyo is rushdown heavy and brute forces the opponent to make very untimely decisions. A-Groove Sample Match N-Groove Sample Match |
| Yamamoto | Japan | A-Groove | Twitter: N/A | A very methodical Kyo, but uses Kyo's restand CCs and various mixups to great effect. Sample Match |
| Bean | Japan | P-Groove | N/A | One of Japan's best P-Groovers. Has a dominant Kyo who pulls off crazy parry punish combos. Sample Match |
| Makoto | Japan | P-Groove | N/A | Not only is he a titan with Kyo, He also manages to turn almost every parry to a damaging punish combo. Sample Match |
| OTK | Japan | K-Groove | Twitter: @Den_ta9 | Once Hailed as Japan's best Rock and best K-Groove player, OTK has a JD crazy Kyo that punished seemingly everything and had mega-mind reads. Sample Match |
Normal Moves
Far Normals
5LP
5MP
5HP
5LK
5MK
5HK
Close Normals
clLP
clMP
clHP
clLK
clMK
clHK
Crouching Normals
2LP
2MP
2HP
2LK
2MK
2HK
Jumping Normals
8LP
8MP
8HP
8LK
8MK
8HK
Command Normals
6HP
3HK
6MK
j2HP
Throws
4/6HP
4/6HK
Special Moves
Aragami
Kyo's Rekka series can be intimidating at first, but the tree is fairly simple! Here is a quick rundown.
Aragami > Konokizu > Nanase/Yanosabi
Aragami > Yanosabi > Nanase/Migiri Ugachi
There are different reasons to use either of these two trees and the two possible enders for each, but memorizing the order is simple.
Konokizu
Yanosabi
Nanase
Migiri Ugachi
Dokugami
Tsumiyomi
Batsuyomi
Oniyaki
RED Kicks
Kai
Kai Followup
Oboroguruma
Kototsuki You
Supers
Final Showdown
Orochinagi
Strategy
C- Groove
Pros:
- Great meter building
- Stored meter is great to choose what level super to use on demand
- Access to roll cancel, gives moves more range
- Amazing level 2 damage
- Huge stun output with level 2, especially in the corner
- Easy to land damage up close
- Trade combo off MP DP near corner close to 9.5k
- Access to air block/chicken guard can help some bad matches
Cons:
- Roll cancel rekka must be spaced properly, can be punished by fast supers
- Bad roll
- LP rekka is safest at -5, hard to execute due to overlapping kick special
- Level one supers are near useless
- Can have a difficult time getting in without low jump
- Loses low jump instant overhead D+HP vs big characters
- Can be difficult to whiff punish due to short range, s.rh xx super can be hard to do during a intense match (SNK motion)
- Dash is mediocre, can not corpse hop
- Can struggle vs characters with superior pokes and zoning
A-Groove
Pros:
- Great meter building
- Access to roll cancel, gives moves more range
- Great CC damage
- Access to two overheads in CC
- Able to force re-stand in juggles for more damage
- Easy to land damage up close
- Trade combo off MP dp in CC does great damage
- CC versatility allows for true AA CC as well fireball punishes
- MP DP chip CC does great damage and guardbreaks (guaranteed vs P/K)
Cons:
- Roll cancel rekka must be spaced properly, can be punished by fast supers
- LP rekka is safest at -5, hard to execute due to overlapping kick special
- Level one supers are useless outside of kill combo (CC too valuable)
- Can have a difficult time getting in without low jump
- Loses low jump instant overhead D+HP vs big characters
- Can be difficult to whiff punish due to short range, no access to s.rh xx super reliably
- Dash is mediocre, can not corpse hop
- Can struggle vs characters with superior pokes and zoning
P- Groove
Pros:
- Great meter building
- Access to parry allows for easy combo to knockdown with good damage (s.mp or c.mp xx rekka)
- Easy to land damage up close
- Trade combo off MP dp into super does good damage
- Access to low jump help with poking (low jump j.mk) and mix ups (empty jump throw/low)
- Low jump gives access to instant overhead D+HP vs tall crouchers/fatties
- Parry allows for more air approach depending on player's parry skills
- LP rekka is safest at -5, but punishable by fast supers. Parry allow it to become safe (-4) due to being able to parry 1-frame prior to blocking
Cons:
- Weak guard bar, vs character with good guard and better pokes, Kyo is more open to being guard crushed
- Can have a difficult time getting in without low jump
- Can be difficult to whiff punish due to short range, no access to s.rh xx super reliably
- Dash is mediocre, can not corpse hop
- Can struggle vs characters with superior pokes and zoning
- P-Groove is a skill heavy groove, can become overwhelmed if unable to parry on top of being a hard character to play
- Not Kyo specific, but A-Groove can get free damage in some cases (block Sakura s.lp, she activates and shosho's)
- No access to RC, must parry (fireballs, pokes, etc) and if wrong will take damage
S-Groove
Pros:
- Very good Kick dodge attack
- Good run
- Easy to land damage up close
- Access to low jump help with poking (low jump j.mk) and mix ups (empty jump throw/low)
- Low jump gives access to instant overhead D+HP vs tall crouchers/fatties
- Full meter bonus damage is great bonus for his damaging combos
Cons:
- Meter tied to a timer
- Very mediocre dodge punch
- Level one supers are not easy to land when in desperation (flashing red life/infinite level ones)
- Can not take advantage of great meter building
- Charge mechanic works against his playstyle (have to choose knock down to mix up/Oki or charge)
- Can struggle vs characters with superior pokes and zoning
- MP DP juggle to level one cant be taken advantage much of in red life (trade damage may kill you)
- No access to RC, must dodge (fireballs, pokes, etc) which is not advancing
- Rare to get a level 3 if meter isnt built far when hitting desperation, have to give up oki if wanting a level 3 (flashing red life/infinite level ones)
N-Groove
Pros:
- Great meter building
- Good run
- Access to roll cancel, gives more range
- Easy to land damage up close
- Access to low jump help with poking (low jump j.mk) and mix ups (empty jump throw/low)
- Low jump gives access to instant overhead D+HP vs tall crouchers/fatties
- Breaking stock is great bonus for his damaging combos
- Can break stock for access to more damage or a level 3 after a knock down and continue pressure
- Counter roll punishes can be very damaging
Cons:
- No instant access to level 3
- Bad roll which limits his guard cancel roll punishes
- Meter tied to a timer
K-Groove
Pros:
- Good run
- Access to Just Defend allows for easy combo to knockdown with good damage (s.mp or c.mp xx rekka) on certain heavy normals (ex. Blanka c.fp)
- Nature of Just Defend being safe allows it to be used freely in neutral helping vs more dominant pokes and grants health
- Easy to land damage up close
- Access to low jump help with poking (low jump j.mk) and mix ups (empty jump throw/low)
- Low jump gives access to instant overhead D+HP vs tall crouchers/fatties
- Rage drastically improves his already high damage (about 35% overall) and gives defense buff (12.5%)
- Even though rage is timed, K-timer is longer than N and S, not being as much of a con due to easily landed supers
- Unlike N and S, Kyo will get access to two level 3 supers, up to 3 if player can Just Defend well
- Unlike parry, a wrong guess just means Kyo will block
Cons:
- Weak guard bar, vs character with good guard and better pokes, Kyo is more open to being guard crushed, but not as much as P-Groove since Just Defending is easy
- Meter tied to a timer (although not as bad as S/N due to gauranteed two level 3's)
- Can struggle vs characters with superior pokes and zoning
- Not Kyo specific, but A-Groove can get free damage in some cases (block Sakura s.lp, she activates and shosho's)
- No access to RC, must Just Defend (fireballs, pokes, etc)
Why play Kyo?
Kyo is a very fun character who can quickly destroy an opponent once he gets in. He has high damage, high stun output, and great guard damage. His roll cancels are not abusable, but great use tactically or as punishes for obvious moves. He is made to rush down, mix up, or break guard and land big combos. He has many juggles as well as OTG combos. Good for players who like:
- Rush down - High damage - Mix ups - Combos with links
Safe Fall Punishes Midscreen
Sweep - Kyo can punish safe falls vs most characters off even a max range sweep with RC HP rekka. From closer ranges you can use mp rekka or running grab.
LP/MP Rekka - Use Rekka to punish safe falls from Rekka. Rekka always loops into itself. If you have meter or want to change sides you lk double kick. If they safe fall you can juggle super, if they don't you switch sides and have oki.
Uppercut - None
LK Double upkicks - HK running grab, delay a few frames or he may stop early.
HP throw - running grab if close to corner
Combos
****Meterless Bread and Butter****
c.lk, c.lp, c.mp xx mp Rekka series - Your main go to combo that leads to great knockdown that can not be quick rised, another Rekka after will cover the knock down. This leads to many option as well for oki.
c.lk, c.lp, s.mp xx mp Rekka series - An alternate version on his bnb that uses s.mp for extra range and generally better for combos if they can't duck it.
c.lk, c.lk, c.lk xx lk upkicks - A beginner-friendly combo that can lead to big damage with meter.
****Advanced meterless****
c.lk, close s.hk xx mk upkicks - Big boy combo for max damage that has different routes depending on what you goal is (1 thru 5).
1. HP DP ender - Best mixture of damage and stun, can't pressure after vs quick rise mid screen.
2. HK DP ender - Best corner carry and stun, but slightly less damage than HP DP in longer combos.
3. F+HP xx Rekka, OTG ender - Best damage, lower stun output.
4. Running Grab - Worst option, should only go for it post stun, same damage as HP DP, but 0 stun.
5. s.hk xx mk RED Kick - cheeky reset, but safe on block as RED Kick hits meaty MOVE TO RESETS
c.lk, c.lp, c.fp xx mp rekka or hp Rekka- A tougher link for bigger damage from Rekka. HP Rekka should only be used in the corner since its midscreen knockdown is bad.
****Metered Bread and Butter****
c.lk, c.lk, c.lk xx lk upkicks, juggle Lvl 3 Serpent Wave - The main go-to combo for most grooves
c.lk, c.lk xx any level Final Showdown - An ok super, but Serpent Wave is typically better.
Far s.rh xx Lvl 3 Serpent Wave
Point blank c.hk, juggle Lvl 3 Serpent Wave - This is just a safe option to land a lvl 3, not ideal. Sweep is only -2 and has 6 active frames for meaty.
MP DP *TRADE* any lvl Serpent Wave MP DP Trade options
(C-Groove only) MP DP *TRADE* Lvl 2 Serpent Wave, HK upkicks, Lvl 1 Serpent Wave Note: Only possible due to how high up the combo puts the opponent.
(C-Groove only, midscreen) Far s.rh xx Lvl 2 Serpent Wave xx mk upkicks, HP DP or HK DP - from farther range cancel directly into HK DP as sometimes upkicks leave you too far away midscreen to land another juggle. Timin gon the Lvl 2 Serpent Wave juggle is very tight.
(Midscreen, C-Groove only) Point blank c.lk, c.lk OR close s.hk xx lk upkicks xx juggle lvl 2 serpent wave xx HK DP - Massive damage off a level 2 cancel, optimal midscreen.
(A-Groove Only) MP DP *TRADE* (Activate CC) Anti Air CC - See A-Groove combos
(A-Groove only) c.lk, close s.hk xx mk up kicks, (Activate CC) Anti Air CC - See A-Groove combos
(A-Groove, near corner only) c.lk, c.lk, c.lk xx lk upkicks, (Activate CC) Anti Air CC - See A-Groove combos
(A-Groove only) c.lk, c.lk, (Activate CC), Anti Air CC or c.mp xx ground CC - See A-Groove combos
****Custom Combos****
A-Kyo is very versatile with great damage, one of the better characters in A groove by a far margin who isn't Sakura or M.Bison.
Pros:
Great damage Easy ground custom Strong advanced customs Can go for stun post CC instead of super leading to dizzy Overhead CC Shosho chip CC Overall a custom for any situation
Cons:
No low jump makes getting in and mix ups tougher, some matches become much harder Must be able to proficiently RC
****Ground Custom**** *Note there are many variations*
s.hk x5, df+hk (1 hit) xx s.hk x3 xx (df+rh 2-hits xx c.mp)xN xx Final Showdown
****Anti-Air Custom****
(MP DP xx DF+HK whiff)x7, MP DP xx c.fp xx Serpent Wave
****Restand CC****
A few examples of restand CC
c.lk, c.lk, c.lk xx lk upkicks near corner, (Activate CC) s.hk xx (Whiff) lp rekka series to otg, df+hk xN, Final Showdown
****Overhead blocked CC****
Kyo can do rekka otg during a blocked custom to restand. The timing do do this is very tricky since if you press buttons too fast or too slow you can mess up as you can kara cancel the rekka INTO normals on start up before rekka hits. Do this by doing the motion for the first two rekkas BEFORE the first rekka hits, then double tapping punch as you see the overhead connect. Press punch too soon and you will kara cancel the overhead before it hits onto what version of punch you are pressing. The input should be all follows:
QCF+P, HCB+P (input both during the start up animation for first rekka), 1st rekka blocked, 2nd overhead rekka hits, double tap any punch.
Once the ground pound OTGs you can restand with df+hk.
Gunter's Kyo A-Groove Collection - Various custom combos
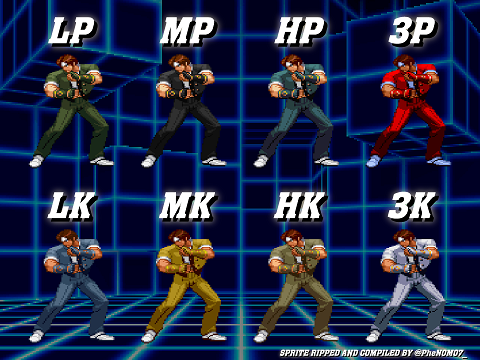
Colors
