|
|
| (39 intermediate revisions by 9 users not shown) |
| Line 1: |
Line 1: |
| [[Image:SF2T.png|right]] | | {{SF2HFHeader}} |
| | |
| | [[Image:HFsplash.png|right|Title Screen]] |
| | [[Image:HFselect.png|right|Character Selection]] |
| | [[Image:HFaction.png|right|New Moves]] |
|
| |
|
| == Introduction == | | == Introduction == |
|
| |
|
| Released in late 1992, this game is Capcom's response to all of the bootleg versions of the Street Fighter series that were popping up around the world. One of the more famous bootleg versions was called Street Fighter 2: Rainbow Edition. | | Released in late 1992, Street Fighter 2 Hyper Fighting (known as ''Street Fighter 2 Turbo'' in Japan) is Capcom's final Street Fighter release on the CPS1 arcade hardware, and a response to [https://wiki.supercombo.gg/w/Street_Fighter_2:_Champion_Edition/FAQ#Bootleg_Versions bootleg versions] of [https://wiki.supercombo.gg/w/Street_Fighter_2:_Champion_Edition Street Fighter 2' Champion Edition] which often had faster gameplay and allowed special moves to be performed in the air. |
|
| |
|
| Hyper Fighting introduced some additional moves for select characters which helped in balancing the game. Some examples of this are:
| | SF2HF introduced an overall game sped up, fixed SF2CE bugs (But not all of them!) and balanced the characters in various ways, including additional moves for several of them and even nerfing some top tiers. Examples of this are: |
|
| |
|
| • Air hurricane kicks with Ken and Ryu | | • Air hurricane kicks with Ken and Ryu |
|
| |
|
| • Chun-li fireball | | • Chun-li Fireball |
| | |
| • Blanka vertical ball
| |
| | |
| • E. Honda sumo splash
| |
| | |
| • And tons more...
| |
| | |
| == Game Mechanics ==
| |
| | |
| ===Damage===
| |
| | |
| Damage comes from 2 sources: Hits, and Throws. Each are handled separately for randomness, scaling, and special other factors.
| |
| | |
| *<b>Hit damage</b>
| |
| | |
| The basic formula for any hit's damage is
| |
| | |
| (base + rnd) * char_scaling * life-scaling
| |
| | |
| Any hit has a predefined "base" damage level. This is the raw amount of damage that would be dealt, were there no other random factors or scaling. A random value (which may be positive or negative) is added to this base level, which varies by both the hit and how much life the opponent has left. After this, each character has a 'defense rating' which decreases damage dealt to that character by an amount specific to that character (shown in the table below). Finally, the amount of life an opponent has determines a final scaling factor.
| |
| | |
| {| border="1em" cellspacing="0" style="border: 1px solid #999;"
| |
| | align="center" | Damage Scaling || align="center" | Characters
| |
| |-
| |
| | align="center" | 27/32 || align="center" | Ryu, Guile, Ken, Chun Li, Dhalsim, Vega (Claw)
| |
| |-
| |
| | align="center" | 25/32 || align="center" | E.Honda, Blanka, Boxer, Sagat, Dictator
| |
| |-
| |
| | align="center" | 22/32 || align="center" | Zangief
| |
| |}
| |
| | |
| Every character takes less than full damage, but Zangief takes the least damage.
| |
| | |
| *<b>Throw damage</b>
| |
| | |
| Throws are unaffected by a character's 'defense' scaling. This means a throw will do the same damage to Zangief as it will to Chun Li. They are however affected by Lifebar scaling, and also are given a boost if the thrower is behind in rounds won.
| |
| | |
| Damage scaling tables are documented at [http://wiki.shoryuken.com/Damage_Scaling_(HF) HF Damage Scaling]
| |
| | |
| ===Dizzy===
| |
| | |
| *<b>About dizzy</b>
| |
| Once a character has accumulated 32 points of dizzy, they become dizzied. To reach this value, they must be hit or thrown several times in quick succession.<br>
| |
| Along with a counter tracking how many dizzy points a character has accumulated, there is a separate 'dizzy timeout' counter, which tracks how long until their dizzy point tracker is reset to 0. Dizzy timeout is decremented with every game tick, regardless of whether the character is blocking an attack, in hitstun, or knocked down.
| |
| | |
| *<b>Move dizzy properties</b>
| |
| Any hit or throw has a predefined base dizzy amount. To this is added a random value (which may be negative), consistent across all moves.
| |
| | |
| The lookup table for dizzy randomness is as follows:
| |
| | |
| {| border="1em" cellspacing="0" style="border: 1px solid #999;"
| |
| | align="center" | Modifier || align="center" | -3 || align="center" | -2 || align="center" | -1 || align="center" | 0 || align="center" | 1 || align="center" | 2 || align="center" | 3
| |
| |-
| |
| | align="center" | Likelihood || align="center" | 3.125% || align="center" | 12.5% || align="center" | 15.625% || align="center" | 37.5% || align="center" | 15.625% || align="center" | 12.5% || align="center" | 3.125%
| |
| |}
| |
| | |
| For example, Vega's crouching Strong has a base dizzy value of 8, to which a random value between -3 and +3 is added, resulting in a 5~11 possible dizzy range, with 8 being the most likely value and 5 or 11 being very unlikely. His throw has a base dizzy value of 10, resulting in a 7~13 possible dizzy range.
| |
| | |
| | |
| As well as raw dizzy value, each move has a predefined "dizzy timeout" value, which is added to the character's dizzy timeout tracker. This means that successive hits increase the length of time until a character's dizzy is reset.
| |
| | |
| ===Impact Freeze===
| |
| | |
| Impact freeze is a period of time where the game freezes momentarily when an attack hits or is blocked. It is why a move on hit seems to show on the screen for much longer than the same move when it whiffs. Impact freeze allows special move cancels such as Ryu's cr.mk XX fireball to be much easier than the number of active frames would suggest. See [http://sonichurricane.com/?p=1043] and [http://shoryuken.com/forum/index.php?threads/on-impact-freeze-and-hit-or-blockstun-after-single-attacks-or-in-combos.115025/] for much more information.
| |
| | |
| In HF, normal game ticks still occur during impact freeze, so timers such as the Dizzy Timer still decrease.
| |
| | |
| In HF, Impact freeze lasts for 14 frames, regardless of attack strength.
| |
| | |
| ===Hit Stun and Block stun===
| |
| | |
| After any attack has hit or has been blocked, and after impact freeze, the attackee enters a state of hit stun or block stun. Depending on the attack, hitstun or block stun may end before or after the attack has finished, putting the attackee in advantage or disadvantage.<br>
| |
| During hitstun, the character is unable to perform any action, and is also unthrowable. They may however buffer special moves during hitstun.<br>
| |
| During blockstun the character is additionally allowed to switch block states (e.g. from high blocking to low blocking).<br>
| |
| | |
| Hit stun and block stun are generally identical in Hyper Fighting, although there are very specific times when they can be a frame different. See [http://shoryuken.com/forum/index.php?threads/on-impact-freeze-and-hit-or-blockstun-after-single-attacks-or-in-combos.115025/] for more info.
| |
| | |
| In HF, the strength of the move determines the amount of hitstun.
| |
| | |
| {| border="1em" cellspacing="0" style="border: 1px solid #999;"
| |
| | align="center" | Strength || align="center" | Jab/Short || align="center" | Strong/Forward || align="center" | Fierce/Roundhouse
| |
| |-
| |
| | align="center" | Hitstun (in frames)|| align="center" | 14 || align="center" | 19 || align="center" | 23
| |
| |}
| |
| | |
| Special moves may have their own specific hitstun values.
| |
| | |
| ===Randomness===
| |
| | |
| Frame skipping<br>
| |
| Damage<br>
| |
| Dizzy dealt<br>
| |
| Time spent in dizzy (difficulty of mashing out)<br>
| |
| Throw invincibility upon wakeup<br>
| |
| Winner of a same-frame throw vs throw exchange<br>
| |
| When Vega's claw will fall off
| |
| | |
| See [http://sonichurricane.com/articles/sf2randomness.html SF2 randomness] for more details.
| |
| | |
| == Basic Strategy ==
| |
| | |
| == Advanced Strategy ==
| |
| | |
| Utilizing the CPS1 gaming engine to your advantage:
| |
| | |
| The first three editions of Street Fighter II (WW,CE,HF aka Turbo) were programmed with the CPS1 engine. There was an old glitch that was fixed in Super and Super Turbo that allowed for a number of rapid fire kicks to be linked into a punch and then further cancelled into your favorite special.
| |
| | |
| EX. Ken: 3x c.lk-> s.hp xx Hadoken (qcf+p)
| |
| | |
| How this works is beyond me, but I do know how to utilize the CPS1 chains, and here's how:
| |
| | |
| After hitting with the first three rapid fire kicks, let the pad, stick, whatever go back to neutral (so you are standing) and input lk+whichever punch you want with the same timing as the initial lk's. In the example above you would input c.lk..c.lk..c.lk.(neutral).s.lk+hp then just cancel into hadoken.
| |
| | |
| This is the just one of the ways to use CPS1 chains. You can use these to get high punches in when all you had time for was a low kick.
| |
| | |
| One more note, you can go from standing lk's to crouching punches; or from crouching lk's to standing punches. But curiously enough not vice versa, punches don't go to kicks, and standing kicks do not go to standing punches.
| |
|
| |
|
| --Danthrasher
| | • Blanka Vertical Ball ("Upball") |
|
| |
|
| | • E. Honda Sumo Splash |
|
| |
|
| Here's a video description of CPS1 chains (CE used in the vid, but the process is identical for HF)<br>
| | • Dhalsim Yoga Teleport |
| http://www.youtube.com/watch?v=0WzU3IXDOT0
| |
|
| |
|
| == The Characters ==
| | • Balrog's (Boxer) Turn Around Punch can pass through fireballs |
| <table width=100%><tr><td width=50%>
| |
| * [[Street Fighter 2: Hyper Fighting/Balrog|Balrog]]
| |
| * [[Street Fighter 2: Hyper Fighting/Blanka|Blanka]]
| |
| * [[Street Fighter 2: Hyper Fighting/Chun-Li|Chun-Li]]
| |
| * [[Street Fighter 2: Hyper Fighting/Dhalsim|Dhalsim]]
| |
| * [[Street Fighter 2: Hyper Fighting/E. Honda|E. Honda]]
| |
| * [[Street Fighter 2: Hyper Fighting/Guile|Guile]]
| |
| </td><td width=50%>
| |
| * [[Street Fighter 2: Hyper Fighting/Ken|Ken]]
| |
| * [[Street Fighter 2: Hyper Fighting/M. Bison|M. Bison]]
| |
| * [[Street Fighter 2: Hyper Fighting/Ryu|Ryu]]
| |
| * [[Street Fighter 2: Hyper Fighting/Sagat|Sagat]]
| |
| * [[Street Fighter 2: Hyper Fighting/Vega|Vega]]
| |
| * [[Street Fighter 2: Hyper Fighting/Zangief|Zangief]]
| |
| </td></tr></table>
| |
|
| |
|
| == Tier List ==
| | • No more infinite combos for M.Bison (Dictator) |
| The tier listing is never exact but it can give a strong indication on what would happen in a match between two players at the same capability level. Below is the general listing for HF.
| |
|
| |
|
| <Center>
| | • And a lot more... |
| {| style="width:100%; border="1"
| |
|
| |
|
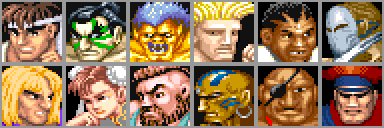
| | == Characters == |
| | {| width="128px" |
| | | align="center" width="64px" | [[Street Fighter 2: Hyper Fighting/Ryu|Ryu]] || align="center" width="64px" | [[Street Fighter 2: Hyper Fighting/E._Honda|E.Honda]] || align="center" width="64px" | [[Street Fighter 2: Hyper Fighting/Blanka|Blanka]] || align="center" width="64px" | [[Street Fighter 2: Hyper Fighting/Guile|Guile]] || align="center" width="64px" | [[Street Fighter 2: Hyper Fighting/Balrog|Balrog]] || align="center" width="64px" | [[Street Fighter 2: Hyper Fighting/Vega|Vega]] |
| |- | | |- |
| !Top Tier
| | | colspan="6" | |
| !Upper Mid Tier
| | <imagemap> |
| !Lower Mid Tier
| | Image:Sf2hf-charselect.png |
| !Low Tier
| | rect 0 0 63 63 [[Street_Fighter_2:_Hyper_Fighting/Ryu]] |
| | rect 64 0 127 63 [[Street_Fighter_2:_Hyper_Fighting/E._Honda]] |
| | rect 128 0 191 63 [[Street_Fighter_2:_Hyper_Fighting/Blanka]] |
| | rect 192 0 255 63 [[Street_Fighter_2:_Hyper_Fighting/Guile]] |
| | rect 256 0 319 63 [[Street_Fighter_2:_Hyper_Fighting/Balrog]] |
| | rect 320 0 383 63 [[Street_Fighter_2:_Hyper_Fighting/Vega]] |
| | rect 0 64 63 127 [[Street_Fighter_2:_Hyper_Fighting/Ken]] |
| | rect 64 64 127 127 [[Street_Fighter_2:_Hyper_Fighting/Chun-Li]] |
| | rect 128 64 191 127 [[Street_Fighter_2:_Hyper_Fighting/Zangief]] |
| | rect 192 64 255 127 [[Street_Fighter_2:_Hyper_Fighting/Dhalsim]] |
| | rect 256 64 319 127 [[Street_Fighter_2:_Hyper_Fighting/Sagat]] |
| | rect 320 64 383 127 [[Street_Fighter_2:_Hyper_Fighting/M._Bison]] |
| | desc none |
| | </imagemap> |
| |- | | |- |
| | | | | align="center" width="64px" | [[Street Fighter 2: Hyper Fighting/Ken|Ken]] || align="center" width="64px" | [[Street Fighter 2: Hyper Fighting/Chun-Li|Chun-Li]] || align="center" width="64px" | [[Street Fighter 2: Hyper Fighting/Zangief|Zangief]]|| align="center" width="64px" | [[Street Fighter 2: Hyper Fighting/Dhalsim|Dhalsim]]|| align="center" width="64px" | [[Street Fighter 2: Hyper Fighting/Sagat|Sagat]]|| align="center" width="64px" | [[Street Fighter 2: Hyper Fighting/M._Bison|M.Bison]] |
| | |
| Ryu
| |
| | |
| Guile
| |
| | |
| Sagat
| |
| | |
| | |
| | |
| | | |
| | |
| Ken | |
| | |
| Blanka
| |
| | |
| Zangief
| |
| | |
| | |
| | |
| | | |
| | |
| Chun-li | |
| | |
| E. Honda
| |
| | |
| Dhalsim
| |
| | |
| Blarog
| |
| | |
| | | |
| | |
| Vega
| |
| | |
| Bison | |
| | |
| | |
| | |
| | |
| | |
| |} | | |} |
| </Center>
| |
|
| |
| == Game Versions ==
| |
|
| |
| '''CPS1 (arcade)'''<br>
| |
| This the original release of Hyper Fighting.
| |
|
| |
| Variations of combinations of the A and B CPS1 board can result in the game running at different speeds. [http://www.mametesters.org/view.php?id=408]
| |
|
| |
| '''Playstation'''<br>
| |
| '''Playstation 2'''<br>
| |
| '''Super Nintendo'''<br>
| |
| '''Sega Genesis'''<br>
| |
| '''Xbox'''<br>
| |
| '''Xbox 360'''<br>
| |
|
| |
| == Regional Differences ==
| |
|
| |
| Please note that the Japanese versions are not the same as the American versions:
| |
|
| |
| <center>
| |
| <table cellspacing = 2 border = 1 cellpadding = 5>
| |
| <tr>
| |
| <td><b><center>American Version</center></b></td>
| |
| <td><b><center>Japanese Version</center></b></td>
| |
| </tr>
| |
| <tr>
| |
| <td>Boxer character = Balrog</td>
| |
| <td>Boxer character = M.Bison</td>
| |
| </tr>
| |
| <tr>
| |
| <td>Claw character = Vega</td>
| |
| <td>Claw character = Balrog</td>
| |
| </tr>
| |
| <tr>
| |
| <td>Dictator character = M.Bison</td>
| |
| <td>Dictator character = Vega</td>
| |
| </tr>
| |
| </table></center>
| |
|
| |
| == Miscellaneous ==
| |
|
| |
| -After getting up from being knocked down, you are unthrowable for a number of frames, randomly selected from 1 to 29 inclusive.<br />
| |
| -When hitting a dizzied player, they are immune to dizzy for 60 game ticks. This means any combo after a dizzy will only start causing more dizzy after 60 frames of the first hit. This is important to take into account for redizzy combos.
| |
|
| |
| == Other HF links ==
| |
|
| |
| ===General===
| |
| [[http://shoryuken.com/forum/index.php?threads/the-sf2-hyper-fighting-thread.17029 SRK SF2HF thread]]
| |
|
| |
|
| |
|
| ===Technical Details===
| |
| [http://dammit.typepad.com/blog/2010/05/sf2-sfa-dizzies.html SF2 Dizzies]<br>
| |
| [http://dammit.typepad.com/blog/2010/06/dizzy-durations-and-limits.html Dizzy durations and limits] and [http://dammit.typepad.com/blog/2010/12/dizzy-meter-video-project.html update]<br>
| |
| [http://dammit.typepad.com/blog/2010/09/street-fighter-ii-hitboxes.html SF2 Hitboxes]<br>
| |
| [http://dammit.typepad.com/blog/2011/05/sf2-throwboxes.html SF2 Throwboxes]<br>
| |
| [http://dammit.typepad.com/blog/2011/06/random-damage-in-sf2.html SF2 Random damage]<br>
| |
| [http://dammit.typepad.com/blog/2011/06/sf2-codes-and-random-findings.html Cheat codes & findings]<br>
| |
|
| |
|
|
| |
|
| {{Hyper Fighting}}
| |
|
| |
|
| | {{Navbox-SF2HF}} |
| [[Category:Street Fighter 2: Hyper Fighting]] | | [[Category:Street Fighter 2: Hyper Fighting]] |
| | [[Category:Street Fighter II series]] |