SeenConnroy (talk | contribs) |
SeenConnroy (talk | contribs) (→Move List: Edited active frames to include hovertext to prevent congestion in the cell.) |
||
| (4 intermediate revisions by the same user not shown) | |||
| Line 4: | Line 4: | ||
{{MoveData | {{MoveData | ||
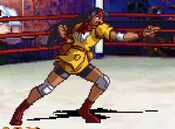
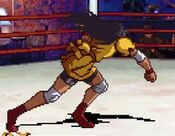
|image=AVG2_Jun_stLP.jpg | |image=AVG2_Jun_stLP.jpg | ||
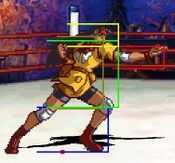
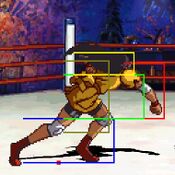
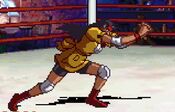
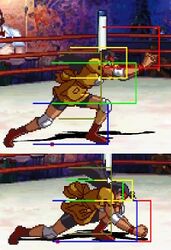
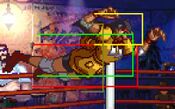
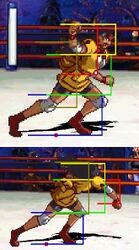
|hitbox=AVG2_Jun_stLP_hitbox.jpg | |||
|caption= | |caption= | ||
|name={{Icon-Capcom|LP}} | |name={{Icon-Capcom|LP}} | ||
| Line 25: | Line 26: | ||
{{MoveData | {{MoveData | ||
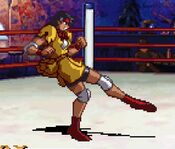
|image=AVG2_Jun_stLK.jpg | |image=AVG2_Jun_stLK.jpg | ||
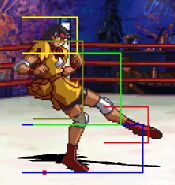
|hitbox=AVG2_Jun_stLKhitbox.jpg | |||
|caption= | |caption= | ||
|name={{Icon-Capcom|LK}} | |name={{Icon-Capcom|LK}} | ||
| Line 43: | Line 45: | ||
{{MoveData | {{MoveData | ||
|image=AVG2_Jun_stHP.jpg | |image=AVG2_Jun_stHP.jpg | ||
|hitbox=AVG2_Jun_stHPhitbox.jpg | |||
|caption= | |caption= | ||
|name={{Icon-Capcom|HP}} | |name={{Icon-Capcom|HP}} | ||
| Line 59: | Line 62: | ||
{{MoveData | {{MoveData | ||
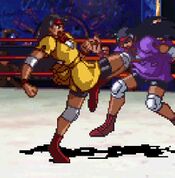
|image=AVG2_Jun_stHK.jpg | |image=AVG2_Jun_stHK.jpg | ||
|hitbox=AVG2_Jun_stHKhitbox.jpg | |||
|caption= | |caption= | ||
|name= | |name=far.{{Icon-Capcom|HK}} | ||
|data= | |data= | ||
{{AttackData-AVG2 | {{AttackData-AVG2 | ||
| Line 66: | Line 70: | ||
|guard= Mid | |guard= Mid | ||
|startup=13 | |startup=13 | ||
|active=10 | |active={{Tooltip | text=10 | hovertext= 1 hit. 5, 5}} | ||
|recovery=17 | |recovery=17 | ||
|frameAdv=- | |frameAdv=- | ||
| Line 75: | Line 79: | ||
{{MoveData | {{MoveData | ||
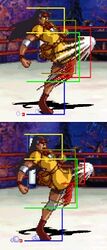
|image=AVG2_Jun_clHK.jpg | |image=AVG2_Jun_clHK.jpg | ||
|hitbox=AVG2_Jun_clHKhitbox.jpg | |||
|caption= | |caption= | ||
|name=cl.{{Icon-Capcom|HK}} | |name=cl.{{Icon-Capcom|HK}} | ||
| Line 82: | Line 87: | ||
|guard= Mid | |guard= Mid | ||
|startup=6 | |startup=6 | ||
|active=6 | |active={{Tooltip | text=6 | hovertext= 1 hit. 4, 2}} | ||
|recovery=17 | |recovery=17 | ||
|frameAdv=- | |frameAdv=- | ||
| Line 89: | Line 94: | ||
}} | }} | ||
---- | ---- | ||
=== Crouching Normals === | === Crouching Normals === | ||
{{MoveData | {{MoveData | ||
|image=AVG2_Jun_crLP.jpg | |image=AVG2_Jun_crLP.jpg | ||
|hitbox=AVG2_Jun_crLPhitbox.jpg | |||
|caption= | |caption= | ||
|name={{Motion|2}}{{Icon-Capcom|LP}} | |name={{Motion|2}}{{Icon-Capcom|LP}} | ||
| Line 110: | Line 117: | ||
{{MoveData | {{MoveData | ||
|image=AVG2_Jun_crLK.jpg | |image=AVG2_Jun_crLK.jpg | ||
|hitbox=AVG2_Jun_crLKhitbox.jpg | |||
|caption= | |caption= | ||
|name={{Motion|2}}{{Icon-Capcom|LK}} | |name={{Motion|2}}{{Icon-Capcom|LK}} | ||
| Line 126: | Line 134: | ||
{{MoveData | {{MoveData | ||
|image=AVG2_Jun_crHP.jpg | |image=AVG2_Jun_crHP.jpg | ||
|hitbox=AVG2_Jun_crHPhitbox.jpg | |||
|caption= | |caption= | ||
|name={{Motion|2}}{{Icon-Capcom|HP}} | |name={{Motion|2}}{{Icon-Capcom|HP}} | ||
| Line 142: | Line 151: | ||
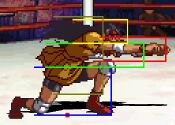
{{MoveData | {{MoveData | ||
|image=AVG2_Jun_crHK.jpg | |image=AVG2_Jun_crHK.jpg | ||
|hitbox=AVG2_Jun_crHKhitbox.jpg | |||
|caption= | |caption= | ||
|name={{Motion|2}}{{Icon-Capcom|HK}} | |name={{Motion|2}}{{Icon-Capcom|HK}} | ||
| Line 159: | Line 169: | ||
{{MoveData | {{MoveData | ||
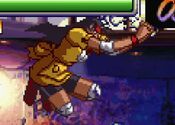
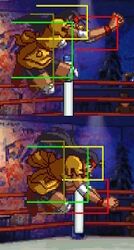
|image=AVG2_Jun_jLP.jpg | |image=AVG2_Jun_jLP.jpg | ||
|hitbox=AVG2_Jun_jLPhitbox.jpg | |||
|caption= | |caption= | ||
|name=j.{{Icon-Capcom|LP}} | |name=j.{{Icon-Capcom|LP}} | ||
| Line 166: | Line 177: | ||
|guard=High | |guard=High | ||
|startup=7 | |startup=7 | ||
|active=13 | |active={{Tooltip | text=13| hovertext= 1 hit. 5, 8}} | ||
|recovery=5 | |recovery=5 | ||
|frameAdv=- | |frameAdv=- | ||
| Line 179: | Line 190: | ||
{{MoveData | {{MoveData | ||
|image=AVG2_Jun_jLK.jpg | |image=AVG2_Jun_jLK.jpg | ||
|hitbox=AVG2_Jun_jLKhitbox.jpg | |||
|caption= | |caption= | ||
|name=j.{{Icon-Capcom|LK}} | |name=j.{{Icon-Capcom|LK}} | ||
| Line 189: | Line 201: | ||
|recovery=5 | |recovery=5 | ||
|frameAdv=- | |frameAdv=- | ||
|description= #1 air normal to press 95% of the time you are jumping, is '''INSTANTLY''' active and will remain active for a ''long'' time, great when paired with a super jump. Can hit this rising on a standing opponent and then chain into j2HP to hit cross up, or delayed while rising into a heavy of your choice (primarily j2HP) for a left/right depending on how you delay the heavy, or use it by itself for left/rights. | |description= '''THE''' #1 air normal to press 95% of the time you are jumping, is '''INSTANTLY''' active and will remain active for a ''long'' time, great when paired with a super jump. Can hit this rising on a standing opponent and then chain into j2HP to hit cross up, or delayed while rising into a heavy of your choice (primarily j2HP) for a left/right depending on how you delay the heavy, or use it by itself for left/rights. | ||
j.{{Icon-Capcom|HP}}<br> | j.{{Icon-Capcom|HP}}<br> | ||
j.{{Motion|2}}{{Icon-Capcom|HP}}<br> | j.{{Motion|2}}{{Icon-Capcom|HP}}<br> | ||
| Line 198: | Line 210: | ||
{{MoveData | {{MoveData | ||
|image=AVG2_Jun_jHP.jpg | |image=AVG2_Jun_jHP.jpg | ||
|hitbox=AVG2_Jun_jHPhitbox.jpg | |||
|caption= | |caption= | ||
|name=j.{{Icon-Capcom|HP}} | |name=j.{{Icon-Capcom|HP}} | ||
| Line 214: | Line 227: | ||
{{MoveData | {{MoveData | ||
|image=AVG2_Jun_jHK.jpg | |image=AVG2_Jun_jHK.jpg | ||
|hitbox=AVG2_Jun_jHKhitbox.jpg | |||
|caption= | |caption= | ||
|name=j.{{Icon-Capcom|HK}} | |name=j.{{Icon-Capcom|HK}} | ||
| Line 232: | Line 246: | ||
{{MoveData | {{MoveData | ||
|image=AVG2_Jun_6HP.jpg | |image=AVG2_Jun_6HP.jpg | ||
|hitbox=AVG2_Jun_6HPhitbox.jpg | |||
|caption= | |caption= | ||
|name={{Motion|6}}{{Icon-Capcom|HP}} | |name={{Motion|6}}{{Icon-Capcom|HP}} | ||
| Line 239: | Line 254: | ||
|guard= High | |guard= High | ||
|startup=16 | |startup=16 | ||
|active=12 | |active={{Tooltip | text=12| hovertext= 1 hit. 4 x3}} | ||
|recovery=14 | |recovery=14 | ||
|frameAdv=- | |frameAdv=- | ||
|description= A rising double axe-handle command launcher. A bit on the slow side, but leads to good damage. Needs to be used preemptively due to it's slow startup, but works as a solid anti-air thanks the arc it covers, with last hitbox being able to hit opponents jumping behind you. Is special cancellable, but Earth Shaker doesn't combo, and while cancelling into LK Sway may be quicker than letting it recover, you'll mainly use this as an anti-air so you'll have plenty of time to confirm on hit (not to say you shouldn't use Sway cancel). | |description= A rising double axe-handle command launcher. | ||
A bit on the slow side, but leads to good damage. Needs to be used preemptively due to it's slow startup, but works as a solid anti-air thanks the arc it covers, with last hitbox being able to hit opponents jumping behind you. Is special cancellable, but Earth Shaker doesn't combo, and while cancelling into LK Sway may be quicker than letting it recover, you'll mainly use this as an anti-air so you'll have plenty of time to confirm on hit (not to say you shouldn't use Sway cancel). | |||
}} | }} | ||
}} | }} | ||
| Line 248: | Line 265: | ||
{{MoveData | {{MoveData | ||
|image=AVG2_Jun_j2HP.jpg | |image=AVG2_Jun_j2HP.jpg | ||
|hitbox=AVG2_Jun_j2HPhitbox.jpg | |||
|caption= | |caption= | ||
|name=j.{{Motion|2}}{{Icon-Capcom|HP}} | |name=j.{{Motion|2}}{{Icon-Capcom|HP}} | ||
| Line 258: | Line 276: | ||
|recovery=7 | |recovery=7 | ||
|frameAdv=- | |frameAdv=- | ||
|description= Legally mandated grappler body splash cross-up tool, You know what this is good for. Interchangeable with jHK as a chain ender, but very consistent for left/rights after jLK. jLK into j2HP will take you very far in this game. | |description= Legally mandated grappler body splash cross-up tool, You know what this is good for. | ||
Interchangeable with jHK as a chain ender, but very consistent for left/rights after jLK. jLK into j2HP will take you very far in this game. | |||
}} | }} | ||
}} | }} | ||
---- | ---- | ||
=== Throws === | === Throws === | ||
{{MoveData | {{MoveData | ||
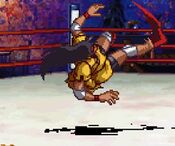
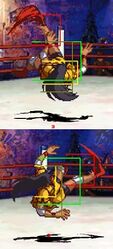
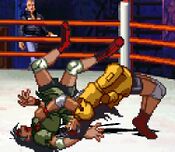
|image= | |image=AVG2_Jun_PThrow.jpg | ||
|caption={{Motion|4}}/{{Motion|6}} + {{Icon-Capcom|P}} | |caption=cl. {{Motion|4}}/{{Motion|6}} + {{Icon-Capcom|P}} | ||
|name=German Suplex | |name=German Suplex | ||
|data= | |data= | ||
| Line 275: | Line 292: | ||
|damage= | |damage= | ||
|guard= | |guard= | ||
|startup= | |startup= | ||
|active= | |active= | ||
|recovery= | |recovery= | ||
| Line 284: | Line 301: | ||
---- | ---- | ||
{{MoveData | {{MoveData | ||
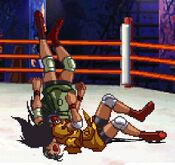
|image= | |image=AVG2_Jun_KThrow.jpg | ||
|caption={{Motion|4}}/{{Motion|6}} + {{Icon-Capcom|K}} | |caption=cl. {{Motion|4}}/{{Motion|6}} + {{Icon-Capcom|K}} | ||
|name= Brainbuster | |name= Brainbuster | ||
|data= | |data= | ||
| Line 291: | Line 308: | ||
|damage= | |damage= | ||
|guard= | |guard= | ||
|startup= | |startup= | ||
|active= | |active= | ||
|recovery= | |recovery= | ||
|frameAdv= | |frameAdv= | ||
|description= Sometimes leaves you closer to the opponent (holding a direction influences it?), Hard Knockdown, can not OTG afterwards, slightly more initial damage than punch throw but since you cannot OTG it's less damage in the long run. Can still get jLK/j2HP left/rights afterwards depending on how close it leaves you, but it's semi-random if you'll be close to them or not | |description= Due to grappler privilege, Jun also has a {{Icon-Capcom|K}} throw as well unlike the rest of the cast. | ||
Sometimes leaves you closer to the opponent (holding a direction influences it?), Hard Knockdown, can not OTG afterwards, slightly more initial damage than punch throw but since you cannot OTG it's less damage in the long run. Can still get jLK/j2HP left/rights afterwards depending on how close it leaves you, but it's semi-random if you'll be close to them or not so it's not as useful as punch throw (looks cool at least!). | |||
}} | }} | ||
}} | }} | ||
| Line 303: | Line 322: | ||
{{MoveData | {{MoveData | ||
|image=AVG2_Jun_stLP.jpg | |image=AVG2_Jun_stLP.jpg | ||
|hitbox=AVG2_Jun_stLP_hitbox.jpg | |||
|caption= | |caption= | ||
|name={{Icon-Capcom|LP}} Guard Cancel | |name={{Icon-Capcom|LP}} Guard Cancel | ||
| Line 319: | Line 339: | ||
{{MoveData | {{MoveData | ||
|image=AVG2_Jun_stLK.jpg | |image=AVG2_Jun_stLK.jpg | ||
|hitbox=AVG2_Jun_stLKhitbox.jpg | |||
|caption= | |caption= | ||
|name={{Icon-Capcom|LK}} Guard Cancel | |name={{Icon-Capcom|LK}} Guard Cancel | ||
| Line 335: | Line 356: | ||
{{MoveData | {{MoveData | ||
|image=AVG2_Jun_Earth_Shaker.jpg | |image=AVG2_Jun_Earth_Shaker.jpg | ||
|hitbox=AVG2_Jun_EShitbox.jpg | |||
|caption= | |caption= | ||
|name={{Icon-Capcom|HP}} Guard Cancel | |name={{Icon-Capcom|HP}} Guard Cancel | ||
| Line 351: | Line 373: | ||
{{MoveData | {{MoveData | ||
|image=AVG2_Jun_Kubota_Sway.jpg | |image=AVG2_Jun_Kubota_Sway.jpg | ||
|hitbox=AVG2_Jun_Swayhitbox.jpg | |||
|caption= | |caption= | ||
|name={{Icon-Capcom|HK}} Guard Cancel | |name={{Icon-Capcom|HK}} Guard Cancel | ||
| Line 366: | Line 389: | ||
---- | ---- | ||
== Special Moves == | === Special Moves === | ||
{{MoveData | {{MoveData | ||
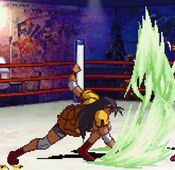
|image=AVG2_Jun_Earth_Shaker.jpg | |image=AVG2_Jun_Earth_Shaker.jpg | ||
|hitbox=AVG2_Jun_EShitbox.jpg | |||
|caption= {{Motion|214}} + {{Icon-Capcom|P}} | |caption= {{Motion|214}} + {{Icon-Capcom|P}} | ||
|name=Earth Shaker | |name=Earth Shaker | ||
| Line 408: | Line 432: | ||
{{MoveData | {{MoveData | ||
|image=AVG2_Jun_Kubota_Sway.jpg | |image=AVG2_Jun_Kubota_Sway.jpg | ||
|hitbox=AVG2_Jun_Swayhitbox.jpg | |||
|caption= {{Motion|421}} + {{Icon-Capcom|K}} | |caption= {{Motion|421}} + {{Icon-Capcom|K}} | ||
|name=Kubota Sway | |name=Kubota Sway | ||
| Line 464: | Line 489: | ||
{{MoveData | {{MoveData | ||
|image=AVG2_Jun_Kubota_Lariet.jpg | |image=AVG2_Jun_Kubota_Lariet.jpg | ||
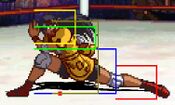
|hitbox=AVG2_Jun_Lariathitbox.jpg | |||
|caption= {{Motion|4}}(Charge){{Motion|6}} + {{Icon-Capcom|HP}} | |caption= {{Motion|4}}(Charge){{Motion|6}} + {{Icon-Capcom|HP}} | ||
|name=Kubota Lariat | |name=Kubota Lariat | ||
| Line 480: | Line 506: | ||
---- | ---- | ||
== Super Moves == | === Super Moves === | ||
{{MoveData | {{MoveData | ||
|image=AVG2_Jun_Kubota_Shuttle.jpg | |image=AVG2_Jun_Kubota_Shuttle.jpg | ||
|hitbox=AVG2_Jun_Lariathitbox.jpg | |||
|caption= {{Motion|6}}{{Motion|41236}} + {{Icon-Capcom|K}} | |caption= {{Motion|6}}{{Motion|41236}} + {{Icon-Capcom|K}} | ||
|name=Kubota Shuttle | |name=Kubota Shuttle | ||
Latest revision as of 16:49, 6 September 2024
Move List
Standing Normals
| Damage | Guard | Startup | Active | Recovery | FrameAdv |
|---|---|---|---|---|---|
| - | Mid | 15 | 4 | 17 | - |
|
A lumbering downward punch, may look like an overhead but it is not. Does special cancel. | |||||
| Damage | Guard | Startup | Active | Recovery | FrameAdv |
|---|---|---|---|---|---|
| - | Mid | 13 | 10 | 17 | - |
|
A leaping wheel kick, honestly not great at all because the range is not anywhere near as far as it may seem and has to be pretty far away to activate. It *can* anti-air during the first part of the move, but you have better options for that. | |||||
| Damage | Guard | Startup | Active | Recovery | FrameAdv |
|---|---|---|---|---|---|
| - | Mid | 6 | 6 | 17 | - |
|
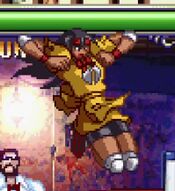
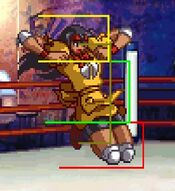
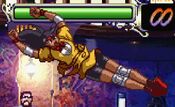
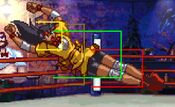
A knee strike to the stomach. It has a further range than any close proximity normal I've ever seen, which is good because its a worthwhile normal to have access to thanks to it's long hitstun meaning you can get a Earth Shaker to combo off it. | |||||
Crouching Normals
| Damage | Guard | Startup | Active | Recovery | FrameAdv |
|---|---|---|---|---|---|
| - | Low | 6 | 3 | 9 | - |
|
Your main button at close range besides 5LP to catch jump outs so you can grab with with Kubota Buster. It's also her OTG pickup, so you will get very used to this button. | |||||
| Damage | Guard | Startup | Active | Recovery | FrameAdv |
|---|---|---|---|---|---|
| - | Mid | 7 | 3, 2 | 16 | - |
|
A 2-hit axe handle strike, pretty much invalidates her 5HP as a poke. It starts up much faster, can successfully special cancel of either hit into Earth Shaker. | |||||
| Damage | Guard | Startup | Active | Recovery | FrameAdv |
|---|---|---|---|---|---|
| - | Low | 7 | 5 | 19 | - |
|
Fast startup, great active frames, good range and being special-cancellable makes this a core button to both poke and combo with. Cancel into Lariat to secure a hard knockdown for either OTG extensions or oki. | |||||
Jumping Normals
| Damage | Guard | Startup | Active | Recovery | FrameAdv |
|---|---|---|---|---|---|
| - | High | 9 | 4 | 11 | - |
|
A downward strike, sadly overshadowed by her other air normals. | |||||
| Damage | Guard | Startup | Active | Recovery | FrameAdv |
|---|---|---|---|---|---|
| - | High | 7 | 5, (4), 5 | 10 | - |
|
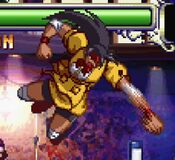
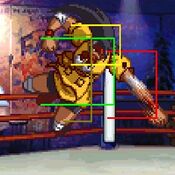
A quick dropkick, you'll be using this button when you want range (and slightly more damage) either for jump ins or air to airs, otherwise interchangeable with j2HP. A good normal to protect air space with neutral or back jumps thanks to its speed and disjoint, even if the hitbox stops before her ankles. Also a good chain ender for approaches where j2HP isn't as good. Curiously has a gap during active frames. | |||||
Command Normals
| Damage | Guard | Startup | Active | Recovery | FrameAdv |
|---|---|---|---|---|---|
| - | High | 16 | 12 | 14 | - |
|
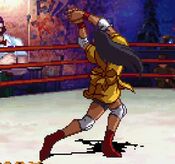
A rising double axe-handle command launcher. A bit on the slow side, but leads to good damage. Needs to be used preemptively due to it's slow startup, but works as a solid anti-air thanks the arc it covers, with last hitbox being able to hit opponents jumping behind you. Is special cancellable, but Earth Shaker doesn't combo, and while cancelling into LK Sway may be quicker than letting it recover, you'll mainly use this as an anti-air so you'll have plenty of time to confirm on hit (not to say you shouldn't use Sway cancel). | |||||
| Damage | Guard | Startup | Active | Recovery | FrameAdv |
|---|---|---|---|---|---|
| - | High | 8 | 12 | 7 | - |
|
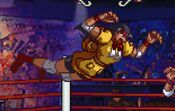
Legally mandated grappler body splash cross-up tool, You know what this is good for. Interchangeable with jHK as a chain ender, but very consistent for left/rights after jLK. jLK into j2HP will take you very far in this game. | |||||
Throws
| Damage | Guard | Startup | Active | Recovery | FrameAdv |
|---|---|---|---|---|---|
|
Hard Knockdown, OTG-able afterwards for a combo or you can forego it for a left/right with either jLK/j2HP (will have to microwalk back first for same-side j2HP). Main OTG combo is 2LK>Lariat meterlessly, or microwalk forward 2LK> Kubota Shuttle for ludicrous damage. | |||||
Guard Cancels
Special Moves
Super Moves
| Damage | Guard | Startup | Active | Recovery | FrameAdv |
|---|---|---|---|---|---|
| Low | 1 + 45 | 20, 6? | 18 | - | |
|
A powered up Kubota Lariat that does dino damage when it hits. For reasons our best scientists have yet to adequately explain, this move hits low. Using this to end combos is a huge part of Jun's high damage, since one of the move's most terrifying attributes is that the damage from the falling portion of the move will never be affected by damage scaling. Can be done via SP1 + SP2. Locked into a longer recovery on hit and, for some reason, the last 6 active frames do not hit actually hit the opponent, only the lariat will. | |||||
| Damage | Guard | Startup | Active | Recovery | FrameAdv |
|---|---|---|---|---|---|
| N/A | 1 + 0 | 1? | 68 | - | |
|
Mostly useful for the fact that it's 1F startup. While the damage is high, you often get better damage from HP Kubota Buster into EX Earth Shaker, so you mostly want to use this when you need speed more than damage. | |||||
