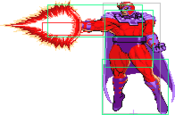
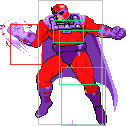
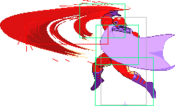
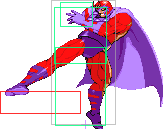
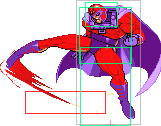
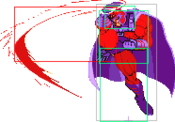
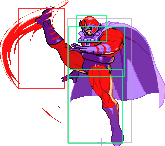
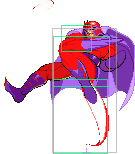
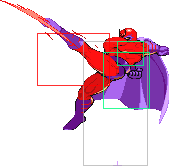
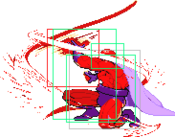
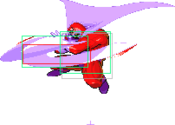
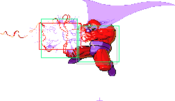
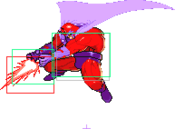
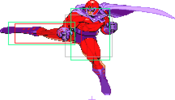
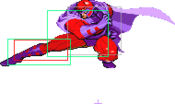
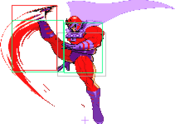
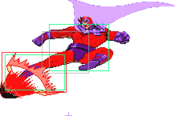
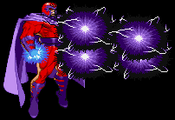
(Updated framedata to be inline with Zachd.com's Move Start Up page + 1 frame for first active hitbox.) |
m (removed AIR OK of Magnetic Force Field. Magneto can't perform it while in the air) |
||
| (14 intermediate revisions by 5 users not shown) | |||
| Line 1: | Line 1: | ||
{{MVC2 Character Intro|char= magneto|full=Magneto|short=MGN|content | {{MVC2 Character Intro|char=magneto|full=Magneto|short=MGN|content= | ||
== Story == | == Story == | ||
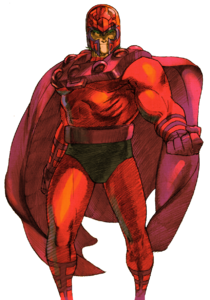
Magneto, born Max Eisenhardt, later known as Erik Magnus Lensherr, is a character from the X-Men series by Marvel. He is a mutant with a powerful ability to control all forms of magnetism. Viewing humankind as morally and naturally inferior, he aims to conquer the world in order to establish mutantkind as the dominant species; however, his extreme methods and cynical outlook derive from his desire to protect fellow mutants from the atrocities he endured as a child during the Holocaust. | Magneto, born Max Eisenhardt, later known as Erik Magnus Lensherr, is a character from the X-Men series by Marvel. He is a mutant with a powerful ability to control all forms of magnetism. Viewing humankind as morally and naturally inferior, he aims to conquer the world in order to establish mutantkind as the dominant species; however, his extreme methods and cynical outlook derive from his desire to protect fellow mutants from the atrocities he endured as a child during the Holocaust. | ||
== Gameplay == | == Gameplay == | ||
The | Magneto, The Scourge of the X-Men, easily one of the most popular characters to come from this game, and for good reason. Being the M in MSP, Magneto is based almost entirely on rushdown and taking down your opponent at blisteringly fast speeds, never letting them breathe. Magneto is incredibly flexible, and relies only on a good understanding of neutral and positioning to truly flourish. From the simple air magic series combos, all the way to Touch of Deaths of stray hits in neutral, the execution of Magneto is entirely dependent on what how far you want to take him. If you're willing to get past his steep, '''steep''' learning curve, The Master of Magnetism is for you. | ||
{{2 Column Flex|flex1=6|flex2=4 | |||
| | |content1= | ||
{{Content Box|content= | {{Content Box|content= | ||
'''Magneto''' is a pixie rushdown character capable of devastating damage and lightning-fast offense and mixups. | |||
{{ProConTable | {{ProConTable | ||
|pros= | |pros= | ||
| Line 23: | Line 19: | ||
* '''EM Disruptor Assist:''' One of the better keep-away assists in the game. Sentinel in particular gets a lot out of this assist, and other zoners get similar benefits from it. | * '''EM Disruptor Assist:''' One of the better keep-away assists in the game. Sentinel in particular gets a lot out of this assist, and other zoners get similar benefits from it. | ||
* '''Guardbreak Into Infinite:''' Easy guardbreak on incoming into his infinite allows him to massacre opposing teams with one or two clean hits. | * '''Guardbreak Into Infinite:''' Easy guardbreak on incoming into his infinite allows him to massacre opposing teams with one or two clean hits. | ||
|cons= | |cons= | ||
* '''Steep Learning Curve:''' Rewards advanced understanding of the game engine and its inner workings. Can be frustrating to learn when compared to many of the other god-tiers' respective strengths (AHVB, fastfly, etc.) | * '''Steep Learning Curve:''' Rewards advanced understanding of the game engine and its inner workings. Can be frustrating to learn when compared to many of the other god-tiers' respective strengths (AHVB, fastfly, etc.) | ||
| Line 29: | Line 24: | ||
* '''Reliant On Rushdown:''' Magneto can't zone or chip that well, so you'll have to take the risk of getting close in order to use him effectively. | * '''Reliant On Rushdown:''' Magneto can't zone or chip that well, so you'll have to take the risk of getting close in order to use him effectively. | ||
* '''Counter-Play:''' Many teams and tactics have been conceived and designed solely to counter Magneto, just like the other god tiers. | * '''Counter-Play:''' Many teams and tactics have been conceived and designed solely to counter Magneto, just like the other god tiers. | ||
* ''' | * '''Footsies:''' His safe jab-style attacks can be out-prioritized with good anticipation. | ||
* '''Low Life:''' Magneto has below average health, meaning he can't tank stray hits the way characters like Sentinel can. | * '''Low Life:''' Magneto has below average health, meaning he can't tank stray hits the way characters like Sentinel can. | ||
}} | |||
}} | |||
|content2= | |||
{{Content Box|content= | |||
<center><youtube>9f0Yh1ZL4K8</youtube></center> | |||
}} | }} | ||
}} | |||
== Character Summary == | |||
{{3 Column Flex | |||
|content1= | |||
{{Content Box|header=Special Moves|content= | |||
;EM Disruptor (Air OK) | |||
*{{hcf}} + {{p}} | |||
;Hyper-Gravitation | |||
*{{hcb}} + {{k}} | |||
;Magnetic Force Field | |||
*{{hcf}} + {{k}} | |||
;Magnetic Blast | |||
*{{uqcf}} + {{p}} | |||
;Flight | |||
*{{qcb}} + {{lk}}{{hk}} | |||
}} | |||
|content2= | |||
{{Content Box|header=Super Moves|content= | |||
;Magnetic Shockwave | |||
* {{qcf}} + {{lp}}{{hp}} | |||
;Magnetic Tempest (air OK, mash for more hits) | |||
* {{qcf}} + {{lk}}{{hk}} | |||
}} | |||
|content3= | |||
{{Content Box|header=Assist Moves|content= | |||
;Type α - Projectile Type | |||
*Assist: {{lp}} EM Disruptor | |||
*Counter: {{lp}} EM Disruptor | |||
*Combination: Magnetic Shockwave | |||
;Type β - Capture Type | |||
*Assist: {{lk}} Hyper Gravitation | |||
*Counter: {{lk}} Hyper Gravitation | |||
*Combination: Magnetic Tempest | |||
;Type γ - Launcher Type | |||
*Assist: {{d}}{{hp}} | |||
*Counter: {{d}}{{hp}} | |||
*Combination: Magnetic Tempest | |||
}} | |||
}} | |||
}} | |||
== Colors == | == Colors == | ||
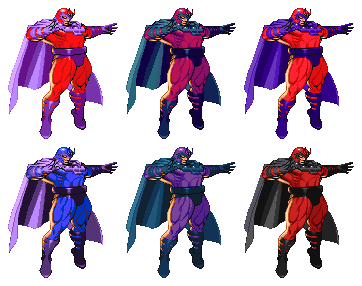
First row: LP, HP, A1. Second row: LK, HK, A2. | First row: LP, HP, A1. Second row: LK, HK, A2. | ||
[[Image:Mvc2-magneto.png]] | [[Image:Mvc2-magneto.png]] | ||
== Moves List == | == Moves List == | ||
=== Normal Moves === | |||
-When grounded, Magneto has the 2-Hit type [[Marvel_vs_Capcom_2/System#The_Magic_Series|Magic Series]], meaning they can follow the {{lp}}/{{lk}} > {{mp}}/{{mk}}/{{hp}}/{{hk}} cancel tree. | |||
=== | |||
==== Standing Normals ==== | |||
{{MoveData | {{MoveData | ||
|image= Magneto_s.lp.png | |image= Magneto_s.lp.png | ||
| Line 59: | Line 102: | ||
|Adv. Guard= - | |Adv. Guard= - | ||
|Adv. Pushblock= - | |Adv. Pushblock= - | ||
|description= | |description= Magneto fires a small blast from his palm. An innocent enough looking light attack but this is an important piece of Magneto's movelist. Standling LP can be used to interrupt at a further distance than his other light attacks, but most importantly it will hit a jumping opponent. This can be chained to lead to conversions or potentially guard breaks. | ||
}} | }} | ||
}} | }} | ||
| Line 84: | Line 127: | ||
|Adv. Guard= - | |Adv. Guard= - | ||
|Adv. Pushblock= - | |Adv. Pushblock= - | ||
|description= | |description= Chain that launches opponent, can be followed up with an air combo (ie go straight into a Rom). | ||
}} | }} | ||
}} | }} | ||
| Line 109: | Line 152: | ||
|Adv. Guard= - | |Adv. Guard= - | ||
|Adv. Pushblock= - | |Adv. Pushblock= - | ||
|description= | |description= Magneto does a huge slap. This has amazing range and priority but also can be cancelled with specials, or super on block/hit or super jump on hit. This can be a tool to swat opponents away or to harass from further. The ability to cancel into super means you can DHC into a full screen super, like Storm's Hail, and convert. | ||
}} | }} | ||
}} | }} | ||
| Line 132: | Line 175: | ||
|Adv. Guard= - | |Adv. Guard= - | ||
|Adv. Pushblock= - | |Adv. Pushblock= - | ||
|description= | |description= Awkwardly kick your opponent's shins. Will miss a jumping or airborne opponent and can be blocked standing. | ||
}} | }} | ||
}} | }} | ||
| Line 140: | Line 183: | ||
|image= Magneto_s.forward(1).png | |image= Magneto_s.forward(1).png | ||
|image2= Magneto_s.forward(2).png | |image2= Magneto_s.forward(2).png | ||
|caption2= | |caption2= | ||
|name= 5MK | |name= 5MK | ||
|linkname= 5MK | |linkname= 5MK | ||
| Line 156: | Line 199: | ||
|Adv. Guard= - | |Adv. Guard= - | ||
|Adv. Pushblock= - | |Adv. Pushblock= - | ||
|description= | |description= Magneto kicks high up. This will chain off your lights and hits higher up. Not as fast as 2MK but it will hold your opponent in place longer; consider this chain to allow for later assist calls. | ||
}} | }} | ||
}} | }} | ||
| Line 181: | Line 224: | ||
|Adv. Guard= - | |Adv. Guard= - | ||
|Adv. Pushblock= - | |Adv. Pushblock= - | ||
|description= Hits twice. The first hit is useful for comboing into magnetic shockwave. Two hit's is good for setting up ROM against Sentinel. | |description= Hits twice. Both hits will juggle the opponent. The first hit is useful for comboing into magnetic shockwave. Two hit's is good for setting up ROM against Sentinel. | ||
}} | }} | ||
}} | }}<br> | ||
==== Crouching Normals ==== | |||
{{MoveData | {{MoveData | ||
|image= Magneto_c.lp.png | |image= Magneto_c.lp.png | ||
| Line 223: | Line 266: | ||
|Guard= HL | |Guard= HL | ||
|Special Property= Projectile | |Special Property= Projectile | ||
|Cancel= | |Cancel= Special, Super | ||
|Adv. Hit= - | |Adv. Hit= - | ||
|Adv. Guard= - | |Adv. Guard= - | ||
|Adv. Pushblock= - | |Adv. Pushblock= - | ||
|description= | |description= Magneto fires a little orb at the opponent's feet, putting them airborne. Though it can be cancelled out of this one is a bit weird | ||
}} | }} | ||
}} | }} | ||
| Line 250: | Line 293: | ||
|Adv. Guard= - | |Adv. Guard= - | ||
|Adv. Pushblock= - | |Adv. Pushblock= - | ||
|description= The | |description= Mag's standard launcher. The range is short, so often a micro dash is needed to ensure it connects. Typically chained from 2LK. Sends the opponent straight up. | ||
}} | }} | ||
}} | }} | ||
| Line 257: | Line 300: | ||
{{MoveData | {{MoveData | ||
|image= Magneto_c.lk.png | |image= Magneto_c.lk.png | ||
|caption= | |caption= Round start meta revolves around me | ||
|name= 2LK | |name= 2LK | ||
|linkname= 2LK | |linkname= 2LK | ||
| Line 273: | Line 316: | ||
|Adv. Guard= - | |Adv. Guard= - | ||
|Adv. Pushblock= - | |Adv. Pushblock= - | ||
|description= | |description= Magneto's most infamous move, particularly at round start. It is the fastest low in the game and tied for fastest normal period. The range is the shortest of the normals and it can be jumped but is otherwise an invaluable option. Great for hitting the opponent [[File:Otg.png]] | ||
}} | }} | ||
}} | }} | ||
| Line 280: | Line 323: | ||
{{MoveData | {{MoveData | ||
|image= Magneto_c.forward.png | |image= Magneto_c.forward.png | ||
|caption2= | |caption2= | ||
|name= 2MK | |name= 2MK | ||
|linkname= 2MK | |linkname= 2MK | ||
| Line 296: | Line 339: | ||
|Adv. Guard= - | |Adv. Guard= - | ||
|Adv. Pushblock= - | |Adv. Pushblock= - | ||
|description= good for hitconfirming with assists like Psylocke AA | |description= Quick followup to 2LK that also hits low, good for hitconfirming with assists like Psylocke AA. | ||
}} | }} | ||
}} | }} | ||
| Line 303: | Line 346: | ||
{{MoveData | {{MoveData | ||
|image= Magneto_c.hk.png | |image= Magneto_c.hk.png | ||
|caption= Slide | |caption= Slide | ||
|name= 2HK | |name= 2HK | ||
|linkname= 2HK | |linkname= 2HK | ||
| Line 314: | Line 357: | ||
|Recovery= 8 | |Recovery= 8 | ||
|Guard= L | |Guard= L | ||
|Special Property= | |Special Property= special, super, SJ | ||
|Cancel= | |Cancel= | ||
|Adv. Hit= - | |Adv. Hit= - | ||
|Adv. Guard= - | |Adv. Guard= - | ||
|Adv. Pushblock= - | |Adv. Pushblock= - | ||
|description= Good range and hitbox. | |description= Good range and hitbox. Forces the opponent to roll. Can combo into Hyper-Grav under certain conditions | ||
}} | }} | ||
}}<br> | |||
==== Jumping Normals ==== | |||
-When in the Normal Jump state, Magneto has the Hunter type [[Marvel_vs_Capcom_2/System#The_Magic_Series|Magic Series]], meaning they can follow the {{lp}} > {{lk}} > {{mp}} > {{mk}} > {{hp}} > {{hk}} cancel tree. | |||
| Line 342: | Line 388: | ||
|Adv. Guard= - | |Adv. Guard= - | ||
|Adv. Pushblock= - | |Adv. Pushblock= - | ||
|description= | |description= Useful air to air for starting air strings. Often necessary for character specific combos. | ||
}} | }} | ||
}} | }} | ||
| Line 365: | Line 411: | ||
|Adv. Guard= - | |Adv. Guard= - | ||
|Adv. Pushblock= - | |Adv. Pushblock= - | ||
|description= | |description= Magic series filler. | ||
}} | }} | ||
}} | }} | ||
| Line 388: | Line 434: | ||
|Adv. Guard= - | |Adv. Guard= - | ||
|Adv. Pushblock= - | |Adv. Pushblock= - | ||
|description= | |description= Strong hitbox. Integral part of the "5-fierce" combo. Cancelling j.HP > airdash > j.HP is his best whiff meter build option. | ||
}} | }} | ||
}} | }} | ||
| Line 411: | Line 457: | ||
|Adv. Guard= - | |Adv. Guard= - | ||
|Adv. Pushblock= - | |Adv. Pushblock= - | ||
|description= Slightly bigger than jLP, deceptive sprite-hitbox. | |description= Slightly bigger than jLP, deceptive sprite-hitbox. Great air to air tool for strings, works well against standing, big characters. | ||
}} | }} | ||
}}<br> | }}<br> | ||
| Line 417: | Line 463: | ||
{{MoveData | {{MoveData | ||
|image= Magneto_j.df.lk.png | |image= Magneto_j.df.lk.png | ||
|caption= | |caption= Watch your head! | ||
|name= j. | |name= j.2LK | ||
|linkname= j. | |linkname= j.2LK | ||
|input= | |input= {{d}} + j.LK | ||
|data= | |data= | ||
{{AttackData-MVSC2 | {{AttackData-MVSC2 | ||
| Line 433: | Line 479: | ||
|Adv. Guard= - | |Adv. Guard= - | ||
|Adv. Pushblock= - | |Adv. Pushblock= - | ||
|description= | |description= Keystone Magnus move. Acts as a fast overhead out of his down-forward airdash. Influences the opponent's trajectory based on Magneto's momentum; enables many of his infinites. | ||
}} | }} | ||
}}<br> | }}<br> | ||
| Line 455: | Line 501: | ||
|Adv. Guard= - | |Adv. Guard= - | ||
|Adv. Pushblock= - | |Adv. Pushblock= - | ||
|description= Pops the opponent straight up on hit. | |description= Pops the opponent straight up on hit. Important air combo filler to use, usually after j. 2LK. Helps for setting up magneto's tricky resets by giving space to dash under. | ||
}} | }} | ||
}} | }} | ||
| Line 478: | Line 524: | ||
|Adv. Guard= - | |Adv. Guard= - | ||
|Adv. Pushblock= - | |Adv. Pushblock= - | ||
|description= Faster and a little bigger than jHP. Good jump-in | |description= Faster and a little bigger than jHP. Good jump-in. | ||
}} | |||
}}<br> | |||
=== Universal Mechanics === | |||
{{MoveData | |||
|name= Throw (Punch) | |||
|linkname= 4/6HP | |||
|input= 4/6HP // {{b}} or {{f}} + {{hp}} | |||
|data= | |||
{{AttackData-MVSC2 | |||
|Damage= 16 | |||
|Startup= - | |||
|Active= - | |||
|Recovery= - | |||
|Guard= N/A | |||
|Special Property= Throw | |||
|Cancel= None | |||
|Adv. Hit= | |||
|Adv. Guard= | |||
|Adv. Pushblock= | |||
|description=Cover the opponent in pink rocks(?) Can be aimed up or down slightly. Opponent can mash out when they hit the ground. | |||
}} | }} | ||
}}<br> | |||
{{MoveData | |||
|name= Throw (Kick) | |||
|linkname= 4/6HK | |||
|input= 4/6HK // {{b}} or {{f}} + {{hk}} | |||
|data= | |||
{{AttackData-MVSC2 | |||
|Damage= 16 | |||
|Startup= - | |||
|Active= - | |||
|Recovery= - | |||
|Guard= N/A | |||
|Special Property= Throw | |||
|Cancel= None | |||
|Adv. Hit= | |||
|Adv. Guard= | |||
|Adv. Pushblock= | |||
|description=Opponent can roll when they hit the ground. If you time right, you can catch them before the roll window. Hold down to get an alternate throw that throws the opponent straight down. | |||
}} | }} | ||
<br> | }}<br> | ||
=== | {{MoveData | ||
|name= Air Throw (Kick) | |||
|linkname= 4/6HK | |||
|input= 4/6HK // {{b}} or {{f}} + {{hk}} | |||
|data= | |||
{{AttackData-MVSC2 | |||
|Damage= 16 | |||
|Startup= - | |||
|Active= - | |||
|Recovery= - | |||
|Guard= N/A | |||
|Special Property= Throw | |||
|Cancel= None | |||
|Adv. Hit= | |||
|Adv. Guard= | |||
|Adv. Pushblock= | |||
|description=Kick throw, can also hold down to get alternate throw. | |||
}} | |||
}}<br> | |||
=== Special Moves === | === Special Moves === | ||
{{MoveData | |||
|image= MVC2_Magneto_HCF_P_01.png | |||
|caption= | |||
|name= EM Disruptor | |||
|linkname= HCFP | |||
|input= HCF+P // {{hcf}} + {{lp}} or {{hp}} (Air OK) | |||
|data= | |||
{{AttackData-MVSC2 | |||
|Damage= | |||
|Startup= | |||
|Active= | |||
|Recovery= | |||
|Guard= HL | |||
|Special Property= Projectile | |||
|Cancel= Super | |||
|Adv. Hit= | |||
|Adv. Guard= | |||
|Adv. Pushblock= | |||
|description= A decent full-screen projectile. Use only the TK jab version as the other has dangerously more lag. Use this when turtling or when trying to establish full-screen distance. Alright option against Sentinel's trying to fly back or Storm's building meter close to the ground. | |||
}} | |||
}}<br> | |||
{{ | {{MoveData | ||
|image= MVC2_Magneto_HCB_K_01.png | |||
| | |caption= | ||
| | |name=Hyper Gravitation (Air OK) | ||
| | |linkname= HCBK | ||
|input= HCB+K // {{hcb}} + {{lk}} or {{hk}} | |||
|data= | |||
| {{hcb}} + {{ | {{AttackData-MVSC2 | ||
|Damage= | |||
|Startup= | |||
|Active= | |||
{{ | |Recovery= | ||
| | |Guard= HL | ||
| | |Special Property= Projectile | ||
| | |Cancel= Super | ||
|Adv. Hit= | |||
|Adv. Guard= | |||
| | |Adv. Pushblock= | ||
| | |description=Homing projectile, mainly used in combos due to it causing a capture state. Either version can be used in most combos, but outside of it always use the roundhouse version to be safe. Experience-wise, it has its moments outside of combos both good and bad, so use it sparingly as it has tremendous lag. Good situations would be when the opponent is falling down to you from a superjump, or when baiting him to attack your "unprotected" assist. When it connects perform his launcher as soon as you're in range as this can be mashed out of easily. | ||
| | }} | ||
}}<br> | |||
| | |||
| | |||
| | |||
}} | |||
===== | {{MoveData | ||
|image= MVC2_Magneto_HCF_K_01.png | |||
|name=Magnetic Force Field | |||
|linkname= HCFK | |||
|input= HCF+K // {{hcf}} + {{lk}} or {{hk}} | |||
|data= | |||
{{AttackData-MVSC2 | |||
|Damage= | |||
|Startup= | |||
|Active= - | |||
|Recovery= | |||
|Guard= HL | |||
|Special Property=Counter | |||
|Cancel= Super | |||
|Adv. Hit= | |||
|Adv. Guard= | |||
|Adv. Pushblock= | |||
|description=A counter move in which Magneto conjures a circular field around him to protect him against physical attacks, though it is too short to be of any use unless when fooling around. Avoid this like the plague. | |||
}} | |||
}}<br> | |||
{{MoveData | |||
|image= MVC2_Magneto_896_P_01.png | |||
|caption= | |||
|name=Magnetic Blast | |||
|linkname= 896P | |||
|input= U,UF,F+P // {{u}}{{uf}}{{f}} + {{p}} | |||
|data= | |||
{{AttackData-MVSC2 | |||
|Damage= | |||
|Startup= | |||
|Active= | |||
|Recovery= | |||
|Guard= HL | |||
|Special Property=Projectile | |||
|Cancel= None | |||
|Adv. Hit= | |||
|Adv. Guard= | |||
|Adv. Pushblock= | |||
|description=Magneto lets out a slow-moving projectile with a weird angle. The main use of this move is to delay your descent, the projectile is just icing on the cake. Good situations would be to avoid Doom's molecular shield assist, Sentinel unblockable and some ground-based traps. | |||
}} | |||
}}<br> | |||
===== | {{MoveData | ||
HCB + | |image= MVC2_Magneto_QCB_KK_01.png | ||
|caption2= | |||
|name=Flight | |||
|linkname= QCBKK | |||
|input= QCB+KK // {{qcb}} + {{lk}} + {{hk}} | |||
|data= | |||
{{AttackData-MVSC2 | |||
|Damage= | |||
|Startup= | |||
|Active= | |||
|Recovery= | |||
|Guard= HL | |||
|Special Property=Flight | |||
|Cancel= Super | |||
|Adv. Hit= | |||
|Adv. Guard= | |||
|Adv. Pushblock= | |||
|description=Magneto does a quick spin and then floats steadily. You cannot block while in this mode. You can move by either holding the stick to anywhere you want to float to, or using his PP airdash which is a hundred times faster and a million times more useful. Do the motion again and you will fall to the ground (You can be hit while falling unless you have Unfly mode). Be warned that doing this the wrong way (HCB + KK) will make him do a Hyper-Grav which will get him killed. This has a similar use to the Magnetic Blast: to delay your descent. This can be used to avoid Sentinel's unblockable (as Justin Wong popularized) and, in conjuction with airdashing, avoid the infamous Strider/Doom trap. He can also be in Unfly mode which makes it a little bit safer to use. Don't bother using this in combos. | |||
}} | |||
}}<br> | |||
==== Assist Moves ==== | |||
{{MoveData | |||
|image= MVC2_Magneto_HCF_P_01.png | |||
|caption= Assist α | |||
|name=EM Disruptor | |||
|linkname= HCFP | |||
|input= A1 // A2 | |||
|data= | |||
{{AttackData-MVSC2 | |||
|Damage= | |||
|Startup= - | |||
|Active= - | |||
|Recovery= - | |||
|Guard= HL | |||
|Special Property= Projectile | |||
|Cancel= N/A | |||
|Adv. Hit= | |||
|Adv. Guard= | |||
|Adv. Pushblock= | |||
|description=Magneto comes out and does the fierce version of his EM Disruptor. This assist has so many uses—zoning, quick ground control, more damaging resets and combos, you can even use this as a pseudo-AAA! | |||
If there's a character that benefits the most from this assist, it's Sentinel. It gives the robot more powerful combos (e.g. launch lk mp ff.lp + Mag-A f.hp xx LP Rocket Punch), better zoning and keepaway games. It also serves Cable and his keepaway very well. This assist forms the backbone of teams Rowtron and Combofiend and for this reason you should strive to keep Magneto alive for the late game 'clutch'. | |||
Using this as a pseudo-AAA means pushblocking off your opponent's overheads while calling Magneto to brush him off you. | |||
}} | |||
}}<br> | |||
===== | {{MoveData | ||
|image= MVC2_Magneto_HCB_K_01.png | |||
|caption= | |||
|caption4= Assist β | |||
|name=Hyper Gravitation | |||
|linkname=HCBK | |||
|input= A1 // A2 | |||
|data= | |||
{{AttackData-MVSC2 | |||
|Damage= | |||
|Startup= | |||
|Active= | |||
|Recovery= | |||
|Guard= HL | |||
|Special Property= Projectile | |||
|Cancel= N/A | |||
|Adv. Hit= | |||
|Adv. Guard= | |||
|Adv. Pushblock= | |||
|description=Magneto performs the HK version of Hyper-Gravitation. | |||
}} | |||
}}<br> | |||
{{MoveData | |||
|image= MVC2_Magneto_2HP_01.png | |||
|caption= Assist γ | |||
|name=Crouching Heavy Punch | |||
|linkname=2HP | |||
|input= A1 // A2 | |||
|data= | |||
{{AttackData-MVSC2 | |||
|Damage= | |||
|Startup= - | |||
|Active= - | |||
|Recovery= - | |||
|Guard= HL | |||
|Special Property=Launcher | |||
|Cancel= N/A | |||
|Adv. Hit= | |||
|Adv. Guard= | |||
|Adv. Pushblock= | |||
|description=Magneto performs his 2HP launcher. | |||
}} | |||
}}<br> | |||
==== | ==== Super Moves ==== | ||
{{MoveData | |||
|image= MVC2_Magneto_QCF_PP_01.png | |||
|caption= | |||
|name=Magnetic Shockwave | |||
|linkname= QCFPP | |||
|input= QCF+PP // {{qcf}} + {{lp}}{{hp}} | |||
|data= | |||
{{AttackData-MVSC2 | |||
| {{qcf}} + {{lp}} | |Damage= | ||
| | |Startup= | ||
|Active= | |||
|Recovery= | |||
{{ | |Guard= HL | ||
| | |Special Property=Projectile | ||
| | |Cancel= N/A | ||
| | |Adv. Hit= | ||
|Adv. Guard= | |||
|Adv. Pushblock= | |||
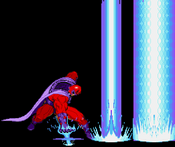
|description=Magneto reels his arm back and slams it down the ground, creating successive columns of blue Magnetic energy that shoot upward from the ground in front of him. | |||
==== | |||
Magneto reels his arm back and slams it down the ground, creating successive columns of blue Magnetic energy that shoot upward from the ground in front of him. | |||
* Whenever the opponent's point character gets hit by the super the game goes into "Flying Screen" as the camera follows the opponent until the super ends. But if the super hits an assist and not the point character, the assist gets hit normally but the game does not go into Flying Screen. | * Whenever the opponent's point character gets hit by the super the game goes into "Flying Screen" as the camera follows the opponent until the super ends. But if the super hits an assist and not the point character, the assist gets hit normally but the game does not go into Flying Screen. | ||
| Line 572: | Line 801: | ||
* Generally, this is the safer super to DHC Magneto in, but you still have to take your chances. | * Generally, this is the safer super to DHC Magneto in, but you still have to take your chances. | ||
* If the first hit of the Shockwave 'trades' with an incoming move from the opponent's point character, the Shockwave seems cancel after the current shockwave, Flying Screen occurs, Flying Screen finishes, and then the Shockwave reappears and finishes. [https://www.youtube.com/watch?v=P1oWujPXBFc Video example]. Note that Magneto does not actually take damage from this 'trade'. | * If the first hit of the Shockwave 'trades' with an incoming move from the opponent's point character, the Shockwave seems cancel after the current shockwave, Flying Screen occurs, Flying Screen finishes, and then the Shockwave reappears and finishes. [https://www.youtube.com/watch?v=P1oWujPXBFc Video example]. Note that Magneto does not actually take damage from this 'trade'. | ||
}} | |||
}}<br> | |||
== | {{MoveData | ||
|image= MVC2_Magneto_QCF_KK_01.png | |||
|caption= | |||
|name=Magnetic Tempest | |||
|linkname= QCFKK | |||
|input= QCF+KK // {{qcf}} + {{lk}}{{hk}} | |||
|data= | |||
{{AttackData-MVSC2 | |||
|Damage= | |||
|Startup= | |||
|Active= | |||
|Recovery= | |||
|Guard= HL | |||
|Special Property=Projectile | |||
|Cancel= N/A | |||
|Adv. Hit= | |||
|Adv. Guard= | |||
|Adv. Pushblock= | |||
|description=Magneto lets out numerous metal shards from his hands that shoot out in random directions except behind him. | |||
* This unlike Magneto's Shockwave super can be mashed for more damage (I can't confirm this, though most people do it anyway). | * This unlike Magneto's Shockwave super can be mashed for more damage (I can't confirm this, though most people do it anyway). | ||
| Line 587: | Line 832: | ||
* The best situation to DHC Magneto in safely with this is when you have your back against the corner AND you're full screen away from the opponent. Watch out against beamers. | * The best situation to DHC Magneto in safely with this is when you have your back against the corner AND you're full screen away from the opponent. Watch out against beamers. | ||
* You can use this super's long DHCing window to let him fill the screen first with shards to cover your next character before you DHC him out e.g. Mags is full screen away from the opponent, he does his Tempest super, then he lets the super fill the screen with shards, and he DHCs into Cable's Time Flip super. Cable will be safe against most forms of retaliation. | * You can use this super's long DHCing window to let him fill the screen first with shards to cover your next character before you DHC him out e.g. Mags is full screen away from the opponent, he does his Tempest super, then he lets the super fill the screen with shards, and he DHCs into Cable's Time Flip super. Cable will be safe against most forms of retaliation. | ||
}} | |||
}}<br> | |||
}} | |||
< | |||
{{Navbox-MVC2}} | {{Navbox-MVC2}} | ||
[[Category:Marvel Vs. Capcom 2]] | [[Category:Marvel Vs. Capcom 2]] | ||
Latest revision as of 23:53, 6 March 2025
Story
Magneto, born Max Eisenhardt, later known as Erik Magnus Lensherr, is a character from the X-Men series by Marvel. He is a mutant with a powerful ability to control all forms of magnetism. Viewing humankind as morally and naturally inferior, he aims to conquer the world in order to establish mutantkind as the dominant species; however, his extreme methods and cynical outlook derive from his desire to protect fellow mutants from the atrocities he endured as a child during the Holocaust.
Gameplay
Magneto, The Scourge of the X-Men, easily one of the most popular characters to come from this game, and for good reason. Being the M in MSP, Magneto is based almost entirely on rushdown and taking down your opponent at blisteringly fast speeds, never letting them breathe. Magneto is incredibly flexible, and relies only on a good understanding of neutral and positioning to truly flourish. From the simple air magic series combos, all the way to Touch of Deaths of stray hits in neutral, the execution of Magneto is entirely dependent on what how far you want to take him. If you're willing to get past his steep, steep learning curve, The Master of Magnetism is for you.
Magneto is a pixie rushdown character capable of devastating damage and lightning-fast offense and mixups.
| Strengths | Weaknesses |
|---|---|
|
|
Character Summary
- EM Disruptor (Air OK)
 +
+ 
- Hyper-Gravitation
 +
+ 
- Magnetic Force Field
 +
+ 
- Magnetic Blast
 +
+ 
- Flight
 +
+ 

- Magnetic Shockwave
 +
+ 

- Magnetic Tempest (air OK, mash for more hits)
 +
+ 

- Type α - Projectile Type
- Assist:
 EM Disruptor
 - Counter:
 EM Disruptor
 - Combination: Magnetic Shockwave
- Type β - Capture Type
- Assist:
 Hyper Gravitation
 - Counter:
 Hyper Gravitation
 - Combination: Magnetic Tempest
- Type γ - Launcher Type
- Assist:


- Counter:


- Combination: Magnetic Tempest
Colors
First row: LP, HP, A1. Second row: LK, HK, A2.
Moves List
Normal Moves
-When grounded, Magneto has the 2-Hit type Magic Series, meaning they can follow the ![]() /
/![]() >
> ![]() /
/![]() /
/![]() /
/![]() cancel tree.
cancel tree.
Standing Normals
| Damage | Startup | Active | Recovery | Guard | |
|---|---|---|---|---|---|
| 4 | 3 | 3 | 9 | HL | |
| Special Property | Cancel | Adv. Hit | Adv. Guard | Adv. Pushblock | |
| None | Chain, Special, SJ, Super | - | - | - | |
|
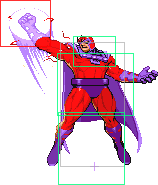
Magneto fires a small blast from his palm. An innocent enough looking light attack but this is an important piece of Magneto's movelist. Standling LP can be used to interrupt at a further distance than his other light attacks, but most importantly it will hit a jumping opponent. This can be chained to lead to conversions or potentially guard breaks. | |||||
| Damage | Startup | Active | Recovery | Guard | |
|---|---|---|---|---|---|
| 7 | 9 | 11 | 11 | HL | |
| Special Property | Cancel | Adv. Hit | Adv. Guard | Adv. Pushblock | |
| Launcher | SJ | - | - | - | |
|
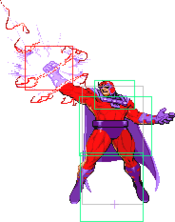
Chain that launches opponent, can be followed up with an air combo (ie go straight into a Rom). | |||||
| Damage | Startup | Active | Recovery | Guard | |
|---|---|---|---|---|---|
| 13 | 6 | 7 | 24 | HL | |
| Special Property | Cancel | Adv. Hit | Adv. Guard | Adv. Pushblock | |
| None | Special, SJ, Super | - | - | - | |
|
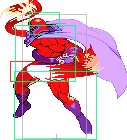
Magneto does a huge slap. This has amazing range and priority but also can be cancelled with specials, or super on block/hit or super jump on hit. This can be a tool to swat opponents away or to harass from further. The ability to cancel into super means you can DHC into a full screen super, like Storm's Hail, and convert. | |||||
| Damage | Startup | Active | Recovery | Guard | |
|---|---|---|---|---|---|
| 5 | 7 | 2 | 17 | HL | |
| Special Property | Cancel | Adv. Hit | Adv. Guard | Adv. Pushblock | |
| None | Chain, Special, SJ, Super | - | - | - | |
|
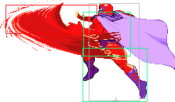
Awkwardly kick your opponent's shins. Will miss a jumping or airborne opponent and can be blocked standing. | |||||
| Damage | Startup | Active | Recovery | Guard | |
|---|---|---|---|---|---|
| 7 | 7 | 7 | 19 | HL | |
| Special Property | Cancel | Adv. Hit | Adv. Guard | Adv. Pushblock | |
| None | Special, SJ, Super | - | - | - | |
|
Magneto kicks high up. This will chain off your lights and hits higher up. Not as fast as 2MK but it will hold your opponent in place longer; consider this chain to allow for later assist calls. | |||||
| Damage | Startup | Active | Recovery | Guard | |
|---|---|---|---|---|---|
| 9 + 4 | 7 | 20 | 16 | HL | |
| Special Property | Cancel | Adv. Hit | Adv. Guard | Adv. Pushblock | |
| Launcher | Special, SJ, Super | - | - | - | |
|
Hits twice. Both hits will juggle the opponent. The first hit is useful for comboing into magnetic shockwave. Two hit's is good for setting up ROM against Sentinel. | |||||
Crouching Normals
| Damage | Startup | Active | Recovery | Guard | |
|---|---|---|---|---|---|
| 4 | 4 | 3 | 11 | HL | |
| Special Property | Cancel | Adv. Hit | Adv. Guard | Adv. Pushblock | |
| None | Chain, Special, Super | - | - | - | |
|
5LP but crouching. | |||||
| Damage | Startup | Active | Recovery | Guard | |
|---|---|---|---|---|---|
| 7 | 9 | 14 | 38 | HL | |
| Special Property | Cancel | Adv. Hit | Adv. Guard | Adv. Pushblock | |
| Projectile | Special, Super | - | - | - | |
|
Magneto fires a little orb at the opponent's feet, putting them airborne. Though it can be cancelled out of this one is a bit weird | |||||
| Damage | Startup | Active | Recovery | Guard | |
|---|---|---|---|---|---|
| 13 | 7 | 8 | 25 | HL | |
| Special Property | Cancel | Adv. Hit | Adv. Guard | Adv. Pushblock | |
| - | Special, SJ, Super | - | - | - | |
|
Mag's standard launcher. The range is short, so often a micro dash is needed to ensure it connects. Typically chained from 2LK. Sends the opponent straight up. | |||||
| Damage | Startup | Active | Recovery | Guard | |
|---|---|---|---|---|---|
| 6+3 | 4 | 8 | 21 | L | |
| Special Property | Cancel | Adv. Hit | Adv. Guard | Adv. Pushblock | |
| None | Special, Super SJ cancellable | - | - | - | |
|
Quick followup to 2LK that also hits low, good for hitconfirming with assists like Psylocke AA. | |||||
| Damage | Startup | Active | Recovery | Guard | |
|---|---|---|---|---|---|
| 13 | 7 | 27 | 8 | L | |
| Special Property | Cancel | Adv. Hit | Adv. Guard | Adv. Pushblock | |
| special, super, SJ | - | - | - | - | |
|
Good range and hitbox. Forces the opponent to roll. Can combo into Hyper-Grav under certain conditions | |||||
Jumping Normals
-When in the Normal Jump state, Magneto has the Hunter type Magic Series, meaning they can follow the ![]() >
> ![]() >
> ![]() >
> ![]() >
> ![]() >
> ![]() cancel tree.
cancel tree.
| Damage | Startup | Active | Recovery | Guard | |
|---|---|---|---|---|---|
| 4 | 4 | 8 | 12 | H | |
| Special Property | Cancel | Adv. Hit | Adv. Guard | Adv. Pushblock | |
| None | Chain, Special, Super | - | - | - | |
|
Useful air to air for starting air strings. Often necessary for character specific combos. | |||||
| Damage | Startup | Active | Recovery | Guard | |
|---|---|---|---|---|---|
| 7 | 5 | 16 | 12 | H | |
| Special Property | Cancel | Adv. Hit | Adv. Guard | Adv. Pushblock | |
| None | Chain, Special, Super | - | - | - | |
|
Magic series filler. | |||||
| Damage | Startup | Active | Recovery | Guard | |
|---|---|---|---|---|---|
| 13 | 8 | 13 | 8 | H | |
| Special Property | Cancel | Adv. Hit | Adv. Guard | Adv. Pushblock | |
| Flying screen | Special, Super | - | - | - | |
|
Strong hitbox. Integral part of the "5-fierce" combo. Cancelling j.HP > airdash > j.HP is his best whiff meter build option. | |||||
| Damage | Startup | Active | Recovery | Guard | |
|---|---|---|---|---|---|
| 4 | 3 | 10 | 11 | H | |
| Special Property | Cancel | Adv. Hit | Adv. Guard | Adv. Pushblock | |
| None | Chain, Special, Super | - | - | - | |
|
Slightly bigger than jLP, deceptive sprite-hitbox. Great air to air tool for strings, works well against standing, big characters. | |||||
| Damage | Startup | Active | Recovery | Guard | |
|---|---|---|---|---|---|
| 4 | 3 | 10 | 9 | H | |
| Special Property | Cancel | Adv. Hit | Adv. Guard | Adv. Pushblock | |
| None | Chain, Special, Super | - | - | - | |
|
Keystone Magnus move. Acts as a fast overhead out of his down-forward airdash. Influences the opponent's trajectory based on Magneto's momentum; enables many of his infinites. | |||||
| Damage | Startup | Active | Recovery | Guard | |
|---|---|---|---|---|---|
| 7 | 3 | 1 | 30 | H | |
| Special Property | Cancel | Adv. Hit | Adv. Guard | Adv. Pushblock | |
| None | Chain, Special, Super | - | - | - | |
|
Pops the opponent straight up on hit. Important air combo filler to use, usually after j. 2LK. Helps for setting up magneto's tricky resets by giving space to dash under. | |||||
| Damage | Startup | Active | Recovery | Guard | |
|---|---|---|---|---|---|
| 14 | 7 | 6 | 15 | H | |
| Special Property | Cancel | Adv. Hit | Adv. Guard | Adv. Pushblock | |
| Flying Screen | Special, Super | - | - | - | |
|
Faster and a little bigger than jHP. Good jump-in. | |||||
Universal Mechanics
| Damage | Startup | Active | Recovery | Guard | |
|---|---|---|---|---|---|
| 16 | - | - | - | N/A | |
| Special Property | Cancel | Adv. Hit | Adv. Guard | Adv. Pushblock | |
| Throw | None | - | - | - | |
|
Cover the opponent in pink rocks(?) Can be aimed up or down slightly. Opponent can mash out when they hit the ground. | |||||
| Damage | Startup | Active | Recovery | Guard | |
|---|---|---|---|---|---|
| 16 | - | - | - | N/A | |
| Special Property | Cancel | Adv. Hit | Adv. Guard | Adv. Pushblock | |
| Throw | None | - | - | - | |
|
Opponent can roll when they hit the ground. If you time right, you can catch them before the roll window. Hold down to get an alternate throw that throws the opponent straight down. | |||||
| Damage | Startup | Active | Recovery | Guard | |
|---|---|---|---|---|---|
| 16 | - | - | - | N/A | |
| Special Property | Cancel | Adv. Hit | Adv. Guard | Adv. Pushblock | |
| Throw | None | - | - | - | |
|
Kick throw, can also hold down to get alternate throw. | |||||
Special Moves
| Damage | Startup | Active | Recovery | Guard | |
|---|---|---|---|---|---|
| - | - | - | - | HL | |
| Special Property | Cancel | Adv. Hit | Adv. Guard | Adv. Pushblock | |
| Projectile | Super | - | - | - | |
|
A decent full-screen projectile. Use only the TK jab version as the other has dangerously more lag. Use this when turtling or when trying to establish full-screen distance. Alright option against Sentinel's trying to fly back or Storm's building meter close to the ground. | |||||
| Damage | Startup | Active | Recovery | Guard | |
|---|---|---|---|---|---|
| - | - | - | - | HL | |
| Special Property | Cancel | Adv. Hit | Adv. Guard | Adv. Pushblock | |
| Projectile | Super | - | - | - | |
|
Homing projectile, mainly used in combos due to it causing a capture state. Either version can be used in most combos, but outside of it always use the roundhouse version to be safe. Experience-wise, it has its moments outside of combos both good and bad, so use it sparingly as it has tremendous lag. Good situations would be when the opponent is falling down to you from a superjump, or when baiting him to attack your "unprotected" assist. When it connects perform his launcher as soon as you're in range as this can be mashed out of easily. | |||||
| Damage | Startup | Active | Recovery | Guard | |
|---|---|---|---|---|---|
| - | - | - | - | HL | |
| Special Property | Cancel | Adv. Hit | Adv. Guard | Adv. Pushblock | |
| Counter | Super | - | - | - | |
|
A counter move in which Magneto conjures a circular field around him to protect him against physical attacks, though it is too short to be of any use unless when fooling around. Avoid this like the plague. | |||||
| Damage | Startup | Active | Recovery | Guard | |
|---|---|---|---|---|---|
| - | - | - | - | HL | |
| Special Property | Cancel | Adv. Hit | Adv. Guard | Adv. Pushblock | |
| Projectile | None | - | - | - | |
|
Magneto lets out a slow-moving projectile with a weird angle. The main use of this move is to delay your descent, the projectile is just icing on the cake. Good situations would be to avoid Doom's molecular shield assist, Sentinel unblockable and some ground-based traps. | |||||
| Damage | Startup | Active | Recovery | Guard | |
|---|---|---|---|---|---|
| - | - | - | - | HL | |
| Special Property | Cancel | Adv. Hit | Adv. Guard | Adv. Pushblock | |
| Flight | Super | - | - | - | |
|
Magneto does a quick spin and then floats steadily. You cannot block while in this mode. You can move by either holding the stick to anywhere you want to float to, or using his PP airdash which is a hundred times faster and a million times more useful. Do the motion again and you will fall to the ground (You can be hit while falling unless you have Unfly mode). Be warned that doing this the wrong way (HCB + KK) will make him do a Hyper-Grav which will get him killed. This has a similar use to the Magnetic Blast: to delay your descent. This can be used to avoid Sentinel's unblockable (as Justin Wong popularized) and, in conjuction with airdashing, avoid the infamous Strider/Doom trap. He can also be in Unfly mode which makes it a little bit safer to use. Don't bother using this in combos. | |||||
Assist Moves
| Damage | Startup | Active | Recovery | Guard | |
|---|---|---|---|---|---|
| - | - | - | - | HL | |
| Special Property | Cancel | Adv. Hit | Adv. Guard | Adv. Pushblock | |
| Projectile | N/A | - | - | - | |
|
Magneto comes out and does the fierce version of his EM Disruptor. This assist has so many uses—zoning, quick ground control, more damaging resets and combos, you can even use this as a pseudo-AAA! If there's a character that benefits the most from this assist, it's Sentinel. It gives the robot more powerful combos (e.g. launch lk mp ff.lp + Mag-A f.hp xx LP Rocket Punch), better zoning and keepaway games. It also serves Cable and his keepaway very well. This assist forms the backbone of teams Rowtron and Combofiend and for this reason you should strive to keep Magneto alive for the late game 'clutch'. Using this as a pseudo-AAA means pushblocking off your opponent's overheads while calling Magneto to brush him off you. | |||||
| Damage | Startup | Active | Recovery | Guard | |
|---|---|---|---|---|---|
| - | - | - | - | HL | |
| Special Property | Cancel | Adv. Hit | Adv. Guard | Adv. Pushblock | |
| Projectile | N/A | - | - | - | |
|
Magneto performs the HK version of Hyper-Gravitation. | |||||
| Damage | Startup | Active | Recovery | Guard | |
|---|---|---|---|---|---|
| - | - | - | - | HL | |
| Special Property | Cancel | Adv. Hit | Adv. Guard | Adv. Pushblock | |
| Launcher | N/A | - | - | - | |
|
Magneto performs his 2HP launcher. | |||||
Super Moves
| Damage | Startup | Active | Recovery | Guard | |
|---|---|---|---|---|---|
| - | - | - | - | HL | |
| Special Property | Cancel | Adv. Hit | Adv. Guard | Adv. Pushblock | |
| Projectile | N/A | - | - | - | |
|
Magneto reels his arm back and slams it down the ground, creating successive columns of blue Magnetic energy that shoot upward from the ground in front of him.
| |||||
| Damage | Startup | Active | Recovery | Guard | |
|---|---|---|---|---|---|
| - | - | - | - | HL | |
| Special Property | Cancel | Adv. Hit | Adv. Guard | Adv. Pushblock | |
| Projectile | N/A | - | - | - | |
|
Magneto lets out numerous metal shards from his hands that shoot out in random directions except behind him.
| |||||
