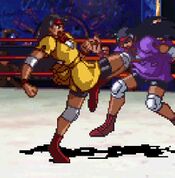
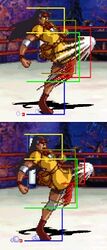
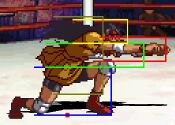
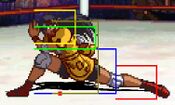
m (→Guard Cancels) |
SeenConnroy (talk | contribs) (→Move List: Edited active frames to include hovertext to prevent congestion in the cell.) |
||
| (6 intermediate revisions by the same user not shown) | |||
| Line 1: | Line 1: | ||
{{AVG2 Character Subnav|char=jun|short=jun|sub=1}} | {{AVG2 Character Subnav|char=jun|short=jun|sub=1}} | ||
== Move List == | == Move List == | ||
=== Standing Normals === | |||
{{MoveData | {{MoveData | ||
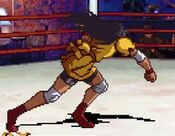
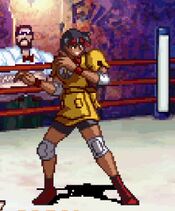
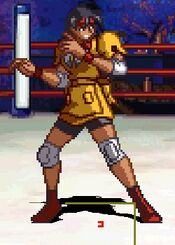
|image=AVG2_Jun_stLP.jpg | |image=AVG2_Jun_stLP.jpg | ||
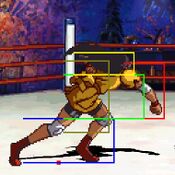
|hitbox=AVG2_Jun_stLP_hitbox.jpg | |||
|caption= | |caption= | ||
|name={{Icon-Capcom|LP}} | |name={{Icon-Capcom|LP}} | ||
| Line 9: | Line 11: | ||
|damage=- | |damage=- | ||
|guard= Mid | |guard= Mid | ||
|startup= | |startup=5 | ||
|active= | |active=2 | ||
|recovery= | |recovery=12 | ||
|frameAdv=- | |frameAdv=- | ||
|description= A strike right to the gut. | |description= A strike right to the gut. Can be rapid fired, chains into 5LK and cl.HK for a combo, and 5HP for a frame trap.<br> | ||
'''Chains to:'''<br> | '''Chains to:'''<br> | ||
({{Motion|2}}{{Icon-Capcom|LP}}) > cl.{{Icon-Capcom|HK}}<br> | ({{Motion|2}}{{Icon-Capcom|LP}}) > cl.{{Icon-Capcom|HK}}<br> | ||
| Line 24: | Line 26: | ||
{{MoveData | {{MoveData | ||
|image=AVG2_Jun_stLK.jpg | |image=AVG2_Jun_stLK.jpg | ||
|hitbox=AVG2_Jun_stLKhitbox.jpg | |||
|caption= | |caption= | ||
|name={{Icon-Capcom|LK}} | |name={{Icon-Capcom|LK}} | ||
| Line 30: | Line 33: | ||
|damage=- | |damage=- | ||
|guard= Mid | |guard= Mid | ||
|startup= | |startup=9 | ||
|active= | |active=2 | ||
|recovery= | |recovery=20 | ||
|frameAdv=- | |frameAdv=- | ||
|description= A quick shin kick, | |description= A quick shin kick with slightly less range than 5L, can be rapid fired and chains into 2LK, links into itself pretty easily. Can special cancel, but its tight if you are trying to combo into an Earth Shaker. If you wanna get tricky you can 5LK, LK Kubota Sway if the opponent tries to mash afterwards, and then go for a Kubota Buster. | ||
'''Chains to:'''<br> | |||
{{Motion|2}}{{Icon-Capcom|LK}} | |||
}} | }} | ||
}} | }} | ||
| Line 40: | Line 45: | ||
{{MoveData | {{MoveData | ||
|image=AVG2_Jun_stHP.jpg | |image=AVG2_Jun_stHP.jpg | ||
|hitbox=AVG2_Jun_stHPhitbox.jpg | |||
|caption= | |caption= | ||
|name={{Icon-Capcom|HP}} | |name={{Icon-Capcom|HP}} | ||
| Line 46: | Line 52: | ||
|damage=- | |damage=- | ||
|guard= Mid | |guard= Mid | ||
|startup= | |startup=15 | ||
|active= | |active=4 | ||
|recovery= | |recovery=17 | ||
|frameAdv=- | |frameAdv=- | ||
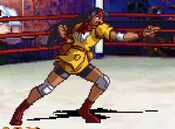
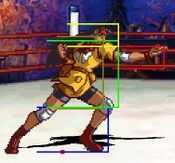
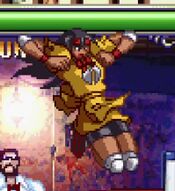
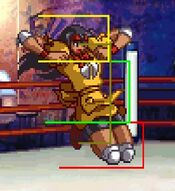
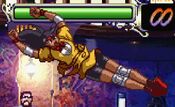
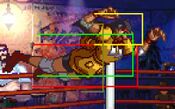
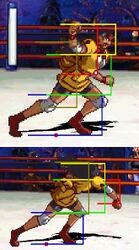
|description= A lumbering downward punch, may look like an overhead but it is not. Does special cancel. | |description= A lumbering downward punch, may look like an overhead but it is not. Does special cancel. | ||
| Line 56: | Line 62: | ||
{{MoveData | {{MoveData | ||
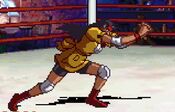
|image=AVG2_Jun_stHK.jpg | |image=AVG2_Jun_stHK.jpg | ||
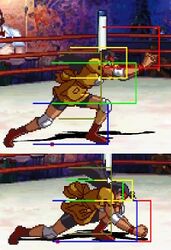
|hitbox=AVG2_Jun_stHKhitbox.jpg | |||
|caption= | |caption= | ||
|name= | |name=far.{{Icon-Capcom|HK}} | ||
|data= | |data= | ||
{{AttackData-AVG2 | {{AttackData-AVG2 | ||
|damage=- | |damage=- | ||
|guard= Mid | |guard= Mid | ||
|startup= | |startup=13 | ||
|active= | |active={{Tooltip | text=10 | hovertext= 1 hit. 5, 5}} | ||
|recovery= | |recovery=17 | ||
|frameAdv=- | |frameAdv=- | ||
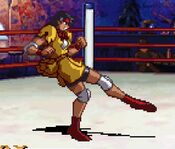
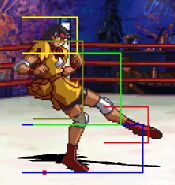
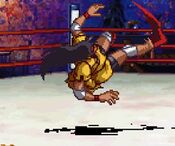
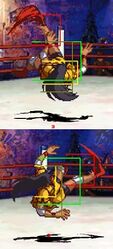
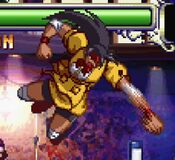
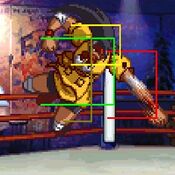
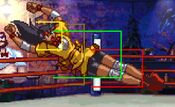
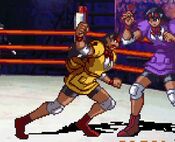
|description= A leaping wheel kick, honestly not great at all because the range is not anywhere near as far as it may seem and has to be pretty far away to activate. | |description= A leaping wheel kick, honestly not great at all because the range is not anywhere near as far as it may seem and has to be pretty far away to activate. It *can* anti-air during the first part of the move, but you have better options for that. | ||
}} | }} | ||
}} | }} | ||
| Line 72: | Line 79: | ||
{{MoveData | {{MoveData | ||
|image=AVG2_Jun_clHK.jpg | |image=AVG2_Jun_clHK.jpg | ||
|hitbox=AVG2_Jun_clHKhitbox.jpg | |||
|caption= | |caption= | ||
|name=cl.{{Icon-Capcom|HK}} | |name=cl.{{Icon-Capcom|HK}} | ||
| Line 78: | Line 86: | ||
|damage=- | |damage=- | ||
|guard= Mid | |guard= Mid | ||
|startup= | |startup=6 | ||
|active= | |active={{Tooltip | text=6 | hovertext= 1 hit. 4, 2}} | ||
|recovery= | |recovery=17 | ||
|frameAdv=- | |frameAdv=- | ||
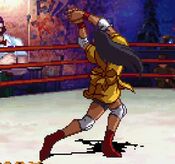
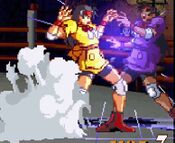
|description= A knee strike to the stomach. It has a further range than any close proximity normal I've ever seen, which is good because its a worthwhile normal to have access to thanks to it's long hitstun meaning you can get a Earth Shaker to combo off it. | |description= A knee strike to the stomach. It has a further range than any close proximity normal I've ever seen, which is good because its a worthwhile normal to have access to thanks to it's long hitstun meaning you can get a Earth Shaker to combo off it. | ||
| Line 86: | Line 94: | ||
}} | }} | ||
---- | ---- | ||
=== Crouching Normals === | |||
{{MoveData | {{MoveData | ||
|image=AVG2_Jun_crLP.jpg | |image=AVG2_Jun_crLP.jpg | ||
|hitbox=AVG2_Jun_crLPhitbox.jpg | |||
|caption= | |caption= | ||
|name={{Motion|2}}{{Icon-Capcom|LP}} | |name={{Motion|2}}{{Icon-Capcom|LP}} | ||
| Line 94: | Line 105: | ||
|damage=- | |damage=- | ||
|guard= Mid | |guard= Mid | ||
|startup= | |startup=5 | ||
|active= | |active=4 | ||
|recovery= | |recovery=11 | ||
|frameAdv=- | |frameAdv=- | ||
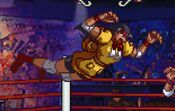
|description= A double-fist thrust, snappy enough for startup but has less range than you would like. Special cancelable, but not enough hitstun to be worthwhile.<br> | |description= A double-fist thrust, snappy enough for startup but has less range than you would like. Special cancelable, but not enough hitstun to be worthwhile.<br> | ||
| Line 106: | Line 117: | ||
{{MoveData | {{MoveData | ||
|image=AVG2_Jun_crLK.jpg | |image=AVG2_Jun_crLK.jpg | ||
|hitbox=AVG2_Jun_crLKhitbox.jpg | |||
|caption= | |caption= | ||
|name={{Motion|2}}{{Icon-Capcom|LK}} | |name={{Motion|2}}{{Icon-Capcom|LK}} | ||
| Line 112: | Line 124: | ||
|damage=- | |damage=- | ||
|guard= Low | |guard= Low | ||
|startup= | |startup=6 | ||
|active= | |active=3 | ||
|recovery= | |recovery=9 | ||
|frameAdv=- | |frameAdv=- | ||
|description= | |description= Your main button at close range besides 5LP to catch jump outs so you can grab with with Kubota Buster. It's also her OTG pickup, so you will get very used to this button. | ||
}} | }} | ||
}} | }} | ||
| Line 122: | Line 134: | ||
{{MoveData | {{MoveData | ||
|image=AVG2_Jun_crHP.jpg | |image=AVG2_Jun_crHP.jpg | ||
|hitbox=AVG2_Jun_crHPhitbox.jpg | |||
|caption= | |caption= | ||
|name={{Motion|2}}{{Icon-Capcom|HP}} | |name={{Motion|2}}{{Icon-Capcom|HP}} | ||
| Line 128: | Line 141: | ||
|damage=- | |damage=- | ||
|guard= Mid | |guard= Mid | ||
|startup= | |startup=7 | ||
|active= | |active=3, 2 | ||
|recovery= | |recovery=16 | ||
|frameAdv=- | |frameAdv=- | ||
|description= A 2-hit axe handle strike, pretty much invalidates her 5HP as a poke. It starts up much faster, can successfully special cancel of either hit into Earth Shaker. | |description= A 2-hit axe handle strike, pretty much invalidates her 5HP as a poke. It starts up much faster, can successfully special cancel of either hit into Earth Shaker. | ||
| Line 138: | Line 151: | ||
{{MoveData | {{MoveData | ||
|image=AVG2_Jun_crHK.jpg | |image=AVG2_Jun_crHK.jpg | ||
|hitbox=AVG2_Jun_crHKhitbox.jpg | |||
|caption= | |caption= | ||
|name={{Motion|2}}{{Icon-Capcom|HK}} | |name={{Motion|2}}{{Icon-Capcom|HK}} | ||
| Line 144: | Line 158: | ||
|damage=- | |damage=- | ||
|guard= Low | |guard= Low | ||
|startup= | |startup=7 | ||
|active= | |active=5 | ||
|recovery= | |recovery=19 | ||
|frameAdv=- | |frameAdv=- | ||
|description= | |description= Fast startup, great active frames, good range and being special-cancellable makes this a core button to both poke and combo with. Cancel into Lariat to secure a hard knockdown for either OTG extensions or oki. | ||
}} | }} | ||
}} | }} | ||
---- | ---- | ||
=== Jumping Normals === | |||
{{MoveData | {{MoveData | ||
|image=AVG2_Jun_jLP.jpg | |image=AVG2_Jun_jLP.jpg | ||
|hitbox=AVG2_Jun_jLPhitbox.jpg | |||
|caption= | |caption= | ||
|name=j.{{Icon-Capcom|LP}} | |name=j.{{Icon-Capcom|LP}} | ||
| Line 160: | Line 176: | ||
|damage=- | |damage=- | ||
|guard=High | |guard=High | ||
|startup= | |startup=7 | ||
|active= | |active={{Tooltip | text=13| hovertext= 1 hit. 5, 8}} | ||
|recovery= | |recovery=5 | ||
|frameAdv=- | |frameAdv=- | ||
|description= A glacerial double axe-handle strike. | |description= A glacerial double axe-handle strike. Useful as an air to air while rising because it hits higher than your other normals and lets you chain after. Chains into jHP, jHK, and j2HP. | ||
'''Chains to:'''<br> | '''Chains to:'''<br> | ||
j.{{Icon-Capcom|HP}}<br> | j.{{Icon-Capcom|HP}}<br> | ||
| Line 174: | Line 190: | ||
{{MoveData | {{MoveData | ||
|image=AVG2_Jun_jLK.jpg | |image=AVG2_Jun_jLK.jpg | ||
|hitbox=AVG2_Jun_jLKhitbox.jpg | |||
|caption= | |caption= | ||
|name=j.{{Icon-Capcom|LK}} | |name=j.{{Icon-Capcom|LK}} | ||
| Line 180: | Line 197: | ||
|damage=- | |damage=- | ||
|guard= High | |guard= High | ||
|startup= | |startup=1 | ||
|active= | |active=26 | ||
|recovery= | |recovery=5 | ||
|frameAdv=- | |frameAdv=- | ||
|description= | |description= '''THE''' #1 air normal to press 95% of the time you are jumping, is '''INSTANTLY''' active and will remain active for a ''long'' time, great when paired with a super jump. Can hit this rising on a standing opponent and then chain into j2HP to hit cross up, or delayed while rising into a heavy of your choice (primarily j2HP) for a left/right depending on how you delay the heavy, or use it by itself for left/rights. | ||
j.{{Icon-Capcom|HP}}<br> | j.{{Icon-Capcom|HP}}<br> | ||
j.{{Motion|2}}{{Icon-Capcom|HP}}<br> | j.{{Motion|2}}{{Icon-Capcom|HP}}<br> | ||
| Line 193: | Line 210: | ||
{{MoveData | {{MoveData | ||
|image=AVG2_Jun_jHP.jpg | |image=AVG2_Jun_jHP.jpg | ||
|hitbox=AVG2_Jun_jHPhitbox.jpg | |||
|caption= | |caption= | ||
|name=j.{{Icon-Capcom|HP}} | |name=j.{{Icon-Capcom|HP}} | ||
| Line 199: | Line 217: | ||
|damage=- | |damage=- | ||
|guard= High | |guard= High | ||
|startup= | |startup=9 | ||
|active= | |active=4 | ||
|recovery= | |recovery=11 | ||
|frameAdv=- | |frameAdv=- | ||
|description= A downward strike | |description= A downward strike, sadly overshadowed by her other air normals. | ||
}} | }} | ||
}} | }} | ||
| Line 209: | Line 227: | ||
{{MoveData | {{MoveData | ||
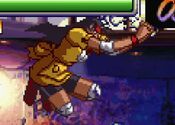
|image=AVG2_Jun_jHK.jpg | |image=AVG2_Jun_jHK.jpg | ||
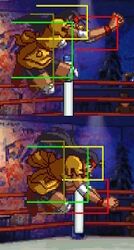
|hitbox=AVG2_Jun_jHKhitbox.jpg | |||
|caption= | |caption= | ||
|name=j.{{Icon-Capcom|HK}} | |name=j.{{Icon-Capcom|HK}} | ||
| Line 215: | Line 234: | ||
|damage=- | |damage=- | ||
|guard= High | |guard= High | ||
|startup= | |startup=7 | ||
|active= | |active=5, (4), 5 | ||
|recovery= | |recovery=10 | ||
|frameAdv=- | |frameAdv=- | ||
|description= A | |description= A quick dropkick, you'll be using this button when you want range (and slightly more damage) either for jump ins or air to airs, otherwise interchangeable with j2HP. A good normal to protect air space with neutral or back jumps thanks to its speed and disjoint, even if the hitbox stops before her ankles. Also a good chain ender for approaches where j2HP isn't as good. Curiously has a gap during active frames. | ||
}} | }} | ||
}} | }} | ||
---- | ---- | ||
=== Command | |||
=== Command Normals === | |||
{{MoveData | {{MoveData | ||
|image=AVG2_Jun_6HP.jpg | |image=AVG2_Jun_6HP.jpg | ||
|hitbox=AVG2_Jun_6HPhitbox.jpg | |||
|caption= | |caption= | ||
|name={{Motion|6}}{{Icon-Capcom|HP}} | |name={{Motion|6}}{{Icon-Capcom|HP}} | ||
| Line 232: | Line 253: | ||
|damage=- | |damage=- | ||
|guard= High | |guard= High | ||
|startup= | |startup=16 | ||
|active= | |active={{Tooltip | text=12| hovertext= 1 hit. 4 x3}} | ||
|recovery= | |recovery=14 | ||
|frameAdv=- | |frameAdv=- | ||
|description= A rising double axe-handle command launcher. A bit on the slow side, but leads to good damage. Needs to be used preemptively due to it's slow startup, but works as a solid anti-air thanks to it' | |description= A rising double axe-handle command launcher. | ||
A bit on the slow side, but leads to good damage. Needs to be used preemptively due to it's slow startup, but works as a solid anti-air thanks the arc it covers, with last hitbox being able to hit opponents jumping behind you. Is special cancellable, but Earth Shaker doesn't combo, and while cancelling into LK Sway may be quicker than letting it recover, you'll mainly use this as an anti-air so you'll have plenty of time to confirm on hit (not to say you shouldn't use Sway cancel). | |||
}} | }} | ||
}} | }} | ||
| Line 242: | Line 265: | ||
{{MoveData | {{MoveData | ||
|image=AVG2_Jun_j2HP.jpg | |image=AVG2_Jun_j2HP.jpg | ||
|hitbox=AVG2_Jun_j2HPhitbox.jpg | |||
|caption= | |caption= | ||
|name=j.{{Motion|2}}{{Icon-Capcom|HP}} | |name=j.{{Motion|2}}{{Icon-Capcom|HP}} | ||
| Line 248: | Line 272: | ||
|damage=- | |damage=- | ||
|guard= High | |guard= High | ||
|startup= | |startup=8 | ||
|active= | |active=12 | ||
|recovery= | |recovery=7 | ||
|frameAdv=- | |frameAdv=- | ||
|description= Legally mandated grappler body splash cross-up tool, You know what this is good for. | |description= Legally mandated grappler body splash cross-up tool, You know what this is good for. | ||
Interchangeable with jHK as a chain ender, but very consistent for left/rights after jLK. jLK into j2HP will take you very far in this game. | |||
}} | |||
}} | |||
---- | |||
=== Throws === | |||
{{MoveData | |||
|image=AVG2_Jun_PThrow.jpg | |||
|caption=cl. {{Motion|4}}/{{Motion|6}} + {{Icon-Capcom|P}} | |||
|name=German Suplex | |||
|data= | |||
{{AttackData-AVG2 | |||
|damage= | |||
|guard= | |||
|startup= | |||
|active= | |||
|recovery= | |||
|frameAdv= | |||
|description= Hard Knockdown, OTG-able afterwards for a combo or you can forego it for a left/right with either jLK/j2HP (will have to microwalk back first for same-side j2HP). Main OTG combo is 2LK>Lariat meterlessly, or microwalk forward 2LK> Kubota Shuttle for ludicrous damage. | |||
}} | |||
}} | |||
---- | |||
{{MoveData | |||
|image=AVG2_Jun_KThrow.jpg | |||
|caption=cl. {{Motion|4}}/{{Motion|6}} + {{Icon-Capcom|K}} | |||
|name= Brainbuster | |||
|data= | |||
{{AttackData-AVG2 | |||
|damage= | |||
|guard= | |||
|startup= | |||
|active= | |||
|recovery= | |||
|frameAdv= | |||
|description= Due to grappler privilege, Jun also has a {{Icon-Capcom|K}} throw as well unlike the rest of the cast. | |||
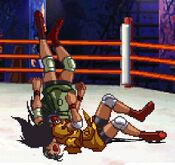
Sometimes leaves you closer to the opponent (holding a direction influences it?), Hard Knockdown, can not OTG afterwards, slightly more initial damage than punch throw but since you cannot OTG it's less damage in the long run. Can still get jLK/j2HP left/rights afterwards depending on how close it leaves you, but it's semi-random if you'll be close to them or not so it's not as useful as punch throw (looks cool at least!). | |||
}} | |||
}} | |||
---- | |||
=== Guard Cancels === | |||
{{MoveData | |||
|image=AVG2_Jun_stLP.jpg | |||
|hitbox=AVG2_Jun_stLP_hitbox.jpg | |||
|caption= | |||
|name={{Icon-Capcom|LP}} Guard Cancel | |||
|data= | |||
{{AttackData-AVG2 | |||
|damage= | |||
|guard= | |||
|startup= | |||
|active= | |||
|recovery= | |||
|frameAdv= | |||
|description=Uses Jun's {{Icon-Capcom|LP}}. This, along with her {{Icon-Capcom|LK}} guard cancel, have a very strange property -- the damage of the guard cancel is determined by the damage of the last attack that Jun blocked (i.e. the one she blocked when she did the guard cancel). This property applies to subsequent uses of the normal when chaining into itself as well, meaning this guard cancel can potentially be the most damaging in the game this side of Kaori's infinite-starting guard cancel. | |||
}} | |||
}} | |||
---- | |||
{{MoveData | |||
|image=AVG2_Jun_stLK.jpg | |||
|hitbox=AVG2_Jun_stLKhitbox.jpg | |||
|caption= | |||
|name={{Icon-Capcom|LK}} Guard Cancel | |||
|data= | |||
{{AttackData-AVG2 | |||
|damage= | |||
|guard= | |||
|startup= | |||
|active= | |||
|recovery= | |||
|frameAdv= | |||
|description=Uses Jun's {{Icon-Capcom|LK}}. Is mostly outshone by LP guard cancel, due to its lack of self-chaining. | |||
}} | |||
}} | |||
---- | |||
{{MoveData | |||
|image=AVG2_Jun_Earth_Shaker.jpg | |||
|hitbox=AVG2_Jun_EShitbox.jpg | |||
|caption= | |||
|name={{Icon-Capcom|HP}} Guard Cancel | |||
|data= | |||
{{AttackData-AVG2 | |||
|damage= | |||
|guard= | |||
|startup= | |||
|active= | |||
|recovery= | |||
|frameAdv= | |||
|description=Uses Jun's {{Icon-Capcom|LP}} Earth Shaker. | |||
}} | |||
}} | |||
---- | |||
{{MoveData | |||
|image=AVG2_Jun_Kubota_Sway.jpg | |||
|hitbox=AVG2_Jun_Swayhitbox.jpg | |||
|caption= | |||
|name={{Icon-Capcom|HK}} Guard Cancel | |||
|data= | |||
{{AttackData-AVG2 | |||
|damage= | |||
|guard= | |||
|startup= | |||
|active= | |||
|recovery= | |||
|frameAdv= | |||
|description=Uses Jun's {{Icon-Capcom|HK}} Kubota Sway. Can actually be really useful for blowing through certain blockstrings to find a gap for a Kubota Buster or something faster. | |||
}} | }} | ||
}} | }} | ||
---- | ---- | ||
== Special Moves == | === Special Moves === | ||
{{MoveData | {{MoveData | ||
|image=AVG2_Jun_Earth_Shaker.jpg | |image=AVG2_Jun_Earth_Shaker.jpg | ||
|hitbox=AVG2_Jun_EShitbox.jpg | |||
|caption= {{Motion|214}} + {{Icon-Capcom|P}} | |caption= {{Motion|214}} + {{Icon-Capcom|P}} | ||
|name=Earth Shaker | |name=Earth Shaker | ||
| Line 266: | Line 399: | ||
|version={{Icon-Capcom|LP}} | |version={{Icon-Capcom|LP}} | ||
|damage= | |damage= | ||
|guard= Mid | |guard= Mid, Mid | ||
|startup= | |startup=10 | ||
|active= | |active=6, (10), 12 | ||
|recovery= | |recovery=7 | ||
|frameAdv=- | |frameAdv=- | ||
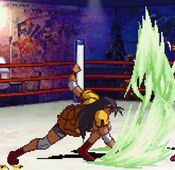
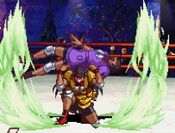
|description= A generally very useful special move that mostly sees use as an OTG follow-up and as a meaty hitbox for the opponent to wake up into. | |description= A generally very useful special move that mostly sees use as an OTG follow-up and as a meaty hitbox for the opponent to wake up into. The punch OTGs and the shockwave clears projectiles. Can be done via SP1. | ||
}} | }} | ||
{{AttackData-AVG2 | {{AttackData-AVG2 | ||
| Line 278: | Line 411: | ||
|damage= | |damage= | ||
|guard= Mid | |guard= Mid | ||
|startup= | |startup= 12 | ||
|active= | |active=7, (11), 12 | ||
|recovery= | |recovery=9 | ||
|frameAdv=- | |frameAdv=- | ||
|description= Does more hits and damage, but isnt really any slower to start up. If you have a confirm but lack the charge for Kubota Lariat, this is your best option. | |description= Does more hits and damage, but isnt really any slower to start up. If you have a confirm but lack the charge for Kubota Lariat, this is your best option. The punch OTGs and the shockwave clears projectiles. A cornerstone of Jun's gameplan. | ||
}} | }} | ||
{{AttackData-AVG2 | {{AttackData-AVG2 | ||
| Line 289: | Line 422: | ||
|damage= | |damage= | ||
|guard= N/A | |guard= N/A | ||
|startup= | |startup= 1 + 11? | ||
|active= | |active=7, 39* | ||
|recovery= | |recovery=32 | ||
|frameAdv=- | |frameAdv=- | ||
|description= The EX version functions almost like Potemkin's Slidehead in Guilty Gear, causing an unblockable hitbox to track to the opponent's position, launching them high into the air for a combo follow-up depending on positioning. | |description= The EX version functions almost like Potemkin's Slidehead in Guilty Gear, causing an unblockable hitbox to track to the opponent's initial position, launching them high into the air for a combo follow-up depending on positioning. *Shockwave is active at the same time as the punch is. | ||
}} | }} | ||
}} | }} | ||
| Line 299: | Line 432: | ||
{{MoveData | {{MoveData | ||
|image=AVG2_Jun_Kubota_Sway.jpg | |image=AVG2_Jun_Kubota_Sway.jpg | ||
|hitbox=AVG2_Jun_Swayhitbox.jpg | |||
|caption= {{Motion|421}} + {{Icon-Capcom|K}} | |caption= {{Motion|421}} + {{Icon-Capcom|K}} | ||
|name=Kubota Sway | |name=Kubota Sway | ||
| Line 306: | Line 440: | ||
|damage= | |damage= | ||
|guard= Mid | |guard= Mid | ||
|startup= | |startup=0 | ||
|active= | |active=23 | ||
|recovery= | |recovery=0 | ||
|frameAdv=- | |frameAdv=- | ||
|description= Jun stands in place and sways, gaining full strike invulnerability for the duration of the move. There is no punishable recovery on the move, but she's completely open to throws. Extremely useful tool against characters who want to abuse instant supers, since she can buffer this during superflash. The LK version is only active for a snap, so it can be used as a special cancel option to mix up your pressure and go for a throw. | |description= Jun stands in place and sways, gaining full strike invulnerability for the duration of the move. There is no punishable recovery on the move, but she's completely open to throws. Extremely useful tool against characters who want to abuse instant supers, since she can buffer this during superflash. The LK version is only active for a snap, so it can be used as a special cancel option to mix up your pressure and go for a throw or to shorten recovery on your heavy pokes. Can be done via SP2. | ||
}} | }} | ||
{{AttackData-AVG2 | {{AttackData-AVG2 | ||
| Line 317: | Line 451: | ||
|damage= | |damage= | ||
|guard= Mid | |guard= Mid | ||
|startup= | |startup=0 | ||
|active= | |active=37 | ||
|recovery= | |recovery=0 | ||
|frameAdv=- | |frameAdv=- | ||
|description= The sway is active for much longer, better used for actually avoiding something. | |description= The sway is active for much longer, better used for actually avoiding something. | ||
| Line 334: | Line 468: | ||
|damage= | |damage= | ||
|guard= N/A | |guard= N/A | ||
|startup= 1 | |startup=1 | ||
|active= | |active=1? | ||
|recovery= | |recovery=46 | ||
|frameAdv=- | |frameAdv=- | ||
|description= Jun's command grab, and boy is it a good one. The range is fantastic, and it even opens up combo opportunities if you can time an EX Earth Shaker. Incredibly strong move. It's worth mentioning that unlike every other command grab in the game, Kubota Buster DOES have a whiff animation. | |description= Jun's command grab, and boy is it a good one. The range is fantastic, and it even opens up combo opportunities if you can time an EX Earth Shaker. Incredibly strong move. It's worth mentioning that unlike every other command grab in the game, Kubota Buster DOES have a whiff animation. | ||
| Line 345: | Line 479: | ||
|damage= | |damage= | ||
|guard= N/A | |guard= N/A | ||
|startup= 1 | |startup=1 | ||
|active= | |active=1? | ||
|recovery= | |recovery=67 | ||
|frameAdv=- | |frameAdv=- | ||
|description= HP Buster has the same startup, it does more damage but has worse recovery on whiff. Still, it's worth prioritizing for the additional damage it gives. | |description= HP Buster has the same startup, it does more damage but has worse recovery on whiff. Still, it's worth prioritizing for the additional damage it gives. | ||
| Line 355: | Line 489: | ||
{{MoveData | {{MoveData | ||
|image=AVG2_Jun_Kubota_Lariet.jpg | |image=AVG2_Jun_Kubota_Lariet.jpg | ||
|hitbox=AVG2_Jun_Lariathitbox.jpg | |||
|caption= {{Motion|4}}(Charge){{Motion|6}} + {{Icon-Capcom|HP}} | |caption= {{Motion|4}}(Charge){{Motion|6}} + {{Icon-Capcom|HP}} | ||
|name=Kubota Lariat | |name=Kubota Lariat | ||
| Line 362: | Line 497: | ||
|damage= | |damage= | ||
|guard= Mid | |guard= Mid | ||
|startup= | |startup=11 | ||
|active= | |active=12, 4 | ||
|recovery= | |recovery=19 | ||
|frameAdv=- | |frameAdv=- | ||
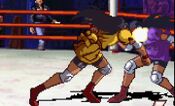
|description= Extremely important move in Jun's combos because it provides one of the few hard knockdowns in the game, guaranteeing an OTG follow-up. However, this knockdown only occurs on the early hitbox, so the move becomes far less rewarding when used at longer distances. Its safety is also very spacing-dependent, so you want to be judicious when throwing this move out in neutral. The side that Jun ends up on when scoring the knockdown is somewhat inconsistent, so make sure you learn how to properly confirm your positioning so you don't lose out on OTG damage. | |description= Extremely important move in Jun's combos because it provides one of the few hard knockdowns in the game, guaranteeing an OTG follow-up. However, this knockdown only occurs on the early hitbox, so the move becomes far less rewarding when used at longer distances. Its safety is also very spacing-dependent, so you want to be judicious when throwing this move out in neutral. The side that Jun ends up on when scoring the knockdown is somewhat inconsistent, so make sure you learn how to properly confirm your positioning so you don't lose out on OTG damage. | ||
}} | }} | ||
}} | }} | ||
| Line 440: | Line 509: | ||
{{MoveData | {{MoveData | ||
|image=AVG2_Jun_Kubota_Shuttle.jpg | |image=AVG2_Jun_Kubota_Shuttle.jpg | ||
|hitbox=AVG2_Jun_Lariathitbox.jpg | |||
|caption= {{Motion|6}}{{Motion|41236}} + {{Icon-Capcom|K}} | |caption= {{Motion|6}}{{Motion|41236}} + {{Icon-Capcom|K}} | ||
|name=Kubota Shuttle | |name=Kubota Shuttle | ||
| Line 446: | Line 516: | ||
|damage= | |damage= | ||
|guard= Low | |guard= Low | ||
|startup= | |startup= 1 + 45 | ||
|active= | |active=20, 6? | ||
|recovery= | |recovery=18 | ||
|frameAdv=- | |frameAdv=- | ||
|description= A powered up Kubota Lariat that does dino damage when it hits. For reasons our best scientists have yet to adequately explain, this move hits low. Using this to end combos is a huge part of Jun's high damage, since one of the move's most terrifying attributes is that the damage from the falling portion of the move will never be affected by damage scaling. | |description= A powered up Kubota Lariat that does dino damage when it hits. For reasons our best scientists have yet to adequately explain, this move hits low. Using this to end combos is a huge part of Jun's high damage, since one of the move's most terrifying attributes is that the damage from the falling portion of the move will never be affected by damage scaling. Can be done via SP1 + SP2. | ||
Locked into a longer recovery on hit and, for some reason, the last 6 active frames do not hit actually hit the opponent, only the lariat will. | |||
}} | }} | ||
}} | }} | ||
| Line 462: | Line 534: | ||
|damage= | |damage= | ||
|guard= N/A | |guard= N/A | ||
|startup= 1 | |startup= 1 + 0 | ||
|active= | |active=1? | ||
|recovery= | |recovery=68 | ||
|frameAdv=- | |frameAdv=- | ||
|description= Mostly useful for the fact that it's 1F startup. While the damage is high, you often get better damage from HP Kubota Buster into EX Earth Shaker, so you mostly want to use this when you need speed more than damage. | |description= Mostly useful for the fact that it's 1F startup. While the damage is high, you often get better damage from HP Kubota Buster into EX Earth Shaker, so you mostly want to use this when you need speed more than damage. | ||
Latest revision as of 16:49, 6 September 2024
Move List
Standing Normals
| Damage | Guard | Startup | Active | Recovery | FrameAdv |
|---|---|---|---|---|---|
| - | Mid | 15 | 4 | 17 | - |
|
A lumbering downward punch, may look like an overhead but it is not. Does special cancel. | |||||
| Damage | Guard | Startup | Active | Recovery | FrameAdv |
|---|---|---|---|---|---|
| - | Mid | 13 | 10 | 17 | - |
|
A leaping wheel kick, honestly not great at all because the range is not anywhere near as far as it may seem and has to be pretty far away to activate. It *can* anti-air during the first part of the move, but you have better options for that. | |||||
| Damage | Guard | Startup | Active | Recovery | FrameAdv |
|---|---|---|---|---|---|
| - | Mid | 6 | 6 | 17 | - |
|
A knee strike to the stomach. It has a further range than any close proximity normal I've ever seen, which is good because its a worthwhile normal to have access to thanks to it's long hitstun meaning you can get a Earth Shaker to combo off it. | |||||
Crouching Normals
| Damage | Guard | Startup | Active | Recovery | FrameAdv |
|---|---|---|---|---|---|
| - | Low | 6 | 3 | 9 | - |
|
Your main button at close range besides 5LP to catch jump outs so you can grab with with Kubota Buster. It's also her OTG pickup, so you will get very used to this button. | |||||
| Damage | Guard | Startup | Active | Recovery | FrameAdv |
|---|---|---|---|---|---|
| - | Mid | 7 | 3, 2 | 16 | - |
|
A 2-hit axe handle strike, pretty much invalidates her 5HP as a poke. It starts up much faster, can successfully special cancel of either hit into Earth Shaker. | |||||
| Damage | Guard | Startup | Active | Recovery | FrameAdv |
|---|---|---|---|---|---|
| - | Low | 7 | 5 | 19 | - |
|
Fast startup, great active frames, good range and being special-cancellable makes this a core button to both poke and combo with. Cancel into Lariat to secure a hard knockdown for either OTG extensions or oki. | |||||
Jumping Normals
| Damage | Guard | Startup | Active | Recovery | FrameAdv |
|---|---|---|---|---|---|
| - | High | 9 | 4 | 11 | - |
|
A downward strike, sadly overshadowed by her other air normals. | |||||
| Damage | Guard | Startup | Active | Recovery | FrameAdv |
|---|---|---|---|---|---|
| - | High | 7 | 5, (4), 5 | 10 | - |
|
A quick dropkick, you'll be using this button when you want range (and slightly more damage) either for jump ins or air to airs, otherwise interchangeable with j2HP. A good normal to protect air space with neutral or back jumps thanks to its speed and disjoint, even if the hitbox stops before her ankles. Also a good chain ender for approaches where j2HP isn't as good. Curiously has a gap during active frames. | |||||
Command Normals
| Damage | Guard | Startup | Active | Recovery | FrameAdv |
|---|---|---|---|---|---|
| - | High | 16 | 12 | 14 | - |
|
A rising double axe-handle command launcher. A bit on the slow side, but leads to good damage. Needs to be used preemptively due to it's slow startup, but works as a solid anti-air thanks the arc it covers, with last hitbox being able to hit opponents jumping behind you. Is special cancellable, but Earth Shaker doesn't combo, and while cancelling into LK Sway may be quicker than letting it recover, you'll mainly use this as an anti-air so you'll have plenty of time to confirm on hit (not to say you shouldn't use Sway cancel). | |||||
| Damage | Guard | Startup | Active | Recovery | FrameAdv |
|---|---|---|---|---|---|
| - | High | 8 | 12 | 7 | - |
|
Legally mandated grappler body splash cross-up tool, You know what this is good for. Interchangeable with jHK as a chain ender, but very consistent for left/rights after jLK. jLK into j2HP will take you very far in this game. | |||||
Throws
| Damage | Guard | Startup | Active | Recovery | FrameAdv |
|---|---|---|---|---|---|
|
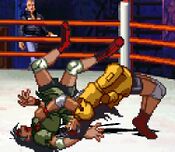
Hard Knockdown, OTG-able afterwards for a combo or you can forego it for a left/right with either jLK/j2HP (will have to microwalk back first for same-side j2HP). Main OTG combo is 2LK>Lariat meterlessly, or microwalk forward 2LK> Kubota Shuttle for ludicrous damage. | |||||
Guard Cancels
Special Moves
Super Moves
| Damage | Guard | Startup | Active | Recovery | FrameAdv |
|---|---|---|---|---|---|
| Low | 1 + 45 | 20, 6? | 18 | - | |
|
A powered up Kubota Lariat that does dino damage when it hits. For reasons our best scientists have yet to adequately explain, this move hits low. Using this to end combos is a huge part of Jun's high damage, since one of the move's most terrifying attributes is that the damage from the falling portion of the move will never be affected by damage scaling. Can be done via SP1 + SP2. Locked into a longer recovery on hit and, for some reason, the last 6 active frames do not hit actually hit the opponent, only the lariat will. | |||||
| Damage | Guard | Startup | Active | Recovery | FrameAdv |
|---|---|---|---|---|---|
| N/A | 1 + 0 | 1? | 68 | - | |
|
Mostly useful for the fact that it's 1F startup. While the damage is high, you often get better damage from HP Kubota Buster into EX Earth Shaker, so you mostly want to use this when you need speed more than damage. | |||||
